By Craig Coker
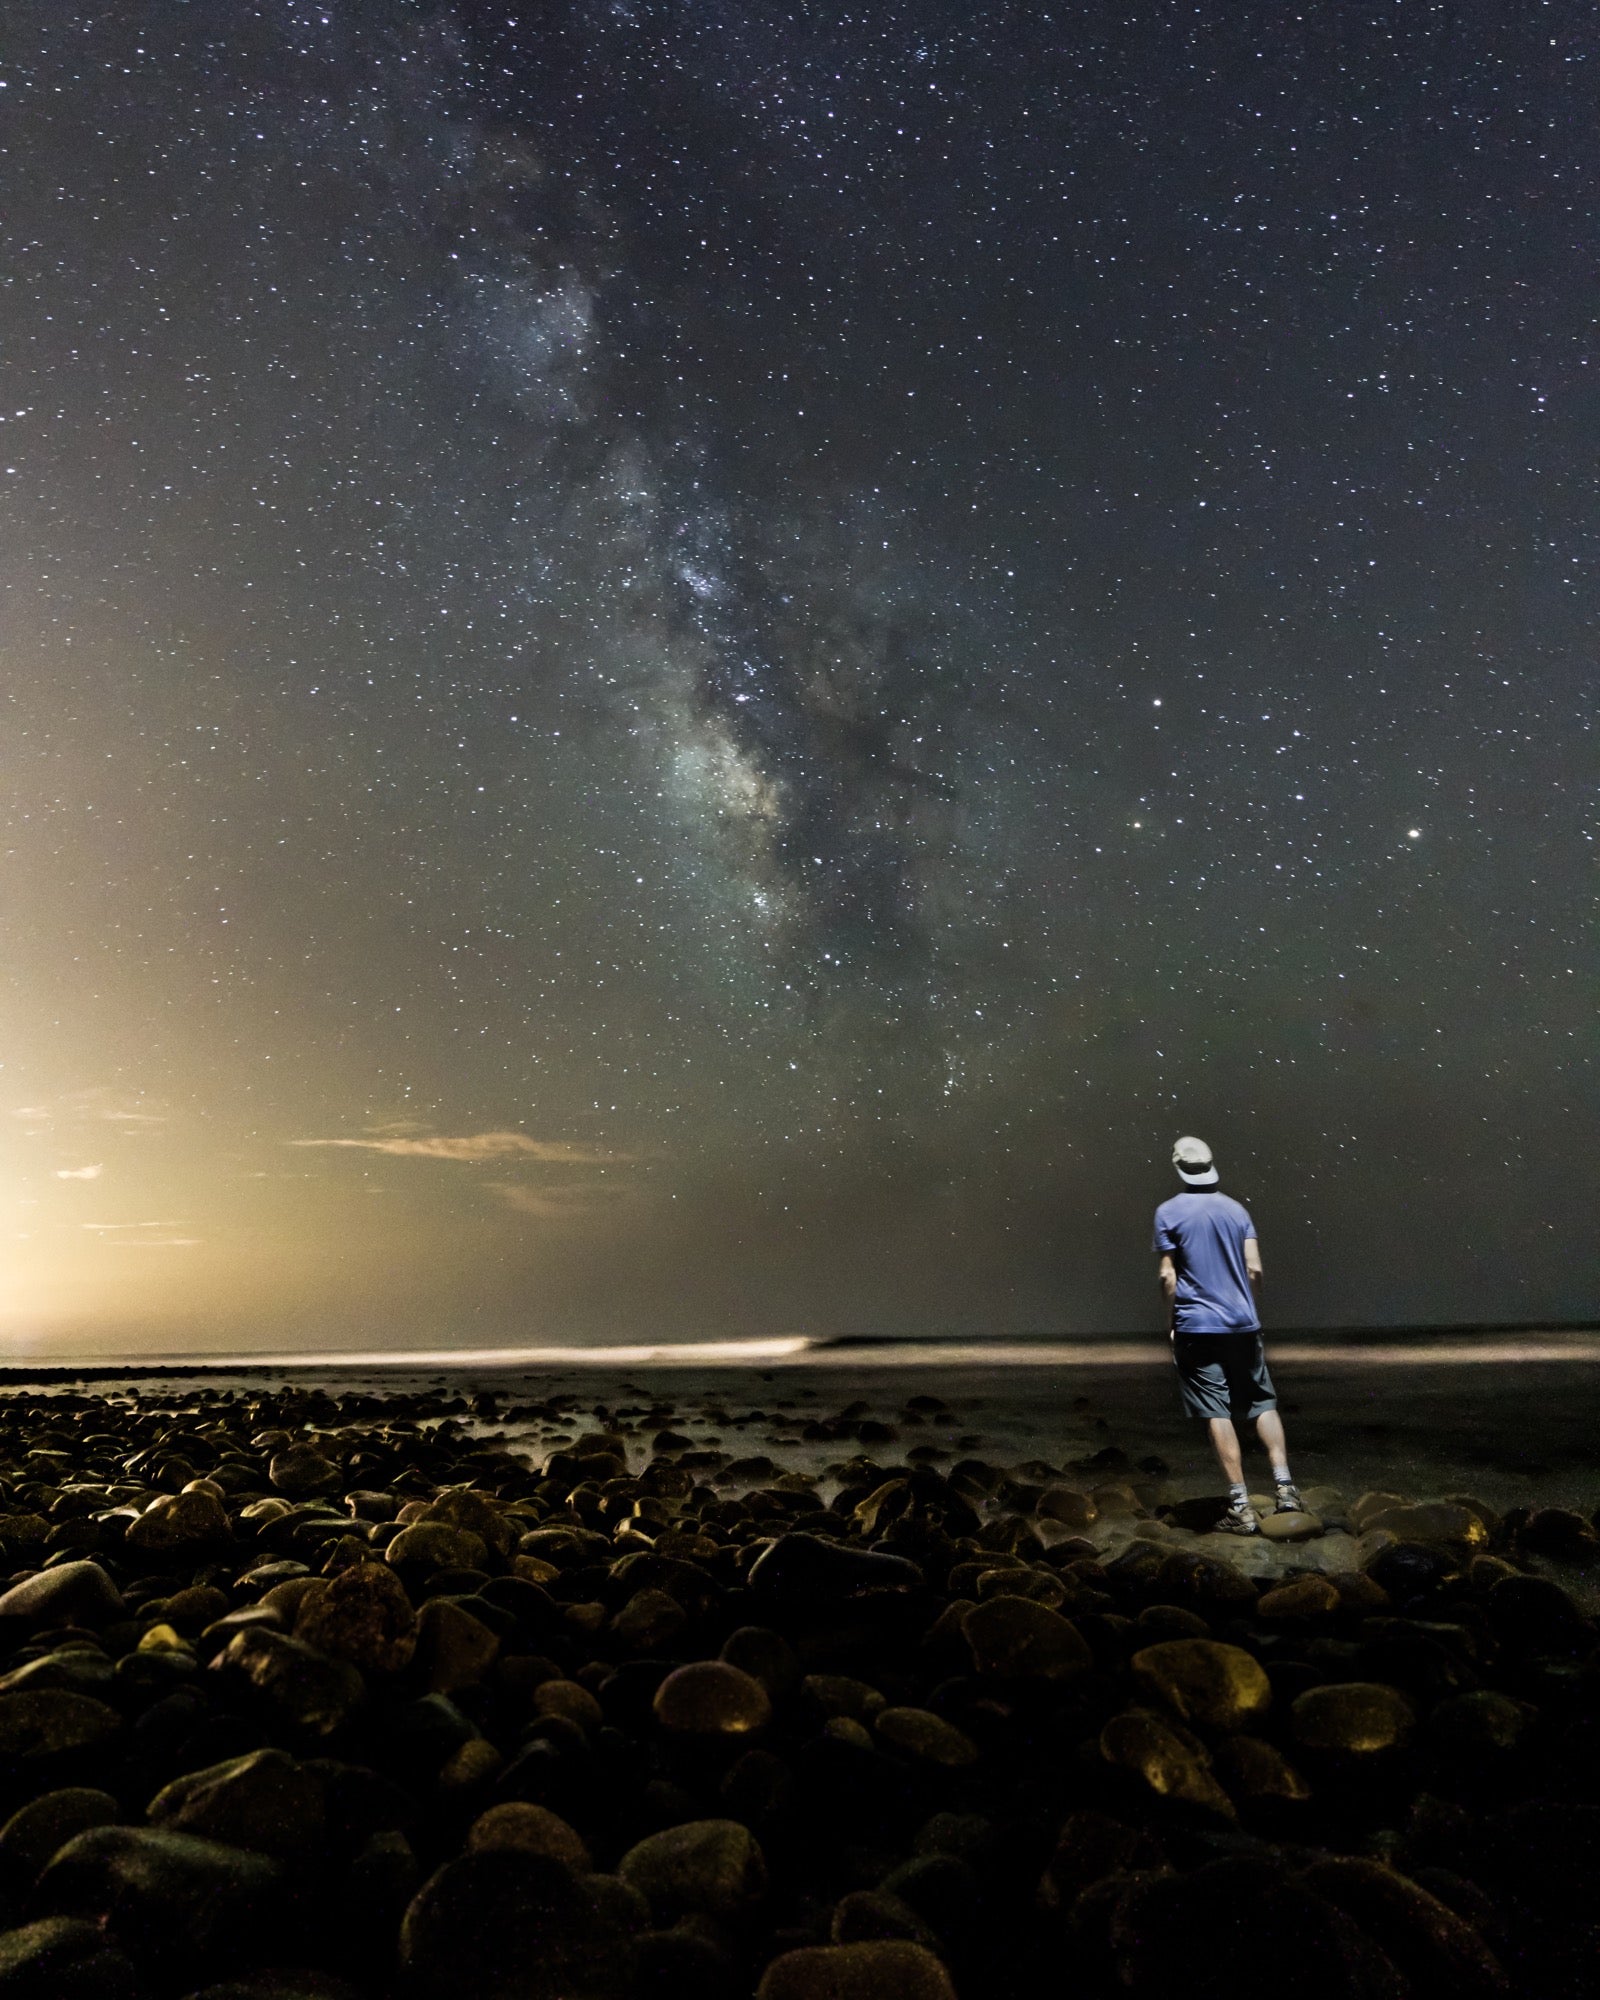
It’s 11:30pm. All I can see is a mere outline of my hiking shoes as it’s a near pitch dark setting. As luck would have it on this night I have clear skies and am observing a plethora of stars. Possibly even a light silhouette of the Milky Way. All I can hear is the sound of waves crashing into rocks. I use Google Maps and a dropped pin to navigate where I think is the precise location of where I scouted earlier that day. I take out my α7R II, mount it to my sticks and then direct it towards what may be the center of the Milky Way. I tweak the settings to a 30-sec. open shutter with maximum aperture and a higher than normal ISO then I manually focus just a hair under closer than infinity. As I wait for my first long exposure to process, I try to fully take-in my current setting. I hear pure nature talking to me. I’m alone and I think to myself, it’s blissful moments like this that drive my hunger for exploration.
The single shot finishes and the preview lights up the screen with a spectacular view of the Milky Way. I’m overjoyed with the outcome, but I know the real fun has just begun. I manipulate the camera settings again and set a 10-second shutter delay. I then direct my attention to the second bag I’ve taken on this journey and I pull out a 3DR Solo drone that’s nearly ready to take flight to the starry skies. This drone has a special attachment—a Foxfury LED light mounted to the belly. I power up the light and… 3-2-1…we have liftoff!
It’s incredible! I can now see my surroundings. I navigate my flying contraption towards my desired subject then I let the drone’s autonomous feature take over. The 3DR Solo locks onto satellites in the sky to maintain a precise hovering position by itself. While keeping the drone in my peripheral view I push down the shutter release button on the α7R II to start the 10-sec. timer and I quickly and cautiously move into position for a decidedly different kind of selfie. I can feel the downdraft of the drone and see that I’m perfectly positioned under the spotlight like I’m being abducted by a UFO.
I glance back at the camera to see its blinking red light, then I look up at the Milky Way and hold still until I hear the camera’s shutter close. I land pilot the drone to a landing and review the photo. It’s good, but I’m not done yet. I repeat the process several times and around 3:30 AM I’m finally content that I got the shot I envisioned.
Sony α7R II, Sony Vario-Tessar T* FE 16-35mm f/4 at 16mm, 2-sec., f/8, ISO 250
What Is Drone Lighting
To begin with how I got into all of this, I was a professional athlete for 15 years working on the other side of the lens. It was there that I grew inspired to create my own images. I’m no veteran to photography and I’m still learning, but I also think one never really stops learning photography. I’ve been involved in the drone industry for 5 years. I also worked for a drone company called 3DRobotics and prior to that I built my own drones for fun.
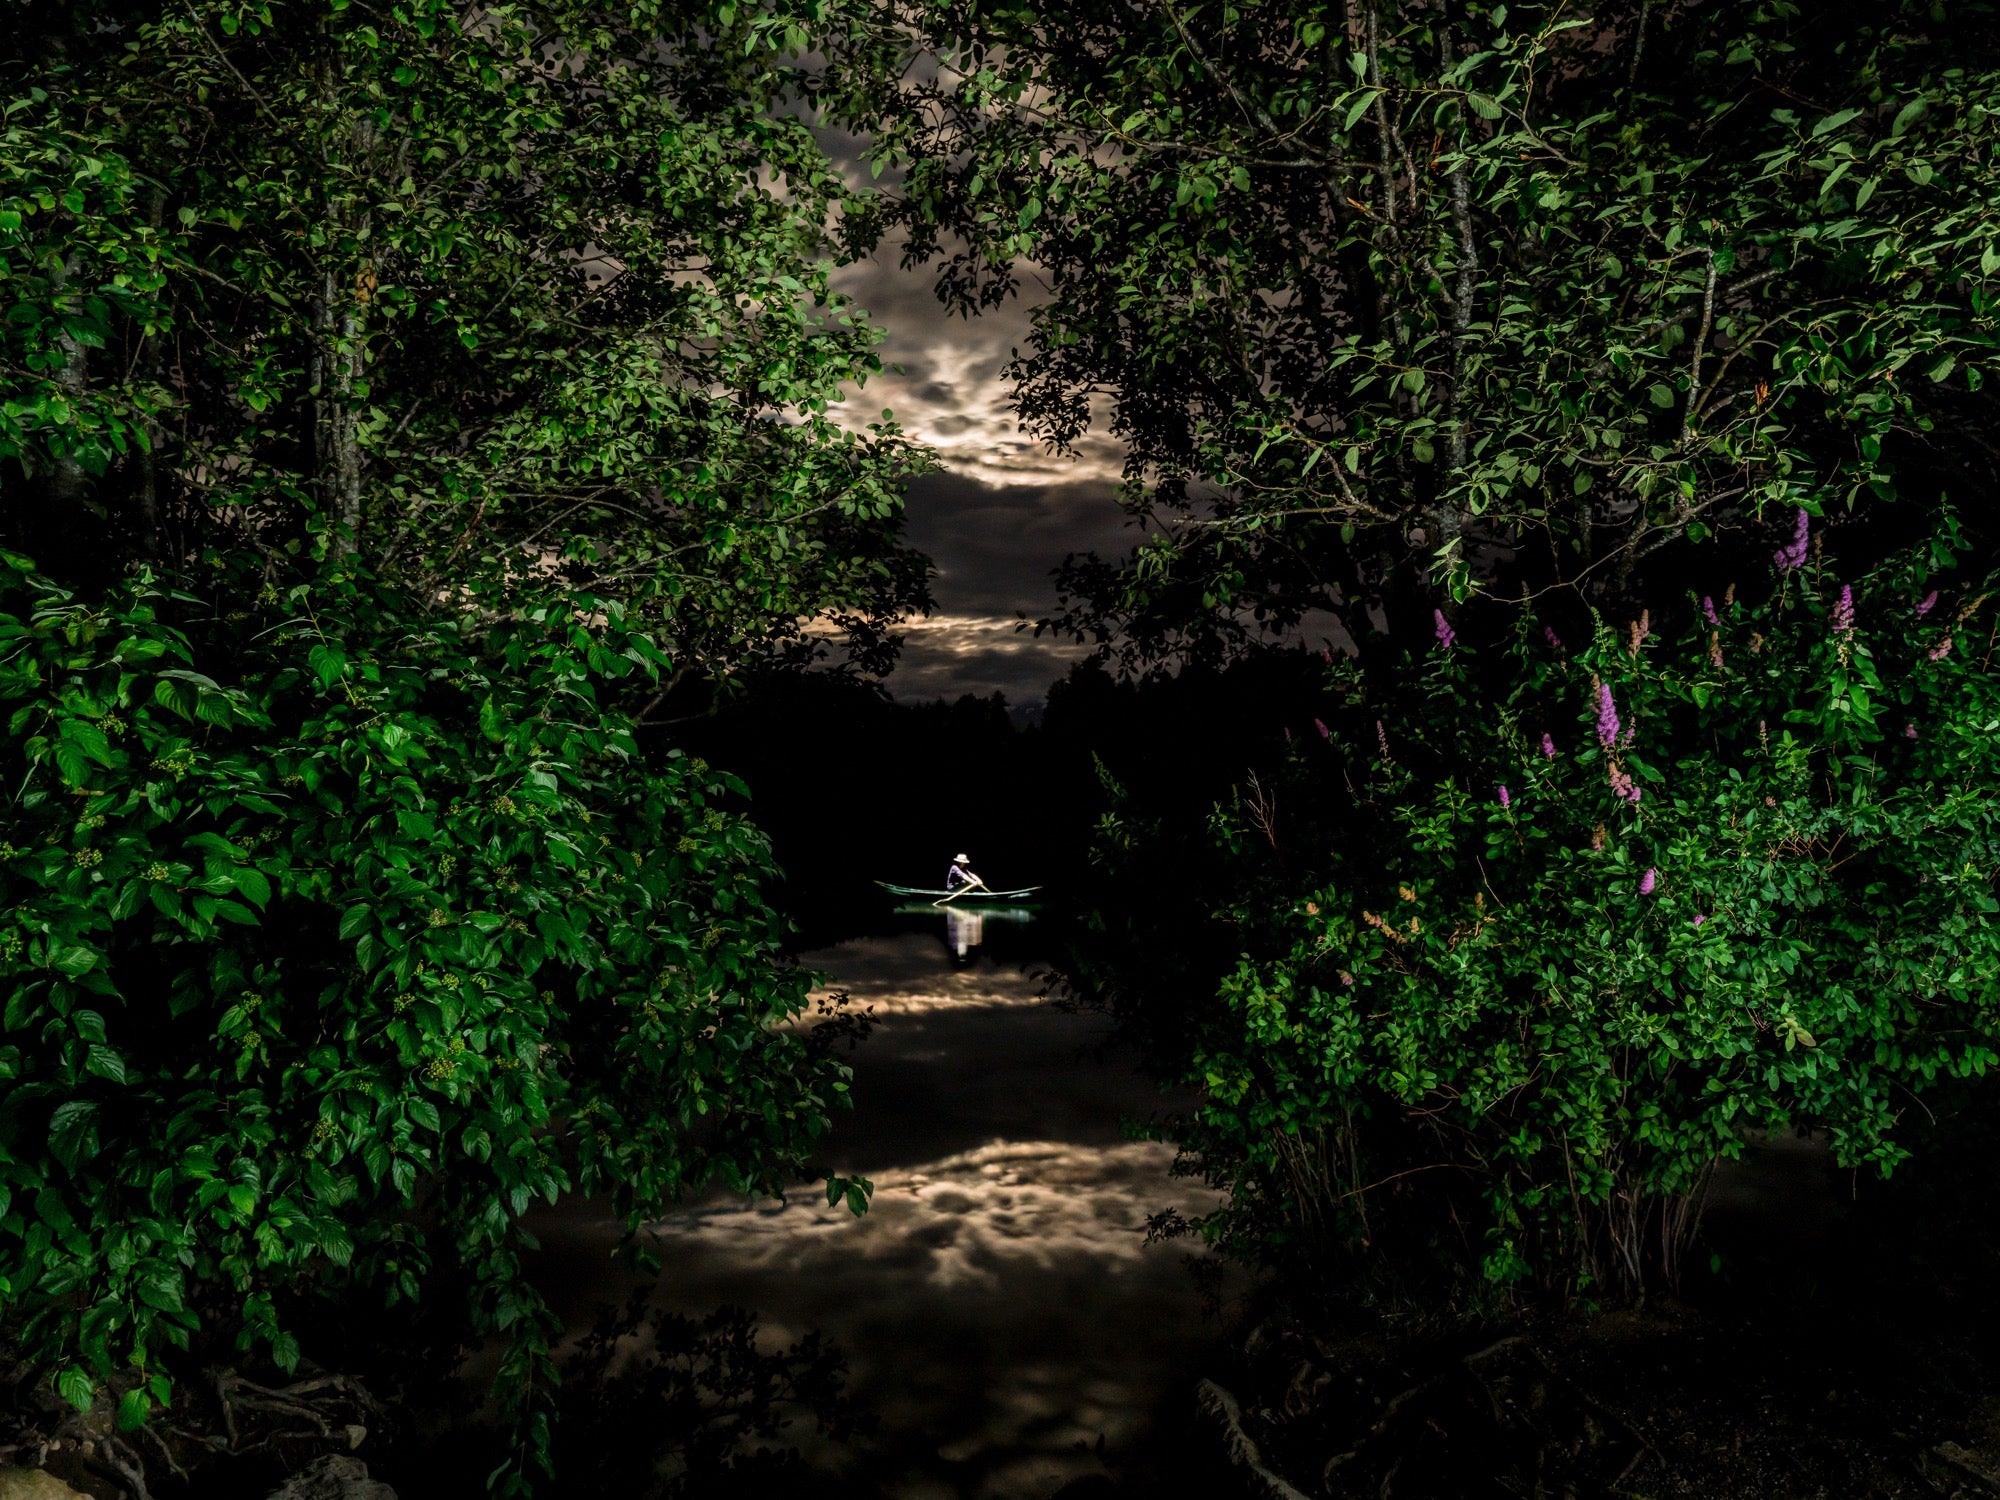
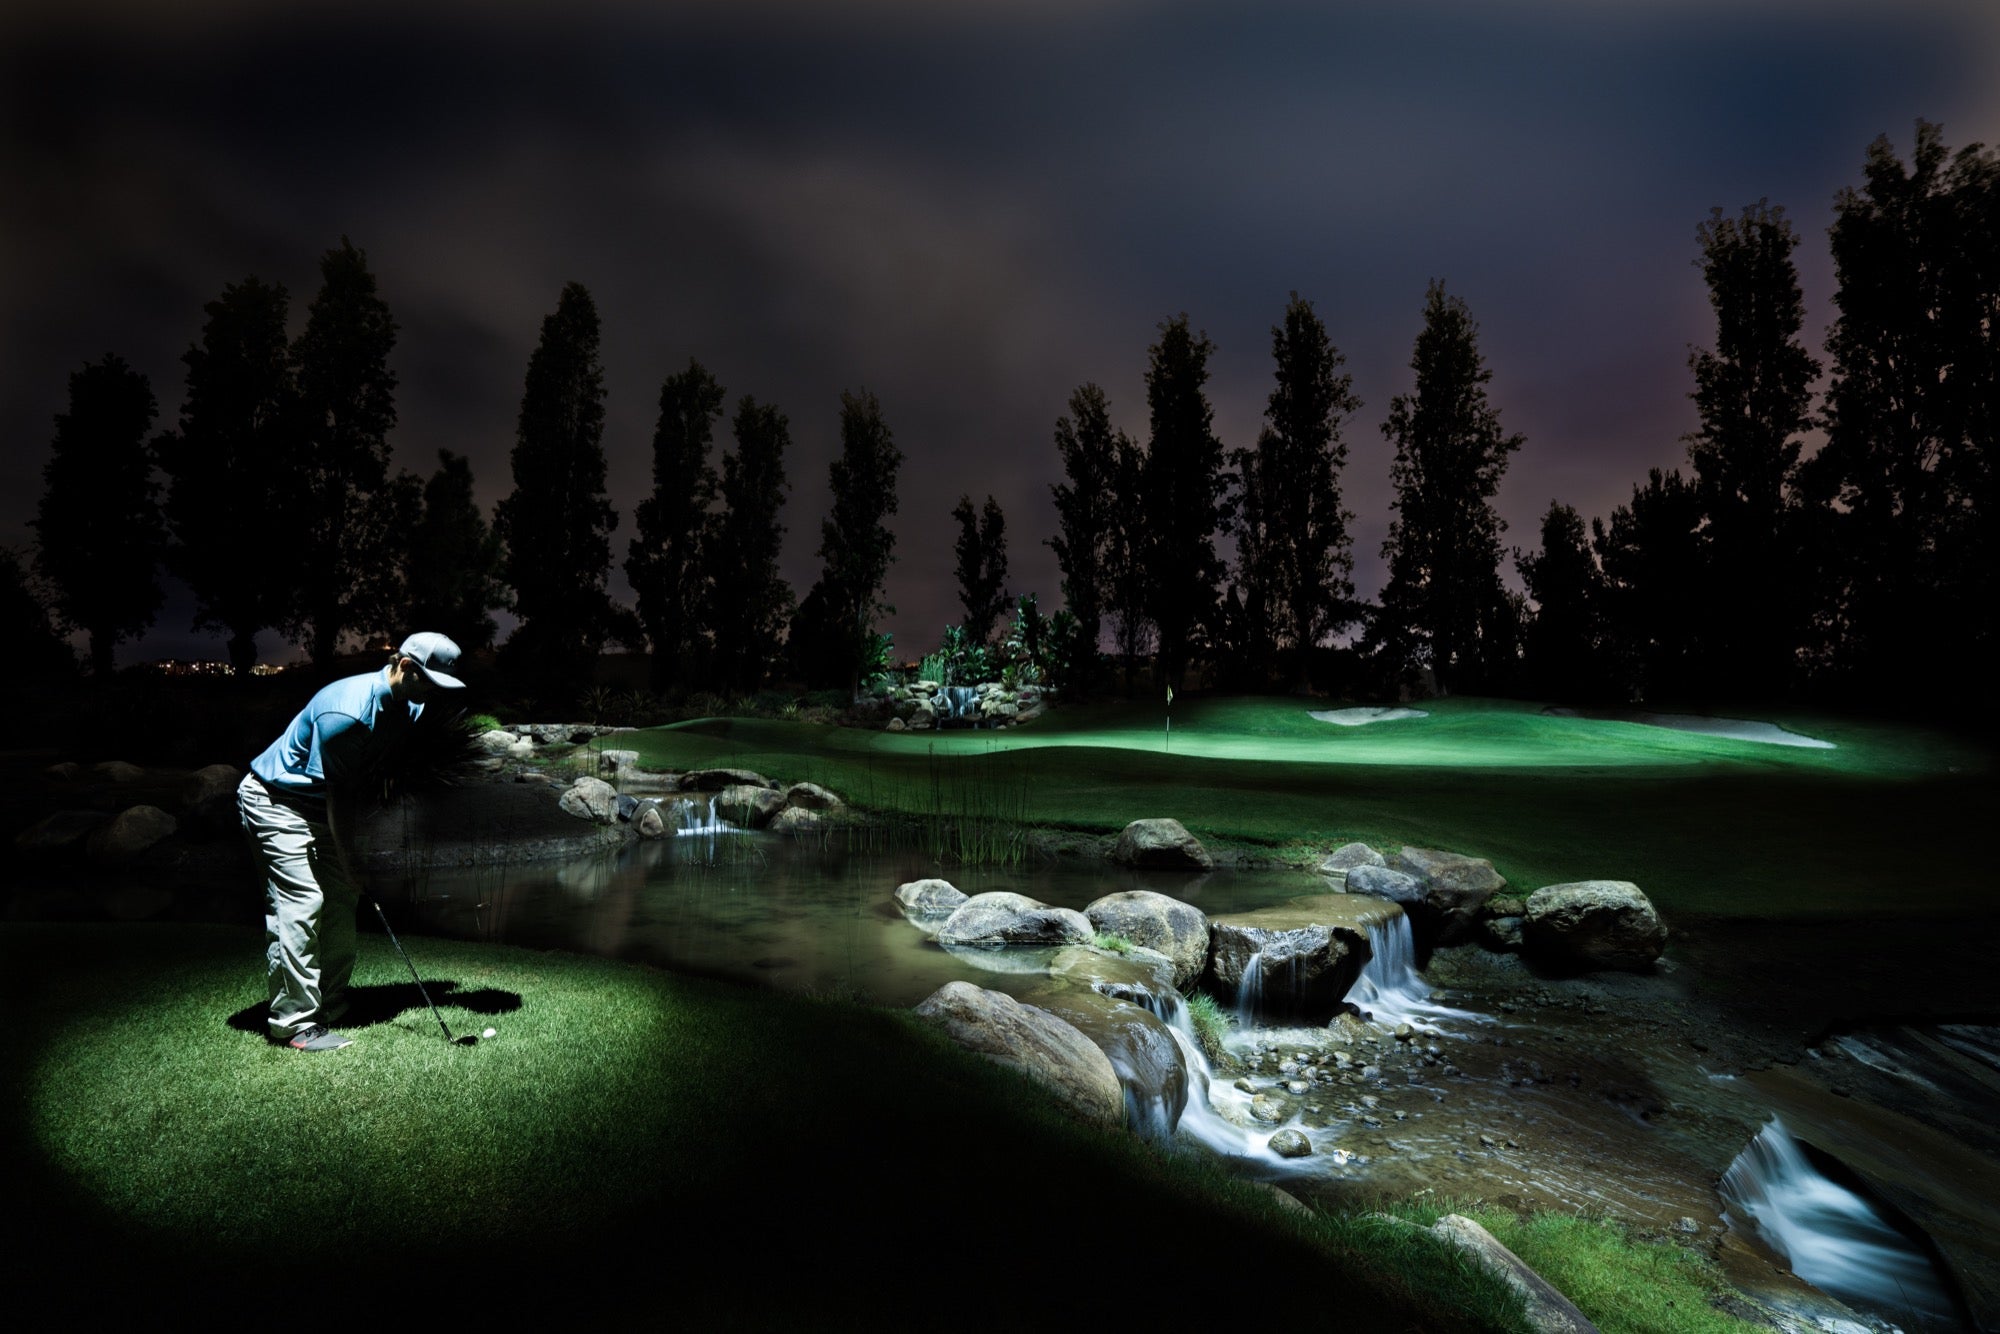
Most people know about light-painting in photography. Drone lighting is a lot like that except you’re using a drone to light your subject or scenery from above. What’s great about this is you can create unusual lighting perspectives or even mimic moonlight.About 5 years ago I saw an image of a drone shining a light straight down on a mountain range. The image wasn’t that great but it was inspiring enough to burn into my mind. 4 years later, 3DRobotics collaborated with a light company to use drones for photography, cinematography and search & rescue. I was lucky enough to be one of the drone operators of that project. From there I ventured out and started shooting photos. I feel I have just scratched the surface. There’s so many more perspectives out there I can’t wait to capture.
Sony α7R II, Sony Vario-Tessar T* FE 16-35mm f/4 at 26mm, 1.6-sec., f/6.3, ISO 500
How To Get Started
I have 20+ years of experience in radio-controlled hobbies and six years of drone operation. I wouldn’t recommend drone lighting to someone until they are completely confident in flying a drone in daylight. At times it can be hard to know the orientation of the aircraft when it’s flying, and your depth perception changes. You know that label on the passenger side mirror of a car? “Objects in the mirror are closer then they appear.” Well that’s also true for drone-light photography.
Perhaps following these suggestions can save yourself from harming someone or saving an expensive crash. The best advice I have is start small and gradually move into more complicated projects. Don’t cut corners and try to just jump right in. Know your drone and its abilities from the inside out. Also, know your abilities as an operator and don’t overstep them. Only operate in sparsely populated areas. Flying a drone can be dangerous and adding people or private property to the mix ramps-up the stakes. Always bring extra light sources so you can set up and observe your equipment.
 Sony α7R II, Sony Vario-Tessar T* FE 16-35mm f/4 at 16mm, 1/80-sec., f/9, ISO 50
The Photo Gear I Use
The α7R II is the perfect camera because it’s small, has a very high-resolution sensor and incredible high-ISO capability. The low light capability is exceptional and the dynamic rage is amazing. The 42MP sensor is icing on the cake! I mainly use the camera for photography but it actually can accommodate use of 4K video which I’ll be using on one of my heavy-lift drones.
As far as camera settings for drone light photography, my rule of thumb is to set the ISO as low as possible without losing too much data and range in my blacks. I try to keep my shots as low noise as possible, but capturing things like the Milky Way often requires a higher ISO. Moving subjects also require higher ISO to get a faster shutter speed. Nothing is worse than getting back to the computer after a long night of shooting only to see a low-noise photo that’s blurry!
I typically shoot at maximum aperture for my drone light photography. If I want to create a deep depth of focus while keeping the foreground sharp, then I’ll usually stop to around f/8 or f/11. If I do that, I have to bump up the ISO or shoot a longer exposure. I try to couple my camera with fast glass so I can capture as much light as possible and as fast a shutter speed as possible without having to increase my ISO.
Night focus is a hard task. Especially when your subjects or scenery are barely visible. I usually start with focusing near infinity, then take some long exposure samples and fine-tune from there. My white balance settings usually fall between 2200K-4000K, but that’s just my personal aesthetic preference.
With all this I’ve learned that you’re always sacrificing range in one setting but gaining in another. You just have to find that happy medium that makes you content.
Sony α7R II, Sony Vario-Tessar T* FE 16-35mm f/4 at 35mm, 1/80-sec., f/2.8, ISO 2000
The Drone Gear I Use
As of now I use a 3DR Solo. It’s light in weight and very reliable in difficult conditions. It has a pretty straight forward radio control, too. Unfortunately, there aren’t many lighting options that are plug in and play. One light setup I use is a RUGO made by Foxfury. They can mount directly to the solo using its GoPro mount system. You can also daisy-chain multiple RUGOs together for a brighter spotlight. A drone should always have balanced center of gravity so I’m careful to mount them with that in mind. Sometimes I use a light that’s a little more advanced with 8,000 lumens of light. That one is a little more classified, but stay tuned!
Follow @Craig.Coker on Instagram
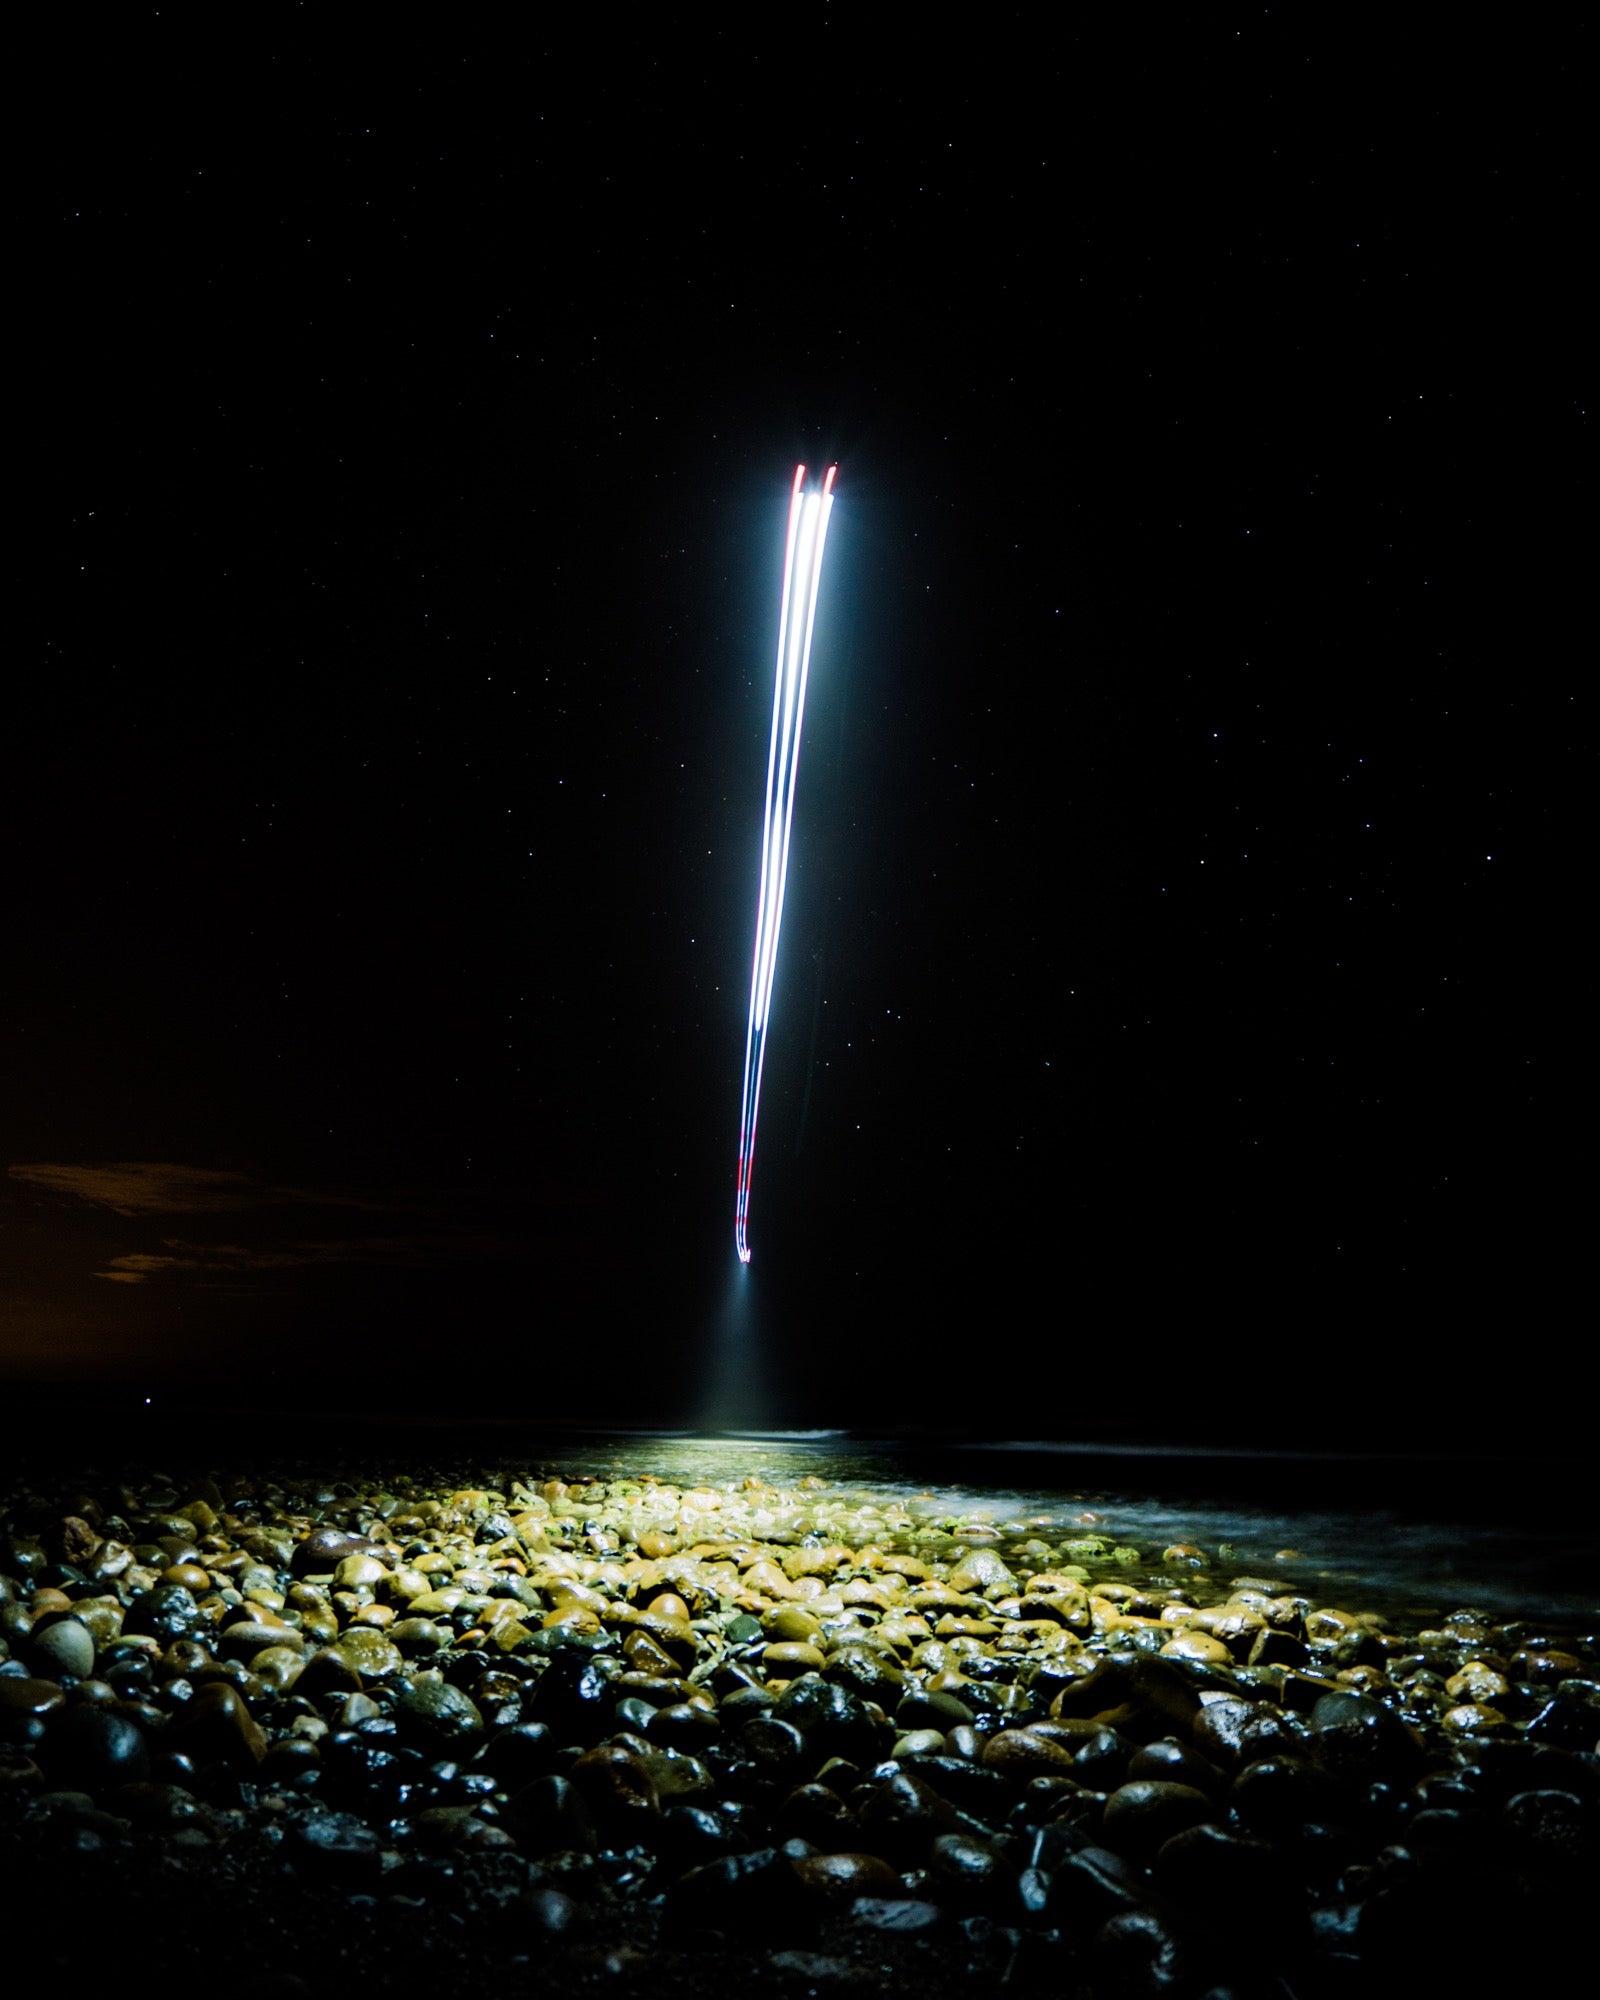
Sony α7R II, Sony Vario-Tessar T* FE 16-35mm f/4 at 35mm, 25-sec., f/2.8, ISO 800
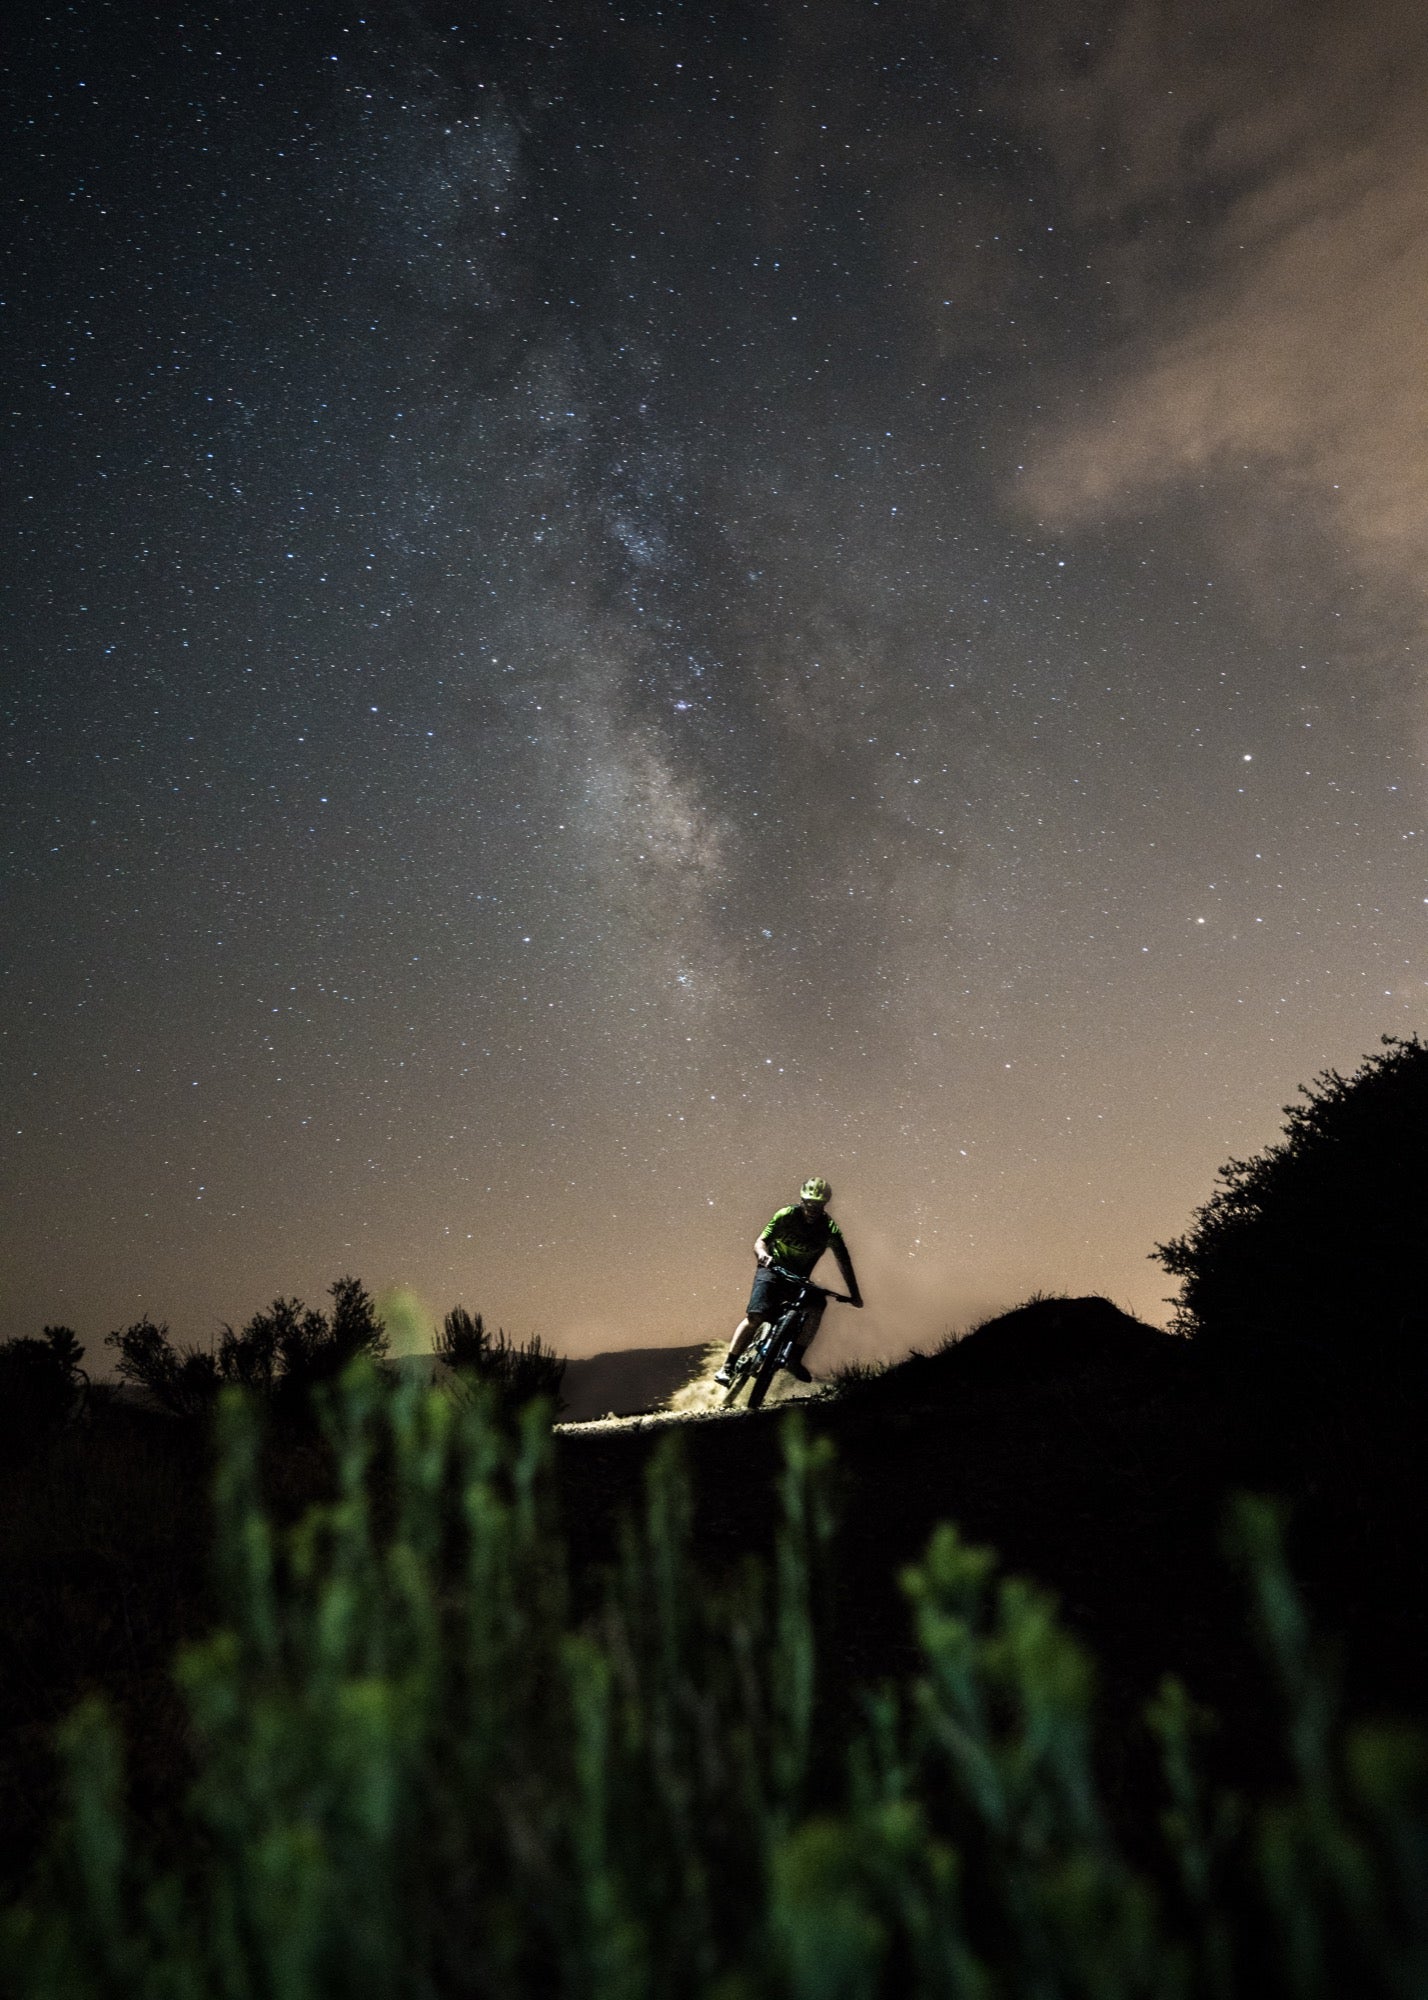
Sony α7R II, Sony Vario-Tessar T* FE 16-35mm f/4 at 16mm, 8-sec., f/4.0, ISO 500
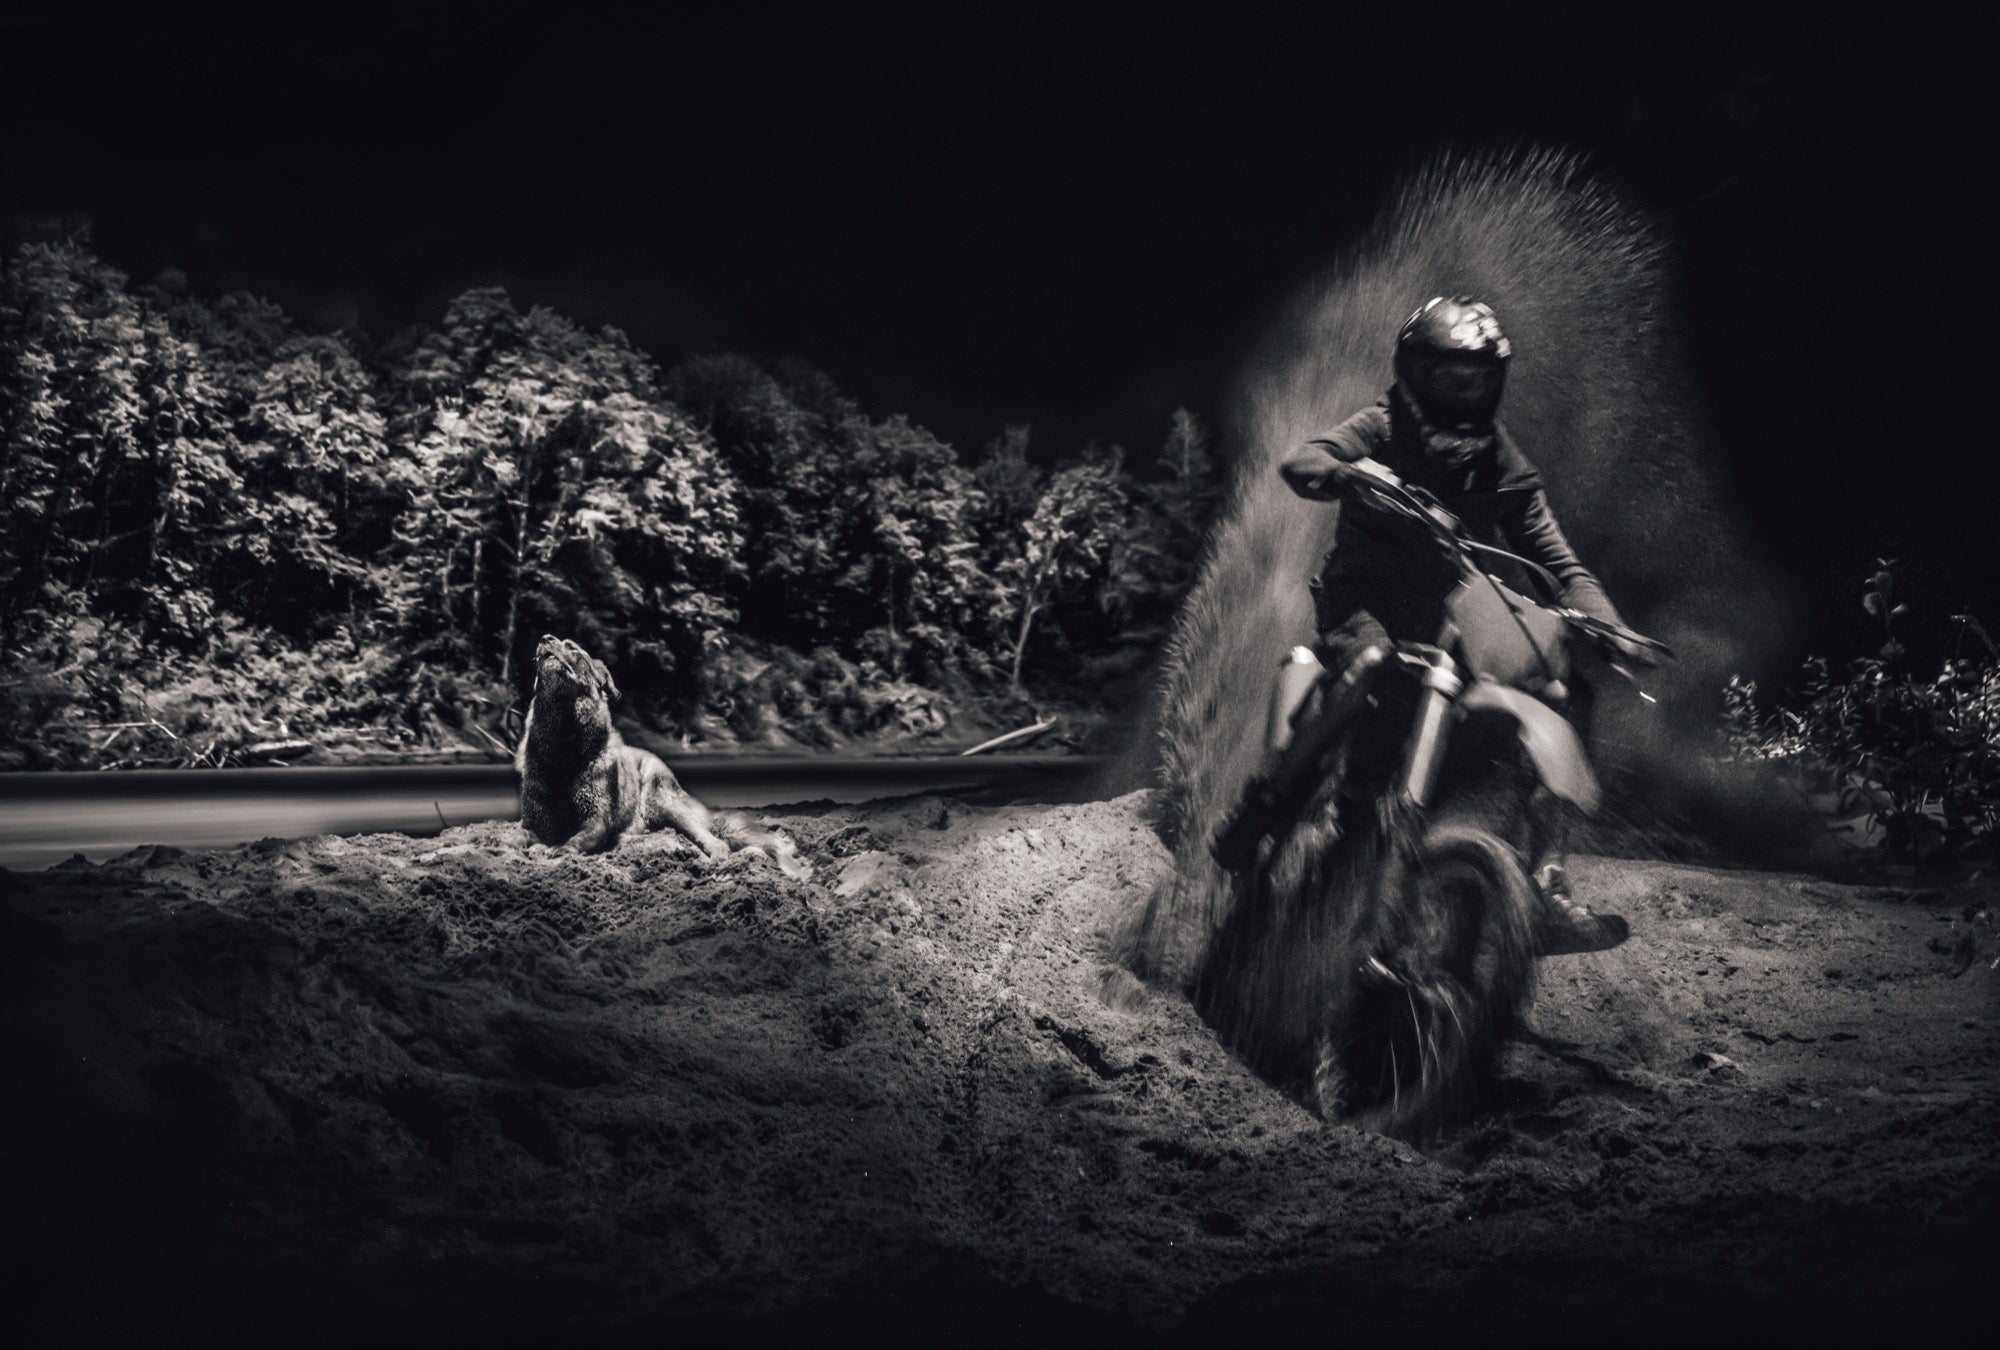
Sony α7R II, Sony Vario-Tessar T* FE 16-35mm f/4 at 16mm, 1/125-sec., f/4.0, ISO 5000
Shop Now


Celebrating 10 Years Of Sony Full-Frame Mirrorless
Why This APS-C Shooter Reaches For The Sony Alpha 6700
Quick Guide: How To Update Your Sony Camera's Firmware
5 Tips For Landscape Photography
5 Things To Know About The Sony ZV-1 II
See Why This Leading Wildlife Conservation Photographer Is Making The Switch To Sony
Best Lenses For Content Creators & Vloggers
For This Creator, Switching To Sony Came Down To Community
“Why I'm Buying the Sony Alpha 9 III”
Promos

