Portrait Photography 101
Master portrait photography fundamentals – lighting, composition, posing, gear, and editing.
- Details
- Module
- Quiz
About this course
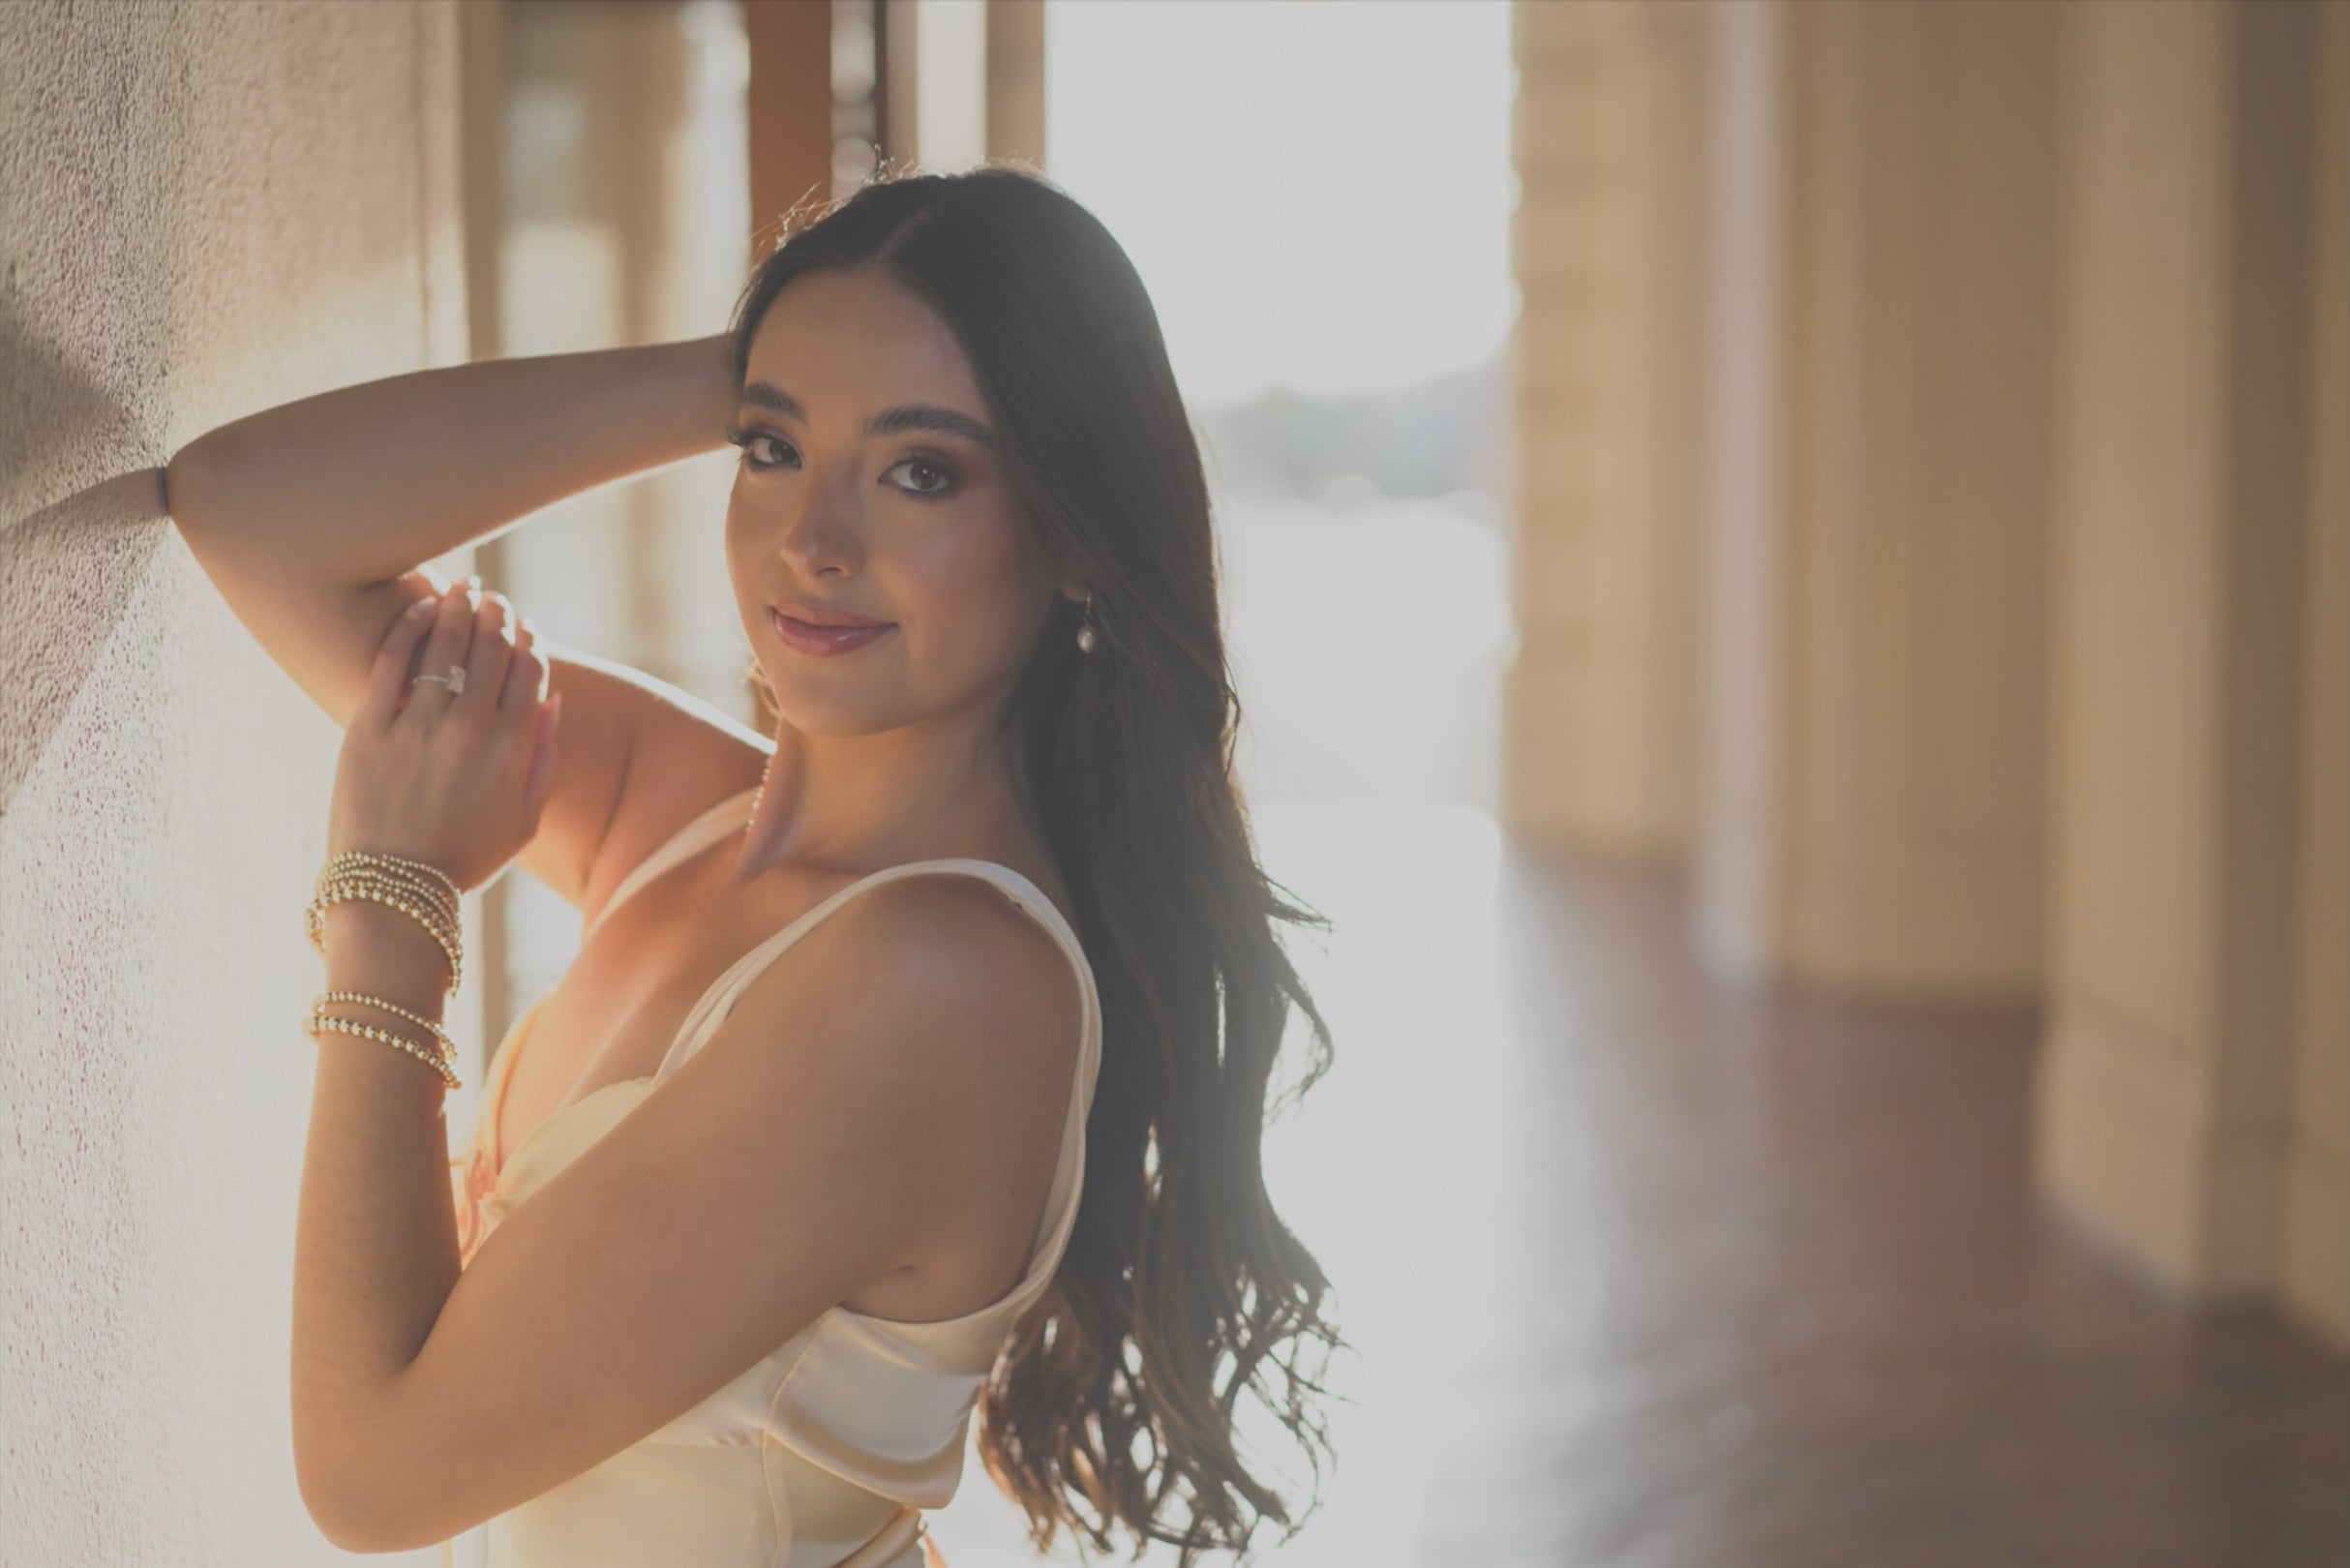
Portrait Photography 101 teaches a practical, on-location system for creating professional portraits, covering smart gear choices (like the 50mm f/1.8), composition essentials (rule of thirds, framing, leading lines, diagonals, “blurry sandwich”), and lighting techniques that work anywhere (open shade, reflectors, natural bounce, matching exposure, direct sun, shooting into darkness). You’ll learn the exposure triangle with easy, repeatable settings, how to direct authentic emotion and movement, and posing frameworks for flattering, confident images. The course finishes with a streamlined Lightroom workflow for organizing, editing, and backing up thousands of photos. Designed for beginners and upgraders alike, it gives you proven tools you can use immediately.
Course highlights
Instructor
Scott Robert Lim is a globally recognized environmental portrait and wedding photographer with a career spanning more than 25 years. His work has been featured in books and magazines worldwide, earning him a reputation for creativity, artistry, and excellence.
Today, Scott is a sought-after international speaker who shares his passion for photography with audiences around the globe. He is dedicated to coaching, mentoring, and inspiring photographers at every level of their journey.
Known for his enthusiastic teaching style, Scott has a unique ability to break down complex techniques into simple, practical methods that empower photographers to succeed.

Scott Robert Lim
Photographer, Sony Artisan Of Imagery
Featured gear

Skills
Transcripts
- Welcome to Portrait Photography 101. I'm thrilled to have you here. My name is Scott Robert Lim and I specialize in environmental portrait photography, capturing powerful professional quality portraits in real world settings across the globe. Over the years, I've developed a simple, yet highly effective system that consistently delivers stunning results, and I'm excited to share it with you. In this class, you'll learn how to find the magic light that transforms an ordinary scene into a breathtaking portrait. Pose your subjects like a pro, enhancing natural beauty and building confidence. Compose with purpose to create dynamic images that tell unforgettable stories. Choose the best gear for your budget without compromising quality. Edit, with award-winning techniques to bring your portraits to life. We'll also head out on location so you can see these techniques in action. Real environments, real challenges, real results. Whether you're just starting or looking to level up your skills, this course is designed to give you a solid foundation and proven tools you can use immediately. Ready to elevate your portrait game? Let's get started.
- Welcome to Portrait Photography 101. I'm thrilled to have you here. My name is Scott Robert Lim and I specialize in environmental portrait photography, capturing powerful, professional- quality portraits in real world settings across the globe.
Over the years, I've developed a simple, yet highly effective system that consistently delivers stunning results, and I'm excited to share it with you. In this class, you'll learn how to find the magic light that transforms an ordinary scene into a breathtaking portrait. Pose your subjects like a pro enhancing natural beauty and building confidence. Compose with purpose to create dynamic images that tell unforgettable stories. Choose the best gear for your budget without compromising quality. Edit, with award-winning techniques to bring your portraits to life.
We'll also head out on location so you can see these techniques in action - real environments, real challenges, real results. Whether you're just starting or looking to level up your skills. This course is designed to give you a solid foundation and proven tools you can use immediately. Ready to elevate your portrait game?
Let's get started. Let's talk about the gear you need to take amazing portraits. I would recommend number one is to get a camera that has interchangeable lenses, because you can put different lenses on it for different effects, and that's great.
Now, there's two different types of interchangeable lens cameras. One is the APS-C or crop sensor, and another is full frame. The full frame has a larger sensor, and the difference is on a full frame, you can get better quality in low light, and also it's easier to blur the background on a full frame lens.
Now, lens choice, what do I recommend? Well, there's millions of options out there actually, but I'm going to recommend a 50mm f/1.8 lens. In fact, I'm going to use that lens for all of our live sessions, and every image that you see me shoot will be with a 50mm f/1.8. And so that's the pairing that I would recommend, is a 50mm f/1.8.
And also, if you can afford it, a full frame sensor. One, it's going to be easier to blur the background. And two, it's going to be a better quality, especially when shooting in low light. But I wouldn't get too tied up on the type of gear to use. because honestly, it's not really the gear that makes the photo - it's the photography skill. And as they say, the best camera is the one on you.
- Managing exposure. The goal is to make your subject the brightest and sharpest part of the image. Using a low F-stop will help you achieve this by blurring out the background. This is the look and style of professional portraits. Let's dive in on how to find the best exposure for portraits.
What is exposure? Exposure really is just the brightness or darkness of a image, and it's controlled by three elements in your camera. One is the shutter speed, two is the aperture or F-stop, and three is the ISO, and they refer to this as the exposure triangle.
So let's look at this next image. And so you can see the exposure triangle, and at the top I have shutter speed, F-stop, and ISO. Now, what does the shutter do? Shutter controls the sharpness of motion, whether you want it tack sharp or sometimes you want it blurry too.
F-stop is the focus and depth of field, meaning if you want that blurred background, then you're probably going to want a low F-stop. ISO is the light sensitivity of image quality. So the lower the ISO, the higher quality the image.
And then the higher ISO, which is more sensitive to light, well, it may have more grain to it, and so the quality is not as good. So let's talk about shutter speed. By slowing the shutter speed, you're increasing light into the sensor, making it brighter. Faster. shutter speed freezes action, but it decreases light into your camera. Sharp images require the correct shutter speed.
And let's go through the different types of motion that you might want to stop. For still portraits, you want 1/100-sec. or greater for motion portraits, which I call, is maybe somebody like walking or moving slowly, you need 1/250-sec. or greater. And if you want to stop fast action, you want 1/500-sec. or greater.
Now, there's another determining factor of what your shutter speed should be, and it relates to the type of lens that you put on your camera. And a general rule is you take the lens length. Let's say you're using a 50mm lens, you double that. So 50 times two is 100, so you want to be at least at 1/100-sec. or greater. So you have to pay attention to what lens you have on.
So let's say you're using a 200mm lens, you want to make sure that you're at 1/400-sec. or greater. Now let's talk about F-stop. And that's actually controlling the depth of field. So in this next chart, you can see what the different F-stops are. And so the higher number, so if you look at f/16, you can see it lets a small amount of light through. When you do that, your images are a lot sharper because you have more depth of field in your frame.
Now if you go to f/8, you can see that it lets a larger amount of light in, but also you'll get that blurry background or that bokeh effect. So if you choose a low F-stop, like 1.8, you're creating a larger hole, letting a lot of light in. Or if you close it down, you could put it at f/16, which allows less light in, but greater depth of field. 99% of the time I choose the lowest F-stop on my lens. And so usually it's at f/2.0 or f/2.8, and I usually always use that low F-stop.
Here's some examples of what exactly a 50mm f/1.8 lens looks like and how it blurs the background out. You can see this first image here. You can see the smoke is all blurred out. The second image, I'm in Italy on a gondola, and you can see I'm fairly close to this subject, but you can see how the depth is blurred. Then I do even group shots, and so when I'm 20 feet away and shooting full length, I still get the necessary sharpness on every single person. But you can see it blurs the background out, and I love using this technique for shooting groups of people.
And now I get really close and you can see that I've got sharpness right on the eye and pretty much everything else is blurred out. Here's a boxer, and you can see the blurred out image behind him. And now I'm using a little bit longer lens. I'm using 60mm at f/2, and you can see the city is blurred out. This next shot, I'm shooting at 85mm at f/1.8, and because I'm getting a full lane shot, I have to move further back, which allows the subjects to be razor sharp and the background to be blurry, even at 1.8. Now I'm at even greater at 110mm at f/2 and you can see the subject's razor sharp, but you could see a blurry foreground and a blurry background.
Let's talk about ISO, which is light sensitivity and image quality. Now I'm going to tell you or give you a guideline of how to set your ISO. And once you set your ISO correctly, everything falls into place and it's really easy to get your perfect exposure. So set your ISO to 100. If you are in a bright light situation, you see sharp shadows on the ground, beautiful blue sky, set it to 100. If you're in the shade, set it to 400. And if you're indoors or in extremely low light, set it to 800-1600.
Now I'm going to give you the magic camera settings. One: Turn your camera and put it in manual mode. Two: Set your F-stop to 1.8 or 2.0, and this way you're going to get that beautiful blurred background. Three: Set your ISO according to the light situation, which I just explained. And then 4: All you have to do is adjust your shutter settings to dial in that right exposure. Because you are setting the correct ISO to the situation, you will always have a sharp image because that shutter speed is going to be over 1/100-sec. and many times even over 1/500-sec. to keep everything sharp.
So here are your portrait camera settings guide. One: Set your F-stop to 1.8 or f/2 and your ISO accordingly. 100 if you are in a bright light situation, 200-400, if you are in the shade or overcast, and indoors or low light, you want to be at 400-1600. So if you are in bright light, your settings are going to be ISO 100. If you're at f/2, you're going to be around 1/6400-sec. And so you can just fine tune your shutter to get you the right exposure. Now, some cameras don't go up to 1/800-sec. If that's the case, just raise your F-stop to 2.8 and then in super bright light, you should be around 3000 and you can fine tune your exposure.
Now if you're in the shade or overcast, I like to set my ISO to 400, and if I'm at f/2, my shutter speed will be around 1/800-sec, and I can fine tune the shutter speed to get me the right exposure. When I'm in low light, I'll either set it to 400 or 1600, and I just have to make sure that my shutter speed is above 1/200-sec. Now, one thing to consider is if you're doing fast action, you have to move your shutter speed up to 500. So you may need to bring up your ISO a little bit higher.
Now I have a free portrait guide. You can just scan this QR code, and I list all the different situations and what your shutter and aperture should be, and it'll give you a great guideline to what your shutter speed should be. So let's summarize again. For the perfect portrait exposure, One: Set your F-stop to f/1.8, set your ISO according to the light setting, make sure your shutter speed is over 100, or if you have fast action, make sure your shutter speed is over 500. And then all you do is simply dial in your shutter to give you the right exposure. That's the system that I use.
I hope these lessons on camera settings and exposure have helped you, and I know these are going to help you to take great portraits.
- Let's talk about composition. Good composition creates impact and arranges the elements in the frame to create balance and harmony. Let's examine five techniques that will help you create images with a compelling story.
The number one rule is: make the subject the brightest and the sharpest part of the image, because that's where your eye goes to. So whenever you look at an image, your eye immediately goes to the brightest and sharpest and make sure you have that in every single shot. Now let's go with number one technique is called the rule of thirds. So divide the frame into thirds and place the subject on one of the lines.
And you can do that by dividing the horizontal frame in thirds and also the vertical. Do it in thirds and any one of those lines will work. And especially if you put the main subject in one of the crossing points that's a hot spot, and that will also give you balance in harmony. Let me show you a couple examples of using the rule of thirds. On this first image, look at the yellow lines and you can see the subject is at the cross point of the bottom left.
Now this is a horizontal image and look at the blue lines and you can see that it's right on the hotspot on the upper right. Now, on this next image, look at the two red lines and you can see the subjects are right on those red lines. This next image, look at the blue line, and you can see the subject is dead center, but it's on the lower third line. This next image, again, the subject is dead center, but the head is on the third of the upper line. So look at the yellow line in that composition.
2. Framing, and framing is huge. You could use doors, you could use windows and archways. Let me show you a couple examples here. Again, this image is with the two frames, and I've got the bride in one door, and I've got the bridesmaids in the other door, and it makes for great framing. Here I have a subject and look behind them. You can see a picture frame, a very large picture frame behind them - and I put the subject right in that picture frame that will kind of bring your attention right to them.
Another type of framing is with lights, and this is a great example here. I'm using light in a different way. You can see the surfer and the sunlit water spray frames the subject. Now I'm in Italy and you can see the two different frames where I have one is the subject in the red dress. She's in the window, and I waited for that precise moment - I took that shot where the gondolier is framed by the archway. And it's a double framing because there's a larger archway and a smaller archway, and I got it right dead center, so it works.
Now here's a door and a circular window that this person is framed, and so when you combine two different elements into one, it's a very strong composition. So you can see the door and also you could see the circular window, and that subject is boom, right there in the middle. Here's in Paris, and I have some framing by this iron structure. I put her dead center and your eye naturally goes right to her. You can also do some unconventional framing, and as you see, I took this wide shot and the subject is framed by the two trees, as you can see right here.
So as your compositional skills get better and better, you'll probably like to use wider angle lenses because you are more skilled at putting more elements together. And so I find that as you get more experienced, you're probably going to gravitate to some wide angle lenses as your composition gets better. Here's the third concept - is leading lines.
And in this next picture you can see that the lines lead right to the subject and also the subject is framed by the boat. And so it's like double elements helping center and draw attention to that subject. In this next example, you can see I used horizontal lines that point right to the subject. So whenever I see a wall with horizontal lines, if you move the camera right next to the wall, it'll give you those beautiful lines that lead right to your subject. Here you can see that I have those string lights and I use those lines to kind of lead right to the subject. In this picture, you're going to see other lines in the background that help lead right to the subjects.
Number four, diagonals. Diagonals are very powerful because it creates order in your frame and your eye goes all the way through the diagonal and makes you view the entire image. And so you can see in this picture I used the neon sign as a diagonal, and this next one I have the dancers and how I have them arranged. You can see the diagonal line from one dancer to the left all the way to the other dancers. In this image, you can see the diagonal line going from her feet to her head, and also she's in a bathtub, which creates another circular or oval framing element, which looks great.
Five, creating a blurry sandwich, and I really love this technique, and so what you do is if you have blurry in the foreground, sharp on the subject and blurry in the background, it really makes for a great composition. If you can see this dancer here, you can see that one I'm putting my camera next to the wall, using that as my foreground, which is blurry. Then the subject is sharp, and then the background is blurry. This works best if you're using a lens 50mm or greater. And at f/1.8 - works great. Here I'm at a wedding and I'm using a little bit longer lens, and I found some flowers. They're right in the foreground, and so I framed them with the flowers, the colorful pink flowers in the foreground. They're sharp and then the background in the end, but they're dead center. What you might want to do is, is try to shoot through something. So if you can shoot through an element in the foreground, it's going to automatically give you a blurry background.
Here I'm using a very shallow 50mm lens, and I'll zoom in close to the eye. You can see what I was shooting through. There's this metal grid with a bunch of little holes in it, and so I shot through one of the holes, which would give me that red blurry effect.
If you don't have anything to shoot through, you could always have the subject put their hands close to the lens and you automatically have a blurry background. This next subject, I'm shooting through a crack in the door, so the door was blurry, the subject was sharp, and then there was a blurry background behind the subject. And this next one is a little bit different in that I created these blurry bokeh balls. I got one of those LED mini string lights, which you can get for a few dollars at Amazon, and I just put them in front of my lens to create that blurry bokeh ball effect.
So those are the five compositional techniques that I use, and: One was the rule of thirds. Two is framing, using doors, arches, shapes, etc. Three, leading lines. Fourth was diagonals, and fifth was the blurry sandwich. So you can use these techniques to help you create a better story. A good way to learn composition is to watch high budget cinematic movies and television series and pay attention to how they frame the subjects and elements. That's how I learned, and I hope you learn something from these five techniques on composition.
- I am going to show you my magic lighting tricks where you're going to find nuggets of good lighting almost anywhere you shoot. Are you ready? Let's go.
Alright, I found some great light and we have a beautiful archway here with some open shade, meaning my subject is in the shade, but my subject can see open sky that has a brighter light that is in the shade. And so that's going to give him a beautiful catch light in his eye. He has to have a contrast of lighting. He's in a darker area where he's looking and that gives you a beautiful catch light.
So here I'm going to go shoot here, I'm going to turn my ISO to 400. I'm in the shade and that gives me plenty of shutter speed. I have my F-stop at 1.8 and I've got a symmetrical shot right here. I'm going to take a lower angle to give them kind of a hero look. And Roy, if you could just look straight out into that light right there. And then let's try one with your hands, like right there. Center? Yeah. Good. I'm shooting waist up and I'm doing a very symmetrical shot. It looks great. OK, that looks amazing.
Let's put Roy over here. And so now my light is coming in this way and now I've got some shadow and some highlight. And my number one rule is nose to the light. And so if he turns his nose this way, I've got a beautiful highlight and shadow, which is perfect lighting. And now I've got my shutter speed at around 2000. How about if you put your hand in your pocket there? OK, can you look right at the camera right there? I love that right there.
So I still get highlight and shadow on his face to create dimension. That's just some beautiful lighting right there. How about you cross your arms right there. Nice. Now I've got some beautiful split lighting, which is very strong for a male subject.
So half his face is in shadow, half is in light, and that's very strong. I found some great light coming through this door. I have some open sky here filtering through and this is acting like my soft box lighting my subject. And you know it's great light because why? You can see amazing catch lights in Roy's eyes. I'm at ISO 400 again at 1.8 at 1/320-sec. He looks great. Got the beautiful catch lights.
I'm going to do some portraits. I'm going to shoot waist up. Give me a little smile Roy. There you go. Perfect. Now that's how you find amazing light simply through a door.
This is another lighting technique I call matching exposure. So my background exposure and the exposure on her is the same. So everything works out perfectly. You're still going to get an amazing catch light in her eyes because the sky above her is shining right into her eyes. And I'm going to take another shot right here. Perfect. Look right here at the camera. Awesome.
So that is the matching exposure technique. All you have to do is make sure that this exposure on your subject is equal to the exposure in your background and you got a perfect shot every single time.
I'm going to show you how to shoot in direct sunlight. This is a great technique when you want to really show the bright colors of the sky and colors really pop. So the key is putting your subject in the sun. And if the background is in the same exposure, you set the one exposure with your subject. And it's a good idea too. so sometimes if your subject's wearing a sunglasses, because that sun can be very bright, but using the direct sun can be an advantage.
If you really want to have those colors pop and have a beautiful blue sky in the background, it looks perfect every single time. Another great technique I like using is using a simple reflector. Adrian, come on in. So what you have to do is have the sunlight behind the subject and you use the reflector to reflect the light back on the subject, which looks great. What I try to do in my background, I try to find something that is lit by the sun too, to give it kind of some pop in the background.
So let's try that. Go ahead Adrian. Let's turn your body towards there. And then I am going to shoot down into those great flowers behind her. Looks great, right there. Awesome. Let me just show you without the reflector and with the reflector. So this is without the reflector. Turn your body a little bit this way. You got some. And then right there. That looks awesome right there. Now Adrian, come on in and add the reflector and see. You can see that light right on her face. Looks beautiful. And that's how you use your reflector to create great fill in light, which is an awesome way to add light when you need it.
Another lighting technique I like to use is finding a natural reflector in my environment. I saw that the sun was shining on this light colored wall and I said, you know what? That's the perfect reflector that I can use and it's huge. So it's going to give some really soft light on my subject. So, I'm going to shoot this way because the sun is shining on this wall, lighting her, giving her beautiful catch light, and I got some awesome rim light around her at the same time. Gorgeous. Turn your nose towards that wall and look back at me with your gorgeous eyes. There you go. Perfect.
And so, that's it. That's how you can use a natural reflector in your environment to create a beautiful shot for you. With these lessons on lighting, I hope you feel confident going into almost any situation and finding great light. I've been using these methods for decades and I'm sure you're going to have a lot of success with them.
- Creating expression with your subjects, it can be difficult, but I'm going to give you seven techniques that I use all the time. So let's get into it. First of all, you have to know that emotion is very important. Emotion is what creates the story, and it brings out the personality of the subject.
Your photography is actually a reflection of yourself, so you have to be what you want from your subjects. So if you want positive energy, if you want joy, you have to show joy. If you want confidence, you have to be confident. And from that, your subject will mirror you.
One: Create positive energy, and one thing you can do is just smile and smile a lot. Be positive. Two: Compliment and encourage. Now, sometimes subjects, especially if it's their first time shooting with somebody, they're very self-conscious, so the more you compliment them and tell them how good they look and what a great job they're doing, they're not going to think about maybe some of the negatives that they think about themselves. Maybe they, you know, are afraid to smile because they're, they're, they feel like their teeth is not straight enough or whatever it is. Compliment a lot always takes away that self-consciousness.
Avoid dead air or long silent pauses. Silence makes people uncomfortable, so I'm always talking to them. And if I'm, oh, you know, having an issue, I just explain what I'm doing. Oh, I have to reset my camera settings and so just hold on for a moment. I'm always informing the client what I'm thinking and what I want to do. And that's very important in directing and leading your subjects.
And that's the second point, is you have to make it easy for your subjects, meaning you are in control, you are directing them, you are coaching them. Take all the pressure, put it on yourself and make things happen for them. One way to do that is to actually demonstrate the poses. Either they're the female poses or the male poses. Direct them all, show them what you want, and they will do it. Two: Act out your expressions. So if you want them to laugh, then show them how you want them to laugh. Ha ha, ha. You know, it's very easy for them to see what they want if you do it first. If you want confidence, show them what a confident look is.
Another thing is with the physical movements. If you want them to dance, then show them how to dance, right? If you want them to walk, a lot of times if you have a subject walk, here's how they're going to walk towards the camera, right? So a lot of times I'll say, OK, when you walk towards me, I want you to look over to your right then right at the camera, and then to the left, and then move your arms around. So just describe it and show it, and you'll have good success with that.
Here's number three: Start in a quiet environment. So what you want to do is start where there's not a lot of people, because subjects can get nervous when they feel like a lot of people are watching them like they're performing or they're on stage. And so if you can start in a quiet environment where there's not a lot of people, that's the best rule to follow. Number four: Use a location with structural elements. Meaning is there a place for them to sit? Is there a place for them to lean on? Because that's really going to help with the posing is to be able to sit or lean on something and it really helps.
Five, create a broad range of emotions. Look at this picture. I have one picture where she's giving me that confident model pose, and the next picture, she's like screaming out loud. So you want to capture those two types of images and everything in between six.
Here's a powerful technique, which I call the vowel technique, and what are the vowels: A-E-I-O and U. And have them repeat those vowels in different ways. For example, have them repeat it, angry, A-E-I-O-U, or have it repeating, smiling, A-E-I-O-U. Or you can even have him repeat it while you're singing A-E-I-O-U, right? And you can just use those as micro starters to get them bringing out their personality and showing different emotions.
Number seven: Create action or movement. Now, I know this to be true. Whenever somebody is running or dancing, they never have a stern face. So if you want to get them, if you're having trouble with the subject to show emotion, this is the best way to do it. Make them do something right. Running or dancing or twirling around or talking with their hands and singing. But whatever it is, get them moving. Sometimes you can have something like a deck of cards and have them throw it in the air or whatever. Just get them moving and you can be creative in the way that you can get them to move.
Here on this next photo, you see, I have somebody creating expression while they're walking. And then the next photo you can see, I have a group of bridesmaids where I made them dance with their arms up in the air. I literally told them, I said, I need you to dance like this. And that's what they did. And came out with a great picture.
And then I'm creating action on the next shot where I'm having them throw some fake money up in the air and I told him to laugh hysterically. Let's sum it up with these seven techniques on expression and emotion. One: Create positive energy. Two: Make it easy. Direct and coach your subjects. Three: Start in a quiet place. Four: Use structural elements where you can lean them on, sit them on, create a range of emotions. Six, repeat vows, A-E-I-O or U. Seven: Create action or movement.
You'll see me demonstrate many of these techniques in my real world on-location session. I hope these techniques will help you. I've had great success with them, and I know you're going to take many amazing portraits using them.
- Posing is simply maximizing the beauty or mood of a subject. It can be difficult, but I'm going to show you some easy ways to make your subject look beautiful every single time. Let's get going.
There's a few things that you need to do before you get started posing and shooting. One, your lens has to be the correct length, 50mm or greater because in this way this is going to keep your subject in proportion. If you use a wide angle lens, your subject can look distorted depending on where you place that subject in your frame. And so just to be safe, if you use a 50mm lens or greater, you're always going to have a great portrait.
Second is the camera sensor. Generally you want to keep the plane of the sensor the same as the plane of the face, so you do not distort the image. For example, if she's looking straight this way and I shot her close and I shot like this, her chin would look huge because it's closest to the camera. A general rule, you don't always have to follow it. But generally, let's say if you were squatting down, can you do that? I would have to have the plane of her face, so I'd have her to have her look up a little bit. So now my camera plane of the sensor is the same and have the same angle - she would look in proportion.
Now sometimes, you know, you can kind of work within those areas. It doesn't have to be an exact science, but that's generally the rule. The third fundamental that applies to posing is the nose must be towards the light. And in this situation here, I can see that there's a highlight here and a shadow here, and that open sky right there is my light. So look at that. When she looks towards that light, I get a beautiful catch light and I get a highlight and a shadow, and that creates the perfect lighting and creates dimension on the face for a great portrait.
Another pose I want to show you is if the subject just simply leans on something, almost anything. So I'm going to have Roy, if you can kind of lean in that corner there. And so now he's got his all his weight on something and he can relax there and put all your weight on this leg there. Good. You can cross your legs there. Perfect. And I'm going to shoot right here. Now all his weight is on this ledge here, relieving that pressure making for a great pose. And he looks very natural.
If your subject can't freeform stand on a pose - a great thing to do is just have them lean against something and it will look fantastic. So we're going to show you a few tips on how to use a wall in you're posing. And the first one is we're going to kind of use the elbow. So why don't you put your elbow against the wall, right? And then take this arm and put it right there. And this always looks good because all the weight is shifted on the wall. And so now she can relax and it creates triangles and you've got a great shot doing that. That's one pose you can do with the wall.
The second one is we can kind of what I call, do a hair hang where she's leaning against the wall like this, creating a triangle there, which I like. And then she's pulling all her hair on one side and letting it hang. And it creates a nice shot here. Perfect. And that one looks good. And the key to that one is having the subject lean forward and then the hair, so it creates a triangle. And so leaning forward, arching the back is the key to that pose.
I'm going to do a third pose called the yin yang boom. And we're going to do it right over here. So you're going to lean against this and we're going to create one triangle here. We're going to create another triangle with the knee and then bring your other arm up. Perfect. Look towards me. Good. Put your chin up just a bit like you're feeling a sun on your face. Now look towards the light. Perfect. This is a really strong pose because I have three triangles and she's creating a triangle here. And I call that the yin-yang-boom. And you can't miss with that pose.
Another great pose I want to show you, it's called the leaning pose. And this is great for showing confidence. So Roy, we're going to have you your arm up here, kind of lean forward on your wrist there. Good. I got a great catch light from the reflection of the wall here. He's leaning forward. Awesome. Masculine, look, if you want that masculine feel to it, I'm going to shoot both ways, landscape, and I'm going to kind of shoot through this plant here. That's awesome. So when you want to show confidence, have your subject leaning forward towards the camera and it works every single time.
Here's a couple poses when you have your subject sitting on something, so we have this bench right here, and so I call this the rollover pose where you're going to roll up on one hip and bring this knee over so I can kind of create this V shape, which is very important to the feminine form. And look at that. She looks great. And then how about if you can, can you spread your arms out just a little bit and lean forward? Great. Now that's one pose we can do.
And we can do an alternate pose, which I call the double V, where we have the legs kind of in two vs. Lean forward just a bit. Turn your nose this way and look back at the camera. Perfect. And that's a very modern pose that a lot of people like to use. We're going to do another pose where the subject's sitting down, and this is very simple, and I'm going to have her cross her legs so she can be up a little bit higher and then lean forward and put your arms up there. Right? And I like to have the legs at a slight angle. What makes this post look natural is breaking that spine from the perpendicular and having it lean forward. Good. And you always want to kind of shoot the edge of the hands, which she has right there, which is perfect. And that's a very easy pose to do. It works all the time. All you have to do is cross her legs, lean forward, and you got the shot.
This is how you do a pose on the stairwell. Roy, I'm going to have you sit down and you're going to position your legs a little bit this way and you're going to have one foot higher than the other. And you're going to lean forward on this and put your hands on top of each other. Take this other hand right there and then look back at the camera. And that should be a great shot because I have him leaning forward. He's relaxed. The key to this shot is having one leg higher than the other and not the knees. Not straight into the camera, but off to the side. And every single time if you do this, you're going to get a great shot. OK, we're going to do another pose, which looks really good if you just have the subject squatting down. And what you want to do is put the knees off to the side and she leans down like that. And now you have a higher angle. And as long as you put the subject in great light, you've got an awesome shot there. Good. Perfect. Put one hand up. Yeah, there you go. Beautiful.
So make sure that your subject is in great light. Have them squat down and you've got a great shot every single time. The number one pose in the world, which I call the classic walkaway. And so basically you have to figure out where your light is, which is right here. And generally you kind of walk away from the light but face towards the light. And you're putting all your hip on one leg and this leg is trailing and it's like she's holding an orange with her knees and she's doing it perfect right now. Look over there. Up that way. Perfect. Ooh, I like that right there. Look at the camera. That looks great. Good. Now look down. Bring this arm up. Yeah, there you go. Look down and like close your eyes. Perfect. And then look at the camera. Turn your nose a little bit more towards the camera. This way. Right there. Great. And that is the classic walkaway pose.
Now this is the modern pose, which is used a lot today. And it's very simple. So what you have to do is put your weight all on one leg. And I like having the shoulders at a slight angle to the camera because if her shoulders were facing me, I don't see the shape as well as if she's turned her shoulders this way. Now I can see some shape and it brings out that feminine form. So all you have to do is pop the hip and then just bring that knee out a little bit like that. And that works every single time. And in this case, the nose is to the light any direction she chooses. And so I can do full length and I could do waist up and it still looks great and I can have one of the hands up and one of them down. Great. So that's the modern pose. Shift the weight on one leg and just poke that knee out just a little bit like that. And you're going to get perfect results.
I'm going to show you how to do a free standing pose. And the key to this is actually shifting the weight. I like the shoulders at a slight angle. And so you start with the feet first. If you can position your feet this way, and then with this heel, kind of bring it in. And I want all your weight on this leg there. Good. And turn your shoulders a bit this way. Put your hands in your pockets. I like to have space in between the arms and the waist. What makes this pose look masculine is if his head is tilted to the lower shoulder. And because his shoulders are facing this way, his lower shoulder is this shoulder because it's further away from the camera. Now if I have him just slightly tilt his head towards that lower shoulder, he's going to look more relaxed and it's going to give him a more confident look. So look right at the camera here. That's looking good. I'm going to choose a higher angle here. That's perfect.
So the key to a freestanding post is to make sure you have that weight shifted to one leg. And for a masculine look, have the head tilted to the lower shoulder.
Here's another thing you can do while your subject is freestanding, is that you can have your subject kind of rock and get into a pose, because sometimes subjects get to be a little bit stiff and they need help shifting that weight. And so this is one technique I call the rocking technique that works a lot. So Roy, what I'm going to have you do is kind of just take a step forward and just rock back and forth, right? And just be free with it. Like you're walking that way and you're looking back at the camera. I need a little bit more motion. There you go. Yeah, there you go. Swing your arms back and forth. This really helps the subject. Learning how to shift that weight makes them practice. But it always looks so natural when you take a picture of it and just keep rocking back and forth. Keep going. Look back at me with your eyes there. There you go. Give me a smile. Perfect.
The rocking pose is great and it helps the subject practice shifting that weight and it looks very natural. You're going to have a lot of success with it.
Alright, those are some great tips on posing. I've been using those for decades and I know you're going to have a lot of success with them. So get out there and start shooting.
- Let's put it all together. I see the highlight and shadow, so I know that there's some beautiful light this way and so I'm going to have her lean against that wall. OK. Tavia like can you turn your back a little bit this way or maybe put your shoulder just in front and then if I have her nose towards the light that way now give me like a smile there. Great.
Now I'm going to go take a full length view here. Awesome. Now I'm going to come in close. Why don't we do a few things where you're kind of doing the A-E-I-O-U, but like you're almost singing it with a lot of big expression and then kind of take your hands like towards the camera. Yeah, there you go. Nice. And then how about one where just kind of putting your arms like this? Good. Turn your nose towards the light. Look back at me. Ooh, that looks great.
Okay, I'm going to do some shots where I'm creating action and different emotions. The one thing you have to make sure is that your shutter speed, as I said before, is above 500. So I'm going to move my ISO up to probably around, I'm going to bust it up to 1600 so I could get that over 500. And then I'm just going to have her walking and I'm going to take a few shots and then she's going to walk down and walk back and let's see what we come up with. Alright, Tavia, let's go. Looking good. Nice. Keep going. Alright, now just kind of twirl around there like you're dancing. Good. Put your hands over your head. There good. Nice and perfect.
So that's how you kind of create some spontaneous emotion by getting them moving, walking, running, dancing, having a good time. And I guarantee you're going to get some great shots. This is another example of putting it all together. And so I saw these beautiful flowers and I go, wouldn't it be awesome if I can shoot through these flowers and create a blurry sandwich, right? Because they got nice color here. There's perfect light right here. And to figure out where the brightest point is, I could take my palm and I can move my palm and see where the brightest spot is.
And I can see it's in this general area right here, this wall that creating reflected light right on my subject. And as you can see on Tavia, she's got beautiful catch lights in her eyes. Let's do the walkaway pose where you're kind of taking a step this way and then looking back towards that wall where the light is. Yeah, that looks gorgeous right there. I'm going to shoot through these flowers and I've got the beautiful tower in the background. One, two. Good. Nice. Now take this far hand and maybe hold your hair. And I like to keep the hands at different locations creating a diagonal in the shot. That looks beautiful. Alright, great.
Now let's try a different pose. How about if you do kind of the modern pose where you're turned this way. Can you do the hair? Hang on one side. I feel like the wind is blowing this way. Yeah, there you go. Gorgeous. Good. And head up just a bit right there. And look straight out into that light right there. There it is. I see the catch light. That's gorgeous.
And so I'm shooting at ISO 400 because I'm in the shade. I'm putting it at F/2 and my shutter speed is at 2000. So I have plenty of shutter speed. Just using that technique of when you're in the shade, set your ISO to 400. You should have no problem. I've got a few great shots using all those techniques that I talked about before and I hope you like it.
OK, I'm going to try to do the matching exposure technique in direct sun. So I noticed that the sun is right on her face and that exposure matches the exposure in the background. This is one of these shots where it's actually shooting in the direct sun, so I'm going to put it at ISO 125 and then I can lower my shutter down to around 2000 or so. And so she's in the sun and I see, also see an archway that I can frame her in. And if I can try to get some of this, this is also the same exposure, so that will be properly exposed with the contrast in the shadow. Her face will properly be exposed and the sky and you may need to move into the sun because we're losing sun real fast.
And let's do that walkaway pose. And so you're looking towards the sun and your chin's down. I'm finding a framing of that wall, which is darker than her, so she really pops off now. Alright, and then just turn towards the sun and let's do some posing the modern pose that way, just shift all your weight on your legs. Yeah, turn your nose this way. There you go. Right there. Good. Ooh, I love that wind. Let's go. Nice. And then bring one arm up. There you go. Good. Nice.
Alright, so I'm using the shoot through technique also I'm using matching exposure where I'm putting direct sunlight on my subject, which is the same exposure that's with the beautiful blue sky behind her and also doing framing within the column. And I'm doing the walkway pose and I'm also doing the modern pose. And so everything's coming together. I found another great shot where we could put it all together. I love this little area here, this window, but I notice that this can act as a reflector. And so if I put my subject close to this, it will reflect light back and I can have a catch light here.
Now my background, I have two choices. I could either shoot to the left, which is very, very bright, or I can shoot on the shady side. So I of course going to try to shoot the exposure that best matches the exposure on my subject, which is this side. So this shot works if I shoot it this way, but it doesn't work if I shoot it that way, this will be completely white. OK, so let's go ahead and let's do that elbow pose where you can kind of, it's a pose that I like because she can kind of put her face close to that light. And if you can back up as much as possible there. Great. So I can still go ISO 100 if I want to because I'm at 1/800-sec. at f/2. Maybe I'll go one down to 1.8 and then I've got a beautiful background behind her. I got a little bit of a leading line towards her, but what I really want to do is get that those beautiful trees behind her. I like how the light is hitting those trees. So whenever you see highlight and shadow, it makes for a great background.
I'm going to shoot, give her a hero look and I'm going to shoot down lower and I just kind of cover all the angles. I like to shoot high, I like to shoot low, I like to shoot landscape, I like to shoot portrait. And I just do a variety of everything since I know that the lighting is great here. I want to give every type of shot. Perfect.
And so what I like to do when I'm doing this, I have my shutter on Continuous Mode and I just keep taking photos and I just keep my finger pressed down on the shutter to make sure I can catch, catch that perfect moment. So I love using repetitive highlight and shadow in my shots. And if you shoot columns, that's what you can see. Now I have two choices. I can shoot on this side of the columns or on the other side of the columns. The exposure on the subject is the same whether I'm shooting here or over there.
But why I like shooting on the other side is the shadows have more contrast. I'm going to set my ISO to 400 so I don't have to worry about shutter speed. I'm at 2000, so I'm fine. The light is coming in this way. So if her nose is pointing that way and if we do kind of a modern pose and her arms are up looking that way, she will look great. But look at the shadows. Look how deep and rich they are. Even though my exposure is the same, the shadows are much richer on this side. And then I'm going to shoot it portrait and that looks great.
I'm going to try different angles a bit. If I move out this way I can get more shadows. Let's move back just a bit. I like shooting a lower angle because I give my subject more of that hero taller look. And then now after that I've got the exposure locked in. I've got a full-length shot. I might as well move in and take a waist-up shot, but I want to try to use this as my frame so you can step down and up there. I'm only going to go waist up.
Let's do a pose right here. Yeah, that looks great. I still see a catch light in her eye. And let's do something where you're kind of just looking off down your shoulder. So what I like to do too is when I have one of the hands up is I actually like to use the hand that's away from the light because if it was strong light, it would cast a shadow across her body. So I'd use the other hand up away from the light. And this way if there's a shadow, it's off her body. And so that's a general rule that I like to use.
Now this light is so low it could be that way or this way. Whatever you feel comfortable. Do you like that way? We'll do that for right now because the light is very low. Perfect. And that's great. So this example of using the highlight in shadow and then using that same light to come in and take a waist-up portrait, you can capture it all within one area. Another technique I like using is called shooting into darkness. And so I noticed I was looking on the floor, I saw this really bright light here because the sun is directly shining in here. So if I actually put my subject in the sun and I use the technique nose to the light, I get this beautiful highlight in shadow. This is so bright. I have a beautiful highlight and shadow, but because the exposure on her face is full sun, it's actually a bright light shot.
So I'm going to move my ISO all the way down to 100. And it's so bright that if I'm at 1.8, I'm already maxed out at 8,000 on my shutter. So I'm going to move my F-stop up to 2.8 so I can bring down my shutter around 4,000. So I have some wiggle room to lock in that perfect exposure. So I'm going to have her pose and I'm going to kind of do her body slightly this way and her looking this way directly into the light.
And what I'm looking for is her face all the way in light and a shadow there to define her. And then yeah, move that elbow out. So for posing wise, I like to have a little bit of space right here. She's looking over there and so now when I expose for her face, it's completely dark behind her. Good. And just kind of move around and do some different poses. As long as your nose is towards the light, everything is good. So go ahead. Ooh, I love that. Good. Great.
Then why don't you kind of like hug yourself like you're cold and look down and close your eyes because of the brights. Ooh, beautiful. Good. I'm going to shoot some this way too. Good. I'm going to step back a bit. Nice. So everything behind her is dark because that exposure on her is extremely bright. I'm at 1/4000-sec. of the shutter at f/2.8, ISO 125. Since I have a blackness behind me, that's when the rule of thirds really works well because that will create balance in your shot. Now I'm going to take some tight ones. The exposure's all the same.
So OK, so that is shooting into darkness using the bright sun to expose your subject and even have to adjust my F-stop because it's actually so bright. And what happens is that brings the background into complete blackness and your subject's going to really pop off the frame. Here's another shot where we saw a golden stream of light coming in, making her look real warm in color, which actually matches the tone of the lights above her.
So if I could put those two elements in my frame, it would be very powerful. And also I could use the leading lines of the pillars and also the leading, lines of the light. Basically the light is coming this way so she can have her body towards me. Put the arms up. I love that pose. And look towards the light. That's good. Now as your nose is towards the light. Nice. Good. I'm going to come in closer and I'll also make those lights bigger too. Great and good.
And let's take your body and turn it either this way or that way. There you go. Now I've shot her out of a bit of an angle now, which looks great. And so I've got repetitive highlight and shadow and some leading lines behind her. I've got these beautiful lights that are kind of framing her and also creating a leading line. Look out that way again right there. And bring one hand up. Perfect. Look out towards the light. Good. Your chin a little bit towards me. There you go. How about if you lean towards me into the camera. Chin down. Good.
And you have to turn your body this way a bit right there. And then more good. And then lean towards me just a little bit. Good? Yep. And then look off that way. That looks great. Good, good. OK. So that's using kind of a lower light situation, but I see some beautiful golden light. I see some leading lines and I can also frame her with the arches making for a perfect portrait. OK, we're going to do a lesson. We've got some great light here and I'm just going to have her move around and dance. And I've got a beautiful background and so let's just get doing it. Go for it. Now I've got to make sure that my shutter is fairly high. I'm making sure she's below the light there. Can you take your dress and kind of go back and forth? There you go. There you go. Perfect. There. Great. And she's just moving around. How about if we can, can you take up your dress and kind of go back and forth? There you go. There you go. Perfect. Nice. And so I've got some archways that's framing her. That's perfect.
- I am going to teach you how to efficiently organize your thousands of images and give you some professional editing techniques that will make your images stand out using the very powerful Adobe Lightroom.
Lightroom creates a non-destructive set of instructions that organize and also edits your images. It does not alter your original images. Once you export your images to be shown, it cooks your edit in instructions into the photo and creates a new image.
So how do you store your thousands of images? I'm going to give you a tip that I use and it took me a long time to figure this out actually, but it works really well. And the key is to store all your images, not on your computer, but on an external hard drive. And so there you will never run out of space because if you need more space, you just buy a low cost drive. What happens is if you put all your images on your computer, it eventually runs out of space and then it makes things complicated, especially if you use Lightroom.
So let me show you how to do that. We're going to go to my screen. You can see my hard drive here is four terabytes. And so what I do is I put everything after I shoot an event, I put everything on this hard drives and I organize it by year. So you can see the different years that I have.
So let's go to 2025 and I create an event for every single session that I do. And let me just make this a little bit larger. So you can read the different events that I have here. So I date it, I started off with the year, then I go to the month, and then I go to the day. So let's go to the bottom. And I just did a recent session where I, you know, shot the portraits, which you've seen. What I do is start off 25. I name the date -08-25. Then I name the event. In this case I put Sony Portrait 101, and if you look inside that folder, you will see all my captures.
This number here, this first folder is from my camera, and I have all the images inside there. I think there's about a thousand. This second folder you can see are some screen captures that I took when I was recording exactly what my screen on my camera was, and I put them in there. Generally I don't have those things, and you just see the images. So all my images are in there.
Now I create a second folder and a new Lightroom catalog every time I do a new event. And so what I do is I name it the exact same thing as the event. So you can see down here, my second folder says everything the same, 25-0825-SonyPortrait101. But I add one more little thing, I put a dash, and then I put a LR for Lightroom catalog. And so I create a new catalog every single time I shoot a event.
And why this is so powerful is I can literally take this drive, put it in your computer, and if we have the same Adobe Lightroom version, I can open it up and continue editing where I left off. And I don't know about you, I have several computers. I have one upstairs, one downstairs in my laptop. I might want to edit on the plane. And so I can just take this one drive, put it into any computer and continue to edit. And as I expand and have more images, I just buy new drives.
And so my computer is like the brain and the externals are my storage. And what I recommend you do is you make a backup of this drive every time you add information on it, or you do a new Lightroom category just to get you in a good habit of duplicating and copying. Let's go into Lightroom now.
So I'm going to click my Lightroom catalog that I've created and I'm going to select the catalog. Now let's get into the editing. One, you're going to go up to the develop module up top, and then we're just going to use the basic panel because that is really the most important panel when editing. And what I want to do is, when I look at this image is that I want to have a really nice bell curve in my histogram here. And so when I look at the image, the first thing I do is I want to actually crop it and create whatever lines are straight in real life. I want to make them straight. So if you can see above our head, the hedge is slightly crooked. So I am going to rotate that.
So that hedge is kind of parallel, and that looks pretty close. OK, so now it's straightened. Let's get into developing the image. Now, when you do the great lighting and everything, and you capture it in camera correctly, you're going to see a bell curve there correctly, but you don't want all the information to the left, which is dark, and you don't want all the information to the right, which is brightness. And so you want something that's evenly distributed and a nice bell curve.
I right now am looking at the darkest parts of the photo, and I want to make sure that there's detail in the dark parts and there's detail in the brightest parts. So to do that, when I go and I want to edit just the darks, I want to see, make sure that there's detail in there. You can play with two sliders. One, is the shadows and you can bring the shadows up and the blacks, you can bring that up. So I am looking to get detail in there.
OK, now I go to the highlights. And so there's other sliders you can do that. One is called highlights. And I can drop those down. So I could bring those highlights down. And you can see how the bell curve changed as I control these sliders. And then also whites. Now if they're wearing white, this really helps with that. And you can adjust that and you can create a nice bell curve pattern with that.
And so now when you have all the tones represented like that, it's evenly balanced and that's when it looks really great. And then I can do an overall global, I can just mess around with the exposure, which looks good, and then I can tone it with the temperature. If I want it a little bit more warm, I can bring warmth into it. Or if I want it colder, I can bring it to the blue. And that's how you adjust the overall warmth with it.
If I want to bring out texture, I could go down to the presence and bring the texture up. The clarity is the midtone clarity. I can bring that up and mess around with it. I, if you want to make things look natural, you don't really mess around too much with these. And then the important one on on the bottom is vibrance and saturation. Vibrance adjusts all the colors, but tries to keep the skin tone natural. And that's why I like this one is because what you don't want to do is make your skin tone look unnatural.
So if I move saturation up, it's going to take all the tones and just bring it up. Look at the skin tone, turn like yucky orange. But if I use the vibrance, it's going to bring out like the green and all that, but generally leave all the skin tones. Perfect. Let's show a before and after. And you can see how I have rebalanced the tone of the image and the bell curve looks great. That's how you basic edit your photo, and it's going to look great if you follow those rules.
Now let's go into the black and white. Now, very easy. The first thing I do is hit Auto and it, you can see it brings the contrast out. And then you just go over there and hit the black and white button. And then if it looks great, leave it and you're off. And here it looks pretty good. But if you want to adjust your black and white, you scroll down to the black and white module, and all you do is go through each color, move it up and down, and see what it does with the image. And you can either use it or not use it. And if that color is not present, you'll move that slider and there'll be no effect at all. And so I just go through very quickly every single slider to kind of fine tune the black and white effect that I want to do, and adjust the colors. And that's it.
And let me show you a before and after. And that's how you create a black and white image. So these are two very important tools to use when editing. One is the basic panel, which I just showed you. And to create great black and whites, all you have to do is one, hit the auto button. Then go over, hit the black and white button, go down to black and white, open that panel. It'll show a range of colors. And just adjust the sliders and lock in how you want it to look.
When you capture the image correctly in camera with good lighting, composition and posing, editing is easy because the corrections are minimal, and any creative editing looks fantastic. Make sure you back up your work. Remember, all hard drives go bad. So practice the classic rule: 3, 2, 1. 3 copies, 2 locations, 1 online. I hope you learn something. And this helps you with your post-processing, with your portraits. I hope you liked my class.
Right at the camera right there. I love that. Look at the shadows. There you go. Try one with your hands. Like right there, I see the catch light. Just keep rocking back and forth. Go for it. There are so many types of portraiture to explore, family engagement, boudoir, headshot, school, but I hope this class was a great teaching tool to get you excited and inspired to take portraits. Perhaps this can be a launching pad, discovering more about photography and creating your own portrait stories. I'd love to see what you did with this class and any portraits you feel great about. Until next time, this is Scott Robert Lim signing off and hoping to see you somewhere around the world.
Rate this course
Your feedback helps us improve our content.
Course rewards
Complete any course and earn a unique badge to celebrate your progress. Collect them all as you level up your skills!