Landscape Photography 101
Learn landscape and night photography basics – exposure, focus, lenses, light, composition and planning.
- Details
- Module
- Quiz
About this course
This course will help you build a solid foundation for landscape and night photography, covering the exposure triangle (aperture, shutter, ISO) with priority and manual modes, lens selection from ultra‑wide to telephoto, precise focusing, tripod best practices, and composition frameworks. You’ll learn to chase and plan light using Windy, PhotoPills, and GPS Tracks, prep safely and comfortably, and tackle your first night shoot with practical settings and focusing techniques. Designed for beginners, the course emphasizes clear, repeatable field workflows you can apply immediately.
Course highlights
Instructor
Rachel Jones Ross is a proud member of the Sony Alpha Imaging Collective, and a passionate educator. She is most inspired by snow covered mountains, and skies full of stars. She's a full-time photographer who is fortunate to call the Canadian Rockies home, where she teaches photography workshops, as well as private lessons.
Rachel Jones Ross
Photographer, Alpha Imaging Collective
Featured gear
Skills
Transcripts
- Welcome to Alpha Camera Academy. My name is Rachel Jones Ross. I'm a landscape and astrophotographer from the Canadian Rocky Mountains. I'll be your guide through Landscape 101.
In this series, I'll walk you through field concepts like depth of field, capturing movement, focus, creating compelling compositions, and even preparing you for your very first night shoot. I will also guide you through common questions about gear and planning. As you work your way through each class, please feel welcome to reach out if you have any questions whatsoever. You can find my contact info on the Sony Alpha Universe profile page. Let's get started.
Welcome to Alpha Camera Academy. The goal of this class is to understand how to achieve sharp images from corner to corner. To begin with, we need to talk a little bit about light. There are three ways we control the light reaching the sensor of the camera: aperture, shutter speed and ISO. Today we will focus on aperture.
Aperture refers to the opening in the lens that controls the amount of light entering the camera. Aperture is adjusted using F numbers, also called F-stops, which typically range between f/2.8 and f/22. It sounds counterintuitive, but the smaller F numbers indicate larger apertures, and the larger F numbers indicate smaller apertures.
Creatively though, the real magic of aperture is that it controls the depth of field in your image. Depth of field is the distance between the nearest object and the furthest object, that is an acceptably sharp focus. If you're taking a picture of a person or a small detail in the scene, you can use shallow depth of field like f/2.8 to f/4 to create that soft dreamy look called bokeh around your subject. Bokeh helps to isolate your subject and make it stand out more in the scene.
But if you have a big grand landscape, you might want to get more of the scene in focus. For that, we will use higher number F-stops, typically between f/11 and f/22. Let's look at an example together. First, I want to show you how changing the aperture affects light, but remember when I said that those other two variables, ISO and shutter speed also affect the light? I'm going to set the ISO to 100 and the shutter speed to 1/20-sec., so that the only variable that changes in our example is aperture. As you can see, wider apertures, the smaller F-stops, let in more light, whereas higher number apertures, larger F-stops, let in less light.
To make the magic happen and use aperture to create depth of field, I'm going to set my camera to Aperture Priority. Aperture Priority is indicated by the "A" on the dial. It allows the camera to change the other two variables, ISO and shutter speed, so that you can concentrate on depth of field. When using Aperture Priority, you also have to tell the camera how bright to make the image. We do this with the Exposure Compensation dial on the top of the camera. This tells your camera if you want an evenly exposed image, an underexposed image, or an overexposed image. As you can see, more of my image is sharp at higher F-stops. A
s I open up the aperture using lower F numbers, less of the total image is in focus. In the next class, we will look at other creative ways to control light. Until then, you can practice changing the depth of field in your image by setting your camera to Aperture Priority and changing the F-stop to create dreamy bokeh or increase your depth of field for images that are sharp from corner to corner. Please don't hesitate to reach out if you have any questions at all. Until next time, happy shooting.
- Welcome to Alpha Camera Academy. My name is Rachel Jones Ross. I'm a landscape and astrophotographer from the Canadian Rocky Mountains. I'll be your guide through Landscape 101. In this series, I'll walk you through field concepts like depth of field, capturing movement, focus, creating compelling compositions, and even preparing you for your very first night shoot. I will also guide you through common questions about gear and planning. As you work your way through each class, please feel welcome to reach out if you have any questions whatsoever. You can find my contact info on the Sony Alpha Universe profile page. Let's get started.
- Welcome back to Alpha Camera Academy. As I mentioned in the last class, there are three ways we control the amount of light reaching the camera sensor: aperture, shutter speed and ISO. Today, we're going to focus on shutter speed.
Shutter speed refers to the length of time the camera shutter stays open, exposing the sensor to light. Shutter time is also referred to as exposure time, and it's measured in seconds or fractions of a second. The longer the shutter is open, the more light is entering the camera. Conversely, as the shutter time is reduced, less light enters the camera.
The real magic of shutter speed, however, is that it controls the sense of movement in an image. Faster shutter speeds freeze movement, which can help convey a sense of urgency, rushing or explosiveness. In contrast, longer shutter time, smooth out elements in the scene like clouds and water, which creates a sense of peace, tranquility, or calmness. To demonstrate these concepts, let's go photograph a waterfall. Together, we'll change the shutter speed to capture movement and ultimately create really different moods in the image through that sense of movement.
First, I want to show you how changing the shutter speed affects light, but remember when I said those other two variables, ISO and aperture also affect the light? I'm going to set the ISO to 100 and the aperture to f/11, so that the only variable we're changing in our example is shutter speed. As you can see, shorter shutter times let in less light, whereas longer shutter times let in more light. To make magic happen and use shutter speed to create a sense of motion, I'm going to set my camera in Shutter Priority.
Shutter Priority is indicated by the "S" on the dial on the top of the camera. It allows the camera to change the other two light variables, ISO and aperture, so you can focus on creating motion. When you use Shutter Priority, you also have to tell the camera how bright to make the image with the Exposure Compensation dial on the top of the camera. Exposure Compensation tells your camera if you want an evenly exposed image and underexposed image or an overexposed image. As you can see, the longer the shutter is open, the more smooth, silky, and calm the water looks. As the shutter time gets shorter, the water looks more like it freezes mid-motion.
It's important to note that if you're working on a tripod, you can leave the shutter open for longer periods than if you're shooting handheld. If you're taking pictures handheld, it isn't possible to hold your body still enough to take exposures longer than about 1/60-sec. on a wide-angle lens, and that's because our bodies are always in motion and the images are going to look blurry unless you have some sort of magical abilities to hold still, which clearly I don't. In the next class, we will discuss ISO.
Until then, you can practice using shutter speed to create a sense of motion in your image by setting your camera to Shutter Priority. You can create drama by freezing objects mid-motion or using longer exposure times to make the motion smooth and calm. For best results, use a tripod, but also experiment with how long you can handhold your shots while still getting sharp images. Please don't hesitate to reach out if you have any questions whatsoever. Until next time, happy shooting.
- Welcome back to Alpha Camera Academy. In our first two classes, we explored depth of field and creating movement. As you may recall, faster shutter speeds, which freeze movement reduce the amount of light that reaches your camera sensor. Similarly, narrower apertures which provide the greatest depth of field, also reduce the amount of light reaching your sensor.
So what do we do if there isn't enough ambient light for our desired aperture or shutter speed? That's where ISO enters the light equation. ISO refers to the camera sensitivity to light. Lower ISO numbers mean the camera is less sensitive to light, potentially resulting in darker images. And higher ISO numbers mean the camera is more sensitive to light, resulting in brighter images. But there's a trade off - as we increase ISO, we also increase the amount of noise in the image. Noise can be a grainy look or a blotchy color.
The good news is that camera technology has advanced significantly over the years, enabling us to shoot at high ISO numbers that would've been nearly impossible on our early DSLR cameras. To find the right ISO, we want to start with the lowest possible ISO for the lighting conditions and increase it only as needed to achieve a proper exposure. And for that, we're going to have to look at our histogram.
On the Sony cameras, you can pull up the histogram by hitting the display function on the wheel at the back of your camera. The histogram is a graphical representation of the exposure, values, or brightness of your image. A histogram that is skewed to the left indicates that your image is potentially underexposed. It might be a bit too dark. A histogram that is skewed to the right indicates an overexposed image - too bright.
To set your exposure, you're going to need to be in Manual shooting mode to control all three variables of ISO, aperture and shutter speed. Manual shooting mode is indicated with the "M" on the dial at the top of the camera. Ideally, we want to choose our aperture and shutter speed first when setting our exposure. This enables us to make creative decisions about how the image should look. Once we decide on the aperture and shutter speed, we can adjust the ISO upwards to increase the light sensitivity of the sensor to support the aperture and shutter choices that we made. We need to increase the ISO until the histogram isn't touching either the left or the right side of the graph.
That said, use the histogram only as a guide, not a strict rule, because you may want to underexpose or overexpose your image for artistic reasons. In short, ISO is the supporter of your creativity. The important takeaway from this Module is that ISO is the final piece of the exposure puzzle, and that increasing ISO can help you to achieve the creative choices of depth of field and movement. But it comes at a cost of increasing the amount of noise or grain in your photos. It can take time to working up to shooting in full manual settings.
Please be patient with yourself. I recommend shooting in Aperture Priority until you have a good understanding of how F numbers relate to depth of field and how much of the image is in focus. And shooting in Shutter Priority to control movement until you have a good understanding of what kind of shutter speeds will produce the kind of movement you want to capture. And then move on to full manual shooting mode. As always, feel free to reach out if you have any questions as you practice. Until next time, happy shooting.
- Welcome back to Alpha Camera Academy. In the first three classes, we looked at how to create magic by changing aperture, shutter speed and ISO. Today we're going to explore how lens choice shapes the images that we create.
Lenses are typically referred to as wide-angle, mid-range, or long lenses, but each of those terms cover a variety of focal lengths, measured in millimeters, and can vary greatly in their aperture range. And all of these variations affect the types of shots that we can achieve. So, let's break it down a little bit.
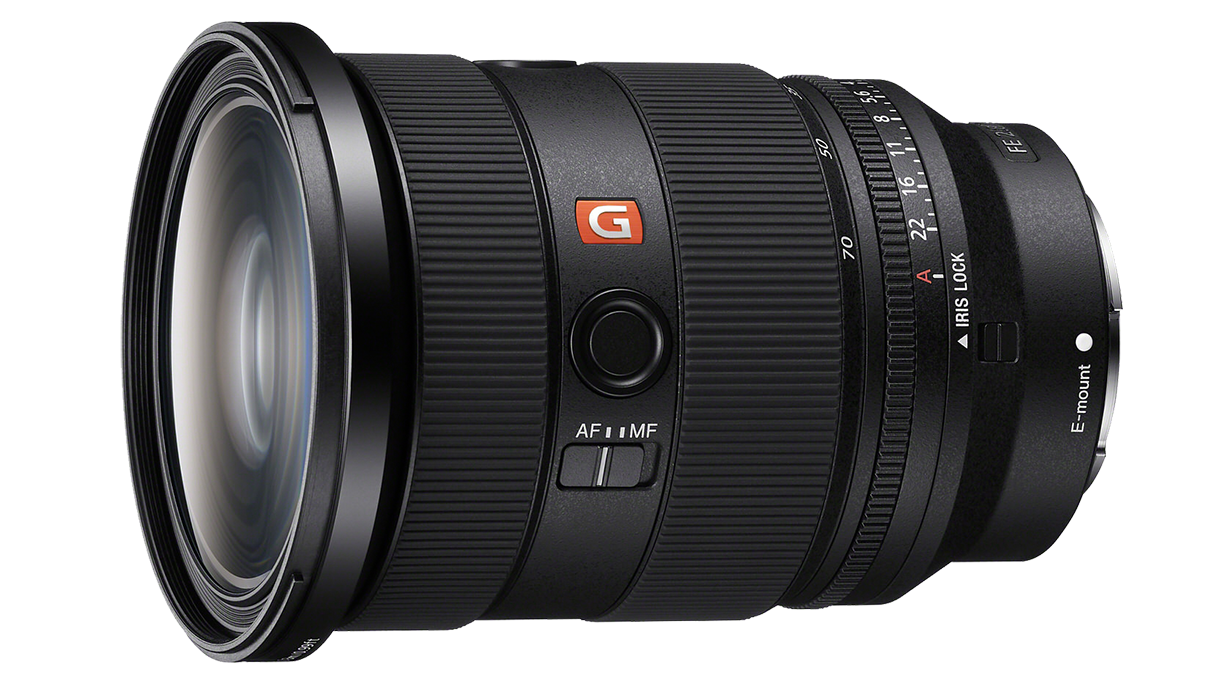
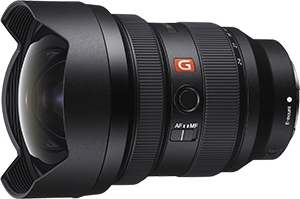
Wide-angle lenses are those with focal lengths less than 35mm. My go-to wide-angle is the Sony 12-24mm f/2.8 G Master. Wide angle lenses are ideal for landscape photography because they encompass the broadest field of view, which can enable us to capture really grand landscapes in a single frame. More importantly, wide-angle lenses are also a creative tool. Because of that broad field of view, wide-angle lenses create distortion along the sides and corners of the image, and that can be used to create really compelling compositions.
Let's look at an example together. This is a very wide scene, filling the frame of my Sony 12-24mm f/2.8 G Master lens at 12mm. Watch what happens to the mountain as I angle the lens downward. Do you see how the mountain gets elongated? The foreground also gets stretched. This effect is even more pronounced when we shoot vertically. Watch what happens to the reflection this time when I tilt the lens.
Because the reflection is in the center of the frame, it looks kind of squished compared to the stretched peak. So, if you are using the distortion of a wide-angle lens to create a compelling composition, do be mindful to balance the different elements in the scene.
A mid-range lens covers a focal length that is similar to what we can see with our eyes, ranging from 35 to 70 millimeters. My favorite mid-range lens is the Sony 24-70mm f/2.8 G Master II. This is an extremely versatile focal range, and my go-to lens when I'm traveling.
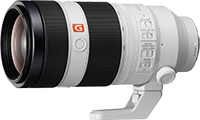
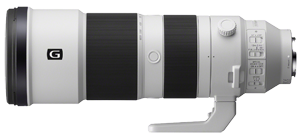
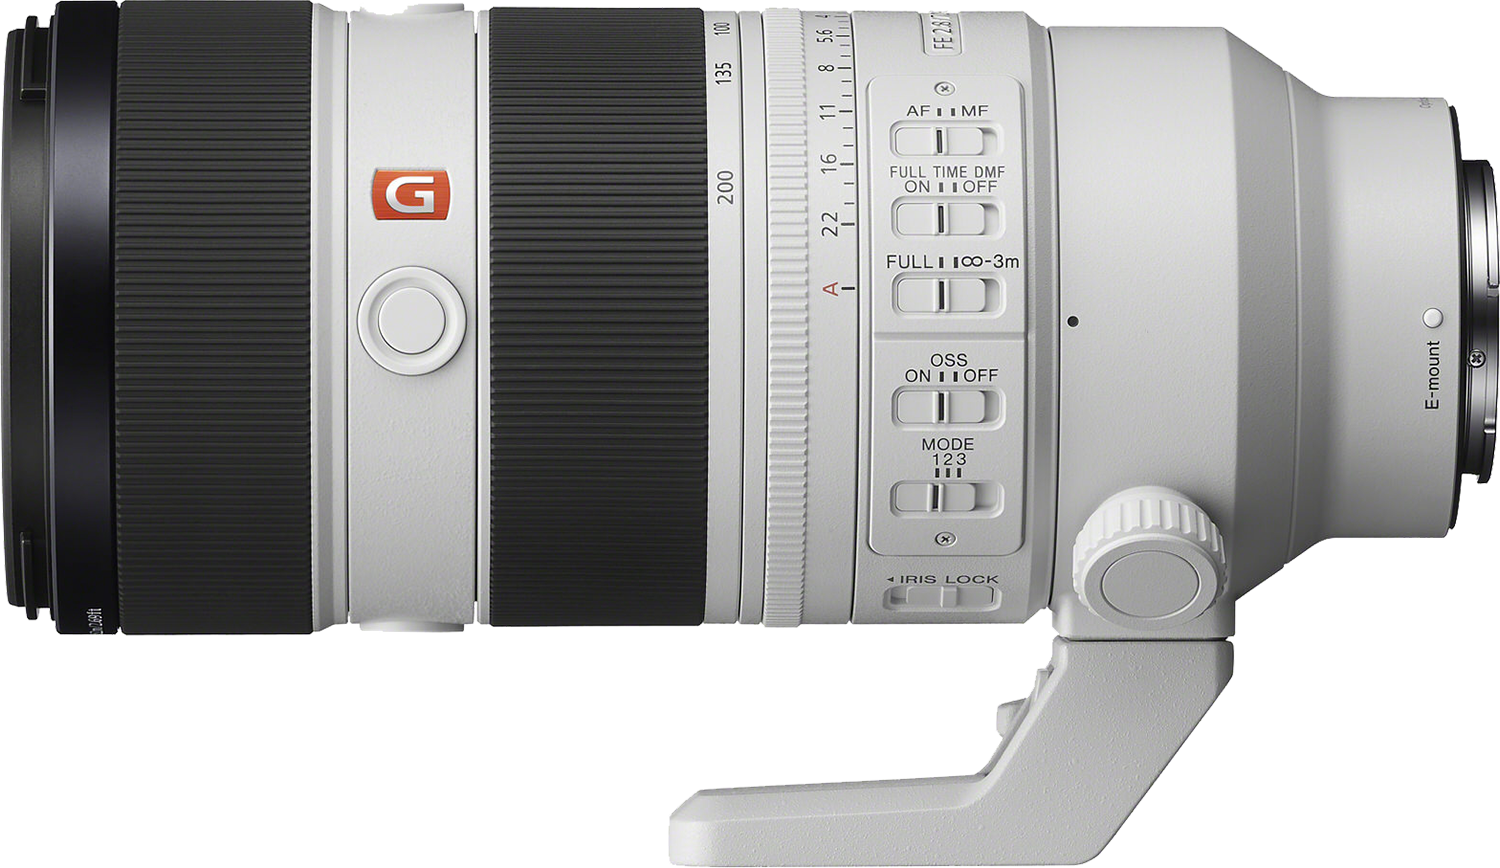
Long or telephoto lenses have a focal range of over 70mm, including lenses like the 70-200mm f/2.8 G Master II, but the 100-400mm f/4.5-5.6 G Master and 200-600mm f/5.6-6.3 G are also really valuable focal lengths for landscape photography.
Long lenses are ideal for shooting distant landscapes, layered shots, and wildlife in the landscape setting. The look of these types of photos is very different from wide-angle shots. Long lenses create compression and draw more distant objects closer to the viewer.
So which lens is right for you? With so many focal lengths and aperture choices, it's helpful to ask yourself a few questions. What type of landscape is it that interests you most? If you're interested in any kind of low light shooting, especially night photography, you'll be much happier with your night photos. If you have a lens that can stop down to f/2.8.
For objects as faint as stars, we need to let as much light into the camera as possible. If you're not interested in night photography, then you might enjoy an f/4 lens as it'll be lighter and easier to carry.
I hope this information helps you to navigate the plethora of lens choices available. As always, please feel welcome to reach out with to me with any questions whatsoever. Until next time, happy shooting.
- Welcome back to Alpha Camera Academy. It's time for us to get focused. In photography, focus refers to the sharpness and clarity of an image. Focus is a crucial element for directing the viewer's eye and creating a visually appealing image. The goal of our time together today is to understand the difference between different focus modes and focus areas, as well as where to set the focus point.
In module one, we took our first steps towards taking sharp images. We talked about depth, the field and an image. How much of the image is in acceptably sharp focus from the nearest object to the furthest object and how that is related to aperture. We're going to build on this knowledge to take our next step in mastering focus.
First, we need to define a few new terms. The focal point of the image is the area of the image that is in sharpest focus and is usually the area where the photographer wants the viewer to look first. This is where we're going to set our focus box when we prepare to take our photo. Then we have focus modes and focus areas.
Focus modes refer to how the lens adjusts to achieve a sharp subject, and there are two broad categories. Manual Focus, which allows the photographer to manually adjust the focus using a ring on the lens. And this can be useful in challenging situations where auto focus might struggle, for example, in low light settings or to focus on a star.
The second category is Autofocus, which automatically adjusts the lens to achieve focus on a chosen subject. Autofocus is the easiest starting place for us, but we have some choices here too. Single Shot Autofocus is for stationary subjects, and Continuous Autofocus is for moving subjects.
There's also a mode called Directed Manual Focus, DMF, that allows for an initial Autofocus adjustment followed by a Manual adjustment, but we're not going to use this one very much. Once we choose how the camera is going to focus, we need to choose where it's going to focus, and that's our Focus Area. You can find Focus Area options in the Function Menu at the back of the camera. As you can see, there are many options, but of all the choices, I'm going to recommend just two.
First, for most shooting with no moving subject in the frame, choose Autofocus Single , and under Focus Area choose Spot Area Small. This option ensures you know exactly where you are focusing. If you choose Spot Area Large, you're telling the camera that it can choose anywhere in that large box to focus on, but that doesn't mean everything in that box will be in focus. To set your focus, you can move your focus box using the toggle on the back of the camera. To get as much of the image in focus as possible, I typically focus on something about two thirds of the way through the frame.
My second recommendation is only for when you have a moving subject in your landscape like wildlife. Choose Autofocus Continuous on the dial and Tracking Spot Medium for the Focus Area. As always, if you have any questions about this as you practice, don't hesitate to reach out. Until next time, happy shooting.
- Welcome back to Alpha Camera Academy. Today I want to talk about tripods - the good, the bad, and the ugly. And no, I don't mean how beat-up my trusty tripod is. Rather, let's talk about when a tripod can help us take amazing shots, and when it might become more of a hindrance. I'll also cover some tips on features to look for if you're in the market to buy a new tripod.
So first, the good. Tripods enable us to take time when composing a shot and really fine tune our compositions. They also eliminate camera shake, which ensures sharp images, particularly when using slow shutter speeds or long lenses. They're vital for long exposure photography, allowing us to make those effects like milky smooth water or those long streaky clouds. They're also essential for capturing images in low light conditions where longer shutter speeds are often necessary.
Tripods also facilitate the use of a remote trigger, allowing the photographer to be in the scene or capture images in challenging locations. In some situations though, tripods are more of a hindrance, and this typically happens when we rush to put our camera on the tripod before taking the time to really find a compelling composition. Once the camera is on the tripod, finding a new perspective or angle is really hindered and slowed down because you have to move the whole unit and adjust the legs each time you want to explore a new angle.
The best advice I can give for setting up your tripod is to find a composition. Before you place your camera on your tripod. You want to move around the location and find 20 compositions handheld before you commit to one. So some of the features I look for when buying a new tripod are that when fully extended, it reaches my eye level. I also want it to get really low to the ground.
I'm partial to those twist lock mechanisms on the legs over the clip locks. In cold weather, it's really easy to pinch your fingers in the clips. Most importantly, the tripod needs to be sturdy enough to keep the camera steady in a brisk wind. Very thin legs don't usually stand up to much wind, which will limit your ability to use those slow shutter times for soft water or clouds or in low light or night photography situations.
I hope you picked up some useful tips here today. As always, please feel welcome to reach out if you have any questions whatsoever. Until next time, happy shooting.
- Welcome back to Alpha Camera Academy. Today we're going to be talking about chasing light.
When I first started shooting landscapes, it was mostly at night. I was completely enraptured with the Milky Way, so all of my planning was around going at the darkest times of the month, and that was usually a week before or a week after New Moon. And I didn't really plan sunrises or sunsets. They were just the thing that happened if I happened to be out shooting my night skies.
Of course, over time, I grew to love chasing all different kinds of light. But if I could go back and give my younger self some advice, it would be this class on how to chase light. I thought I would start by showing you some examples of a location that I've been to many, many times under various different light conditions.
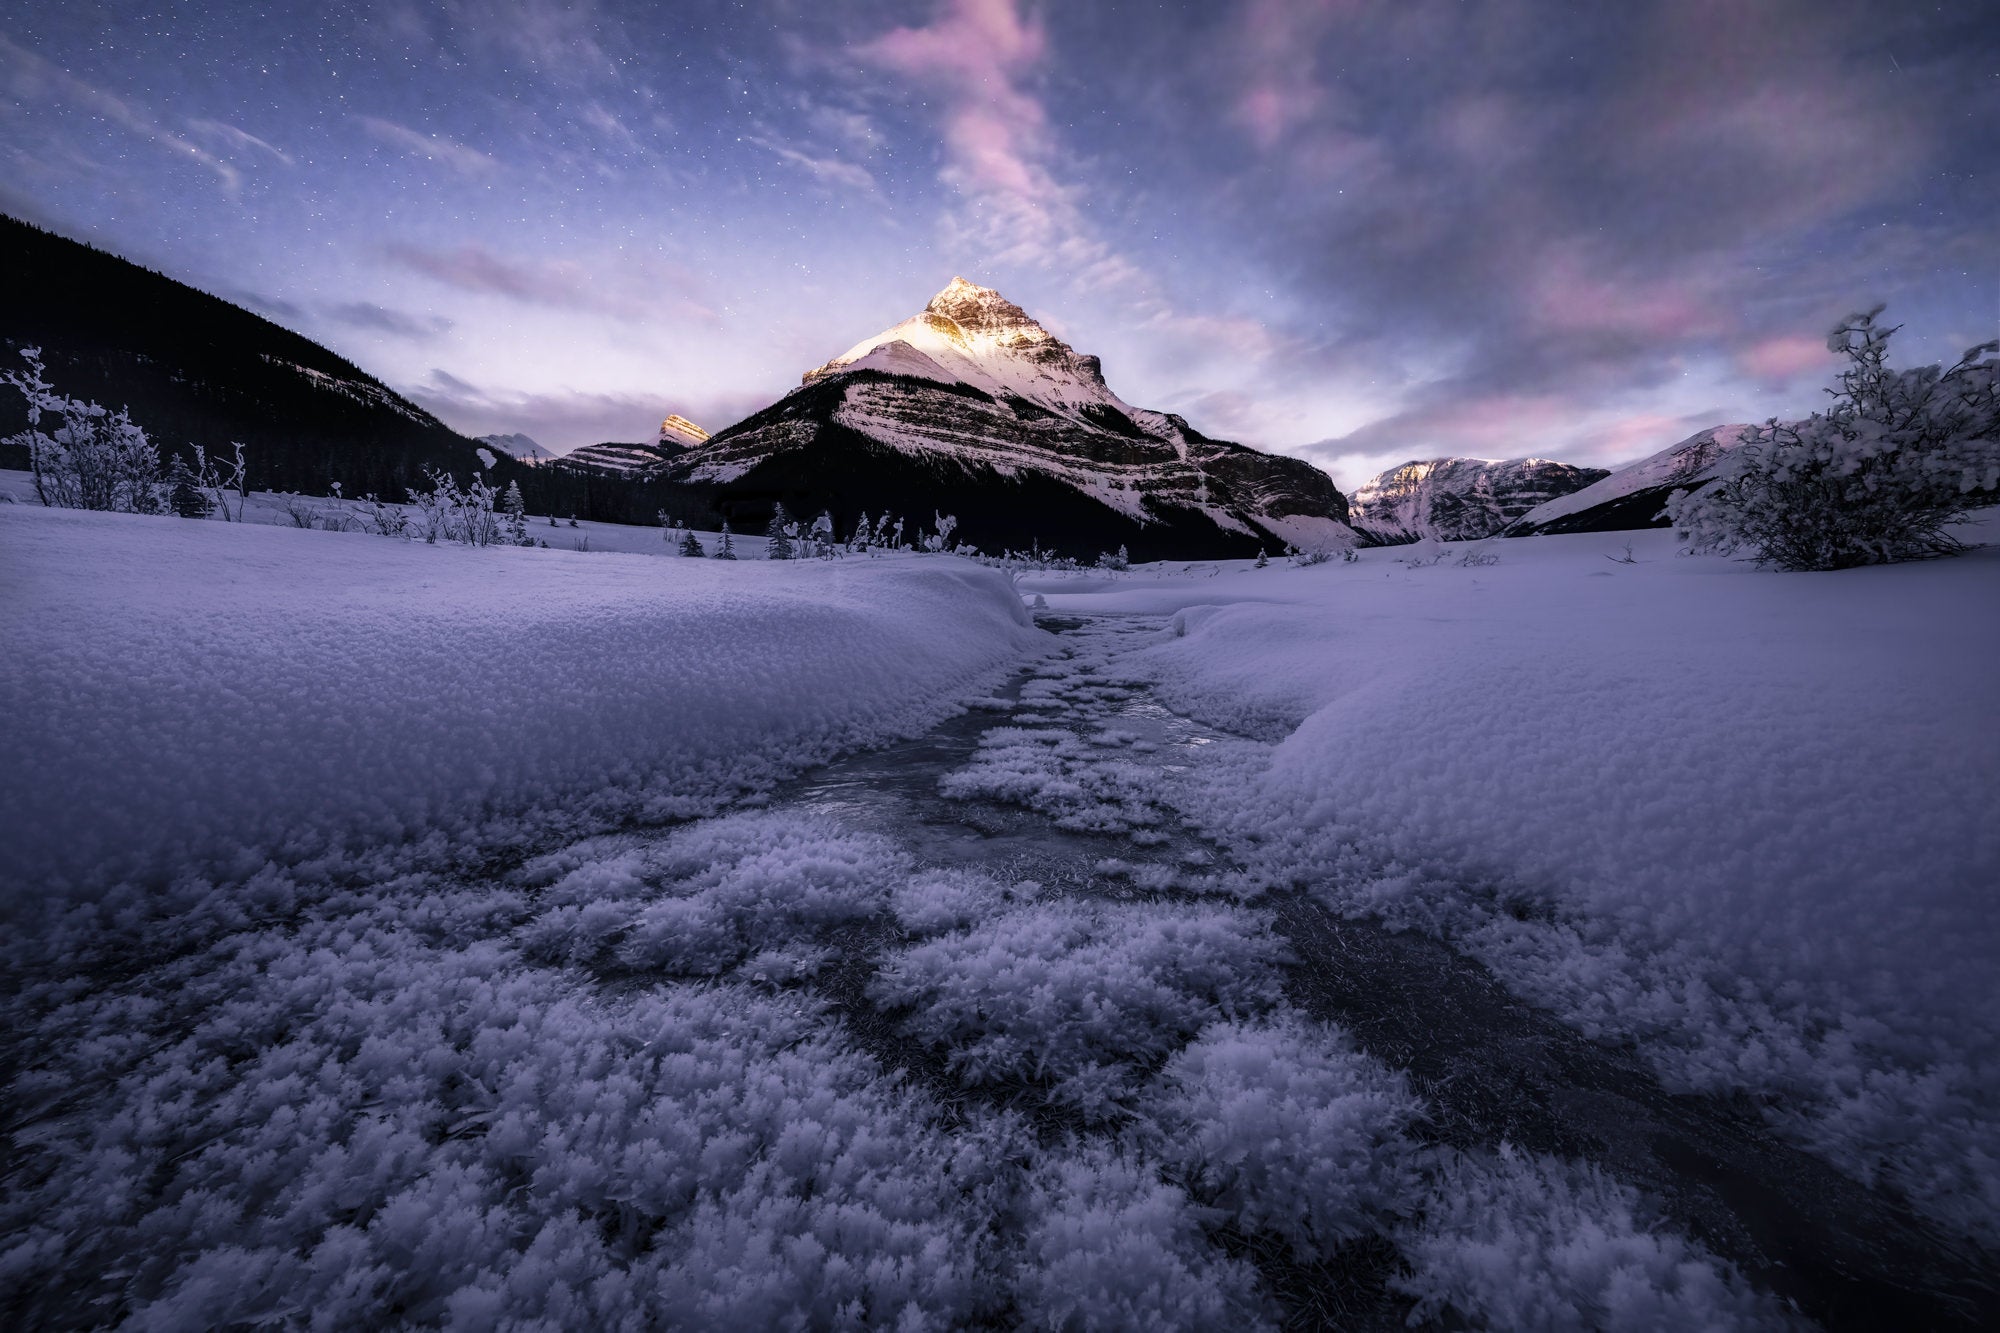
These images were all taken at Emerald Lake Lodge. Emerald Lodge has been my home base for many of my winter workshops over the years, and so I have seen this location transform under many types of light. I have seen everything that ranges from the darkest nights under inky black skies with stars so bright it looked like you could pluck them out of the sky, to auroras dancing across the peaks, full moons, twilights, and everything from sunrise to sunset. And all of these different types of light create different moods in the image.
Another place I've visited very often is Vermilion Lakes. This is where I used to go to practice my night photography, and now I bring my workshop groups here. Of all the different types of light that I've seen at Vermilion, I think the most rare and unique is crepuscular rays. Crepuscular rays are rays that extend from the horizon upwards instead of like from the clouds downwards. Another time I caught corpuscular rays that were so strong, it actually cast a shadow of the mountain onto the clouds. This happened just before sunset and just after a rainstorm had passed through the location.
Crepuscular rays are a very rare event, but they typically happen during sunrise or sunset. And when the sun is either setting or rising right behind your subject. Those first minutes after a rainstorm passes are some of my absolute favorites because it creates so much drama in an image. And the same is true for night photography as it is during the day. This image from Peyto Lake was taken after a rainstorm had just passed. The clouds were clearing, but they were low and hugging the mountain tops, and then there was aurora.
Another weather-related event I've seen is when it's really cold, ice crystals in the atmosphere reflect light and create a halo around either the sun or the moon. We call this a sun dog or a moon dog. These weather-related events are very difficult to predict, but going out to shoot as the storm is clearing or the weather is cold - it creates really rare opportunities for beautiful light.
Perhaps my very favorite type of light though, is something that you can plan for, and that is a big moon during astronomical twilight. I first stumbled upon this type of light very much by accident, and after it happened a couple of times, I figured out a way to reverse engineer what the exact conditions were that produced that type of beautiful light.
And if you guessed I used PhotoPills, you're correct. So I looked at where the moon was during this event and what time of night it was, and what type of light I had, because I looked at the timestamp on my camera. And what I found was that if I had a big full moon during astronomical twilight and the moon was less than 20 degrees above the horizon, I could get this kind of light. The little caveat here is that you also need some clouds for the moon to reflect the light off of. So the amount of clouds that I look for is very similar to the amount of clouds that I would have for a sunrise or a sunset. That's pretty good.
And of course, if you want to make this sort of twilight moon thing even more magical, you can add aurora here too. My advice to you and to younger me is to go out and chase the passing storm light and go out when it's really cold. And even if sunset is a total bust, stay for twilight, especially if the moon is big and low on the horizon. The most elusive and magical light usually follows the harshest weather. Until next time.
- Welcome back to Alpha Camera Academy. My goal for this class is to help you plan for a successful landscape shoot. I'll share my favorite go-to planning apps, but first I want to take a minute to remind you that you are going to be at your most creative and most focused if you take care of your body with the same care and attention that you take care of your gear. Misery from cold, hunger and fatigue is the ender of joy and often the biggest determining factor in whether or not you're going to have a successful shoot.
Relatedly, I cannot stress the importance of safety considerations before you head out to shoot. Make sure to have a means of communication like a Garmin inReach or the Apple iPhone with satellite texting and let someone know where you're going and when to expect you back.
And now that I know you're going to be all safe and comfy, I'll share my most-used planning apps with you. When it comes to weather, most landscape photographers end up studying a little bit of meteorology. In some parts of the world, I can imagine where weather would be more stable and predictable than it is here in the Rocky Mountains.
But where I live, it can change really quickly. So my favorite weather app is called Windy. I don't use a fraction of the tools that Windy has to offer, but I do use it to look at both cloud cover and weather patterns. I also use it for looking at things like fog. So if you navigate to the bottom right hand side, you can see that there are multiple weather models available. A lot of the weather apps that you use are going to use one of these models.
But the beauty of Windy is that you can get all of these models in the same place and then you can compare them. And while some models might be good for certain regions, other models may not be so, for example, here in Canada, I find that HRDPS is the most reliable, but in other parts of the world, the ECMWF has been very accurate.
You've probably already figured out that PhotoPills is one of my other favorite planning tools. This app is specifically designed for photographers and it has more features than I can describe here in the time that we have. So I'll just focus on the ones that I use the most.
I use the PhotoPills app to get myself to a location when the light is going to be the most magical. This is typically twilight, blue hour, golden hour, sunrise or sunset, and for stars - it depends on what my goals are. For night shooting, I can use it to determine the moon phase, how much ambient light from the moon I might have to work with, and it, I can use it to determine when the Galactic Center of the Milky Way is going to be visible above the horizon. This is my number one favorite planning tool, and I highly recommend that you download it.
Another app that I use often is called GPS Tracks. This app can help you track your hike or your walk, and it can be incredibly helpful if you are some distance from your vehicle when darkness sets in, because you can follow your track back to where you started. It's also really helpful for marking a location of, say, a favorite composition if you want to return to it at a later time or when the weather or some sort of alignment is more favorable. As always, if you have any questions about this, please don't hesitate to reach out. Until next time, happy shooting.
- Welcome back to Alpha Camera Academy. Today we're going to talk about creating compelling compositions. All of the things that we've talked about so far are very important, but I think you're going to find that over time, choosing your settings and choosing your lens is going to become second nature.
The thing that you're going to continue to work on though, I suspect is going to be composition. Composition is the soul of your photograph. Even though I've been doing this for a very long time, it is the thing that I spend the most time on when I'm out in the field. You'll hear a lot of terms when it comes to composition, like framing and leading lines and balance, and all of those things are important, but they are just tools.
The bigger picture of what I want you to take in is that we're creating a visual pathway through the image. We're inviting the viewer to look to start with the details and move their eye through the scene. We're inviting them to linger on specific details or a patch of light and make their way around and come back again. A compelling composition is one that really demands a viewer's attention.
There are three types of compositional structure: layers, framing and leading lines. Transitions are the elements within the scene that guide the viewer's eye, and they help to create a sense of three dimensional space on a two dimensional image. Natural transitions include high contrast to low contrast, dark to light, cool to warm, big to small, and out of focus to in focus.
Let's look at an example together. High contrast to low contrast. Imagine yourself standing in a field of flowers on the valley floor and you're looking off towards a distant horizon. All those flowers that are close to you are going to look really detailed. They're going to be full of contrast because they're so close, but those distant peaks, they might look a little hazy because there's so many particles and dust and things like that in the atmosphere that light is bouncing off of between your eyes and that distant object.
Similarly, in landscape scenes, the light source is typically the sun or the moon. So it makes sense that things nearer to us would be more in shadow, and that things in the distance in the scene are going to be more under the light. And this is another cue to our visual system that helps us to perceive depth. So not surprisingly cool to warm is going to follow the same idea with cool tones in the shadows and warmth in the highlights.
And at the risk of sounding repetitive, big to small capitalizes on the same idea. If you're looking at many of the same thing, the object that's close to you is going to look a lot bigger than the same object that is further away from you. The challenge with landscape photography is to make many parts into a cohesive whole, and that's different than other types of photography that work to isolate the subject. So when you look at the image on the back of your camera, try to identify what is the structure of your composition that is going to start that process of leading the eye through the frame, and then try to identify the natural transitions that are going to assist in creating depth in your image.
I hope these tips help, and until next time.
- Welcome back to Alpha Camera Academy. As we wrap up the course, I wanted to give you some pointers on going out for your very first night shoot.
The light at night is much more variable than it is during the daytime, and this is because the lunar cycle makes the light different every single night. There's also differences in the ambient light due to light pollution or to things like aurora activity. But you can navigate the moonlight with planning tools like PhotoPills, which will tell you how bright the moon is going to be and when it rises and sets.
And if your goal is Milky Way photography, you want to go out on one of the darkest nights of the month, and that's going to be either the week before New Moon or after New Moon. And you're also going to want to check and see what time the Galactic Center of the Milky Way is visible above the horizon. And yes, PhotoPills can help with that too.
Second, because of the rotation of the earth, the stars are going to look like they're going to move in relation to your camera. That means if we leave the shutter open too long, the stars are going to look like little dashes instead of like little dots. And we call this star trails. Believe it or not, PhotoPills can help you with this problem as well.
So there's a function in PhotoPills called Spot Stars. And Spot Stars takes into account your sensor size on your camera, your aperture and your focal length, and it tells you how long you can leave the shutter open for before the stars are going to look like they're starting to trail. So that leads us into settings. To go out for your first night shoot, you're going to want to be in full Manual Mode. You'll need to use a wide open aperture, ideally f/2.8, and then you can use PhotoPills to find your shutter time.
If you don't have the PhotoPills app, just take a 20-sec. exposure. And if you see on the playback that your stars look like little dashes instead of little dots, then you can decrease your shutter time from there. PhotoPills can't calculate your ISO though, because of the differences in ambient light from location to location with light pollution and with the moon. Start with ISO 3200 and increase your ISO until the image on the back of your screen looks like it's got a good exposure - and you can use your histogram as a guide.
But, as we discovered in our third class, you can adjust your ISO upwards until you get a nice exposure. Focusing in the dark is completely different than it is in the daylight. To focus in the dark, you're going to have to be in manual focus, and it helps if you assign a function in your camera called Focus Magnifier to one of your custom buttons. This will enable you to make the star look bigger in your Viewfinder so that you can see more easily when it is in sharp focus. So, once you have your Focus Magnifier assigned to a Custom Button, you'll press it until the star is nice and big in your Viewfinder, and then you turn the focus wheel until the star reaches its very smallest point. If you turn your focus wheel beyond the focus of the star, it'll just look big again.
You're also going to want to use a 2-sec. delay or a remote shutter so that when you press the shutter, you don't get camera shake on your long exposures. And of course, don't leave home without checking that you have extra batteries and memory cards, a headlamp, your tripod and some snacks. Make sure you're cozy and warm. And as always, if you have any questions, please feel welcome to reach out. I would love to hear from you. You can find my contact info on the Sony Alpha Universe page.
It's been my absolute pleasure and I hope to see you out in the field sometime.
Rate this course
Your feedback helps us improve our content.
Course rewards
Complete any course and earn a unique badge to celebrate your progress. Collect them all as you level up your skills!