Wildlife Photography 101
Turn wildlife encounters into stunning photos with pro gear tips, settings, light, composition and editing.
- Details
- Module
- Quiz
About this course
Build your wildlife photography skills from the ground up: choosing the right gear and support, dialing in core settings, harnessing light, and crafting strong compositions (framing, rule of thirds, negative space, depth of field). You’ll learn targeted techniques for birds and pets, research-driven strategies for wild subjects, ethical best practices and working with local guides, how to protect gear in extreme environments and pick the right bag, plus a streamlined post-shoot workflow for culling and natural-looking edits – ending with personal projects to sustain growth and creativity.
Course highlights
Instructor
Colby Brown is a photographer, photo educator, author and Sony Artisan based in Eastern Pennsylvania. Specializing in wildlife, landscape and travel photography, his photographic portfolio spans the four corners of the globe. He spent years working with some of the biggest companies in the industry, including National Geographic. Currently, his company leads photography workshops on all seven continents each year, around the world.
Colby Brown
Photographer, Sony Artisan Of Imagery
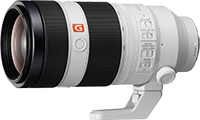
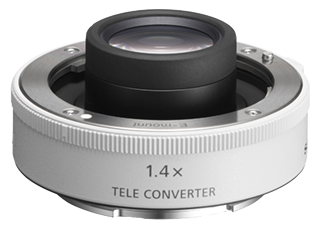
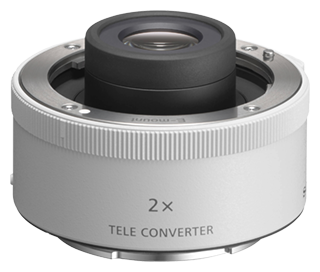
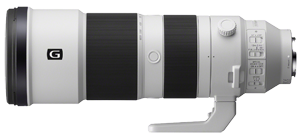
Featured gear

Skills
Transcripts
- Hi, and welcome to the Wildlife Photography Course here at Alpha Camera Academy. My name is Colby Brown and I'm a professional wildlife photographer, photo instructor, and Sony ambassador with nearly 22 years of experience within this industry.
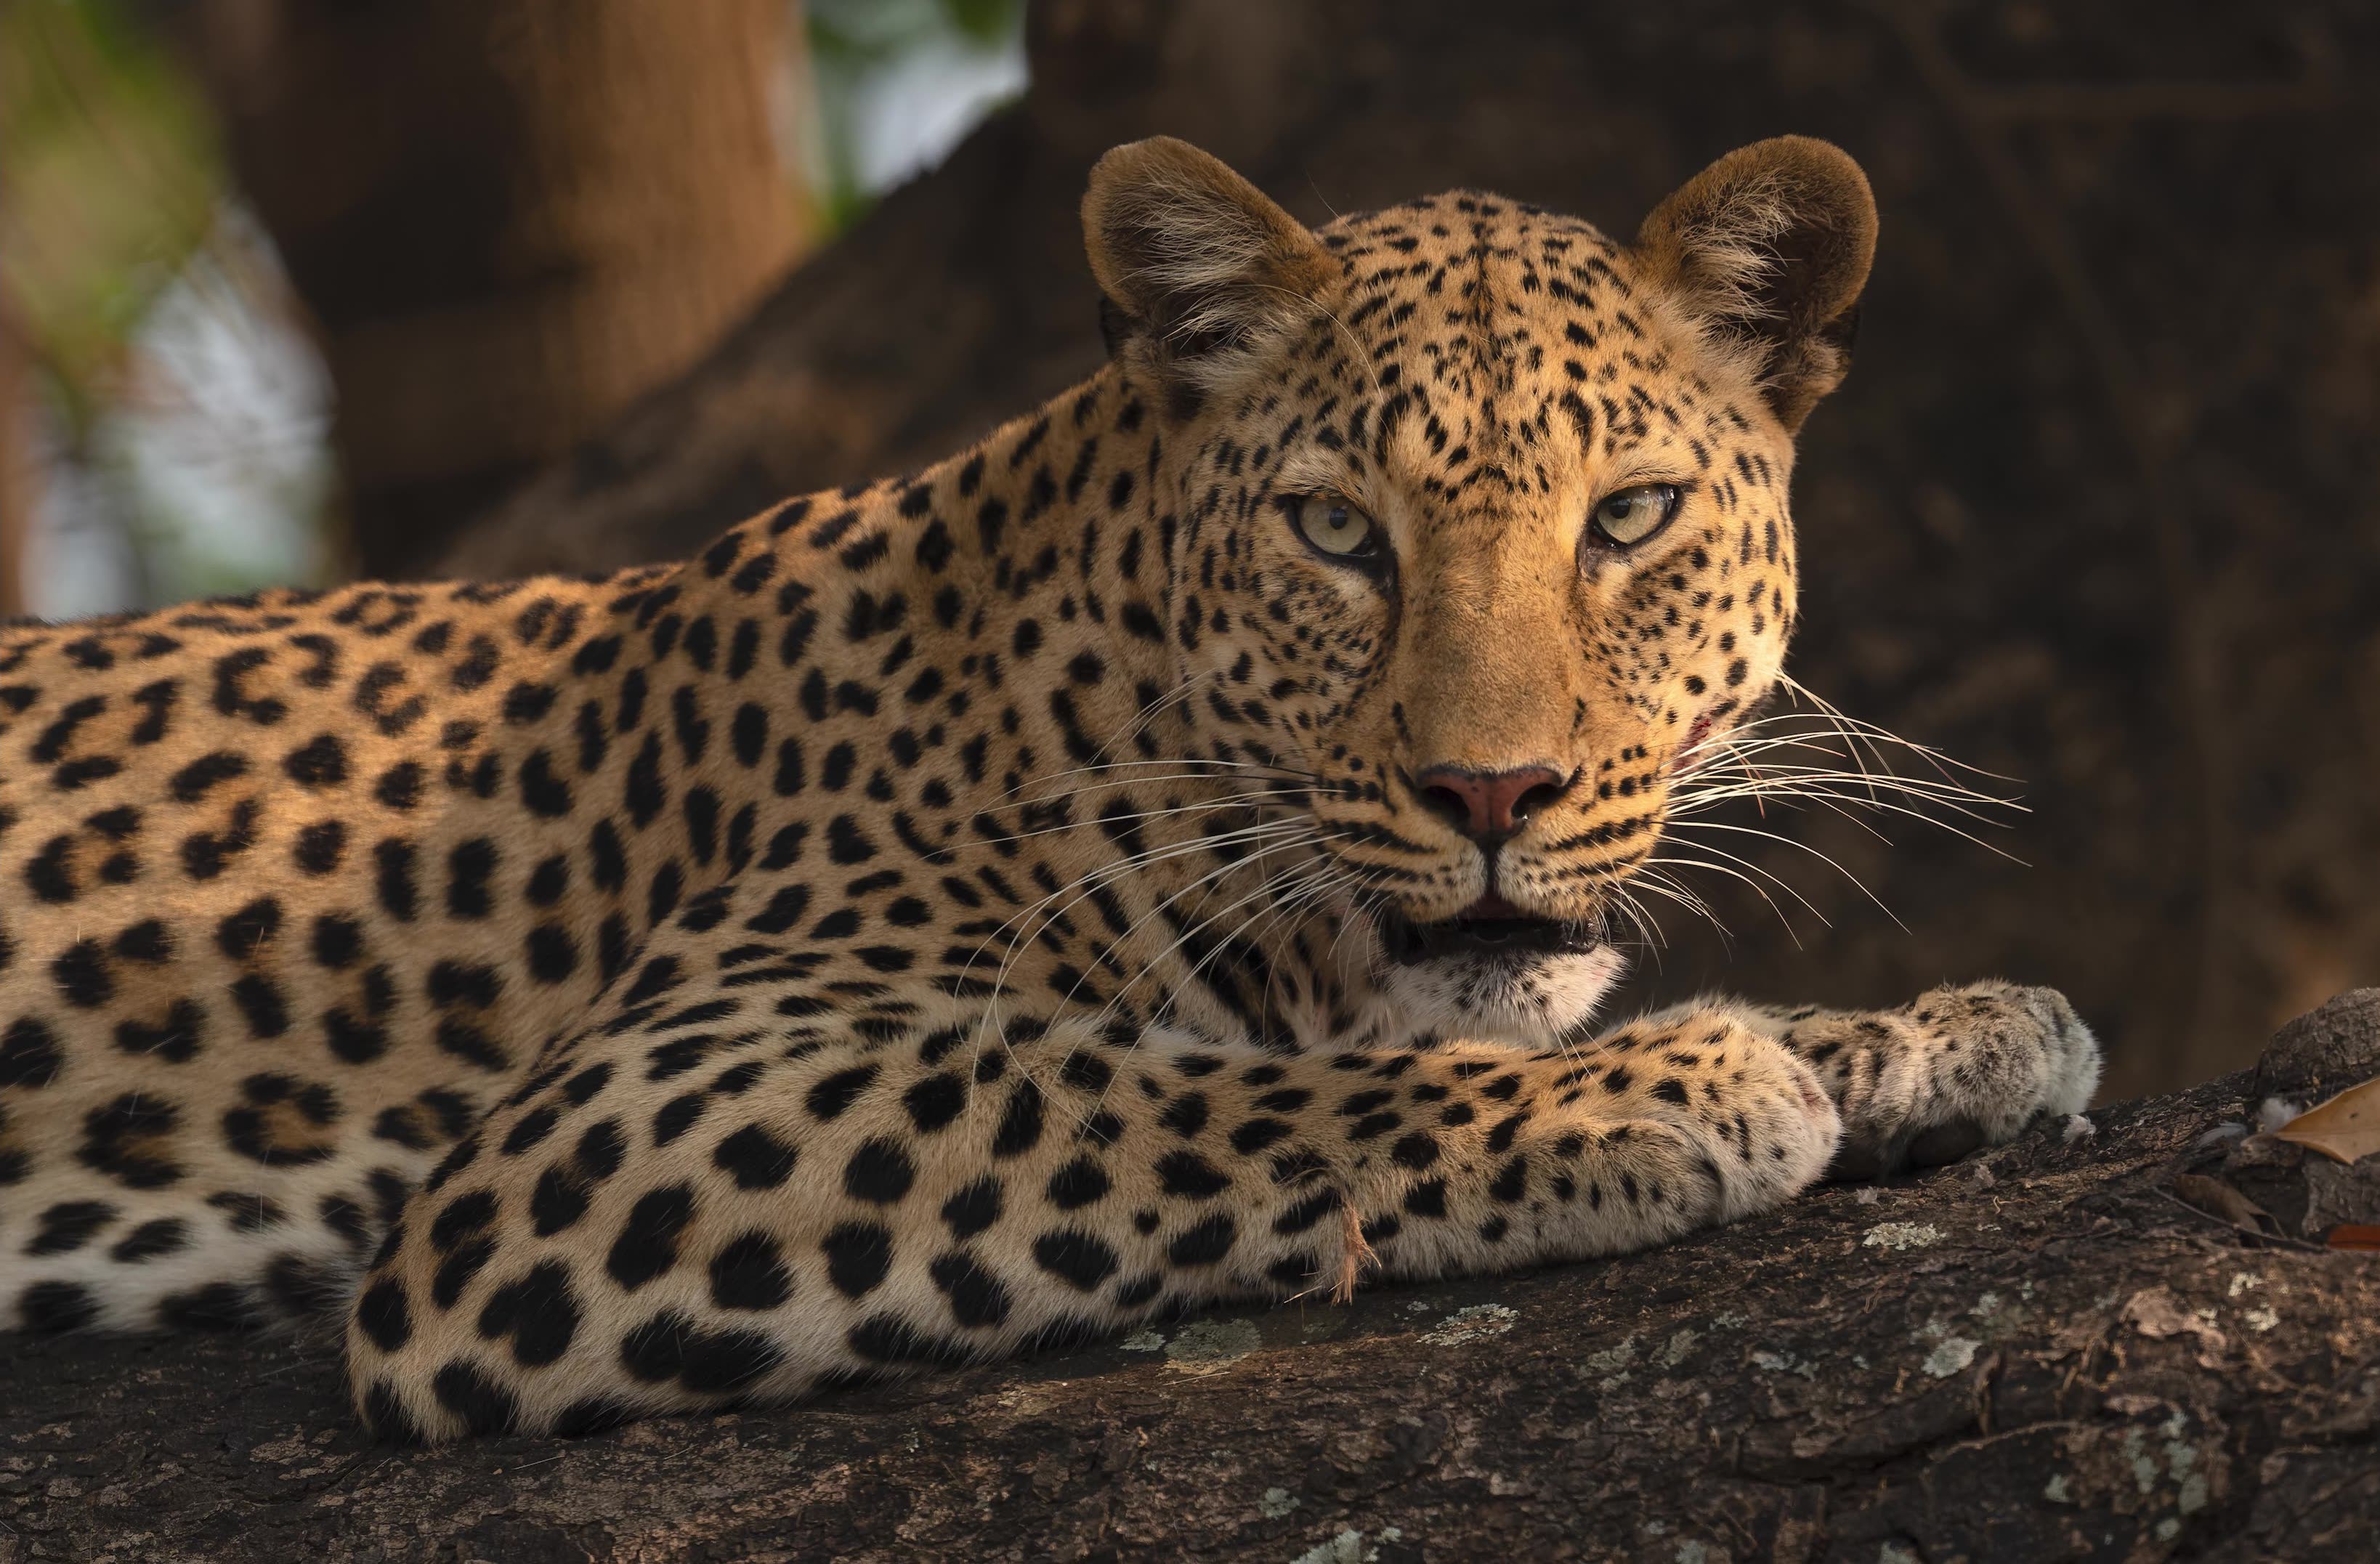
Now throughout my career, my camera has taken me on some of the most incredible adventures around the planet. There's nothing quite like the feeling of watching a leopard stalk its prey in Africa, or locking eyes with a tiger while exploring jungles of India. Capturing those moments, that raw, untamed beauty and sharing them with others is truly my passion, and that's exactly what I wanna help you do with this course. This is your fundamental guide to the world of wildlife photography. We're gonna start from the ground up, covering everything you need to know to start taking wildlife images that you can truly be proud of.
Now we're gonna dive into the essential gear that you need and what you don't. Master the core camera settings to take tack sharp photos and explore the art of composition to create powerful and impactful images. Additionally, we'll discuss wildlife ethics, use of guides and naturalists, animal behavior, and so much more. So grab your camera and your notepad, and let's get started. In our first lesson, we're gonna break down the essential gear you need to bring your wildlife images back into focus.
- Hi, and welcome to the Wildlife Photography Course here at Alpha Camera Academy. My name is Colby Brown and I'm a professional wildlife photographer, photo instructor, and Sony ambassador with nearly 22 years of experience within this industry.
Now throughout my career, my camera has taken me on some of the most incredible adventures around the planet. There's nothing quite like the feeling of watching a leopard stock its prey in Africa or locking eyes with a tiger while exploring jungles of India. Capturing those moments that raw, untamed beauty and sharing them with others is truly my passion, and that's exactly what I want to help you do with this course. This is your fundamental guide to the world of wildlife photography.
We're going to start from the ground up, covering everything you need to know to start taking wildlife images that you can truly be proud of. Now we're going to dive into the essential gear that you need and what you don't. Master the core camera settings to take tack sharp photos and explore the art of composition to create powerful and impactful images.
Additionally, we'll discuss wildlife ethics, the use of guides and naturalists, animal behavior, and so much more. So grab your camera and your notepad, and let's get started. In our first lesson, we're going to break down the essential gear you need to bring your wildlife images back into focus. Unlike many other genres of photography, wildlife photographers tend to have more barriers to entry when it comes to the required gear needed to photograph different kinds of species, regardless of whether they could be found in your own backyard or while on safari in Africa. I
n this module, we will focus on the various tools and accessories that might find their way into your next gear bag for your next big wildlife adventure. To begin, let's discuss cameras as they're a crucial component to wildlife photography. While I could spend hours discussing the various nuanced differences between each camera model, that would take way too much time. Instead, let's quickly discuss the three core elements of a camera that help you determine if it could be a good fit for wildlife photography: megapixels, the auto focus system and frames per second, otherwise known as FPS.
When it comes to megapixels, the higher the number, the higher the resolution of the images that can be captured with that camera. While at a high megapixel count, such as 50 or 60 is not required for wildlife photography, it can be very helpful because it means that you can crop into your image and still retain a lot of details. Many species, especially birds, are both small and can be far away from your camera. The extra resolution in megapixels can allow you to crop into your frame after taking the image, allowing your subject to take up more space within the photograph that you create.
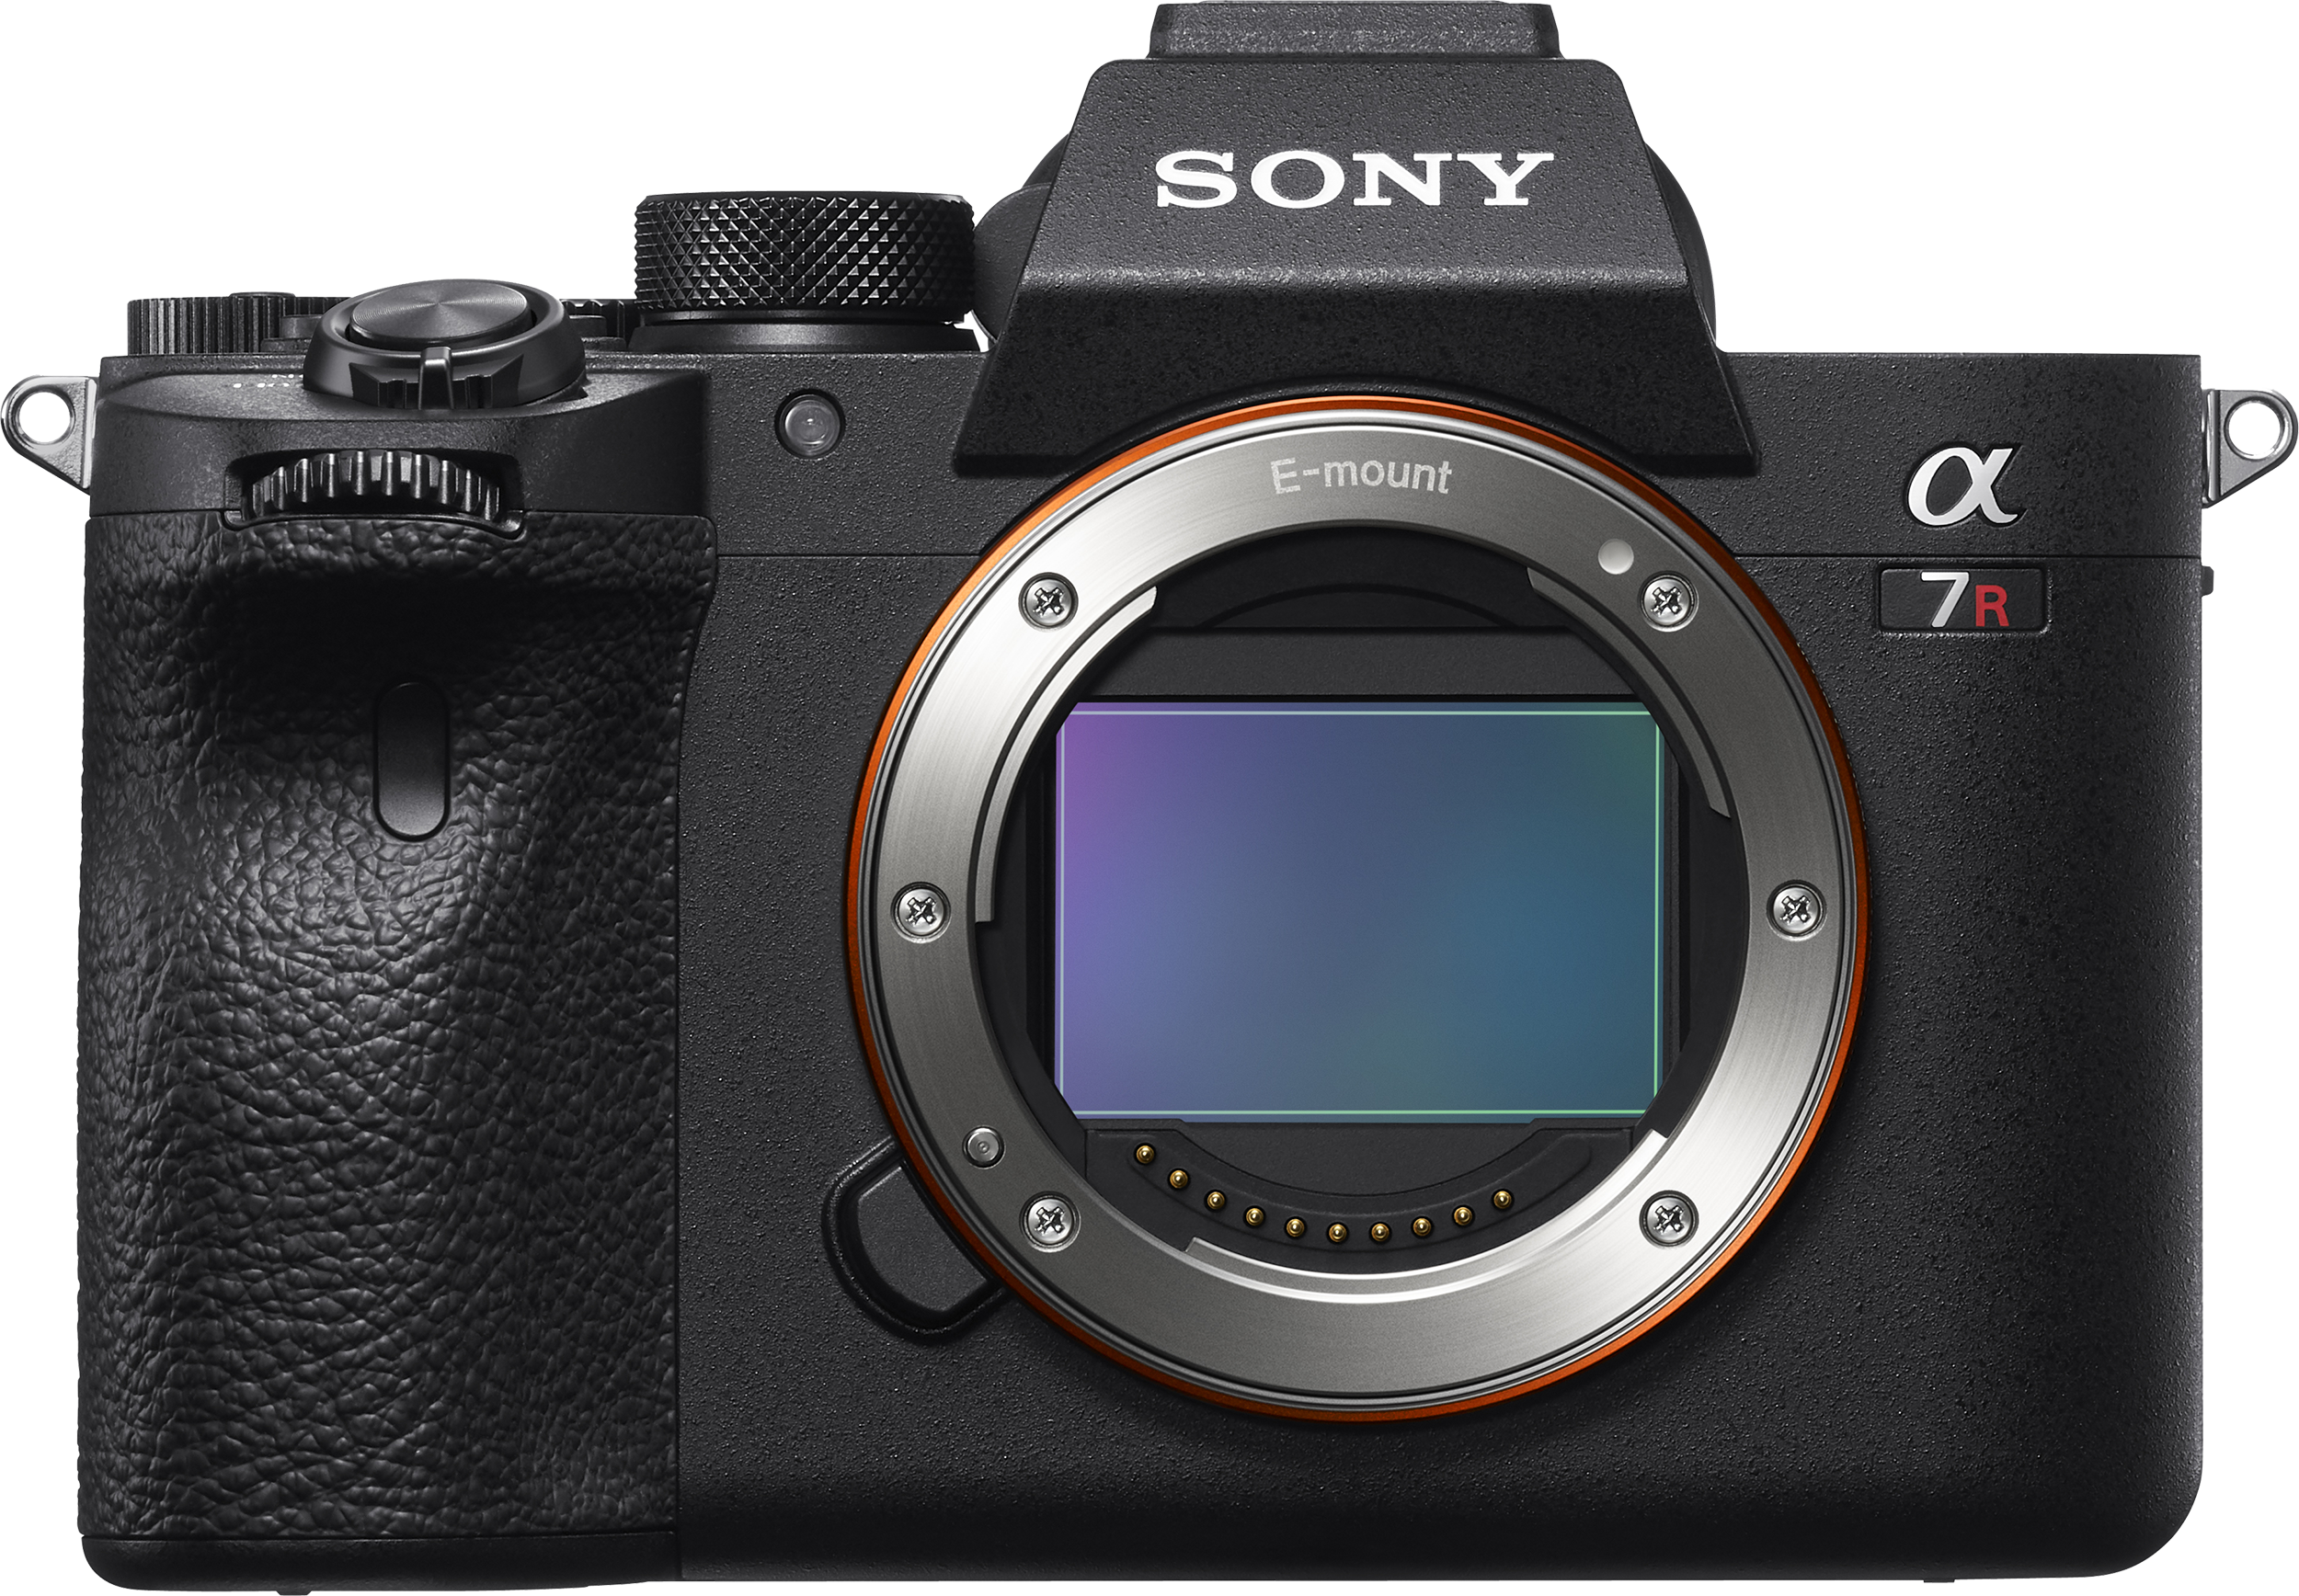
Your camera's autofocus system is also essential, especially since most wildlife tends to be moving. Having a digital mirrorless camera with an incredible auto-focus system such as the Sony Alpha 7R V, or the Alpha 1 II, will make it much easier for you to track and capture amazing images of wildlife. Both of these cameras feature an additional dedicated processor that focuses solely on autofocus tracking and subject identification. Once I got used to having these features built into the camera bodies that I personally use, I couldn't see myself going back to a camera that doesn't have them, as I find them so helpful when it comes to locking focus on my subjects.
Lastly, we need to discuss frames per second or FPS. This determines how many images your camera can take in a single second when you hold down the shutter release button. The more photos that are captured, the better. Why? When you have a bird moving within your frame, every articulation of fixed wings can create a new image when you shoot with a high frames per second camera, such as 30 frames per second.
However, if you camera can only shoot 10 frames per second, you'll have more gaps of time between each image. Ultimately, shooting with high frames per second means that you have more opportunities to capture that perfect picture.
Now, let's take some time to talk about the two different types of camera lenses that you want to consider for wildlife photography. A prime lens versus a zoom lens. A prime lens has a single fixed focal length, such as 300 millimeters, 400 millimeters, or 600 millimeters. If you want to change your composition such as getting tighter or closer to your subject or moving further away and showing more environment, you have to move closer or further away physically. This is often referred to as zooming with your feet. The two primary benefits of prime lenses are that they often produce the sharpest images and they exhibit excellent low light performance.
Many prime lenses have wide maximum apertures, such as f/2.8 or f/4. This allows more light to enter your camera sensor with a significant advantage when it comes to shooting in low light conditions such as the early morning or late afternoon when wildlife is most active. Now, let's contrast that with the zoom lens, which covers a specific range of focal lengths, such as 70 to 200 or 200 to 600.
Zoom lenses are more versatile because you can zoom in and out of your frame, which can be handy when your subject moves closer or further away while you're photographing it. Most zoom lenses have a variable maximum aperture of f/4.5-5.6 for example, which means that they don't allow as much light to hit their sensor as a prime lens with an aperture of f/2.8. In real world situations these zoom lenses are still capable of capturing incredible images in low light, but they require a higher ISO or slower shutter speed to compensate for those limitations.
For most people starting in wildlife photography, a zoom lens is more practical and versatile choice. It allows you to adapt to different situations quickly and helps you understand which focal lengths that you enjoy using the most. Prime lenses are fantastic, and many professional wildlife photographers, myself included, swear by them for their superior image quality and low light capabilities.
The downsides that prime lenses tend to be more expensive and they're often larger and heavier by design. Ultimately, choosing the right lens for your needs depends on both your budget and the type of wildlife that you are interested in photographing. For example, small birds will require as much reach as possible, so a lens with a minimum focal length of 600mm is often necessary. Larger mammals, such as bears, lions, or jaguars, can often be photographed effectively with a 300 to 400mm lens. Pets, such as cats and dogs feel much more comfortable with you when compared to wild animals.
So a shorter focal length such as 70-200mm can be ideal. However, don't worry, we will cover each of these different scenarios in more depth in a later module within this class. Now, before we move on to the next Module, let's take a moment to talk about stability. The longest lenses for wildlife photography tend to be larger and heavier than the lenses used in most other genres of photography. Due to this handholding, these lenses can become a challenge over time.
To help solve this problem, you could mount your camera and lens to either a tripod or a monopod. A tripod, as the name suggests, has three legs and offers the best stability. A monopod, on the other hand, has just one leg, but it is much easier to carry and is significantly faster to set up and move around in the field. So which one is right for you? For maximum stability, especially with heavier lenses or in low light, a tripod is often your go-to tool.
However, if you want to prioritize speed, flexibility, or portability, especially when tracking moving subjects, the monopod is the clear winner. Now that wraps up our first module, which has been focusing on the gear needed to get into wildlife photography. Next up, we're going to focus on the various different camera settings for wildlife photographers. I will see you all there.
- You spent the time, you found the location, and an incredible animal appears right before you. You raise your camera, press the shutter, and you get a blurry, dark or completely missed shot. So one of the most frustrating feelings when it comes to wildlife photography, and it's almost always because your camera settings weren't ready for the moment.
But what if I told you that by understanding just a few key settings, you could start taking deliberate control of your camera to capture the images that you've always wanted. In this Module, we are going to do precisely that - we're going to break down the most essential settings when it comes to the beginner wildlife photographers. Now to start, ensure that your camera is set in the RAW file format instead of JPEG. Why?
Think of JPEG as a finished cake. The camera makes all of the decisions for you, adjusting color, contrast, and sharpening. While you can make some changes in the processing phase, your options are a bit limited.
Now, in contrast, a RAW file is like having all of the raw ingredients. It saves all the unprocessed image data, straight from your camera sensor. This gives you total creative control. You can recover incredible detail from dark shadows or bright skies and adjust your colors perfectly. For wildlife where lighting conditions constantly are changing, this flexibility makes a huge difference.
Now, next up, let's talk about Focus Modes.
With any modern camera, you can choose from at least one or two different Focus Modes. On the Sony camera system, these are known as a AF-S or AF-C. AF-S stands for Autofocus Single Shot. This is the best mode to use when I'm photographing subjects that remain stationary, such as a tree or a mountain. Because both you and your subject are not in motion, you generally only need a camera to check autofocus just a single time.
In contrast, AF-C, which stands for Autofocus Continuous. In this mode, the camera continuously checks and rechecks focus on your subject. For wildlife photography, this is the mode that you want to be in. Even if you're photographing a perched bird that isn't moving much, it could move such as taking off in flight. The AF-C mode will significantly increase your chances of achieving focus in these situations.
Aside from ensuring that you are in AF-C, you will want to consider the Autofocus Area Mode you are in. This relates to the area within your frame where your camera will attempt to find something to focus on. This is important because sometimes your subject may not be immediately apparent to the camera, such as with a smaller wildlife species. For example, if you allow your camera to try to find something to focus on throughout your entire frame, it may get distracted by other objects within your frame.
However, if you choose a smaller auto focus area and position it closer to the subject that you wish to focus on, not only will your camera's auto focus system be faster at acquiring focus, but it'll often be more accurate as well. As technology is advanced within the photography industry, so have the autofocus capabilities of the mirrorless cameras.
Many of these cameras have built-in AI features that assist in the camera's autofocus system in helping it to quickly identify the type of wildlife species that you're attempting to photograph. It does this by examining hundreds of thousands, possibly even millions of different images of animals, birds, reptiles, amphibians, and even insects, and compares them and their shapes to the different features of what you're camera's currently looking at. This enables the camera to have a better understanding of the subject's body, head and eyes, allowing it to prioritize the autofocus points accordingly. If the camera can locate an eye it, it will attempt to focus on that first. However, if it can't find one, it will then look for what it believes is the head of your subject. Lastly, if it's having a hard time to correctly identify either of those, it will pull its focus back to the body of your subject. This is how the Eye Autofocus for wildlife works within the Sony camera system.
In my opinion, this technology is incredibly helpful, but it doesn't appear in every camera body out there. So if this is a feature that you are keen to learn how to use, make sure that this feature is built into the camera that you currently have. As I've mentioned in module one, the speed or more importantly, the frames per second that your camera is capable of capturing is vitally important when it comes to wildlife photography.
The simple truth is that if your camera can shoot at a higher rate of images, FPS, you will be able to capture significantly more photos of any subject that is in motion. Let's take a look at this series of images of a cheetah chasing an impala that I took in Kenya in the Maasai Mara. I photographed this set with the Sony Alpha 1 that is capable of capturing 30 frames per second. So every second of this chase, I had up to 30 frames to choose from where I could find the one where the cheetah and the impala were in the perfect position. If I'd used a slower camera that could capture only 10 or five frames per second, I would miss out on two thirds of these potential images, which might have included the perfect shot. With wildlife photography, especially with creatures in motion, it is always better to have more frames than fewer.
When selecting the ideal shutter speed for wildlife photography, three key factors must be considered: your movement, the movement of your subject and your choice of lens. First, let's discuss your movement. Every human being moves when standing still, even if it's ever so slightly. Between each breath you take and your natural sway and general coordination, some people are more stable than others. When you factor in the possibility of carrying a large and somewhat heavy wildlife focused lens, you may understand why this needs to be taken into account. If your shutter speed is too slow, essentially your natural movements may be enough to blur the image.
Next, let's talk about the movement of your subject. Some wildlife species move faster than others. For example, a flamingo in flight is moving at a different speed than a jaguar that is walking towards you along a riverbank. The faster your subject is moving, the faster your shutter speed needs to be to have a realistic attempt at getting a sharp image. The last factor relates to the reach of your lens.
The truth is, is that the longer your lens can reach, the faster your shutter speed needs to be to help counteract for the other two movements that we just mentioned. Why? I like to use the analogy of a plane flying through the sky. If you look up at it with your eyes, most planes look like they're moving incredibly slow across the sky above you. But if you looked at that same plane through a pair of binoculars or long telephoto lens, it would be zipping through your frame, even though it is moving at the same speed. Every micro movement by you or your subject makes huge differences when you are zoomed in on your subject while shooting wildlife photography.
If you only remember one thing from this section, it should be that you might need to use a higher shutter speed than you initially thought when it comes to using these bigger lenses.
Now, the final setting or feature that I want to talk about in this module is called Image Stabilization. On Sony's camera system, this is also known as SteadyShot. So what is it? Inside your camera and inside the lenses are miniature gyroscopes that help counter micro movements such as when a photographer breathes while taking a photograph.
But with Sony, the stabilization system inside the camera works in tandem with the one found in most Sony lenses, which allows you to use a slower shutter speed than you might have typically needed to in that given situation. I always recommend keeping this feature turned on whenever you're photographing wildlife, as it can be beneficial in the right situation.
However, if you've examined one of your Sony telephoto wildlife lenses, you may have noticed a switch labeled SteadyShot. While most lenses have an on and off switch for SteadyShot, which you should always leave on, some telephoto lenses geared towards sports and wildlife photographers offer additional options. These are marked as Modes 1, 2 and 3.
Mode 1 is the default mode for stabilization. It is the one that you should always leave on most of the time. This mode is designed to facilitate general movements and overall it works pretty well. Mode 2 is for subjects or objects that are moving parallel to your camera, such as a dog moving through your frame from the left to the right.
Mode 3 is for fast, sporadic movements such as that of a small bird in flight such as hummingbirds. If you don't remember to change between these different modes while photographing wildlife, don't worry about it. Simply leave it on Mode 1 and continue with your day. However, if you have the time or you remember, try experimenting with each of these different modes and see how you like the results.
Every photographer is different and there is no one correct answer when it comes to stabilization. Now, hopefully you now have a better understanding of the various different settings and features that are essential for helping you improve your wildlife images. At the end of the day, the technology we use as photographers should make our lives as creatives easier, not more complicated. The less time we spend worrying about the technical side of photography, the more time we have to focus on being creative and capturing truly unforgettable moments.
Now in our next module, we will focus our attention on understanding why light is so crucial when it comes to wildlife photography. I look forward to seeing you all there.
- What separates a good wildlife image from a great one? While composition, unique animal behavior and depth of field all can play essential roles, the quality of light found within an image often has a significant impact.
One of the most common errors photographers make when getting into wildlife photography is shooting with less than ideal light. In this module, we will focus our time on discussing the most important aspects of light and how they can affect your images.
Now, generally speaking, the best light for wildlife photography is often found when the sun is low on the horizon, such as an hour or two just after sunrise and an hour or two just before sunset. This time of day is known as the golden hour, so why should you prioritize photography around this timeframe?
The primary reason is that the quality of light found within the golden hours is significantly better than it is at noon when it comes to photography. The light during the first hour after sunrise and the last hour before sunset is softer, warmer, and more directional. The midday sun is harsh as it's directly overhead, creating strong unflattering shadows that can wash out the colors of your photos. The light during the golden hours is diffuse as it passes through more of the earth's atmosphere resulting in softer shadows and a more pleasing gentle light on your subject.
Additionally, the light at the beginning and end of the day has a beautiful golden or reddish hue. This warm light can enhance the natural colors of an animal's fur or feathers, as well as the surrounding landscapes, adding a magical quality to your images.
Lastly, the low angle of sun creates longer shadows that can help define the shape and texture of your subject. This adds a three dimensional quality to your photos, making the animal appear more detailed and allowing it for it to have greater depth.
But for wildlife photographers specifically, the reason isn't just because of the quality of light. Many animals are most active during the cooler hours of the early morning or late afternoon. This is when they are often forging for food, hunting, or engaging in other interesting behaviors. During the heat of the day, many species hide in the shadows to stay cool, creating additional challenges for photographing wildlife in the midday sun.
Now, in addition to the quality of light within a photograph, you must also take into account the directionality of light. Let's talk about the three most common lighting situations: backlit, side-lit and front-lit. When a subject is backlit, the primary light source is behind the subject that you're photographing, such as the sun. This allows you to play with soft shadows on the subject while allowing the light to fall on the outer edges or the rim of your subject. Here you can also experiment with creating silhouettes, which is where you purposely darken your subject to the point where you mostly just see an outline of it against the backdrop of the light entering your scene.
Now, a side-lit subject is where the primary light source is coming from, either the left or the right of your composition. Depending on your subject, this can result in an excellent balance between light and shadow, as the light source is positioned only on one side of your subject casting shadows across the subject as the light falls across the frame within your image.
Next, let's discuss front-lit subjects as this is where the primary light source is positioned behind the photographer, allowing more light to reach the front of the subject than the other two situations that we discussed. With the right kind of light, this look can be rich in both detail and color. After learning about the quality and directionality of light, it's also essential to consider the quantity or the amount of light that you allow into your image. This is known as exposure.
While light is vital to creating a photograph, too much or too little can also be problematic. With too much light, you can blow out all the details and colors found within your frame. This is known as overexposing an image. Compare that to having an insignificant amount to reveal the scene's details, and you have an underexposed image that is often too dark for a given scene.
But what happens when light within your scene is constantly changing? Depending on the kind of images I'm trying to create, I will position myself at certain angles as I anticipate the light to change as it hits my subject. For example, consider these images of a tiger moving across the forest floor with dabbled light from the sun filtering through the canopy above. With a bit of patience and a clear vision for the images I'm trying to create, I can precisely time my shots to ensure that the light hits the tiger's face and illuminates its eyes while still capturing the depth and shadows in the environment around it.
While you might not always succeed when dealing with complex lighting situations, it helps to have a game plan and a clear vision for the kind of images that you hope to capture. Now, when it comes to wildlife photography, most of us are constantly searching for good light to work with. We always consider the quality, directionality, and quantity of light that we want within our photographs. The next time that you are out in the field, I hope that you join us as you begin to think about light in a whole new way.
In our next module we'll focus on composition, framing and isolating our wildlife subjects. I look forward to seeing you all there.
- One of the key elements of any photograph is its composition. It's how you arrange elements within your frame, and it's key to transforming a simple snapshot into a much more powerful image. A good composition can draw your viewer's eye into your frame and even help invoke an emotional response to its images.
In this module, we will discuss framing, subject placement, and isolation, as well as how you can utilize the depth of field to enhance your compositions moving forward.
Now, once you have selected your subject, you must learn how to frame it. Composition consists of two core elements: framing and subject placement. With framing, you are not only choosing what is going around or behind your subject, but also deciding what to leave out of your photograph, which is arguably just as important. For example, if you can avoid it - you don't want a branch sticking out of the head of one of your subjects, or a bright, distracting reflection pulling the viewer's eye away from what they should be focusing on.
Sometimes all you need to do is move the camera slightly, possibly to the left or to the right, or even a little higher or lower to change your perspective and avoid including something distracting within your photograph. There's nothing worse than a busy, distracting background that ruins an otherwise incredible wildlife image.
Now, when it comes to subject placement, this refers to the position within your frame where you choose to place your subject. While there are no rules when it comes to art and photography, there are guidelines that can help. For example, let's quickly talk about the rule of thirds. This is essentially two horizontal and two vertical lines that one evenly spaced apart throughout your image. The idea is that where these lines intersect, you can place your subjects so it is pleasing to the viewer and keeps your subject away from the edges of your frame.
The good news is that you don't have to imagine these lines. Nearly all cameras have a rule of thirds feature that you can turn on to provide some guidance. But regardless of where you choose to place your subject, one thing that you should keep in mind is the notion of negative space. Think of negative space as the breathing room around your photograph. It's the empty and uncluttered area that surrounds your main subject, in this case, an animal.
While your instinct might be to zoom in as close as possible, intentionally leaving empty space around your animal can help make your photo feel much more interesting. How? By surrounding your subject with empty space, you eliminate distractions and draw the viewer's eye directly to the animal itself. The simplicity of the background makes the subject stand out more. A lot of negative space can highlight how small an animal is in its vast environments as well, such as a lone wool, first in a snowy field, or a small bird in a wide open sky. This tells the story about an animal's life and its surroundings.
Additionally, if you have an animal that's looking or moving in a specific direction, it's good to practice to leave more negative space in front of it. This creates a more balanced natural frame as the animal has space to move throughout your image rather than feeling confined to the corner of one of your photographs.
Lastly, let's spend a little time talking about depth of field and how it can help elevate your compositions In this most basic sense, depth of field refers to how much of your image is out of focus in comparison to your initial focal point, which in most often cases is your subject. Depending on a few factors, the area in front of your subject and behind your subject can be blurred, while your subject itself remains sharp. This blurred background is known as bokeh, and it's often a fantastic way to help you isolate your subjects and have it stand out from the background of your image. When it comes to wildlife photography, you can use this blur, or bokeh, to not only help you isolate your subjects from a busy background that I mentioned previously, but also take advantage of the narrow depth of field that comes from using these longer telephoto lenses that are popular for wildlife photographers.
Take a look at this photo of a young cheetah hunting a warthog that I took in Kenya. Using my 600mm lens, I was able to take advantage of the shallow depth of field by using a wide open aperture, f/4, focusing on the cheetah, and intentionally including a lot of blurred foreground in the composition. The result is a unique image that forces the viewer to invest more time trying to figure out what is about to happen within the scene.
Now, if this sounds too confusing, don't worry. With time and practice, you'll begin to develop a more creative approach to using composition within your photographs. Now in our next module, I will share my top tips and strategies for photographing birds, including one of the more challenging wildlife scenarios out there for aspiring photographers - capturing birds in flight. I look forward to seeing you all there.
- If I had to pick one species that has inspired more wildlife photographers around the world than any other, it would have to be birds. One can easily find a great deal of diversity, personality, and beauty among our wing friends in the sky.
Photographing birds, whether they're perched on a branch or soaring dramatically in the sky, presents both unique and exciting challenges. In this module, I'll share some of my favorite tips and strategies that will help you take the best bird photos possible on your next outing.
Now, let's start with birds that are perched. While they might seem easier, getting a captivating shot still requires skill. Birds are often skittish and shy, finding a spot with a good light and potential perches, then wait. Don't rush your approach. Often the best shots come when a bird is relaxed and comfortable. Just like with any wildlife, the eye is critical. A sharp eye creates an instant connection with the viewer. Use a Single Point Autofocus Area, and if your camera has it, the Animal Eye Autofocus feature to ensure that your eye is perfectly sharp, even with a stationary bird.
Think about your background. Try to get a clean, uncluttered background that separates the bird from its environment, looking for interesting branches or natural elements that can frame your subject without distracting from it. But even if a perched bird isn't your thing, there is one guarantee that I can always count on. Eventually, that perched bird is going to fly and that can present incredible photo opportunities. As the bird takes off, its wings become more dynamic and the entire feeling of the image changes.
To capture this, it'll require not only patience, but also a faster shutter speed, usually above 1/2500-sec., high frames per second shooting, and an accurate autofocus system. For those shooting with some of the latest Sony cameras, you might have an incredible advantage with the Pre-Capture feature. Here's how it works, when enabled. Your camera starts recording images into its buffer the moment you press the shutter button down halfway to focus on your subject. When you fully depress the shutter button, the camera saves not just the images from that moment forward, but also the second just before the first image was captured. Gone are the days of being just a touch too slow when it comes to reacting to a bird taking off suddenly. Once I tried this feature firsthand, there was no way I can go back to a camera body that didn't have this feature. It is that helpful.
Now, for the ultimate challenge, birds in flight. This is where your camera settings and your technique will truly come into play. Shutter speed here is king. This is the most crucial setting for freezing motion. For most small to medium sized birds in flight, you'll want a minimum shutter speed of 1/1600-sec., and often faster like 1/2000-sec., or sometimes up to 1/4000-sec., especially for fast moving birds such as swallows or raptors. If your shutter speed is too slow, you'll end up with blurry wings, which rarely looks good unless you're intentionally trying to create motion blur for an artistic effect.
Additionally, switch your camera to the Continuous Autofocus or AF-C mode. This mode constantly adjusts the focus as the bird moves. Pair this with a Wide or Zone Autofocus Area mode for larger birds, or a Single Adjustable Spot Tracking mode for smaller birds if your camera offers it.
Now, many modern cameras have Animal Eye-Autofocus with a Bird Autofocus mode that is incredibly effective at locking on and tracking the bird's eye even when it's in flight. Practice tracking the bird before you even press the shutter button if possible. Some birds are easier to photograph flying than others. Most large or medium sized birds move with a more predictable flight path, making them easier to track. Smaller birds, such as hummingbirds or sparrows are not only incredibly fast, but they're also erratic flyers making them difficult to follow with your camera.
The more that you learn about a bird's behavior, the better chances you are at having to come away with images that you're truly proud of. Now, last but not least, shooting with a high frames per second or FPS is your secret weapon. Set your camera to its highest continuous shooting mode - typically 10, 15 or even 30 frames per second.
Birds are unpredictable and you never know exactly when they're going to flap their wings or turn their head. Shooting at a high frames per second significantly increases your chances of capturing that perfect moment with sharp wings and a great pose. You can always delete the extra shots later.
Now, like any skill, bird photography takes practice. Start with larger slower moving birds, such as gulls or ducks, before moving on to the smaller, faster species. Don't get discouraged by blurry shots. Every missed opportunity is a learning experience. By combining patience for perched birds with the right kind of settings for those that are in flight, and leveraging features such as your high frames per second, or Sony's Pre-Capture, and you'll be well on your way to improving the skills needed to take incredible images of birds.
Now, if you've enjoyed this module, you are going to love our next one, where I will share some of my favorite tips and strategies for photographing wild animals in their natural habitats. Lions and tigers and bears, oh my. I can't wait to see you there.
- Now, one of the things that I love most about wildlife photography is the challenge of photographing such a diverse array of species in their natural habitats around the world. Going to your local zoo to learn more about a species is one thing, but there is something special about seeing a wild animal actually out there in the wild.
In this module, we will focus on just that. I'll discuss the importance of researching the species you hope to find, share some of my favorite tips and strategies for general wildlife photography, and we'll also explore different gear setups for various wildlife photo adventures to help make sure that you are prepared for your next outing.
Now, before you even pack your bags, the most important tool you have is knowledge. Research is paramount in wildlife photography, not only for capturing great shots, but also for respecting the animals and ensuring your own safety. The more you know about a given species, the better you can predict its behavior.
Let's say you're preparing or planning for a dream safari in Africa. You're envisioning lions and elephants and rhinos, but Africa is vast and that each species has its own unique behaviors, habitats, and peak activity times. Imagine you're hoping to photograph a leopard. They are notoriously shy and often active at dawn and dusk. If they catch any prey on a hunt, they will locate a nearby acacia tree and drag their kill up to a higher branch for safekeeping from other predators. Knowing this will help you plan your game drives, understanding their typical hunting grounds, and even predict their movements.
Or perhaps photographing bears in Alaska has always been on your bucket list. Are you looking for grizzlies? Fishing for salmon? Or polar bears on the tundra? Their diets, social structures, and even the best time of year to see them can vary drastically. Researching their specific behaviors will help guide you to the right locations at the right time of year. In case you were curious, for Alaska coastal brown bears, the best time of the year is typically June through September, but for polar bears, the best time is often November, although they tend to be in higher numbers in places such as Churchill, Canada or in Svalbard, Norway rather than Alaska.
Once you've done your research and you are preparing to be out there in the field, it's time to talk about different tips and strategies. In terms of camera settings, you're going to want to stick with Continuous Autofocus and high frames per second shooting, especially if you hope to photograph anything in motion. If your camera has Eye-Autofocus technology, make sure that it's turned on and set to the Animal mode. Your Autofocus Area should be representative of the size of the species you are photographing.
However, I tend to stick with the Adjustable Zone Autofocus mode, as it works best with the larger species that I tend to gravitate towards. If you have branches or grass in front of your subject, that is tricking your camera's autofocus sensor, into, you know, getting confused, changing to a smaller adjustable spot, autofocus area, and centering it on your target. This should help the camera get a better idea to know exactly what you are trying to photograph.
However, in addition to the technical aspects of your camera, it's also important to discuss general strategies. Number one is to be patient. Wildlife rarely performs on cue. Be prepared to wait, observe and anticipate. Sometimes the best shots come after long periods of quiet waiting.
Now, anticipating the moment is number two. Too often wildlife photographers get overly excited about the sighting of a species without trying to anticipate the behaviors and the movements to get a better understanding of the creature. I'm constantly thinking about repositioning myself to find the best angles and the lighting on my subjects. The more knowledge that you have, the better prepared you will be.
Now, when it comes to wildlife photography, your camera shutter speed is by far the most crucial setting on your camera. With the use of longer lenses and subjects that are often in motion, we must shoot at higher shutter speeds in order to capture sharp images. However, this comes at a cost typically in the form of shooting at higher ISOs than we might typically be comfortable with. At the end of the day, I would rather have a sharp image with some noise from a higher ISO setting than no image at all.
Additionally, with the latest AI based software for noise reduction, this has become remarkably effective at removing that noise and preserving details in these high ISO based images.
Tip number four is to always have a game plan. When I'm out in the field, I have a clear idea of the kinds of images I'm hoping to photograph, and I've adjusted my camera settings to give myself the best chances at achieving those results. For example, when I'm laser-focused on getting shots of a bear charging through the water in Alaska as it chases salmon, I have a higher chance at actually getting those shots rather than if I was distracted by the bald eagles that were flying around my subject or other bears that were just standing still. If you can avoid the spaghetti test approach to wildlife photography where you're hoping to capture everything and instead focus on very specific kinds of images, the quality and success of your photo adventures will dramatically improve.
To wrap up this module, let's talk about the different camera gear and accessories that you might find you need for various kinds of wildlife adventures. Now, for that African safari that we mentioned previously, you'll want a camera body with good autofocus capabilities and a fast frame rate to capture action. Your most important lens will be a telephoto zoom, something in the range of 100 to 400, or even a 200 to 600 millimeter range. This allows you to get closeup shots without disturbing the animals when they're at a distance, but as the animals move closer to your vehicle, which they do, you can zoom out and continue shooting. A sturdy beanbag and a monopod can also be helpful to add a little bit of stability into your safari vehicle.
Now, what about heading to Alaska for bears? Again, a robust telephoto lens is essential, but in many situations, the bears can actually get pretty close, so do keep that in mind. Consider a lens with a wide aperture, such as f/2.8 or f/4 if you plan on anticipating shooting in lower light conditions. Most of my Alaska adventures also require a bit of hiking to reach my favorite bear spots, so I tend to pare down my camera kit to make it more portable and less heavy. I often use a 70-200mm f/2.8 lens, along with a 300mm f/2.8 lens, and a 1.4 and 2x teleconverter. This gives me the effective covering range of 70 to 600 millimeters in just two lenses.
Lastly, for a trip to your local state park, you might not need the biggest, most expensive lens. A good quality mirrorless camera paired with a versatile telephoto lens, such as a 70 to 300 or 200 to 600 can be perfectly adequate if you are there to photograph animals such as elk, deer, or other mammals. Assuming you aren't hiking or going on long distances, a tripod can also be helpful for stationary subjects or when you're patiently waiting for animals to appear. Regardless of your destinations, always carry extra batteries, plenty of memory cards and protective gear for your equipment like rain covers or lens cleaning kits.
Now, that's it for this module, but remember, research, practicing your technique and choosing your gear wisely is always helpful. With practice and respect for the animals, you'll be capturing breathtaking wildlife moments in no time. Now, in our next module, we'll focus on pet wildlife photography, helping you take the best possible images of the furry friends that we all find in and around our homes. I'll see you all there.
- While photographing wild animals can be incredibly rewarding, in this video, we're diving into the super fun and fulfilling niche of pet photography. Whether you've got a furry friend at home or you just love capturing the spirit of animals that you know, this video is for you. We'll cover everything you need to understand animal body language to mastering motion and using natural light, especially indoors. Let's go ahead and get started.
Now, as I mentioned in the General Wildlife Module, in this course, doing your research and getting to know more about your potential subjects can drastically improve your chances of capturing unique and fascinating animal behavior. Now, great news about pet photography is that generally speaking, these are the animals that you know the best. Over the years, you have watched them grow, learn, adapt, play. This gives you a huge advantage when it comes to photographing them.
Now, most people would agree that our pets are full of personality. The key to capturing these expressive shots is to understand and interpret animal body language. Just like with humans, animals communicate a lot through their posture, their eyes, their ears, and even their tails. For example, this is Ella, my Rhodesian Ridge back and Labrador mix. When her ears are relaxed and her tail is wagging loosely, she's happy and engaged. That's a great time to try and get a smiling shot of both personality. If her ears are back, her body is stiff and she has that infamous ridge of fur standing up behind her front shoulders, she might be anxious, unsure, or even frightened. That's a signal to give her some space and try again later when she has calmed down a bit.
Now, for cats, it's a little bit different. They're most vulnerable when they show you their belly and ask to be petted. So if you get that experience, you generally know that you're good to go from a photographic standpoint. A twitching tail or flattened ears, however, can indicate agitation. Learning these cues will help you anticipate their movements and capture genuine emotions, ensuring both a great photo experience as well as a comfortable experience for both you and your pet. It's all about timing that perfect moment for a joyful expression or a curious glance.
Now, pets are rarely static, and that's why capturing motion comes in. Just as we discuss in the modules focused on bird and wild animals, you'll want to use your camera's Autofocus Continuous mode, and shoot with a high frames per second camera. Shooting with high frames per second, also known as Continuous Shooting, allows your camera to take multiple photos in quick secession while having a single press of the shutter button. Think of it like a rapid fire sequence. This is invaluable when it comes to your pets running, jumping, or playing. You'll get a series of images and at least one of them is bound to be perfectly sharp and in focus, assuming you have a shutter speed, that is fast enough.
Now, one thing that you should keep in mind is your perspective. Human beings are tall creatures, especially when compared to a cat or a dog. So if you try to take images of your pets while standing, the angle of your photography will always be looking down at your pets, which isn't very dynamic. If you have the ability, try to get down on the floor and meet them at eye level instead. This shift in perspective will often allow for some fantastic photo opportunities, but just be prepared for your pets to constantly surround you as they will think that it's playtime.
Now let's talk about lighting. Specifically, let's talk about beautiful natural light. You don't need expensive studio equipment to get stunning pet photos. For indoor environments, the most effective natural light source is typically a large window. Position your pet near a window, but not directly in harsh sunlight. Direct sun can create blown out highlights and deep shadows. A great technique is to place your pet parallel to the window. This provides soft even lighting across their face and body. You can also position them facing the window for a brighter, more front-lit look.
But just be careful of the shadows as you may cast them yourself. If the light is too bright, you can use a white curtain to diffuse it, making it even softer. Avoid using your camera's pop-up flash indoors. It often creates harsh shadows and can cause your pet's eyes to appear like red, which is not nice. Moving outdoors, natural light really shines here. The golden hours that are magical time between sunrise and sunset is often your best friend. The light is soft and warm and creates beautiful glowy effects.
Because your pets know you, you can take advantage of that by getting their attention and positioning yourself with the sun or alternative light source behind you. That way you can get that beautiful natural light dancing across your pets much easier than you could if they were a wild animal. At the end of the day, pet photography is all about finding new ways to appreciate and cherish our favorite fur babies. Make sure that it's a fun experience for both you and your pets, and hopefully you will come away with some great memories that could be hung on the walls around your own home.
Now, in our next module, we will focus on the ethical and responsible wildlife photography practices. So be sure not to miss it. I look forward to seeing you all there.
- Hi everyone, and welcome back. This module is absolutely vital for any aspiring wildlife photographer as it focuses on the ethical and responsible shooting. Now, we all want those stunning images, but we all want to capture them without disturbing and endangering the incredible creatures that we're there to photograph. This isn't just about getting a good shot. It's about being a responsible steward for mother nature.
Now, the golden rule of wildlife photography is to never disturb your subject. This means keeping a significant distance, but what does significant mean? Now, it's going to vary depending on the animal, but good starting point is to assume that if your animal notices you and changes its behavior, you're probably getting too close.
Imagine you're at home and a stranger walks right up to your windows and starts taking photos. You'd probably feel uncomfortable, right? Well, animals feel that same way. Changes in behavior could include anything from looking directly at you for extended periods of time, stopping what they're doing, such as eating, grooming or resting, moving away, or trying to hide, or showing signs of stress, such as the alert stance or flattened ears, vocalizations. Your presence should be as unnoticed as possible.
This often means investing in a good telephoto lens that you can get closeup shots, but from far away. It allows you to capture intimate moments without causing stress or altering the animal's routine. Remember, a blurry distant photo of a truly wild animal is often more valuable than a crisp closeup shot that is achieved through harassment. Now, assuming you want to get closer to your subjects and the animal in question doesn't actually mind, the best approach is to stay where you're at and let the animal come to you. This way, you know that it's not disturbed by your presence. Not only is this a much more positive experience for both you and the animal, but you have a higher chance at seeing unique animal behavior as well.
Now, next, let's start talking about the immense value of using local wildlife guides. Think of them as the key to this entire ecosystem of wildlife photography. Their knowledge runs deep. A good guide knows where to find the animals without stressing them out. They know where their territories are, their feeding grounds and their resting spots. They know how to approach. Just more importantly, they know when to back off. They understand the specific tolerance levels for each of these species and can put you in the right spot for the best light and the best angle, but all from a respectable distance. And they see all the warning signs, those subtle changes in an animal's behavior that tells you that it's feeling stress, long before most of us ever notice it.
Finally, they're experts on the local regulations and protected areas. With the guide, you know that you're not accidentally trespassing or breaking any rules designed to protect the very wildlife that you're there to photograph. By hiring a local guide, you're not only increasing your chances of finding wildlife, but also learning more important facts, but you're also directly supporting local conservation efforts and economies. It's a win-win situation for you and for the wildlife.
But all of this begs the question, why is any of this important? Why is giving animals space so critical? Ultimately, it's all about their safety. When animal perceives a threat, its body goes into a fight or flight mode. This has several negative consequences. All animals have a finite amount of energy between meals, and everything they do burns that energy. Fleeing or remaining on alert burns precious calories that animals need for hunting, foraging, mating, or caring for their young. Repeated disturbances can lead to malnourishment or exhaustion.
Additionally, if an animal is constantly stressed, it might abandon its nest, forging area, or even its offspring. This can have ripple effects on local populations. While animals sometimes appear to tolerate human presence, if they become too habituated to people and lose their natural wariness, it can put them at a greater risk for poachers, traffickers, or other dangers such as being hit by vehicles on roads.
Now lastly, it also is for your safety. A threatened animal, especially a large or predatory one, might feel that has no choice but to defend itself. Maintaining a safe distance protects both you and the animal. All too often in nature, when humans put themselves in a situation where a wild animal acts aggressively or violently, even if it was defending itself, it is usually the animal that pays the ultimate price with its life regardless of the initial outcome. Now, if you are a solo photographer, it is up to you to conduct your own research and familiarize yourself with the rules of the locations that you're visiting, as well as be responsible for finding a trustworthy local guide.
However, if all of this sounds like too much, there are plenty of outfitters out there that have been working ethically within the industry for multiple decades. Personally, I started my own photography tour company over 15 years ago, and we take pride on offering unique and ethical wildlife experiences on all seven continents around the world. We have conducted the research, have experience in these locations, and work with some of the best wildlife photography guides. All you need to do is show up with the right gear, and we will ensure that both you and the wildlife are fully taken care of.
Now that's it for this module. Ultimately, our goal as wildlife photographers is to observe and document nature as it is, not as it reacts to our intrusion. A truly ethical photograph is one where the animal's behaving naturally - completely undisturbed by our presence. This might mean patiently waiting, camouflaging yourself, or accepting that some shots aren't possible without negatively affecting the species that we're hoping to photograph. At the end of the day, mother nature should always come first. Now, in our next module, we will once again talk about camera gear, but this time we'll focus on helping you prepare for shooting in various different kinds of environments. I will see you all there.
- One of the best parts about wildlife photography is that you get to spend so much time out in nature as you look for different species to photograph. This however comes with its own set of challenges. Now in this module, I'll ensure that your camera gear is prepared for operating in various environments and share my thoughts on different types of camera bags to keep your gear protected when in transit.
Let's go ahead and begin. Now, when the weather is beautiful outside, it is really easy to be a wildlife photographer because all you need to do is focus on finding an interesting species to photograph. But what happens when you find yourself in the more extreme environments around the globe? What do you do then?
Let's start off with the Great White North, also known as just a chilly winter day, something that's cold or snow. It can be brutal on electronics, but your biggest enemies here are moisture and sudden temperature changes, as well as the impact of cold temperatures on your camera's battery life. When you're out in the snow, a good rain cover or even just a plastic bag is your best friend. Keep snow off your camera as much as possible, and when moving from the cold outdoor temperatures to the warm indoor space, don't immediately pull your camera out of your bag unless it isn't dry and free of snow and moisture.
If it is dry, please leave it in your sealed bag for at least an hour or even longer. This allows the camera to slowly acclimate to the warmer temperature, preventing condensation from forming inside your lens and your camera body. That's how you get fogging and even moisture damage. Cold weather is also the enemy to your camera's batteries. It slows down the chemical reactions inside making them drain incredibly fast.
Even if they were fully charged, the solution, try to keep them warm. Store your spare batteries in an inside jacket pocket close to your body heat and only put a battery in your camera out right before you start shooting. You should know that a cold battery that seems dead can often regain some of its charge once it's warmed back up. Always bring more batteries than you think you need. Trust me on this now.
Next, let's tackle rain and humidity. Think of rainforest, misty mornings, or just an unexpected downpour. Again, a good rain cover is indispensable. Many come specifically designed for cameras fitting snugly around the lens and the body. If you don't have one, a simple shower cap or a large Ziploc bag can work in a pinch in at least light rain. Most modern cameras have some weather sealing, but it is rarely 100% waterproof. Don't push it.
If your gear does get wet, dry it immediately with a soft cloth or a rocket blower before you put it back into your bag. Many cameras have been damaged from moisture because they were not thoroughly dried off before being placed back in your camera bag. Additionally, if you are working in a hot and human environment, you need to consider the impact of air conditioning. Cameras and lenses that are cold from your hotel's AC overnight will fog up when taken outside into a human environment.
A trick I have learned over the years is to put my camera gear in the bathroom of my hotel room at night. The air conditioner in most hotels doesn't reach the bathrooms, presumably to save energy and money. Keeping your gear in your bathroom will minimize the temperature and humidity differences between the outside environment and your photography equipment in the morning.
Now, let's flip the switch. Let's go ahead and go from wet to dry, extreme dry. Let's talk about desert environments here. Here, your nemesis are the fine sand, dust, and intense heat. Sand and dust are relentless. They can work their way into everything. Lens barrels, sensor chambers, buttons, you name it. And here's a big one. Avoid changing lenses out in the open, especially if it's windy. If you absolutely have to do it in a shelter place, such as in a car, or at least have your back to the wind using your body or a jacket as a shield.
It's also a great idea to use a clear UV filter on your lenses, not for the light, but for the physical barrier against blowing sand that can often feel like sandpaper if the wind is high enough. Extreme heat is also a problem because it can cause your camera to overheat and shut down if the temperature outside becomes too hot. Try to avoid situations where your camera's exposed to direct sunlight for extended periods of time when the outside temperature is extremely high.
I often carry a lightweight scarf with me when I'm in desert environments because it not only helps me protect my skin from the sun, but also it can act as a shade barrier for my camera gear in a pinch.
Now, additionally, regardless of the environments I find myself in, I wrap all of my larger telephoto lenses in a protective covering. This is not just to protect them from the cold or the heat, but also from physical damage while traveling or when is in use out in the field. Keeping your gear in good shape drastically increases the resale value when you decide to upgrade to newer lenses or cameras down the line. Several brands offer protective coverings, but currently my favorite is RolanPro.
Now, let's talk about getting your gear from point A to point B, whether it's across town or across the globe. How you pack can make all the difference, especially with those longer lenses required for wildlife photography. So what options do you have? Backpacks, roller bags and sling bags. Photography backpacks are fantastic for hiking and carrying gear over rough terrain. Look for padded compartments, adjustable dividers, and good lumbar support. They distribute the weight evenly and keep your hands free.
The downside, accessing gear can sometimes be a little bit slow and they can get heavy real quickly. Now, if you're primarily moving through airports or paved areas, a roller bag is a lifesaver when it comes to your back. They offer excellent protection, often have customizable interiors, and they're easy to maneuver. But be mindful of airline carry on size and weight restrictions.
Lastly, sling bags are great for lighter loads and quick access. They sit across your body allowing you to swing them around and grab your camera without having to remove the bag itself. Perfect for single cameras when you have one or two extra lenses, and you need to be more agile. However, they offer less capacity and protection than a backpack or a roller, and the uneven weight can cause back strain if you wear them for extended periods of time.
Now, regardless of the bag type, always use padded inserts. Never throw your camera into a regular backpack without protection. Each lens and camera body should have its own snug padded compartment. And when flying, always try to carry your camera body and lenses in your carry-on luggage, if possible. Avoid checking your camera gear. You can always thank me later. Now, that's it for this Module. Just remember that your camera gear is an investment, and taking a few simple precautions can ensure that it'll lasts for years to come, allowing you to capture countless more breathtaking wildlife moments. So get out there, be prepared and happy shooting.
Now in our next and final module, we'll focus on selecting the best images from a shoot, discuss the fundamentals for editing wildlife images, and explore the importance of creating personal projects. I will see you all there.
- Now that you've taken the time to learn more about camera gear, settings and the strategies needed to become a wildlife photographer, it's time to focus on what happens when you actually get back home and all of a sudden you have thousands of wildlife images to go through and to edit. In our final module for this video course, we're going to talk about image culling, selecting the strongest images, the fundamentals of editing, wildlife images, and the benefits of personal projects, and how they can help you grow as a photographer.
Let's go ahead and jump right in. Now, if you're coming from another genre of photography, especially if you are a portrait, landscape or travel photographer, you might be blown away the first time you return home and realize that you have thousands, sometimes tens of thousands of images to go through from a single wildlife trip. For many aspiring photographers, the process of culling through these images can be daunting at first, but having a plan can help.
In this module, we're gonna be using Adobe Lightroom, as it is the most popular image organizational tool currently available. However, there are many other options with similar features for organizing your images. Whatever programs that works best is what you should use. Now, the key is to develop a system that allows you to quickly identify your keepers and your rejects.
Personally, I reject any image that is automatically out of focus. The default shortcut for this in Lightroom is X. Any image that gets rejected isn't deleted right away, but it gets grouped with other rejected images so that I can go over and confirm those choices before deleting them from my hard drive. Finding your best shots, however, require a bit more effort. My strategy involves taking multiple passes, reviewing all of my images, and selecting images based on one specific thing for each pass. On my first pass through, I'm only looking for the best of the best. These images are not only sharp, but they're also the ones that I'm most excited to process.
The key is to start in the reverse chronological order, so begin with the most recent images and work your way backwards. Why? When you first arrive at a location or encounter a species, most wildlife photographers tend to overshoot because they're excited. However, as time passes, they settle into a rhythm and start thinking more critically about their choices of composition, exposure and timing. Lightroom has a star rating system, which I utilize for this process. Each of these images receives a five star rating, making them easy for me to find afterwards so that I can start processing them.
On my second pass through, I'm looking for images that I know I want to process at some point, but they aren't necessarily giving the same priority as my five star images. These images are sharp, have good composition, and solid lighting. Sometimes these images are what I call sister images where they're similar to the five star image choices, but they're slight variations. Some of those details can vary, such as a lion looking to the left instead of directly at the camera or a bird flight with a slightly different wing pattern than my initial five star choice. These images get a four star rating.
On my next and final pass, I'm looking for three star photos. These images are not ones I plan to process anytime soon, but they do have good fundamentals such as sharpness, composition and subject matter. I like to keep these images just in case. Every now and then, I stumble upon a hidden gem in a Lightroom album from years past that I had saved as a three star photo. The truth is you never know.
For all the images that are still left without a rating, I recommend to quickly review them and determine what went wrong, why you didn't like those images to begin with. Was it user error? Did the camera not focus correctly? Maybe the composition just wasn't the strongest. Taking the time to learn from these mistakes will ultimately help you become a better wildlife photographer.
Now, once you have made your selections and culled your images from your last photo shoot, it's time to focus on editing your images. Now, in an ideal world, I would be able to share my entire photo editing workflow from start to finish with multiple types of wildlife images, but we simply don't have enough time for that. Instead, I would like to discuss the details of a few core concepts related to processing wildlife images that I think will help you start your editing journey.
First up, let's talk about noise. As I have mentioned previously, most wildlife images require the use of higher shutter speeds. To compensate for the lack of light hitting your camera sensor, most photographers end up increasing their ISO to achieve a higher shutter speed. The cost of increased ISO is found in the noise in your images. Cleaning up noise is a complicated process, mostly because the solution to noise, also known as grain in the film days, is to add blur into your image. The problem is, is that if you add too much blur or blurs in the wrong parts of your image, you can smooth out and lose details found in both the feathers or fur within your wildlife images.
Fortunately, AI is very helpful in identifying both noise in your pictures as well as parts of your subject where you want to retain as much detail as possible. Adobe Lightroom, Topaz's Photo AI and DxO's PureRAW offer three of the best solutions currently for removing noise from your images. But just make sure that you're shooting in RAW images rather than JPEGs, because you have so much more freedom to edit those kinds of images.
Now, once you've handled the noise with your photo, which should be the first step in your editing process, it's time to start the creative aspect of actually editing your photos. My advice is to keep your wildlife images looking as natural as possible. While many landscape photographers tend to take more creative liberties when it comes to digital editing, I personally feel that wildlife photography looks best when the edits are subtle and true to the scenes where the animals were found. That being said, I'm a strong advocate for choosing to shoot in the RAW file format, as it provides the most freedom and flexibility when it comes to processing your photos.
However, RAW images by default appear flat and desaturated when you first open them up in Lightroom or any editing software. So you'll have to make some adjustments to bring them back to life regardless. When it comes to color, I recommend avoiding drastic changes such as using the vibrance or saturation sliders. Instead, opt for the Color Mixer feature found in Lightroom. There you have much more control over the hue, the color tone, the saturation, the color punch or luminance, the color brightness, the various different colors found within your image. If the saturation slider is similar to a sledgehammer, think of the color mix of tool more like a scalpel. It offers significantly more precision when it comes to color working with your images.
Now, one of the best pieces of advice I can give to any aspiring wildlife photographer is to avoid over-processing your images. The three most commonly overdone adjustments tend to be sharpness, clarity and saturation. Now, it is simply too easy to push these three adjustments too far when you're first starting out.
My recommendation would be to try any of these sliders and move them to a point where you think that it looks good, but then pull back about 20%. This provides a good opportunity for you to scale back any adjustments that you might have pushed too far, at least until you get a better grasp of what you feel looks good with your images.
Lastly, let's talk about the benefits of personal projects. If you are new to wildlife photography, it is easy to get wrapped up in the sheer number of different animals that you can learn about and attempt to photograph. Having a personal project, something that you are passionate about, can drive some of this newfound passion for wildlife photography and help you stay focused. Additionally, it allows you to focus specifically on the necessary skills to photograph the species in question.
Now, I personally found my own project about six years ago when I came across some incredible photos of poison dart frogs on Instagram. I didn't know much about macro wildlife photography at the time, but the more that I learned, the more interested I became. I had to learn all about flash photography, working with macro lenses, and I had to get comfortable with working in dense jungles and extreme humidity. Before I knew it, I was planning trips to specific locations around the globe with macro wildlife photography in mind.
Since then, I've been able to take a lot of the techniques that I learned about creating light and composition from shooting macro into my work with general wildlife, and I'm a much better wildlife photographer for it.
That's it for this final module. I hope that you have a better understanding of how to cull and organize your images, you picked up a few tips and tricks when it comes to processing your shots, and you're thinking about how you can work on personal wildlife photo projects that can both inspire you and provide some additional learning opportunities to help you improve your wildlife photography skills.
Now, that's a wrap for this Fundamentals of Wildlife Photography Course here at the Alpha Camera Academy. I hope you've enjoyed learning more about wildlife photography and that you've picked up some skills to help you take some of your own amazing images. The beautiful thing about photography is that there is always more to learn - new techniques, to master, new technology, to leverage, new skills to practice. So get out there and enjoy the journey. I know I am.
Rate this course
Your feedback helps us improve our content.
Course rewards
Complete any course and earn a unique badge to celebrate your progress. Collect them all as you level up your skills!