Get To Know Your Alpha 7R V
Everything you need to know to go from a brand new Alpha 7R V camera to professional-quality images.
- Details
- Module
- Quiz
About this course
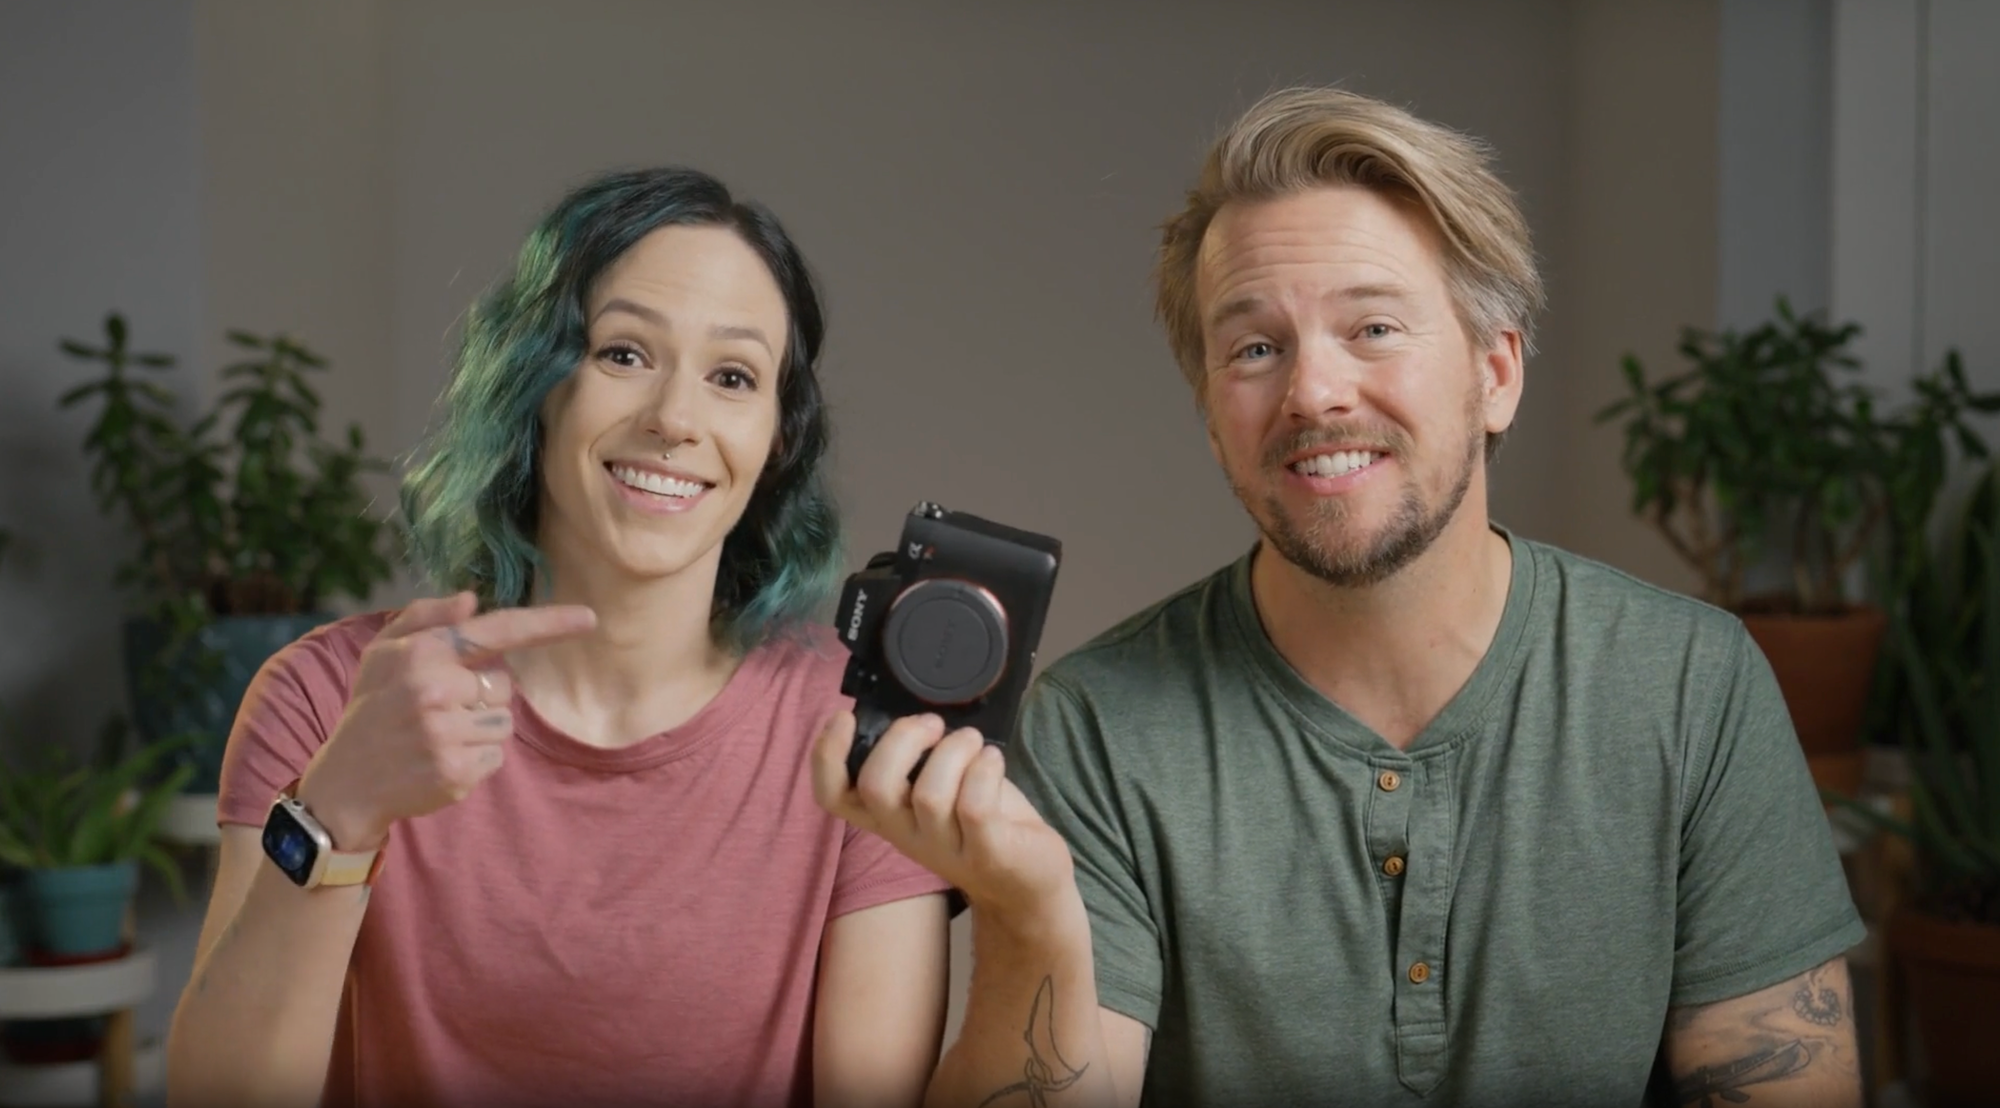
Follow along as Nate Luebbe and Autumn Schrock walk you through everything you need to know to go from a brand new camera to professional-quality images on your Alpha 7R V. They’ll help you get set up right out of the box, with the perfect beginner set up so you can get out shooting right away.
Later modules will then continue on to more advanced topics for the photographically adventurous, with full explainers about the exposure triangle and manually setting the exposure on your camera.
They'll finish up with a discussion about video and audio settings so you’re able to use the full might of this incredible camera and create the content you’ve been dreaming of.
Course highlights
Instructors
Nate Luebbe grew up in the mountains of Colorado, spending nearly every waking moment out in the woods hiking, climbing and exploring. Although Nate is still semi-feral, he has channeled his love of nature into becoming an Eagle Scout, college graduate, and now works as a full time nature photographer specializing in landscapes, wildlife and conservation.

Nate Luebbe
Photographer, Filmmaker, Alpha Imaging Collective
Autumn Schrock is a full-time photographer who specializes in travel, astro and landscapes. She graduated from Herron School of Art & Design with a BFA in photography, and her work is known for its bright, rich colors. She can often be found trekking in search of the most photogenic locations while raising awareness about mental health and our changing ecosystem. When she’s not behind a camera or computer, she also enjoys doing yoga, snuggling her cats, and attempting to housebreak Nate.
She, along with partner Nate Luebbe, are a landscape photography dream team. They are both Sony Alpha Ambassadors and feel exceedingly fortunate that they get to travel the world teaching photography as a full time job.

Autumn Schrock
Photographer, Alpha Imaging Collective
Featured gear
Skills
Transcripts
- Hello, everyone. Welcome. My name is Autumn Schrock. This is Nate Luebbe. We are nature photographers specializing in landscape and wildlife. We're also so fortunate to be Sony Alpha Ambassadors, and we are very excited to be here with you.
- Welcome to the Alpha Camera Academy. This course is all about Sony Alpha seven R five. It is one of our absolute favorite cameras. We have taken it all over the world, from the Arctic to the Antarctic, to Africa, and many more places. We absolutely cannot wait to introduce it to you.
- In this course, we'll walk you through taking it out of the box to getting familiar with all the fancy dials, making creative choices, some video and beyond.
- Let's get into it.
- Hello everyone. Welcome. My name is Autumn Schrock. This is Nate Luebbe. We are nature photographers specializing in landscape and wildlife. We're also so fortunate to be Sony Alpha Ambassadors and we are very excited to be here with you.
- Welcome to the Alpha Camera Academy. This course is all about Sony Alpha 7R V. It is one of our absolute favorite cameras. We have taken it all over the world - from the Arctic to the Antarctic, to Africa, and many more places. We absolutely cannot wait to introduce it to you.
- In this course, we'll walk you through taking it out of the box to getting familiar with all the fancy dials, making creative choices, some video and beyond.
- Let's get into it. The great news is that you just bought an excellent camera, but the downside is that it kind of looks like a spaceship. It's got a hundred different buttons and dials. It controls a thousand different settings, which I know can feel a little intimidating. But the best part of owning such a great camera is that it's designed to work with you. This is a beautiful creative tool built to help you capture the best photos you possibly can, and you don't need to know every single setting to take a great shot. The Sony Alpha 7R V has a setting called I Auto or Intelligent Auto. The Intelligent Auto setting automatically detects the scene and subject and adjusts all the settings for you to practically guarantee you get a great shot, and all you need to do is push the shutter button.
As you learn more, you can use some of the built-in creative styles to take your images to the next level or even start making intentional choices about which settings to change to capture the exact image that you want. In this course, we're going to walk you through all the most important buttons, dials, and settings, so you know exactly what to touch and what you can ignore so that you can start creating photos that you'll cherish forever. Now that you have your brand new Alpha 7R V, let's open the box and take a look at what's inside.
Right on the top, the first thing you're going to see is the user manual and the warranty information. It's up to you whether or not you want to read any of this, but I think it's very good information to have. As I already mentioned, this camera has a thousand different buttons and it's a little bit overwhelming. This will get you started off on the right foot. You can even bring it out in the field if you want a quick reference guide. There's a lot of fun and exciting stuff in this box, but the most important, obviously, is the camera itself. It comes wrapped in this little protective paper bag. You can take that off and there it is. Before you're able to shoot, you'll need to put in a battery, a memory card and attach a lens, but this is the beauty of the operation. This is all you need to get started.
The other thing that's right on the top is the strap. I cannot overstate how important this strap is. The first thing I do when I pull a new camera outta the box is attach the strap. It's just an easy little bit of insurance to make sure it's around your neck. Anytime I'm using a camera, not seated at a desk or something, I have the strap around my neck just in case. And along those same lines, I also like to go online and buy a screen protector for the back screen. They're difficult to break, but it's just a little bit of extra insurance as it hangs around your neck or you lift it to your eyes. If you forget that you have glasses on, for example, you don't want to scratch the back screen and damage this. It's so easy. It's so cheap. I put on a screen protector right after I put on the strap.
Next up, the battery and the charger. I think it's probably pretty self-explanatory what those are for, but to charge the battery, you just insert it in. It's actually coded. They both have arrows on them. You just align the arrows, slide it in until it clicks and you're good to go. In the box is the cable that plugs into the charger, and then it goes right into a wall outlet. Couldn't be easier. There's one other cable in here, a USB-A to USB-C data transfer cable. You can use the camera itself as a card reader. If you don't want to purchase an SD card reader, you can just plug directly into the side of the camera, plug that into your computer and offload all of your photos and videos to your computer that way.
And then the last thing in the box is the cable protector. This screws into the side of your camera to hold the cables in HDMI, USB-C, audio cable, etc. As you progress a little bit more in photography and videography, you will probably find yourself attaching accessories. This just ensures that the cables don't get pulled out and potentially ruin a shot. It's not a super commonly used accessory, but it's very nice to have if you need it. Now that everything's out of the box, you've got your batteries charged. We're going to insert it into the camera. The teeth on the battery go towards the outside of the camera. It drops in like this till you hear a click, and then you close the battery door and you're ready to go.
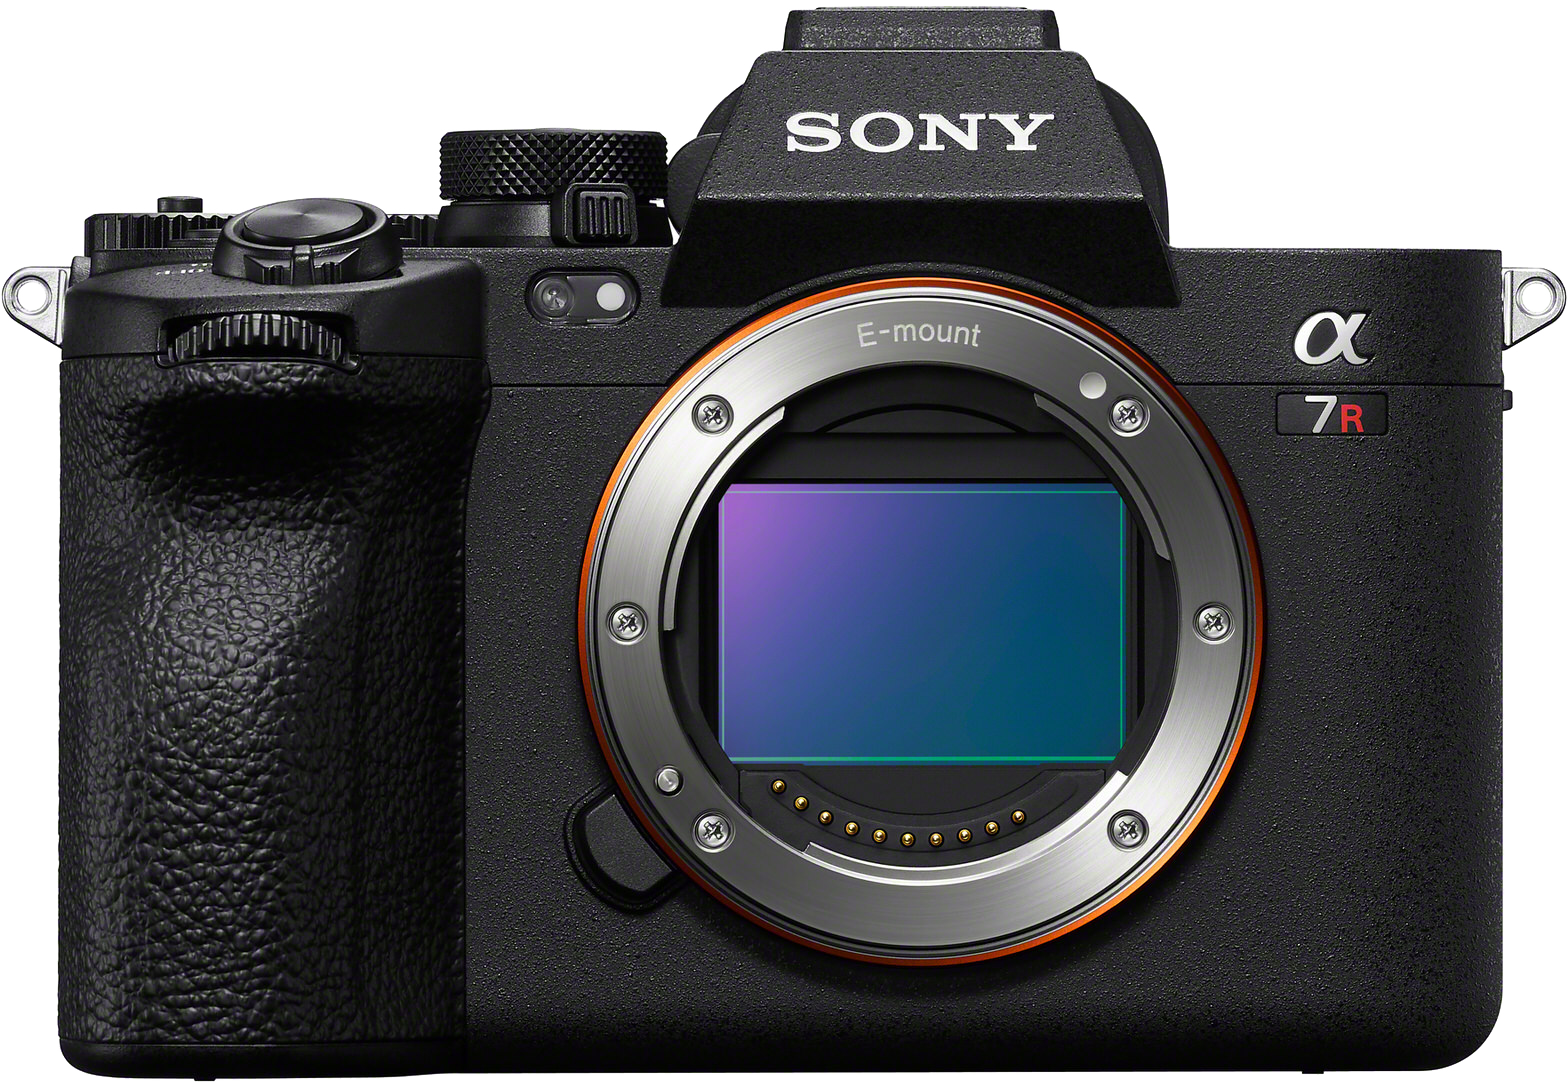
Now that we've got the camera set up out of the box, let's talk about attaching lenses, putting in memory cards, and taking your first photos. This camera is what's known as Sony E-Mount. The great news is that as of this recording, there are 74 different lenses from Sony that are compatible with it. Any lens marked as Sony E- Mount will fit on this camera. But it's important to note that only lenses marked as Sony E-Mount will fit on this camera. It's also worth noting that this camera is what's known as a full frame camera. Sony does make smaller sensor cameras, known as crop sensor or APS-C sensors, like the Alpha 6000 series. Those lenses will fit on this camera, but will not display the image properly. So when purchasing lenses, you're going to want to look for lenses that are designed for full frame cameras, specifically.
To attach a lens, remove the front body cap from the camera by twisting counterclockwise. Grab your lens, remove the back cap from it as well. And then you're going to want to align the white dot on the lens with the white dot on the lens mount of the camera. And then you twist clockwise until you hear the click. There you have it ready to shoot. To disconnect the lens, you're going to want to push the button that's located right down here. It's conveniently right next to where your ring finger will sit while holding the camera. You push that in, turn the lens counterclockwise and it pops right off.
Whenever you go to change the lens, it's important to remember to keep the camera with the sensor pointed down to prevent dust and debris from landing on your sensor, and then quickly put the body cap back on to eliminate as much time of that sensor being exposed as possible. This camera is compatible with two different kinds of memory cards: SD card and CFexpress Type A. Cfexpress Type A cards tend to be a little bit more expensive, but they are significantly faster and come in higher storage capacities. The SD card is the standard memory card that you're likely already familiar with, and they tend to be slightly slower in the read and write speeds, and in general lower capacity, but they're more affordable and a little bit more compatible. For example, my laptop has an SD card reader built in, whereas the CFexpress Type A card will require a dedicated card reader. This camera can take either card in both of the card slots, so whichever card you purchase will be perfect for using.
It's important to note that the CFexpress Type A cards insert with the label facing you as you use the camera and the SD cards insert with the label facing away from you. Whenever you get a brand new memory card, it's important to insert it in the camera and use the camera's internal formatting function from the menu system to ensure that the memory card has no extraneous data and is maximally compatible with your system. If you've had an amazing few days using your camera, you might find that the memory cards are full - once those photos are copied from the SD card to your computer, you can simply put the SD card back in your camera, reformat it to start fresh and keep shooting.
Now, it might seem a little silly, but there is a bit of a trick to how to hold the camera. Now, of course, you're not going to just grab it top down like this. It's pretty obvious that your right hand is going to grab the grip here. The ergonomics are fantastic where your finger is directly located on the shutter button. But for me, I like to position my left hand underneath the lens to give it a little bit of support. Using both hands gives me extra stability. I keep my elbows down to my side so I can hold the camera right up to my eye and have maximum stability while shooting. This also frees up my left hand to manipulate the various controls on the lens, and don't worry about those. We'll discuss those in a little bit in a later module. Once, feel comfortable holding it, let's turn it on and get it set up.
When you first turn the camera on, the first question it's going to ask is what language you want to use. I assume because you're watching me talk to you, you're comfortable in English, so that's the option I'm going to choose. There is a privacy notice that you can agree to, and then it will ask you if you want to connect to the Creators' app. I love the Creators' app. I use it all the time. I am actually literally using it at this exact moment to control the camera. I'm recording this on and I will walk you through how to set that up in just a little bit. So for now, let's push the trash can button to set up all of these settings on the camera. The date and the time, this seems a little bit silly, but do set these correctly. And I go back into the menu later to change these. If I ever cross time zones, for example, I live in Mountain Time. If I fly to Europe for a project and I take my camera with me, I will change my date and time settings to match the European time zone. because otherwise, when you come home and you say, well, what photo did I take on June 12? Your camera might say that you took it at 2:00 AM on June 13, and it gets a little bit confusing.
After you set the date and time, it's going to ask if you want to increase the Auto Power OFF Temp when shooting from a tripod. I do change this to set it to High because I don't want my camera turning off due to temperature issues and potentially ruining a take. It will not damage the camera. All it does is improve the usability. So I click Set now. It'll ask one last time to confirm. Click OK, and then you are ready to shoot. Now that your camera's all set up and ready to shoot, this is when I like to connect to the Sony Creators' app. It's super straightforward on an iPhone or Android. The app itself actually will walk you through all the steps, so there's no need for me to give you a step-by-step instruction. Just follow the steps on screen in the Sony Creators' app to connect to your camera. You can control the camera remotely. You can transfer images and videos directly from your camera to your phone wirelessly, which is beautiful if you go out and you take a shot that you're immediately excited of and you just cannot wait to get back home before you share it to Instagram.
The Creators' app is also what you'll use to download and install firmware updates for your camera, which is fantastic because it'll help keep your camera functioning like brand new even after you've had it for several years. Now that we've got the camera out of the box and ready to rip, I'm going to pass this off to Autumn to actually take some shots.
- Now that your camera is powered on and set up, let's talk about actually using it. Step number one is to choose a shooting mode. Set the top dial that's located next to the viewfinder to Auto. This is called the Mode Dial. When our mode is set to Auto, it auto adjusts our camera settings to optimize the image quality based on, you know, whatever you're shooting. So this Auto setting also has what's called Scene Recognition. So if your camera is pointed at a person, it will use different settings than if your camera is pointed at a landscape. No need to worry about what the camera is changing just yet, though.
One of my favorite features of this camera is the Real Time Eye Auto Focus. It's so smart that it can recognize different subjects that you're photographing and specifically focus on their eyes to ensure that you get a really great photo. You know, the eyes are the window to the soul, as they say. So it's important that we get the eyes in focus. Unless you know you're doing something for creative reasons, it can also track that subject so you never lose focus on them. The current subjects that this camera will recognize are human, insect, car/train, airplane, animal, bird, animal/bird - I use this one a lot when I'm shooting a bunch of different types of wildlife so that I don't have to keep switching between animal or bird.
For example, these photos are all from a single day in Botswana, where I didn't have to switch between animal or bird. To turn this on or off or to switch between subjects, you'll press the Menu button, navigate to the purple Focus tab by using your thumb to scroll on the control wheel, then scroll down to sub-menu number three, Subject Recognition to focus the lens.
When taking a photo, all you have to do is half press the shutter button. You'll hear a little beeping sound to let you know that the lens is focused. Then you can go ahead and fully press the shutter button to take the photo. This camera also comes equipped with touchscreen controls for the LCD screen. To turn the touch operations on and off, simply press the trash can button on the lower right of the back of the camera. With touch operations on, you can specify the position where you want to focus, simply by touching it on the LCD screen. You can also do the same thing to select a subject that you want to track. To turn Touch Tracking on, after enabling touch operations, tap the touch icon in the top right of the screen until you see the icon that kind of looks like it has wings on the right side. You can easily disable Touch Tracking simply by pressing the center of the control wheel whenever you're on the shooting screen.
After you take your first photo, you'll be able to review it on the camera's LCD screen by pressing the playback button, which is located on the back of the camera just to the left of the trash can button. To view numerous photos that you've taken, press the playback button and scroll with the control wheel forward and backward. To zoom in on a photo while you're in playback, press the Auto Focus-On button, which has a magnifying glass with a little plus sign next to the button. So use the control wheel to zoom in and out, and then the Multi-Selector Button, or as I call it, the joystick, located directly below the Auto Focus-On button to move around the photo while you're zoomed in. If you took two photos that are similar and you want to zoom in to see all the subtle changes between the two, while you're in playback and zoomed in on the area, use the rear dial left or the shutter speed dial, which we'll talk about more later. It's located directly above the Auto Focus-On button. Use this dial to switch between different zoomed in photos.
There are three different ways to access menus on this camera, and while that may sound overwhelming, they've actually made it incredibly easy to access quick menu options without having to actually go into the big overwhelming main menu. The first way to access the menu is by pressing the, you guessed it, the Menu button. This opens up the full menu with brightly colored tabs along the side. So from here you can access every single menu item. There are a lot of options here, which is fantastic that you can customize your camera this much, but seeing all of it for the first time is definitely a little bit overwhelming when you aren't sure you know what most of the options even do. So just a quick overview. The very top tab is called My Menu. It's the gray tab with a star icon. It's a customizable quick menu that we'll chat about in just a little bit. Below that is the Main Menu white tab with a house and camera icon, and here you can display and change your current shooting settings from exposure to file format to which memory card to write to. Next is the Shooting Menu, the red tab with a camera icon. This is where you set things like image quality, file format, and video recording settings like frame rate and resolution.
Then the Exposure/Color Menu is a pink tab with a + and - box with a camera icon, which is just like it sounds. You can adjust exposure and color settings like ISO exposure compensation, metering and white balance. Next is the Focus Menu purple tab with Auto Focus/Manual Focus and a camera icon, and this is where you choose your focus mode and focus area, as well as all of the auto focus subject recognition settings. Next is the Playback Menu, a blue tab with the play button inside of a rectangle. Here you can adjust different playback options like which memory card to playback, as well as some edit settings like crop rotate and delete.
Then the Network Menu, the green tab with the network icon, and this is where you manage smartphone, Wifi and Bluetooth connections. It's where you'll connect the camera to the Creators' app on your phone. And last is the Setup Menu. It's the yellow tab with a toolbox icon. This contains more general settings like date and time, monitor and viewfinder brightness, touchscreen controls, and customizing the various buttons and dials. Thankfully, most of the time you'll only be adjusting a handful of options. So that's where the second method of accessing the menu comes in really handy: My Menu. My Menu is the top menu tab, the gray tab with a star in it, and this allows you to customize and access commonly used menu items much easier and more efficiently than fumbling through the entire menu system. Things that I add to My Menu are Silent Mode Settings. You know, if you want to turn off the shutter sound or audio signals. Creative Looks, which we'll talk about in a later module.
Focus Mode, so Auto Focus or Manual Focus. Subject Recognition on or off, like we talked about earlier. As well as the Recognition Target, Monitor Brightness and Viewfinder Brightness. If you're photographing in a darker place, turning the brightness down helps to keep your eyes more adjusted to the low light. To add items to My Menu, you can do it directly from the My Menu page, or you can go through the full big menu and press the trash can button on your selection. Now, the third way to access the menu is the Function Menu. So we access this quick menu by pressing the Function Button, which is directly above the control wheel. This is my most-used menu for sure. I save it for my most commonly used items such as Drive Mode, Focus Area, Image Quality Settings, White Balance and a few others. Don't worry. We will cover what all of these are in the next few modules.
To set up this Function Menu, navigate to the Setup Menu, which is the yellow tab with the toolbox icon. Navigate to number three, Operation Customize, and then Function Menu Settings. These smaller, bite-sized menus really help to streamline any adjustments that you need to make, which just helps to keep you shooting more than, you just scrolling through menu after menu, you know, looking for that one setting. We've talked about a few already, but let's go through the key buttons and dials to better familiarize yourself with what each of them adjusts. Alright, the Mode Dial. We touched on this one at the beginning of the module, if you remember. So use the Mode Dial to select a shooting mode according to the subject and your purpose of shooting. Press the button on top of the dial, then rotate it to switch your mode. If it's already, switch it to Auto. The Auto Mode adjusts all of our settings for us, where M on the other hand stands for Manual, so you as the photographer will adjust each setting manually. The others, S, which stands for Shutter Priority. A, Aperture Priority. P, Program Auto. These are all modes that are in between Auto and Manual with varying degrees of creative control, and Nate will touch on these in the next module, so don't worry.
The Still/Movie/S&Q dial. The Mode dial is actually a double dial. If you notice three icons below. There's a camera icon, a video camera icon, and then the letter is S and Q. You adjust this dial by pressing the little lock release button on the front side of the dial and then turning it. This dial selects Still Image Shooting Mode, Movie Recording mode or Slow Motion/Quick Motion Shooting Mode, which is what S&Q stands for. Shutter button, I think we all probably know that this button is the button in the front of the camera here. That is the shutter button. That's certainly a key button to know. Exposure dials, there are three dials that control exposure or the brightness or darkness of your image. There are three settings for controlling your exposure too. So aperture shutter speed, and ISO. Nate will cover these in more depth in the next module though.
The front dial is below the shutter button and defaults to adjusting the aperture. The rear dial left just above the magnifying glass icon defaults to adjusting the shutter speed, and then the rear dial right adjusts the exposure compensation. So normally exposure is set automatically when in Auto Mode, but with this dial when in the other exposure modes, you can make the entire image brighter or darker. So turning it counterclockwise makes it brighter and clockwise makes it darker. This style also has a lock on it, so press the center button to release and then press again to lock it in place. Control wheel, this control wheel is a multi-use dial and it also has a very nice click to it. I'm a very tactile person and I love playing with the control wheel. But not only is it a dial, but each side is also a button that can be pressed as well. The left side of the control wheel defaults to Drive Mode. The top defaults to display setting and the right side defaults to adjusting ISO. The bottom is not set by default, but it can be customized if you'd like. Playback button, we already talked about the playback button, but this is, you know, another key button to know and familiarize yourself with. We also touched on the delete button or the trashcan button, but only for turning the touch screen operations on and off. It also does function as an actual trash can. When you review images with the playback button, you can press the trash can button to delete an image.
There are two ways to what you are photographing the LCD screen and the Electronic Viewfinder, also called the EVF. The cool thing with these cameras is that there is a sensor that detects when you hold the camera up to your eye to look through the viewfinder, the screen will turn off. And then when you bring the camera down from your eye, the screen will activate again and the viewfinder will turn off. Another important dial to familiarize yourself with is the Diopter Adjustment dial on the right side of the viewfinder. Everyone's vision is different and you may look through the viewfinder right out of the box and find everything to be a little bit blurry. While you're holding the camera up to your eye, adjust the dial until the display appears clear to you. Using the viewfinder is a fun way to determine whether you are left or right eye dominant. For instance, I'm left eye dominant. Nate is right eye dominant. This isn't really anything that matters, but I hadn't really thought about it until I got into photography. But it's significantly more comfortable for me to look through the viewfinder with my left eye, and you may find that as well.
A few quirks, let's say, to know about the LCD and the EVF. The viewfinder will not activate if the screen is pulled out away from the camera. It thinks that you're using the screen and it will therefore prioritize it. Also, the LCD will turn off if something is blocking the viewfinder sensor like dirt or a camera strap or something. So if you don't have the camera up to your eye and the screen seemingly won't turn on, but you can see that the viewfinder is activated, try cleaning off the eye sensor, which is the little piece below the viewfinder. I personally prefer using the viewfinder when I photograph as it helps me to block everything else out apart from, you know what I'm seeing in the frame. I feel like it helps me to compose better photos and I can clearly see when things are in focus or not when looking through the viewfinder. To each their own, of course. But I recommend, you know, playing around with using both and see which one that you prefer. It's easy to get caught up with shooting, and then all of a sudden your memory card fills up or the camera battery dies and it's frantic. The camera displays an indicator for both the memory card shots, remaining indicator displays in the top left screen with a little SD card icon and a number next to it, and then the battery life remaining displays in the top right with a percentage next to it. It's important to keep an eye on both of these so you don't unexpectedly, you know, miss shots due to the battery dying or your memory card filling up.
OK, that was a long module - hopefully you're still with me. If you're antsy and you absolutely cannot wait to get out there and take your first photo, even before you finish this course - here's a quick and great beginner setup to get you started. Set your camera settings to Wide Focus Area, Continuous Autofocus, Auto White Balance, JPEG File Format, and Single Shooting Drive Mode. All right, now get out there and happy shooting.
- Well now that Autumn got you set off on the right track, hopefully you were able to go out and take a couple good photos to get started. Let's start refining your skills right now. And the first thing to talk about is the auto focus. This camera has one of the most advanced focus systems of any Sony camera. And there's a lot to know, but it's beautiful the way that you can fine tune it to exactly what you're trying to shoot.
So the first thing I want to talk about is Auto Focus, Single vs. Auto Focus Continuous on the back screen. This will be referred to as AF-S or AF-C. Now the AF-S means that it's going to focus one time, when you push the shutter, you'll hear kind of a beep as it locks on the focus, and it will stay focused there as you continue taking photos. AF-C, the Continuous stands for continuous focus. So as you push the shutter, it will continuously refocus or track with one of your subjects. You can also fine tune your focus zone. So the default is what's called Wide, and that means that the entire screen that you see is available as a focus area.
I like to use what's called Zone Focus. If you select this on the back menu, you'll see a small box shows up on the screen - it'll default to the center. The focus will only grab subjects that are inside that box. Now using this little thumb pad, Sony officially calls it the Multi-Selector Button, but normal people just say joystick. You can move that box around the screen. So if you want to have a subject in the lower left corner, for example, you can put the box on that lower left corner, get the composition you want, and it will focus in that area only and disregard the rest of the frame. There's a bunch of other options beyond Wide and Zone.
There is also Center Fix, Spot: M, Expand Spot, and a Tracking Spot. There's a lot of literature online to explain what these are, and we can talk about them a little bit more in some later modules, but for now, I think just using the zone and the wide is a beautiful way to get started on your auto-focus journey. In Module 2, you heard Autumn use the term exposure and exposure compensation. Let's talk a little bit more about what that means. An exposure is, of course, just a word that means more or less how bright or dark your image is. We're going to aim more or less for 0 - correctly exposed.
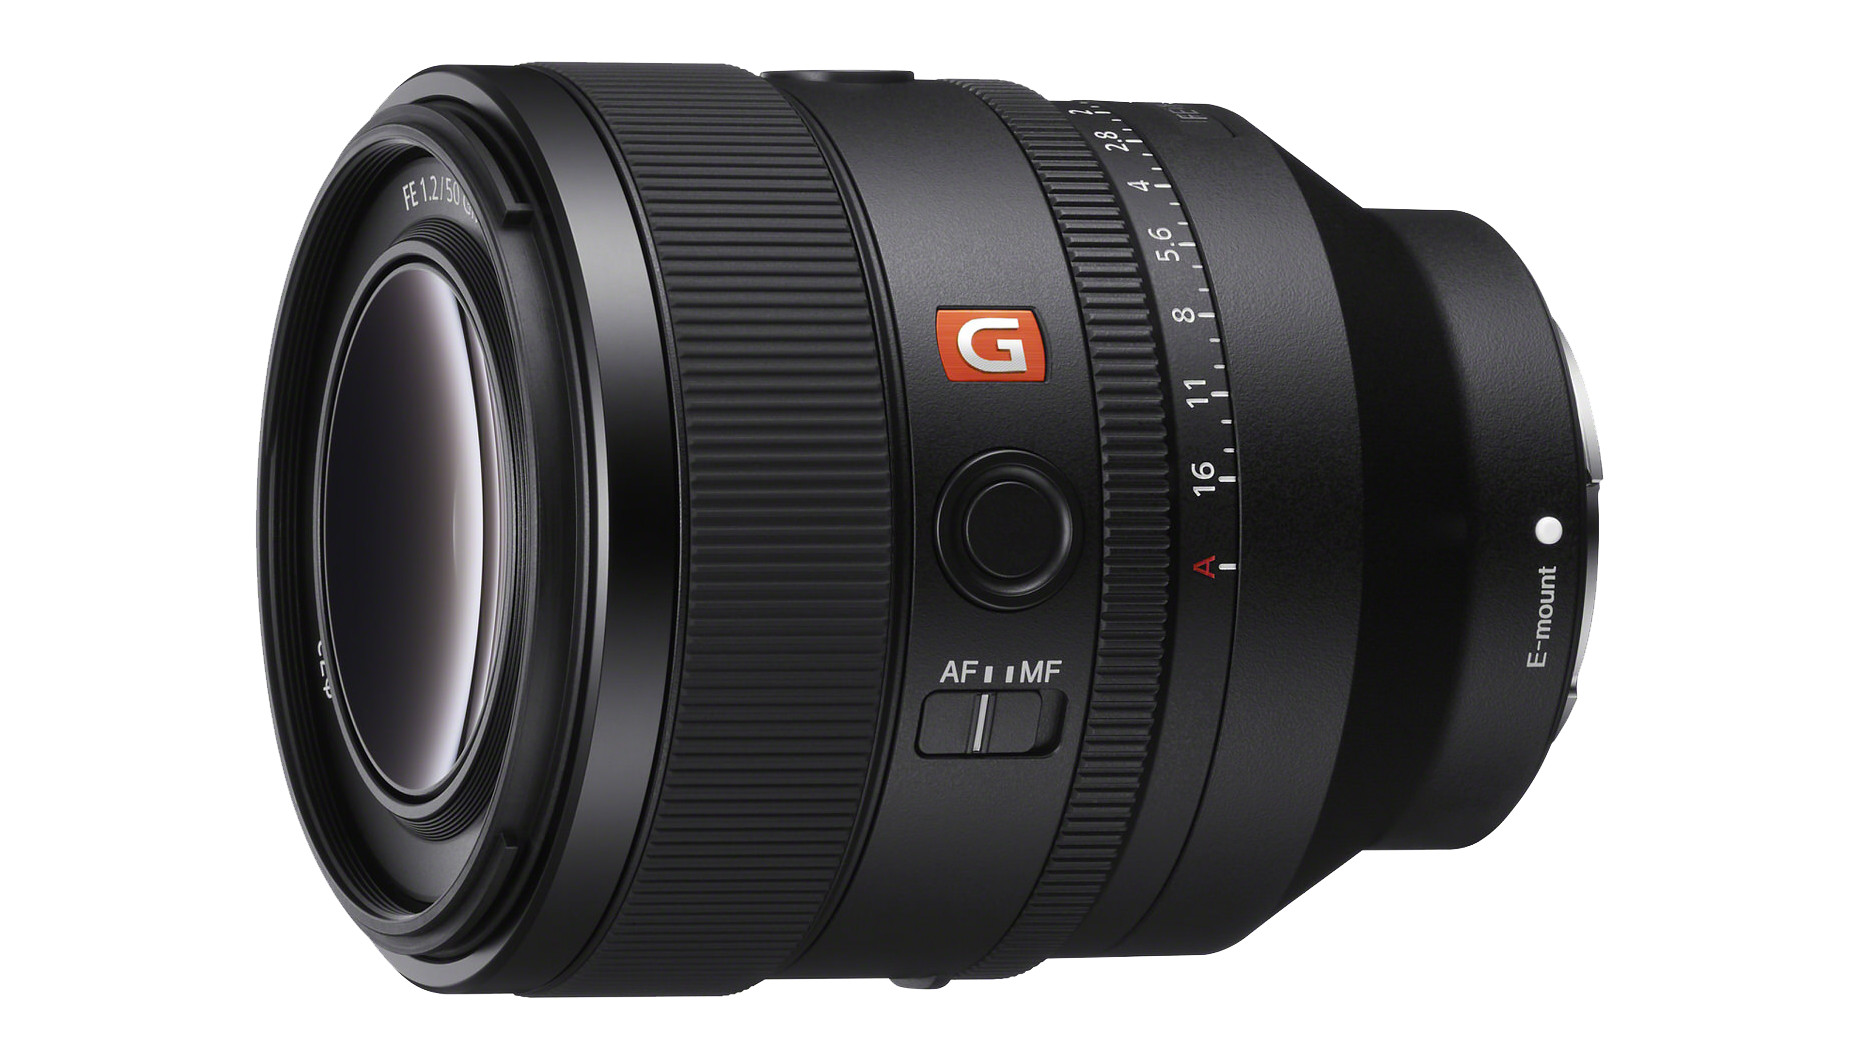
There are three settings that you can manipulate to control the exposure in your camera, and that is what's referred to as the exposure triangle. The top point on the exposure triangle is aperture. And aperture refers to how wide the opening is on the lens and how much light then hits the sensor of the camera. To think of aperture, it's basically an iris that opens and closes. So the lower the F number, the lens I'm using here is what's referred to as F2.8, the lower that number is, the wider open, the aperture on the lens is. And the higher the number, for example F16 or F22, the smaller that opening is, and the less light gets through. A smaller opening with less light coming through will make for a darker image, and a wider open with a lower F number will make for a brighter image.
Aperture also controls a mechanism known as depth of field that refers to how much of the image is in focus as you move away from the camera or closer to it. So F2.8, a wider aperture or a lower F-stop number will give you a thinner depth of field. So you'll have one subject in focus, but everything in front of it and behind it will be out of focus. A higher F number like F22 will be a smaller aperture, but give you a deeper depth of field. So more elements in your frame will be in focus. The second item on the exposure triangle is the shutter speed. Think of this like the blinds on a window. It's literally the shutter opening and closing and the amount of time it takes for that to happen. As you might expect, a faster shutter speed will let in less light. A slower shutter speed will let in more light.
Much like aperture, shutter speed in addition to changing your exposure has a secondary effect, and that is motion blur. So with fast moving objects, a slow shutter will have a longer exposure time, which means you will actually see the motion blur of that moving object with your slower shutter. Whereas conversely, a faster shutter speed will freeze that action because the movement is slower than the actual shutter itself. And that's how you get those really crisp photos of say, a baseball or a waterfall or a running animal. The third and final corner of the exposure triangle is what's called ISO. You don't really need to know exactly what that stands for, but the gist of it is that it is the sensitivity of your camera to capturing light. A high ISO number, like say 4,000, will capture a lot of light and make for a very bright image. And a low ISO number, for example 100, will capture less light and make for a darker image.
Just like the other two, ISO does have a secondary component where higher ISO numbers, even though they make for a brighter image, will cause a slightly noisy final image. It kind of looks a little bit like film grain, whereas a lower ISO number will be a cleaner image with more natural details. Now that you have a handle on the exposure triangle, it's time to move this dial off of Auto and start making some intentional choices with our exposures. So in some scenarios, you'll find that the aperture is actually the only setting that really matters, say for a portrait or maybe a still life macro shot. So in this case, you don't want to have to worry about all three corners of the exposure triangle, and that's where Aperture Priority comes in. That is the A on this top dial. You can set your camera to Aperture Priority by turning the mode dial to A, and then the camera will automatically adjust shutter speed and ISO for you, so your image is properly exposed while you change the aperture to suit your creative goals.
Now, similarly, Shutter Priority does the same thing, but just for shutter speed. Turn the dial to the S, and if you're photographing a moving object, for example, you can choose if you want to fast shutter to freeze the action or slow shutter for beautiful motion blur, and the camera will compensate the exposure using aperture and ISO. There's also a setting, the P on this dial stands for Program Auto that allows you to control the ISO to get the brightness where you want it, and the camera will automatically adjust both the aperture and the shutter to get the exposure exactly how you want it.
Now, the fun thing when you're shooting in Aperture Priority, Shutter Priority or Program Auto, is that the camera is not going to choose your exposure entirely for you. You actually get a little bit of creative control over how bright or not bright the image is, and that is known as exposure compensation. Now for exposure compensation, you're going to use this dial all the way on the far right of the camera, and by turning that either clockwise or counterclockwise, it will tell the camera that you want the image to look brighter or less bright. The cool thing about Sony cameras is that it will give you a live preview of your exposure on the back screen or in the viewfinder. So you can actually just turn this dial, see how it looks, and make the decision in the field. There's really no surprises. Gone are the days of shooting a roll of film and waiting a month to find out if you didn't get any photos of your vacation.
In addition to the back screen, giving you an image preview to show you how bright or dark your image is, it actually has an indicator on the back screen also between the F-stop and the ISO. You'll notice as a default it says 0.0. This is your Exposure Compensation Meter. If you turn the dial counterclockwise, the image will get brighter and this will change to +0.3, +0.7 plus one, etc. And if you turn it clockwise, it will go negative the same amount. The +1 indicates that your image is one stop of light overexposed, what the camera is determining to be a neutral exposure. And -1 would be the equivalent of one stop of light underexposed from what the camera determines to be a neutral exposure. Now, I would like to say that I don't think overexposed or underexposed, although those terms sound a little scary, they don't necessarily mean an incorrect image. There will be scenarios where you want to do that. Say you're photographing a sunset over a beautiful mountain, your eyes will want the mountain to look a little bit darker, so you will probably choose to underexpose the image a little bit to retain the colors and details in the bright clouds. So you'll want to turn that dial maybe to say -0.3 or -0.7. The camera is telling you that that's slightly underexposed, but it is not telling you that the exposure is wrong. That is the basis of making artistic choices to reach your own creative goals and capture the image that you want.
- Now that you have a handle on exposure and focus settings, let's add some style with Creative Looks. There are a number of presets or Creative Looks as Sony calls them, built into this camera that can be applied to your photos when shooting to adjust things like contrast, highlights, shadows, saturation, etc. This gives you more creative control over how your photos turn out without having to use any photo editing software on your phone or on your computer. There are 10 Creative Looks installed and you can tweak these to your liking. There are also six slots for Custom Looks, a function that allows you to register your favorite settings. Note that Creative Looks cannot be used when you're in the Auto Mode.
To show you a few of these - Vivid and Vivid 2 are really great Creative Looks to use for landscapes, flowers, and anything in nature really, as the saturation and contrast are raised to make for more striking and colorful scenes in Vivid. And then Vivid 2 builds on Vivid by adding some more brightness and even more clarity. One of the other looks is black and white, which is a classic. It's a really neat look to have images come straight out of your camera without any other editing.
Creating black and white images is a really nice way to emphasize things like texture, minimalism, mood and composition. It's really easy to customize and tweak these looks as well. Press the Menu button, then you can navigate to the Exposure color tab, which is the pink one. Choose number six, Color/Tone, and then Creative Look. Choose a Creative Look that you want to tweak. Then press the right side of the control wheel. You'll see the adjustments at the bottom of the screen, and you can add more by pressing up on the control wheel, or you can subtract by pressing down on the control wheel. When you're finished, simply press the center of the control wheel and you're done. Another cool effect that this camera has is called the Soft Skin Effect, which gently smooths out skin and is fantastic for portraits. You can choose from low, mid, and high to set the amount of smoothing. The Soft Skin Effect can be found in the same menu location as Creative Look.
Normally when you press the shutter button, the camera takes one photo at the time it's pressed. A setting called Drive Mode allows us to alter how the camera behaves when the shutter button is pressed. Determining both the number of photos taken with each press and how long after it's pressed to take the photo. There are nine different modes, but to start out, you really only need to consider three of them: Single, which is the normal shooting mode. When you press the shutter, it just takes one photo. Continuous, which shoots images continuously while you press and hold down the shutter button and Self-Timer, which shoots an image after either two, five or 10 seconds have elapsed since the shutter button was pressed.
Single is what you'll use most of the time for everyday scenarios. Continuous is great for fast action like animals running or sports, etc. If you pair the Continuous Drive Mode with Continuous Auto Focus that Nate talked about in the last module, the camera will focus during each photo that's taken while the shutter button is pressed down. So if you use Single Auto Focus with Continuous Drive Mode, the camera won't refocus the subsequent photos until you half press that shutter button. Again, use the self-timer for all of those gorgeous selfies that you take. But this is also great for taking group portraits, or for long exposures when you don't want your camera to shake at all. Even you pressing the shutter button does make the camera shake a little bit.
Different types of light, like sunlight, shade, or a light bulb have different color temperatures. So in our cameras, the way that we deal with this is called white balance. So basically white balance is the setting that makes white things white in your photos. So you can adjust the white balance when the color in the image doesn't quite come out as expected or when you want to, you know, change the color on purpose for a creative expression. If the color doesn't come out as expected, your photos can look either too warm, like too yellow, or too cool, or like blue. As you start out using Auto White Balance, you'll find that the camera typically does a really great job at finding the correct white balance for a particular scene.
But there are instances, certain scenarios when it can get tricked a little bit and struggles. This is when we can move out of Auto White Balance and choose a more particular white balance setting. There are 11 white balance presets that you can choose from, one manual adjustment and three custom white balances that you can set. Apart from Auto, which I use quite often, daylight, shade, and cloudy are commonly used white balance presets. Each one is used in the shooting scenario, so daylight when it's a clear, bright day, shade when you're shooting in shade and cloudy...you get it. So the daylight setting is the coolest of the three. Cloudy is a bit warmer, and then shade is very warm. So I recommend playing around with the white balance presets to see what you like and what all of them do because like I mentioned before, it can be used to get creative with your photos. Now that we understand how white balance controls the color accuracy of your image, let's take a step back and think about the overall quality of the file your camera creates.
There are two file types that we can choose for our camera to create for us a JPEG or a RAW file. I'm sure you're familiar with what a JPEG is. It's a smaller file that's ready to use and share straight out of your camera. A RAW file on the other hand, is a much higher quality file with a larger file size, but it requires processing or editing. I like to think about RAW vs. JPEG, like cooking. Shooting with RAW files is like cooking a meal from scratch. You get to choose which fresh ingredients go in it. You spend more time preparing and cooking it. Shooting with JPEG files is more like cooking a pre-prepared meal. You can add seasonings after it's made to enhance it, but you can't change the ingredients. And if you don't like how it turned out, there's not much that you can do to change it. So to keep it short and sweet, use JPEG if you need quick results and minimal editing and use RAW if you want full control in editing, especially for professional work. Most cameras nowadays offer an option to shoot both RAW and JPEG at the same time, giving you the best of both worlds. The only real downside is if you have limited storage space on your memory cards or on your hard drives. But if this is, you know, more casual shooting and you aren't planning to dive into any intense editing, you can just shoot with jpeg.
- Okay, so now let's get into the fun part: Video. Switch your camera into Video by using the double mode dial. You're going to use the bottom part that you control with your pointer finger there. And then your camera will be in Video Mode. Now there is a ton that we could talk about here, but I'm going to keep this a little bit simple so that we can get you off and shooting as soon as possible.
So let's start with the format being XAVC S 4K. That's a high-efficiency compression codec. It'll make manageable file sizes, but still have very high image quality. Set your camera to 30 frames per second. We're going to use AF-C for Auto Focus Continuous. The reason we do that is because with video, unlike stills, of course, it is moving and so you don't want your camera to just focus one time and then the subject moves and it's out of focus. So you want it on Continuous Focus so that it tracks with a moving subject - that seems fairly straightforward, right?
For the exact same reason, you're also going to want to turn off Auto White Balance and choose one of the predetermined white balances like daylight, shade or cloudy. This again, is because with still images with Auto White Balance, if you take two photos and the camera determines the white balance slightly differently, it's no big deal, you can fix that in editing. But with video, if you are moving from left to right and it tracks from a blue or white balance to a warmer in the same clip, it's very difficult to compensate for and it looks a little bit strange later. So again, XAVC S 4K, 30 frames per second, Auto Focus Continuous and a manual white balance, usually on daylight.
Now this camera can film 8K. It can also film 4K and it can film HD, which is also known as 1080p. I think 4K is the perfect sweet spot for people just getting into video. 8K makes for massive file sizes and at this point still the vast majority of screens can't display that. MacBooks can't display it. Most televisions can't display it. In general, there's no need for 8K video right now. 1080p is small file sizes, which is plenty good for social media videos, but this camera films beautiful 4K footage. It's a perfect middle ground. It gives you the ability to crop in later if you're subject is too far away. That's where I would recommend starting.
Now the main thing to keep in mind for video is your shutter speed and frame rate interplay. This is known as the 180 degree shutter rule, and it's a bit of a legacy from the old film cameras. The days when the shutter used to literally be a disc with half of it cut out and its spinning was what exposed the film as it flew by the lens.
Nowadays, everything's digital. We still just use this rule as a legacy, but it's a beautiful way to get nice cinematic looking footage. You want your shutter speed to be twice your frame rate. By which I mean, if your frame rate is 30 frames per second, you take the 30 and you put a one over on top of it and then you double it. So 30 frames per second, your shutter speed should be one over 60 or one 60th of a second. If your frame rate is 60 frames per second, your shutter speed should be one over one 20.
Now of course, one of the other major differences between still photos and video, is that for video you're going to be capturing audio. Now this camera does have a built-in microphone, but for slightly higher quality audio, I like to use external microphones. There's a bunch of different ways to do it, but right here on the side, if you open this door, there is an 1/8-inch microphone jack. There are a thousand different after-market options for microphones that will mount on the camera and you just use a cable to input it there, and then the camera will automatically record audio from that microphone. Alternatively, this little cover on the top is what's known as the hot shoe. If you simply pull that off, it reveals the hot shoe and there are microphones that slide right in the top.
One of my favorite microphones of all time is made by Sony. It slides right in there, and automatically the camera will record from that microphone and it sounds beautiful. It's worth mentioning that right below the microphone input is a second door that opens and there's another 1/8-inch jack that is for headphones to plug in so you can monitor the audio. It is worth mentioning to pay close attention to which one of those you're using. I have before plugged my headphones into the microphone port and the microphone into the headphone port, and then I couldn't understand why I couldn't hear anything and the camera wasn't recording audio. Hello, it's me. I'm the problem.
Pay attention to which ones plugged in where and you shouldn't have any problems. I like to use the headphones to monitor the audio to make sure that I'm not recording it too quiet or too loud, but on the back screen of the camera - there is also an audio level indicator known as the VU meter. In general, if you're seeing the green line go up about halfway while noise is happening, you're in a good range. You just want to make sure that you're not seeing any red at the far right side of that indicator. If you have your microphone plugged in and it is constantly hitting the right side of it and showing you red, that means that the audio is clipping and it is going to sound a little bit weird later. And so you're going to want to go into the menu to the audio recording level and just decrease the level at which the camera is recording the audio. This metric ranges from zero to 31. In general, I'm happy around 16 or so, but it really depends on the microphone you're using, so just keep a close eye on that.
Now that you've got a bunch of beautiful photos on your memory card, it's time to talk about offloading them. The very bottom door opens up and there's a USB-C port, and you can plug that directly into your computer and offload the photos and videos that way. Alternatively, I prefer to pull the memory card out and either insert it directly into my computer or using a memory card reader designed for SD or CFexpress Type A cards, read the images off the card that way. Now you will want to make sure that if you're viewing the images on the card, you transfer them either into a cloud backup or to an external hard drive. I'm personally a big fan of this Sony brand, SSD, but there are a bunch of different options out there for you to choose from.
Please just be careful to make sure that you copy the images off of the memory card either to the cloud or an external hard drive before you format the card. Don't just look at them on your computer and then trust that they're copied. Trust me, this is a lesson everybody learns the hard way.
If you've taken some photos that you're exceptionally proud of, it is good practice to have multiple backups as well. For example, Autumn and I went to Antarctica last year, a once in a lifetime trip that I've been dreaming about since I was literally 10 years old - those photos are stored in four different places because I refuse to ever live in a world where I can't find them.
It's great for the health of your memory cards to format them regularly. Once you've made sure that you've backed up the images off of it, I put it back into my camera, reformat the card so it's fresh and ready to go for your next trip. Also, please avoid pulling the memory card out while the camera is still writing to it and avoid turning the camera off until you see that it is finished writing all of the images to the memory card.
It's always good practice to have extra memory cards with you when you go out to take photos, just in case you either fill one of the cards up or God forbid you have a card failure, it's always nice to have backups. There's nothing worse than driving two hours into the mountains, hiking to the top of a mountain for sunset, and then realizing that the only memory card you brought with you has all of the photos from your niece's bat mitzvah and you can't possibly clear those off and then now what? You're just on a mountain without a camera. Very sad. Bring an extra card. They weigh nothing. They don't cost very much. Just have a couple extras with you.
Along those exact same lines, please buy an extra battery and bring a spare battery with you. Make sure they're charged. Every photographer has the experience at least once in their life where you show up to a shoot and either your battery is dead or your SD card is full. Just bring extras. They weigh nothing. It's very easy and it's very important. You can charge the batteries by plugging into the USB-C port on your Alpha 7R V, but it's also good practice to use that external charger that came with the camera because then you can have a battery on the charger while there's one in your camera that you're using, and then you just always have one of your batteries fully charged.
If you don't want to go through all the trouble of either plugging in your camera or using a card reader onto your computer, you can actually use the Sony Creators' app to transfer the images directly from the camera to your cell phone. Connecting is very easy. Transfers are fast. It's a very cool way to immediately share photos that you're proud of with your family and friends. Now, if you follow these best practices and the ones from previous modules like spare batteries, spare memory cards, keep the strap around your neck, honestly, you're ahead of like 80% of other professional photographers and you're going to be ready to hit the ground running and start taking some killer photos.
- Thank you so much for joining us. We hope that this has been helpful for you and get you started off on the right foot with your Sony Alpha 7R V.
- If you'd like to continue your educational journey, there are tons of additional courses and information right here on the Alpha Camera Academy or if you'd like to practice your newfound camera skills out in the field, Autumn and I teach in-person workshops all over the planet, and it is an incredible way to practice your camera skills in a beautiful location with two beautiful people.
- You can find all of our trips at inthewildworkshops.com, or you can find both of us all around the web as @autpops, , and I am @nateinthewild.
- Thanks again so much for joining us. Hope you have a great rest of your day and happy shooting.
Rate this course
Your feedback helps us improve our content.
Course rewards
Complete any course and earn a unique badge to celebrate your progress. Collect them all as you level up your skills!