Get To Know Your Alpha 7 IV
Clear steps, quick wins and real-world tips to help you feel at home with your Alpha 7 IV camera fast.
- Details
- Module
- Quiz
About this course
Learn how to get the most out of your Sony Alpha 7 IV in this beginner-friendly course with instructor Matt Johnson. Whether you just unboxed your camera or want to feel more confident shooting photos and videos, this course walks you through everything step by step. You’ll discover what every button does, which memory cards and lenses work best, and how to use essential shooting modes like Intelligent Auto, Aperture Priority and Shutter Priority. You’ll also learn how to take advantage of Sony’s Creative Styles for better-looking images and how to set up your Alpha 7 IV for video recording. By the end, you’ll know exactly how to use your camera to capture stunning photos and videos with confidence.
Course highlights
Instructor
Matt Johnson is a filmmaker, YouTuber, and content creator specializing in wedding films and educational content for filmmakers and photographers. He teaches camera techniques, lighting, and video editing through his YouTube channel, helping creators bring their stories to life. Matt has filmed weddings worldwide and across the United States. Whether documenting unforgettable moments or sharing practical tutorials, he is passionate about inspiring others to create cinematic, meaningful films.

Matt Johnson
Photographer
Featured gear
Skills
Transcripts
- This is the Alpha seven four. My name is Matt Johnson. I'm a photographer and content creator, and in this Alpha Camera Academy course, I'm gonna be helping you to get to know your Alpha seven four camera. We're gonna talk about getting it set up, how to take your first photos and then expand beyond just using the auto mode, covering easy creative controls, and even video recording. It's gotta be a lot of fun.
This is the Alpha 7 IV. My name is Matt Johnson. I'm a photographer and content creator, and in this Alpha Camera Academy course I'm going to be helping you to get to know your Alpha 7 IV camera. We're going to talk about getting it set up, how to take your first photos, and then expand beyond just using the Auto Mode, covering easy creative controls, and even video recording. It's going to be a lot of fun.
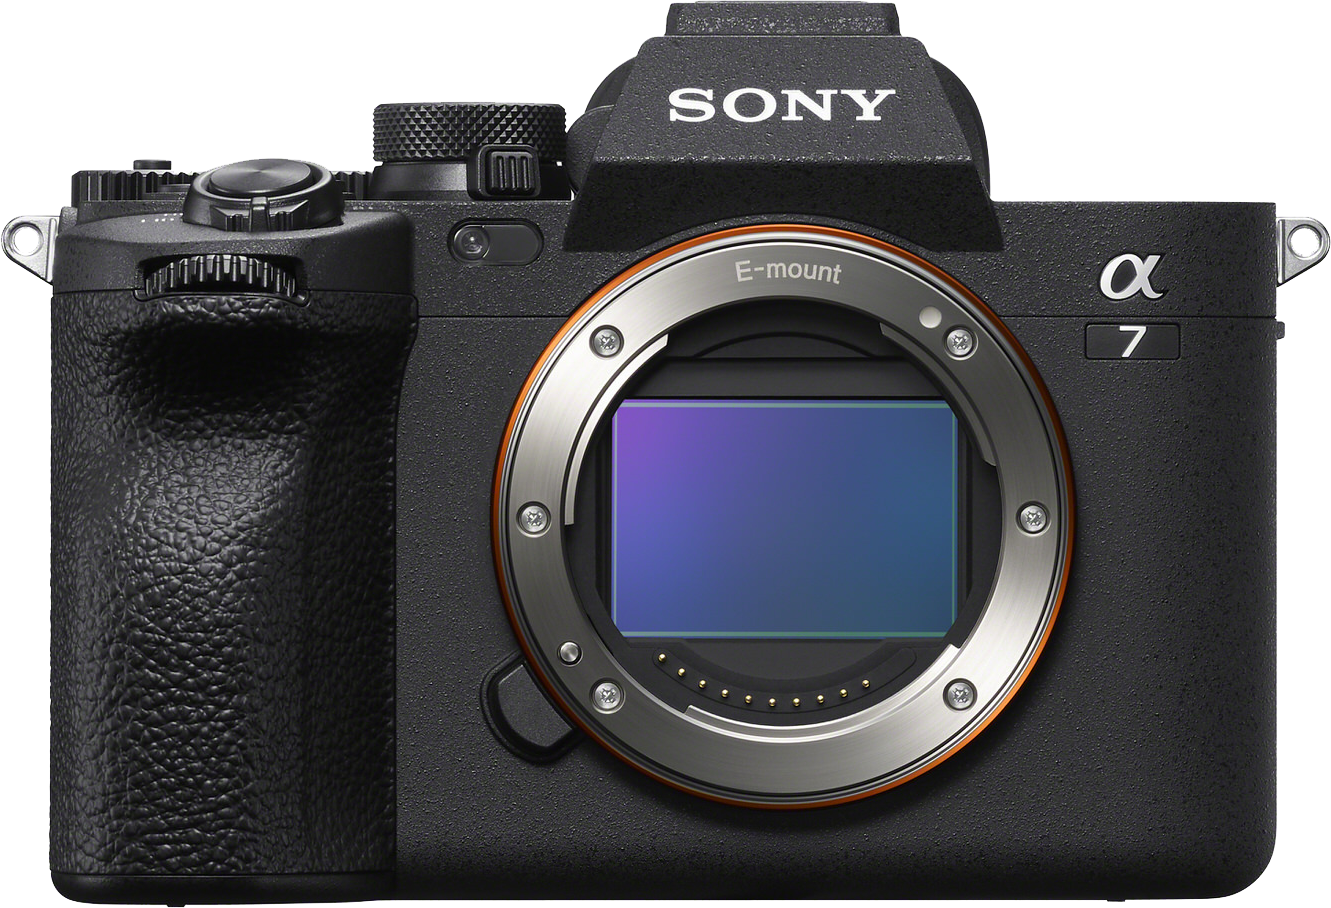
Let's start where you are, probably starting by talking about everything that you get in the box with your Alpha 7 IV. Inside the box, you will of course, find your camera body as well as a camera strap that may already be attached to it, plus a battery, a battery charger, and a USB-C cable. Before you do anything else, I would recommend inserting the battery into the charger and charging it for a few hours if possible. These batteries usually ship with some charge to them, but there's nothing worse than getting your camera already to take pictures, only to discover the battery is dead, so I highly recommend charging it if you have time.
With that done, you now need two more items that are not going to come in the box with your camera, and these are extremely important because otherwise your camera is just going to be a glorified paperweight. The first item is a memory card, and if you look at the side of your camera, you can slide this switch down to open the memory card door, and here you'll be presented with two memory card slots, one of which can take a CF Express Type A memory card, or SD card, while the other slot can only take an SD card. A CF Express Type A card is the newest, fastest and sturdiest type of card that your camera can use, but it's going to be more expensive to purchase a CF Express Type A card for a similar storage size to an SD card.
For SD cards, which can be confusing because there are a ton of different brands, sizes, speeds, et cetera. This sweet spot, in my opinion, is a 128 Gigabyte UHS-II SD card that has a V 30 speed rating, which will be indicated as the name implies by the letters V and the numbers 30 after it on the card sticker. These cards will be large enough to take a lot of photos and fast enough to let you take them quickly, while also enabling you to record video at all of the frame rates and resolutions that the Alpha 7 IV supports as well. So you can think of an SD card like this as a very rounded option that will handle everything that the camera's capable of doing very well, while also being affordable.
Next, for the second item that you'll need, that does not come in the box with your camera. In addition to the memory card, you are also going to need a lens that you will attach to your camera to allow your camera to see, for lack of a better word. In this tutorial, I'll be using a Sony 24-70mm F/2.8 G Master II lens. That is one of the most versatile lenses that Sony makes. Capable of getting wide shots, tight shots, and everything in between, while also offering very impressive low light performance. I love this lens. I would highly recommend checking it out, but you should also be aware that Sony currently makes over 75 different lenses and they're creating new ones all the time. So you have a ton of options when it comes to building out a kit of lenses. But take it from me. The 24-70mm is a great starting point.
Last but not least, it's now time to attach this lens to your camera. And this is very easy to do. Simply remove the plastic cap on the back of your lens by rotating counterclockwise and pulling it away from the lens. Then remove the cap from the body by rotating that counterclockwise, putting that down, and then grabbing your lens. Be careful whenever you do this because dust may get into your camera body and onto the sensor. And to help prevent this, I would have your lens ready to be attached next to you. And then attaching your camera to your lens is as simple as finding the white dot on the lens and the white dot on the camera. Lining those up and rotating the lens clockwise to attach it. And the lens is going to click indicating it's connected. And if you ever want to remove the lens to either swap it out for a different lens or replace the cap on the camera body, all you have to do is locate the release button near the bottom of the lens mount, press it and rotate the lens counterclockwise, and it will easily be removed from your camera.
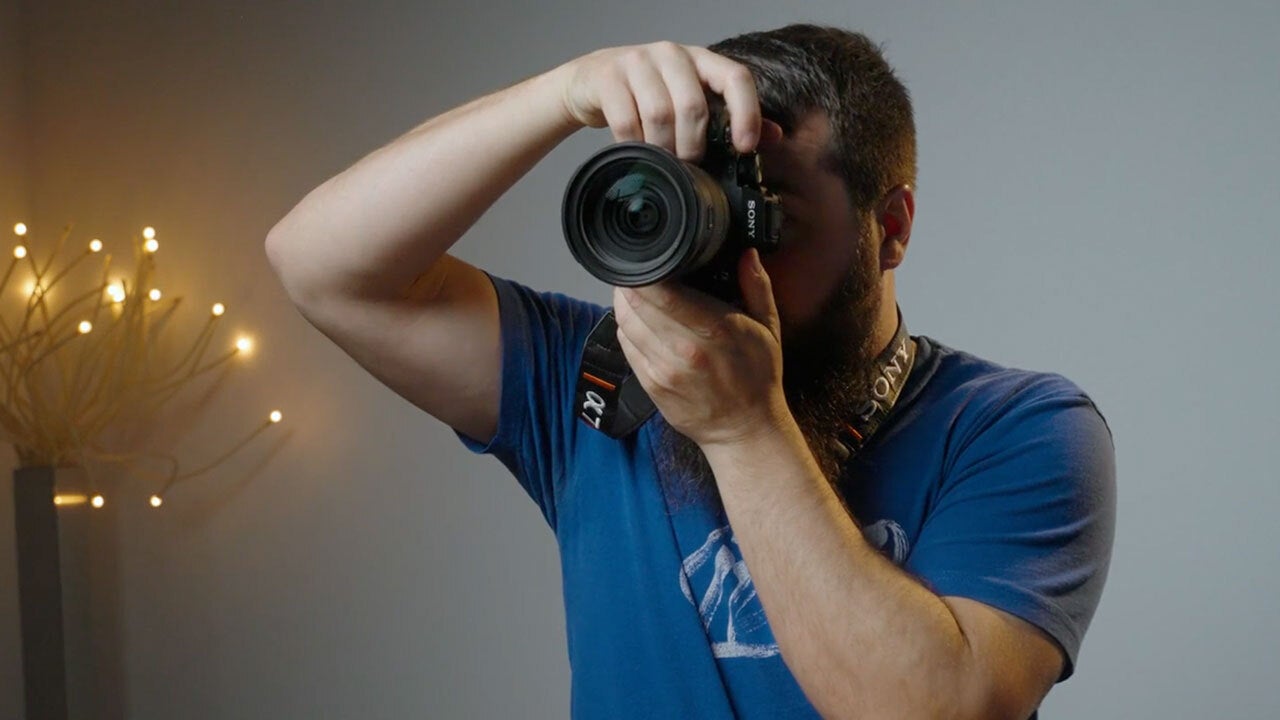
Now, I want to draw your attention to where this lens release button is located on the camera, because we need to take a moment to talk about how you hold your Alpha 7 IV when you're getting started. I always recommend wearing the camera strap to ensure that you don't drop the camera. And then holding the camera is as simple as grabbing it from the back with your right hand. So three of your fingers are going around the grip very comfortably. Your thumb goes around the back of the camera, and your index finger will rest comfortably near the shutter button at the top of the camera. This is a very comfortable position where you can easily access all of the buttons and dials on the back of the camera with your thumb and all the buttons and dials on the top in front of your camera with your index finger.
And then bringing things back to that lens release button down here at the front bottom, I want you to notice that your ring finger will rest very comfortably right next to it. So if you want to remove a lens, it's going to be very easy for you to grip the camera, press that button with your ring finger and then rotate the lens to remove it. By holding your camera with the grip in this way, you'll have a very firm grasp of it, which will prevent it from being dropped, and all of the controls will be at your fingertips. And if you want to take a photo, all you have to do is bring the camera up to your eye, or you can even rotate the camera vertically to take a vertical picture as well, and press the shutter button. And with that, we have just set up your camera, and there's plenty more to learn about about all these dials and buttons and how the display works, but I think you're ready for it. So let's get to the next lesson.
Now that your battery is charged, memory card is inserted, and lens is attached to the front of your camera, it's time for us to turn it on, dial in a few settings, and then talk about what all of these buttons and dials do.
On your Alpha 7 IV to power on your camera, simply grab it and flip the power switch on the top near the shutter button clockwise, and it'll power on. Then I want you to turn your attention to the back of the camera where you're going to find the articulating screen. You can pop it out backwards and rotate it around to make it visible, tilt it back and forth. It's very versatile. I'm going to nestle it back into the camera with the screen visible now, which is how I recommend having it as we go through the rest of this lesson.
The camera will then take you through a first time setup whenever you first turn it on, where it asks you the language that you want the interface to be in, whether you want to use the Creators' smartphone app to set up your camera, which you can press the trash can button on the back, bottom right of your camera to skip. It'll ask you for the time zone and the date and time that you are currently in, and then with those settings dialed in, the Alpha 7 IV is going to present you with a preview image on the back screen of what the camera sees. Look, there's me. Wow. And at this point, you can press the shutter button to take a photo, but of course, there are a lot of other buttons and controls and settings that we need to go over first. So get excited. We are getting there.
Let's start by talking about some of the most important controls of the camera, beginning with the mode dial at the top of the camera. There are two dials here, but the one that you're going to want to focus on first is the larger one that has a lot of letters and numbers like P-A-S-M, 1-2-3, and most importantly, for getting started with taking photos. You have the word Auto. You're going to want to start by rotating the mode dial of your camera all the way around until it is set to Auto, and then there's a very important step you're not going to want to make sure you don't miss.
I want you to notice that nestled right under the mode dial is a secondary dial, and if you're looking at the back of the camera, there's a small photo camera icon, video camera icon, and the letters S and Q. This small dial is how you control whether the camera is in Photo Mode, Video Mode, or a special Video Mode called S and Q, which stands for Slow and Quick, which enables you to film with the camera in slow-motion or even film timelapses with it, which is very cool. For the sake of what we're going to be talking about in this lesson though, you're going to want to make sure that your camera is set to Photo Mode, the little camera icon there, and then you are now ready to move on to two more incredibly important dials that we need to talk about on the Alpha 7 IV.
The front dial that your index finger will rotate, and the left top dial that your thumb can rotate. Please notice that there's also a third dial on the top right of the camera that can be locked or unlocked to rotate it, but that dial is used for a feature called Exposure Compensation that I promise we will talk about in a future lesson. The front dial is going to be used to change the shutter speed of your camera, and the back dial is going to be used to change your camera's aperture, but you should also be aware that if your camera is in Auto Mode, which we have it set to now, neither of these dials is going to do anything because the camera's going to automatically handle adjusting the aperture and the shutter speed for you. But please keep these dials in mind because we're going to talk about them more in depth and actually use them in a future lesson very soon.
With dials out of the way, let's turn our attention to buttons on the camera, with the first being the shutter button where your index finger is resting. This is the button you're going to use to take photos, and this is a pressure sensitive button where if you press it down halfway, the camera will engage its Autofocus, and whenever you press it down completely, it will then take a photo. It's really cool.
Next, I want you to know that on the top and back of the camera, you have all these different buttons that have the letter C, and then the numbers 1 through 4 on them, and these are Custom Buttons that I would highly recommend learning more about once you have a more basic understanding of the camera in this course, because these buttons are customizable.
I want you to notice on the back of the camera there is an AF-ON button that you can use to enable the camera's Autofocus whenever you hold down, similar to how you can enable the Autofocus, whenever you have press on the shutter button. There's also an AEL button over here that stands for Automatic Exposure Lock, which if you're taking a photo and you want to adjust your composition by changing the angle that you're taking a photo from, but you don't want any other camera settings to change, you can hold down this button with your thumb and it will lock all of the settings even whenever you move the camera around, which is really useful.
In addition to those two buttons, you also have an unlabeled joystick button here on the back that you can press as a normal button, as well as move in any direction. You're going to find this joystick very useful for reviewing images that you have taken. Then you also have a button here that says, letters "Fn" which stands for Function, and this button is going to bring up a Function Menu of the most important camera settings for you to access, which of course, if you want to get fancy, you can also customize every single item in this Function Menu.
And then toward the bottom down here, you have a flat dial that not only rotates, but if you press it up, down, left or right, it will operate as four different buttons, and as a bonus, you also get another button. You can press right in the middle, press this dial button to the left, and you'll enable a timer or switch between single or Continuous Shooting modes, AKA if you wanted the camera to take a photo whenever you hold down the shutter button, or you want to take a lot of photos, whenever you hold down the shutter button. There's a display button at the top, which lets you change how the screen looks on the back of the camera and how much information it shows you. Or you can press the right dial button if you want to adjust your camera's ISO, which if you think that ISO is short for something, it's actually not. It's just a photography term. And in short, ISO is a great way for you to adjust how bright your image is, but just keep in mind because the camera's set to Auto Mode, it's going to handle setting your ISO as well automatically. You don't have to think about it.
Lastly, you have a bottom button down here that, well, that is not used by default. And below that you have a play button that you can press to review images or videos that you've already taken and a button with a trash can on it. So if you are removing images, you can use this button to delete them. Or if you are not reviewing images, this button doubles as another custom button that you can set up to modify a big variety of different settings.
Finally, turning your attention to the back left of the camera. Now, there is, of course, another custom button, and most importantly, a Menu button, which is how you'll access the vast majority of the camera's settings. When in doubt, if you're trying to find something, it's probably in the menu here.
Buttons and dials out of the way, I want you to know that there are actually two different ways that you can preview an image that you're taking with this camera, and the Alpha 7 IV is actually really smart in how it lets you switch between these two options. By default, if you're holding your camera and looking at the back screen, you're going to see a preview of what your camera sees, and you can simply press the shutter button if you want to take a photo. But alternatively, if you want a more, let's say, traditional photography experience where you hold the camera up to your eye, which let me say is especially important, if you're taking photos outdoors on a bright and sunny day, whenever you bring the Viewfinder up to your eye, the camera actually has a sensor here that we'll use to automatically switch to the Electronic Viewfinder, which is another smaller screen inside the camera that's magnified and will fill your vision with a preview of what you're shooting.
Notice how if I hold my hand up here, the screen turns off, bring it back, now it's back, so anytime I bring my hand up, it's mimicking, switching to this Electronic Viewfinder if I brought up my eye to it, which is really cool. Sony is all about giving you options for how you prefer to use the Alpha 7 IV, and that's a really good thing.
Now, looking at this screen on the back of the camera, by default, it's going to give you a lot of information. But remember, you can press the display button on the back of the screen to change how much it shows you if you want a less cluttered view. My recommendation to you though, is that as you're learning this camera, you are actually going to want more information because it's important to learn what all of these settings mean on the back of the camera, so you can use it well, and I also have good news. We're going to be covering what these settings mean on the screen in the next lesson.
Team-GPT< 1 min ago
Here's the plain transcript with timestamps and formatting removed, organized into logical paragraphs:
Let's talk about some important settings on the screen of your Alpha 7 IV, starting with this green camera icon with the letter "i" next to it. In the top left, this icon indicates that your camera is in Auto Mode for taking photos and saves you from having to look up at the mode dial on the top. To confirm which mode it's in, you can just check this screen instead.
Now, there are more settings along the top of the screen, but I want to draw your attention to the bottom of your screen where some of the most important settings are located up. First, on the bottom left, you have your camera's shutter speed, which we talked about earlier, which can also be controlled by the front dial of your camera as long as it's not in Auto Mode. Next, you have the F-stop of the camera, which is how your camera tells you the aperture of the lens, how wide it is, how much light it's letting in. And if you weren't in Auto Mode, this setting could be adjusted with the back dial of the camera right here after that.
And lastly, for your settings at the bottom. On the bottom right here, you have the camera's ISO, which if you recall from earlier, this setting can be adjusted with the right ISO button on the back of the camera. And so if you're not sure what ISO on your camera set to this setting right here will tell you. But remember, your camera is currently set to Auto Mode, so it's going to say ISO Auto and the camera will be choosing the ISO for you.
Last but not least, for important icons on your screen, if you look at the very top right of your camera screen here, you're going to see a battery with a percentage next to it. In case you haven't guessed, this is your camera's battery life and Sony was really helpful because they not only give you an icon that gives you a rough approximation of your battery life remaining, they also show you the percentage giving you a much more precise idea of how much battery life you have remaining. While your Alpha 7 IV has fantastic battery life, it will still be in your best interest to check the battery life from time to time and ensure that it isn't getting too low, because that would mean you would need to charge the battery.
And those are the most important buttons, dials, and icons on your camera. And as you continue to take photos with your camera, you're going to remember what all these settings do and be ready to take photos faster than ever before.
Are you ready to take some photos with your camera? It's time to take some photos. If you followed through the previous lessons, your camera is now set up in Auto Mode, and you should have a good idea of what most of the buttons and dials do on the Alpha 7 IV.
Now, I want you to notice the green auto camera icon in the back of your screen and how it has this lowercase "I" next to it. This lowercase "I" is really important because it stands for intelligent, and the mode that your Alpha 7 IV is currently in is called Intelligent Auto Mode. That sounds fancy, doesn't it? Right? Intelligent Auto Mode is great because your camera is really smart, and whenever you point it at something or someone, it can recognize what it's taking a photo of and modify the settings to perfectly match the scenario. For example, your camera can recognize if you're taking a portrait, a landscape photo, macro photo, super close-up, night photo, et cetera. Like I said, it's really smart.
So what's great is that no matter what first photos you're wanting to take with your camera, the odds are that it's going to be smart enough to recognize the photo that you are trying to take and optimize itself to take the best photo. And you don't have to do anything different to make this work. You're just pointing the camera and holding it on the shutter button.
Next, let's talk about Autofocus, because if we're talking about your camera being smart, Autofocus is an area where it really shines. The Alpha 7 IV is capable of not only locating a person's face in a scene and focusing on it, the camera can also detect their eyes and make sure they're in focus, and it can even track their eyes or anything else for that matter, and follow them in real time as they move around the scene.
To enable this tracking, it's really simple. Just point your camera at the person or object you want to take a photo of and hold the shutter button down halfway on your camera. This will engage the camera's Autofocus and nearly instantly bring the person or object into focus. And then whenever you're ready to take the photo, press the shutter all the way down, and congratulations, you've just taken a photo.
Now, let's say you want to review this photo and confirm that it looks good. Your Alpha 7 IV makes that really easy to do as well. Simply press the play button on the back of the camera, which will bring up all the photos that you've taken, and you can now either use the joystick on the back of your camera with your thumb to scroll through the images, or you could use the dial at the top of your camera to scroll through them, or even the back left and right buttons to scroll through. Sony is so great, they give you a ton of options when it comes to how you want to review your images, which is such a good thing.
Now, if you want to confirm that an image that you've taken is in focus, look at the top back of your camera and you're going to see a magnifying glass next to the AF-ON button. Press that AF-ON button, and you can then rotate on the control reel on the back of the camera to zoom in and out on the part of the image where the camera focused when it was taking a photo. And there you can confirm if it was properly in focus. In addition, if you wanted to look through multiple photos without needing to zoom in on each one of them, you could rotate the front or rear dial, and the camera will then stay zoomed in, which is really useful if you've taken multiple photos of the same thing and you want to check the focus on all of them very quickly.
Lastly, you need to get these photos from your camera to your computer or smartphone so you can edit and share them. And again, this is another area where Sony gives you multiple options for how to do that. You could purchase a separate memory card reader, then remove the SD card from your camera, insert it into the card reader and plug that into your computer.
But if you want to save money, Sony gives you multiple ways to copy your images from your camera without needing an extra memory card reader. Your first option would be to take the USB type C cable that Sony provides for you in the box. Insert one end of the cable into the USB Type C port on the side of your Alpha 7 IV, and the other end into your computer, which the camera menu will then ask if you want to use it as a webcam or for image transfer. Select image transfer. And then your camera will be mounted to your computer, like an external drive where you can access all the images taken with it.
Or lastly, and one of the coolest ways to copy your images from your camera to your smartphone is to use the Sony Creators' app. You can download this app on the Google Play Store or Apple App Store. And then once you have that installed, you can then wirelessly connect the camera via Bluetooth to your smartphone in the Creators' app, and you will then be able to wirelessly transmit your photos to your smartphone in their full quality, where you can then use your favorite image editor app to edit and post them.
With that, you've just taken your first photos with your camera and with the Intelligent Auto Mode, I'm betting, they look really great.
Now that we've talked about how to take photos using the Intelligent Auto Mode with your Alpha 7 IV, it's time for us to take a step beyond auto and talk about how you can use some of the easy creative controls that Sony gives you to take more unique photos.
To start, looking back at the mode dial at the top of your camera. While it's currently in Auto Mode, there are other modes with the letters P, A, S and M, and we're going to focus on the P, the A, and the S in this lesson, because while these modes are not full Manual Mode, which is what the M stands for here, by the way, they each unlock unique capabilities of the camera that you're going to love to use while also not being as intimidating as full Manual Mode.
We're going to start with Aperture Priority Mode, so we're going to change the mode dial over here to the "A". And in short, Aperture Priority Mode is a way for you to be able to manually set the aperture of your camera lens while the camera handles all the other settings automatically in the background. If you want to take photos with a shallow depth of field where the person or object you're taking a photo of is sharply in focus, but everything else behind them has a really pretty looking blur in the background, Aperture Priority Mode is a fantastic way to get this look.
I remember from the earlier lesson where we talked about how the back dial of your camera lets you change the aperture of your lens and how on the bottom of your camera screen there is a setting called the F-stop of your camera that tells you how wide open the lens is. Well, with this Aperture Priority setting, you can use this back dial to manually adjust the aperture of your lens, and by setting it to a lower aperture, like F/2.8, which is the widest aperture, this 24-70 lens supports, you'll have a much more shallow depth of field with a lot more separation from the background. Alternatively though, if you want to have more of your image and focus with less background blur, you can turn this aperture lower to something like F/4 or F/8 even. Aperture Priority Mode is great for getting extra control over your depth of field, and I think you're going to love using it.
Next on the mode dial, now you have the letter S, which stands for Shutter Priority Mode, and just like how Aperture Priority Mode made all the camera settings automatic except for the aperture, Shutter Priority Mode will make all this camera settings automatic except for the shutter. So let's switch over here to shutter mode now, and if you want to control how the motion looks in the photos that you take, this is the mode for you. Rotate your camera's front dial to increase your shutter speed and make fast moving objects in your images look incredibly crisp and sharp, or rotate the dial the other direction to decrease your shutter speed and add more motion blur to your images. This style is the only one that you have to think about. All the other camera settings are handled remotely, which makes getting the perfect freeze frame shot of your kids running, or a beautiful blurred motion of a waterfall with water pouring over the cliff, so easy to get next.
Moving right along the Mode Dial here, you're going to want to rotate to the "P" mode. Now, which stands for Program Mode. Unlike Aperture or Shutter Priority Mode where all the camera settings are auto except for one, you can think of program mode as a hybrid of these two modes. The real power of Program Mode is going to come with a feature called Program Shift, which will enable you to rotate the top rear dial of your camera that you would normally be using to adjust your aperture. And whenever you rotate this style, this is going to adjust both your shutter speed and your aperture at the same time while maintaining the same exposure level.
What's the point of that, Matt? Well, this will let you choose if you want to have a faster shutter speed or a wider aperture with just one dial rotated. So if you are taking photos of something fast moving, you can rotate the dial to give yourself a faster shutter speed while the camera will automatically open up the lens to let in more light. Or alternatively, if you want a slower shutter speed, maybe you want some motion blur in your image. You can turn the shutter speed slower and the camera will close the lens to let in less light. The best part about this setting is that you do not have to manually adjust anything to still have good exposure. The camera handles all of the other settings in the background to give you an image that isn't too bright or too dark.
Now, speaking of too bright or too dark, it's finally time to talk about this other dial at the top right of your camera, the one that does not adjust your aperture and has a button in the center that you can press to lock or unlock its rotation. This dial is called the Exposure Compensation Dial. And whenever you're in one of these P,A,S modes, this is going to let you make your image brighter or darker very quickly just by rotating the dial without needing to change to a fully Manual Mode. You can basically think of the Exposure Compensation Dial as a way for you to tell the camera that you like how it's handling taking photos, but you want the overall image to be a little bit brighter or a little bit darker. And what's great is that Sony makes Exposure Compensation super easy to use with your camera.
For the sake of this example, we're going to stay in Program Mode, but I want you to remember that you can also use the Exposure Compensation Dial if you're in Aperture Priority or Shutter Priority Mode as well. Then you have just three simple steps to use Exposure Compensation. First, look at the back screen of your camera and between the aperture of your camera, which is the roughly the bottom middle left of the screen that says on mine F/2.8 and the ISO, which most likely says Auto on yours, you're going to notice that there is another setting here that has just appeared. It's a plus and minus box with a 0.0 next to it. This 0.0 number is your camera telling you the level of Exposure Compensation that you are applying to it. And because it says 0.0, that means that it's not applying any Exposure Compensation.
But if you want to change that, let's say you want to make your image brighter, here are the next two steps you need to take. First step you're going to want to take is to go up to the exposure compensation dial and press the button in the center. So it's raised with a white outline around it. This button lets you lock or unlock the dial. And so if you can see the white outline, that means it's unlocked and ready for you to adjust it. Now remember, we want to make our image brighter. So the last step you're going to want to take is to rotate the dial counterclockwise with your thumb, and notice that whenever you do that, the image is going to get brighter and the Exposure Compensation number in the bottom middle of your screen is going to start increasing in increments of a third of a stop of light.
Which side note, by the way, a stop is how the camera represents how bright an image is. The higher the number, the brighter the image. So as you rotate this dial, notice it's going to have a plus followed by the numbers 0.3, then 0.7, then 1.0, 1.3, et cetera, et cetera, which can go all the way up to 5.0, which would be five stops over the exposure level that the camera was originally at. Alternatively, if you rotate the dial the other way, it's going to say negative 0.3, negative 0.7, all the way down to negative 5.0 as well, which is going to be five steps under the original exposure level.
Now, in the background, your camera's going to be handling everything automatically. It's going to be doing all the work to adjust your shutter speed, aperture and ISO to help you raise or lower your exposure level whenever you use this exposure compensation tool. But you didn't have to do any of this other work. All you had to do is rotate this style counterclockwise if you want your image to be brighter or clockwise if you want it to be darker. It's super simple to do and it's a great way for you to help, let's say, nudge your camera in the right direction. So I would keep this exposure compensation tool in your back pocket, and as you're taking more photos with your camera, if you notice, huh, I want things to be a bit brighter or a bit darker, you can easily make that tweak with the Exposure Compensation Dial. Just remember that if you're not planning on using Exposure Compensation, keep this dial locked by pressing the button in the middle, because the last thing you want to do is accidentally rotate it when you don't mean to, which would adjust your camera settings.
Last but definitely not least, we need to talk about some other cool camera effects that you can use with your Alpha 7 IV to access these camera effects. First, make sure that you're in one of the P,A or S modes on the top dial. Then hit the Function button on the back of the camera and select Creative Look from the menu. This menu is where you can unlock a whole smorgasbord of colorful image presets that you can use while taking photos. And what's great is that these presets are applied directly in camera, so you don't need to do any work in post. If you take a picture with one of these presets enabled, it's going to be automatically applied to your image. In addition, your camera is also going to show you a live preview of how each preset will look before you select it. So I highly recommend scrolling through all these different presets to see which one you like.
Now, to start, the creative preset that your camera is going to have selected by default is going to be set to ST, which stands for standard and is the default look of your camera. Notice also though that as you're scrolling up and down through these looks, you can press the right button to go into and change the individual settings for these presets as well. You can adjust the contrast, highlight shadows up or down if you want to.
Next, you have the PT preset, which stands for portrait, and this preset prioritize making skin tones look their best. So keep that in mind, and I would consider using the setting whenever you're taking pictures of people. Next, you have NT, which stands for neutral, and this is going to reduce the saturation and sharpness of the image, which if you want to do some tweaks to your photo later, this can be really useful. Now, VV is pretty cool. It stands for vivid and it's going to punch up the saturation and contrast of your image. Basically, you can think of it as the opposite of the neutral preset.
The FL preset is going to boost the blues and greens of your image while desaturating other colors and adding more contrast. It's a very cool look, especially for landscapes, in my opinion. For the IN preset now, you can almost think of it as a boosted version of the neutral preset, which has an even flatter look. SH is going to give you a very bright and soft image with boosted shadows. BW unsurprisingly stands for black and white, giving you a high contrast image. SE stands for Sepia, a classic look that has been around basically forever.
And then once you get through those, you have six more Creative Looks. And while these may seem redundant in that you already have a standard look vivid look, black and white look, et cetera, notice there's a number next to these last six looks here. Because these are custom looks, you can completely customize. So you can think of the preset that they're currently at as a starting point, but you can go in and make very large changes to them if you want to.
Once you start using these presets as well as the Program, Aperture Priority and Shutter Priority Modes on your camera, you're going to be able to take the exact kinds of photos that you want to take with the exact look that you want them to have.
It is now time to talk about using your Alpha 7 IV to record video. And to get your camera ready for video recording, the first thing you're going to want to do is set it to Video Mode by looking at the mode dial at the top of the camera and setting the sub dial below the main dial to the video camera icon in the middle.
Then I would also set the main mode dial at the top of your camera, rotated around to "M" for Manual Mode because that is the mode that I recommend using for recording video. Alternatively, you could also consider using Shutter Priority Mode on your mode dial, which will let you lock your shutter speed to 1/50 of a second and handle all of the other settings automatically if you want an easier filmmaking experience.
With that done, congratulations. Your camera is now in Video Mode, but there are more settings that we're going to have to talk about in the menu of your camera to make sure that you are recording high quality video.
So to start, press the Menu button, go over to the red camera icon at the top, then over to Image Quality and select File Format. Here you have a variety of video formats you can choose to record in, but my recommendation to you is to choose XAVC HS 4K, which is going to record very high quality video with your camera without making the files too large.
Then you're going to want to go down one menu level to Movie Settings. And for recording frame rate, I would leave this at 24p, which is 24 frames per second, AKA, the frame rate that most Hollywood movies are recorded in. And then for record setting, you're going to want to change this from 50 M 4:2:0 10bit to 100M 4:2:0 10bit, which is going to give you a very high quality video file that will also play back smoothly on the majority of computers.
With these menu settings dialed in, you're going to want to go out of the menu, and because you're in Manual Mode, you're going to want to dial in a few more basic settings. First, for your shutter speed, which will now be adjusted by the back dial at the top of your camera. You're going to want to change this to 1/50 shutter speed. And then you'll also want to adjust your lens aperture to make sure that your image is bright enough by using the front dial on your camera. And lastly, press the ISO button on the back of your camera and make sure that you switch it from auto ISO down to ISO 100, which is a good starting point if you're filming in a brighter room. But if it's not bright enough, feel free to increase this higher. Just be aware that if you raise it too high, you're going to start to get noise in your footage.
With that, your video settings are all dialed in. The only thing you need to consider is audio. And to access your audio settings, go ahead and press the menu. Again, go back to the red video camera icon, down to subheading 7, Audio Recording. And in this menu, make sure that audio recording is turned on. And if your audio is too loud or too quiet, feel free to go down to audio level and adjust this setting up or down as well.
Now to record a video, all you have to do is move your index finger up to the top of your camera and press the red record button, which will start and stop your camera recording. Very high quality video. That looks great, and that is video recording with your Alpha 7 IV.
I do want you to be aware that there are many other photo and video features of this camera that we have not had the opportunity to cover in this course that I highly recommend you look into. Because this camera is capable of doing so much, you have RAW photo taking capabilities that give you virtually unlimited control over how your image looks. Log video recording that gives you even greater detail in image quality, S&Q Mode, which will enable you to record slow motion video or time lapses in camera. There are so many features I highly recommend you learn how to use them.
As you continue to grow and become more experienced with this camera, I would highly recommend checking out the other courses here in the Alpha Camera Academy as well. For now, thank you so much for watching and have a great day.
Rate this course
Your feedback helps us improve our content.
Course rewards
Complete any course and earn a unique badge to celebrate your progress. Collect them all as you level up your skills!