Get To Know Your Alpha 6700
From unboxing your new Alpha 6700 to confidently creating photos and videos you’re proud of.
- Details
- Module
- Quiz
About this course
In this course, Arthur R. will walk you step-by-step through the basics of your Alpha 6700 – from inserting a battery to understanding the core settings and menus to capturing sharp, well-lit photos and videos you’ll be proud of. You’ll also learn some camera tricks, how to transfer your photos, and the best next steps as you grow your skills. It's basically everything photographers wish they had known when they first picked up a camera. If you’re new to photography or just want to feel more confident with your Sony APS-C camera, you’re in the right place.
Course highlights
Instructor
Arthur Reutov was just a normal guy, just got married, worked at a bank, and in 2015, he bought an Alpha 6000. And although he had virtually no photography experience at the time, he says that camera changed his entire life. It ignited his passion for these little APS-C cameras Sony makes, and that has only grown stronger year after year.
Arthur runs a YouTube channel with over 200,000 subscribers, where he tests out cameras, lenses,and gear – but what he really loves is helping people who are just starting out. His style is all about keeping things simple, practical and easy to follow – no tech overload, just what you need to get great shots.

Arthur R
Photographer
Featured gear
Skills
Transcripts
- Hello and welcome to Alpha Camera Academy. I'm Arthur Reutov, also known as Arthur R on YouTube, and I'm here to help you get the most out of your Sony A 6700. And congratulations, by the way, because you've just purchased my favorite Sony camera ever made, and I hope that you learn to love yours as much as I do mine. Whether you're brand new into photography or you've been snapping photos on your phone and you want to take things to the next level, you're in the right place.
Here, it's all about the results. We are going to skip the overly technical stuff that makes your head spin and really focus on what actually gets you sharp, beautiful photos and videos without needing a photography degree. By the time that you are done, you will know how to set up your camera with confidence, use it to capture photos that you're proud of, add a little creative flare, and when you're ready, even start shooting great video. So grab your camera and let's get started.
- Hello and welcome to Alpha Camera Academy. I'm Arthur Reutov, also known as Arthur R on YouTube, and I'm here to help you get the most out of your Sony Alpha 6700. And congratulations by the way, because you've just purchased my favorite Sony camera ever made, and I hope that you learn to love yours as much as I do mine.
Whether you're brand new into photography or you've been snapping photos on your phone and you want to take things to the next level, you are in the right place. Here, it's all about the results. We are going to skip the overly technical stuff that makes your head spin and really focus on what actually gets you sharp, beautiful photos and videos without needing a photography degree. By the time that you are done, you will know how to set up your camera with confidence, use it to capture photos that you're proud of, add a little creative flare, and when you're ready, even start shooting great video. So grab your camera and let's get started.
Here is what you get inside of the Alpha 6700 box. You get the camera body with a body cap. You get an FZ type rechargeable battery. You get little triangles that will be hanging on the ends of this camera body and that goes along with the shoulder strap so that you can carry it around with you on the go. There is an extra eye cup for the viewfinder and reading material, warranty information and the manual. Now, you might be expecting a thick manual, but in fact what you get here is a little QR code. So the manual is all available online so you can pull it up on your phone. You could also just Google it and search for it that way. That way you can always have it easily accessible. You don't have to worry about losing a paper manual, which is not a good thing.
First, let's power it up so the battery goes in the bottom of the camera, so you flip it upside down. There's a little latch here that you can flip, and it opens up the battery door. The battery only goes in one way with the pins down and the battery facing the outside of the camera. So there's a little blue latch that you'll see right here. It moves up and down. You kind of want to press the battery up against it and then slide it into place. It will bounce because there is a spring at the bottom, and then if you push it hard enough, it will click into place. And to remove it, you just have to move that blue tab out and it will come out. So there you go. Once you're done installing the battery, you can close this battery door cover and latch it in place and you are ready to go.
You may have noticed there's no charging brick or cable inside of your packaging. That's because this camera uses USB-C, so you can use any USB-C cable to charge it. So flip the camera on its side, this is where the viewfinder is, and then open up this top latch right here. And you'll see there is a USB-C charging port. You can take a regular USB-C charging cable and plug it in just like so. And you'll notice that there is a little orange light that illuminates indicating that the battery inside is charging. Once the battery is completely charged, that light will turn off. I do recommend giving it a full charge before your first outing.
Next, let's move on and install our SD card. Now the SD card is the memory card that stores all of your photos and your videos. Now what we'll do to insert it right underneath where we charge this camera, there is another flap. What we'll want to do is flip this little switch over and it will open up this door, and that's where we put our SD card in. Now the way you wanna put this card in is with the label facing the back screen or the back of the camera or facing you if you're just holding the camera regularly. So with the label facing the back and the pins down, we want to insert it just like this, and you'll feel that there is a little bit of a spring there, just like the battery, and you want to push it into place and it will click - just like that.
To remove it, you want to push down and it will come up just a little bit, enough to get your fingers around there and pull it out of the slot. If you try to put it in with the label facing the front of the camera, it simply will not go into place. It'll get stuck, and if you don't insert it with the pins down, it will also not go in. So there's only one way to put this in. So with the pins down and the label facing the back of the camera, and we'll put it in, click into place and then we can go ahead and close this little door.
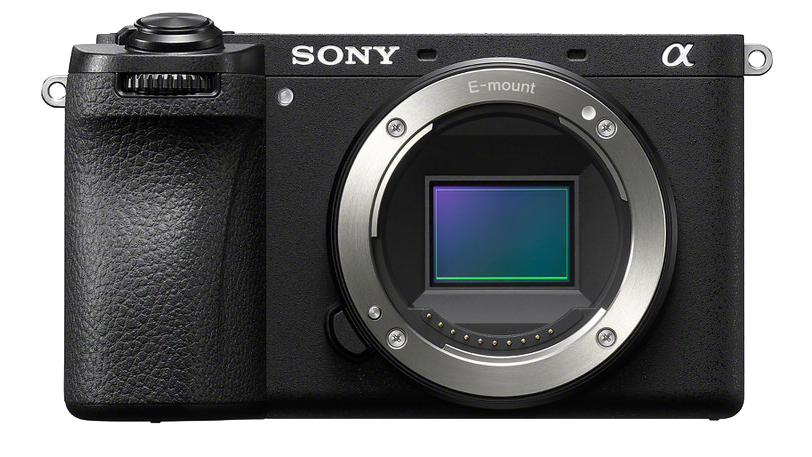
Your Alpha 6700 uses something called the E-mount system. This is just Sony's way of saying this is the lens connection type. To attach your lens, first you have to remove this body cap. In order to do that, I like to hold the camera with my thumb and with my fingers like this. And there is a little button right here that you can hit with your middle finger. You want to push that down and then rotate the body cap counterclockwise just like this and you can remove it. Now, this is your camera sensor. That is what takes all of your photos in your videos. It's very sensitive. You do not want extra dust or dirt or fingerprints or anything getting in there. So be very careful when you are putting on and taking off camera lenses. You'll see that button that we pushed- there is a little pin right here that gets depressed and then it pops back up on a spring. There is also a white dot here that is very important.
So take a lens, whether it's your kit lens or any other lens that you plan on using with your camera. And you want to line up this white dot on the mount with the white dot on the lens itself. And then you want to attach it like this and then rotate it clockwise until you hear a click. And that's the sound of that pin going into the lens, locking it into place. Now to remove this lens, you want to push that button again, and then you want to rotate it counterclockwise, and now you can remove it. Never force this. If it does not turn smoothly, something really is not lined up there. Again, that locking tab is very important, so you want to make sure that you put it on correctly and carefully.
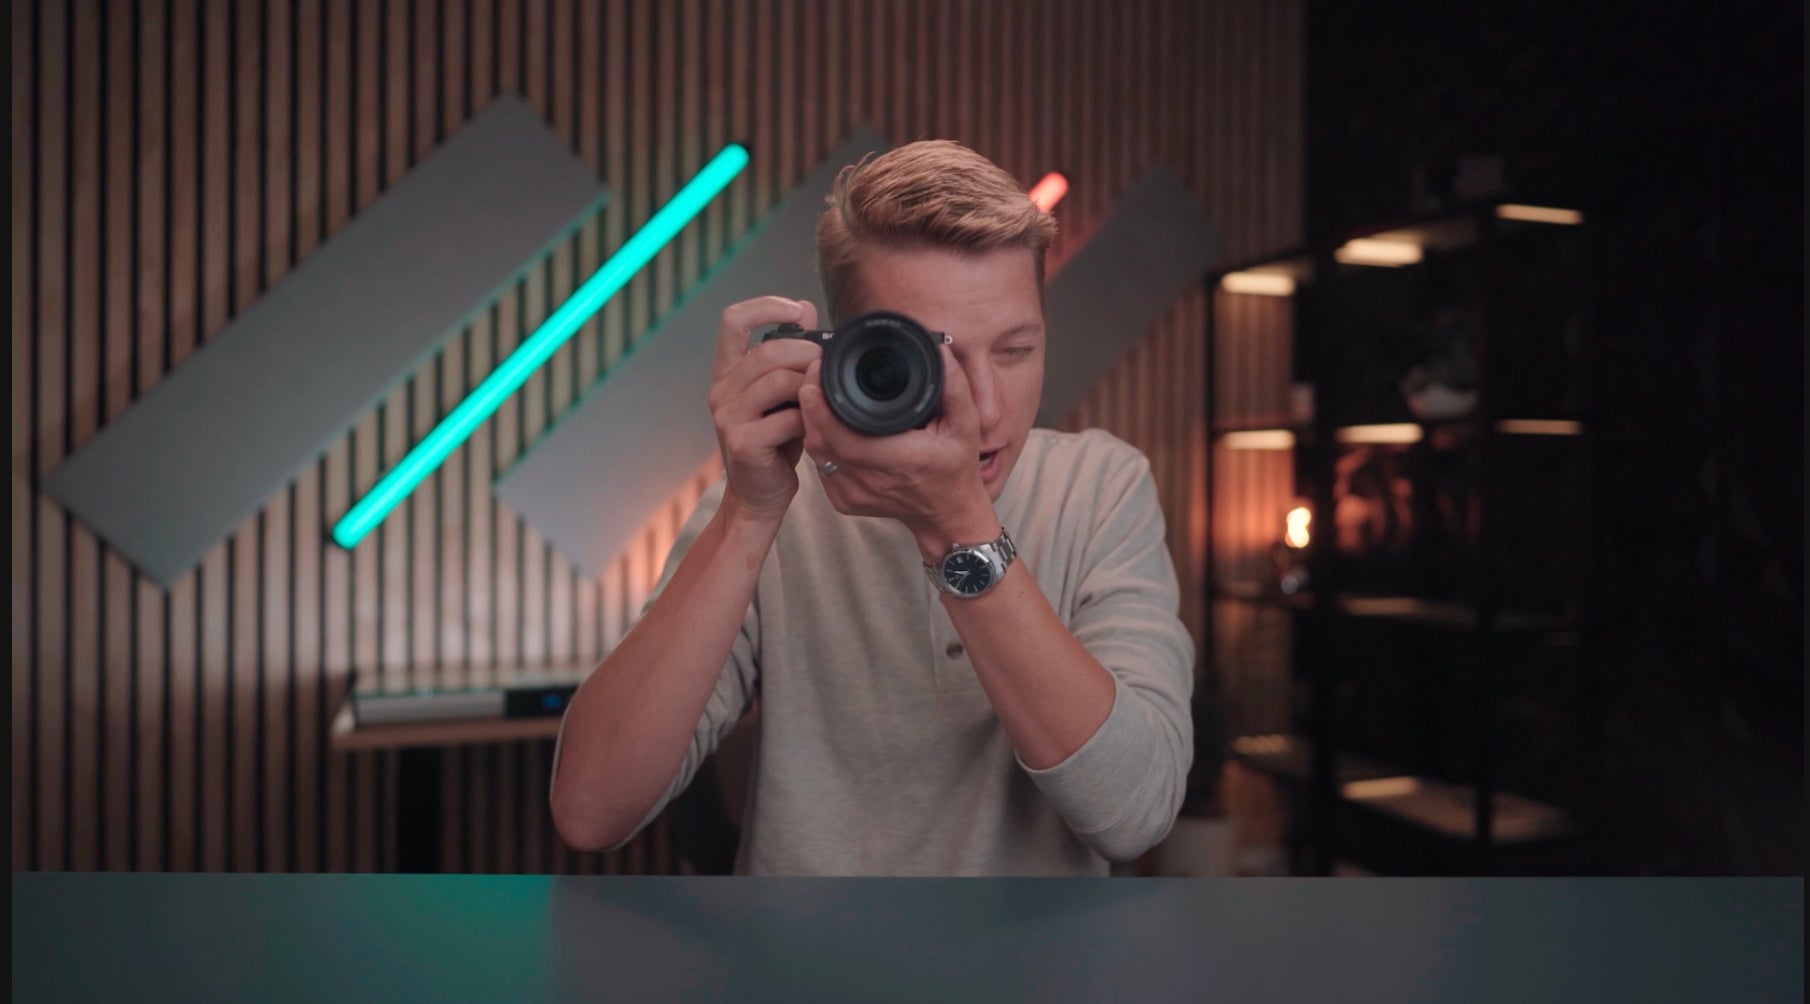
Great photos start with a steady hand. So the way that you hold this camera is with your right hand. I wrap three fingers around this pretty large grip on the Alpha 6700. Then I'll rest my index finger on the shutter button on the very top. That is what takes the photos, and then you kind of just grip it with one hand, like so. Shutter button here, thumb on the back, and then three fingers around. With my left hand, I like to hold the bottom of the lens. I don't hold it on the side or on the top, just because if you eventually get to the point where you are using some flashes, your hand will get in the way. And then you want to hold your camera as close to your body as possible just for added stability. I find that the further out you are, the more shaky your shots get. The closer you are to your body, the more stable things get. Also, this applies to using the Electronic Viewfinder as well. If you hold the camera up to your eye, that's also another contact point to stabilize things.
- All right, now that you've unboxed your Alpha 6700, you've charged it up and you've attached a lens - it's really time to get to know your camera's personality. Think of this as the camera equivalent of learning where all of the light switches are in a brand new house. Once you know what's there, using your camera becomes second nature. Step one, you want to turn on the camera. Now around that shutter button that we were resting our index finger on, you could see there is a little switch that has on and off. You want to flip the switch clockwise and turn the camera on. Turn it off counterclockwise, just like that. So we'll turn it on and the first time we turn it on, we are met with this screen here. And we're going to run through the setup process really quickly together. In order to navigate the menu system, I'm going to be using this D-pad, which is a scroll wheel on the back of the camera, but also you can click up, down, left or right, and then the center button to select. So you can scroll up to select our language, which is English, and press the center button. And here is your first Privacy Notice.
Now this Alpha 6700 can recognize faces and store them. So it stores biometric data that's just letting you know. So I'm going to hit, I understand, which is the center button here. Now it's going to prompt me to connect to my smartphone. Now, I can do this now, but in order to save some time, I'm going to hit the little trashcan icon and say, do not connect. It'll say that you can connect later on. And I'm going to hit OK. Now I'm going to set the date and the time. This is very important because once you start shooting photos and videos, you want to go back and see what days and what times you shot those at. So I am in Central Time. I'm going to select English, and then I'm going to plug in a random date, let's say June 26, 2026. And you can adjust the time moving up and down. And once you're done, hit the OK button. Now the camera is going to ask you if you want to use the high temperature setting. Now, if you are recording super long videos, for example, after an hour or two, your camera will get very, very hot. So there's a low temperature setting and a high temperature setting, meaning the high one, the camera will continue working even though it gets really hot. I recommend that you just enable that off the go.
So I'm going to hit OK, set - and it will tell you here the temperature of the device may rise to prioritize recording time. Would you like to change the setting? We're going to move up and hit OK. And then it will tell you that you can swipe in or out from the sides or from the bottom to get the touch function icon and function menu. We will learn more about that later. So hit OK. And now you are at the main screen with your camera.
Now, before you go out and you start shooting pictures, there are two things that I recommend changing right away. Well, the first thing is formatting that SD card that we just put in. We want to hit the menu button here right at the top. So we hit menu, and then it's going to look a little complicated, but it's pretty simple. I promise you. You're going to move all the way to the left to where you see all of these colored tabs. You're going to move all the way down to the third tab, which is red. You're going to move over and you're going to select item number two, which is media, and then move over to the right again. And that's the format. You can either select the center button or move over to the right, and then it says, performs quick format. All data will be deleted. Now everything on that SD card will be deleted in this step. So if you have pictures that you want to back up, do that before you wipe it all clean. But if you have a brand new card, I can just do it and not worry about it.
I'm going to move up and hit enter, and it will format the memory card just as quickly as that. So it's all done. And now we can go back out into the menu. Now let's go up one more tab and move over. So this is your main settings tab. What I want to go to is the first row, second row, and then move over to the second column. This is File Format. So when you're taking photos, and by the way, you should have your camera set in Photo Mode. We're going to go over the dials and sub-dials, but this sub-dial can go into S&Q, Slow and Quick, video or photo. Make sure it's in Photo Mode, and then go back into the menu. So if you click on this center button, it will show you all of the options.
Now, when it comes to taking photos, you can shoot them in JPEG, which is smaller files, easier to send to your friends online. They take up less space on your SD card, or you can shoot in RAW, which is a more advanced kind of larger file format. If you're printing large things, or if you want to really dial in your colors and spend a lot of time editing, I am going to select JPEG. You also have an option of shooting RAW in JPEG, which means every time that you take a single photo, it will have two files associated with it. So I'm gonna select jpeg, and then I'm going to move over twice. One, two to the right. This is JPEG quality. Now you can click on the center button here and default it's set to fine. You can see there's standard, there's light. I always like to move this to extra fine. I changed this setting because I want the best looking images I can get from this camera in JPEG format, and this is the way to do it. It does take up a little bit more space on your SD card, but I think it's well worth it.
And then to get out of the menu, you could hit the menu button at the top, or you could depress the shutter button and you are all set up. So now let's meet the MVPs of your camera controls. There is a big mode dial on the very top. Now this is your main selector. It switches between Auto Mode and your various scene modes also into your full Manual Mode and Custom 1, 2, and 3 modes. For now, let's just leave it in Auto. The nice thing about the Alpha 6700 is that you have a sub mode dial right here, and that switches from Photo Mode over to Video Mode and then into S&Q, which is Slow and Quick, which is for slow-motion or timelapses. So I'm going to leave this in photo mode for now. At the very front of the camera where we rested our index finger is the shutter button. This is a two stage shutter button, so if you push it halfway, it will focus and you'll hear that beep, and then all the way it will take the shot. So halfway all the way, there you go. Then next to it, you have some Custom Buttons. So there's a C2 Custom Button here. There is a C1 Custom Button on the side, and then your C3 Custom Button is the trashcan icon on the very bottom. So all three of these Custom Buttons can be customized to perform a wide variety of different things. It's nice to have.
You have a dedicated record button for video on the very top outlined in red. And then you have some wheels. So you have this wheel on the back, you have a front dial wheel, and then you have that D-pad that we've already used as a wheel. So you can control your aperture, your shutter speed, and your ISO in three separate dial wheels if you want to go full manual down the line. We're going to keep things simple and go in Auto Mode for the time being. And then around the back, we have that Menu button that we have already used. We have AF-On. This is a button that lets you focus without half pressing the shutter. So it's great for action shots. A lot of people use this as a back button, auto focus, that's a little bit more advanced technique. And then we have a Function button. Now this Function button brings up the quick function menu on the screen. So you'll see as soon as I hit that, it opens this up. And because this is a touch screen, you can move around and you can make changes to things on the menu. The other way of accessing the quick function menu with this Alpha 6700 is, you can swipe up from the bottom and it does the exact same thing. So you can swipe down, swipe up, or press that Function button and get to the exact same spot. Now, the D-pad is also a scroll wheel. You have display, ISO, exposure and drive mode, and then you have the playback button on the very bottom that will allow you to review all of the shots that you've taken with your camera, and then the trash can to go through and delete. We'll get more into it later, but just know that they are there.
Now, Sony menus can feel like a supermarket. There's a lot to choose from, but everything has its place. Everything has an aisle. So if we go into the menu, you get out of everything by moving all the way to the left and just using these tabs, you can usually find what you're looking for by looking at the labels on the tabs. And again, you move over to the right and then further on to the right, just like that. If you don't want to dive into this menu system, you can actually just go back. So hit the menu button, and when you are shooting, you can use that function button or swipe up from the bottom of the screen. And the nice thing about this is there are a couple of things that are grayed out because we are in Auto Mode right now. But you can fine tune and adjust all of these settings. So if you have something that you routinely change on your camera, you can add that as a quick function and just use it via touch, and it makes things really easy. You don't have to really dive into the menu with this camera because you can program it in a way where everything that you routinely use on a daily basis when shooting video or photos is easily at your fingertips.
Now, there are two ways to see what your camera is seeing. You can use the screen on the back, which is very good, or you can use the EVF or Electronic Viewfinder, which is great for bright conditions where the glare makes seeing what's on the screen hard. The flip out LCD, however, is very good because you can flip it out like this and you can see what you're recording. If you are recording yourself for vlogging purposes, you can also rotate it for low-angle or high-angle shots. I also like the fact that you can close it. In this position right here. If you are storing or packing your camera and you're going on a trip, this way, it ensures that you don't accidentally scratch your screen with your other camera gear. With the EVF, you'll notice there is a sensor here and it shuts off the screen as soon as something is put up there. So when you put the camera up into your eye, the LCD screen turns off and the EVF turns on. So you could see everything that you see on the LCD screen through the Electronic Viewfinder.
Also, right next to the EVF, there is a little dial. If you use glasses or if you simply put this up to your eye and you look through the EVF and it looks blurry, then you can use this little dial to adjust what you see in the EVF and make it nice and sharp. And again, this Alpha 6700 has a touchscreen so you can tap to focus. So if you want to take a picture of something and it's not in focus, just tap on it just like you would on a phone, and it will focus and it will track that subject while you are taking a photo and even navigating the menu. So if you go into the menu and you don't want to use this D-pad or scroll through it, you can actually just tap on things and you can make changes just like that. You can exit out, go to a different tab. It makes it really quick, very easy.
When it comes to battery life, the Alpha 6700 uses the NP-FZ100 battery. It has solid life, but shooting 4K video or lots of continuous bursts of photos will drain it faster. So keep an eye on the battery level. You'll see that in the upper right hand corner of your screen. Right now, I'm at 59%, and if you are planning on shooting a super long day, for example, I'd say bring an extra battery with you. Lastly, Sony releases firmware updates to improve performance or add new features to their cameras. You can check your current firmware by going into the menu. So hit the menu, go all the way out to the left, and then scroll down all the way to the toolbox icon on the very bottom. Then move over and you want to move down to the very last menu item, which is number 13. It says Setup Option. Then move over again, and we will go down to version and move over. And that will tell you the current firmware version on the camera itself, as well as the lens firmware version. You can update this easily through the Sony website. We're not going to dive into that in this video, but just know that it is available. So now that you know what each button dial and screen does, you're well on your way to feeling at home with your Alpha 6700. Next, we will start actually shooting and getting those beautiful photos.
- Okay, it's time to take some actual photos. If you've been waiting to press that shutter button ever since you unboxed your Sony Alpha 6700, this is your moment. Let's start with the easiest setting on the camera, Intelligent Auto, or I-Auto for short. This mode basically turns your Alpha 6700 into a really, really smart point and shoot camera. The camera chooses all of the settings for you, shutter speed, aperture and ISO. So you can focus on your subject instead of your settings. To turn it on, you want to rotate this mode dial to the Auto, which is green, and that is it. You are in I-Auto mode. Now, sometimes you want one photo per click. Other times you want a burst of shots, like when your kid is jumping into a pool or your dog is doing a cool trick, that's where the drive mode comes in. So let's demonstrate this.
Let's turn the camera on and then I'm going to put this down like this so you guys can see the back of my camera. And we remember this scroll wheel on the very left side is the drive mode. So let's press that one time and you'll see this menu pops up. Now the first item here is Single Shooting. That is the standard mode. So you press it once and it captures one photo. If you move down, you'll get into Continuous Shooting. This is your burst mode. Now you'll notice there are two little arrows on the sides, which means you can actually move left and right to select whether you want Hi+ Continuous Shooting, Hi, Mid, or Lo. Now let's say for example, you want Hi+, you select that when I hold down the shutter button. Now you'll hear how fast this camera is. Taking photos pretty quick. Not going to miss much with that.
Now, for everyday moments, I'd say using the single drive mode is fine. Single shooting that is, you can scroll down and this is where you would set a self-timer. For example, you could do a 10-second, you can move over to the left or right, five-second, two-second, and that means you can set it up on a tripod, on a couch, wherever it is, push the shutter button, it will flash, and then it will count down from 10. And then take a photo with all of you, hopefully smiling, and with your eyes open. If that doesn't work, you can move one more option further down. And this is Self-Timer Continuous. So this will take 10 seconds and then three images, so that way hopefully everyone's eyes are open at the exact same time. You can move over and decide, you know, 10 seconds and five photos, five seconds, and three photos, five seconds, and five photos and so on. But for now, let's move all the way back up to single shooting. We're gonna select the center button and we are done.
One of the Alpha 6700 secret weapons is Real Time Auto Focus. That means the camera will automatically find and focus on your subject's eyes, whether it's a human, an animal, or even a bird, and keep it sharp, even when they move around. To use it, just half press the shutter button and watch for the little focus box to appear over your subject's eye. If your subject moves, the camera will track them automatically. This really is game-changing for portrait work, for pets, anything moves anything with motion. And you may have already seen this, but in the quick function menu, you can press that and you can change the recognition target. So it's set to human by default, but you can press the center button and you can change it to animal, bird, you can change it to animal, you can change it to bird, you can change it to an insect car or a train or an airplane. I'm going to move back up to humans because I take pictures of people more often.
Now we already talked about using the shutter. It is two-stage, so again, half pressed to focus and then full press to take the photo. Now this is really important when you are holding it and when you're pushing it down, you want to make sure that you make the movement pretty slight. You don't want to press it and kind of shake the camera while you're doing it because that will result in some blurry images. So you want to keep the camera stable, press it halfway, make sure that what you want in focus is in focus, and then to press it all away and snap the photo. In addition to this, your Alpha 6700 has In-Body Image Stabilization or IBIS for short, which Sony also calls SteadyShot. That sensor is moving around and compensating for small shakes in your hands so that way you can capture stuff and it's not going to be blurry. It's going to be nice and crisp and sharp. Now you do have to turn this setting on. The quickest and easiest way to enable this setting or make sure that it is enabled is by using the quick function menu. So you can swipe up from the bottom, just like that, and it is highlighted right here. It's labeled SteadyShot, and I can tap on that and I can turn it on or off. And I can also get into that same menu by hitting the function button, just like we did earlier. It's very easy and convenient. You don't have to go through the entire menu, although if you do want to go through the menu just to learn, it would be the third tab down. You move over. It is down here, number seven, Image Stabilization. And you could turn it on or off here as well.
Now, should you leave SteadyShot on all the time? Probably. It does spend a little bit more of your battery because it's stabilizing that sensor, but the results are well worth it. The only time that you can turn it off realistically, is if you're using a tripod and you don't really want it to work or need it to work. But in most situations where you are handling the camera with your hands, I'd recommend leaving it on. Now, once you've taken a few shots, let's check them out. So you want to press the play button at the very bottom and you will see your last photos. So you can scroll through this using the scroll wheel, or you can just move directionally left or right, just like this. And you'll see the videos show up just like this. If you want to play a video, you could press the center button and it will start to play. There is a little speaker on the camera and you'll hear some audio as well. And there's a little control panel that you can hit and you could fast forward or you can play and pause, or you could just exit out to stop playback. Hit the center button and then you can go back and then you can keep working through your photos.
Now the cool thing about the A6700 is that you have a Touchscreen. Now you can also just swipe through your photos just like this. You can even go as far as to pinch in to zoom. So let's click on this and let's pinch to Zoom. And we can move around and we can see that your photo is in focus or is not in focus. You could double tap, you can move to the next photo, double tap, and it will punch in just like that. So it's really convenient. The other way to access the zoom is you'll see there's a little magnifying glass with a plus at the top of this AF on button. And you could press that and that zooms in. If you want to partially zoom out, you can do that with the scroll wheel here. So you can scroll out like that, and then you can also move around to make sure that what you want in focus is in focus and your shot looks good. Let's say you see something in there that you don't like, like this image, I'm going to say I don't really want to keep this one. So you can press the delete button right here, the trashcan. One time it will confirm. So you want to move up and hit the center button, and that photo is now deleted from your SD card.
Now, another cool thing about the review button is you can go in and see what your settings were at the time. So for example, if you really like this picture and you want to know, Hey, how did I shoot it? What were my camera settings? You can just go to it and then hit the display button and it will show you your shutter speed, your F stop, your ISO value. Hit it one more time and it will even give you a color graph, a histogram, and then show you all of the settings that were on your camera during that shot. The Alpha 6700 also has a built-in gyroscope. So if you rotate your camera out like this, you'll see that the photo rotates. So just like that. To exit out, you press the review button again, the play button, and you are back to your home screen, back to your main menu. And that's it. Your first photos with I-Auto, you can relax knowing that your camera is doing the heavy lifting for you. And with these quick tips, you'll start getting sharp welcome composed shots right from the beginning. In the next video, we'll take your skills up a notch and start exploring some creative control. But for now, just go take a couple minutes and just play around with your camera. Try shooting a pet or a friend or your morning coffee. The more that you practice, the more natural this will feel.
- I wanted to take a little break and talk to you about transferring your photos and your videos that you are now taking to your computer or to your phone so that you could share them with your friends, your family, whoever it is. So I'm going to start by the simplest way of transferring photos, videos from your SD card in your camera to your computer. And that's just by using that USB-C cable. So we used that earlier to charge this camera, flip the camera on its side. You want to open up this top door, plug in this USB-C cable just like this. And then the other end goes to your computer. In my case, I'm using a Mac, so I will plug that in right here. Now a quick note here, not every USB-C cable is going to work. There are some of them that transfer data and some of them that do not. They simply charge the camera. So to charge it, you can use any USB-C cable, but if you plug it in and this screen does not pop up immediately on your camera, then your USB-C cable probably doesn't have the ability to transfer data. So you might want to find another one that just happened live with me right here.
Now from here, there are a couple of options that the camera gives you. You can do a livestream if you wanted to, but we're going to select the second option down the list, Image Transfer . And so we're going to press the center button and then it goes into USB mode connecting to mass storage. And then it pops up with this message that says you can go here for applications. I'm going to click, do not show this again. And OK, and now it will stay on this USB mode mass storage, USB. Now what you'll see is on your computer, there will now be a folder that pops up. So let's head over there. So here you'll see there is a new drive called Untitled, and if you double click it, that gets you into the SD card on your camera. Now the way that we are going to import photos is just by using the Stock Photos app on your Mac. So let's go ahead and search for that. You can search photos up here and then you can hit open. And what you'll see here is all of the photos on your computer. And on the left side there will be a bunch of different options. Now what we want to see is go down to devices. And here you'll see it says Untitled. And we want to click on that 'cause that is the name of this camera and the SD card that's in the camera. And once you click on that, you'll see all of the photos that are available on your camera.
Let's say I want to copy these six of 'em. I can just drag and highlight six of them and go up to the top and say, import six selected. Do that. And it automatically imports those six images. And now those photos are saved to your iPhotos folder. You can close out of this. And to disconnect your camera, you can drag this down to the trash can to release it. And now you can safely unplug your camera from your computer. But wait, what if you have a Windows computer? Well, I got you covered there too. So here's a Windows computer. Let's do a little quick swaparoo and let's do this process on Windows. So we take that same cable, we plug it into our camera, we plug the other end into our PC now, and you'll see we have the same option here. We want to go to Image Transfer , press the center button USB mode connecting to mass storage, and automatically this pops up on your Windows computer. You can close out of this section right here. And you can see down here in the folder structure, if you click on your folders on the left side, you'll see there is a USB Drive . What we're going to do is we're going to close this out, we're going to go to the search and we're going to search for the photos app. And here it's very simple. On the very left hand side, you'll see there is a USB Drive right here. We want to click on that. And it says, we are loading your items from USB Drive.
This may take a few minutes, and that is it. It starts loading all of the photos and all the videos that are on your SD card, and you can select all of them. You can select whatever you want. Let me go down here and see if I can find a good one. So let's say I want to copy over these three photos. I'm going to check the box here, one, two, and three. And then I can go up here where it says add three items. And all three were successfully imported. Now the cool thing about this process that we just did by plugging in our camera to our computers is the exact same thing can be done by just removing your SD card and plugging it into your computer. If you have a computer with an SD card reader or if you have a dongle with an SD card reader in it, both ways work just as well and just as quickly.
But now let's say you want to transfer your photos and your videos from your camera to your phone. Well, how do you do that? Well, the simple and easy way to do that is through the Sony Creators' app. So step one is to download the app. So whether you are using an iPhone or an Android, you can go to your respective app store and download the Sony Creators' app. So you want to search for that right here. And we found it right here. In my case, it's already downloaded, so I'm just going to hit open and it will take me directly to my Creators' app. If you are downloading it for the first time, you may have to sign in by using an email and a password or create an account using email and a password. But after you go through that process, you'll get to this screen right here. And there are a couple of options. You can connect to your camera, you can import images, you can upload to the Cloud. We're going to go ahead and select the import images and it will automatically prompt us to connect with your camera. So it says, connecting your phone and smartphone via Bluetooth or Wifi lets you set up your camera, update your camera software remote, control your camera, and import your images from the camera to your smartphone. So I'm going to hit next and it will tell me which cameras are compatible with this app. Very last on this list is the Alpha 6700.
So we want to click on that and then we want to turn on our Bluetooth. So we're going to swipe down, enable Bluetooth here, and then go back to the app. And now this app is going to walk me through the pairing process. So it says open the camera's menu. So I'm going to hit the menu, I'm going to go down to the smartphone connect. I'm going to go all the way out to the left, and I'm going to go down to the second tab from the bottom. That's the little globe that says Network. Go over one. The first option is Connection. And then over one more time and Smartphone Connection. And then go ahead and select the center button. And it says, Bluetooth pairing is required to connect smartphone set Bluetooth settings to on. We want to hit OK, so we're doing that now. It says Bluetooth function, standby. And this is telling you to keep this screen open while you connect with the Creators' app. You can install the app from this QR code. We already installed it.
And you could see on my phone right now it says ILCE 6700. That is the Alpha 6700. And it says pairing. So I want to tap on that. And now you want to hit start connection at the bottom and it will pop up with a little screen. You might have to wait for a couple of seconds to see your camera. So just hold on a second. And there it is. It popped up ILCE 6700. That is my Alpha 6700. We want to tap on that and you'll see on your camera now there is confirm that the code shown on your smartphone is the same as below and press OK, so both of these codes look identical to me.
So I'm going to click pair and I'm going to tap, okay, on the Alpha 6700 and it says Bluetooth pairing request on my phone, ILCE 6700 would like to pair with your phone. I'm going to tap pair. And now the camera says, connected to your smartphone, it's connected to my iPhone, just like that. And now in the app, it shows me a picture of the Alpha 6700, shows me how many photos are available on my SD card, my battery life. I can go in and I can do remote shooting, which we're not going to get into. But what I want to do is I want to tap on the import, the center icon right here.
Now, when I tap on import images, it gives me two options. I can do a USB connection or a Wifi connection. So we connected via Bluetooth. But in order to transfer your photos, you want to set up a Wifi network so that these two devices can communicate with each other. So we're going to tap Wifi connection. At the very top, it says if another device is connected to the camera, it may be get disconnected. I'm going to hit OK. And now it says, checking camera response, checking camera status. And now it says, "Creators' app wants to join the Wifi network DIRECT-feU1:ILCE-6700". That is the Wifi network that the camera is setting up just to pair to the phone.
So I'm going to tap join, and it is checking camera response. And this may take a couple of seconds. The first time that you do it, it does get much faster - almost immediate. As soon as you do this a couple of times, it's going to ask if you want to allow the Creators' app to find devices on local networks. Now it pops up with a message here. You can just click on, Don't Show This Again. You can read through it. And now you'll see all of your photos are organized by the date on the SD card. So let's say that I want to go through and I want to find a couple of photos that I took in June, and I want to copy this one. I'll just tap it. I'm going to copy this one. I'm going to copy whichever one. Let's say this one. Now, those three that I selected, I can now go down to the very bottom. There's an import button, you can click import, and now it says import.
Using this setting image size for importing original. You see that there's an option here for change settings, and that will give you some options. So image size for importing, whether you want to keep the original size, that means you get the full resolution of your photos from your camera over to your phone. And the second option is a two-megapixel version of that photo. So it's very compressed, much smaller file size, takes up less space on your phone. I'm going to select original and then go back. And then I can go back here as well. And now I can hit that import, that message will pop up, but I'm going to hit OK. And those three files, 1, 2, 3, are going to be imported directly into your phone's camera roll. And again, if you are importing the full file sizes, that takes a little bit longer to transfer over to your phone. If you choose the two M option, it's very quick because those files are so much smaller.
So congratulations. Now you know how to transfer images and videos from your camera to your computer, Mac or PC or directly to your phone. Now let's move on and get into some more advanced settings on this thing.
- So now that you're comfortable getting great results in Auto Mode, let's add a little creative control to your photography without diving all the way into full manual settings. We'll start with scene modes. I'm going to turn my camera on and then I am going to still be in that Auto Mode, the green icon, and you'll see that this is what you'll see on the screen.
Now this up top is Intelligent Auto or Full Auto. It automatically identifies a scene and it shoots a photo. It's very simple, but let's say that you know that you want to shoot something different, you can move down and there are several options here. So the first is night scene. You can move over to the right night portraits, you can do portraits, you can do sports action, macro, landscape, sunset and back to night scene. Each mode automatically adjusts the settings for the subject. For example, portrait smooths out skin tones and slightly blurs out the background while the landscape mode enhances colors and sharpness for scenery. These are great shortcuts to get better looking images in specific situations. Next I want to talk about Aperture Priority or A Mode.
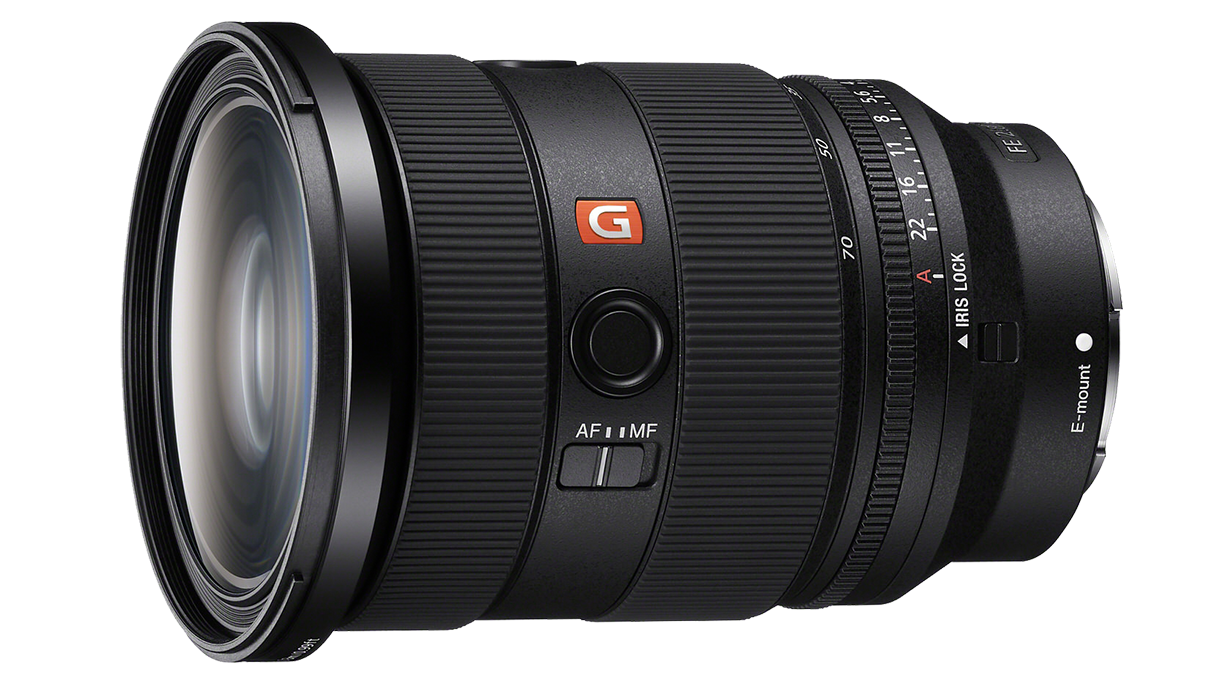
So we'll switch to that here. You control the aperture, which changes how much of your scene is in focus, and the camera adjusts everything else. Aperture is the physical opening inside of the lens itself, so it's determining how much light is hitting the sensor. The larger the opening, the more light that it gathers, the faster the shutter closes on the camera itself and the blurrier the background gets. If your aperture is smaller, it's going to take a little bit more time to get all the light gathered, and so your image is sharp across the frame. So aperture is measured in F stops.
So for example, F/2.8 gives you a blurry background for that professional bouquet look, you can even go down to F/1.8 or F/1.4. A higher number such as F/8, keeps more of the scene sharp, which is perfect for landscapes where you want everything sharp in the shot. If your photo looks too bright or too dark, you can also use Exposure Compensation. So you want to look for the plus and the minus sign on the camera, which happens to be at the very bottom of this D-pad. With the camera on, you can press down and you'll see that there is a scale here where you can easily move up or move down. This lets you quickly brighten or darken your image without touching the other settings. It's especially helpful when you're shooting in tricky lighting situations such as snow or backlight.
But now let's talk about ISO Control because that's important. ISO measures your camera's sensitivity to light. So just like we talked about the opening, the sensor itself in this camera can be more sensitive or less sensitive depending on this setting. And you'll see the ISO is right here. So you want to push this button right here, and all of your ISO settings are here. You can scroll down all the way to your max or you can actually scroll 102,400. If you ever find yourself in a super dark situation like this. One of the ways that you can improve your image and actually see what you're trying to shoot is by adjusting your ISO. As I start with ISO 100. You can't see a thing, but as I move it up higher and higher, increasing the sensitivity of the sensor, more of the image becomes visible and becomes clear.
Now in darker environments raising the ISO will make the sensor more sensitive. So it allows for brighter shots without a flash or using flashlights or an actual flash on your camera. But be careful, higher ISO can also add what's called grain, and that can make your image look a little bit pixelated and not so pleasing. It's best to keep your ISO value as low as possible while still getting a clear shot. For the Alpha 6700. I like leaving it in Auto ISO because the camera itself does a really good job of adjusting sensitivity based on the situation that you find yourself in. As things get brighter or darker in your scene, the camera automatically adjusts to account for this. Next, let's talk about White Balance. White balance adjusts how your camera interprets color based on lighting. To access this menu, you can swipe up from the bottom, and you'll see AWB in the very corner that is Auto White Balance. You can click on that or touch it and you can move down and you can cycle through the various options. And if you have something in the frame, you'll see that it does change the colors that are displaying on the back of the LCD.
You can also create a custom white balance right here. There are a lot of different options with the Alpha 6700. The auto white balance is really quite good. So if you are just starting out, I would leave it in auto for the time being and not worry about it.
Now let's go back to the mode dial. There's another mode that we just skipped over, and that is P, which stands for Program Auto or P Mode. It works a lot like Auto, but allows you to change your settings such as ISO and White Balance and Exposure Compensation, such as what we've been talking about. So you can easily customize the shot while the camera handles the technical details for quick style changes. You can also explore creative looks and picture effects in the menu.
So let's swipe up from the bottom and the very top left hand side, you see a little "ST" and you want to tap on that, and this is your Creative Look. So you can scroll down and there are various different options. Now as you have something in the camera, you'll see what it does. This is kind of like adding filters on Instagram, but it's built into your camera. Not only can you choose between a wide variety of them here, you can also customize them. So you can go over one and you can adjust the contrast level. You can adjust highlights, you can adjust shadows, you can adjust the fade and the intensity of all of this. So saturation, sharpness, sharpness range, clarity.
There's a lot of customization here. So if you find something that you want to play around with, you can create one and you can save it and use it on all of the photos that you take. This is also where you'll find the black and white mode, so you can select that and shoot pictures in black and white. Finally, let's talk about the histogram and exposure preview.
Now, I'm not going to go into super detail, but a histogram is a small graph that shows how bright or dark your image is, and you could pull it up by hitting the display, it pops up. So let's push the display one more time, and there it is in the corner. It's pretty small here. So if you want to see a larger version of this, you can hit the display again and one more time and you'll see a larger one here. This shows you basically from left to right, how bright your image is. So if you go all the way to the left, your shot is underexposed. That means it's too dark. All the way to the right means it's overexposed, which means it's way too bright. What I recommend is using this histogram in combination with the exposure preview, which is this little plus and minus button, and that will tell you if it's +0.5 or +1, means you are overexposed. If it's -1 or -0.5, you are underexposed. And that fluctuates as you move your camera around different scenes. And again, the Alpha 6700 is touchscreen. So if you want to change your ISO, for example, from auto to something else, you could just touch and you could just move it to whatever value you want. And that's it.
These tools give you just enough control to start shaping your photos creatively. But don't get too intimidated. If you want to start out again, start with Auto - and as you build your confidence, move into Program Auto or Aperture Priority and play around with the settings. Then see what it gets you. Ultimately, practice is the best teacher of all, so get out there and start shooting.
- Well now is the time to move beyond photos and start capturing video. But don't worry, it's not complicated and your Alpha 6700 makes it really approachable. First, let's cover the essentials. Every video has resolution. That is how big your video is. Like 4K, super sharp. It's massive. It's great for big TVs or full HD, which is 1080p. Now we can actually change these in the setting, so let's go ahead and do that. So we want to hit the menu button and we want to go all the way out to the left and then all the way up to the second tap down, we are on the main screen. Now you'll notice that you don't see any video settings because what you need to do is you need to go to your secondary mode, dial and switch over to Video Mode, just like that. Now we go into the menu and it looks like this.
Now this menu looks very similar to Sony's high-end Venice Cinema cameras. You'll notice that a lot of this is going to be grayed out because we are still in Auto Mode. So let's go ahead and switch over to Aperture Priority. We'll hit the menu button again, and now we can see a lot more information and less is grayed out. Now the first box here is your frame rate. So we can record 60 frames per second, 30 frames per second, 24 frames per second, or 120, which is slow motion frames per second. I recommend that you start out with 24 frames per second just to make things easier. As you get comfortable, you can change this up and you can record slow-mo and it's going to be awesome.
Once you start playing with that, you'll have a lot of fun. Next over is the your shutter speed. Now in this case it is grayed out because you are an Aperture Priority, so your shutter speed is going to be controlled by the camera itself. If you want full control over it, you want to switch over to full manual. I know it sounds intimidating, but don't worry, it's not too bad. And this way you can actually control how fast your shutter speed is. Now, shutter speed, quick, easy explanation. It's kind of like your camera blinking every single time that it blinks. It shuts the shutter and it records that information to the sensor and to your camera. So the faster your shutter speed, the faster you blink, the more information it can gather and the smoother your footage looks. The slower you blink, your camera blinks in this case - the more detailed that image could get potentially.
But the action if you're moving quick, can get a little bit jittery. Hopefully that makes a little bit of sense. Most cinematic movies are shot in 24 frames, so 24 blinks per second, and then the shutter speed is usually double whatever the frame rate is. So if the frame rate is 24, the shutter speed will be one over 50. Now moving down you'll see that we can control the aperture value here. So if you want to open up the aperture or close it down, you can do that here.
You can also adjust the ISO right here. Then we go down further. There's your Auto White Balance . You can change it to a custom White Balance if you want in Video Mode. This "PPOFF" is Picture Profile, so if you wanted to shoot in a specific look with a specific color profile or shoot flat video to color grade it in post, you can go down and go through and select that. And then we go down to the smaller tiles and this will tell us our file size. So there are a couple of different formats that you can use to record. What I recommend doing is switching this immediately to XAVC HS 4K, and then you can move over and select your record setting. Now there are a bunch of options here and what this is is at the very top is the highest quality, highest bitrate setting. Now the higher the bitrate that you choose, it provides greater detail and flexibility if you are color grading your videos.
However, it is more demanding on your computer and so when you are video editing, it might be a little bit slower to load up if you choose a lower bitrate, something like 50 megabits per second, it offers smaller file sizes and smoother editing. And the trade-off being less image detail and less color flexibility in editing. I usually stick to the second setting 100M 4:2:0 10bit because I found that's what my computer works really well with. But you can play around with the other options as well and see how much more detail they give you.
Now there are two other settings here, the Assist settings that we won't get into, but let's set this up from the beginning. So if you're just starting out for video, I would set your frame rate to 24 frames per second. Set your shutter speed to double your frame rate. So 1/50. You can adjust your aperture here later on. Auto ISO is fine for the time-being. And then we have 4K down here that's really important. Now as I mentioned before, your Sony Alpha 6700 has IBIS or In-Body Image Stabilization, but it also has digital stabilization which crops the frame slightly, which means it zooms in on your picture and electronically through the use of computers and wizardry - it smooths video out even more. You can make changes by going down on this menu to the second page and you can move over and there is a little hand with a camera that says STD. You can click on that and there are three options. The first is Off, then there is Standard, which is just the IBIS, and then the Active Mode is a combination of the IBIS, which is the mechanical stabilization of the sensor moving and then the electronic stabilization where it zooms in and electronically stabilizes your video.
The Active Mode is really nice if you're running around with your camera and you want more stable shots. Let's briefly talk about audio. If you scroll back up, you'll see that there are some audio levels at the very bottom right hand side and you can make changes to your audio level if you want. There is a built-in mic with this camera, which is OK for casual video, but it's not super crisp. There are two little mic holes right above where the lens mounts.
You can also plug in an external microphone if you'd like, and that is under the flap that we use to charge the battery. So you open that up and you'll see that there is a mic port right there at three and a half millimeter. And if you want to monitor your audio as you are recording, you could plug in a set of headphones if you open up flap at the bottom, there's a micro HDMI port, and there is a headphone jack. Again, three and a half millimeter. Now Sony also makes some excellent microphones that you could just attach to your hot shoe on the top of the camera.
So if you open up this hot shoe right here, there are some electronic contacts right there and you could take a microphone such as this. This is Sony's ECM-B10, very good, affordable microphone. And you can simply slide it into the top of your camera and this will give you incredible audio quality. There are no cables that you have to worry about. The camera automatically texts this microphone and it automatically uses it. All of the levels are controlled auto if you are in Auto Mode. So I'd highly recommend if you are planning on doing a lot of video work, you need to get very good audio check out Sony's little microphones. You'll be pretty impressed with them. And as you are recording, keep an eye on those audio meters. They're all the way at the top on the left hand side. You'll see they are moving as I'm speaking right now. If they are too high, that means the audio levels are too high. So you want to turn the volume down on the camera to adjust for that.
Now as a bit of a recap, let's go over some starter video settings to get started right away. So in the menu, I would recommend that you set your resolution to 4K, which is down here, very small tile right here, XAV CHS 4K. Set the frame rate to 24 frames per second at the top shutter speed to about double the frame rate 1/50 for natural motion blur. You can turn on the IBIS, which is all the way down here on the second page, and it is set to active right now. And then you can plug in a mic if you want better audio. That's really a solid starting point that will get you very clean cinematic looking footage without needing to tweak every single setting. From here, practice is really the key. Shoot a short clip, walk around, try a talking head style video or a scenic shot and you'll start to see how small adjustments make a big difference.
- Congratulations, you've unboxed your camera, explored the buttons, taken your first photos, transferred them to your phone or your computer, experimented with some creative controls and hopefully taken your first video as well. Now, there are a few extras that make life easier, extra batteries. This is pretty important if you're planning on shooting outside for a long period of time and you're not going to have access to a USB-C cord.
To plug in your camera, I'd recommend picking up at least one extra battery. You may want to go out and pick up an extra SD card. Again, V30 or higher if you're planning on shooting video. For photos, The slower ones are okay. They just take a little bit longer, but it's perfectly fine. You also might want to pick up a UV filter or a polarizing filter to protect the front of your lens and to control some reflections. Also, if you do plan on shooting a lot of video, you could pick up a variable ND filter for the front of your lens. That's kind of like putting sunglasses on your lens. That way you can keep your shutter speed and your ISO value and your aperture where you want it. Still get those blurry backgrounds without having a super-bright, washed out image.
You might want to consider getting a camera bag as well to keep everything organized and safe. Also, picking up a small tripod is probably a good idea. It's great for stable shots, for low-light photography or for shooting video. By far, the biggest key to getting better is simple: practice. Take lots of photos of friends, pets, coffee cups, or city streets. Try shooting in different lighting conditions, so morning, sun, indoor lamps, cloudy skies. Record a short video every once in a while. The more that you practice with this camera, the more that you will learn and the more confident you'll be using it each and every day.
I'd encourage you, practice, practice, practice. Your Sony Alpha 6700 is capable of so much more - lighting, advanced video settings, creative techniques. Explore Sony's tutorials and manuals for tips. You can also watch YouTube creators who use Sony cameras. They're a gold mine for inspiration. You can upgrade lenses or accessories when you feel ready to expand your skills. Remember, photography and videography is a journey. Each shot that you take teaches you something new, and the more that you practice, the better you get.
So you've got the basics down. You're ready to create images and videos that you're proud of, and now you have the confidence to keep growing. So go grab your camera, start shooting, and most importantly, have fun with it. Thank you so much for watching. Have a nice day.
Rate this course
Your feedback helps us improve our content.
Course rewards
Complete any course and earn a unique badge to celebrate your progress. Collect them all as you level up your skills!