Family Portraiture
Capture beautiful family photos that feel joyful, natural, and holiday-card ready—even if you’re just starting out.

- Details
- Module
- Quiz
About this course
In this simple, beginner-friendly class, Sony Artisan Monica Sigmon teaches you how to create the kind of family portraits that make perfect holiday cards. You’ll learn how to find soft, flattering light, gently guide families into poses that feel relaxed and connected, and keep sessions calm so you can capture real smiles and genuine moments. Monica shows you how to photograph kids and pets without stress, choose camera settings that make portraits look clear and bright, and bring everything together in a style that feels warm and timeless.
By the end of the course, you’ll know exactly how to create a holiday card photo you’ll be excited to send—along with everyday family images you’ll love for years to come.
Course highlights
Instructor
Monica opened her portrait studio in 2000 and quickly built a successful business with a reputation for excellence and cutting-edge imagery. She has earned the prestigious Craftsman and Master’s Degrees from the PPA, earned her Fellowship Degree from ASP, and was named a Sony Artisan of Imagery in 2021. Monica speaks to professional photographers around the country, providing entertaining programs on marketing, building your brand and lighting; energizing seasoned and new studio owners alike.

Monica Sigmon
Portrait Photographer, Sony Artisan Of Imagery
Skills
Transcripts
- Hi everyone. I'm Monica Sigmon, a Sony Artisan of Imagery and a portrait photographer based in Houston. I'm really excited about this course and we're going to cover the fundamentals and basics of children and family photography.
You're going to learn everything from how to get real expressions, how to see and find light, and how to pose everyone to look their very best. Whether it's for a holiday card, the first day of school, or just your family's own memories. Great pictures of your kids and family are treasures for a lifetime. I hope you enjoy.
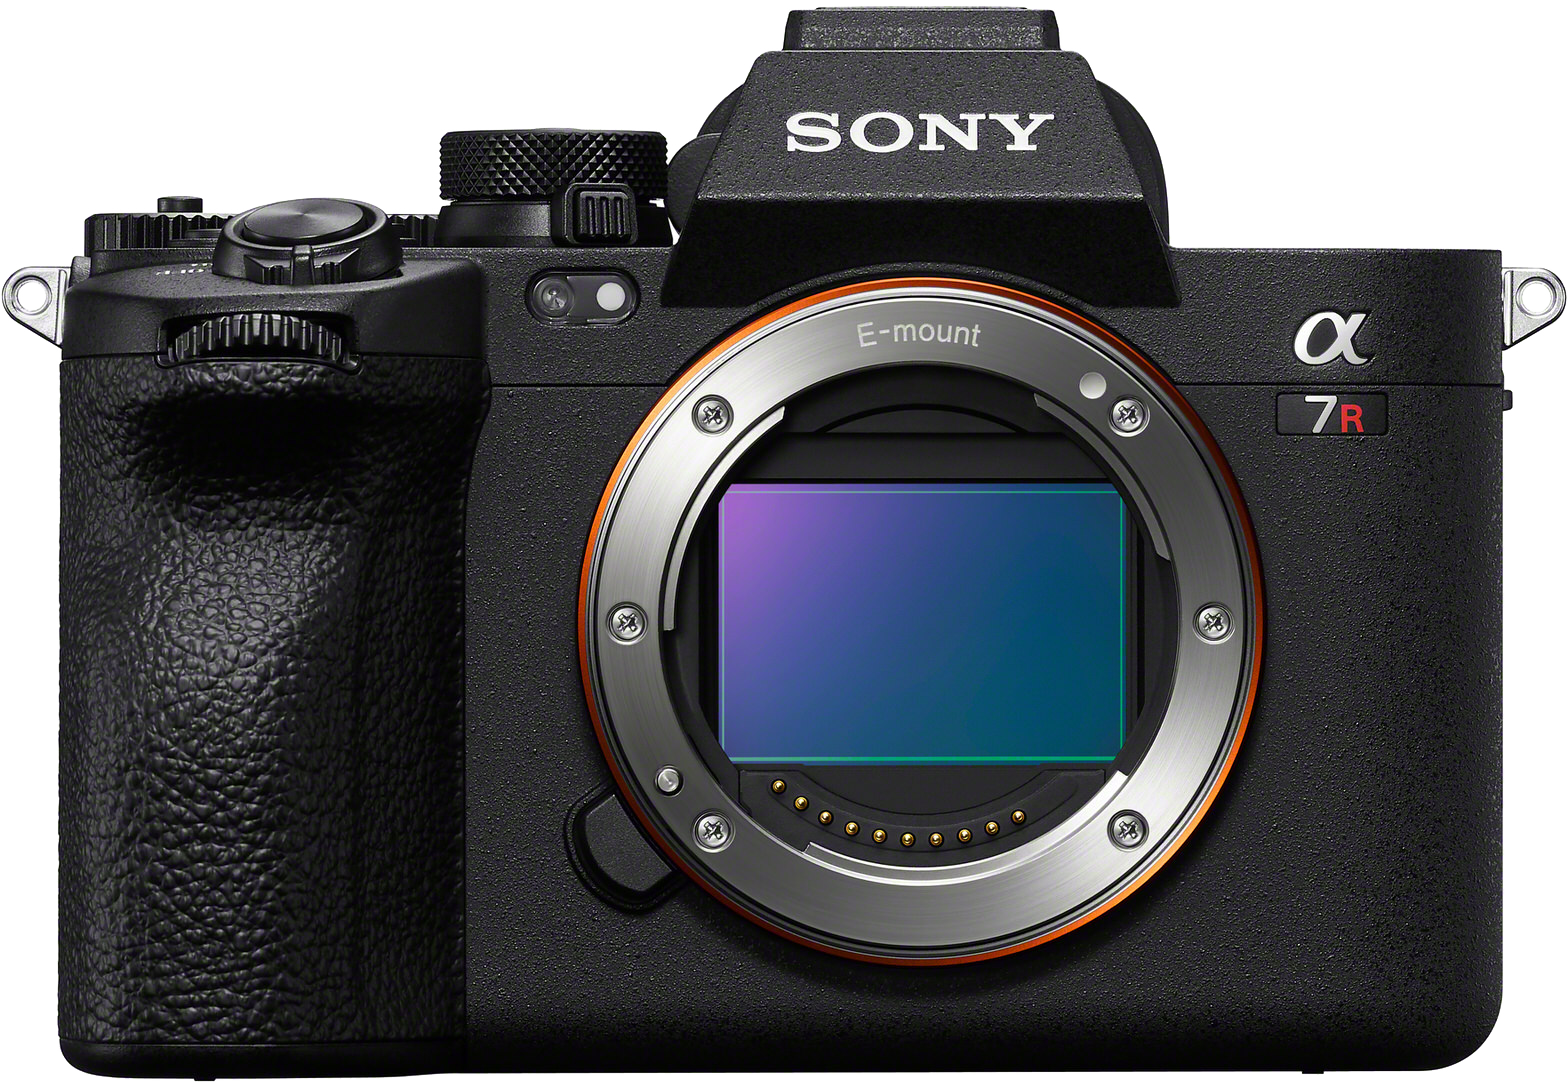
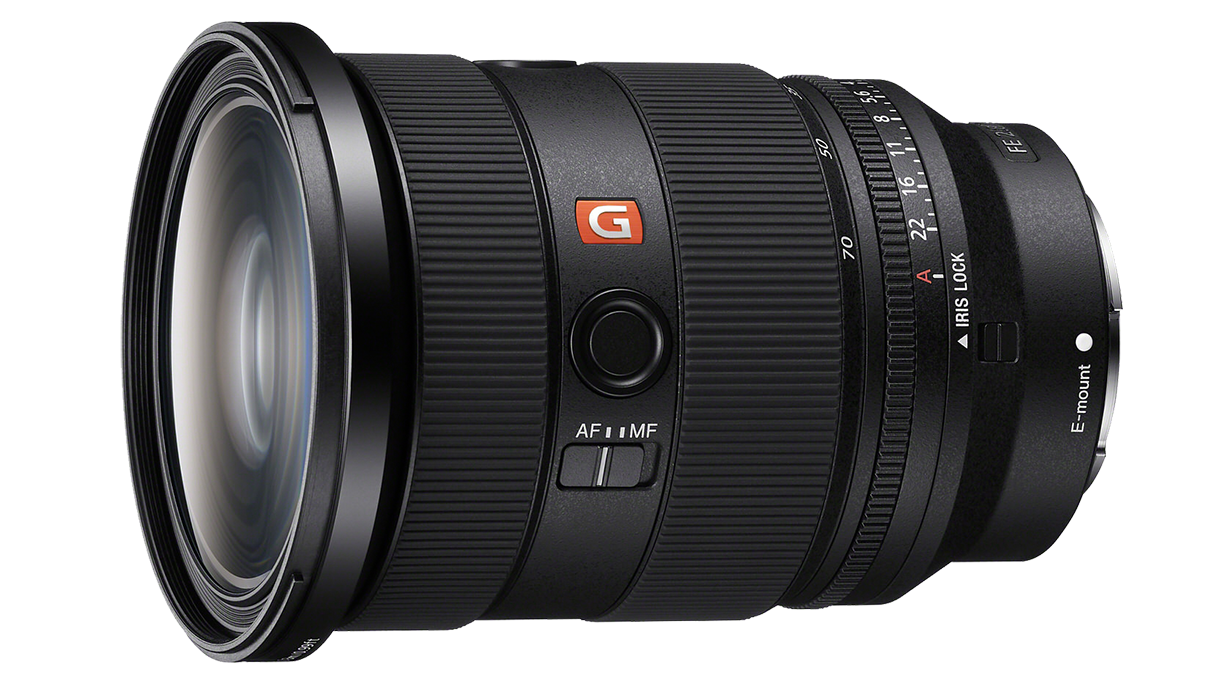
Welcome to Module One. We're going to talk about finding and shaping light, but first, let's get our camera settings out of the way because everybody always asks and wants to know what I'm doing here. So I shoot with the A7R V. I use it for absolutely every session that I do. Typically for a family and children's session, I'll use the 24-70mm f/2.8 GM II.
The reason is because it allows me so much versatility when I'm shooting wide, I can get the whole family full-length, which allows me to sell a nice wall portrait, or I can come in a little bit, get a three-quarter length, and I can even take two steps forward, zoom in a little bit more, and I'm at head and shoulders for that lovely group hug shot.
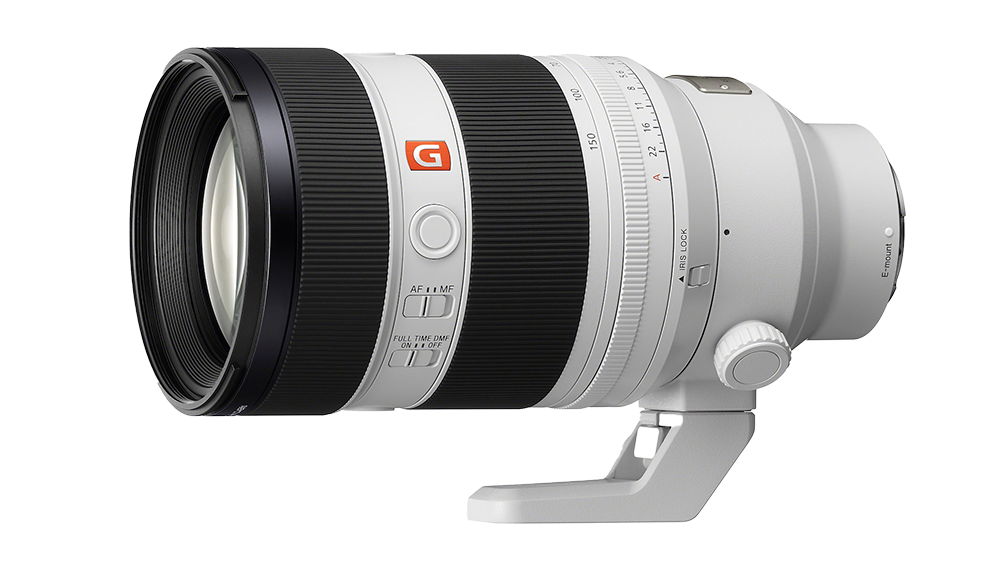
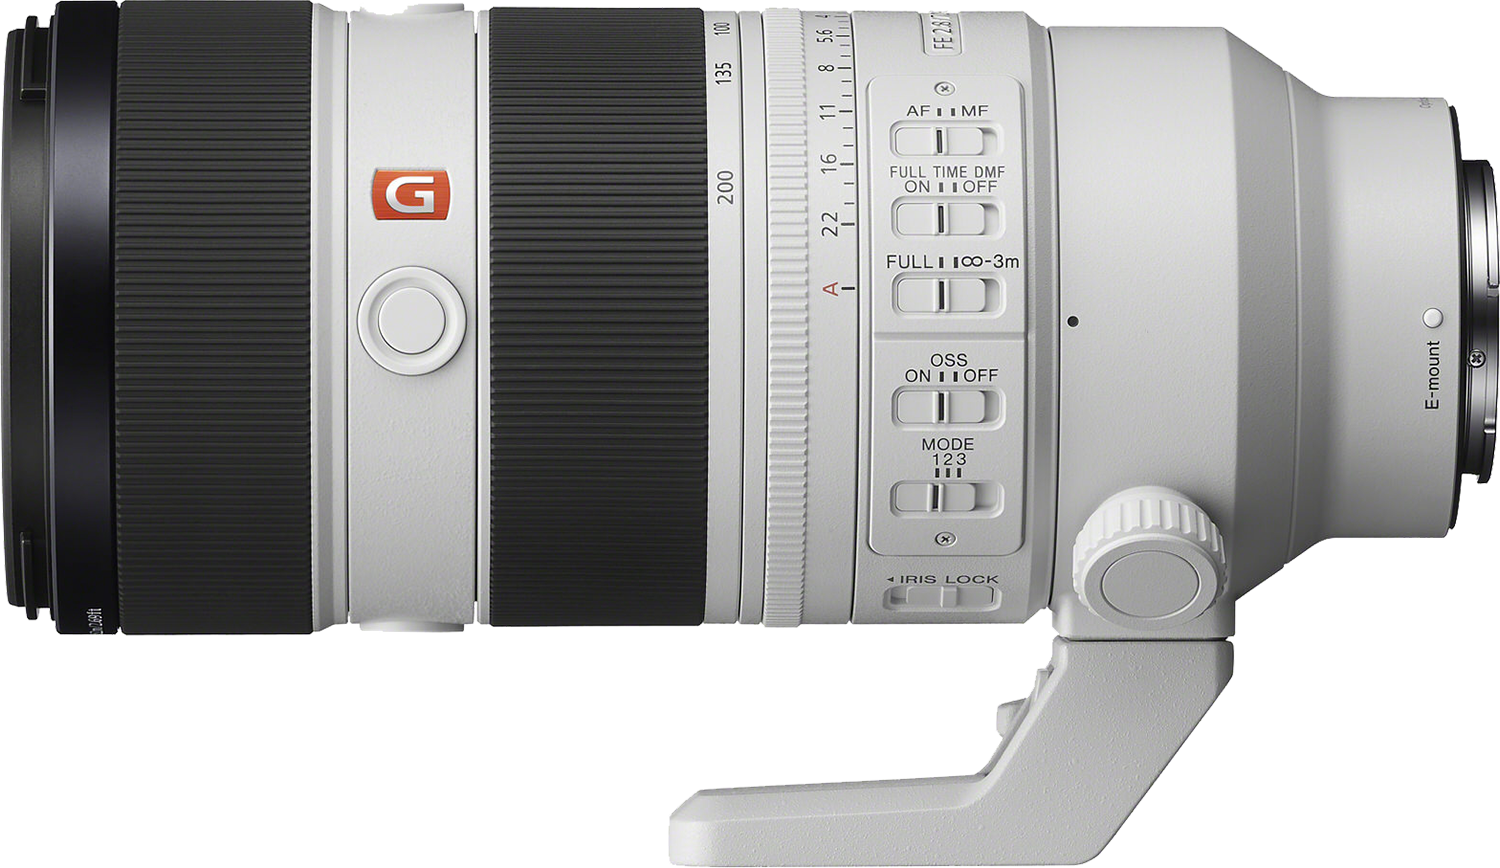
So with a 24-70mm, giving me that much versatility, I don't have to stop and interrupt the rhythm of the session to change lenses. Now when I'm photographing outdoors, my lens of choice is the new 50-150mm f/2 GM. This is so beautiful and so much fun to shoot with. I like to have a little bit more bokeh, a little bit more depth of field when I'm outside. I like that compression. So that's why I typically shoot with a longer lens here.
I used to shoot with the 70-200mm f/2.8 GM II quite a lot, and I still have it, but this new one is really finding a permanent place in my bag.
So one thing you want to think about when you're photographing groups or families or children, when you're setting your camera up, is how many people are you photographing? How much depth of field do you need? So that's usually the first decision I'll make is what aperture I'm going to shoot at. For that reason, you can easily just turn your camera to Aperture Mode and decide.
If you're photographing an individual child, then I like to shoot pretty wide open. I like that beautiful fall off. But if I'm photographing a family of four or five or moving pieces and parts, little kids, animals, what have you - I'm going to want to increase that aperture up to F/8, maybe even F/11. So those are the first decisions that I need to make.
Now, when you set your camera on Aperture Priority, everything else will be handled by the camera. That's the beauty of it. So I don't have to really be thinking about shutter speed because it's going to compensate for that. Auto ISO will even help us get the lowest ISO possible for that shooting environment. So just a quick tip, if you want to take your mind off of the technical and really focus on the subjects in front of you, Aperture Priority is a great way to go.
So as a portrait photographer, the main thing I'm looking for is lighting on the face and particularly the mask of the face. And what we mean by that is kind of edge to eye, edge of your eye to the other edge of your eye - so the mask. And it's not enough just to have exposure and lighting. We want to actually shape the light to flatter the face. During COVID particularly, we all got used to ring lights or lights right on the top of our computer. And what that does is actually flattens our face out, makes it look really wide because it's one big light source blasting at us.
But if we simply move the light source to one side or the other, that will give us highlight and shadow and help us shape the face. So what I want to do now, whether you're doing this indoors or outside, I'm just going to show you a quick little lighting demo here so you can learn to see the light. So I'm going to bring in my beautiful model, and most people, if this is my light source, whether it's the window or a studio light, what have you, just step forward for me. Most people tend to put their subject kind of in the middle of the light source. And the problem with that is, now you're getting some split lighting and you're blocking at least half of your light. You're effectively cutting your light source in half.
So the problem with that is not only is it not efficient, but it's just not flattering. So by simply backing your subject up - watch your step here, there we go - to the edge of the light. Now we have this beautiful wrap around. So we have light on this side, and then it's just falling ever so slightly here, giving us that beautiful Rembrandt triangle.
So whether you're indoors or out, we want to think of your light source. Where is it coming from? Maybe it's a window, maybe it's a soft box, maybe it's the sun. Whatever it is, that's your light source, and that's what we're going to use to shape the mask of the face. So in this instance, if this is our window, I like to work on the edge of the light. So really back here, I want that light to feather across.
If you think of light as a flashlight, it's not a tube. It's not light coming through a pipe, right? It's a flashlight like this. So I want to work on this back edge of the light because it's softer and it's more flattering. When you put somebody in the middle of a light source, that's the hottest, least flattering part of the light. So by backing up to the edge of a window to the edge of a door, that'll give you that nice soft wraparound light that we're looking for. We want to use this entire light source, not half of it, not the back of it, but this entire source.
So again, as a portrait photographer, lighting on the is what I'm looking for. As you look through these portraits, you'll see that no matter the location, no matter the setup, the lighting on the face stays pretty consistent. And in groups too, I want the lighting on each individual to be great. The greatest sign of a wonderful group portrait is that each individual looks really, really good. So I'm looking for patterns of light across all of the subjects in my portraits.
So why is all of this important? Well, the reason is most of our faces are not symmetrical. Most humans do not have symmetrical faces. The exception being models, right? What makes them beautiful to our eye and our brain is that their faces are pretty proportional and pretty symmetrical. That's why lighting straight on them works.
But for regular people who don't have symmetrical faces, we need to learn to look at those faces and then learn how to flatter. So by turning a face this way or this way, we can even out unevenness, we can shape things that aren't symmetrical, and it just is more pleasing to the eye. Typically, people will look and feel better when the lighting on their face is more flattering.
One of the biggest mistakes photographers make is when they're photographing, they're looking for a background first. They're looking for something that's visually interesting and appealing. The problem with that is that a beautiful background doesn't always give us beautiful light on the face, and that's actually more important. So when we're looking for where to shoot, we want to find beautiful lighting on the face first, just like we demonstrated, and then find a background behind them that will fall into place exposure-wise, something that's not too bright or too dark. So we'll still have information in the background, but it's not going to be competing with the light on their face.
For this reason, when we're outdoors, I actually do something that's a little bit contradictory. So instead of using that sun, that main light to the side or in front of the client, I typically put it behind my subject. And then I'll use a reflector or a reflective surface, which we'll talk about to bounce light back into the face. And by directing that reflector, I can shape the light on the mask of the face. So the lighting behind my family or my subjects, my children - will give us some beautiful backlight and edge lighting that's really, really lovely to look at.
And then I'm going to shape this light coming on their face. I can use a reflector. I can use a piece of poster board from my child's art class. I've used a white sheet for a family of 18. I laid it on the ground. You can use all kinds of things to just bounce light back into the face. You also want to be looking about what's around you. So if you're photographing on green grass, that's going to be reflecting up into the face.
But if you're photographing on sand or a lighter colored sidewalk, that's also working as a reflector. Is there a building near you that the sun is hitting and bouncing back into your subjects? So while you're walking around, always be looking at where the light source is and where it's bouncing off of. When photographing outdoors, I typically like to do it at the end of the day. That really sweet spot of lighting.
I don't photograph all day long. We do one session a day at the end of the day, and the number one thing to consider is when your subjects are at their best. So if you have small children, then we need to find out when their nap time is, when they're happy, when they're hungry, and avoid the bad times, and really set ourselves up for success. So for very, very small children, in the wintertime, I can still photograph them at the end of the day because it gets dark earlier. But in the summertime, I'm going to have to move to a morning session.
I want soft light. I don't want to set myself up for failure by trying to photograph at noon. When I'm photographing outdoors. I'm not bringing lighting with me, so I'm looking for natural light and reflective surfaces.
That's it for Module One. I hope that helps you to feel more comfortable in finding and shaping light for your subjects.
- In this module, we're going to talk about specifically working with children. And the first thing to remember is that you are in control. This is your session. You are setting an environment in which the magic can happen. So this is your job and your responsibility, and that means that you have to know your lighting like we've talked about. You have to have your location already chosen, and now it's time to let the magic happen.
So when children come on set, the first thing to remember is don't gush all over them. The more attention you give them at that moment, the more they're going to be prone to act so that they will get a reaction out of you. They are just little adults, mini adults. That's it. So don't be scared, don't gush, don't go overboard. They're like dogs. They can smell fear, they can smell insincerity. So we just have to talk to them like little humans.
The second most important thing to remember is that for all the lighting we've talked about today, expression is the most important thing to think about. So when in doubt, just make sure you've got those great expressions. We want to perfect our skillset with great lighting and great posing, but if we don't have a great expression, we've got nothing.
So how do we get these great expressions? Well, with children, it's really important to mirror the behavior that you want to see. So the louder they get, the quieter I get, the bigger and more boisterous they get, the more calm and more still that I get. They will eventually get tired of that. When you don't give them a reaction, they will get centered. And then you have control of the set again.
So don't feel like because a child is starting to act up or they're getting bored or they're getting fussy, that the session is over. Photographers give up way too early. We just need to be patient. We need to keep the parents assured that we've got this in hand, we're going to be fine. Their kids are awesome because they're feeling nervous, and that nervous anxiety and energy will translate to the children.
So if you're photographing your own children, the same thing comes into play. They're going to push your buttons a little harder because they know which buttons to push. But just stay calm and stay in control. Don't ask questions, just give nice directives. Don't ask a question that a child can say no to. Don't say things like, do you wanna sit on the stool? Because if they say no, you're kind of stuck.
So just tell them, let's go ahead and sit on the stool. We're not rude, we're not demanding, but we're firm and they know that I'm in control. So those are my first and most important tips for working with children.
All right, Becky. Ready? I love that. Turn your chin this way for me just a little bit. Great job. Chin down. Perfect, back. Don't giggle, buddy. I know you're real. There it is. Great job. Perfect.
Let's talk about how to get great expressions. Everyone, no matter how old or young, love to talk about themselves. They love to be the center of attention.
So with children, I ask a lot of questions. I try not to direct as much, but asking more questions. And as I have their attention, I can make small modifications. So the first thing I'm going to do is get that safe shot, get something I know that we can use. We can use it on our card, we can use it as a client portrait. We can use that.
But then I'm going to start finessing, because now I have their attention and they're getting engaged. And so I can make minute corrections to hand placements or posing or that kind of thing because they don't realize that I'm doing it. So I'm going to ask them questions about what are their favorite, whatever colors, foods, whatever. What did they ask for Santa? What did they wear for Halloween? Like anything like that.
And so the other thing I've learned to do, is tell them before I'm going to start asking questions. So for instance, I'll say, "OK, are you ready? I have a lot of questions for you." And they'll just kind of immediately lift up their little backs and they'll lean in a little bit because they're curious now. And then I'll say, "Are you ready? Are you ready for my first question?"
And they're leaning in and their eyebrows go up. And it's a really beautiful, engaged expression, especially if you're trying to get a little bit less than the big toothy gummy smile, right?
So I'll say, "OK, are you ready for the first question? Okay, turn your nose this way. Alright, here's what I want to know. Are you ready? Okay, lean in. Just like this. Just like this. Perfect. Okay, I want to know..."
And then I'll ask a question, and then it'll either provoke a laugh or maybe just a straight answer. But that that is actually not the portrait I'm typically looking for. The one that I want is that shot of them with their little eyebrows up. They're engaged, they're curious, and they're waiting on what I'm going to say next. Those are always the most popular expressions because typically it's really hard for parents to get that. But now you know the trick.
Another tip, when working with children, I really like parents off set. The reason is because the child doesn't know who to listen to - me, or mom, or dad. So when I ask the parents to just leave the set, then I am again in control of that session and I can really narrate what I need, and they're focused on me. They're not worried about what mom's going to say or if they're doing the right thing, I've got them right with me.
So framing and composition, there's nothing more boring than a one-note melody, right? So if you think about heads as music notes, nobody wants to listen to a melody that's six or seven straight notes in a row, with no variation, no difference in length, and no change in note.
So what we want to do and what we love to enjoy listening to, is music that goes up and down like a melody. There's spaces, there's room, there's pauses, there's lows, there's highs.
And so we can do the very same thing when posing groups. And this is really, really important because we want it to be visually interesting. Anybody can take a picture of a group all lined up, but let's tell a story. Let's get some levels and height difference. Let's get some heads higher, some kids seated, some standing.
And then lastly, I love connection. So after I get all the bodies put together, now it's time to finesse. Let's just get that little hand on her brother's shoulder. Let's get these two leaning in together. Let's get his head leaned against her shoulder. Anything that shows a connection or a story. So more than just what people look like, we want to show who they are. We want to tell the story of their relationships. And those little pieces of connection, those little touch points are exactly what can help do that.
So I threw a lot at you, but the goal of this module is to help you see how to take control of the session and get great expressions.
- We're at Module 3 now, and it's time to talk about groups. We've talked about lighting and we've talked about expressions, and now we have to put it all together with groups. This can help us create the perfect holiday card, vacation photo, family reunion photo, or really any moment with a larger group of people. Maybe it's the parents, maybe it's cousins, whatever the case may be. Now we get to put everything together to make more magic.
So one of the things that we want to think about is how to pose naturally. That's always the biggest question. So what I like to do is I kind of get everybody generally where they're going to be, whether it's indoors or out, and then I walk back to my camera and I kind of pretend that I'm messing around with some settings and I just am watching and observing how they're interacting, naturally.
You can tell a lot just from a few seconds of watching. You can tell which child gravitates towards which parent. You can tell if siblings do not get along. Let's not force intimacy and make them hold hands in a portrait. You can tell which ones are more shy, which ones are more reserved.
But one thing I really love is seeing how they stand naturally. Are they standing with their hands in their pockets? Are they crossing their arm? Do they just stand with the weight on one leg or the other? Are they twisty? Are they squirmy? What are the things I need to know?
And then I like to start generally with that pose. I try not to preconceive a pose in my mind because everybody's different and every personality is different, and I want these poses to feel real and authentic. So if one child is putting his hand in his pockets, that's great. I'm going to start with him there because it feels comfortable to him, even if that's not the portrait that I'm looking for. It's a good starting place for everybody to get warmed up.
So watch what they're doing. If their hands are in their pockets, start there. Let's see if they're crossing their arms. Start there. What feels natural to them? What is something that they're comfortable with? And start with that.
So when shooting groups, I really want to use a telephoto lens, a zoom lens. So 24-70mm f/2.8 GM II is my go-to, because again, I can get that full-length family portrait. I can take a couple steps in, get a group hug, something more intimate and not have to interrupt the rhythm of the session.
Outdoors, I'll often use the 70-200mm f/2.8 GM II, and now my new favorite, the 50-150 f/2 GM. These allow me to get beautiful fall off behind them, and really force the viewer's attention to the subjects of the portrait.
When we look at a photograph, our eye goes to the sharpest part, the point of most contrast. So if something is in focus versus out of focus, our eye will naturally go to the in focus part of the photograph first. So let's make sure that all of our subjects are in focus. Again, that will help determine the aperture I want to shoot at. If I've got just a small group of older children that I know will sit still, I can shoot more shallow, I could go F/4, 5, 6. But if I've got little kids who are a little bit more wiggly, or a bigger group, I want to make sure I'm sharp from front to back, and making sure that if anybody moves out of that plane of focus, my plane is actually deep enough that it won't matter.
So that's how I decide what aperture I'm going to use. Again, setting your camera on Aperture Priority here, is a great way to start. We want to not be having to think about the technical things, because when we're thinking about that, we're actually not thinking about the subject in front of us. When we're nervous about the job that we're doing, we can't be serving them in front of us. Our brain can't think about two things at one time.
So if you're nervous, shift your perspective and start thinking about how can I pour into that person right in front of me, that child, that dad, that family. How can I love on them? How can I get the best expression? How can I make this a great experience for them?
Before you know it, you won't be nervous and you'll get great results.
Are you going to make me come tickle you? Leave your hand. Oh, good job. Good job. There it is. Good job, Sam. Mary Gwen, tilt in your head into your brother. Nice job. Perfect. Oh my gosh, you guys, this is so good. Oh my gosh, awesome job you guys. This is the most beautiful shot - we've got hair light, we've got beautiful light on their faces.
They're listening wonderfully. We got the safe shot first, and then we just kept finessing. And so we got a little bit more connection, a little bit more storytelling. While many kids love being photographed, there are a lot that don't, and they're looking at this as a chore, and chances are that parents have either threatened them or bribed them or told them they're going to be in trouble, or they have to say cheese. And you have to in 30 seconds, undo all of that and let these kids warm up to you and win them over without them really realizing what you're doing.
So I tell parents ahead of time, don't tell them they're getting their pictures taken. Don't make a big deal about that. Tell them they're coming to play. Tell them they're coming to a park. You're going to see Miss Monica. So just make it so that there's not so much pressure on these children.
And if they're thinking that they have to perform, what I want to do is just break that down and again, start talking to them, asking them questions. Get them talking about themselves. Even little kids really like it when people are interested in them. If they're shy, just don't push too hard. Just take your time, be patient. There's not a timeline here. We can take all the time we need to, to warm up and get those beautiful, beautiful expressions. We can ask them what they want to do, "How do you want to pose?" And they'll tell you, and maybe it's a terrible shot. It probably will not work, but you're winning them over and now it's feeling collaborative, even to a small child.
You can ask them to come and hold the reflector for you when you're photographing mom and dad, or their brother or sister. You can ask them to come look at the back of the camera. Anything that makes it feel collaborative for them will get a buy-in.
Some simple things to remember about relationships. Watch body language. You will be able to instantly tell if siblings have some rivalry going on and they're not really, really close, let's not try and represent something that's not true. Let's let them be individuals. Let's watch if they're really snuggly to one parent or the other, then let's go for that win and put them with their parent.
So just watching body language and seeing when they stiffen up or when they relax and really paying attention to what's happening, not just the lighting, that's really, really important to see how we can make them feel and look really authentic and natural.
The other thing to do, if you're really having trouble and you can't get some of the littlest expressions, or maybe dad's feeling a little uncomfortable or whatever, I like to do what we call a choreographed candid. So it's really not just a candid shot, it's telling everybody where to look, but having them interact and that gives them something to think about, not me, not the camera. And we can get a beautiful shot, a little storytelling there, and that works really, really well. Our families always love that.
The trick with that is you'll have to remember for people to make eye contact with each other, not to talk and to just smile and hold those expressions. You will be delighted with the results.
So in working with groups, remember your lens choice. Remember, stay in control of that session and look for poses and body language that will work naturally and authentically to really represent that subject matter in front of you.
- If you want to add in a family pet, this module is for you. Those of us who have four-legged friends in our family know that no portrait is complete without them.
So how do we do it? We're wrestling children, we're wrestling dads, we're wrestling all of the things, and now we want to add an animal. Are you kidding?
So let me give you some tips and tricks. Number one, I don't photograph cats. That's my first tip, because I can't control them and I have to stay in control of the set. I'm joking, but not really. So if I am going to photograph a cat, it will be indoors.
But let's move to dogs. That's a little bit more common. Dogs are like children. They also can smell fear. So just relax and be patient. You will actually have more trouble with the parents than you will with the dog because the parents are going to be so worried that their dog is going to misbehave or embarrass them. They're going to be nervous wrecks, but you just, again, take control of that set. Invite them to watch from the sidelines and bond with the dog for a few minutes before you start photographing.
Another tip for families is to wear the dog out before the session. Make sure they take that dog for a long walk or a run in the morning. We don't want them fresh from a nap. Just, you know, hyper and energy and excited about being in a new place. So we want them to be a little bit more relaxed, a little bit more tired out. Have your family bring treats, but you take the treats from the family as soon as they walk on set.
We don't want the family members holding the treats for the dogs because the dog will just keep searching within those family members for treats the whole time. I want to hold them so I can show them if I need to, but I really am going to try not to give them the treats during the session. The same reason I wouldn't give a two-year-old a lollipop on a break, because you will never get them back on set without that lollipop. So unless you want it in the photograph, really try not to use it. You can use squeaker toys, you can use dog whistles. I buy a bag full of squeakers from Amazon so I don't have to rip apart the stuffed animal toy, and I can just hold it in my hand while I'm turning my lens and make that squeaking noise. And it works almost every time.
It also works with little children because I'll show you, you can use it as a squeaker to just get their interest piqued.
Poppy. Poppy, want to go for a walk? Good girl.
Dogs, like children, will get bored easily, so make sure you're changing it up. If they've stopped reacting to the squeaker, now it's time to shake a bag of treats. Once they stop reacting to that, now it's time to use their keywords, whether it's treats or walk or run. You'll find out from the family. So they're going to get bored really fast.
And again, don't sacrifice the whole group just for the dog. Make sure that you keep an eye on those humans too. And then just at the last second, pop in that squeaker. Say those magic words, get the dog's ears up and you'll be ready to go.
Mary Gwen, put both hands on Poppy's head. Just gently pet her, gently. There we go. Look at sister. Perfect. Got it. Great job everybody.
Patience is the key when working with the animals. Parents will be so worked up about it taking too long. They'll feel so badly. But just say, "We're going to get it. We're going to get it." Photographers give up way too easily. I almost always can get a shot of the dog. It just takes a few minutes.
The kids might get nervous. Just tell them to relax. Pinpoint which family member is best with that animal. It's not necessarily the disciplinarian because I don't want that animal to be scared. So maybe it's just lying in a lap of one of the children, what have you, but make sure that the animal is just as comfortable as the humans.
So when it comes to posing, we've got to be nimble. We've got to be flexible. I might want the dog seated, but that dog may be nervous and just want to stand. We're going to have to go with it. We need to have a plan B, plan C, for that pose, and watching to see who's reacting how, and who's leaning in. Maybe somebody can put their arm around the dog like a hug, but it's also gently holding that dog in place.
We like to kind of trap them. We do the same thing with two-year-olds. Put them in a chair where they can't go running away. Put them in a parent's lap where they're being held onto. The less mobile little children and dogs are, the more successful you'll be.
One of my favorite tips when I'm photographing little children and animals is to use the Continuous Focus mode on my camera - that will enable the camera to react so quickly when somebody moves, or a dog moves this way or turns their head, or whatever, having a separate processor in the A7R V, just for AI to anticipate body movement and animal movement, is huge. And it saves me so many lost shots.
I can also put my focus directly on animal mode and make sure that that camera is tracking just the eyes of the animal. It has saved me so many times, and I've gotten beautiful portraits as a result. So make sure before you get started, before you get that dog on set, that you have all of your camera settings in place. You have a general plan of how you want the humans posed. You'll add the dog in at the last minute, and you'll be off to the races.
So to wrap up this module, remember: Be patient, stay in control of your set, and use those little tricks and tips to get the dog's attention while still keeping the humans engaged.
- Well, you've made it this far. We are at Module 5, and we are going to talk about taking your photography to the next level. But what's next?
We've got to think about what is the photography style we want to be known for? What is the consistency? What's the thread that's going to travel throughout our work to make it uniquely ours? Everywhere I go, every museum I go to, I'm always looking and referencing artists and art, even lighting in movies. I'm watching to see how lighting can create mood. I'm watching to see posing. I love John Singer Sargent and his lighting has influenced so much of my work. So think about who is it that you want to be inspired by? Don't copy, but who do you want to be inspired by?
So I like to take a bird's-eye view. I'll set all of their work together and just study what is it that's attracting me to that body of work. For Degas, when I look at his portraits all on one computer screen, then I see it's about lighting and it's about feeling and how can I use that to bring that into my work?
But the number one thing is you don't want to just copy somebody's style because it won't feel genuine and it won't last. You'll get tired of it because it's not coming from your heart. So think about what inspires you, why you like it, and how you can incorporate it into your own body of work. Once you've decided that, then it's time to practice, practice, practice and practice more.
There is nothing more important than shooting all the time at every opportunity that you have. Grab neighbors, grab friends, grab anybody that you can, and start practicing.
And then to take it the next step, you want to make sure that you're editing and culling your images right as soon after a session as you can. The reason for that is because as you're culling, you are going to see portraits that stand out to you, things that you like and things that you don't like. And if you wait too long to do that, you could forget what was that tweak that you made that makes you really like this portrait a lot. You changed the lighting somehow. Maybe you moved the reflector, but if you're not looking at those images for another week or two, it's going to be really easy to forget the change that you made.
So I recommend every time you make a change, take a pullback shot first and then do the portrait. And that way you have an easy reference to see, "Oh yeah, that's where I moved the reflector." Or, "That's where I turned the family, or I turned this face," - or what have you. And you'll start to learn, especially if you're able to do it right after your session, it'll be fresh in your mind and then you'll be able to replicate these results because you're getting the patterns built in your brain.
Now that we've got that, let's move on to some basic editing tips. I like to crop in-camera as much as I can when I shoot, but if you're nervous or you're not sure, you can always shoot wider than you need to. By shooting on the A7R V, I have plenty of megapixels to choose from. So if I want to crop in on that image, I'm not sacrificing any quality on the file.
And here's where you can get creative. Off-center cropping is something I really like to do. I shoot off-center all the time. Maybe you'll forget, but you can play with it in cropping in post, and it just gives the viewer something else interesting about your work, rather than the very straightforward centered portrait.
So compositionally, I shoot a lot off-center and if that's something you want to try, but you're forgetting in the craziness of a session, that's something you can play with in post really easily. So cropping will allow you to play with different perspectives and different compositions to see what it is you like and that can influence the way you shoot in the future. And on the A7R V, because I have that many megapixels, I can take a full-length family, even from far away and crop into a head and shoulders group hug if I need it. So I have a lot of flexibility there.
The other thing I'm looking for when I'm editing in post is making sure that my exposure is right, making sure that I don't have to bring up any information in the shadows or highlights. Occasionally I'll add some vibrance to get the colors to pop a little bit more, but I typically tend to stay away from saturation when I'm working with humans. I don't want to change the skin tones. The skin tones come in so beautifully on the Sony cameras. I don't want to mess with that. So adjusting vibrancy can enhance the photos without changing your skin tones.
I am a portrait photographer because I love photographing people. I don't want to sit at my desk and have to correct files. So I try and get as much right in the camera as possible. When I'm bringing my images into the editing software, I don't want to have to spend a lot of time to fix things. And what I love about the Sony cameras is that I have to make very few adjustments on my exposures, highlights, or shadows. The in-camera metering system is so good that I don't have to take time to make those adjustments later. It's really, really helpful again for me to just be able to concentrate on the subject matter at hand, getting those great expressions and then having more time to shoot.
The last thing I want to leave you with is how important it is to actually print all of these beautiful portraits that you're making. They're great in our phones and our digital frames, but there's nothing like the actual printed portrait. We have seen research that tells us that children who see printed portraits of themselves and their families in their home feel better. They feel more secure in their family unit. They feel and know that somebody is proud of them. And that changes the way a child sees themselves.
So make sure that you're offering prints. Make sure that you're printing your own photos, even if it's ones you've just taken on your phone. Your children need to see them and they need to be documented. This is actually the most photographed generation, and they will have no portraits if we don't start taking care of this. So make sure you're printing things. We want generations in the future to be able to look at a portrait and say, this is where I come from.
So that's it for today. We've covered everything from how to see and shape light, how to pose groups, and most importantly, how to get great expressions from your subjects. I hope you found these tips helpful, and for more courses, stay tuned to Alpha Camera Academy.
Rate this course
Your feedback helps us improve our content.
Course rewards
Complete any course and earn a unique badge to celebrate your progress. Collect them all as you level up your skills!