Video 101
Start creating crisp, confident videos with simple, step-by-step fundamentals today.
- Details
- Module
- Quiz
About this course
Built for creators ready to tell stories through motion, Video 101 walks you through the fundamentals – picking the right camera and lens, dialing in resolution, frame rate, and exposure, nailing focus and composition, capturing clean audio, lighting your scene, and planning your shoot – so you can make professional-looking videos that feel dynamic and intentional. Led by Instructor Katie Steckly, the course is practical, encouraging, and designed to help you level up fast.
Course highlights
Instructor
Katie Steckly is a full-time content creator, agency founder and travel enthusiast. She says she started her internet journey over a decade ago as an awkward teen girl making YouTube videos in her bedroom. Now, she creates content on YouTube to help creators and runs her video editing agency, Creatorly Media. She's always down for seeing and trying new things, and says what she's learned over her 10+ years as a creator online is that content creation is one big old adventure.

Katie Steckly
Videographer, Content Creator
Featured gear


Skills
Transcripts
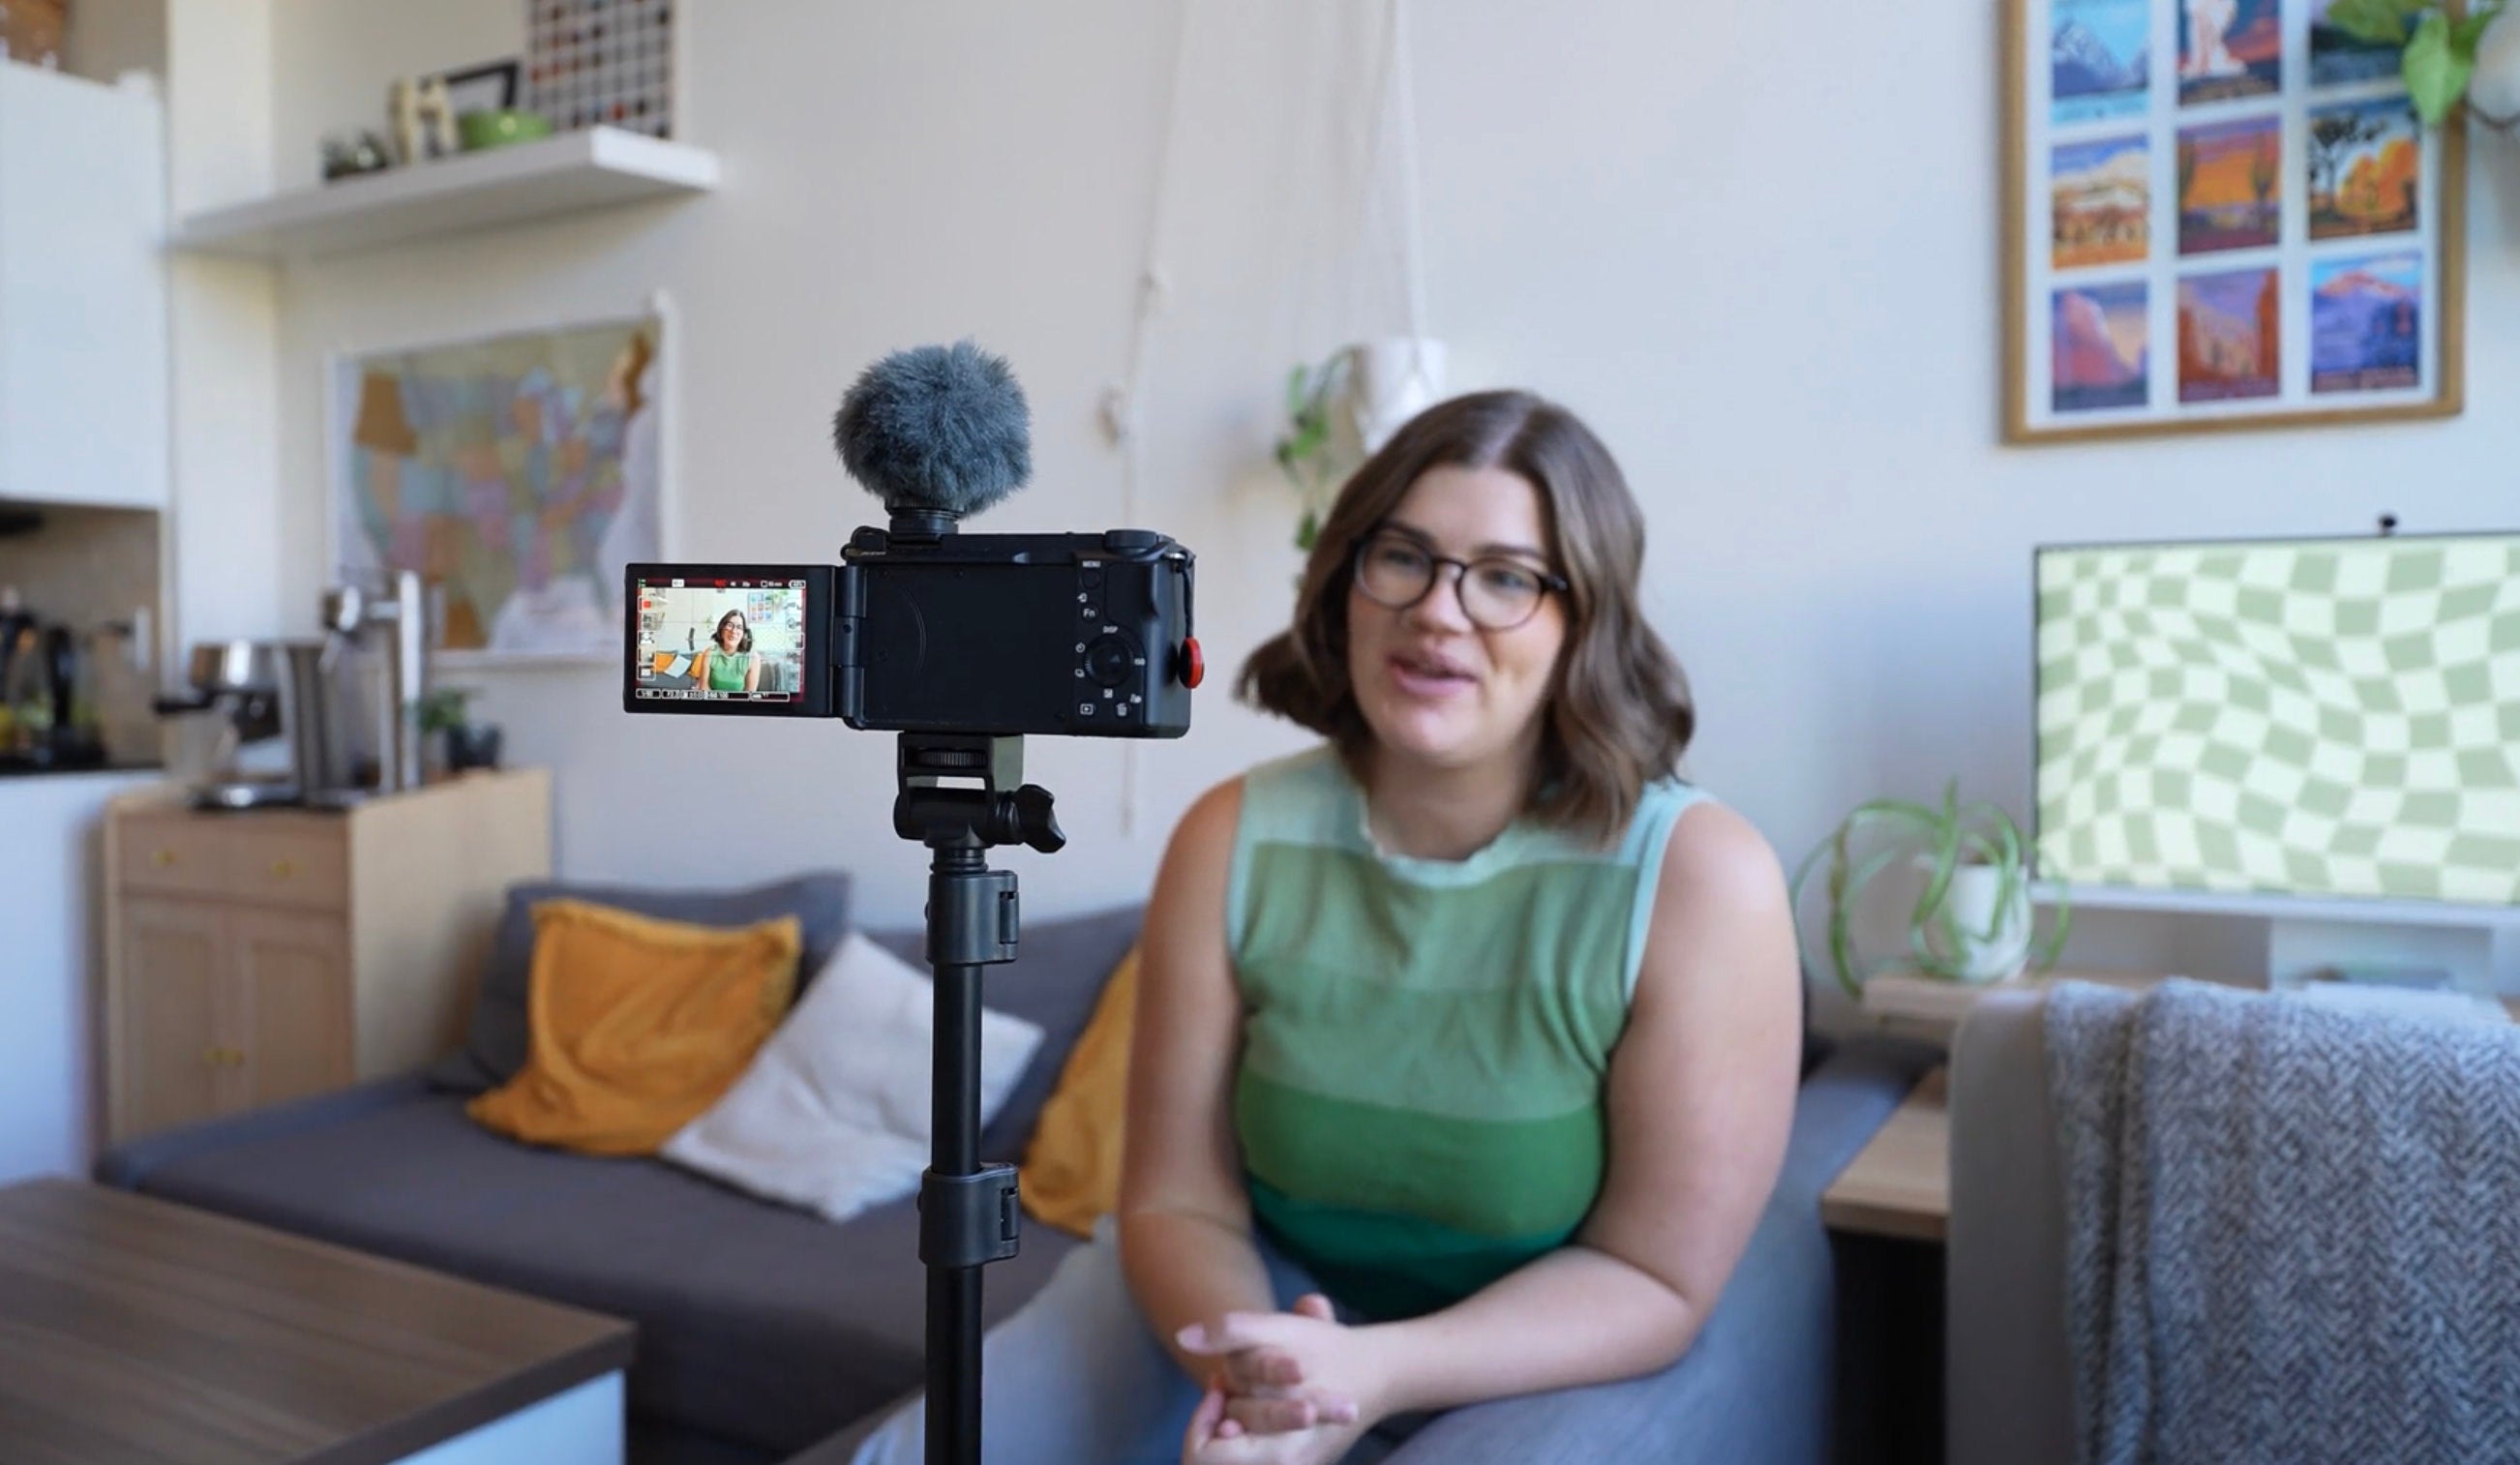
- Hey everybody. Welcome to Video 101 in the Alpha Academy. In this course, we're going to be going over the beginner basics of shooting video. Everything from gear, to your video settings, to lighting and audio, and everything in between with a specific focus on content creation.
I'm Katie Steckly. I'm a full-time content creator and the founder of a video editing agency for YouTubers called Creatorly Media. I started my career as a freelance videographer, and now I teach other creators how to capture better and more compelling videos and have fun doing it. Maybe you've only ever filmed videos using your phone before, or maybe you're finally ready to graduate from shooting on Auto on your camera. Either way, this course will be a helpful way to get you started.
I'm so excited to have you here with me, so let's jump into it.
- When it comes to picking out your camera, there's going to be some differences between photography being your priority and video being your priority. Sony's Alpha Series cameras are really optimized for photography, which often means in those cameras are going to get a viewfinder, higher megapixel images and faster burst shooting modes. Essentially, features that are going to be more helpful specifically for photography.
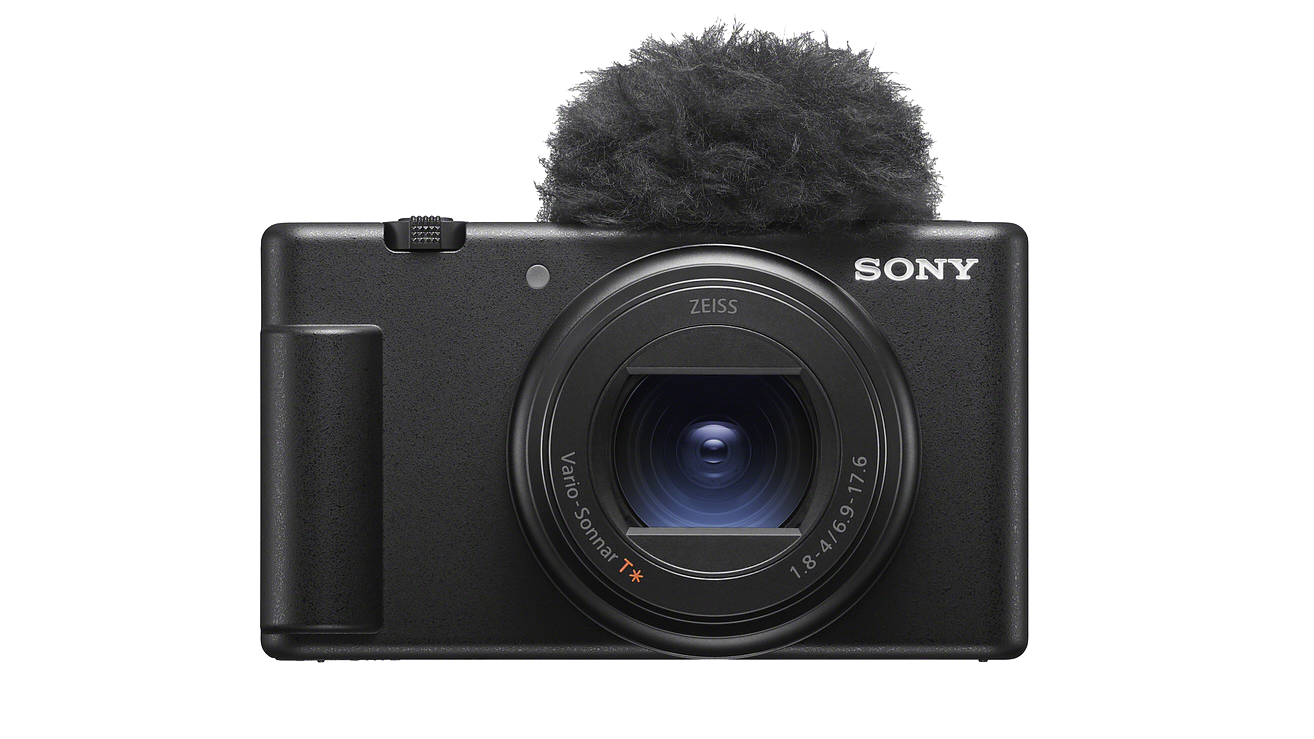
The ZV series, which we're going to focus on today, are really optimized for video, especially for content creation. Basically, all of these cameras are quite small and compact. They all produce 4K video with various slow motion options as well. You get some stabilization, which basically means that you get nice, smooth footage that looks like you shot it on a gimbal, even though you were just holding the camera handheld.
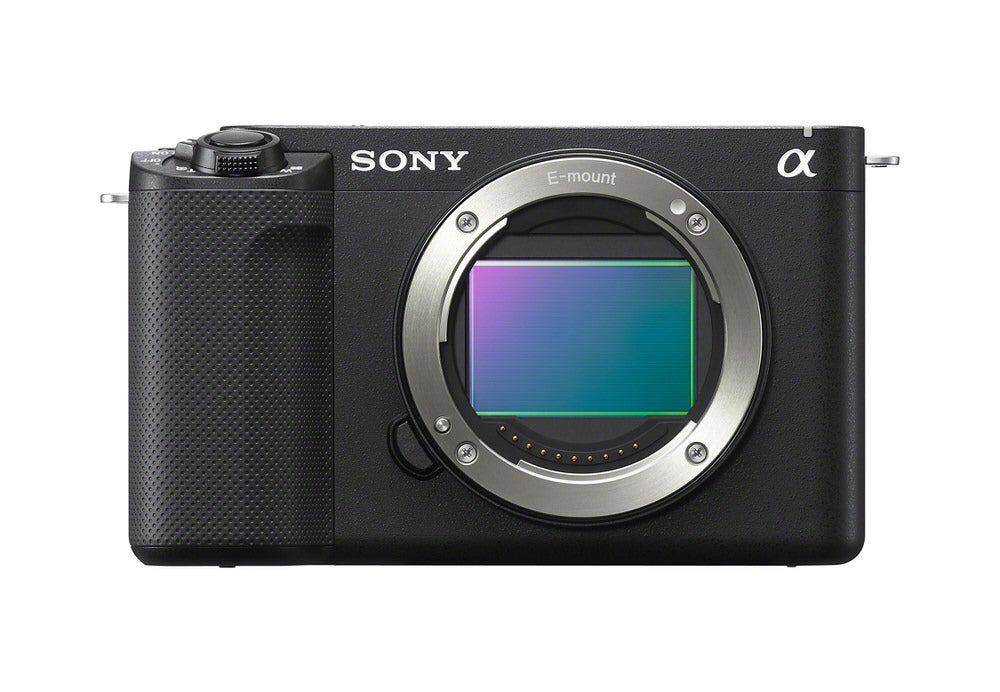
And we've also got Product Showcase Mode, which is really handy for content creators because it means the camera will automatically focus on something that you're holding up rather than just always focusing on your face. We'll talk more about that later. Now, there are hybrid camera options as well, which basically means they have features that are well suited to both photo and video, and Sony's new A7 V would be a good example of that.
For content creators focused on video, I would highly recommend picking something from the ZV lineup. There are various options here, depending on your priority. Starting off, we've got the ZV-1 II. This is a pocketable camera, so easy for you to take on the go and still get really lovely high-quality results. This is what I would definitely recommend if you're thinking about upgrading from your phone to your first camera.
Then we've got the ZV-E10 II. This is an APS-C, or crop sensor, mirrorless camera, which means we can change out the lenses, but it's still smaller and lighter and more affordable than a full-frame camera. Speaking of full frame, finally, we have the Sony ZV-E1. So this is a full-frame mirrorless camera. Of course, we can change out the lenses and it has so many powerful video features built in.
In case you've never heard the terms full frame or APS-C before... When I say those, I'm talking about the size of the sensor in these cameras. The biggest difference you'll notice, first of all, the field of view on a full frame camera, like the name implies, you see the full frame, you're getting a wider field of view with the same lens, so a 16 millimeter lens on a full frame camera is going to look like a 24 millimeter lens on a crop sensor camera. Because it's cropping in, we're seeing a little bit less. It's also going to impact the depth of field, which is basically how blurry the background is. On a full frame camera, you're going to be able to achieve more of a blurry background or what we call bokeh.
I have to say the ZV-E1 is my absolute favorite camera. This is what I use to shoot all of my YouTube videos, but ultimately, you should choose the camera that's best for you. The ZV-1 II is definitely the best for portability and also super easy for beginners. The ZV-E10 II is also still really portable, but you get the flexibility of being able to change out the lenses, and the ZV-E1 is just your full on video powerhouse. You're not giving up anything with this camera, and it still comes in a surprisingly compact package, especially for a full frame camera.
- Now that you've picked the right camera for you, you're going to need a lens. And there are so many to choose from. So we're going to break down some of the major categories.
The first two categories you should know about are prime lenses versus zoom lenses. Prime lenses are a single focal length, which basically means that you can't zoom in. Usually they have a lower aperture as well, which is what gives you that nice depth of field, that blurry background.
And then of course, zoom lenses, as the name implies, allow you to zoom. So there's multiple focal lengths, and you can cover a range of looks in just one lens. Another category you should know about is wide lenses. This is a personal favorite of mine because I love using a wide angle lens to vlog, and they're also just really helpful if, like me, you live in a small space, so you could capture more of the room if you have a wider lens. 16mm is a really great focal length for vlogging.
So if you're filming on a camera like the ZV-E10 II, then I would really recommend this 11mm prime lens. It's an f/1.8 and it is 11mm, but when you put it on a crop sensor camera, like the ZVE-10 II, you're going to achieve about a 16mm. Look, this is one of my favorite lenses ever, and I highly, highly recommend it, especially if you have the ZV-E10 II.
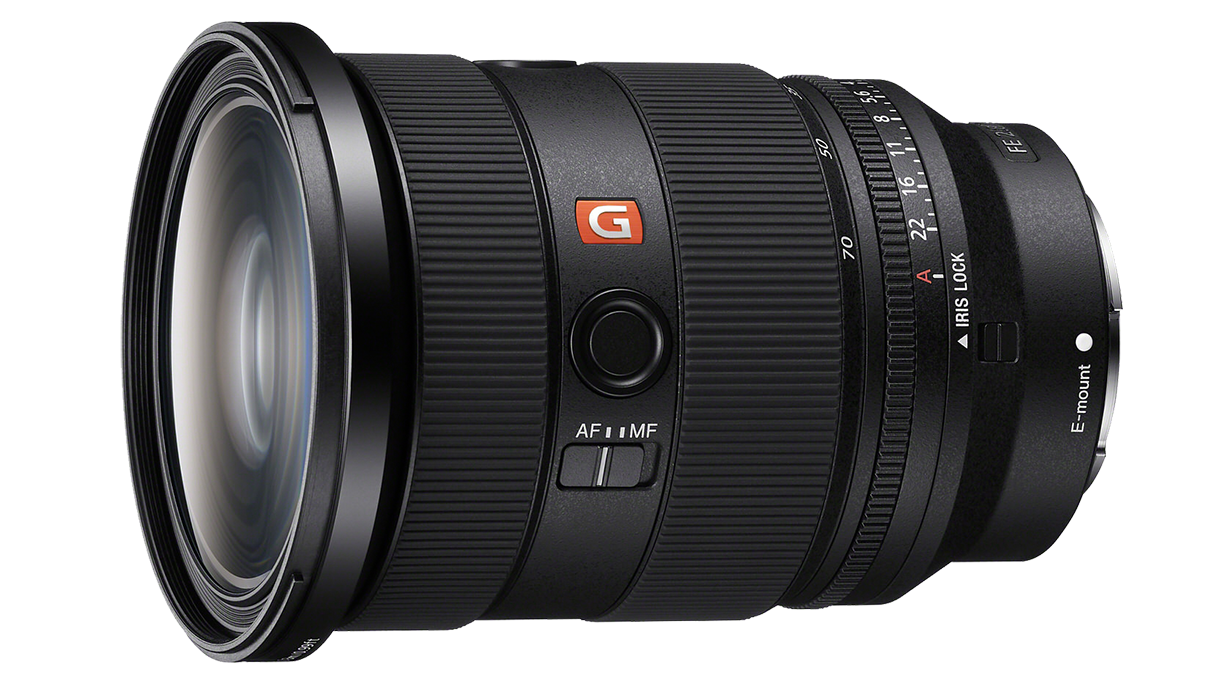
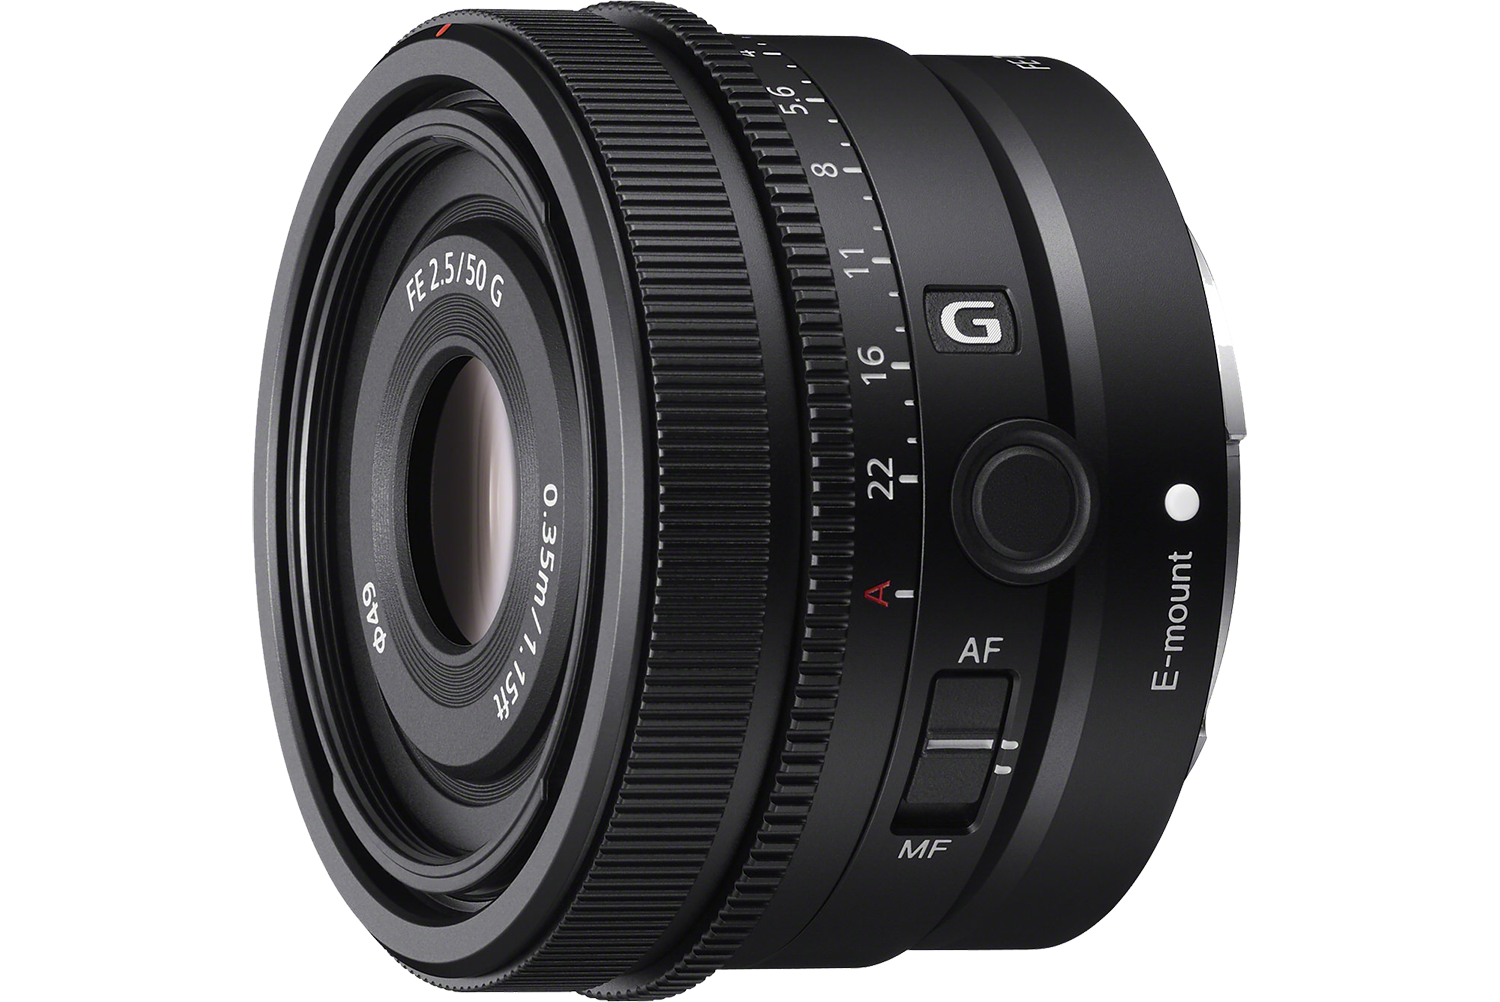
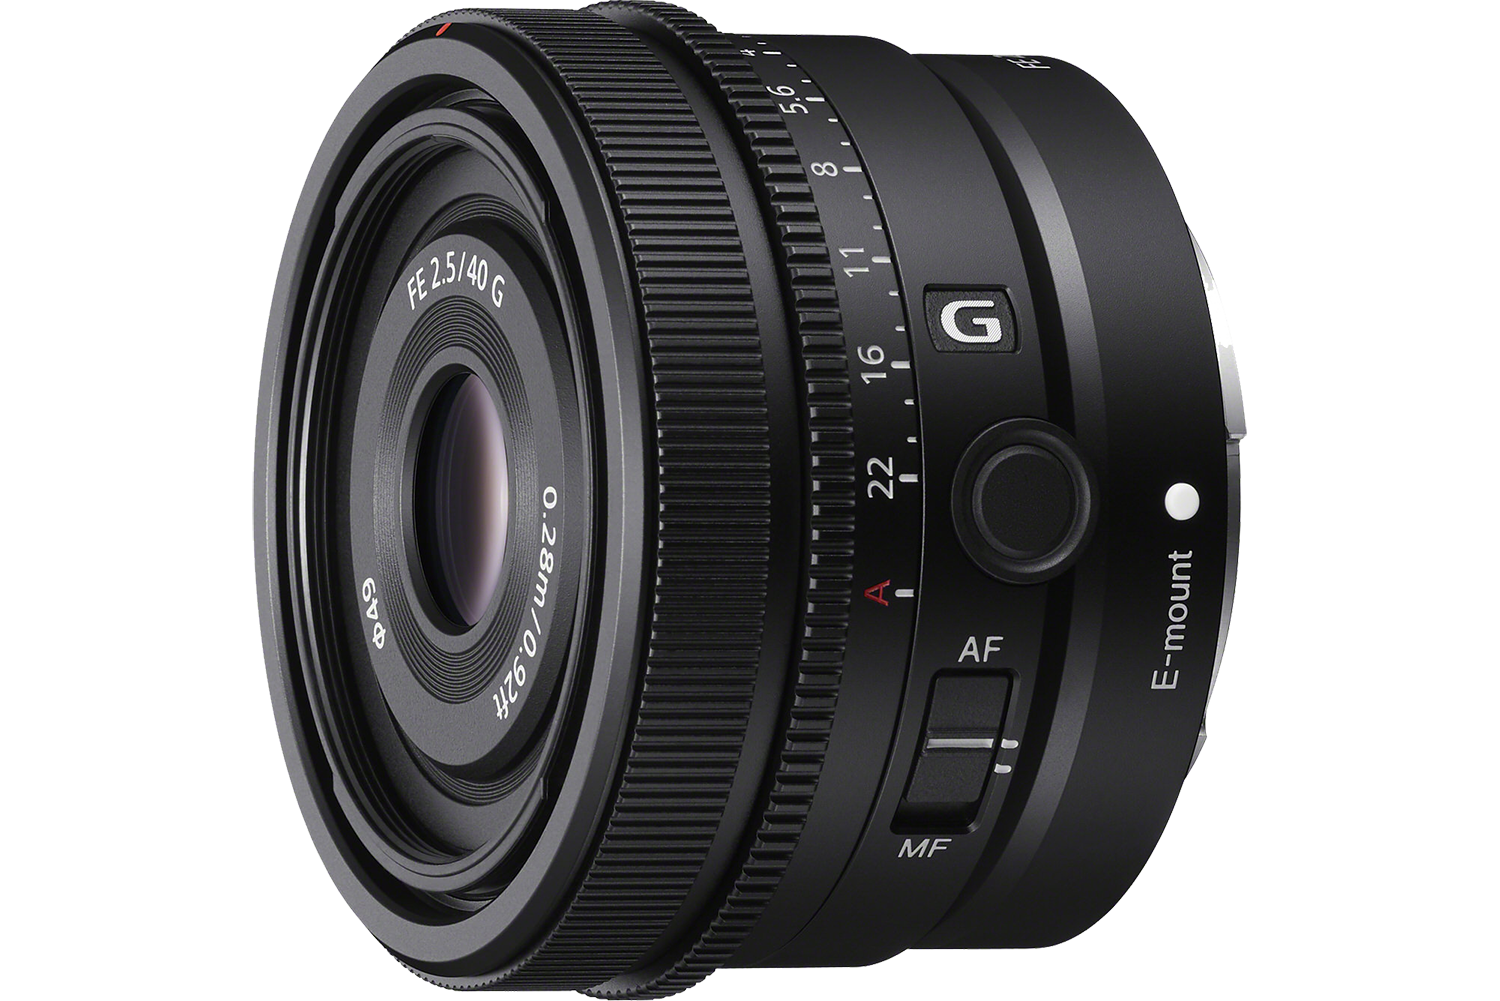
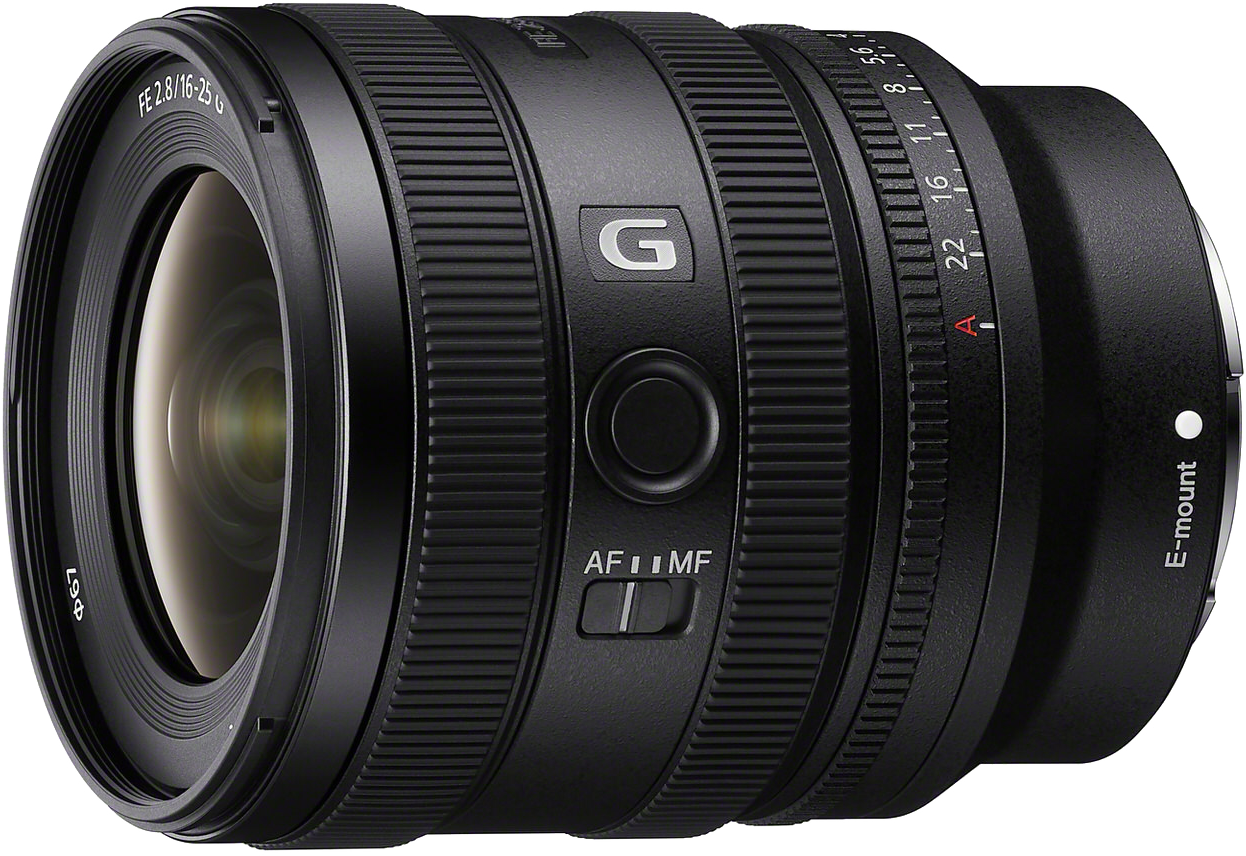
The point of having a collection of different lenses like this is because different focal lengths achieve different looks. For example, something like the 16-25mm lens here. This is perfect for vlogging. This is what I always have on my ZV-E1. It's also really great for capturing landscapes because you get that wide angle view. You can capture a lot of a scene in your shot. Something like this, 40mm lens, or even up to the range of 50mm is really great for getting close-ups, capturing details, doing interviews.
In general, in the video world, we consider 50mm to most closely replicate the look of what we see with our eyes. It gives a really natural focal length, depth of field. So 50mm or 40mm in the case of this lens is just a really great all-around lens. Anything around 70mm or past that is really great for zooming in on something further away, capturing details in the distance, or getting really close up to something.
So obviously, if you're just getting started, you're not going to have a full collection like this. So here's what I would recommend. If you have the ZV-E1, then I really love the 16-25mm lens. And a lot of people also love the 24-70, and this paired together pretty much would cover any focal length that you would need.
Personally, my favorite combo for this camera is a 16-25, and then this 40mm prime, because that covers the range of pretty much everything I do. Plus if you use Clear Image Zoom, then it basically turns your 40mm lens into like an 80mm, so it covers a lot. For the ZV-E10 II, like I said before, this 11mm lens is perfect for vlogging. I also love the 18-105mm lens. This covers a huge range of focal lengths. I have taken this on so many trips over the years. I would say this is a perfect combo for vlogging, travel - pretty much anything you'd want to capture with the ZV-E10 II.
Other than lenses, there's a few key accessories that you're going to need if you're getting started. So you're probably going to want some extra batteries. Those are always handy to have on hand when you're filming for a big day. You're also going to need some SD cards. I recommend the Sony TOUGH cards. It's what I've been using for years, and they hold up really well. And you're also going to want a tripod so that you can actually set up your camera and get a steady locked off shot potentially even with you in it. Ultimately, you need to choose the camera and lens combo that is right for you. But my personal favorite is the ZV-E1 with the 16-25mm lens But as you can see, there is so much to pick from.
- Next, let's talk about your settings. There are actually several components that all come together to make up what we think of as the quality of our videos. The first is probably one you've heard of before, and that's resolution, basically how many pixels you're capturing. So we've got our Standard HD, that's 1920 by 1080 pixels. That's what we call 1080p.
And then of course, there's 4K. That's 3840 by 2160 pixels. Basically the number of pixels you're capturing is making up the level of detail or the clarity of the shot. I personally always film in 4K, so I would recommend you do the same. However, if you're strictly filming for social media, then 1080p is going to be good enough because that's what most people are seeing when they're looking at it on their phones. But shooting in 4K does give you the ability to crop in later without losing quality and still get a 1080p final result. So that's why I always love to shoot in 4K.
Next, you're going to want to pick your file format. I know these options can seem technical and confusing, so I'm going to try to make it simple. First, we've got XAVC S. This is going to result in an H.264 file. Which you're going to end up with a slightly bigger file size, however, this is easier for most computers to work with. The other option is XAVC HS, which is going to give you an H.265 file, which basically is a bit smaller. It's a more optimized file size, but it can be more difficult for some computers to deal with. So this is going to depend on the processing power of whatever computer you're planning to edit on. If you're not sure that your computer can handle it, it's better to stick to H.264, which is gonna be your XAVC S option here. So I'm gonna go ahead and pick my XAVC S 4K.
Next, you need to pick your bit rate. At the top here, you're going to see 4:2:2 10bit. Basically, shooting in this mode is going to allow you to have more possible shades of color, which is going to come in handy later if you want to color grade. The next option, 4:2:0 8bit. This is going to give you smaller file sizes. However, you're going to have less possible shades of color, which makes it not as good for color grading. If you really want to color grade later, you're going to want to pick the 10bit option. However, if you don't really plan on color grading and you're concerned about filling up your memory cards or your hard drives too fast, then just go for 4:2:0 8bit.
Speaking of color grading, which if you're not familiar, is a process that lets you adjust the colors in your video while editing, we need to talk about Picture Profiles. If color grading is something that you want to do, then you're going to want to shoot in S-Log3, which is basically a Picture Profile setting that's going to give you quite a low saturation and low contrast result, which allows you to have full flexibility to add back in whatever colors you want in post. We're not going to get into the details of that in this beginner course, but I just wanted you to know what S-Log is for, and that's something you can pursue if you want to get into color grading later.
Now, let's talk about frame rates. You've got a few options here, 24 frames per second. That's kind of your movie frame rate. It looks the most cinematic. Next, we've got 30 frames per second. That's traditionally the TV frame rate. It's also what most people use when they're filming for YouTube or social media. Both of these frame rates look really natural to the eye. It simulates the motion blur that you would kind of see in real life.
And finally, we have 60 frames per second and 120 frames per second, which you can slow down later to get smooth cinematic slow motion. You can choose between 60 and 120 depending on how slow you want that motion to be. Speaking of slow motion, if you want to achieve that, you can manually change your frame rate over to 60 frames per second, and then later on when you're editing, you can slow down that footage by 50% to achieve slow motion in a 30 frames per second timeline.
Or you can use the Slow & Quick Mode to automatically achieve that in your camera without having to slow it down later. So you can adjust your record frame rate here. So that's going to be what the final video clip is captured in what you're going to play it back as. So I'll choose 30 frames per second.
And then for your S&Q frame rate, you're going to choose what you want the original clip to be captured in. So you can see at the bottom here, it's doing the calculation for you. If I am filming in 120 frames per second in S&Q Mode, and then I have my record frame rate set to 30 frames per second, I'm going to end up with four times slow motion.
So that's a rundown of all of the video settings that make up your video quality. But I just want to tell you quickly what I do for my style of content creation. I personally find that the XAVC S or H.264 file format paired with the 4:2:0 8bit is totally fine for my workflows. Since I don't personally tend to color grade, I like how the Sony colors look straight out of camera, and I shoot all of my regular talking head footage at 30 frames per second, and I tend to shoot most of my B roll at 60 frames per second so that I can slow it down later if I want to.
- Exposure in really basic terms is how bright your video is. Basically how exposed your camera's sensor is to the light.
There are three key factors that affect your exposure, and that is aperture, shutter speed, and ISO. So aperture is measured in F-stops. Basically the lower the F number, the brighter your image is going to be. So something like f/1.8, that's going to be wide open, that's going to let in a lot of light. Something like f/11 is going to let in less light onto your sensor. This also directly impacts the depth of field. So a lower F number is going to get you a blurrier background. A higher F number is going to make it so that pretty much everything in frame is roughly like in focus.
Shutter speed is measured in fractions of a second, so something like 1/60th or 1/60. Basically it's how quickly the shutter opens and shuts. ISO is kind of an interesting one. This is your camera's sensor's sensitivity to light. It kind of helps your camera see better in the dark, but if you push your ISO too high that you're going to end up with a noisy or grainy image. OK, so this is what I would recommend you start with.
I like to drop my aperture quite low. So on this lens I'm gonna set it to 2.8. I love that blurry background. I just think it looks really cool and that's going to help me achieve that. For your shutter speed, you're always going to want to keep that at double your frame rate. So if like me, you're filming in 30 frames per second, then you're going to want to set your shutter speed to one over 60.
For ISO, I'm going to tell you a secret, come close... just set it to Auto. That's what I do. I recommend this for the majority of content creators and beginners with video. Obviously eventually, if you have a very specific look that you're going for, you can set it manually. But I like to leave my ISO on Auto, so if the lighting shifts a little bit, it can adjust to keep my exposure looking correct.
- So let's talk about the options you have for Focus Modes. In general, we've got Manual Focus and Auto Focus. Honestly, the majority of the time you're going to want to just use autofocus. With Sony cameras, you really don't have to think about your focus that much because the autofocus is very fast and accurate. Of course, you could always swap it over to manual focus mode if you want to do something specific or artsy. But when I'm filming my YouTube videos, I just leave it in Continuous Autofocus Mode.
OK, so let's talk about the two main autofocus modes that you're going to want to be familiar with. So the first one I've already mentioned, Continuous Autofocus... Basically that is going to focus in on your eye and lock in on that and follow you around no matter where you are in the frame to make sure that your face stays in focus. This is so useful for vlogging or just filming yourself in general. So this is definitely the mode that I use the most often.
The other super helpful mode for content creators is Product Showcase Mode. When you have your camera set to this mode, the focus will intelligently shift from your face to something that you're holding up to the camera. So basically, when you're just talking, it will focus on you, but if you hold something up, it will shift focus from your face to that item, which is so helpful. So we don't have to do that funny thing where we like cover our face in the frame so that the object will be in focus anymore. The camera just knows to do that when you're in Product Showcase Mode.
- When you're filming your video, you have the opportunity to play with stability and movement. A good balance of both in your shots will make your video more interesting to watch. Setting up your camera on a tripod is always a great option for a classic locked off shot. But oftentimes, when you're out vlogging, let's just be honest, you don't really want to carry a tripod around with you.
When you start to look for it, you will realize that the world is full of tripods. Window ledges, tables, countertops, all of those can work in a pinch for you to set your camera up and get a nice locked off, steady shot. Tripod shots can lend a sense of calm to your video. They feel cinematic and stable. A lot of beginner vloggers tend to film everything handheld, which there's nothing wrong with, but it can give your video a more polished feel if you also include some tripod shots in there.
Speaking of movement, camera movement can make your videos feel dynamic, action- packed and engaging. However, typically if you're using movement, you do want it to be nice and stabilized, which often would require a gimbal to achieve. However, the ZV cameras especially have some really great built-in features that allow you to get stabilized footage without needing a gimbal.
In particular, the Dynamic Active SteadyShot mode, which is available on the ZV-E1, really, really makes it look like your camera was on a gimbal. So some simple camera movements that you can start experimenting with to make your videos a bit more dynamic include a pan, which is when the camera moves from left to right or right to left. A tilt is basically the same thing, but the vertical version - so if the camera goes from looking up to down or vice versa. Next we have a push. That's when the camera moves in towards a subject. Or you could try an orbit. That's when the camera moves around a subject.
I would really encourage you to practice these and try them out. They're a great way to make your videos a little bit more visually interesting. And don't be discouraged if they don't look perfect at the start. All of these are things that take practice, but once you get the hang of it, it's really fun.
- Next, let's talk about the art of composition or basically setting up your shot so that it's pleasing to look at.
There's a few classic rules of composition that can help you when you're first getting started. First, we've got the rule of thirds. The rule of thirds divides your frame into nine equal boxes using two vertical lines and two horizontal lines. Instead of placing your subject directly at the center of the frame, you could try placing them along one of these third lines. It naturally creates a more balanced and visually interesting shot. You can even turn on gridlines in your camera's setting so that you can see them while you're filming.
Next up is headroom. Headroom refers to the space between the top of your subject's head and the top of the frame. Basically, too much headroom can make your subject feel small and kind of awkward. Too little, and it can feel cramped. A helpful way to get the proper amount of headroom is to line up your subject's eyes with that top third line in your frame.
Another helpful principle of composition is symmetry. Symmetry is a great way to create a polished and satisfying shot just by ensuring that both sides of your frame are visually equal to one another. Finally, you could also try a frame within a frame. This technique uses elements in your environments to frame your subject. For example, you could try shooting through a doorway. This can provide some depth and interest to your scene, and it can help draw the eye in towards your subject.
And finally, and most importantly, for beginners, you're going to want to make sure that you're avoiding distracting backgrounds or at least being intentional about what you're seeing in your shot. I bring this up, especially for beginners and content creators because a lot of us are making videos about our everyday lives. You're probably filming in your house, and so paying attention to any kind of clutter in the background or distracting colors can help you get a more satisfying end result.
- Good quality audio is essential to good quality video. Viewers are much more likely to tolerate a slightly out of focus video than they would listening to bad audio.
The built-in microphones on the ZV cameras are quite good, but if you want to make them sound even better, you could use an external microphone. There are really two different options to choose from. Generally, we've got shotgun mics, which look like this or this. We've got the ECM-G1 or the ECM-B1M. Both of these microphones can connect directly to your camera via the Multi-interface shoe, which is really nice and convenient, so you don't need any extra cables hanging around.
This is a really great choice for when you know you're going to be close to the camera. Maybe you're holding it up vlogging, or you're just not sitting too far away from it. This is also a really great choice for when you don't want there to be a microphone in the scene because it's hidden away behind the camera, of course.
The second main category of microphones are wireless lavs like this set. This is the ECM-W3 set. Wireless microphones like this are really helpful, especially when you're going to be quite a distance away from the camera, because you can still get consistent, really crisp audio even as you move around and the distance between you and the camera changes. OK, so I know this might be a slightly controversial take, but I personally think, especially if you're making content for social media, there's nothing wrong with holding one of these microphones in the shot. You'll get really, really great audio, especially if you hold it up close to your mouth.
Obviously for more high- production value work, you're not going to do that. You wouldn't want the microphone visible, but I think when it comes to most content creators, it's totally fine. I also love using wireless microphones like this when I'm out vlogging in public, because if you hold up the microphone to your mouth, you don't have to talk very loud, which is just like less distracting. It captures less attention from like the people around you. So it makes me feel more confident to vlog in public knowing that I have a tiny little microphone I can speak into and I don't feel like I'm shouting at my camera.
Now. When you can control the sounds in your environment, you definitely should. When I'm filming at home, I turn off my whole HVAC system because if my heating or AC turns on it is going to be super loud, you're always going to want to make sure you silence your phones. You can avoid those interruptions. And when it comes to sounds that you cannot control, if you're filming a video and let's say like a siren goes by or there's honking on the street outside, personally, I just pause for a moment. I wait for the noise to die down, and then I'll just repeat what I just said and that that's the magic of editing. You can cut that stuff out.
I think it's a bit of a learning curve for creators to get onto doing that because in our typical day-to-day lives, we don't just stop speaking because a siren went by on the road, but taking these practices into consideration makes a huge difference in the final quality of your video.
- All right, let's talk about lighting. I really believe that natural light can get you a long way. To demonstrate, here's two options using only natural light that give you really different results. So you could face the window, set the camera between you and the window, and you'll get a fully lit, nice flat studio lighting effect.
Or for something totally different, you could set yourself up next to the window and get this really dramatic, lovely Rembrandt lighting or portrait lighting effect where one side of your face is lit and the other half is in shadow. Both of these methods literally only require a window, and yet you get such different and beautiful results.
Now, when you are shooting with natural light, it's really important that you remember to turn off any of your overhead lights, because electric lights are not going to have the same color temperature as your natural daylight coming in the window and mixing the two is not going to look great. Generally natural light is very cool, and the lights that are in your house are probably quite warm. Also, oftentimes, the overhead lights in your house can cause banding in your video because of the AC current, so it really just makes things simpler to shoot with natural light.
Now, you may end up in a scenario where you want to augment your natural lighting, and something that you might consider for that is using LED light panels. This is what I personally love to use for my own YouTube videos. The important part is that you get an LED light panel that allows you to adjust the color temperature. Color temperature refers to how warm or cool light looks to the camera. It's measured in Kelvin, which gets shortened to "K" because that way you can set it to match your natural daylight. Usually this is gonna be around 5000 to 6500K, but the way I like to do it is just slowly adjust the dial until it looks like the correct color to match the light coming in my window.
My typical lighting setup for my YouTube videos at home is I utilize my window as my key light or my primary source of lighting. It's what's giving me the most brightness into my shot. And then I use this small LED light panel from Godox as my fill light. So I'll adjust the color temperature to make sure that it matches daylight, and I'll set it up on the opposite side of my face from where the window is so that I can fill in some of those shadows that are coming in there just to get myself a little more evenly lit. And I really like this end result, and it is quite simple just utilizing a window and one small lighting panel.
- Now let's talk about shooting your very first video project. Pre-production, in my opinion, is the most important stage of any video project. So even if you're feeling really eager to pick up your camera and start shooting, I want to encourage you to follow these steps first - because I promise you, you're going to end up with a better result in the end if you do.
OK, so the very first thing that you're going to want to do is write a script or create an outline. Depending on your personal preference, you can make this as detailed as you like. Some people prefer just a bullet point outline that allows them to be a little bit more off the cuff when they're filming. But if it makes you more comfortable, you can write out your script word for word and then reference it and say it to the camera and just cut out the pauses where you're looking down at your script.
After you finished writing the script portion of your outline. Next, you're going to want to go ahead and create a shot list. So every single one of my YouTube video scripts looks like this. On the left hand side, I have a column of what I'm actually going to say, like the written script, and then on the right hand side I have bullet point notes of what the shots are going to be. So I always like to ask myself, "How can I visually represent this?"
Any given point that I'm discussing in my script I try to think to myself, visualize it. What could that look like in a video? This can be anything from really literal like demonstrations of what you're talking about, up to more abstract representations of the feeling that you're trying to evoke with what you're saying.
Either way, the more B-roll the better, and it's going to make it easier for you to capture all that B-roll later if you make a lot of notes about what you want to shoot. As you're planning out your shot list, I recommend that you identify those shots as either wide, medium, or close-ups. I like to do this in my notes by just writing like a W, an M or a CU, for example. It might be something like CU: Katie pouring coffee, even just a note as simple as that, gives you a reference point. So when you go to film later, you can just start going through your shot list, like a to-do list rather than try to visualize what you had in mind.
After that, depending on how complicated your project is, you could go through your shot list and organize them out based on location or time of day or the equipment that you need to film it with. So for example, if I'm filming B-roll in my apartment, I might break out my list into shots that I need to get in the kitchen, shots that I need to get in the living room shots that I need to get in my office. That way it's just going to make it more efficient when you actually go to film so you can film everything in one location at a time, rather than going through your whole shot list chronologically.
Planning all of your shots in advance like this is not only going to mean that you're going to have a more engaging and dynamic final video, but it's also going to save you so much time when you actually do pick up your camera and start filming because you'll have it all planned out and you're not going to be trying to brainstorm and do it all on the fly. After you've shot your video, of course you're going to go ahead and edit it, and once it's ready you can upload it to YouTube and share it with the world where I personally will be waiting and excited to watch it as well.
I actually share a ton of tips for YouTubers over on my YouTube channels. It's called Katie Steckly, and I would love for you to come over and hang out with me there. I really hope that you found this course in Video 101 in the Alpha Academy helpful, and I really can't wait to see your very first video. Thanks so much for watching and I hope you have a great day. Bye.
Rate this course
Your feedback helps us improve our content.
Course rewards
Complete any course and earn a unique badge to celebrate your progress. Collect them all as you level up your skills!