Time-Lapse Photography
Learn how to turn time into story through time-lapse photography.
- Details
- Module
- Quiz
About this course
Turn time into story as Instructor and timelapse pro Drew Geraci guides you from fundamentals to fieldwork: gear and planning, intervals and ND‑aided long exposures, composition and safety, plus Sony settings (Interval vs S&Q). Then you’ll grade in Lightroom and build sequences in Premiere – so your cityscapes, landscapes and sunrise/sunset ramps render as professional, cinematic shots.
Course highlights
Instructor
Sony Artisan Drew Geraci is an award-winning photographer and cinematographer with over two decades of experience in television, film and advertising. A veteran of the U.S. Navy, where he served as a Mass Communication Specialist for nearly 10 years, Geraci honed his skills in visual storytelling and media production. After his military service, he became the Senior Multimedia Producer at The Washington Times in Washington, D.C., further refining his craft in high-impact visual content creation.
In 2012, Geraci founded District 7 Media, specializing in cutting-edge HDR motion-controlled time-lapse, aerial cinematography, and high-speed video. His innovative work has made him a sought-after collaborator for some of the most respected names in the industry. Geraci gained international acclaim for creating the iconic opening title sequence of House of Cards alongside acclaimed director David Fincher. Since then, he has worked with luminaries such as Steven Spielberg, Jordan Peele, and Alejandro Iñárritu.
Geraci’s striking visuals have been featured in projects for leading brands and studios, including the NFL, HBO, Netflix, Red Bull, Sony, Apple, Disney, Showtime, Dell, Cartier, and more. His work has graced films like Nope and West Side Story, solidifying his reputation as a pioneer in cinematic storytelling.
Drew Geraci
Photographer/Cinematographer, Sony Artisan Of Imagery
Featured gear

Skills
Transcripts
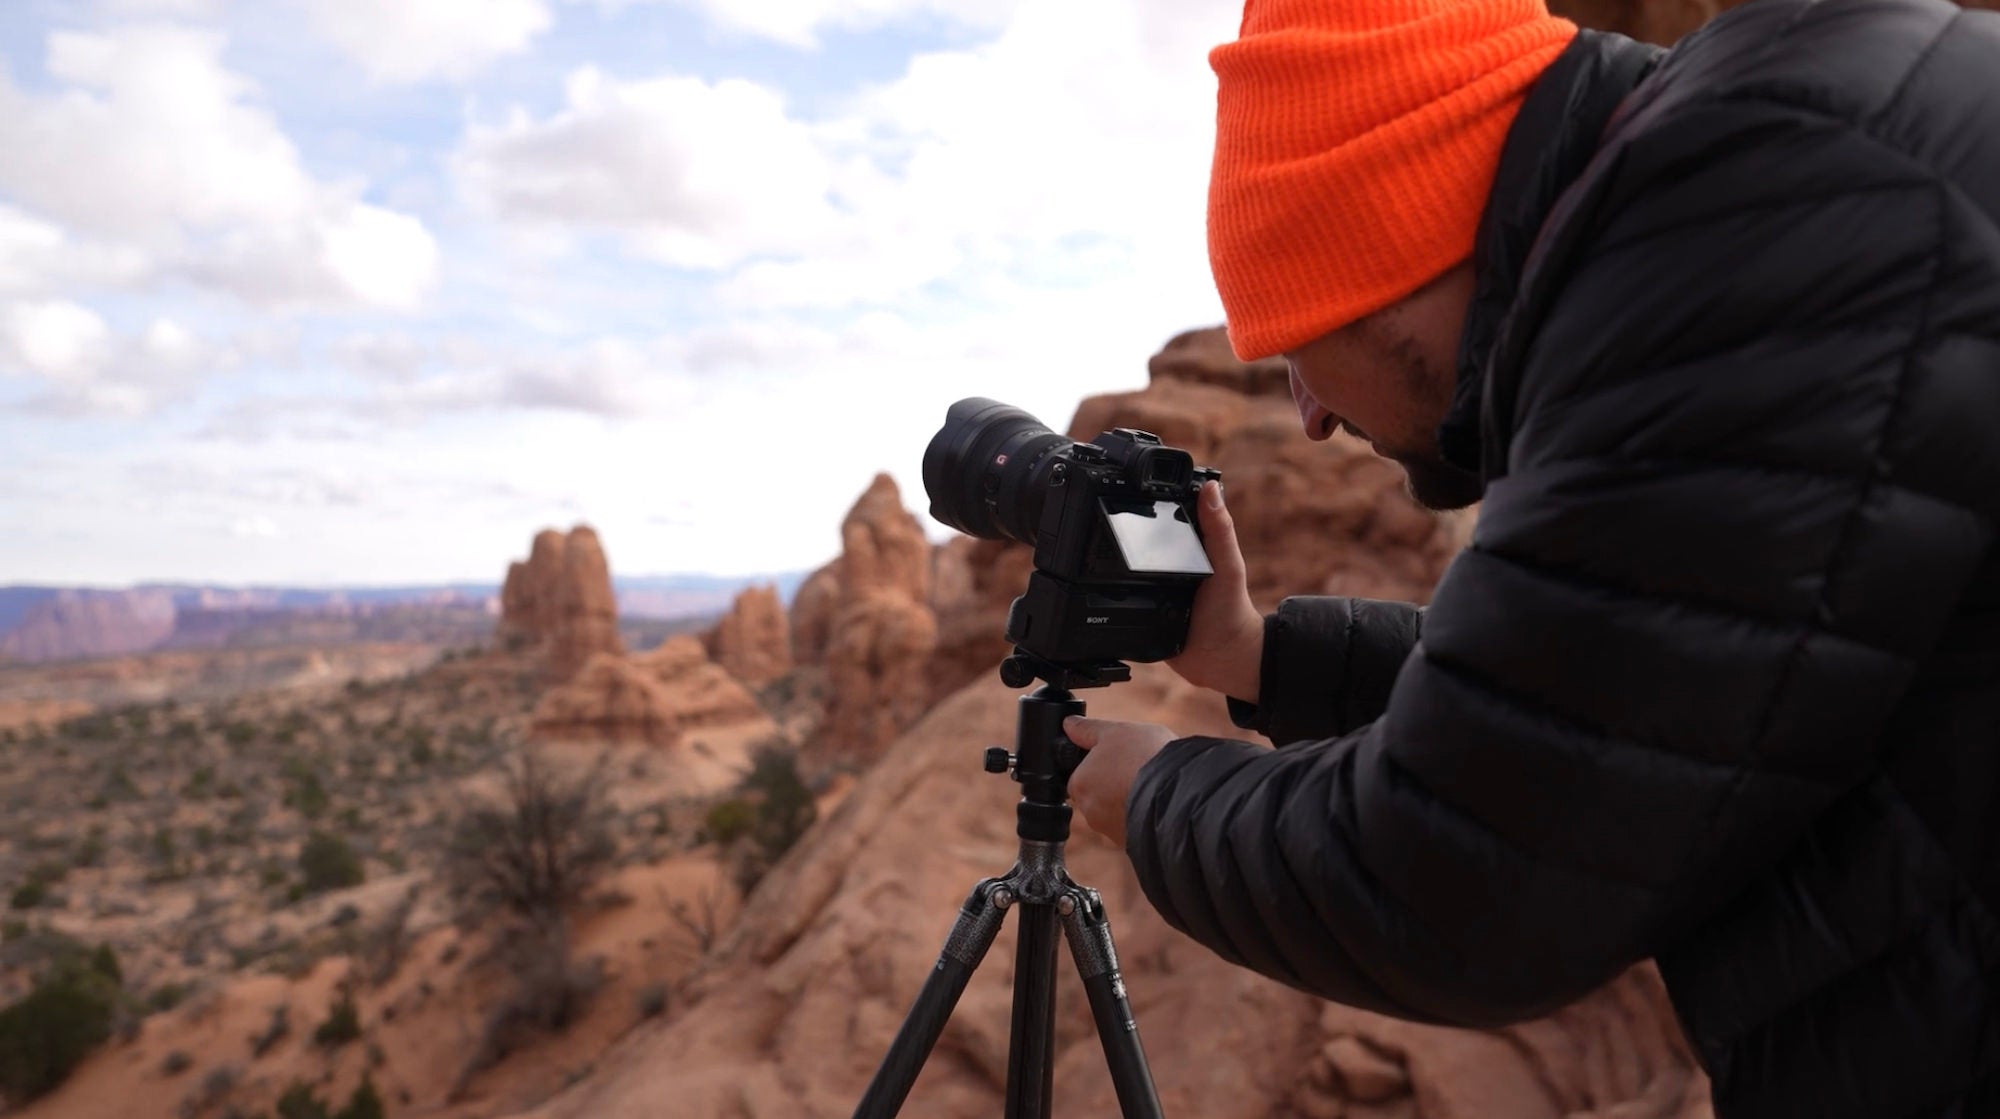
- Hello everyone, and welcome. I'm Drew Geraci and I'm really glad you're here. This is your introduction to Time-Lapse Photography as part of the Sony Alpha Camera Academy.
To start, I've been working professionally across film, television, and commercial productions for nearly 20 years. I'm a Sony Artisan of Imagery, and my work has taken me everywhere from massive city skylines to remote quiet landscapes, all with one goal in line, capturing the passage of time in a way that reveals movement, rhythm, and story, especially in places where change isn't always obvious at first glance. This course is designed to give you a clear, practical foundation in timeless photography, whether you're brand new to the idea or looking to refine and strengthen your existing skills using Sony Alpha cameras.
So if you've ever watched a time-lapse and wondered how it was created or felt like it might be too complicated to try your own, you're in the right place. We're going to simplify the process, focus on creative intent, and start turning time into something that you can shape visually. Let's get started.
- Time-lapse photography is all about compressing time. You're taking something that unfolds slowly - clouds drifting, a city waking up, stars moving across the skies - and turning it into something dynamic and cinematic that we can all experience in just a few seconds. At its core, time-lapse is created by capturing a series of still images at set intervals, then playing them back as video. What might take hours or even days in real life becomes a powerful visual moment that reveals patterns, motion and the change we'd otherwise miss.
Professionally, time-lapse is used everywhere. You see it in feature films, television series, documentaries, commercials and branded content. It's often used as establishing shots, showing the passage of time in a city or a landscape, or as a storytelling tool to visually communicate scale, movement, or transformation. When done well, time-lapse doesn't just look cool - it adds emotional weight to the narrative depth to any project. Before we go further, let's cover a few key terms that you'll hear consistently in a time-lapse workflow.
The first is the intervalometer. This is a tool, either built into your camera or external, that tells the camera when to take each photo. It controls the timing, the consistency, and the length of your sequence. Next is the interval. This is simply the amount of time between each shot. For example, shooting one second every two seconds versus every 10 seconds will drastically change how motion appears in your final time-lapse. Faster moving subjects usually need shorter intervals, while slower changes can use longer ones.
You'll also hear the term shutter dragging, which is just another way of saying long exposure. In time-lapse long exposure helps smooth out motion. Things like car-light trails, flowing water and moving clouds. By adding natural motion blur, this creates a more cinematic and fluid look, especially in urban and daytime scenes.
Now let's talk about the different types of time-lapse, because not all time-lapse are created equal city time-lapse focuses on urban environments, traffic, buildings, crowds, and changing light. It's fast paced and energetic and often using commercial and broadcast work. Nature time-lapse slows things down and highlights subtle movement. Cloud formations, weather changes, plant life, or shifting light across landscape. This style is all about patience and observation. Astro time-lapse captures the night sky, stars, the Milky Way, or even star trails. These sequences require careful planning, long exposures, and an understanding of night photography, but the payoff will be absolutely incredible.
Motion controlled time-lapse introduces controlled camera movement using sliders, pan and tilt heads and robotic systems. This adds parallax and depth making the shot feel more immersive and three dimensional. As you're learning, it's important to watch examples of each type and start recognizing what makes them work: composition, movement and timing. To capture any of these successfully, you need to have the right gear.
Your camera should allow full manual control and ideally have great dynamic range. Interchangeable lenses are preferred, but what matters most is consistency and reliability. Lenses depend on the subject. Wide angle lenses are extremely common in time-lapse world, because they exaggerate movement and capture more of the scene, especially for skies and landscapes. A solid tripod is non-negotiable. Any movement between frames can ruin the sequence completely. Stability matters more than portability here.
The next is filters, especially neutral density filters because they're often used to enable longer exposures during the day. These are critical for shutter dragging in bright conditions. These filters reduce the amount of light coming into the lens, allowing for shutter dragging. You also need plenty of batteries and storage - time-lapses eat through both quickly. Running out of power or card space mid-sequence is one of the most common beginner mistakes.
Finally, interval and remote tools, whether they're built into your camera or external, these give you precise control and help to avoid touching the camera once a sequence starts. But gear alone won't save a bad plan. Planning is what separates a casual time-lapse from a professional one. It starts with scouting. Visit locations ahead of time. Watch how light moves through the scene. Pay attention to where the sun rises and sets. How people or traffic flows. And what elements actually change over time.
When you're planning a time-lapse, always ask yourself, what is moving and is it interesting enough to watch sped up clouds, shadows, crowds, stars? These are all visual engines. You also need to think about time. How long does the action take? How long do you need to shoot to tell a clear story? A successful time-lapse isn't about pressing the record button, it's about anticipating the change and being patient enough to let it unfold. When you combine strong planning with the right tools and a clear understanding of motion, time-lapse stops being a technical trick and becomes a powerful storytelling technique, and that's the foundation that everything else in this course will build on.
- All right. Before we talk about creative ideas or motion, we need to talk about the camera setup because great time-lapses start long before you hit record. In this section, we're going to walk you through the most important Sony Alpha settings for time-lapse photography, why they matter, and when to use each approach. Let's get started inside the camera.
Sony gives you a true interval shooting mode, which is the professional way to capture time-lapse. In the menu, you'll first want to find the Shooting Mode. Then scroll down to Drive Mode, and then you'll select Interval Shoot Function. This particular menu is where you're going to tell the camera to take individual still frames at a set interval: every two seconds, five seconds, 10 seconds, or longer. It really just depends on what your scene is.
The menu is broken down into a simple-to-use settings. You have Interval Shoot On or Off, Interval Shooting Start Time, Shooting Interval, Number of Shots, AE Tracking Sensitivity, Shutter Interval Type and Interval Priority. The first menu page is the most important as the secondary page relates to if you use Aperture Priority Mode, which is vital for capturing day-to-night sunsets or sunrises.
As a general rule of thumb, I recommend setting the number of shots to 400 frames. This will give you 16 seconds of footage and a 24p timeline, but you can always increase the frame count to be as large as you would like. This method of time-lapse captures full resolution still imagery, usually in RAW, giving you the maximum quality and flexibility in post. If you're shooting cityscape, sunsets, night transitions, or anything cinematic, this is the mode you want.
If you have the time, I'd recommend mapping the Interval Mode to a custom button on your camera. That way if you want to go from still mode to time-lapse mode at the press of a button, you can.
Now we'll move on to S&Q time-lapse setup. S&Q Mode, which stands for slow and quick, is Sony's in-camera time-lapse option. Instead of shooting stills, the camera actually records video at a lower frame rate and then plays it back at its faster frame rate. This is simple, fast, and great for beginners or just social media content. But here's the trade off - you're locked into the resolution, the compression and the colors baked into the video, so there's far less flexibility than shooting just plain RAW stills. If interval shooting is for cinema quality work, S&Q is for speed and convenience.
To start, you'll want to turn your dial to S&Q Mode. Then enter the menu by hitting the Menu button. Work your way over to Shooting, which is the red camera icon. Choose the Shooting Mode and select S&Q. You'll then want to select Time-lapse. After this, you'll want to go back into the Shooting menu, choose Image Quality/Recording, and then select Time-lapse Settings. We'll choose a frame rate of 24p in an interval of one second all the way up to five seconds.
When shooting S&Q Mode, you'll find that you only get as high as five-second intervals and 10 minutes of recording time, as that's all the camera's capable of doing currently. Once you're done selecting the interval, you'll likely want to choose the highest bit-rate possible along with the best color space profile of 100 megabits 4:2:2 10-bit color. Now all you need to do is press the red record button on the camera and your S&Q time-lapse will begin.
When using S&Q, I highly recommend making sure that your LCD screen is open and away from the camera, and to make sure the camera's sensor heat threshold is set to maximum or you risk overheating your camera while filming.
Now, let's discuss the best settings for your camera. For time-lapse, manual exposure is king. Why, you ask? Because consistency matters more than anything else. When the camera changes exposure from frame to frame even slightly, you'll see flicker. Aperture Priority and Shutter Priority can work in very controlled situations, but often they introduce micro exposure shifts that ruin the sequence. We'll discuss techniques for changing light, like day to night, later in this course.
When it comes to white balance, as lighting changes, the camera consistently reinterprets color temperature, which causes color flicker, frame to frame. While we set manual white balance, choosing daylight, cloudy, tungsten, or just set a Kelvin temperature depending on the scene. Locking white balance ensures color consistency and saves hours of problems later. So as a rule of thumb, make sure you turn off anything that is auto on your camera, which would include white balance, exposure, aperture, autofocus, image stabilization, and long noise reduction. This is just to ensure that you have the most consistent shots from frame to frame.
Moving on to focus, this is where we find manual operation, again, is the best course of action. Autofocus is great for photography, but for time-lapse photography, it's absolutely risky, and I really wouldn't recommend using it. Even tiny focus adjustments between frames can cause visible pulsing or softness. Once you've set focus, you don't want it moving. For most time-lapse work, manual focus is the safest choice.
Use focus magnification, zoom in, nail the focus and don't touch it. You can also use Autofocus to prefocus the scene, and then after you're done setting the focus, you can confirm everything is sharp. You then just simply turn the lens back to manual, preserving that focal range and preventing any unwanted focal shift. Both amateur and pro-level time-lapse almost always relies on manual focus for the best consistency. If quality matters and professionally, it always does, make sure you shoot RAW. RAW files, give you maximum dynamic range, better highlight recovery, smoother exposure transitions, and far more flexibility for color grading when you get to post-production. JPEG or compressed formats are faster and often smaller in file size, but again, you're throwing away information that you can never get back. For S&Q workflows, H.26 video is fine for interval shooting, RAW is a professional standard.
When it comes to setting up your intervals for different scenarios, here's an easy breakdown of what you want to do for each subject type. For daytime city, or landscapes where the clouds are your subject, a one to two second interval is best. You'll also want to make sure that your shutter speed is as close to the interval time as possible. For example, if you have a two-second interval, make sure your shutter speed is at a 1.6-second shutter speed, so that there's really no delay between the shutter activating and an interval moving to the next frame. This is going to ensure that you get a smooth cinematic shot. You may need to use ND filters to achieve this when you're out in the field.
For sunsets and sunrises, an interval of five to 10 seconds is best. Shorter intervals will capture more detail and the change of sky, while longer intervals will speed up the process going from day to night, or vice versa. If people are your subject, choose a faster interval like one second with a shutter speed of 0.5 seconds, which will allow the people to blur ever- so-slightly without making them disappear. If you prefer a sharper subject, then choose a shutter speed higher than 1/30-second. When time-lapsing vehicles in a daylight or nighttime, an interval of two to three seconds tends to work best with a shutter speed of at least 1.6 seconds so that you can capture those beautiful trails of light as the cars pass by.
Now, let's recap on what we've learned. For S&Q time-lapse - it's fast, it's simple, and it's great for beginners or social media content, but again, it does have its limited flexibility and creativity. For manual, single frame time lapse, which is interval shooting, we get the maximum image quality possible. We get full creative control and post-production editing is the industry standard for TV, film and high-end work. If you're just starting out, S&Q is fine. If you want cinematic results though, client-ready footage and future-proof quality - interval shooting is where you grow and where you'll thrive.
Time-lapse isn't about pressing a button, it's about controlling the change over time. When you understand these settings, you stop reacting to problems and start designing shots intentionally, and that's a difference between a casual time-lapse and a professional one. Thanks for joining me, and I'll see you in the next module.
- All right. Let's talk about how to actually make interesting landscape and cityscape time-lapses because anyone can put a camera on a tripod and press the shutter button. The difference between a forgettable time-lapse and a great one comes down to what moves, when it moves and how you frame it.
Let's start with the composition. When you're shooting buildings or landscapes, the architecture itself isn't moving, so your job is to find the motion around it. I like to look for a minimum of three elements of motion in every frame. This could be as simple as traffic moving through the streets, clouds sliding across the sky, people walking, gathering, or dispersing. Or in landscapes we can think about the changing in exposure, water movement or changing of shadows and lights as it cascades across the landscape. One moving element is okay, two is good. Three is where the shot comes alive.
Use architecture as your anchor, your solid unmoving subject. Then layer motion in front of it, behind it and above it. That's how you add depth without adding movement to the camera at all. Time-lapse is less about reaction and more about the anticipation of what's going to happen in the scene. Before I ever set up the camera, I watch the scene. Where are the cars stopping? When are the crosswalks filling up? Do the clouds actually move in the direction that I need, or are they just stalling and staying in one place? Traffic patterns often change by the minute. Crowds pulse in different waves and light shifts faster than you think. If you know what you're aiming to capture, you can then time your interval and your shutter speed to match that motion. If you don't, your time-lapse will just kind of feel random and meh, overall.
The best advice is to just wait longer than you want to. The shot almost always gets better five minutes after you think you're ready to leave, so make sure you add in some extra frame padding at the end to capture that magic. There's been many times that I've ended a shot early thinking nothing was going to happen, but minutes after I stop, that's when something truly exciting happens and usually it pays off if you wait around.
Now, let's talk about one of my favorite tools and that's shutter dragging or long exposure, however you want to say it. Long shutter speeds are what turn chaos into flow. People become streaks, traffic become rivers of light, and movement feels intentional, but in broad daylight, that's nearly impossible to do without ND filters. Neutral density filters let you slow the shutter down way, way down, even in bright sunlight, so that instead of freezing motion, you stretch it across time. This is how you get soft motion trails from people, smooth out vehicle movement throughout intersections, and a sense of energy without visual clutter.
The trick is balancing shutter speed with your interval. Too long, and the frames overlap awkwardly. Too short, and the motion feels choppy or robotic. When it works though, it's absolute magic and you'll make your final shot look much more cinematic and more pleasing to the audience.
Last, but very important, let's talk about where you place your tripod. Great time-lapses often put you in public spaces, rooftops, sidewalks or overlooks. This means safety and legality matter. Ask yourself, am I blocking foot traffic? Am I creating a tripping hazard? Is this private property? In many cities, tripods are considered professional equipment, and many require permission or permits, especially in high traffic areas. If security approaches you, be polite, explain what you're doing, and have a backup plan. The best time-lapse shooters are flexible, not stubborn. And above all, don't risk people, gear or yourself for a shot. There's always another angle, and it's not worth hurting yourself or anyone else when you are shooting with a tripod.
I also recommend weighing down the tripod with a backpack, or if you have a tripod hammock, you can place a heavy object into it to stabilize it, the shot, against wind or any other kind of movement. Also, be mindful of the surface you place your tripod on. Make sure it's solid and doesn't vibrate. If you're filming on a bridge, for instance, there's a high chance your shot's going to contain a lot of vibration, and that's honestly going to kill your shot. Just be aware.
In closing, landscape and cityscape time-lapse isn't about luck. It's about designing motion. You're not just recording a place, you're showing how that place breathes, moves, or changes over time. When you combine strong composition, anticipation, long exposures and smart scouting, you stop making pretty clips and start telling visual stories, and that's when time-lapse really gets addictive. Thanks for joining me in this module. I'll see you in the next.
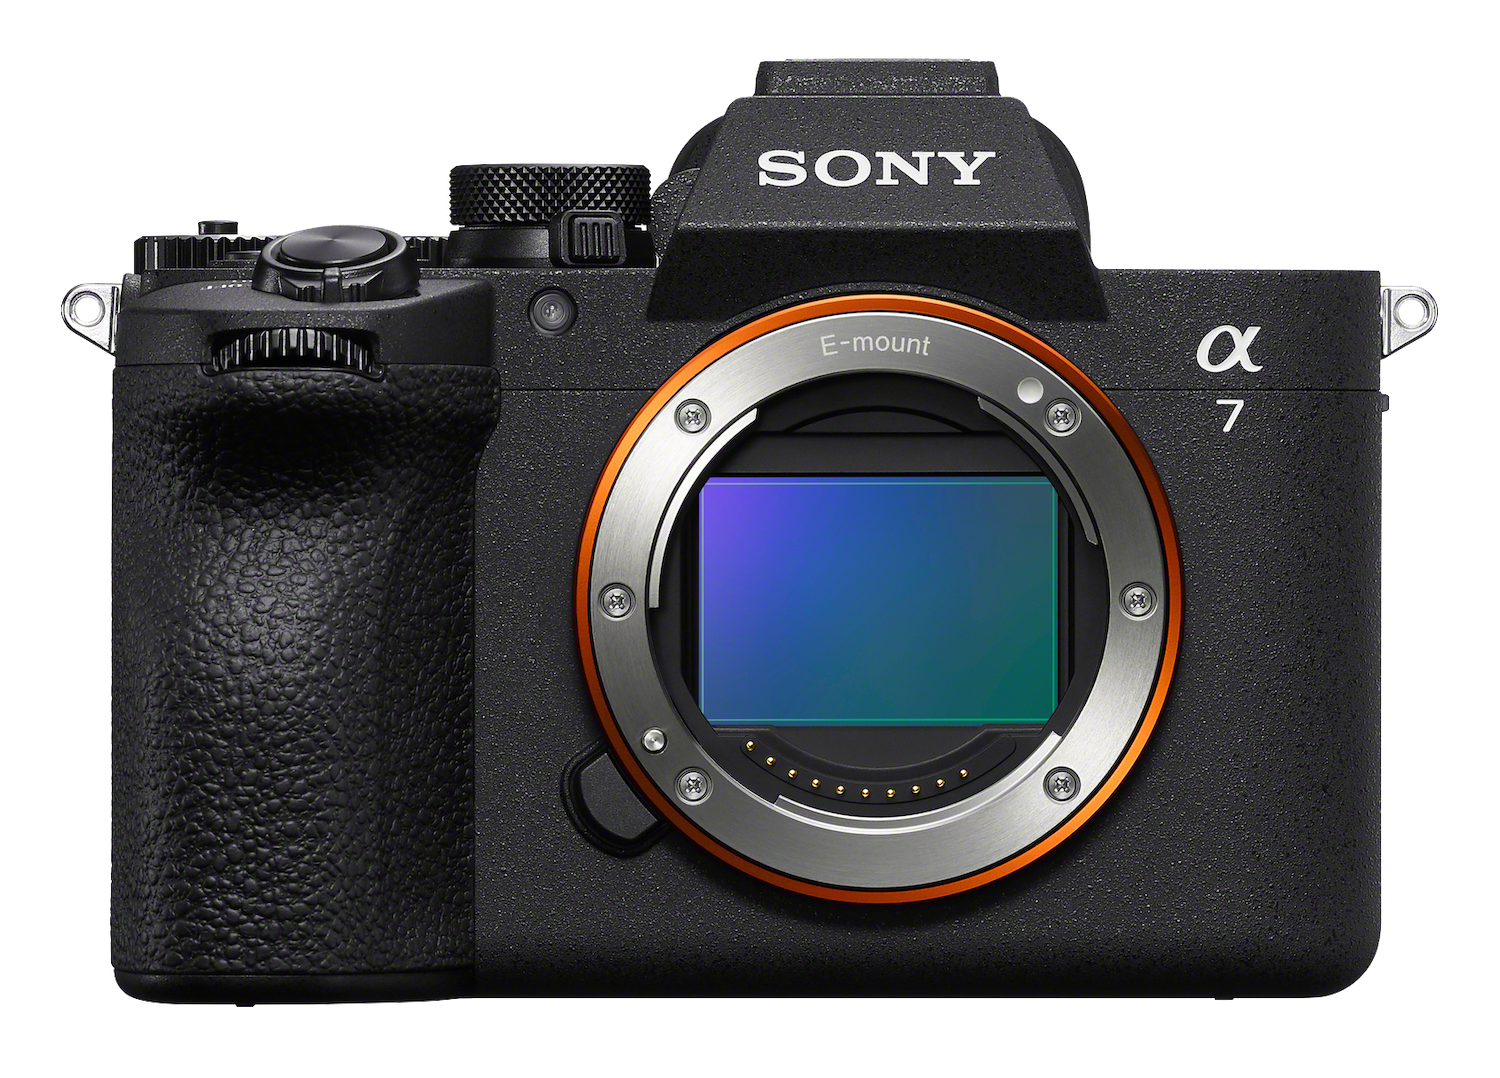
- Hi everyone and welcome back. In this module, we're going to discuss how to capture stunningly beautiful sunrises and sunsets with zoom cameras like the Sony A7 V, the A7R V, and the A1 II. Whether you're a seasoned pro or just starting out, I've got some great tips to help you create breathtaking sunrises or sunsets. It's one of my favorite things to film, so let's get started.
First things first, let's talk about getting your camera ready. For this type of time-lapse photography, we'll be using Aperture Priority Mode in tandem with Auto ISO. Why? Because this combination allows your camera to adjust the exposure automatically. As a light changes during sunrise or sunset, it will gradually ramp the exposure to ensure consistent look throughout your time-lapse. To start, set your camera to Aperture Priority Mode using the dial on top of your camera. This lets you control the depth of field while the camera takes care of the shutter speed, automatically.
Choose an aperture that is suited for the situation you plan on filming and ending your frame on. For example, if you're filming day into night, you'll likely want a fast aperture like f/1.5 to f/2.8 if you plan on capturing the stars at night going in from daylight. The opposite is true if you plan on going from night into daylight. Using an aperture of f/4-f/8 might yield better results if you're trying to keep your shutter speed in a certain range.
Next, set your ISO to Auto. This will allow your camera to gradually ramp up the ISO as the light diminishes or increases. Make sure to set a maximum ISO limit to avoid grainy images. Generally topping out at around 3200 or 6400 depending on your camera's performance. For me personally, I prefer to use the ISO in a range of 1250 to 1600 range. to ensure minimum noise. The speed of your lens you plan on using will also dictate the ISO that you'll use.
When choosing your interval, you'll likely want to choose something moderately long, like five to 10 seconds. You may also want to change the number of frames that you shoot to a larger number to ensure that the total duration exceeds that of the sunset or sunrise. As a general rule, I usually film at least five second intervals for 2200 frames, which gives me a three-hour window to film. I can then either speed up or slow down the end results in post-production.
When you're inside of the Intervalometer menu, make sure you set the AE tracking sensitivity to high as this will help if you have large changes in exposures while filming, and also make sure the Shutter Priority is On. This will make it so that the shutter speed never exceeds your interval and that your camera always fires as it's supposed to.
Now that we've got the technical settings down, let's talk about composition. Here are some tips for framing your shot. Use rule of thirds to position the horizon. This creates a more balanced and engaging composition. If you suspect the clouds will light up beautifully for a sunrise or sunset, make sure that they fill up two thirds of the frame to capture all of that beautiful detail. When choosing a foreground, incorporate elements like trees or rocks to add depth to your time-lapse. Creating separated foreground, middle ground, and background when you film will make your sunset or sunrise shots that much better.
When it comes to planning your shots, scout your location ahead of time. Use apps like PhotoPills to check the sun's trajectory and plan your composition accordingly. The last thing you want to do is show up to a location expecting the sun to rise in a particular direction only to find out that it's in the opposite side where you really want it. The more you can plan your shot, the better the end result will be of your time-lapse.
Filming sunrises and sunsets can come with its own set of challenges. Here are some common issues to know and how to tackle them. Light changes quickly during these times, which is why using Aperture Priority and Auto ISO is crucial, but be prepared to adjust your framing as the light shifts if you end up improperly setting up your composition. If you can tell the light is going to shift out of frame immediately recompose your shot and start it over.
If you're filming in windy conditions, make sure to use a sturdy tripod with added weight on it. Utilize a weighted bag, a sandbag, or heavy objects to stabilize your setup. As you move from day into night, the wind will often pick up or dissipate depending on the weather. Make sure you're ready for whatever comes. Cold temperatures can drain your battery quickly, so bring extras and keep them warm. Use a battery grip if you have one, because the last thing you want to have happen is have your camera dying 50% of the way into the shot. Since you're filming sunrise or sunset, plan for filming for at least three hours. If you're shooting day into astro, expect to use external power sources as you'll need more than eight hours of battery life. Just like regular time-lapse, make sure you keep a consistent white balance. You can change it once you get into post-production to create a white balance ramp inside of DaVinci Resolve or Premiere Pro.
The dynamic range during sunrises and sunsets can lead to highlights being blown out or shadows being too dark. It's important to anticipate the exposure before you start filming. A solution to this problem is to adjust your exposure compensation dial manually to prevent overexposure. I often shoot at EV-1 to ensure that the highlights are preserved if I'm going from night into day. You may want to do the opposite when you're going from day into night. Timing is crucial for capturing sunrises and sunsets as the best light can only last a few minutes. Arrive early to set up and familiarize yourself with the scene before you start shooting. At a minimum, I would recommend showing up at least 90 minutes before blue hour. This will give you time to frame up your shot, capture the change in exposure, and ensure that you capture the entirety of the sunrise or sunset.
By anticipating these types of challenges and preparing accordingly, you can significantly improve the quality of your sunrise and sunset time-lapse photography. That wraps up this module. Thank you so much for joining me.
- Welcome to Washington D.C. There's so much to film here for both landscape and cityscapes, and that's exactly what we're going to be doing in today's module - is we're going to be taking a look at the US Capitol. It's right behind us. It's a very iconic scene, but what we're going to have is a bunch of different traffic lanes. We've got cars, we've got people, we've got scooters, we've got bikes, we've got so much to time-lapse and we combine all those things together into one scene. We're going to be able to walk away with a really cool, really incredible time-lapse.
Now, we don't have the clouds out that I was hoping for today, but that's OK because we can just focus in on the people and the cars and the other things that are going in and out of frame. So let's get to it and let's set up our time-lapses. When it comes to setting up, I'll be using two different tripods, both carbon fiber and both super sturdy. I find that it's best to bring a lightweight tripod if you plan on walking around a lot, or if you plan on doing multiple shots at the same time.
For filming today, I'll be using the Sony A7 V, which offers a 7K resolution image and over 15 stops of dynamic range, which is perfect for this shoot with all the different exposures and the Sony ZV-E1 - both of which are exceptional cameras to film with and easy to set up. I'll be using two 16-35mm lenses along with an ND 64 filter on each of those lenses so that I can drag the shutter during my time-lapse to add motion blur to the cars and the people. For my settings, I'm going with a 1.6-second shutter speed and aperture at f/2.8 and an ISO of 50. This is going to give me the best image quality possible when exporting the time-lapse.
For my interval, I've chosen two seconds at 400 frames, which means the camera will only have a 0.4 second delay between shots, giving us a smoother, more cinematic look. I'll press the shutter button and our time-lapses will officially begin.
So I've got both of my cameras going right now. I've got one in Intervalometer mode, and I've got the other one in S&Q mode. And what I really want to show you is the difference between the RAW and non RAW. So in the S&Q, we're shooting in compressed video and in the interval mode we're sitting in RAW mode. And RAW is going to give us that ability to pull those highlights, those midtones and those shadows out in post-production, and really create something beautiful and something that's customizable for your own likings.
When it comes to the compressed S&Q mode, however, you're kind of left with whatever you see is what you get because everything is baked into the video. Now, at the end of this, I'm going to compare the two together so you can see what it looks like, and you can also see just how versatile it is to shoot in RAW vs. compressed.
One added bonus to shooting in S&Q mode is that I have a file ready to share as soon as the time-lapse stops. Whereas for my RAW interval, I have to process it manually.
Once you've started your camera, it becomes a waiting game, so make sure you have something to entertain yourself while you watch your camera. Since these were relatively short time-lapses at around 20 minutes, I just look around at all of the beautiful architecture that DC has to offer. Once the shot is complete, I can easily break down my gear and head home to edit. Here are the final results of the time-lapse as we shot. The first one will be for our RAW sequence. You'll notice all of the beautiful motion blur that we've created using the ND filters to drag the shutter, and we can see that there are tons of things happening in our scene during that 20-minute period.
The second shot is from my ZV-E1, and while it's good for quick sharing, you can see how much more flexibility RAW gives me for a more polished final product. You also need to be aware that when you're filming in S&Q mode that the maximum slowest shutter speed to film with is only one second. That means the S&Q time-lapse has nearly 60% less motion blur than our RAW camera with a shutter speed of 1.6 seconds. This will ultimately affect how the final shot looks and another reason why you may want to shoot in Intervalometer mode.
Thanks for joining me in this module, and I'll see you in the next one.
- Thanks for joining me, and in this module we'll be discussing how to edit your time-lapse imagery, as well as how to export it as JPEG so that you can use it as pre-graded footage in whatever editor you want, such as the DaVinci Resolve or Premiere Pro. There are other programs out there to use, but these are the best to use that I've tested in my workflow experience.
To start, we're going to download all of our time-lapse material to a new folder on the hard drive. You want to make sure that you create a new folder for each time-lapse if you've shot multiple ones during the course of your filming. Once you've loaded all of your RAW images into the folder, you're going to want to open up Adobe Lightroom. You'll then want to go to the library tab and then hit import. After that, you'll find and select the folder that you've saved your time-lapse material into.
From here, we'll go into the Develop mode and select a frame that represents the best exposure of the series. If your time-lapse has a lot of fluctuation and exposure, you may have to de-flicker it when you get to the post-production phase of editing. Once you've found the image that you want to edit, begin to put your own custom look into the grade. For me personally, if I'm using Lightroom, I tend to only adjust the basic settings plus a few extra color settings. I recommend not changing or adding any of the extra clarity, texture, or dehaze to your shot as Lightroom is not consistent when you begin to apply all of those settings to all of the images. So for me personally, when it comes to editing the time-lapses, especially when we're inside of Lightroom, we want to just take one of these frames and really just deep dive into it.
And what I will say is you want to look for the highlights, the midtones and the shadows, and create a nice beautiful balance between the two. But also you want to accentuate any areas where you think might need more exposure or maybe less exposure. So for this one in particular, this is the shot that we took down in Washington D.C. for our demonstration class. And you can see that we do have some light streaks from the cars. This is during broad daylight. We're again using an ND filter to be able to create those long shutter speeds during broad daylight, which is great because you, you're able to see the cars as they're trailing down Constitution Avenue here, along with all of the people and the bikes and everything else, which is pretty cool.
But the first thing I'm going to do is I'm going to go ahead and increase the shadows. I want to see what's going on in the dark, and immediately if I bring those shadows all the way up, we can see the image change quite dramatically, which is great. But then we also want to make sure, using our histogram, that we're not topping out our highlights too much. And there's a little highlight on the dome here that I don't like. And what I will say is that, while I did expose for the dome during shooting, it is just a little bit overexposed and we were able to take some of that out of post-production. But thankfully with the roll off with the highlights, it's not too terrible and it's not going to impact the final shot too much.
But then what I will do is I'll bring, increase the exposure up a little bit so we can see more of that exposure in there. I'll bring the highlights down again and then also bring the blacks down a little bit and that's going to create more rich tones in here and maybe increase the contrast just a little bit. But I am peeking right on the left hand side here, so I'm going to bring down my exposure just a little bit and we're able to see that. And then I'm going to change the white balance so that it is a little more in tune with what I saw. I'm going to get a little more richer daytime colors to it. But again, you don't want to be messing with texture clarity or dehaze down here as it really just kind of creates a nasty like artifacting when you export it, which isn't great.
But when you're satisfied with the way your image looks and you feel like you're done with it, all we have to do now is apply this to all of the rest of our imagery. And we're done for this part of the phase, which is great. But this is where you basically are able to put your own little custom touch and feel to it with color grading. But let's say you wanted to come in here and really change, you know, the color of the cars or the trees, especially if it's something like fall time period. You can come in there and make those colors really pop, really seem saturated and everything. But since this was taken in a nice wintry mood, it is very cold out. But we're able to see all of our light trails now, and we'll be able to see that motion when it comes to life inside of our time-lapse, which is absolutely fantastic.
So now we'll just move on to the next phase, which is now exporting all of these as a JPEG. Once I've got my frame the way I like it, I'll make sure I do a control A, which will then select all of the images in the image sequence. Then I'll make sure that I'm still on the frame, I edit originally, and then I'll go to the bottom right and hit sync, which will then apply this preset to the entire image sequence. Once the settings have been applied to all of our images, we still have all of our images selected... we'll right click on any of the images and select export. From here, I would suggest changing the file destination to a new folder within the same folder of the images that you've already captured. It makes it easier to find and navigate to when you enter the post-production phase.
I'd also recommend adding a unique file name along with a four digit image sequence affix, so that you're able to ensure all of your shots are properly named when you export. Since we're exporting an 8-bit JPEG, there's not going to be a lot of wiggle room in post-production to do any fix of color highlights, midtones, or shadows, which means you want to make sure that you finish all of your editing before exporting. Once you're satisfied with the file type and the naming convention, you just hit export and then wait until all of the files have been exported and you're done.
In the next module, I'll show you how to take those exported JPEGs, combine them in a timeline of your editor, and then export them like a pro. I'll show you an even better method in which you can edit your photography straight from Da Vinci Resolve, which imports Sony RAW files natively, meaning you get to use the full bit depth and color information when editing. Thanks for joining me, and I'll see you in the next module.
- Hi, and welcome back. In this module, we'll be discussing how to use Adobe Premiere Pro to ingest your JPEG sequence and turn your still images into motion video. This process is relatively easy to do and you'll have a finished time-lapse ready to put on your social media in no time. Let's begin.
The first thing we're going to do is open up Premiere Pro. Once it's open, we're going to create a new project. We'll title, this time-lapse, and then hit create. We're going to skip this screen and go straight into the editor. Now what we'll do is we'll import our media. I'll click on the box in the bottom left and say, import media, and I'll go up to the beginning of the time-lapse and also make sure that I have image sequence selected. This is important because if you don't have image sequence selected, you're only going to import one frame of the JPEG sequence that we created, so make sure that you have image sequence checked.
Click open, and that's going to give us a 14 second JPEG clip here and turn our time-lapse into a live action shot. I'll drag it over to the timeline, and now from here we can go back and play it. And depending on the specs of your computer, this could play back smoothly or it could have a little stutter. It really just depends on the system specs that you have. This is a 7K resolution image, but this is compressed, so it should be playable on most computers. From here, we can do a lot of things. We can go in and change our colors and adjustments here, add some contrast, maybe increase the exposure a little bit, maybe decrease the highlights.
But from here, this is where you kind of create your own image. But again, remember that this is compressed footage, so you only get a little bit of leeway when you want to add or subtract exposure, especially in the highlights. So that's why shooting RAW is always important, but you get the idea and the gist. From here, we can just simply go up to file, export, select media, and then we can choose whichever codec we like. If we want to do this for social media, we can choose an H.264 codec, or if we want to, we can come back in here and go all the way over to Apple ProRes, down to QuickTime.
We have a multitude of different flavors of codecs that we can choose, but ProRes 4:2:2 HQ or for ProRes 4:2:2 are probably the go-to if you're trying to master this time-lapse, I'll use H22 for this one. We'll just need to make sure that our settings are correct. This is going to export as a 7K resolution image, but if we want to do 4K, we can uncheck this box here and just do simply 4K and it'll reconform. Now, you will see the pillar boxes on the left and the right hand side, which means we do need to go back into our timeline and increase the scale of this so that it fills up these areas here. So we could do that now. I'll go back to edit. I'll change the sequence to a 4K sequence, and click OK. And then we, what we can do is come back over to our effects panel, choose the motion in the scale, we can scale it back and just come right back to our pillars. This way, it fills the frame of our 4K image. We can come back, play it back, make sure everything looks good, and it does, and then we can go back to our editing.
So we can click back up here at export. We'll change this to UHD. We'll notice that our black pillars are gone, and from here we just hit export. And again, depending on the type of computer you have, this could take a few seconds to do, or it could take a couple minutes. When it's done rendering, you can now use the time-lapse, throw it up on your social medias, or use it as a repository stock image that you can then sell. You have endless possibilities of what you can do with this, and that'll conclude how you can export your JPEG sequence into a time-lapse live action sequence out of Adobe Premiere Pro.
Congratulations, you've just completed your cinematic time- lapse course, and now you can go back with this information and knowledge and begin to shoot even better time-lapses. Thank you so much for joining me and happy shooting.
Rate this course
Your feedback helps us improve our content.
Course rewards
Complete any course and earn a unique badge to celebrate your progress. Collect them all as you level up your skills!