

Astrophotography
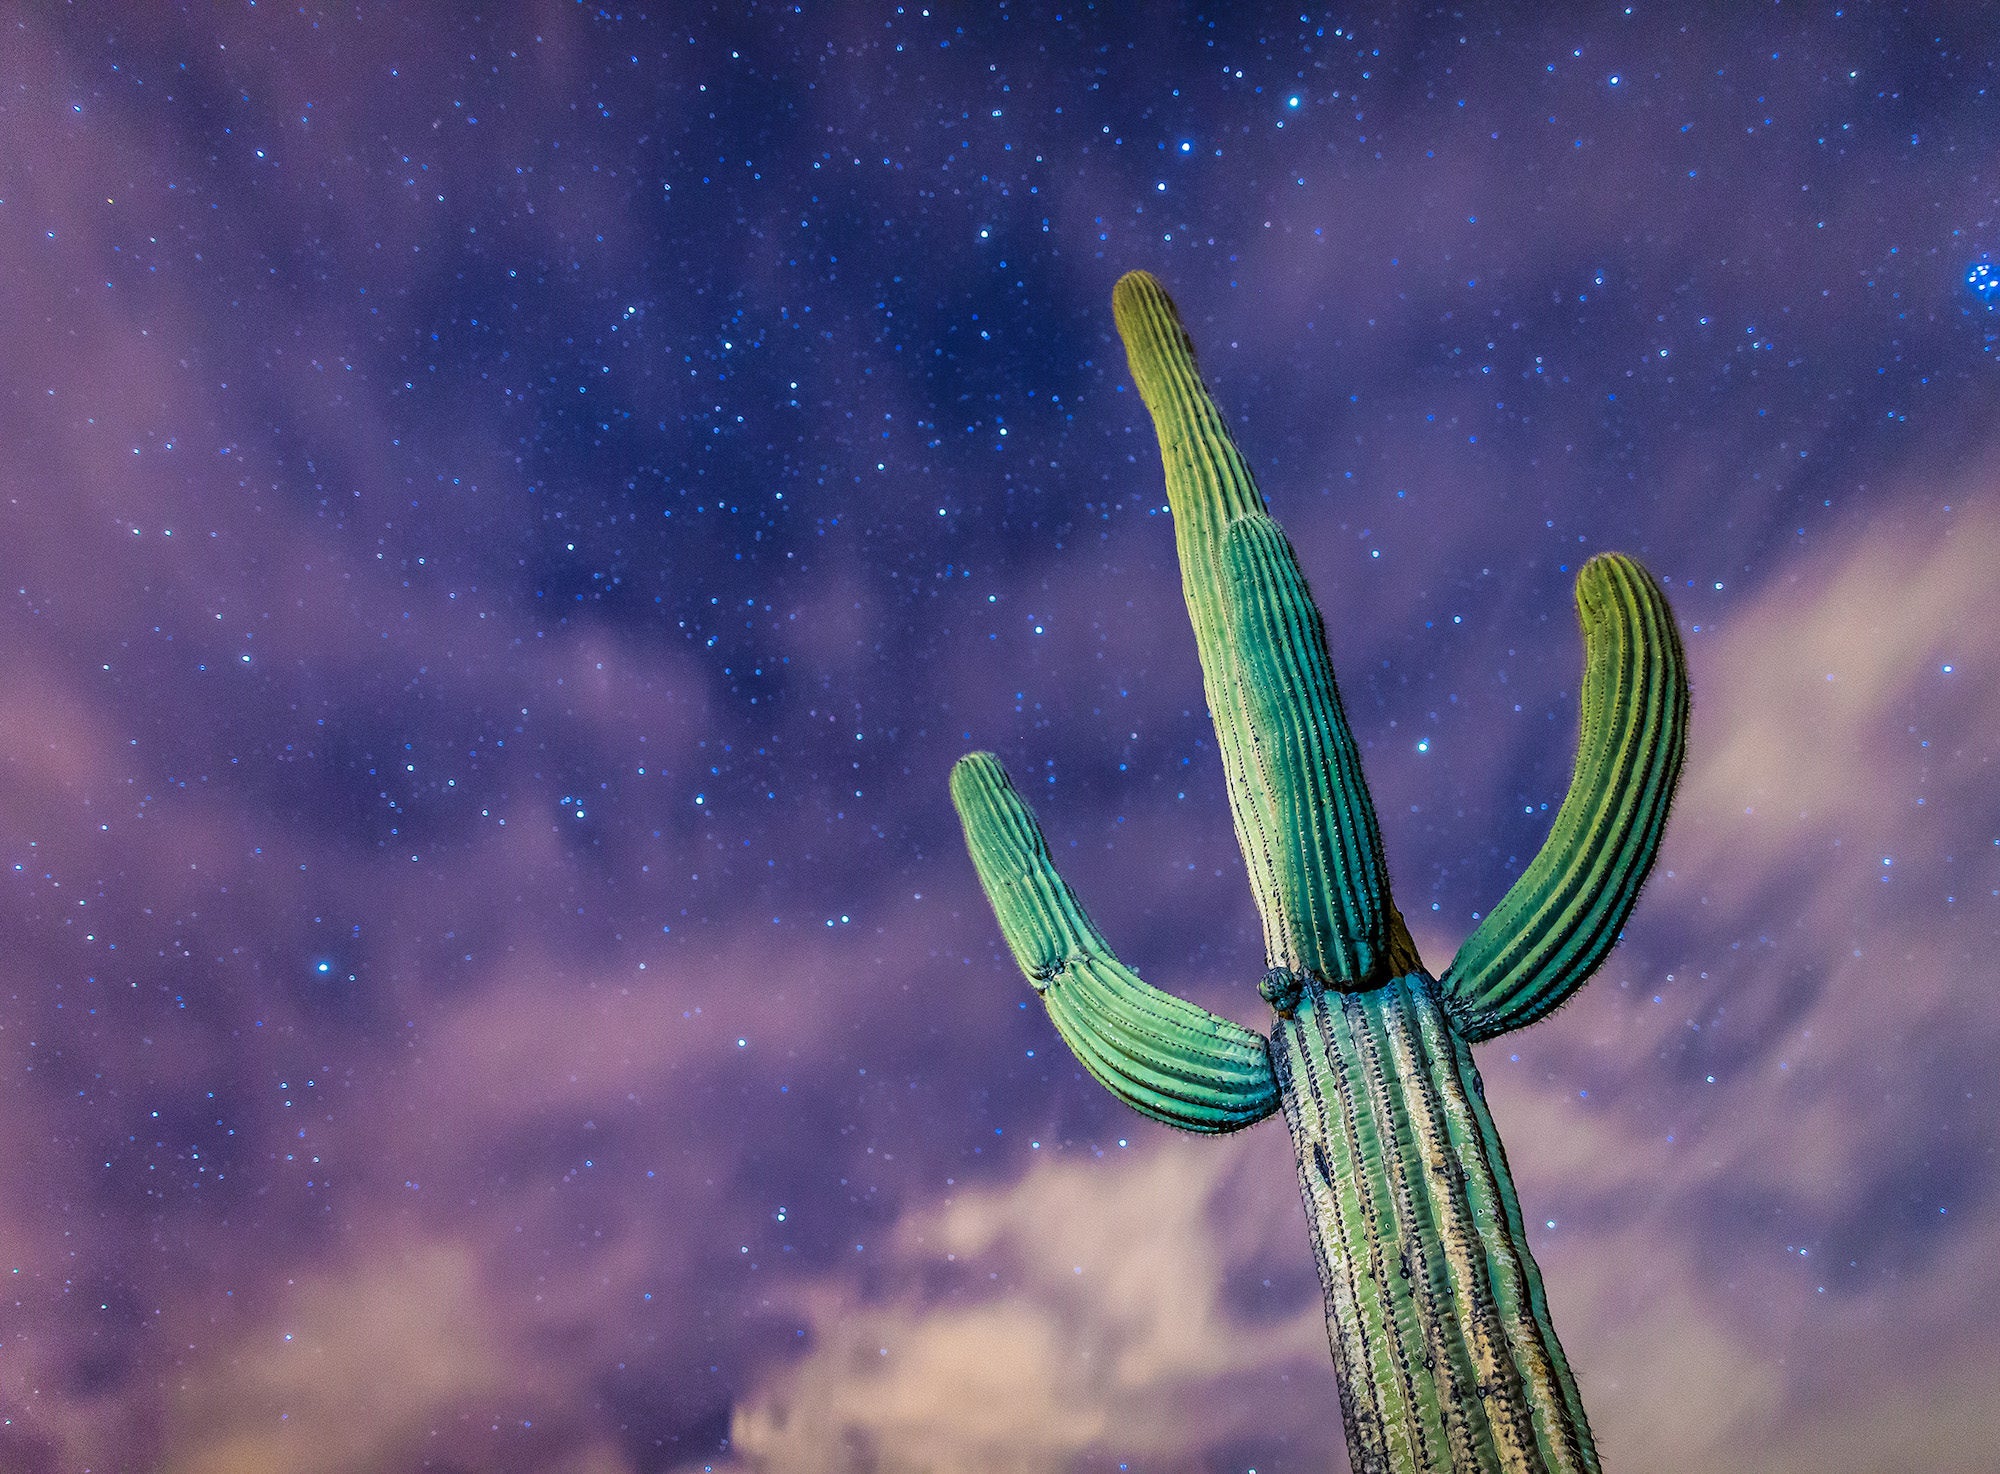
Capture the stars, bring cities to life and master cinematic night photography with your Sony Alpha camera.
- Details
- Module
- Quiz
About this course
Discover how to create striking night imagery with Sony Artisan of Imagery Drew Geraci. In this course, you’ll learn the fundamentals of astrophotography, astro time-lapse photography, and cinematic city night photography using Sony Alpha cameras and lenses.
From setting up your camera for low-light shooting and finding sharp focus in complete darkness to planning around moon phases and composing with movement, Drew shares the techniques behind successful night shoots. You’ll also learn how to capture smooth star motion, build dramatic city light trails, protect your gear in changing conditions, and refine your final images in Adobe Lightroom.
Course highlights
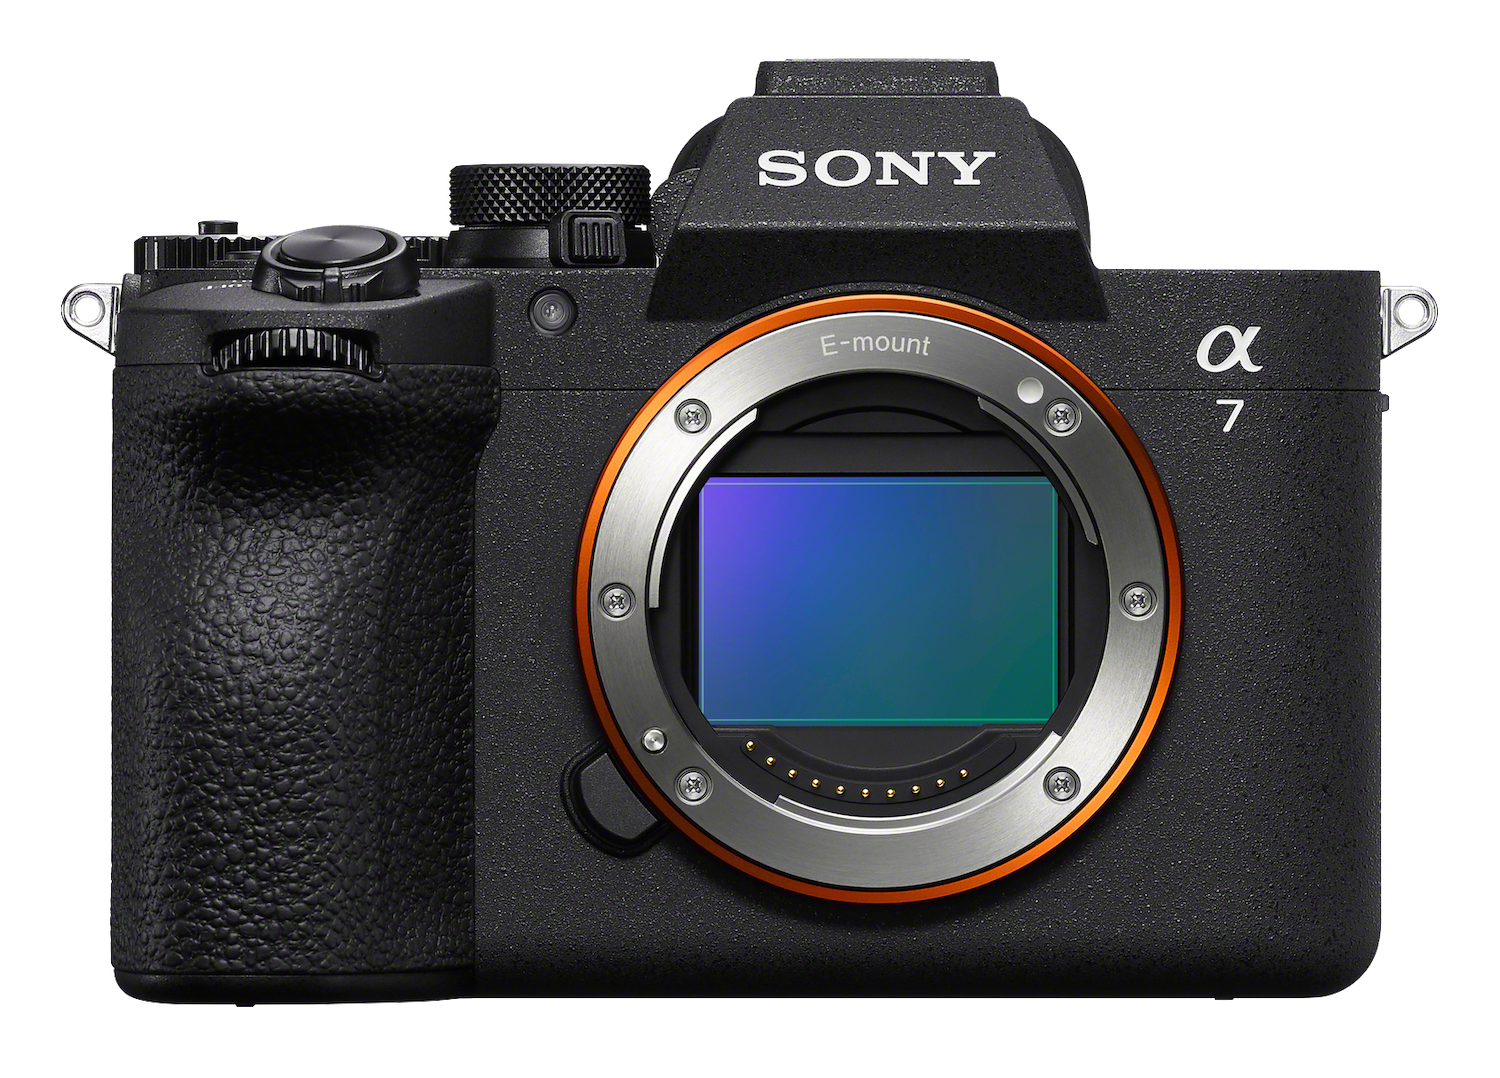
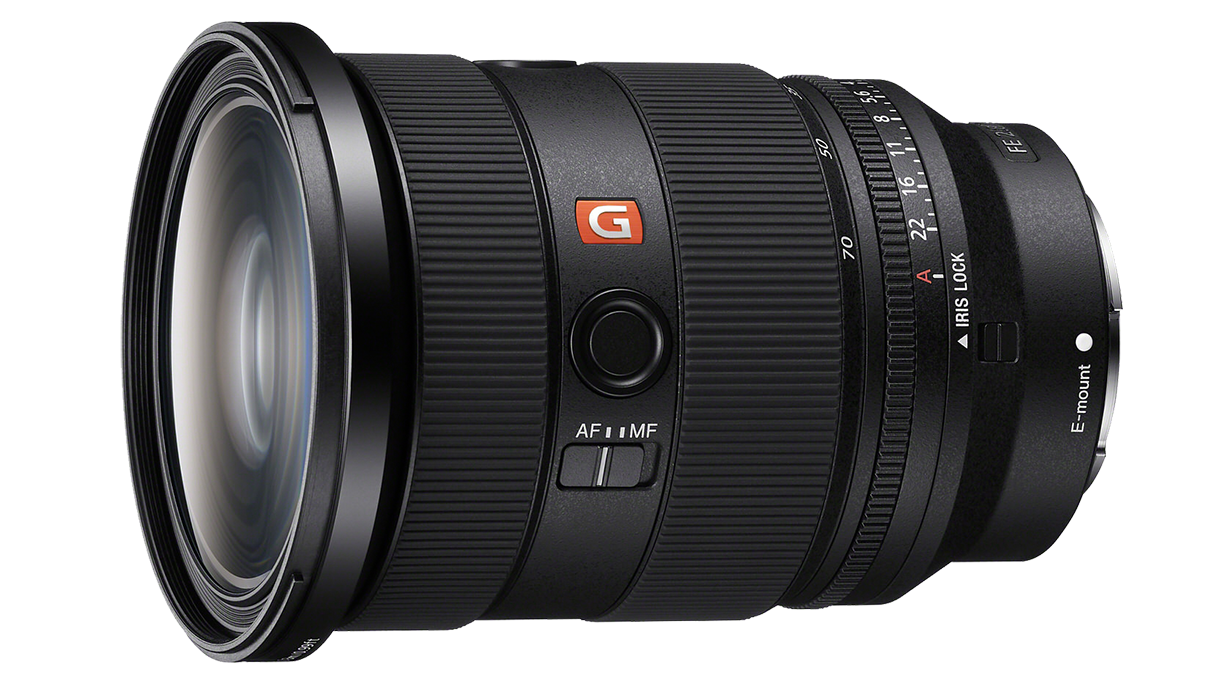
Featured gear
Instructor
Sony Artisan Drew Geraci is an award-winning photographer and cinematographer with over two decades of experience in television, film and advertising. A veteran of the U.S. Navy, where he served as a Mass Communication Specialist for nearly 10 years, Geraci honed his skills in visual storytelling and media production. After his military service, he became the Senior Multimedia Producer at The Washington Times in Washington, D.C., further refining his craft in high-impact visual content creation.
In 2012, Geraci founded District 7 Media, specializing in cutting-edge HDR motion-controlled time-lapse, aerial cinematography, and high-speed video. His innovative work has made him a sought-after collaborator for some of the most respected names in the industry. Geraci gained international acclaim for creating the iconic opening title sequence of House of Cards alongside acclaimed director David Fincher. Since then, he has worked with luminaries such as Steven Spielberg, Jordan Peele, and Alejandro Iñárritu.
Geraci’s striking visuals have been featured in projects for leading brands and studios, including the NFL, HBO, Netflix, Red Bull, Sony, Apple, Disney, Showtime, Dell, Cartier, and more. His work has graced films like Nope and West Side Story, solidifying his reputation as a pioneer in cinematic storytelling.
Drew Geraci
Photographer/Cinematographer, Sony Artisan Of Imagery
Skills
Transcripts
- Hi, I'm time-lapse photographer, cinematographer, and Sony Artisan of Imagery, Drew Geraci. And in this Sony Alpha Camera Academy course, we're diving deep into astrophotography, astro time-lapse photography, and city night photography using Sony Alpha cameras and lenses. If you've ever looked at the night sky and wondered how photographers capture stunning stars, glowing cityscapes, or cinematic time-lapses that make the world feel alive, you're in the right place.
We'll cover everything from setting up your camera for low-light shooting, understanding long exposure settings, and mastering focus in complete darkness, all the way to creating smooth cinematic time-lapses of moving stars, traffic, and city lights. You'll also learn how to plan your shoots using sky tracking apps, moon phases, how to expose properly for both the stars and foreground, and how to avoid common mistakes that can ruin a night shoot before it even starts. And don't worry, this course is designed to be easy to follow whether you're just getting started or looking to level up your night photography skills.
Throughout this course, I'll share real world tips and techniques that I've learned over the years shooting timeless photography and cinematography around the world using Sony cameras in some pretty extreme environments because honestly, capturing incredible night imagery just isn't about having great gear. It's about understanding light, movement, timing, and knowing how to make the most of the tools you already have.
By the end of this course, you'll have the confidence to head out at night, plan your shots intentionally, and create powerful images and time-lapses that truly stand out. So grab your Sony camera, charge your batteries, and let's get started creating some incredible night imagery together. Let's go.
- There's something magical about capturing a night landscape. The world slows down, the light changes completely, and suddenly your camera starts seeing things your eyes can't. Stars appear, traffic becomes rivers of light, clouds streak across the sky, and honestly, that's when photography starts getting really fun.
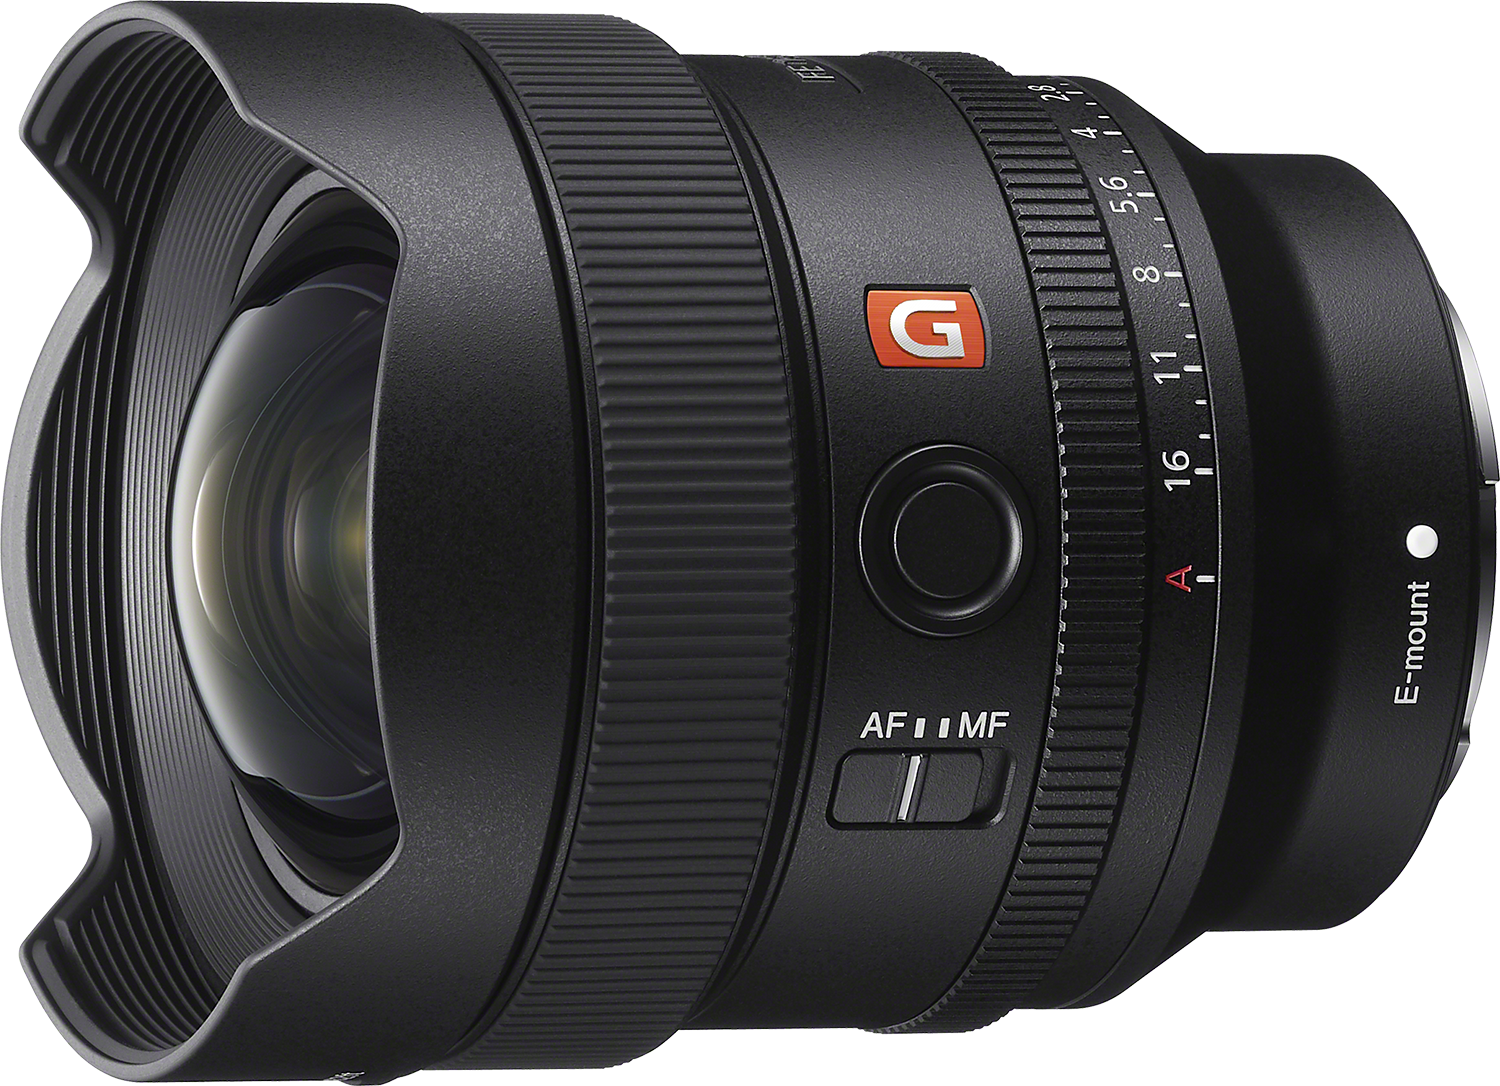
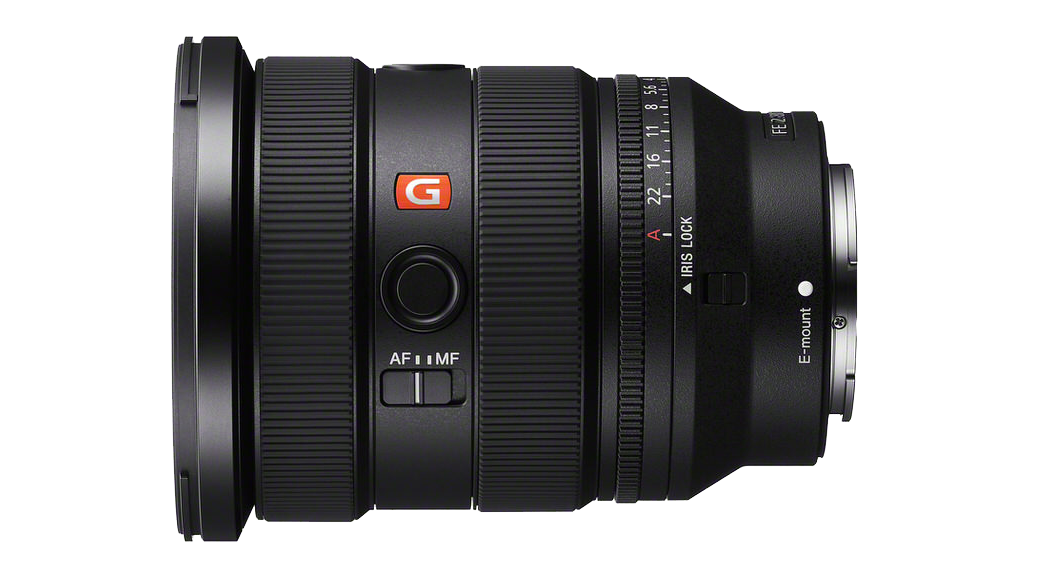
But night photography can also feel frustrating. At first, your autofocus hunts around, your images get noisy, and suddenly every setting matters way more than it did during the day. So in this module, I'm going to walk you through exactly how I set up my camera for shooting the night skies, stars, and cityscapes using the Sony A7 V along with lenses like the Sony 14mm f/1.8 GM, 16-35mm GM II, and the 24-70mm GM II. By the end of this lesson, you'll understand how to expose properly at night, reduce noise in your imagery, focus in complete darkness, and plan your shoots so you're not just guessing when you arrive on location, so let's jump right into it.
When shooting stars or astro-landscapes, the biggest challenge is simple: there's barely any light. So our job is to help the camera gather as much light as possible without destroying the image quality. This is where lens choice becomes incredibly important.
The Sony 14mm f/1.8 GM is honestly one of my favorite astro lenses to use because it's insanely wide and incredibly fast. That 1.8 aperture lets a huge amount of light in, which means cleaner images and brighter stars. The 16-35mm GM II is super versatile if you want flexibility for both landscape and night cityscape scenes, where the 24-70 GM II is amazing when you want tighter compositions or more detail in city shots.
Personally, one of my favorite all-around night astro lenses is the 50mm f/1.2 GM because it allows you to open more possibilities when filming the stars because of how fast the lens is. If you're using a lens that's slower than 2.8, you'll find that it's incredibly difficult to capture the night stars, but it's not impossible.
When I'm setting up my Sony A7 V for astrophotography, I usually start with three things. I use a wide open aperture, I shoot on Manual Mode, and I capture in RAW only. RAW files preserve way more detail in the shadows and trust me, a night shadow details matters more than you might expect.
Now let's talk about the settings everyone gets nervous about: shutter speed and ISO. A really good starting point for astrophotography is ISO 3200, 15-20 second exposures, and then having a wide open aperture. If I'm using the 14mm 1.8, I can usually push my exposure longer because wider lenses show less star movement. With that being said, if you're planning on doing a time lapse, you often want a shorter interval to prevent star streaking. So aim for a 6-8 second interval, which is key.
If you're taking a single photo though and want some of your stars to show movement, then you can definitely shoot with a 15-30 30 second long shutter speed, but be aware that you're definitely going to get some star trails. If you want longer shutter speeds, you likely want to invest in a star tracker that moves with the stars as you're exposing so that you can capture the entire night sky without any issues.
One thing beginners often misunderstand is ISO. People are terrified of high ISO settings because they automatically think that high ISO equates to more noise. The bigger problem is usually underexposing the image though. A dark image brightened later in Lightroom often looks worse than an image properly shot at ISO 3200 or even 6400. If you're shooting at a native ISO on your camera, which is different with every camera model, you'll find that's the best ISO to capture at and you can bump those exposures up later in post for a cleaner image. For the A7 V, the native ISO for video is 800 and 8000 ISO, which means for photos you can shoot ISO 8000 and still get a particularly clean image without really any noise. So don't be afraid to raise your ISO when necessary.
And remember, modern Sony cameras are incredibly good in low light. The A7 V handles nighttime shooting beautifully when exposed correctly. Now eventually you'll notice stars starting to streak if your shutter speed gets too long because the earth is of course rotating. A simple guideline people use is the 500 rule. So with a 20mm lens, 500 divided by 20 gives you roughly 25 seconds before star trails become noticeable. It's not perfect, but it's a fantastic starting point.
For me personally, I use a more narrow exposure of 200 over the focal length to ensure my stars are always sharp and never streaking. For time-lapse photography, this is incredibly important. Now let's optimize the camera itself. One setting I always change immediately is turning off long exposure noise reduction. This is super important for any type of photography and especially time-lapse photography and here's why. If your exposure is 20 seconds, the camera's going to take another 20 seconds to process the image internally. That means you lose half of your shooting time between frames. For astro time-lapse, that's a disaster because your motion becomes choppy and unreadable.
I also recommend turning off Auto White Balance, using a manual Kelvin setting, enabling focus magnification, turning the screen brightness down slightly, and of course using Manual focus. For white balance, I usually live somewhere around 3800 Kelvin to 4500 Kelvin, depending on how much light pollution I'm dealing with. Another quick tip, shoot with Airplane Mode enabled if your camera supports it. Small battery savings matter a lot during long night shoots. Noise is part of nigh photography, so don't obsess over eliminating every single grain of noise because honestly, some noise is completely normal. Instead, focus on getting the cleanest exposure possible in camera.
A few tricks that might help immediately is first, expose slightly brighter than what you think you need without blowing the highlights. Second, avoid overheating your camera during long sessions. And third, colder weather is actually your friend. Camera sensors perform better in cool temperatures and reduce noise because of it. And of course, another huge tip is just using faster lenses, and that's where lenses like the 14mm f/1.8 GM become gamechangers. More light hits the sensor, meaning lower ISO and cleaner files overall.
Focusing in the dark. This is probably one of the number one things that frustrates people when they first start shooting stars. Autofocus usually struggles at night, so here's what I do instead. I switch to Manual focus. I find the brightest star or distant light source available, and then use Focus Magnification on the A7 V. Zoom all the way in digitally and slowly rotate the focus ring until the stars become the smallest, sharpest point possible, not the brightest, the smallest. Tiny focus adjustments make a massive difference in astrophotography.
And one warning, don't trust the infinity symbol on your lens. Temperature changes can slightly shift true infinity focus. To make sure your frame is in focus, always double check visually by taking a test frame and zooming in. And once your focus is locked in, try not to touch the lens ever again. Sometimes you can even place a piece of tape over top of it to make sure it's locked. I ruined entire time-lapse shots by accidentally bumping the focus ring in the night and it's not good.
Another tip is to use Bright Focus Monitoring on the back of your camera, which allows you to see even more things in the dark to focus on. You can easily do this by going into the camera's menu system, scrolling down to custom buttons, and adding a custom button for Bright Monitoring. Night photography takes patience. You'll miss focus sometimes, batteries will die, the clouds will roll in, and at the worst possible moment, and this happens to me pretty much every time I go out and shoot, but that's all a part of the process. But when everything finally lines up, when the stars appear over a skyline or your camera captures details your eyes can barely see, it's completely worth it.
In the next module, we're going to be taking all this knowledge, bringing it to life through astro time-lapse photography, where we'll learn how to create smooth cinematic movement in the night sky. Thanks for joining me. I'll see you in the next lesson.
- There's something almost addictive about astro time-lapse photography. The first time you watch the stars move across the sky in motion, you realize the night isn't still at all. The earth is spinning, clouds are drifting, galaxies are moving overhead, and your camera gets to reveal all of it.
Astro time-lapse is one of the most rewarding things you can shoot because it combines photography, cinematography, patience, and planning all into one process. But it's also very easy to mess up and something that I've personally messed up many times. You could spend three hours shooting only to realize your intervals were wrong, your focus drifted, or your exposure flickered the entire time.
So in this lesson, I'm going to walk you through exactly how I approach astro time-lapse photography using the Sony A7 V along with lenses like the Sony 14mm f/1.8 GM, the 16-35 GM II and the 24-70 GM II. We're going to cover interval settings, focus techniques, planning your shots, and how to balance exposing for the stars versus the foreground. So let's dive right into it.
What makes a good astro time-lapse? A great astro time-lapse isn't just about stars moving, it's about the motion, depth and storytelling. Sometimes the best time-lapse includes clouds drifting through the frame, trees moving in the wind, cars passing through the foreground, or silhouettes against the sky. The stars are the main character, foreground elements give the scene emotion and scale. That's why lens choice matters so much.
The Sony 14mm f/1.8 GM is incredible for huge dramatic skies and Milky Way shots because it captures so much of the environment. The 16-35mm GM II gives you the flexibility you want to recompose quickly or to create layered compositions. And the 24-70 GM II works beautifully when you want tighter details like mountains, structures, or isolated foreground subjects beneath the stars.
When building a time-lapse, always ask yourself, what's moving in this scene? Because movement is what brings the image to life. The next question is, how do I set up my intervals for a smoother time-lapse? Now, let's talk about a single thing that can make or break your time-lapse, and that's the intervals. Your interval is simply the amount of time between each photo your camera takes. If your interval timing is too long, the stars jump across the frame and your time-lapse looks choppy. If the interval is too short, your camera may not have enough time to process and save each image.
Here's the easiest rule to remember. Your interval should usually be about one to two seconds longer than that of your shutter speed. So if your exposure is 15 seconds long, your interval might be around 16 or 17 seconds. That tiny buffer gives the camera enough time to write the files before the next exposure begins. For astro time-lapse, smoother almost always looks better.
One mistake beginners make is trying to shoot too fast. Remember, stars move slowly. Let the motion breathe. On the Sony A7 V, the built-in intervalometer shooting settings makes it incredibly easy to set up and use. And before recording a full sequence, always test about 10 frames first just to make sure everything's working appropriately. Trust me, finding mistakes in the field is way less painful than discovering them five hours later at home after you've shot everything and nothing works. Focus is everything in astro time-lapse. If your focus is slightly soft, the entire sequence falls apart because you're stacking hundreds of images together and they're all going to be soft or out of focus. Just like we talked about in the last lesson, it's not about the brightest spot, it's about the sharpest and the smallest spot. This part definitely takes practice, so make sure you go back and check your frames in the camera.
So here's my process. First, switch the lens to manual focus. Then find the brightest star or distant light source possible. On the Sony A7 V, use Focus Magnification to zoom all the way in digitally so that you can focus. Slowly rotate the focus ring until the stars become the smallest pinpoint possible. And one really important tip is to tape your focus ring down once you've nailed focus. Seriously, I've had people brush past tripods, touch lenses accidentally, or the focus just shifts during cold weather without realizing it. One tiny bump can ruin hours and hours of work and you don't want that.
Also remember that your foreground matters too. If your foreground subject is very close to the camera, sometimes you'll need a focus stack or compromise slightly between perfect stars and foreground sharpness. But generally with a wide angle lens like the 14mm f/1.8, you can often achieve enough depth of field to keep both looking sharp. Foreground subjects are incredibly important for astro time-lapse. Interesting trees, rock formations, abandoned buildings, roads and cities all help give your time-lapse depth and scale. Without foreground, it's often just stars floating around in empty space, which might be exactly what you're looking for, but a lot of the time foreground objects help with scale and visual positioning.
Do you expose for the stars or do you expose for the foreground? This is one of the biggest artistic decisions in astrophotography and time-lapse photography. Usually you can't perfectly expose both in a single image without compromise. If you expose for the stars, your foreground may become a silhouette. If you brighten the foreground too much, you may blow out parts of the sky or increase noise.
Personally, I usually prioritize the sky first because the stars are the hero of the scene. Then I decide how much foreground detail I want. Sometimes silhouettes actually look more dramatic. Other times, I'll use subtle light painting to gently illuminate foreground objects during the exposure and the shoot. This is where balance becomes really important. You want foreground that supports the stars, not overpower them. One thing I always tell people is this: night photography should still feel like night. You don't always need to turn darkness into daylight. Some shadow and mystery actually make the images feel more cinematic and engaging to view.
That'll do it for this lesson. I'll see you in the next.
- Astrophotography is one of the few types of photography where preparation matters just as much as the creativity. You can have the best camera in the world, drive hours to the perfect location, and still walk away with blurry stars, fogged up lenses, or dead batteries if you're not ready for the environment. And honestly, that's part of the whole experience. Night photography teaches you patience, adaptability, and problem solving in ways daylight photography never really does.
In this lesson, we're going to cover three things that can completely transform your astrophotography. That includes planning with Star Tracking apps and moon phases, protecting your gear from dew and battery issues, and one of my favorite techniques of all time, light painting your foregrounds for dramatic still images. Let's jump into it.
One of the biggest differences between a beginner astrophotographer and an experienced one is the planning. Experienced shooters rarely hope for a shot. They know exactly where the Milky Way will be, what time it rises, where the moon is going to be positioned, and how the landscape will line up before they even leave the house. Apps like PhotoPills, SkyGuide, and Ephemeris are absolutely incredible for this and easily help you plan your night. You can track things like Milky Way position, star movement, weather, light pollution, galactic core visibility, and moon phases, which matters more than a lot of people realize. A full moon acts almost like a giant soft light in the sky. It can beautifully illuminate landscapes, but it also washes out stars completely, which is why you should always be aware of what phase the moon is in. A new moon gives you darker skies and stronger star visibility, which is usually ideal for Milky Way photography. Neither is wrong, they just create different looks.
One of the biggest mistakes beginners make is showing up randomly and hoping the Milky Way will magically appear overhead. Planning ahead is what turns random shooting into intentional photography. One thing I always recommend is arriving an hour before sunset whenever possible. Scouting compositions in the daylight is infinitely easier than wandering around in complete darkness, trying not to trip over rocks with thousands of dollars worth of photo gear in your hands.
Now let's talk about the thing that nobody warned you about when you're starting astrophotography. Dew. And I'm not talking about Mountain Dew, I'm talking about condensation on the lens. Lens fog is one of the most frustrating problems in night photography because sometimes you don't even notice it happening until your images suddenly look soft or hazy. What's happening is simple. As the temperature drops, moisture in the air condenses into the colder glass surface of your lens and once that starts, it usually gets worse throughout the night. One of the easiest ways to fight this issue is using lens heaters or lens warmers wrapped around the lens barrel. These gently keep the lens temperature slightly above that of the dew point, which prevents condensation from forming. Even something as simple as hand warmers and rubber bands around the lens can help in a pinch.
Another important thing is avoiding sudden temperature changes. If you're bringing a freezing cold camera into a warm car too quickly, condensation can form inside and outside the gear. So try to let your equipment acclimate gradually when possible. Now let's talk about batteries. Cold weather absolutely destroys battery life. A battery that normally lasts two hours during the day might only last 45 minutes on a cold mountain at night. So always bring more batteries than you think you need. And here's a trick I use constantly. Keep spare batteries inside your jacket pocket close to your body heat. Warm batteries perform dramatically better than cold ones. That little habit alone has saved me countless shoots over the years.
Now this is where night photography really gets creative. Light painting is one of the best ways to add depth, mood, and storytelling to your images. Because sometimes the stars might look incredible, but the foreground completely disappears in the darkness. Light painting lets you gently illuminate parts of the scene during a long exposure to reveal texture and detail. And the keyword here is gently. One mistake beginners often make is blasting the foreground with way too much light. You don't want the scene looking like a construction site in midnight. You want a subtle, natural looking illumination. Portable LEDs work great for this because you can control the brightness and the color temperature easily. Even a dim flashlight can work beautifully if it's used carefully. Sometimes I'll lightly sweep a warm light across trees, rocks, or foreground elements during a 15 to 20 second exposure. If you hold the light still for too long, you create harsh hotspots. Soft movements usually create much more natural looking results.
Now, one of my favorite tricks is using existing light sources creatively. Car headlights can create amazing cinematic lighting if positioned correctly. Moonlight can naturally illuminate landscapes beautifully as well. Even nearby city glow or ambient light pollution can become part of the composition if you embrace it creatively. Remember, you're not just photographing the stars, you're building an atmosphere. You're creating a scene that feels immersive and emotional.
Astrophotography is equal parts skill and creative interpretation. Some nights everything goes perfectly. Other nights, your lens fogs up, batteries die, the clouds roll in and nothing works the way you would plan, and that is all completely normal. But every time you head out and shoot, you get better at reading the environment, solving problems and understanding the night sky. And eventually you stop feeling like you're chasing photos and you start feeling connected to the experience itself. In the next module, we're going to be shifting from remote dark skies into the energy of the city as we explore night city photography, light streaks, composition layering, and blending day and night together into a single cinematic frame.
Thanks for joining me.
- When people think about night photography in the city, they usually picture bright neon lights, glowing buildings, and busy streets. But what really makes a city come alive at night is movement. It's the traffic, the people, the changing of the light, the energy of the streets. All of that becomes amplified when you start working with long exposures and time-lapse photography.
One of the biggest advantages you have shooting a city at night is the amount of available light. Unlike astrophotography, where you're fighting darkness, cities are usually full of practical lighting sources that can help create depth, texture, and motion in your shots. For me, one of the best tools for city night photography is a wide-angle lens. Something like a 14mm, 16-35, or even a 24mm lens gives you the ability to capture scale and movement all at the same time.
Wide angle lenses exaggerate perspective, which can make streets feel deeper, buildings feel taller, and traffic feel more dynamic. The other major advantage is that wide angle lenses naturally allow for longer shutter speeds without introducing as much visible camera shake or motion blur from handheld vibrations. Even though we're using a tripod, the wider perspective helps smooth out movement and gives your shots a more cinematic feel. One of the easiest ways to instantly improve your city night shots is by using long shutter speeds to capture car light trails. Instead of freezing traffic, you're stretching movement across the frame. Taillights become red rivers of light and headlights carve bright paths through the streets.
The key here is balancing shutter speed with traffic movement. If your shutter speed is too short, the cars look frozen, too long and everything becomes an overexposed mess. Usually somewhere between two and 15 seconds works beautifully depending on how fast traffic is moving and how bright the environment is. What I love about long exposures is that they simplify chaos. Cities are visually busy. There's signage, people flashing lights, construction reflections, and movement happening everywhere. Long shutter speeds help smooth all of that together into something cleaner and more artistic.
Aperture also plays a huge role in shaping the look of your scene. This is something a lot of beginners overlook. If you shoot wide open at something like f/1.8 or f/2.8, you're letting in a ton of light, which is great for keeping ISO low and maintaining image quality, but your depth of field becomes much shallower. That means parts of your imagery may drift out of focus, especially when you have objects that are close to the lens. Now, sometimes that may be exactly what you want. A shallow depth of field can isolate a subject and make the city lights melt beautifully into the background. But for wide city scenes where you want sharp detail from foreground to background, stopping down your lens becomes extremely important.
Personally, I spend a lot of time around f/5.6-f/11 for city night work, especially when architecture and leading lines are important to the composition. A narrower aperture increases your depth of field, helping more of the scene stay sharp. It also changes the way light renders in your image. One of the coolest side effects of stopping down your aperture is the creation of starburst effects around bright lights. Street lamps, headlights, and illuminated signs suddenly develop these beautiful sharp arrays that add texture and atmosphere to the image. It's one of those small details that can make a shot feel far more cinematic.
Now, one thing you have to watch carefully when you're stopping down your aperture is diffraction. If you're pushing it too far, like f/16-f/22, your image can actually lose sharpness overall. There's always a balance between depth of field, sharpness and exposure. Another trick I use constantly in cities is layering depth into the frame. Don't just point your camera at a skyline and call it a day. Find foreground elements to help guide the viewer into the scene. It's this depth that makes the night photography feel more immersive instead of flat.
Reflections are especially powerful at night. Honestly, rain is one of the best things that can happen to a city photographer. Wet streets reflecting on signs, headlights, and building lights, instantly doubling the visual complexity of the scene. Some of my favorite city time-lapses were filmed right after storms because the reflections transformed ordinary streets into something cinematic. One trick I recommend is lowering your camera closer to the ground. A lot of beginners automatically shoot from eye level because that's what feels natural, but cities become dramatically more interesting when you change your perspective. Get low near the reflections, shoot through railings, frame subjects between buildings, use compression from farther away and look for symmetry.
The best compositions usually happen when you stop photographing the obvious thing and start photographing the environment around it. As for where to actually find compositions in a city, I usually look for three things: movement, elevation, and separation. Movement means areas with flowing traffic, crowds, trains, or just changing light patterns. Elevation gives you perspective. Parking garages, rooftops, pedestrian bridges, hotel balconies, and overlook areas can completely transform a shop because you suddenly see the rhythm of the city from above.
And separation means finding locations where your subjects stand apart from the background. Instead of visual clutter everywhere, you want clean layers that help guide the eye naturally through the frame. Intersections are incredible for this because they combine motion, geometry, and changing light all at the same time. Crosswalks, traffic signals, headlights turning, and pedestrian movement create endless opportunities for time-lapse sequences or for just still imagery.
Another thing I tell people is to scout cities during the day before shooting at night. You'll move faster, stay safer and identify compositions ahead of time. At night, everything changes visually, but knowing your environment beforehand helps you focus on creativity instead of wandering around searching for shots. And finally, don't just shoot the skyline. Some of the best imagery happens in the smaller moments. The technical side matters. Your shutter speed, your aperture, the lens choice, these are all important variables, but what really separates great city night photography is learning how to capture the mood and the movement together. The city is already performing for you every single night. Your job is to learn how to translate that energy into a frame.
Thanks for joining me.
- For this live demonstration lesson, I headed out to the beautiful Blue Ridge Mountains, which is about two hours from the closest major city and provides an awesome view of the Milky Way barring any bad weather, of course.
For three nights though, I had nothing but clouds, which made for great sunset shots, but I'm here for astro, so I decided to wait it out one more day. This is something that commonly happens and why you should always be prepared to extend your shoot if the wrong weather rolls in. My first goal though when I arrived was to schedule location to set up for the Milky Way. Since we're in the perfect season to film the Milky Way and the moon is gone, it will be the perfect conditions to capture the galactic core and the pitch black of night.
I arrived about an hour before sunset on my last day so I could check my frame and align my camera to capture the stars as they appeared. As I was doing so though, a storm rolled in and I though, "Well, this is it. I'm definitely not going to be capturing any stars on this trip." But with that being said, I decided to stick it out and the time passed and the clouds cleared.
At around 1 AM, it was time to start my time-lapse. With my Sony A7 V with 14mm f/1.8, I zoomed into the scene and started to adjust my focus manually until I saw the most distant light in the frame turned at the smallest stop possible. I then set my camera up with a 5-second exposure at f/1.8 and ISO 3200. I checked the framing camera and then I let it roll.
I decided to film for two hours, which meant I needed a slightly faster interval, so I chose an interval of 6-seconds, just enough to exceed the shutter speed of 5-seconds and 1000 frames. This would take me to about 3:00 a.m. One of the coolest things to see is the Milky Way live and in person. For the longest time, you couldn't capture the Milky Way in video, but with the FX3 and the ISO cranked up to 102,400 ISO, I was actually able to capture the Milky Way live, which is pretty darn cool.
Here's some of the imagery that I captured during the event from multiple spots and you can see how the atmosphere and the ambient light really impact the frame. I did use my 50mm f/1.2 to capture some incredible stills on my FX3 as well, and it was blown away by the detail of a 12 megapixel camera at night.
What a fun adventure and thanks for joining me in the Blue Ridge Mountains. I'll see you next time and happy shooting.
- Hi, and welcome back. In this module, we'll be taking a dive into Adobe Lightroom to edit both an astro night photography shot as well as a night cityscape shot. I'll show you how to balance the exposure of the stars at night, remove noise with ease, how to mask areas in your photograph to make the image pop, and the best export settings to retain the highest possible quality. All right, let's get started.
So the first photo we're going to work on is our night astrophotography shot, and this is one of my favorite to work on because exposing for the stars and getting those stars to pop in post is exactly what we want to have happen. As you can see right here, this is what we're going to be working with. This is the end result that we have here, but here is what the original image looks like. And if we go into our library, we can take a look at the stats.
This was shot at four seconds at f/1.2 at 50mm with an ISO of 1000. So if we're looking at that inside of Lightroom, we can see that it's pretty dang dark and it doesn't offer a lot in the, in the ways of excitement. However, we're going to get to that right now by balancing the image and increasing the exposure. So what we're going to do is start off with our exposure bar. I'm going to come over here and I'm going to increase this probably close to about two stops. And as we're doing that, we can see that we're definitely getting better image quality now. We can see the Milky Way, we can see the gas in the stars, and it's the image is kind of taking shape as we speak.
The next thing I want to do is I'm actually going to increase the highlights, and that's going to make those stars pop a little bit more. I'm going to decrease our shadows just a little bit. I'm going to make those whites pop by increasing the whites. And then I'm going to decrease the blacks a little bit to give it a little more contrast. And I might even come into the contrast and increase the contrast just to give it a little more pop there. And then when it comes down to our texture clarity in DeHaze, I really recommend not using a lot of clarity. In fact, I'm going to be reducing clarity probably about to -13.
And then I'm going to increase the texture just ever so slightly, maybe +10 or 11, somewhere in that range. But we can see that the stars definitely pop here. But as you can see in the image, there is quite a bit of noise and grain that's inside there, even at ISO 1000, but it's actually pretty minimal. But the way that we can get rid of that right now is to go back down to our detailed box right over here on the right-hand side. And this is the easiest thing in the world. You just hit Denoise and literally it does everything for you right off the bat. And that's kind of why I enjoy using Adobe Lightroom in this fashion because it does a really great job of determining what that noise is and removing it. And if we zoom in here, it looks absolutely crystal clear. So kudos to Adobe for that.
Pulling back here. Our image is still not quite the, as poppy as I wanted. We can come in here to Dehaze and increase the Dehaze just a little bit. And then we can see that we are getting much more contrast and much more separation, but I want to get that exposure up just a little bit more to make those stars pop. So I'm going to increase that just ever so slightly. You can even see with the A7R V, even using a 16 megapixel sensor, we do retain quite a lot of detail here and it looks super smooth and beautiful in post-production.
Now what you'll notice is that there's a difference in contrast and tones in our, our sky as well as the cloud layer as well as the low laying cloud layer. And that's because we had a lot of ambient light and a lot of that ambient light was probably giving off some tungsten, which is where we get this orange glow from. So it can be difficult to, to mitigate that. And what we can do is come over here and create a mask. I'll click on the mask icon. And then what I'll do is come down here and I'll select my brush. And what I want to do is I just want to kind of brush this area out and make the tones just a little bit subdued. And if you have this selected as well as having auto mask selected, it's really only going to stay within the, that color channel. And that's going to allow you to come back here and really work it.
So we can come back down here. I can decrease the exposure if I wanted to, but really I just want to like balance out the color. So I'm going to make it more blue. We can see that there's some over here that we want to get rid of. And as I'm doing this, the image is taking a much more realistic and natural looking shape. We're getting rid of that ambient glow and the clouds are turning the color they should be turning. What we can do as well is decrease saturation ever so slightly. Not a lot there. And that's going to get rid of that orange tint right there. And we can do the same thing with these clouds that are up here. Come in and it's almost like waving a magic wand over top of them, getting rid of that haze. We just want to make sure not to go over the Milky Way because we will remove some of that Milky Way glow, which we don't want, but we're going to make that pop as well.
So I'm going to come back here and create another mask and it's going to be another brush mask. And this time I'm going to mask out our Milky Way or where I think the Milky Way is going to be. And this is where you can kind of let your creativity fly. And what we're doing in here is I'm just going to just address some of the contrast so it makes it a little more popular. I can increase those highlights, decrease those shadows a little bit, increase the whites. And we can also play with the color temperature. Don't go too crazy with the color temperature, but keep it as it is right there and I will adjust the tint so we're adding a little more magenta in there to get a little more of like the orangey yellow glow of the Milky Way that you would normally see. And then if I take this back here to our original, so if we look at the original, that's the original. That's where we ended up with. I'm pretty happy with that.
So this is a pretty balanced image as it, as it stands right now. And what we can do is we can go back there and we could add some more adjustments maybe make it a little more tighter so it's more on the Milky Way itself. I'll crop down just a little bit, center it up. And then I am still seeing a little bit of contrast is needed just to make that image pop a little bit more. So I'm just going to crank that contrast all the way up. And now we get that Milky Way popping and glowing and it's looking super spectacular. And I absolutely love this.
So this is what you can do on your own astro night photography shoots. And just using these simple basic settings right over here and you can go back and use masking to make certain areas of the image pop if you want to. You can increase exposure or decrease it. Either way, you're going to come out with a fantastic product. All right, now we're going to move on to our cityscape shot.
So now we're going to work on our cityscape shot and this is one of my favorite types of photography to work on because there's just so many different avenues of light to work on, so many different structures and everything impacts the scene greatly. But just like the astrophotography, we're going to start off by balancing the shot. And as we can tell here, it does look a little dark.
So we'll start off with increasing the exposure. I'm going to increase that probably by a stop or so. Maybe a little bit more. And then I'll come into our highlights, reduce the highlights. We can see that we are clipping in the blue, which is not bad. And I'll increase the shadows just ever so slightly. Make that pop up top here. And what I do love about these cameras is the fact that because it's 61 megapixels, we can see just how beautiful the exposure is and the texture. And look, you can even see a little star right over here. That's pretty cool. But I absolutely love editing these types of photographs.
So I'll come back out here, continue on. I'm going to increase my whites just a little bit. That's going to make those highlights pop. And then I'm going to bring the blacks down and that's going to create a little more contrast in our shot, which is great. And then for texture, I will increase texture just a little bit just because I know how much texture helps to amplify the lines in architecture. And I think that that's great.
And if we come down here and we decrease the clarity just a little bit, you can see just how much that makes those highlights pop. And I like it because if I decrease it, it's going to make the image a little more softer and a little more mysterious, which I do like. And then for Dehaze, we can either increase that a little bit to make that contrast pop or even decrease it just a bit and it's going to make it more dreamy-like. But in this instance, I think I'm going to kind of just leave it as a maybe +4, somewhere right around here.
Now, what I will say is that there is a green tone so we need to increase our magenta just a little bit. So I'm going to increase magenta genta. And that's going to make it a litle more neutral, make those whites white, makes our colors pop. And what I will do as well is we can come down here to our color mixer and if I select any of this orange down here, we can come in here and then basically just reapply a shift. And you'll notice as I shift through it, we can make that turn green or more of a reddish orange. But I'm just going to make it just this really nice orange and it's going to give a nice little complement of color between our blue, white and orange color palette here. And then we can increase saturation a little bit and that's going to make it pop in the background on the foreground. And that's looking really great.
I do really want to de-noise this too because we go up to the top here, we can see that there is a little bit of noise up in those clouds. And if we hit on our de-noise down in details after a few seconds, it should remove a majority of the noise that we're seeing right up here. Once that de-noiser is done, you can see just how beautiful and clean the image looks. The lines are crisp. There's really no noise whatsoever and it just looks absolutely pristine, which is exactly what we want it to look like.
All right, from here, what we're going to do is we're going to create a couple masks. So I'm going to come over to our masks tool and I really want to make our center point here the the main focus of our subject. So I'm going to create a new mask. I'm going to use a brush. I'm going to come in here and make the brush a little bit smaller, make sure auto masking is on. And then I'm just going to come in here and just lightly mask everything on the inside. If we do end up having some of that mask reach the exterior, what we'll do is we'll just hit an alt on our keyboard and that's going to make it come negative. We can reduce the masks here on the side. We definitely don't want the masks exceeding the boundaries of your subject. Just tidy that up a little bit.
And what I'm going to come in here and do is just add a little more contrast, make things pop. I can make the side look a little bit brighter and then I'm going to increase that temperature a little bit just to get some yellows in there as well. Maybe make some blacks, make it pop a little bit, add those whites. I'm just going to make those highlights pop. And this is going to make Freedom Tower look even more exciting and more beautiful as the center of focus.
Now the next thing I want to do is I want to create a nice little natural vignette around the image. So I want to create a new mask. Same with the brush tool. And I'm going to say on the outside edges here, I want to keep this a little darker. I want to keep this building side a little bit darker. And it's just going to create focus on the center of our image. So I'll keep doing that. And if I come over here, I'm going to decrease exposure. Not too much. So there's a little bit here I need to get rid of. Great. And then down here, I really want to make the street a little bit darker as well. Get some contrast in there with the lights so we can kind of paint that right now. And that's looking beautiful.
And the same thing with these buildings on the right-hand side. They're a little too bright, so I'm just going to come into here and knock down the exposure just a little bit. And that's going to help these create a more centralized focal point on the, the center on the old Freedom Tower there. All right.
Now I'm absolutely excited with this image right now. I think it looks really beautiful. This is the before. If I come over here, this is what it used to look like and this is what it looks like right now. I will say there is a little bit of a green in there. I'm going to add just a little bit more magenta to the overall. Bring that down just a little bit. Bring the blues down just a little bit. And there we go. That's going to be our finalized image. We have a really spectacular color palette here of some blues, some teals and oranges. And I think the overall image looks really beautiful.
So from here, we're going to go ahead and export. I'm going to right click on my image, going to go up to export, click on export. I'm going to set the designation to the desktop, which is where some of my images go, but you can also change this to wherever your files are and you can save it in the original photo if you wanted to, or in a specific folder of your choice. Going to rename this cityscape night, and then I'll start with a sequence of one since just one of one. And then from here, depending on where and how this image is going to live whether it's going to be in social media or you want to have it as a original file, if you want the highest quality file, you want to select TIFF. And by selecting TIFF, you can do a known compression and that's great.
And then you'll want to come over here and do 16 bits and that's going to retain all of the information that is in your photograph. But you should also be aware that a TIFF photo is going to quadruple the size of whatever the original photo was. So this could end up being a couple gigs depending on what type of camera you're using. But if you are just using this for web release, then I would say JPEG is great. It is an 8-bit compressed codec. However, if you keep it to the quality of 85, you're going to see that you can retain a really high quality image setting and have a low file size, which is pretty great for what we want to be doing here.
Other than that, we want to keep everything else the same. And we'll click here, click export, and then click export again. And then our file is exported.
Thank you guys so much for joining me. I'll see you next time.
Rate this course
Your feedback helps us improve our content.
Course rewards
Complete any course and earn a unique badge to celebrate your progress. Collect them all as you level up your skills!