Camera Fundamentals 101
Learn Alpha camera fundamentals – from body layout and ports to autofocus, exposure modes, menus, playback tools and powerful customizations.
- Details
- Module
- Quiz
About this course
This introductory Alpha course with instructor Jason Hermann walks beginners through modern interchangeable-lens camera essentials on the Alpha 7R V. You’ll explore the camera body (EVF vs. LCD, ports, hot shoe, lenses, IBIS, memory cards), master exposure and shooting modes for portraits and sports, and harness autofocus tools including AF-S/AF-C/AF-A, subject detection, and focus areas with tracking. The course demystifies the menu system, file formats (RAW vs. JPEG), video settings, and the My Menu and Function menus for speed. You’ll also learn playback power features – protect, rate, zoom to focus point, and Photo Capture from video. Plus practical customizations like button mapping, silent mode, grid lines, peaking, and saving presets to memory recall for fast, real-world shooting.
Course highlights
Instructor
Jason Hermann is a professional photographer, educator, YouTuber and drone pilot. After gaining years of experience in photographing everything from weddings and portraits to sports and landscapes – he now focuses on creating beginner-oriented tutorials to help people learn how-to use their new gear.

Jason Hermann
Photographer
Featured gear
Skills
Transcripts
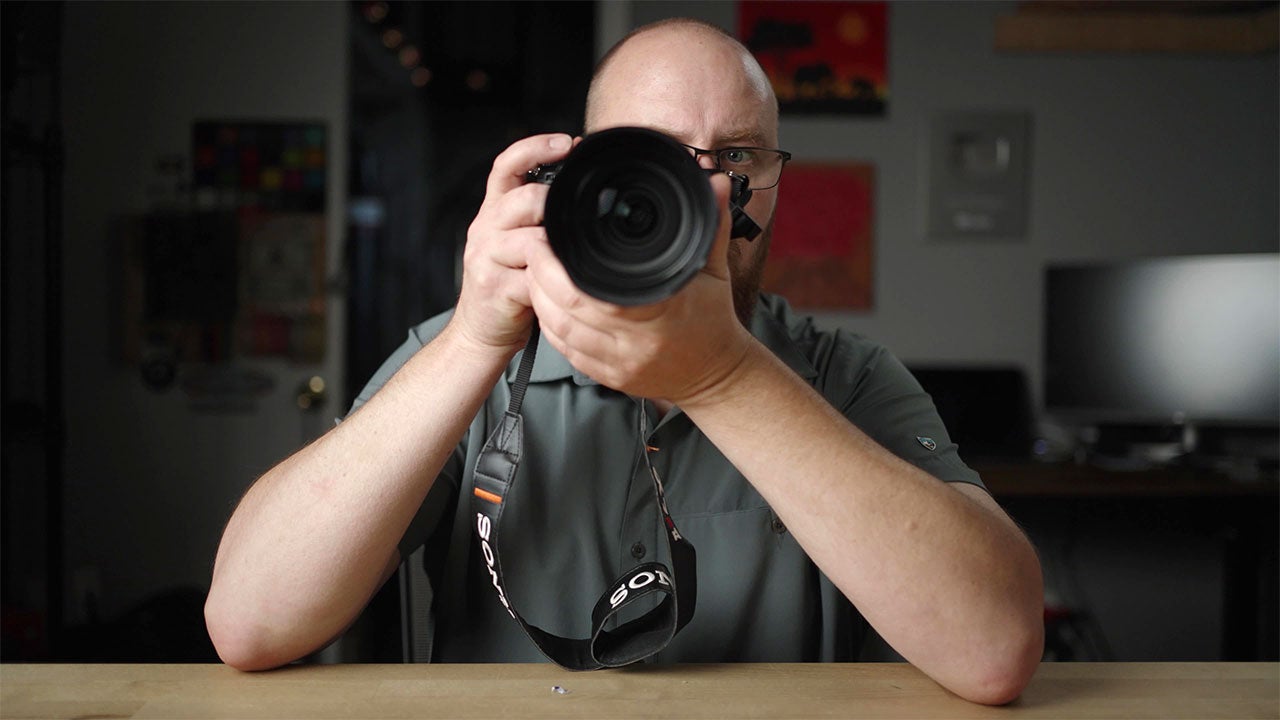
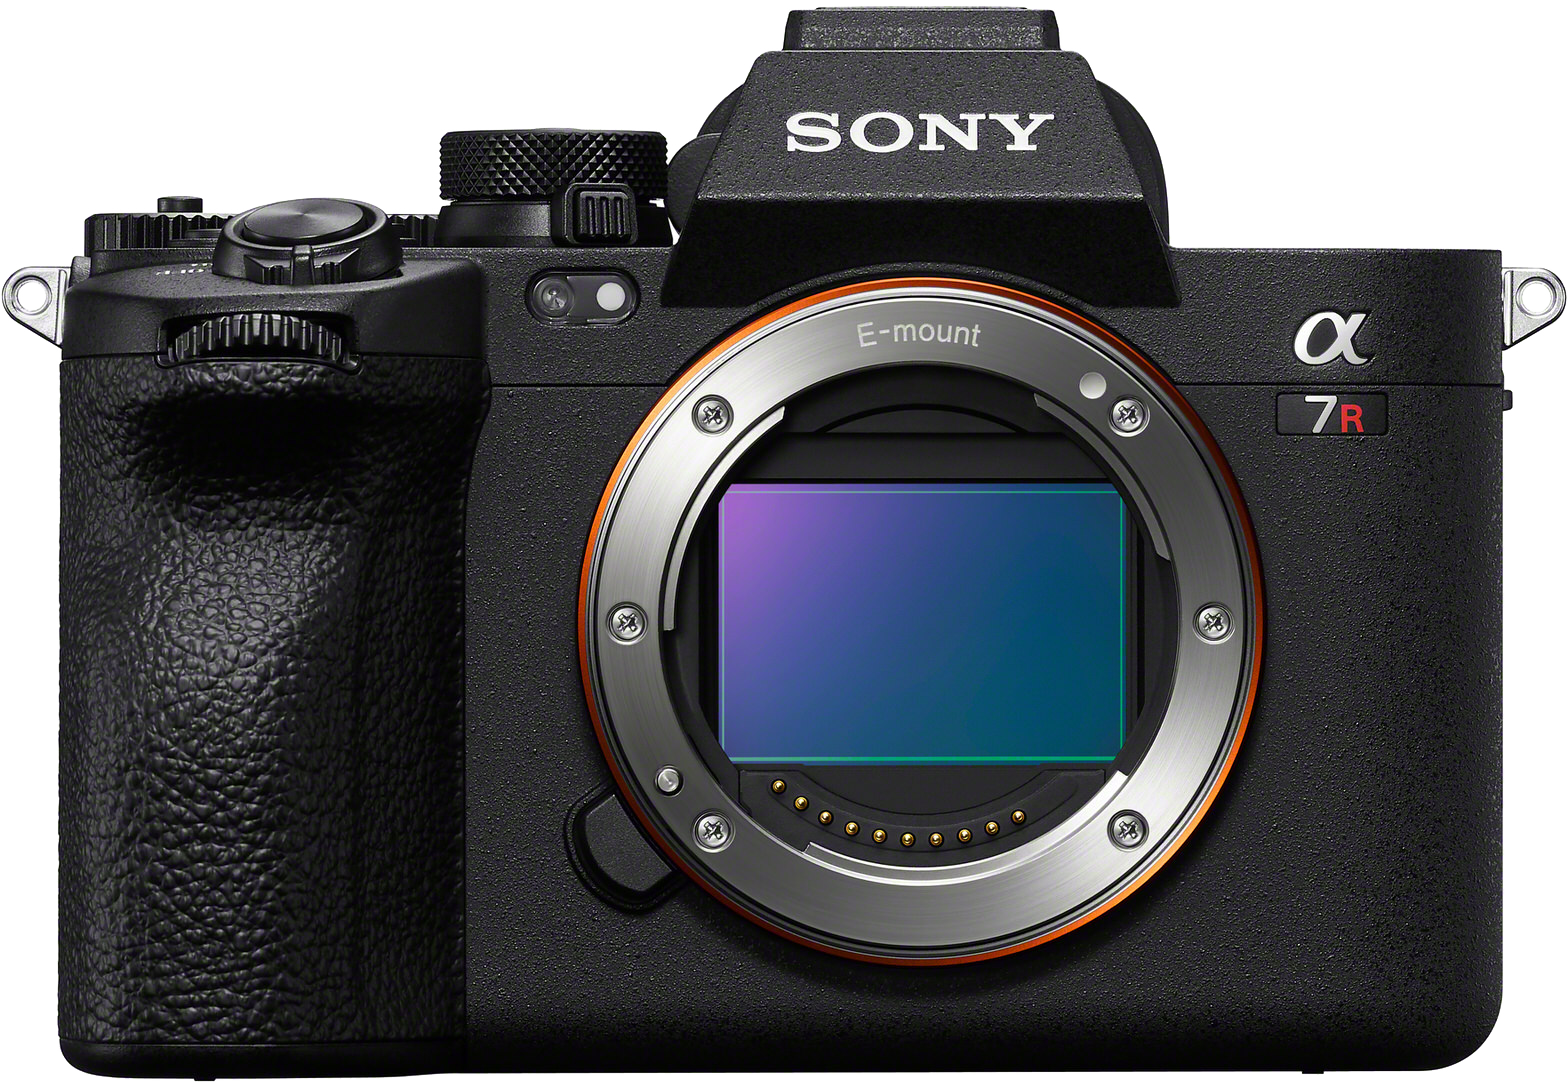
- Hey there. My name is Jason Hermann, and welcome to the Camera Fundamentals Course, brought to you by the Alpha Camera Academy. So in this series, we'll be covering the very basics for those new to the modern day interchangeable lens cameras, such as the Sony A seven R five, which I have right here.
So first, we will cover the camera body and go over all the main parts, including the viewfinder versus LCD screen, changing lenses, various ports, and the overall button layout. Next, we will go over the powerful autofocus system, and I will show you how to track moving subjects, plus how I set up the camera for stills, portraits, and sports.
Next, we will dive into the menu system highlighting several key features along the way that all beginners should know about. Next, we will cover some file management, where you will learn which file formats to use and how to view your photos and videos in the playback area, as well as protect, rate, and even edit them in camera. Bonus tip, I will also show you how to get photos from videos. Lastly, I will show you how to custom configure the camera for even more power at your fingertips.
So by the end of this course, you'll have a great understanding of how the modern day Sony Alpha cameras work and what they are capable of in various ways.
- So pretty much all the modern Sony cameras work the same way, but they do vary a little bit as far as like features and buttons and things like that based on the actual model. So for example, this camera here, the Sony A seven R five, has the electronic viewfinder here. Some cameras don't have the electronic view finder and they just have the LCD screen. So this camera has both. So the electronic viewfinder is awesome for when you're outside in bright conditions. You can look, bring the camera up to your eye and look through the viewfinder. It also will make the camera more stable when you have a third point of contact, like with it on your eye like this. And then when you're tracking moving subjects, it's also easier when you have it up to your eye for that. So it's great for sports, portraits, things like that.
So this camera also offers the LCD screen here, which you can see swivels out, moves around, makes it awesome for when you're very low to the ground. You can swivel the screen upward like this, or you can swivel the screen this way. If you have the camera over your head, like up here like this, you could look up at the screen, you know, to get over people's heads. So the LCD screens are super useful for a lot of different use cases. In addition, the LCD screen is also a touch, so you can pretty much just touch around the screen to focus or change the autofocus area, things like that. So very versatile in that regard. Now we also have a hot shoe on top of the camera. Now this is for mounting flash units, for example, for flash photography. So you could also mount microphones and other things into the hot shoe here, and it will communicate with the camera through the hot shoe, like just making the camera even more powerful basically.
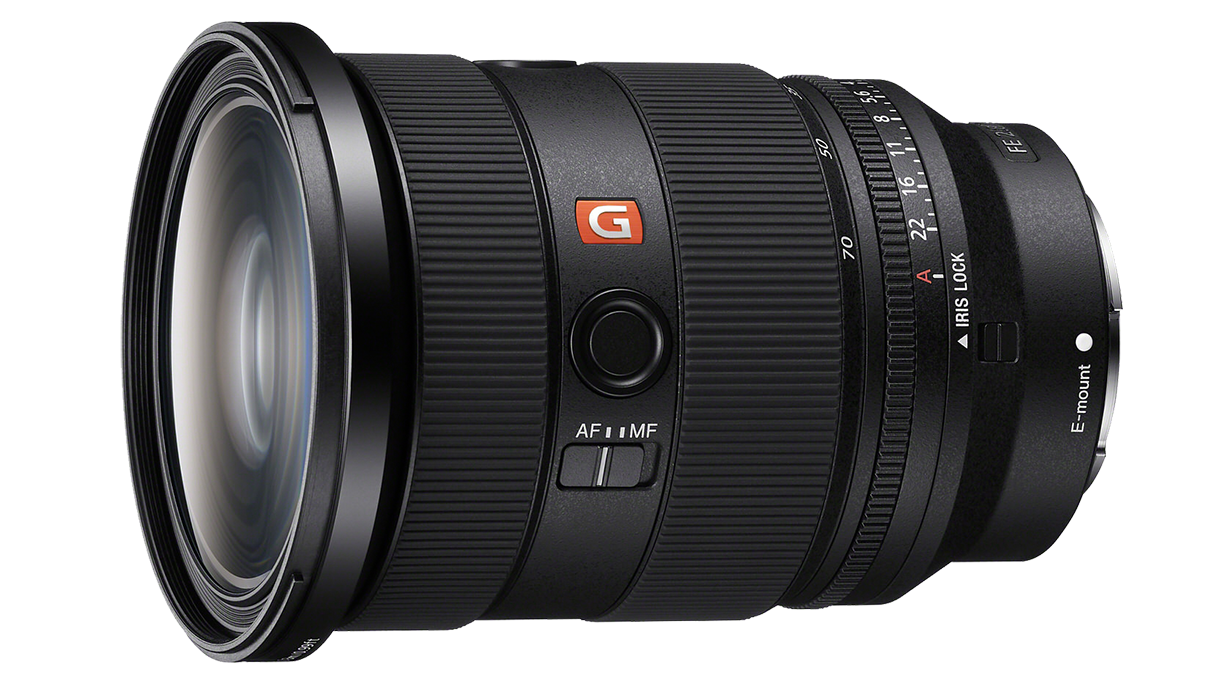
So let's just talk about all these doors and ports, shall we? So on the side of these modern cameras, we'll often have lots of ports. Now, again, depending on what camera model, the ports may vary and so forth. But what we have here is a microphone. We got headphones, so we have USB here for power and so forth. We also have a full size HDMI on this particular camera. So on the bottom here, we have a nice mount point for tripod plates and stuff like that. So you can mount the camera, you know, to a tripod. Nice and easily. Remember I said interchangeable lens camera? So this here is the 24 to 70. This is a very versatile lens, and you can actually take it off the camera and change it. So right here what we have is the full frame sensor.
So another key feature to the new cameras these days is the sensor stabilization. So there's literally like a rig inside the camera that supports the sensor and will stabilize it for you. So it makes handholding much easier. This is also known as IBIS, which stands for in-body image stabilization. So you could basically just mount the lens to the camera, like so, locks into place. And now you have the camera. So another thing I wanted to show you was the memory cards. This particular camera has dual memory card slots. So this can actually handle different types of memory. So this is where your photos and videos will be stored. This is a CF Express card here in slot one, slot two. This is an SD card, so you can use different types of cards in this particular camera with the CF Express being the latest and greatest technology with the fastest read and write speeds.
But again, this is where your data is stored. So photos and videos will be stored on the cameras. You can actually split it up and have photos go to one card, video go to another if you want to. These cameras are very highly configurable in that way.
- So as far as buttons go on this camera, check this out. We have a shutter button here. We have the on and off toggle. We have this really nice mode dial here so you can change the various modes that the camera is shooting in. And you also have custom modes one through three. Below that, it's got the photo video and SNQ toggle switch here.
Now on the back we have the AF on which will initiate auto focus and tracking, depending on how they have the camera configured. You also have custom buttons. You got C1 here, C3 C4, and you also have C2 right here. We also have a record button here dedicated for video, but you can also customize that button. Then we have various dials here to control various camera functions such as aperture and shutter speed. There's also a dial here on the viewfinder to adjust for your vision. It's called a diopter. It's right there.
And then of course we have a menu button here, which will bring you into the menu. We have the playback button down here we have a dial and we have a thumb control. So you can move the autofocus area around with this thumb, nice and easy while you have your eye up to the viewfinder. And then of course, there's the Function button here, which will bring you into another little mini menu sort of thing, which we'll talk about more in a minute.
So just quickly, I wanted to talk about the photo video and S&Q mode. So photo and video is kind of self-explanatory. You know, either you're taking photos or you're recording video. So the S&Q mode is pretty much a turnkey slow motion and quick motion like video capture. So when you put the camera in that mode, you could set it for basically quick motion, which is like a timelapse. Think of it like that. It's like a timelapse. So you can change it and configure it how you want, and it'll give you like a turnkey time lapse. You can just set the camera down, start recording, and then five minutes later you'll have a nice, like 10-second, you know, timelapse clip. And then you can also set it for slow motion. Birds at a bird feeder, for example, you can have it set to slow motion and record when you transfer that to your computer. You don't have to do any work, like the camera already did the work for you. Very powerful feature that I use all the time.
And then again, we have this function button here, which will bring you into this configurable function menu. So it's just quick access to all these different features and you can change this stuff around to what you use most.
- All right guys, so just a quick use case here for different camera modes. So I'm going to try to take a portrait here and I'm going to set the camera to aperture priority mode, because when I'm taking portraits, I like to have the aperture opened up as wide as possible, which will create a nice blurry background.
So what I'm going to do for this particular shot, you could see I'm at 24mm. So if I was using this lens, in this scenario, I have my little model set up. I would zoom into 70mm, try to get a nice portrait of the face, for example, something like that. So I'm in Aperture Priority mode, and for the most blurry background, I'm going to want that number as low as possible. So I would have the camera set to f/2.8 for this particular shot. Then I would point and shoot, and that gives you a nice portrait.
So these cameras also have a feature called Drive Modes, and depending on what you're shooting, you can change that. So you could set it for a Single Shooting, you could set it for Continuous Shooting, for moving subjects. You can use a self-timer if you're doing self portraits. You could also do bracketing if you're doing advanced photography such as HDR photography. Now I also have it set to Drive Mode Continuous, so it's taking multiple shots. So you can change that from High, Medium to Low. So when I put that on Low, you can see there. So it takes consecutive shots, which is great when you're taking portraits because you know people are always blinking and stuff like that. So I highly recommend using Continuous Shooting when taking portraits.
So now if I wanted to take a sports photo, just as an example, I would switch the camera to Shutter Priority Mode, and now I have control over the shutter speed. When you're taking sports photos, you really want to freeze the action in most, most cases. It depends on what you're doing, but in general, you're going to want to freeze the action. So I would have the shutter speed set to like 1/2000-sec. or 1/1000th-of a second, like at minimum, depending on the sport and the speed, just to keep things fairly simple. So 1/1000-sec. is a very fast shutter speed. So that will freeze the action. So Shutter Priority Mode will allow you to dial that in. I would also keep the aperture at a low number as well when doing sports, because I also kind of do want the blurry background. But in addition to that, I want to try to keep the ISO as low as possible, which is the sensor sensitivity.
So this is how I would have the camera set up for sports, except for the fact that I need to change the focus mode to Continuous. So Continuous Focus for sports. Then the Focus Area I would put in the center, and then you can just press the shutter button down and rapid fire. Now, I would also change the continuous speed to at minimum High, you can go all the way to Hi+ plus if you want, but High will give you a better, you know, hit rate. So what's great about Continuous Shooting like this is if you're trying to capture like the bat, you know, the ball leaving the bat or the football player catching the ball, you want to have the camera set to Continuous Shooting and more photos you have the better chance you're going to have, you know, getting that actual like magic moment sort of thing. So this is a great use case of how I would set the camera up, just basically for sports photography. So when in doubt, if you're not sure what to do, you can always rely on the Auto Modes. Now the camera also has Program Auto Mode and full fledged Auto Mode. And these cameras are so smart in advance these days, it'll recognize the scene, it'll see it as sports, it'll see it as a portrait. It'll dial the settings in for you, you know.
So like I said, if you're new to cameras and stuff like that, you could always go to the Auto Modes. So just to wrap things up with camera modes, I just wanted to talk about exposure basics just quickly. So again, aperture allows you to control the lens diaphragm, and that's like the pupil of the lens. That's what Aperture Priority does, it allows you to control the size of the lens diaphragm and that controls depth of field and also how much light can come in. Now, shutter speed allows you to control the time that the shutter opens and closes. That's what allows you to freeze the action. Or you can get a slower shutter speed and get motion blur. So that's how you would get like blurry water by slowing the shutter speed down. So that's what shutter speed does. It's another tool to dial the camera in to get the shots that you need to get.
- So we're going to touch on autofocus and that's basically how the camera decides what it's going to focus on. So to get to the autofocus modes on this camera, you just press the C3 button. But on a lot of the other Sony cameras, you can get to it by hitting the Function button and it'll be in here. Here are the autofocus modes. We have AF-S, AF-A, AF-C, DMF and MF. So AF-S stands for Single Shot AF, and what that means is when you press the shutter button it will focus and lock on basically to what you focused on. So you could then reframe the shot if you wanted to.
Now AF-A is Automatic AF, and it'll basically switch between AF-S and AF-C. Now AF-C stands for Continuous Autofocus. So Continuous is great for sports and stuff like that because you need it to be constantly focusing. It's also good for portraits because it'll track the subject, you know as they're moving around if you're trying to get a portrait of a moving subject. Static subjects, I tend to like to use AF-S mode personally, because I like having it like lock on the subject and then I can reframe the photo exactly how I want it for the scene as an example. But AF-C also works great because it locks onto humans using the incredible Eye Autofocus or Eye-AF. Now below that we have Direct Manual Focus.
Now that's a great mode because it basically works like regular autofocus except after you lock the autofocus you can fine tune it manually. So this is great for close-up photography. For example, if the camera is not grabbing the exact part of the subject that you're trying to focus on. So like flower pedals for example, it might be picking the wrong flower pedal. So you can focus, have it lock, and then fine tune it with the manual focus ring on the lens. And then below that we just have full fledged Manual Focus. So Manual Focus is great if you're doing macro photography or you're using a manual focus lens like a cinema lens or something like that. A lot of those are manual focus only. So that's what MF is for.
So Subject Detection is an amazing tool that the modern cameras have today and what it does is it tells the camera what kind of subject you're actually looking for. So if there's multiple subjects in the scenes such as humans, cars, pets, animals, things like that, the camera will then know what subject you are looking for. Let me show you. So when it comes to subject detection here we can go into the Function menu by pressing the Function button. You can see on the bottom left those are the subjects and we can scroll down here.
So we have Human, we got Animal and Bird, we have just straight up Animal. Then we have just Bird if you want so you can like limit what the subject detection is looking for. Insects - I was doing dragonflies the other day so I had it set to Insect Mode. Then we have Cars and Trains and then we have Airplanes. So tons of subjects in there which is really nice. Again, it's a powerful tool to utilize to get the best possible shots and video possible. Especially if you're trying to track moving subjects, the Subject Detection works so good for that in particular. So highly recommend checking that out.
So for the most part I usually leave it in AF-A mode and it will switch between a FS and a FC depending on what I'm doing. But if I am doing dedicated sports for example, I will just leave it on AF-C mode. Alright guys, now I want to talk about Autofocus Area a little bit. And it's very powerful because you can actually limit the area of focus via the different focus area modes. So let's just get right into it. So you can hit the C2 button by default on this camera and that'll bring up the focus area, but you could also hit the Function button and you can get to Focus Area as well.
So this first option is Wide Area. So that stands for the entire sensor. Pretty much like 95% of the sensor. And that will just look in the scene by default, look for your subject or it'll focus on whatever's closest to the camera if you have Subject Recognition off. So that's Wide Area. Now if you go in there you can change it to Zone Focus. Now that will limit it to a zone. So you could actually move that zone around so you can see the rectangle there. That is the zone that you can limit the focus area to.
Now we have Center Area Fixed. Now that just locks the focus to the center area and it doesn't move. So the joystick does not move it when in that mode. That's why it's Center Area Fixed because it's in a fixed position. So that will limit your focus to just that small little area there. Very convenient for certain situations. Now if we go to this one, this is Focus Area Spot so you can change the size of it. If you notice how it has these little arrows, you got small, medium, and large. So let's go to small and now you can see just how small that little area is and you could move that around with the joystick. This one's movable so that's pretty cool. Hey, you can move it around to get it to what you want.
Now if we go back in there we have Expand Spot. You could also move that around with the joystick and that will expand. Let me just flip it to Photography Mode here and show you that one more time here. Expand Spot. You can see how the dots like expand a little bit. So it gives you like more reach from just the small little area. It's expandable so it will grow. It's very good for tracking moving subjects because it'll give you a little bit of wiggle room. So Tracking Modes are a little bit different than the other Autofocus Modes because once they grab hold of a subject they stay locked on. Even if the subject moves around the frame, it just stays locked on there. It's great for any kind of moving subject, sports, portraits, all sorts of things like that.
Let me show you what I mean. Now if we go down here all the way to the bottom, we have Tracking Expand Spot and that also comes in a bunch of different options here. So it has all different sizes. You got the Wide Area Zone, Center, Tracking Spot ML, and Expandable Spot. So you can actually just have this, I usually use it in this mode right here, Tracking Spot. And then if I hit the AF-On button on the back of the camera, it will just lock onto whatever you are tracking or you could just press the shutter button as well. So that's pretty much how focus area works and it's awesome for limiting where the camera can actually autofocus. So it just like makes it much easier to get it on the subject you want if there's multiple options for the camera to grab. It just limits that area for you. Now with all that being said, you could always override the autofocus by just touching on the screen and by default it will track. So now it's just switched to wherever you want to touch. That's just incredible.
So you always have the touchscreen to rely on if you need to, or you could just move it around with the joystick like we talked about earlier, which is quite convenient if you like to do it that way. There's so many different ways to harness the power of these cameras. That's what I'm trying to illustrate here.
- All right, so just going over the menu quickly here. If you hit the Menu button, we have like a cascading, tabbed design here. So you can see if you go up and down, it's all divided up into like key categories that you can see here. You got Setup, Network, Playback, Focus. So this is where all your focus settings will be. Exposure. So again, exposure settings. Shooting. So then if you go to the right, you could see it drills down into each setting. And if you just keep going to the right, eventually you'll get all the way to that option that you're looking for. Just a few key settings in here. So we have a bunch of different options here. You got Image Quality, Aspect Ratio, you got File Format for one, Recording Video.
So now we're into the Focus Area here and there are a lot of different focus options. Now if I change the camera to Video Mode, we go into the menu here. You have different formats for video as well as you can see here. So lots of different format options. You have 8K on a camera like this, 4K with different compressions. So you have HS and S. So it's basically how the video file is compressed and stored to the memory card. So HS is a higher compression than just regular S, as an example. And then you have S-I, which is by far the best quality. So they'll vary in file size depending on what format you're using.
So for example, if I go to Movie Settings here, you can see this is gonna be 300M, 4:2:2, 10bit. In this particular mode, if I change it to 24, it's going be 240M. So it's just how fast your memory car will fill up and how high quality the video format is. Now if we scroll up here, you have the Main Menu area, and this will change depending on what camera mode you're in. So we are in Video Mode right now. So the main area pretty basically gives you just quick access to all the key features. So you got frame rate up here, for example. You have which recording file format you're using, which bit rate you're set to, 10bit - so forth. And that's what this area is, the main area. And you have two pages here. So here's another page, and this is the shortcut to APS-C shooting. You could see this main area has like a shortcut, which is really cool.
So if I switch it back to Photography Mode and go into Menu, now you can see the main area only has the one page, and here's all the different settings we have in the main area. Now, if we go over to the left and go up, now we have the My Menu area. So the My Menu area is great because you can load it up with the settings that you use most, especially the ones that are harder to find in the menu. You know, that might not be in the Function Menu, but you could load this up with whatever you want. In fact, if we go into the menu here and we find a setting, we want like let's say File Format. If we hit the garbage can here, you could see the garbage can will give us more information. There's a little icon there letting us know. So if we hit the garbage can, it says: Add to My Menu. So you can actually add this feature right to My Menu right from here. Or you could say In-Camera Guide and it'll give you more information on what that feature is.
But I want to add it to My Menu. So I'm just going to hit the garbage can again and go to add to My Menu. And you can see it brings up My Menu and it puts a line there and it just added it. So now if I go over here and go up to My Menu, you can see now I have the File Format option. Now you also have Shutter Settings here, so you can go in here and Silent Mode Settings. This is where you can go and enable Silent Mode. So Silent Mode is a stealthy feature that the modern cameras have. And if you need your camera to be silent, it's right here in the menu. And you can just go in there and you can just turn this on, and now your camera will make no sound. I find that animals tend to be distracted by the noises that the camera makes. So it works great for that type of stuff.
Or if you're just in a quiet environment where you really need the camera to be quiet. I also like silent mode when I'm trying to just be low key, you know, because when you're like in a crowd or something and you're taking photos and that's beeping, people will turn around, things like that. So if you just want to be stealthy, Silent Mode's a great feature as well. So that's how easy this is to configure. So when you're drilling down into the menu and you find that feature that you need, you could always hit the garbage can and just add it to my menu so you won't have to search for it next time. Incredible power. And you could have multiple pages of stuff loaded into the My Menu area.
- So the customization on this camera is unbelievable, and I'm going to show you quickly how to custom program two of the buttons. So let's just go do that right now. So in the Menu here, I'm just going to scroll down to the Setup area and then I'm going to go to Operation Customize.
So when you go into Operation Customize, you can actually customize a ton of buttons on this camera for photo, video, and playback mode. So you have three separate configurations depending on what mode the camera's in. So right now, the camera's in Photo Mode, and we're going to go into the Photo area and go over to the right. And now again, this is the customization options you have. And as you scroll down, you could see all these different buttons that we can change. So it's extremely powerful.
But what we want to change here is this one here, White Balance. So Custom 3, I'm going to change that. So what I want to change that to is the Eye Detect Left to Right. So sometimes you might want to change which eye you're autofocusing on when it comes to the Eye Detect when you're taking portraits. And I just like to have that programmed right to a button.
So sometimes you might want the other eye, you know, if the head is slightly turned. So I'm going to show you how to do that. So let's go in here. We're just going to navigate to the Autofocus, Manual Focus, and then we can scroll down. So right here we have Switch Right/Left Eye. So that's what I'm going to select. And now you can see button three is programmed to that feature. So let me show you how that works. So it's a little bit hard to see on the screen here, but you can see that little green box on the left eye. And now if I hit the C1 button that we just programmed, you could see on the bottom here, it just said it's switching to the other eye. So you can just toggle it so you could see Left Eye Auto, Right Eye Auto. So it's switching as I toggle.
So that's what this feature does. It's just a great way to change the eye if you need to do that just on the fly. It's a super convenient tool. And again, I use it a lot for portrait stuff and also when I'm doing pets and things like that. because sometimes the camera will just, it'll pick like the opposite eye that you want. So right now I could just easily toggle it by hitting the C1. And that's how easy it is to program Custom Buttons on a camera like this. These cameras are so powerful as far as customization goes, and this is just a perfect example of how and why you might do that.
- So in the Playback area, there are a lot more things you can do than just look at your photos and videos, let me show you. So the Playback area is where you go to view your files that you recorded. So photos and videos will be in here. Now you can change the way that this looks by hitting the display button here on this dial. So that's full screen mode with information.
Now here's a smaller thumbnail, but it gives you much more information. So you have an RGB histogram and all the different camera settings. You could see the focal length there, 63mm, and so forth. And you can just cycle through the displays. And now we are back to the full screen. Now notice the green dot there on the I. That is where the focus point was when I took the shot. So I'll show you how to enable that. That's in the menu. You can actually turn that on and off. Now you can also zoom in and out on your photos.
So if you hit the AF-On button, it'll zoom in and you can check your focus, make sure it's nailed. And you can zoom out with this AEL button by default. By the way, when you zoom in like that, it automatically goes to the point of focus or the focus frame as it's called. So now if we zoom out, if you keep going, it goes into this grid view here. So this is just a faster way to navigate all your different files and stuff. And you can also sort them if you want. So if we zoom out even more, you can see it turns into a calendar view, you can actually navigate by day, for example. So here is some video footage that I took the other day of some birds at the bird feeder. So we can go in there and now you're watching a video. So you can scrub through your video here by turning this dial.
You can also hit the display button to see what's going on. A little more detail there. You can see it just play. And now you can see the controls just came up and press the control panel there. And now you have all these different options for video playback and you can see the various settings that the camera was set in. Alright, so here's just a landscape shot.
So let's say I really like this photo and I want to make sure I don't delete it by accident. I can press the C3 button. You can see that little lock icon just came up, so that's going to ensure that I don't accidentally delete this photo. Now you can also rate the photos. The C1 button is the rating. So you can rate photos here so that now this is a five star photo, no rating, one star, two stars and so forth. So again, just very powerful how you can use the playback menu here to kind of sort through your photos, protect them and rate them as well.
So when you import the photos, the ratings will be there for you. Very helpful. Now if we go into the Menu here and you go into the Playback area, you have Magnification and so forth, you can Delete images, you can Edit images. So you have Crop, Rotate, Copy, Photo Capture. So here's a really cool feature that a lot of people don't know about and it's how you get photos from videos and it's called Photo Capture. In the Playback Menu here you can see I have a video up on the screen right now. So if I hit Play on the video, you could see now there's a control panel option there.
Right here is the button for Photo Capture. So now it just put the camera into Photo Capture Mode and you could see the button right here again is right there. So what you do is you just scroll through the video footage like this until you get to the frame that you want to take a photo capture of. So let's just say I want that frame right there. I would then hit this button and now it's taking the JPEG. So it's basically extracting a JPEG from the 4K video footage and it stores it on the camera for you. So it's going to be a little bit lower resolution because it's taking it from the 4K video as opposed to, you know, the full frame photo sensor type of photo. Just so you guys are aware. And that feature's also right here in the Playback Menu called Photo Capture.
And now you can see if I go to the next image here in the Playback Menu, there's now that JPEG there and you can see it's a lower resolution 8.3 megapixel. So that's how you get photos out of videos on the Sony cameras. Now the other option here I wanted to show you was the Focus Frame Display. That's when it shows you the little focus box on the photos. So again, it just tells you where the focus is. Like you could see here that box is where the focus was. So that's the focus frame area and I have that enabled. I really like that. And by default when you zoom in, it will automatically zoom to the focus frame area. So that's where it's zooming to. So you can then check your focus, make sure it's right where you want it.
So when it comes to file format for photos, you have pretty much RAW vs. JPEG. So when it comes to RAW vs. JPEG photo quality, the camera comes in JPEG by default. And how I like to look at it is, RAW is basically like a film negative from back in the day like when you were when cameras used to use film. So you have to develop that file. So RAW files you have to develop in the digital darkroom. Basically in a program like Lightroom as an example. JPEGs are like printed already pretty much is how I like to think about it. They're ready to share, they're ready to show people. It's like as if you developed the photo already and that's what the camera does for you in JPEG mode. It does all the processing for you, pumps out a final result. RAW, you have to do the work, which gives you incredible power and much more editing latitude as far as pulling information out of the shadows, highlights, and color.
Now one other feature that is pertinent to that is this Creative Look. So when you're shooting JPEG mode, you can actually change the Creative Look of the images. So there's all these different features you can scroll through here. You got like Portrait, you got Neutral, Vivid, Vivid 2, you got Black and White, you got Sepia and so forth. So there's a lot of different Creative Looks that you can use for both photo and video.
- All right, so in the Menu here we have this feature called Auto Review. And this is a great feature, especially if you're newer to cameras and stuff like that because what this does is: it's set to five seconds right now, is how I have it set. It is off by default, but what that feature does is when you take a photo like that, for example, the photo will remain here. So you can look at it and you could like zoom in if you want to check the autofocus just as an example. You can zoom out so you can see the focus frame there on the eye and you can hit the display button here to get more information, make sure your camera's set correctly, you can hit the display button again and you can check the exposure with the RGB histogram here. And you can also make sure that all the settings are set how you wanted them.
It's a good way to go to just double check to make sure that all your camera settings are all correct and the photo came out how you wanted because if you missed the focus, you have to take another shot. So you could just go into the Playback Menu and do that as well if you have the Auto Review set to Off.
So in the Menu here, you can turn this off if you don't want it to do that. So I actually normally have this turned off because I don't want that coming up every time, but I just wanted to make you guys aware because it is a great feature if you want to just quickly, you know, check your photo. But I just go into the Playback Menu and I just check it that way manually when I want to do it as opposed to every time I take a photo.
And you can also change the way the display looks when you're just taking photos or video. So I'm in Video Mode right now, and I'm just pressing the Display button and you can see the various features. So the histogram right here, so you have a live histogram. Also note we have the audio meter up here. We got battery life on the top right, battery's getting low right now. Then of course you have how much time you can record on the memory card. That's how much space is left. So based on the current camera settings, I can record 36 minutes.
And remember I had it in a really advanced high quality camera mode, so it's going to lower the amount of time I can record. Now in Photo Mode we can also change the way that the screen looks by hitting the Display button. This particular mode is an Auto Leveler. So you can see those green little bars will let you know if the camera is level or not. And that's a great mode to use. I use it all the time. Now, if you keep going, this is another mode where it'll give you like quick access to like all the different settings that the camera is set to. So this is a great shortcut to find out like where the camera's at if you're not sure.
- So you can customize the camera even further by manipulating the Function Menu just to speed things up depending on your use cases. So again, if you hit the Function button, this is the Function Menu. Now you have a different Function Menu for both Photo and Video. So S&Q is the same as Video. So there's only two Function Menus.
Now we can customize this though. So let's just say this AF-A option here. That's the Focus Mode. We really don't need that in the Function Menu because this C3 button by default already is the Focus Mode. So we might as well change that in the Function Menu to get another tool. That's how I like to look at it. It's just a way to access tools. So this is one of the tool draws sort of thing.
So I'm going to go into the Menu and I'm going to go into the Function Menu settings under Operation Customize. Now we can go in here and change these options again, I can change all of them if I want to. I just want to change the Focus one though. So I'm going to go in there and I'm going to change that. I'm going to change it to APS-C shooting, like so.
So now if I go into the Function Menu, I can change this and turn this On or Off. So right now I'm using the camera in Full Frame Mode. So you can see this is what the scene looks like in Full Frame. Now if I go in here and switch it to Crop Factor Mode, watch how it punches in. See that? So it zooms in.
Alrighty, so now if we switch the camera to Video Mode here, now we're in Video Mode. If I go into the Menu, go to the Function and go down, I can change options here for video. So I'm going to change this to Focus Map right here. Check this out, Focus Map. So I just changed that. Let me show you how Focus Map works. So let me just hit the C3 button here and change it to Manual Focus. There we have it. So now if I go on the Function Menu, go to Focus Map, turn that on, this is what it does. So it literally gives you like a color illustration of focus and depth of field based on the color. So now if I turn the lens, you could see how the focus is actually changing.
So now what I wanted to show you is how you can save a whole bunch of settings. So let's say we have the camera highly configured for a specific use case scenario. For example, portraits. Alright, so now I have all these settings configured how I want. I have it set to Rapid Fire Mode, Medium. The Crop Mode is Off. I have it set to Zone Focus. I have it set to Sun for the White Balance, and I want the aperture at f/2.8 for portraits. So we're pretty much good to go here.
And what I'm going to do now is I'm going to hit Menu and I'm going to go to Camera Set. Memory. And that refers to these numbers here. So we have 1, 2, and 3. So I'm going to go over and I'm going to set it to one and you can see all the settings here. So you can double-check, make sure you have everything set correctly. All that stuff looks good. So I'm just going to click the OK button here, which is also the center button, and now it's Registered. So now if I can just change some settings. Let's just change the aperture to f/8. We can change this to Single Shooting. We can change this Focus Area to Wide, just as an example. And now check this out. I'm going to put it into 1, the Mode Dial here, and it recalled all the settings. Look, everything that we set up is in there ready to go.
So this is like a turnkey way to have the camera hold a whole bunch of settings for you for specific use cases. So let's do one more. Let's say we want to set the camera up for sports. So I'm going to switch the camera to Shutter Priority Mode, and I'm going to set the shutter speed here to 1/1000-sec. That's a good starting place. Set that there. Then I'm going to go to the Function Menu. I'm going to set this to rapid fire High, so we'll put that on High. Hit the Function Menu. Again, Focus Area. I like to use a smaller focus area for tracking. So I do Tracking Expand Spot. So I'm going to set that there like so. And now I can just hit the AF button on the back and it'll automatically track and expand.
So this is my preferred method for shooting sports because it doesn't even have to be on the face. It will just automatically expand when it sees the subject and go right to the eye. As you could see here, you can see how it's just going to the eye. It's incredible how well that works. But this, that's how I like to have the camera set for sports. So now if I go into the Menu here, we can go to Camera Set. Memory, and I'm going to save it to Memory position 2, click OK, and there we have it. So now I can just have the camera set. It's like an Aperture Priority Mode right now. because I just turned the Mode Dial. So it's basically set in totally wrong for what we just programmed. So let's just put this back to two and that will recall all the settings for us. So now we are ready to go as far as sports goes.
So this is just an example of how you can use these memory recall modes to save a whole bunch of settings. So it's excellent for if you have to switch quickly between things. Like for example, if I'm at a volleyball game with my daughter or something like that and she comes running over and I want to get a quick portrait, I can just swivel this right to one because I'm in. Now remember, I'm in sports mode, I'm at a volleyball game, just as an example. I can switch it to 1, now the camera's optimized for portraits. I can take a portrait, boom, boom, then I can switch it right back to 2 - it's right back into sports mode. And then I can capture the actual sports play. So again, extremely powerful how you can configure this camera for speed and different use cases based on your needs.
- So there's even more customization you can do on this camera. And I just wanted to show you a few more things really quick. So Shooting Display, we have Grid Line Display. So I just want to talk about grid lines for a second, which is basically like a shortcut to composition help. So it puts up grids on the screen and then you can just line up your subjects to the corners. You could use the lines for horizons and water to make sure they're level, things like that. Let me show you - I love this feature and I have it set to Rule of Thirds by default and you can actually change the different grids.
And what that does is it overlays the grid on the screen. So you can see like the rule of thirds. So you could see here as an example, I was using it to frame Layla when I was taking portraits of her. And in this example, you can see I was using it to frame the landscape to make sure the water was level and I just used the rule of thirds there to try to make it as pleasing as possible composition-wise for the viewer. So that's what gridlines do.
So another feature you could use to help you focus is Focus Peaking. And if you go into Peaking Display here, you can turn that On, like so. And now you can see in my lab scene how when you're using manual focus, it'll highlight where the focus is. And as you change the focus, you will literally see that like highlight, move throughout the scene onto various subjects and you could dial in the power of it and also the color of it. So if you're shooting a white subject, you can change the Peaking Color to Blue, just as an example. Or if you're shooting, you know, like a red flower, you can change it to Yellow and then the peaking will show on the different petals as you adjust the focus. Incredible power, amazing what these cameras can do these days. And I'm just super impressed and excited about all this technology. I just can't get enough of it.
Alright guys, so again, my name is Jason Hermann. Thank you so much for completing the Camera Fundamentals course. I hope you got something out of it. It was a lot of fun to make. Be sure to check out the other courses on the Alpha Camera Academy - there's a lot to learn. And if you're interested in deep dives into cameras, lenses, and other sorts of tutorials and stuff like that, be sure to check out my YouTube channel. Thanks again for watching, guys. I will catch up with you next time. Take care.
Rate this course
Your feedback helps us improve our content.
Course rewards
Complete any course and earn a unique badge to celebrate your progress. Collect them all as you level up your skills!