Photo Fundamentals
Learn core photography skills with your Alpha camera. Master exposure, focus, composition and light – and learn how to build a clear story with your photos.
- Details
- Module
- Quiz
About this course
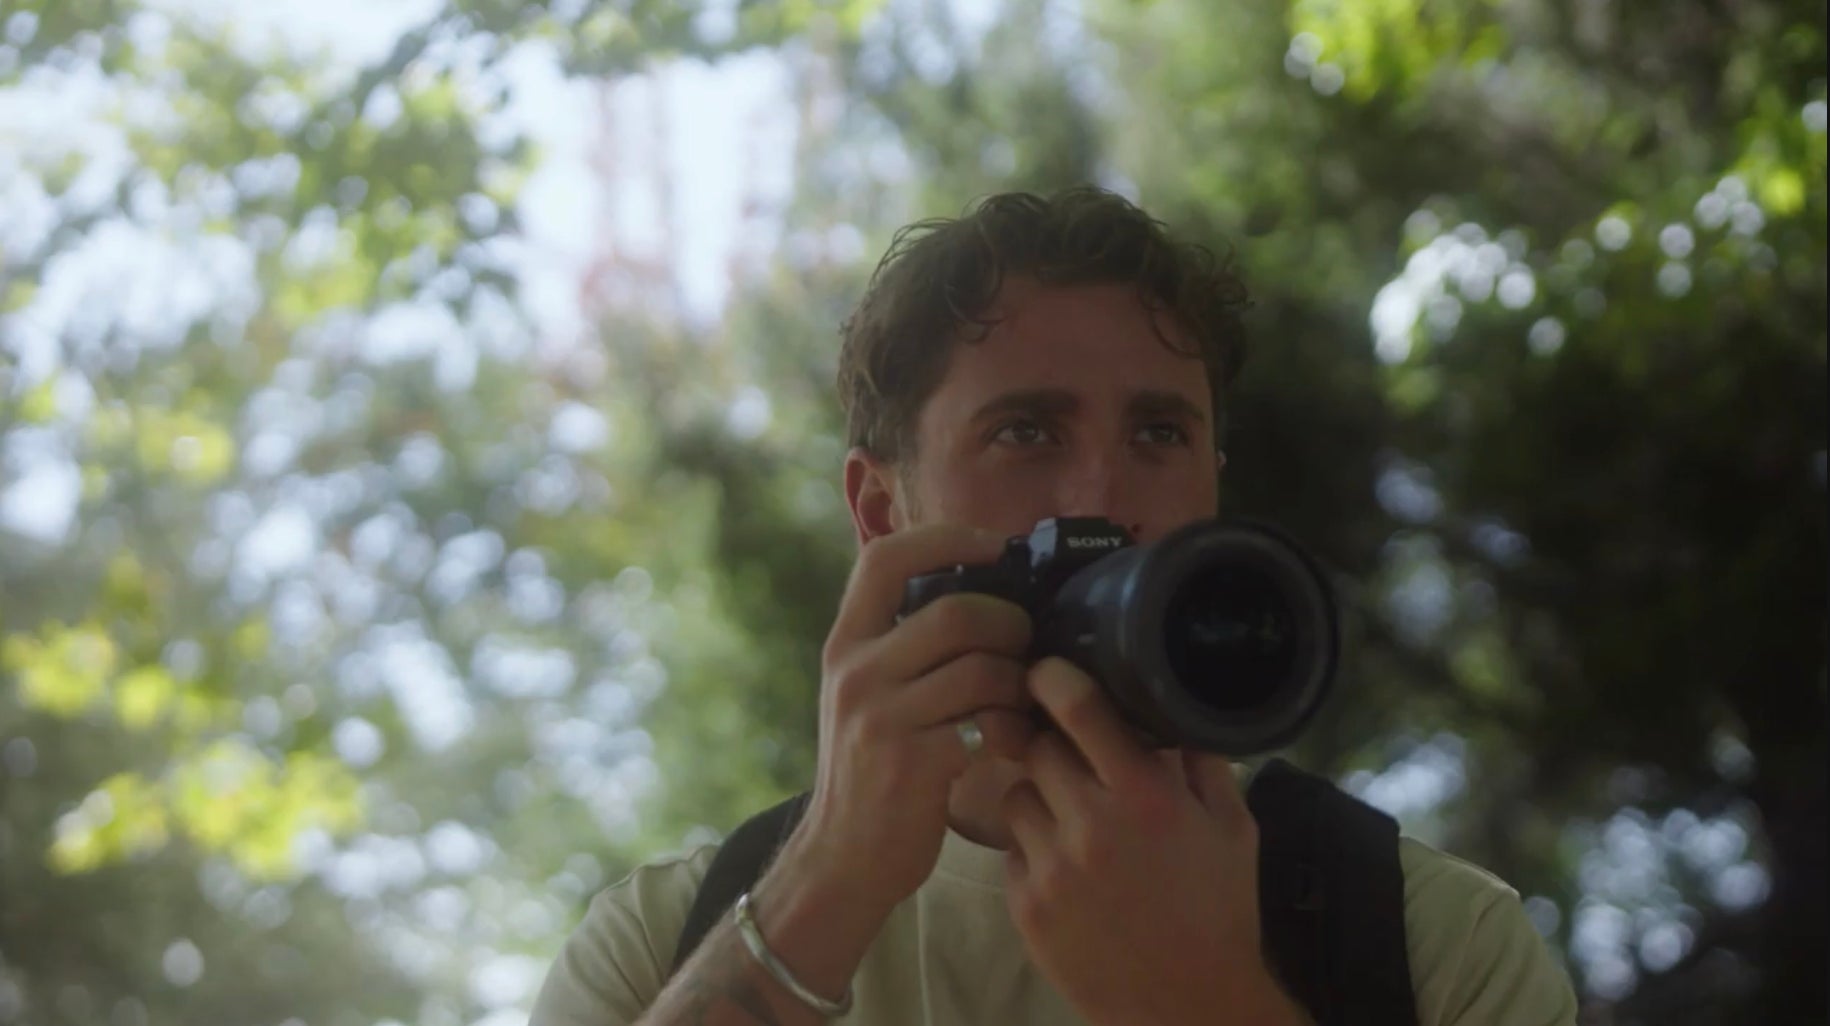
Designed for beginners, this course with instructor Emmett Sparling helps you create more compelling images by focusing on what matters most: composition, light, and story. Start with unique angles and core composition tools (rule of thirds, leading lines, framing, center-weighted) and learn to add depth simply by changing your position. Then “chase the light” with practical guidance on golden hour, sunrise/sunset, and shooting into the light for even tones, soft shadows, and beautiful backlight. In follow-along field sessions, Emmett demonstrates subject positioning, simple settings, and how lens choice supports establishing, medium, character, and detail shots. You’ll finish with a clear, repeatable approach to finding a story-worthy moment each day – and translating what you see into intentional, professional-looking photos.
Course highlights
Instructor
Emmett Sparling is a photographer and director based out of Vancouver Canada. His photography work covers a wide range of subjects from landscapes, wildlife, underwater, portraits, and the travel adventure content he shares every day on Instagram.
Emmett has been traveling full time around the globe since 2016, capturing the beauty of our planet and telling the stories within the landscapes he explores. With an audience of 1.1 million people on social media, Emmett uses his influence for positive impact, storytelling as well as teaching photography.

Emmett Sparling
Photographer, Director
Skills
Transcripts
- Hey everybody, my name is Emmett Sparling, and I'm gonna be your teacher for this next little series of videos. I wanna show you how to take better photos without knowing a single thing about your camera. So this is gonna be more focused on the conceptual side of things versus the technical side of things.
- Hey everybody. My name is Emmett Sparling and I'm going to be your teacher for this next little series of videos. I want to show you how to take better photos without knowing a single thing about your camera. So this is going to be more focused on the conceptual side of things versus the technical side of things.
There are three things that I'm going to be covering in the series that are going to make your photos better, and they're just slight tweaks. They're little things that you can start practicing now without having that base technical knowledge of your camera. These are things that'll shift your mindset when you're taking photos and will ultimately create better results.
The number one thing is finding unique angles. So we call this composition in photography. So learning these different rules of composition are going to make your photos stand out more. The goal with composition is to guide your viewer's eye through your frame and make them stop and stare at your photo.
The second thing we're going to talk about is time of day. because in photography, lighting is everything. Photography is essentially sculpting light. We use our cameras to manipulate the light around us to get the best possible image. Lighting is one of the most important aspects of photography, and time of day is going to really dictate a lot of that with your photos. So we usually aim to shoot at sunrise or sunset, and I'm going to be showing you exactly why we do that. And also, depending on the style of chart you're going for, how different times of day can shape your image.
The third thing we're going to touch on in this series is storytelling. Storytelling is probably the hardest thing to master with photography, but it's one of those things that if you start practicing now and implementing some storytelling practices in your work, you're going to become a much better photographer down the road. A lot of people don't start with the storytelling side of things, and it kind of shows in their work later on. Their photos might not have as much depth and as much meaning as yours will because we're starting from day one, learning how to tell stories through camera.
The storytelling aspect is also going to translate into picking which lens you're going to use when you're trying to approach a scene to tell that story. It really helps when you have a story going into a scene and it kind of dictates everything else that you look for in your shot. Storytelling is extremely important. It's a lot of fun once you get these storytelling exercises kind of part of your daily routine, and you become a much better storyteller even if you don't think you're a good storyteller already.
I'm super excited for this series and I can't wait to dive in.
- Hey everybody, I'm Emmett Sparling and let's talk about composition basics. Composition is essentially finding unique angles in your environment with your camera. It's the guiding rules essentially of photography that dictate the framing of your image. Composition is what makes your photo more interesting. It's shooting the world from a perspective outside of the ordinary. It's about slowing your viewer down when they look at your image because there's so much to look at.
And if you have good composition, your viewer's eye will be guided through the image, and I'll tell you what I mean by that a little bit later. So your camera is your tool for translating the world around you. And learning composition allows you to see the world in a more unique way. And I think even if you're not trying to become a professional photographer, learning photography is going to allow you to see more beauty in the world around you because you have this knowledge of composition, you start noticing more little moments and you become more mindful in your environment.
Composing an image is what sets a photographer apart. Two photographers can be in the same location and take completely different photos because they're composing them in different ways. That one with a knowledge of composition is probably going to take more interesting photos than someone who's just pointing and shooting their camera. So at the end of the day, composition is about showing the viewer how you see the world in a more unique way than they're used to.
There are a ton of different rules of composition that you can use as guidelines for your photography, but I'm going to cover just a few of the basic rules that I usually use in a lot of my photos. You can start practicing by going into your environment and looking for these different elements of composition, and it can be treated kind of like a scavenger hunt with your camera.
So the first rule that almost everybody knows is rule of thirds, and that just means positioning your subject on either the far left or far right side of your frame. So imagine a tic-tac-toe grid over your image. So two vertical and two horizontal lines. Now place your subject where those lines intersect. It creates balance, draws the eye and adds visual interest. So it's just this simple grid adds such a big impact to your photos. The rule of thirds composition just makes it look like you thought through the photo a little bit more than if you were to just randomly point and shoot at something. Takes just that extra step of thought, whether or not the viewer knows that they feel that in the image.
The next rule of composition is probably my favorite, and I use it all the time. It's called leading lines. So leading lines are literal lines in your environment that you're looking for, and these lines are going to be guiding your viewer's eye through the frame. People will see leading lines in their environment and they won't even know that's why they're drawn to a certain photo. So for example, if you're ever on train tracks or something, people always seem to take a photo looking down the train tracks because our eyes are naturally drawn towards the leading lines of the tracks.
The next one is called framing. Now framing's kind of interesting because you're looking for frames in your environment, and these are actual like little picture frames, so holes or I don't know, gaps in a window or something. And rather than just shooting through that window, you're taking a step back and including the window in your photo. This also makes your photo look like it was a bit more intentional. There's some more thought behind it. And it also gives a bit more of a first person perspective of not just looking through the view of the window, but taking a step back and it's like, oh, this is what I would actually see if I was in that environment.
Framing doesn't always need to be a hard frame like that. It can be something more just like a gap in the clouds or a gap in bushes or something like that. Again, draws the viewer's eye into what you want them to focus on. Because the viewer's not going to be looking at anything about the frame. They're going to be looking at what is being framed in your image.
The next rule of composition is something I use all the time, and that's because it works really well for social media, but I also find it looks really clean, is called a center-weighted composition. Now, center-weighted composition is just positioning your subject in the center of your image. The reason I really like this method of composition is because it feels really balanced. Your subject's right in the middle. The whole image feels a lot cleaner. I use it a lot because it's just, I don't know, extra satisfying in my brain, I guess. It's all up to you though what you think looks good.
But center-weighted composition is also great for social media because everyone's trying to crop their social media posts to be vertical these days. So that doesn't give you much room side to side to play with, like rule of thirds or something like that.
The last one I want to touch on is negative space. So negative space is positioning your subject in a way that leaves a lot of room in your frame. So maybe you're positioning your subject in the very, very bottom, like eighth of your frame, and then it just leaves the rest of the frame wide open. So it gives a lot of space for your eyes to look at where there's not much in the frame, but then you're immediately drawn towards that little tiny subject in the corner of your image. Negative space is a bit trickier because you need a really clean environment to get those photos, but it still looks really beautiful when you can, when you can nail it like that.
And the last thing I want to touch on before we end this video is kind of a rule of composition, I guess, but it's something that will make your photos look either professional or look like someone who doesn't really know what they're doing with their camera. And that is keeping a straight horizon. I find people that don't quite know what they're doing with their camera yet will often try experimenting with crooked horizons. And as a professional photographer, I can tell you that you can immediately tell when someone's not a professional photographer, if their horizon is crooked, even a little bit. Every professional photographer is trying to keep their horizon straight because it just looks better. And that's just the industry standard. Usually, you're always going to see straight horizons with professional photography. There are a few exceptions here and there, but it's usually when it works really well with the photo. Maybe there's a lot of movement in the image and the horizon's crooked, but for the vast majority of the time, keeping a straight is going to make your photos just look that much more polished and a little bit more thought through. So just keep that in mind whenever you're taking photos.
So I want you to write down these different rules of composition. We have rule of thirds, we have leading lines, framing, center weighted composition, and negative space. Now those different rules, once you've written them down, I want you to go out on a little photo shoot with your camera and try looking for those different compositions in your environment. You're not always going to find every single one, but it's a great way to kind of have this little scavenger hunt with yourself and start practicing because you want those to be kind of second nature. So we want to be going into our environment and not even having to think about what kind of composition we're going to be shooting with. It just kind of comes naturally when you look at different scenes.
- We're in one of my favorite shooting spots here in Vancouver, and I'm going to show you guys how I wandered through my environment looking for these different methods of composition. So we have leading lines, framing, rule of thirds, negative space and center-weighted composition. Those are all the different types that I'm going to be looking for on the shoot.
And we're just going to explore this little sea wall here, and I'm going to show you how I'm looking for these different elements of composition in my environment. So immediately we have this nice little triangular frame here. I'm going to frame up some buildings in the city and just see how it looks. I'm going to probably be shooting pretty tight to like 70mm, and then I'm just going to frame it through the, through the little hole in the trees here.
Now what would make this photo better is if I had a clear subject in the middle. Hey Carly, do you want to walk on the far side of the sea wall there? Nice. Leading lines. This is a great spot for leading lines because the sea wall is just a perfect leading line already.
What I'm going to do is swap to a wider angle lens because usually I find wider angle lenses are easier to find really good leading lines. I find pathways like this just give such good leading lines for landscape photos. And we've got this beautiful one just leading straight into the sun right here. I don't know, leading lines are kind of everywhere once you start looking for them - especially with roads and paths and that kind of thing.
Let's move on to our next method of composition. We're going to try looking for the center-weighted composition. OK, we've got a great little center-weighted composition here. Cut this little frame set up and just lining them up right in the middle. We can kind of turn a center-weighted composition into a negative space composition pretty easily. All I'm going to do is tilt up a lot more, and then the sky is going to take up most of the frame. So just by tilting the camera up, I'm choosing to get rid of all the grass in the foreground and just have all sky and it usually makes a much cleaner image.
Carly, do you want to just walk through the little patch of light here? That's not really rule of thirds or leading lines necessarily. I mean, there's a line in it, I guess. It's kind of more center-weighted composition, but the light looks really nice and you never want to say no to nice light. The thing with rule of thirds is you want your subject to be facing into the frame. In this case, I want Carly walking this way because I'm placing her on the far right side. So that goes for any portraits you're doing with rule of thirds where you want your subject, looking into the rest of the frame, not looking out of the frame, basically, if that makes sense.
For example, this video shot I'm facing into the frame when I'm talking versus we're not going frame the video shot like this because that doesn't make any sense. It just looks a lot better this way. That's how you properly do rule the thirds. So Carly, I'll get you to just walk again, but I'm going to shoot you walking back towards us instead of away from us. This composition that we found is kind of a mix of three. So we have our leading line of the sea wall. We also have kind of a leading line from the tree. It's also kind of framing our subject.
So it's kind of a nice mix of all of them, and that's really what you want. You want as much of a mix as you can of all your different compositions. And then we're also getting it for the rule thirds where I've placed her on the far right side of the image walking into the frame, and it looks really nice. Oh, that's cool. Heck yeah. Wow.
- Hey everybody. Emmett Sparling here. I want to talk to you about adding depth. So this kind of ties in with composition. This, well, it does tie into composition because it is a part of composition, but it's something that I find a lot of people don't really pay attention to. And it is also something that will change your photography quite a lot because it's not really necessarily a rule of composition because this can be applied to every rule of composition.
So adding depth to your photography is going to make it look a lot more engaging and just overall better, in my opinion. So the first thing that we want to think about is foreground and background. As soon as you incorporate elements of foreground and background in your image, you're automatically adding depth. If you don't really have any of that, usually most photos will just have background, but sometimes the background is so close to your subject that there's not going to be any depth in the image. So it's learning to position yourself in certain ways that are going to increase the depth in your photographs.
I'm going to take this into the field and show you guys exactly how I implement adding depth to my photos. So with our subject placed here, we're really close to our background. That means there's not much depth in our photo. Our background is very shallow. The trick is to be shooting alongside your background. So even though this isn't like a flat wall or something, as soon as we rotate over here, suddenly we have our background way, way farther away, and we have foreground in the shot. This is suddenly creating a lot more depth and much deeper image, and then it's going to make everything a lot more blurry. It's going to just look a lot nicer. That's how we add more depth into our shots, shooting alongside the background rather than at the background.
And you want to basically get your background as far away from your subject as possible, because that creates a deeper image and more depth in your shot. Now we have our foreground and background with a lot more depth. See, the flowers are nice and blurry. We have the city in the background, and it's just a way more interesting composition.
Thanks for watching. I'll see you in the next episode.
- Hey everybody, Emmett Sparling here and I want to talk to you about time of day. This is super, super important for when you're planning your photography because there's a lot that goes into getting that perfect photo and oftentimes it looks unplanned and very candid. That's the ultimate goal.
But there is actually a lot of planning that goes on behind the scenes, and it's not necessarily always about planning to get the perfect shot. It's more about setting yourself up for success and putting yourself in the right place at the right time.
One of the easiest ways you can do that is by getting out at sunrise or sunset. We call this golden hour. The reason we love golden hour as photographers is because the light is just so much better to work with. During golden hour, you get this beautiful warm glow from the sun as it passes through more atmosphere before it reaches you. So when the sun's lower to the horizon, that light is going to be a bit more diffused because it's passing through more atmosphere, it some warmer glow. So it makes people's skin tones usually look a bit more lively, a bit warmer. And then it also is going to look more flattering because it's more diffused.
But the main thing with shooting at sunrise or sunset is it's going to make your photos look more intentional. By planning to shoot at sunrise or sunset, it's going to make your photos not look like just some tour bus, bright, sunny, harsh, light photo that you see all the time from just random people with their cameras. It's going to make it look like you intentionally went out to take photos, and it's going to make those photos look a lot better as well.
There's a few more benefits, especially shooting at sunrise, that you get. So at sunrise, there's usually way fewer people than any other time of day, depending on where you are in the world, but usually sunrise is going to be the least amount of people in the way of your photo. The other thing with sunrise, usually there's less wind. Sometimes it's really windy right before the sun comes up. And then as soon as the sun's up, that wind completely calms down and you usually get those really glassy mornings on a lake or something like that, or the ocean's usually a bit calmer. It's not always the case, but generally, sunrise I've found to be a bit calmer if you're in the mountains.
Sunrise is also when you get crazy cloud inversions, so you get more interesting weather patterns. Setting yourself up for success by shooting at sunrise or sunset like that is just going to give you more opportunity to get those crazy conditions that you see in the best photos from the location that you're in.
There are a few apps that you can use to really dial in your sunrise or sunset shoot, so you can really plan where the light's going to be. My favorite one is Shadowmap. It basically has a 3D map of the whole world, and you can plan exactly where the sun's going to come up and how the shadow is going to be overlaid onto your environment so you can plan exactly where you need to be at what time to get the best possible sunrise or sunset. Shadowmap is so accurate in some places in the world, they have it mapped to the individual tree, so you can see individual tree shadows on the ground and plan your shot that accurately.
Another one that a lot of people use is PhotoPills. PhotoPills is great because you can use augmented reality that overlays the track of the sun on your environment around you. So PhotoPills is also a really handy tool for scouting locations and seeing exactly where the sun's going to be at what time. Those are both the apps that I use. There's probably more out there, but I would highly recommend looking at Shadowmap and PhotoPills for planning your shots.
We don't always have the luxury of shooting at sunrise or sunset, so learning how to work with natural light is going to allow us to shoot all day long. It's super simple once you kind of get these basic concepts down, and it's going to just dictate which direction you point your camera and how good it's going to look.
- OK, so I was talking about shooting in harsh light earlier and how that kind of gives you a different look to your images. We're not always trying to aim for that sunrise and sunset. Sometimes we like harsh light because it can make certain types of photography pop a little bit more.
So we've got our lovely model, Carly, and we're going to be photographing some portraits of her using a reflector. Now a reflector is this super handy tool for bouncing light back onto your subject. This was, I don't know, $15 on Amazon. And it's one of the most useful tools that you can have in your photography arsenal.
It comes with a few different colors. So we've got gold, white, silver, and black, and then they're going to reflect different colors of light back onto your subject.
The trick with a reflector, you want to position your subject with the light source behind them. So sun to their back, subject in the middle, and then reflector on the other side. So they're kind of sandwiched in between two different light sources. The reflector, obviously you need to be in the sun for it to work because it's got to be bouncing that light back off.
We're just going to step into this harsh light here and I'll show you how well it works. So with different skin tones, you're going to want to use different sides of your reflector. With more darker, warmer skin tones, go with the gold side because that's just going to make it look a lot more natural light on your subject. If you have more fair skin and like pale subject, you're going to want to use either the silver side of the reflector or the white side, and it's just going to look more natural that way.
So with Carly, we're going to use the gold side and step into the harsh light over here. It's not quite golden hour yet, so we're still dealing with some pretty harsh light here. And if I were to just take a photo of Carly without any reflector, it's not going to be super, I mean it still looks good because the camera's really nice. I'll show you how much better we can make this look.
One of my number one rules for shooting in natural light is to shoot into the light. I don't really like shooting this way because you get a lot more harsh light on your subject. We turn around and shoot towards our light source towards the sun. It's just going to make everything look a lot more dreamy and a lot better. You see, when Carly's facing this way, the light on this side of her is completely even. Even though it's all in shadow, it's a super even light. If we were to shoot the other way, it's suddenly really harsh light, not as flattering, and it's a bit harder to get those images that you want.
What we're going to do is just shoot towards the light all the time with portraits, landscapes, wildlife, anything I do, I'm trying to shoot towards the light. Now that we're shooting towards the light, we're going to bring in the reflector and the reflector is going to bounce that light back onto our subject. It's going to bring back a lot of that light that we lost when we didn't have the reflector.
Sometimes the gold side gets a little intense and it's also really, really bright on your subject, and we're kind of blinding Carly here. What I'm going to do is I'm just going to use the white side because the white side's not fully reflective, it's going to make a much softer light on her face.
And so see now the light looks a lot more natural. I'm just kind of holding the reflector right above my camera. So again, just sandwiching our subject in between the light source and then the reflector. I'm using the white side of the reflector to just give it a more diffused look and just make that light a little less intense and it just looks really nice. Using a reflector like this is such an easy way to adapt to these harsher lighting situations and just make that light work for you. Basically, we're sculpting the light using the reflector to just get those really nice looking portraits.
So thank you guys for watching this one. I'll see you in the next episode.
- Hey everybody, Emmett Sparling here, and we're going to dive into the basics of storytelling. This is probably one of the most challenging aspects of photography to really master, but if we start practicing now with these little exercises and concepts, it's going to really help your photography later down the road.
When we're trying to capture a scene, we want to be able to tell that story to someone who's never been there before. And there's a few different methods that I use in order to kind of tell that story. The first is by breaking your scene up into puzzle pieces. These puzzle pieces are kind of going to dictate your shot list. It's kind of this mental list that you have in your head of the shots you need to take in order to tell the story that you're trying to tell. By thinking of your scene in puzzle pieces, it's going to kind of just break everything up so you're not trying to do everything at once. You can focus on one thing at a time.
So the first puzzle piece that I usually go for in a scene is the establishing shot. Now, the establishing shot is usually a big wide shot of the environment. It's going to give your viewer context, so it's going to show this is what it looks like from kind of really far back, just looking around at your environment. Usually I use a 16-35mm, for that establishing shot, because it's a nice and wide lens, you can zoom all the way up to 16 and just get this big wide angle shot of your environment.
Now that establishing shot doesn't always need to come first. When you're on a trip or on a photo shoot, I usually take a few days to find that establishing shot because I want that establishing shot to be one of the best photos in the story that I'm trying to tell. So, I usually wait for the best conditions of the trip to try and capture that establishing shot. That's the photo that you usually lead with if you're trying to tell a story with the images.
The next shot that I look for is going to be your medium shot. My medium shot is usually on eye level with the environment. Picture it like you're just getting placed in the environment and looking straight ahead and what are you seeing? So that medium shot is usually on eye level with all the other people or the environment that you're in. It doesn't need to be this big bird's eye view like the establishing shot or like show this super wide angle landscape. It can be a bit tighter and keeping it on eye level. So, just having that kind of human height essentially.
The next shot that I try to go for is the character shot. Now the character shot is just implementing some kind of human element into the environment that's showing who you're with, or it's showing maybe the locals in the environment or it's showing just something with that human element. Could be a portrait, it could be a candid moment, it could be a photo of yourself if you're not with anybody. And I find that character shot lets people relate to your story a little bit more. They can see exactly what it's like being on the ground with you because they can put themselves in the shoes of the other people there.
The fourth and final puzzle piece I usually look for is a detailed shot that's bringing your viewer all the way into the fine details of the scene. So I usually use a macro lens for that. You can use anything from a 24-70mm or a zoom lens. Just something that will get really detailed in on the scene to try and get as much of that like texture that you want to show your viewer.
So what could help is picturing your viewer getting placed in the scene that you're in. They are looking around, they're seeing that establishing shot. Then they're kind of looking around at the people around them in the medium shot. Then they're meeting the locals or the person that they're with in the character shot, and then they're getting really close and looking at the details on someone's hand.
Or, if someone's selling like a bunch of fruit or something that's the detailed shots close up on the fruit or someone holding beads. Those little details in a scene that make up a story in your environment.
Different lenses are going to be able to tell that story better than others. And some lenses are really versatile in telling the whole story in one lens. So for example, I use the 16-35mm all the time because it's a zoom lens. So I can shoot at 16 and then I can punch into 35, which is a bit more of a portrait focal length. So I can be shooting my wide-angle, establishing shot, and my medium and character shot all in one lens. And then I might switch to maybe a 24-70mm.
Zoom lenses are really effective at capturing all the different shots you need to tell a story, and that's why I use zoom lenses all the time. However, portrait lenses are going to be a little more artsy, and you can get blurrier backgrounds, let more light into your camera. So there's trade-offs with every lens that you use, but generally I use zoom lenses to be able to tell those stories a bit better.
So if you go into your environment and you don't really know what lens to choose, think of that shot list: establishing, medium, character, detailed. And with that shot list, let that help dictate what lens you're going to put on your camera.
So, I'm going to focus on getting my establishing shot first, and then you put your wide angle lens on and go try and shoot that. It always happens where along the way you're going to be like, oh, this is a perfect character shot, and you have to quickly switch lenses. It's not a perfect strategy because it's kind of, I mean, I have so many lenses that I bring with me traveling because I'm never able to just pick one lens and stick to it. So I'm always switching lenses. This is going to just help guide which lens you choose. It's just going to kind of give you a bit more thought behind every photo, because that's ultimately what it's all about.
So all these puzzle pieces are again, kind of like a scavenger hunt where you're looking for each piece in your environment, and hopefully as you practice more, finding those puzzle pieces will become second nature to you and you won't even be thinking about what puzzle pieces you need to capture in order to tell that story of your environment.
Just practicing, practicing, write it all down. You're establishing, medium, character, detailed shot, and use it as a little scavenger hunt on your next shoot and just start getting used to trying to capture those puzzle pieces because it's going to make a huge difference in your photography.
- We are here in Vancouver and I want to show you how I approach this beautiful scene that I have in front of me here. And I want to give you my different puzzle pieces that I'm going to be shooting. So we're going to be doing our establishing shot, our medium shot, character shot, and our tight shot.
So starting with the establishing shot, I have my 16-35mm on and I want to capture a photo that is going to give our viewer context. So nice, wide image is usually going to be our best option for that. I want to establish the fact that we're here in Vancouver. So I'm going to take a photo of Vancouver. There's our establishing shot.
OK, now we're going to do our medium shot. So the medium shot is going to be under this nice glowy tree right now because it's so nice. Or I might do one of Carly first. A little character shot. Do you want to just walk along the seawall here?
As I'm shooting Carly here, I'm just keeping the light source right behind her. Now I need a medium shot in this scene. I like this tree right here. I wouldn't consider this an establishing shot because it's not really giving us much context aside from we're on the sea wall, but we don't really know where we are. We don't know who we're with all that stuff. So, that's why I'm going to use the Vancouver photo as our establishing shot because it shows us where we are.
The last photo is our tight shot because I already have a photo of Carly for the character shot. I might just get a closeup of these leaves with this light sparkling behind them because that's going to look really nice. And this is where I need to swap lenses. Oh, the acorn just hit me on the head. I'm just getting some nice tight shots of the leaves with the water sparkling in the background.
We got our establishing shot, our character shot, our medium shot and our tight shot. When they're all laid out together, they tell the story of the scene that we're in right now and it kind of gives you the feeling of what it's like being here right now, which is really calm and peaceful and beautiful weather. This beautiful oak tree hanging over the water.
When you approach new scenes, that puzzle piece technique is going to help you decide what lens you want to choose to capture those different moments. So I used a 16-35mm to get the wide-angle stuff all the way until our tight shot when I switched to my 28-70mm, just to get a bit more zoomed in and a bit tighter. Use those puzzle pieces, go out into your environment and try and find the different elements to build that story.
Thank you guys for watching.
- There are a few different exercises that we can do to become better storytellers because being a good storyteller takes practice. It's not something that you're going to learn overnight and be able to do really effectively.
This exercise that I want to teach you is going to allow you to become a better storyteller with mundane moments in your day. Just turning your every day into more interesting stories. We all have really interesting stories, and it's about finding those in our environment.
The best storytellers are the ones that can have a normal day, but come out of it with funny story or something that is inspirational or motivating or an interesting reflection on their on their day.
There are two things that I find people will do when they're trying to become a storyteller. They either think they have no stories at all in their life, and their life is super boring. Their day is super boring. They have nothing exciting to share, or they're trying to tell their entire day's story, and there's so many moving parts and there's so much fluff, and there's no like direct storyline. They're trying to do too much. Basically, there's too much fluff.
This exercise is going to help cut down the fluff and also help find interesting moments in your day. So this will hopefully help with both of those things. We call this the story worthy moment, or your story worthy seeing, or your story worthy instance.
And so what I mean by that is go out in your day and start slowing down. Notice the little things that might be normal for you, but not so normal to other people. Story worthy moments could be a beautiful sunset is happening on your drive home, or you almost missed your bus. Someone said something really funny to you. You had a disgusting lunch.
Your job is to now figure out how you would capture that. What puzzle pieces would you use to then tell that story and make it more interesting? Because the whole thing with storytelling is making these dull moments more interesting throughout picking one moment out of that big, long story of the day and focusing on that because we don't want to know the fluff of the entire day. We want to know what made that day interesting. We don't want to know the entire lengthy drawn out story.
So essentially it's about simplifying everything. To do this exercise I write in my journal the date, your story-worthy moment, and then maybe a lesson that you learned from that moment. The lesson kind of helps you reflect on that moment and usually helps give that moment a little bit more meaning, and that will ultimately make you better at finding meaning in these different experiences that you have.
And that's usually going to lead to a better story as well. The last thing I want to end this on is to tell your own stories, because the best stories are the most personal ones. So those are stories that mean the most to you, things that have happened to you, or your family, or your people. Something where it's your story is going to feel a lot more authentic.
And ultimately, we want to tell authentic stories. Telling your own story versus trying to tell someone else's story is going to just make for a better end product. It's going to make the viewer feel more connected to your story because whenever you're telling your own story, it's going to feel the most authentic. Cut the fluff.
Pick your story-worthy moment and tell your own stories.
Thanks for watching.
Rate this course
Your feedback helps us improve our content.
Course rewards
Complete any course and earn a unique badge to celebrate your progress. Collect them all as you level up your skills!