Camera
Alpha 7R V
My go-to for all professional & client work.




Learn to capture the personality, energy and everyday magic of the pets you love.
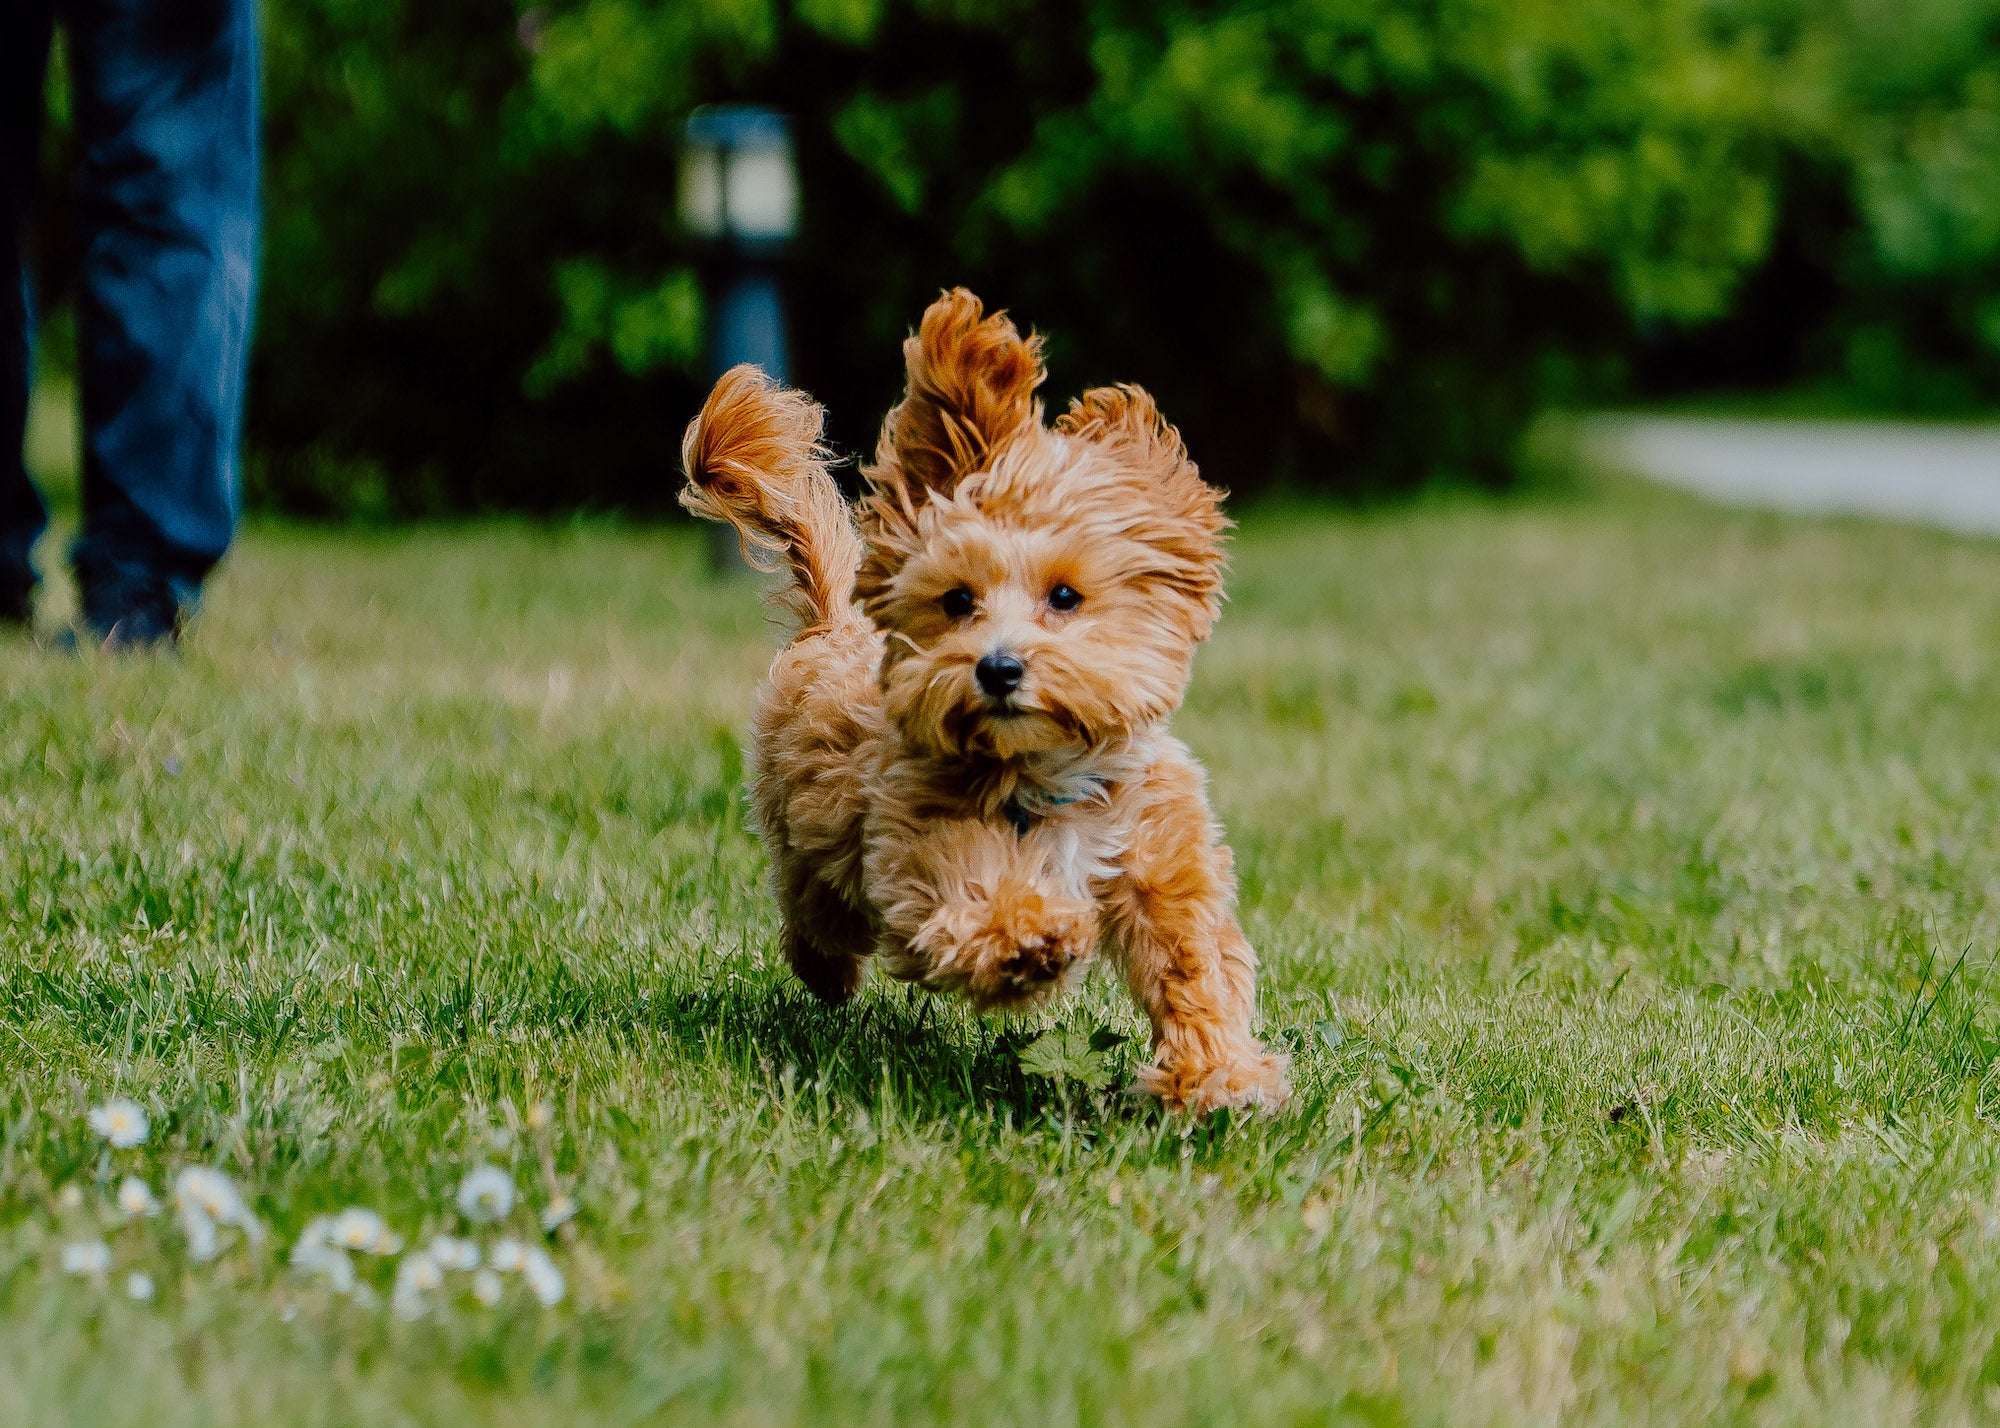
Pet photography is about more than getting your subject to sit still – it’s about being ready for the moments that reveal who they are. In this beginner-friendly course, photographer Justin Veenema shares practical techniques for photographing dogs, cats and other pets with confidence.
You’ll explore camera and lens choices, responsive settings for pets in motion, intentional composition, and natural-light techniques for indoor and outdoor portraits. Justin also shares approachable tips for keeping sessions relaxed, earning a pet’s attention, and capturing the small expressions and behaviors that make every animal unique.
Whether you’re photographing your own pet or building foundational skills for client work, this course will help you stay present, anticipate the action and create photos worth keeping.
This is the gear I use to shoot my street portraits (both dogs & people), as well as my client & brand work. I'm fortunate enough to get to do this for a living, and every piece of gear in my kit plays a very specific role in bringing it all to life.
Justin Veenema is a Vancouver-based dog photographer with an audience of nearly four million across YouTube, Instagram, and TikTok. His work centers on capturing the bond between people and their pets, and using photography as a way to tell their stories along the way.

Photographer
- Hey, everyone. My name is Justin Veenema, and in this course we're going to talk about pet photography for beginners. As the name would imply, this is a beginner level course, but I think photographers at all levels will be able to take something away from this. I've spent the last couple years photographing dogs and the people who love them. My dog is over on the couch right over here. While I focus mostly on dogs, these tips are going to apply to all sorts of pets, whether it's dogs, cats, rabbits, horses, you name it.
If you want to check out my work, you can follow me on YouTube - @justinveenema, or on Instagram, @justin.veenema. I am so excited to share a bunch of tips on how to get better photos of your pets. So without further ado, let's get started.
- Let's kick it off by talking about gear, specifically what camera and lenses to choose for pet photography. My biggest recommendation when it comes to gear is investing in equipment that allows you to stay in the moment with your pet, not fiddling with menus, not fighting with auto focus, equipment that allows you to just be in the moment and capture the moment as it is. That's my biggest recommendation.
For me, when I'm out on the street photographing people and their pets, I'm mostly reaching for the Sony A7C II. The reason why is because it's really small and lightweight and it has incredible animal eye auto focus as well as really strong low light performance. And finally, it has amazing battery life. So I can go out with one battery, photograph dozens of dogs in one day and still have battery left when I come home at the end of the day. Now, when I'm working with clients or doing a commercial shoot, that's when I reach for the Sony A7R V. It has all the same benefits of the Sony A7C II, except it's faster, it has better auto focus, it has more megapixels, which allows you to zoom in more in post so that you can get a different composition after you're done shooting. It offers fast burst shooting, which is really important when photographing pets because they never stay still. And it has this amazing articulating screen, which allows me to get a bunch of different angles very easily.
Now let's talk about lenses. So for me, the 28-70mm f/2 essentially never leaves my camera, and there's a few good reasons for that. The first is that the focal range between 28-70 allows you to get a ton of flexibility with your images without having to change lenses. On the 28 side, you can get these wide environmental portraits that allows you to tell a bit more of the story of where they are and what they're doing. Now, within just a second, you can immediately change the whole frame of the shot by zooming it into 70mm, which allows you to get these gorgeous portraits with beautiful, blurry background and shallow depth of field. And the reason you can do that is because this lens offers an f/2 aperture throughout the entire zoom range. It's kind of like having a bunch of primes, like a 28, 35, a 50, and a 70, all built into one lens. But because it's one lens, you never have to change lenses mid-shoot and risk missing the shot. In my opinion, this lens is really hard to beat, but I will recommend some alternatives that might be a little bit better fit depending on the stage of journey that you're at.
First, we have the 24-70mm f/2. 8. This is an amazing all-purpose lens that allows you to still get the wide and portrait shots, but you're getting a little bit less shallow depth of field due to the f/2.8 aperture. Next, we have the 20-70 f/4 lens. So again, you're still getting a really wide variation of focal lengths, but with the f/4, you're going to be sacrificing some of that shallow depth of field on the aperture. All three of these lenses are going to give you amazing photos. It just depends on your personal preference of how much background separation you want or need in your images.
No matter which camera or lens you choose, just remember, my biggest recommendation is to invest in gear that allows you to stay in the moment. When you're too busy fiddling with complicated menus and settings or fighting the autofocus or the low light, you're not actually in the moment getting the shot, which is the most important thing. Pets never stay still, they're always running around, and you really want to try to capture them in their element. So use the gear that allows you to stay present in the moment with your pet so you can capture the shots that really matter.
- OK, now let's talk about dialing in your camera settings specifically for pet photography. Now, before I reveal my camera settings, I want to just set the stage here a little bit because photographing pets is fundamentally different than photographing any other type of subject. With humans, you can guide them, you can direct them. When you're photographing architecture, it's kind of sitting there still. When you're doing street photography, you're waiting for like the right moment to pass you by.
With pets, it's a little different. They are there and they're present and you're working with them, but they quite often just don't listen to you. Even if you have a really, really smart dog or cat who might understand what you're saying, they might choose not to listen to you or to do something completely different. So the whole goal with the settings is to just make sure that you're able to get the shot while you're moving around and doing all these other things without fiddling too much with different camera settings or different lights. Again, the big lesson here today is that you want your camera to kind of melt into your hands so you can stay 100% present and get the shot.
So without further ado, let's dive into the settings that I personally use for pet photography. The first setting I use, and this is a big one because this is a bit of a cheat code, is that I shoot on Manual, but I use Auto ISO. And the reason for that is because on Sony cameras, the low light performance and the high ISO performance is so good that you can shoot on ISO 5000, ISO 6400, ISO 12,800, and the images are still going to be quite usable. They're going to be really, really good. So what this means in practice is that I can completely trust the camera to expose the shot properly using the auto ISO, and instead I can focus all of my time and mental energy on setting the shutter speed and the aperture properly. So this is one less thing that I have to think about and worry about when I'm trying to run around and get a photo of a corgi.
Now let's talk about shutter speed. For a lot of different subjects, you can set your shutter speed at 1/80-sec. or 1/125-sec., and you're going to get a perfect image. But for pets, it's not that easy because at any given time, they can quickly jolt their head up and run away. So I find for dogs, the minimum that I typically like to shoot with my shutter speed is 1/250-sec. This way, if they have a quick little movement, I'm still able to capture them. However, sometimes depending on the personality or the breed or the age of the dog, cat or horse that you're photographing, sometimes they can be faster than others. So if I'm working with a younger dog and they're kind of running a little bit faster or their movements are a little bit quicker, then I'll bump that up to 1/500-sec. If I'm trying to capture motion, like a dog mid-running or mid-fetch or mid-jump, then I'll bump that up to 1/2000-sec. or even faster, 1/4,000-sec., basically as high as I can get away with.
Shutter speed really comes down to what you're trying to freeze on camera. So if your subject is a little bit more stationary, you can use a lower shutter speed like 1/250-sec. If they're running or jumping, then you want to crank that up a bit. There's no universally perfect shutter speed, but as you use your camera more, this will become a little bit more intuitive of when to use what type of shutter speed for what animal.
Now let's talk about aperture. So aperture is more like the artistic creative direction of the image, and it really comes down to what you're trying to capture and portray. For example, if you're trying to capture a dog sitting in a field and there's nothing behind it and you just want a blurry background, then you're going to want to shoot wide open with a wide aperture or a low aperture like f/1.4, f/1.8 or f/2. However, if you're trying to capture a little bit more of the whole scene, so not just the dog or the cat, but where they are in the world, then you want to bump that aperture up to around like an f/4 to f/8 so that you can get a little bit more of the scenery within the shot. So if you think of it this way, the higher the F-stop, the higher the number, f/4, f/8, f/10, f/16, the more depth of field you're going to have, meaning the more you're going to see both in front and behind the animal. And then the lower the number, f/2.8, f/2, f/1.8, f/1.4, the less you're going to see the details in the foreground and the background. So if you're really just trying to isolate your subject with everything else blurry in front and behind, then you're going to want to use as wide of an aperture, as low as an aperture as possible.
For me, I'm typically shooting at around f/2-f/2.8 if I'm just trying to photograph the dog. If I'm trying to photograph the dog together with the owner, then I'm more shooting at f/4-f/5.6, because I find when the owner's here and the dog's a little bit in front or behind, you don't want to get either one out of focus. And if I'm trying to capture a dog in a really interesting environment, then I would bump that to f/8. I'm mostly shooting between f/2 and f/5.6. That's kind of like the sweet spot range for my style of pet photography.
There's a couple more quick settings that I'll share now that I'm thinking of it. If I'm out and there's changing light and changing environments and changing backdrops, I typically rely on Auto White Balance, but if I'm in a studio, then I like to set the white balance manually. For autofocus, I like to just keep it on Continuous Eye Auto-Focus. And if I'm photographing a dog or a cat specifically, then I keep it on Pet Eye Auto-Focus. If I'm photographing a pet with their human, then I like to move that over to human eye autofocus because I think when someone's looking back on a photo of them and their pet, if they're looking to frame it or put it on the wall, I think they want to make sure that at least they are in focus. But if I'm photographing just a pet, then I'm keeping it on Animal Eye Auto-Focus instead.
And then lastly, I like to use either like a low burst or a high burst shooting mode, depending on what I'm trying to capture, because there's always these little micro-expressions that you're trying to get in between the shots. And I find that when the camera's just single shot firing, you're often missing some of those vital shots. So I like to keep it on burst and I'll shoot 5, 10, maybe 15 photos in a row. Now, there's no perfect camera settings out there. I'm always tweaking and changing my settings as I go, depending on the context, depending on the location and the situation. But hopefully you can use my settings as a base and figure out what kind of settings you like to get the shots that you want.
I think that about wraps up the settings, so let's move on to the next section.
- Now we're going to talk about composing your images and actually capturing the character of your pet. I wanted to include this because this is one of those things that's often overlooked in my opinion, and this is something that can take your photo from good to great. So let's start with composing the shot.
So before you take any photo, the first thing I want you to do is visually scan the area and look to see what is in the background. So for example, if you're looking and maybe there's like a garbage bin in the background, you're going to want to just kind of rotate so that the things that are in the background are not in the background. When you're shooting at f/2.8 or f/2, this doesn't matter as much, but if you're trying to get a little bit more of the environment into the shot, you want the background to be intentional.
When it comes to composing the shot, the other thing you want to think about is foreground. Yes, in the background you can try to like move to a different background, but you also want to think about what is in the foreground. So for example, if you are shooting in foliage, like if you're shooting a dog that's in the leaves or in like flowers, you could shoot through the foliage to give it like a 3D pop effect and kind of lead the eye in using the foreground bokeh to the subject. Your subject has the background that's out of focus, but also the foreground that's out of focus, and right in the middle is your pet. You also want to think about how you can intentionally use context in your images. And I'll give you an example.
Let's say you're walking down street in Europe and you see this beautiful bakery and in the window of this bakery is a cat. A lot of people would take their phone and they would zoom into the cat to get the face of the cat as the shot, and that would be the shot. It's like, yeah, that's a really cute cat. But what makes it really unique is that it's a cat in a bakery. The brain sometimes subconsciously starts thinking of different movie tropes, like is this cat in the back of the bakery helping the owner or something like that. And when you zoom right in with your phone or with a camera and you take a photo of just the cat's face through the window, you're missing out on all of the storytelling in all of the context. So instead, you might want to take a couple steps back, but the focus is maybe not on the cat and it's on the bakery. And maybe when the person looks at the photo, the first thing they see is a bakery, but then if they look for just a split second longer, they see a cute cat little face. You can really start to use context and work that into the photo. But at the end of the day, it really depends on the story that you're trying to tell and it relies on you being intentional to tell it.
The second thing that I wanted to mention is capturing the character of your pet and how you can do that. You can have three different golden retrievers and they might all look similar, but they all would have very different personalities and different quirks. You will likely know your pet better than anyone, but when I'm out on the street photographing people and their pets, I don't know them. So before I start taking photos, I like to try to ask the, the owner a couple questions to get to know the pet and their personality a little bit. If they tell me that their pet is a little bit quirky and funny, then I'll try to capture shots that capture that unique personality of their pet. If they tell me their dog is a Velcro baby and is always right next to them, then I'll try to capture photos of the dog standing right next to the owner's leg and get that context in there with the photo to kind of illustrate that.
Now there's different ways to capture the character of a pet, but one of my favorite ways is to capture micro expressions. Now these are like small fleeting emotions or facial expressions. They're there and gone within a second and they can be very hard to capture. But I've been doing this a long time and I've developed a few kind of cheat codes that you can use to capture these micro expressions as long as you're sitting there ready with your camera. I'm going to try to show you an example of a micro expression.
I'm going to use a live example with my dog here who's kind of blurred out in the background a little bit. So I'm going to wake him up first. Carter. So he got up and he's looking over this way now. If I speak in a certain tone, he will start to move his head like this. Like he's almost trying to understand me. If I'm talking like a normal person, he just ignores me in naps as we see. But if I talk to him in a questioning kind of lighthearted tone, he starts making different micro-expressions and movements. And if I was ready with my camera, all I would have to do is point it at him, make sure that it's on burst mode, ask one of these questions and get his attention, and then click the shutter button. And then I would capture him like this with a cute little cocked head to the side.
So let's see if I can do this. Carter. Hi buddy. How's it going? Okay, so he's off the couch, but you, you saw in that fleeting moment there where he was asleep, then he was awake, and then he was doing some of these. These are these little micro expressions. And as you're sitting there watching the pet go from left to right, if you're very, very well-timed, you can even get them kind of blinking when their tongue is out and it gives this almost like super unbelievably happy face.
Okay, this was unplanned, but I'm going to illustrate again. So I'm talking normally and my senior rescue dog here, he's not paying attention at all. But if I start to talk like this and I say, "Do you want to, do you want to go somewhere?" "Yeah, you want to go somewhere?" So if I was ready with my camera, those are the, the little moments that I would like to try to capture because anyone can point a camera at a dog or a cat, but if you know how to just get their attention in little ways, you can capture these really cute and unique shots that you won't see anywhere else. I
- Now let's talk about working with light. So when I'm out in the streets taking photos of people in their pets, I'm working with natural light pretty much 100% of the time, but not all light is created equal. If you're out in the middle of the afternoon at 12:00 PM or 1:00 PM and the light is coming from right above, you're going to get these really harsh shadows and a lot of squinting and just flat images. So I typically don't try to shoot around that time unless I'm in the shade.
Speaking of shade, this is one of the easiest types of lights to work in because it's nice and soft, it's even, and there's no harsh light coming in that you have to navigate to or away from. So taking photos in the shade is a really good, easy way to take photos outside during the day. But what if it's the middle of the afternoon, maybe 3:00/ 4:00 PM in the middle of summer and you don't have much shade to work with? In that case, I would recommend instead of working against the sun, I would work with the sun.
So there's a few different ways that you can work with the light from the sun to help frame and separate your subject from the background. A mistake that I see a lot of beginners make, they will shoot with the sun in front of the subject because theoretically, if the sun is in front of the subject, then it's lighting the subject up. However, in practice, this often means that you get these harsh shadows and you get your subject and they're like squinting because of the light from the sun.
An easy fix for this is to move your subject so that the sun is coming in from one side. That way on the other side, it's not quite as bright and it's going to give their face a bit of a Rembrandt lighting where it'll be light on one side, slowly moving into the shadows, but that gives it depth. And then this way, if they're angled enough away from the sun, they're not getting that squint. You might still get a little bit of harsh shadows going off to one side, but at least you're kind of wrapping the subject in the light and you have a little bit more control over it.
The last kind of way to work with the sun is to use back light. Now this might seem counterintuitive because if you put a bright sun behind the subject and you photograph this way looking at the subject, they might be a bit of a silhouette depending on how you expose it, but you can play with your settings, you can adjust your Exposure Compensation if you're using Auto ISO, and you can bring it up a little bit. This way you're able to expose them without all of the harsh shadows and without the squinting, and you're even able to get a bit of a rim light from the sun coming in behind them. Now this can work exceptionally well when it comes to pets, especially if the light is a little bit further up in the sky, so it's not completely dominating the scene behind your subject. But if it's up in the sky behind and it's shining down at the back of their head, then you're able to get this angelic glow where the light is lighting them up from the side.
Another thing that you could do is use something like a reflector, either a white-sided reflector, a silver reflector, or a gold reflector. And this allows you to redirect and bounce the light back at your subject. This isn't something that I typically do in my candid street portraits when I'm out on the street, but if I'm doing a client shoot, then I tend to have one of these in my trunk ready to go whenever I need it.
But what if you're shooting indoors? In my opinion, I still like to lean on natural light as much as I can because it, to me, it just gives the most authentic and life-like images. Like it feels like you're really there with your pet. So what I would recommend is if you are shooting from home, get your pet next to a really big window. Don't try to shoot them with the window behind them. Instead, go beside them so that you're getting the side light coming in from the window, which wraps around them and then eventually goes into the dark side. This is going to give you a really nice, big, soft light to work with, and because of the contrast, it can add some depth to your image as well.
Using practical lights can work as well and help give your scene an at-home kind of lived-in vibe. Practical light is the light in the background that isn't the main light source, but it helps add a little bit of texture to your environment. So for example, over here, I have this light coming down from my cabinet. Now, this is a light that is not lighting me. It doesn't, it doesn't really hit me even from behind, but it helps paint a little bit more texture and makes it feel like more of an environment when you see it behind me. There's another light way off to the side here. It's just a little lamp. And even though there's a lot of light coming in from the big window that's behind me, this light just makes it feel a little bit more homey and a little bit more relaxed.
So when I'm photographing Carter over on the couch, I like to try to include that light in there as well, just to give it a little bit of ambiance. Getting a better understanding of how light works with your camera is one of the most fundamental aspects of photography, and pet photography is no different. This is something that can make or break your images. So I suggest spending a lot of time getting to understand how the light works with your pet and with your camera.
- OK, now we got to my favorite part of the course, the tips and tricks section. There's a lot here to cover, so I'm going to rapid fire through them. I'm going to start with some universal tricks that work for pretty much all animals, and then I'll move into tricks specifically for cats and dogs.
Number one, keep sessions short and positive to make sure that the animals stay comfortable. You never want to push an animal past the point of them being comfortable just to get a couple more shots. When I'm photographing dogs, I typically find around like 10 to 15 to 20 minutes is usually the sweet spot. Anything more than that and you start to risk them becoming annoyed or tired or bored, they might start to yawn, which can also mean that they're getting a little bit anxious or just kind of over it. So keep the session short.
Number two, reward often. A pet doesn't really know what a camera is or what you're trying to do. And sometimes when you're wielding something big like this, they get a little nervous, especially when it starts making noises. So make sure to always have their favorite treats on you and reward them as much as you can. Anytime they do something you like, give them a treat. Anytime they've sat through something they don't like, give them a treat. You want them to be just as excited about this experience as you are.
Number three, let them take control. Not for the whole session, of course, but after I would say 5, 10 minutes, take a step back, pause, and wait to see what they do. Sometimes they'll mosey over to a comfortable bed and lay there and you can get a really cute shot of them laying in their bed. Or they'll mosey over to some flowers and start sniffing them and you'll start to get kind of their more natural side rather than the posed and forced side that you're trying to get.
Now, here's some tips specifically for cats. Number one, let them come to you. Cats don't typically do well with people trying to chase them and invade their space. So instead, get comfortable with the cat in the same proximity of the cat and let them come to you. Let them kind of dictate where they feel the most comfortable and where they want to take photos. That is how you earn their trust and you get shots of them looking very comfortable and happy.
Number two, patience over control. Some pets have the ability to sit on command or spin, but for the most part, cats kind of run on their own schedule and beat to their own drum. So in my experience, cats need a little bit more patience than dogs. Go at a slow pace. Don't overwhelm them. Let them get comfortable with you in different scenarios and different poses. And over time, they'll open up to you and show you their cute and cuddly sat.
Number three, shoot at their level. Instead of shooting from above and getting the same typical shot that we typically see when we look at a cat, get down on the floor and get right down on their level. This is not only going to give you a more interesting perspective, but it's going to let you unlock shots that really show off their character. Number four, use a wand or a feather toy to guide their direction. A lot of people, when they pick up one of these toys, they think, OK, I'll just sit here with my camera and then dangle it in front of them and then you're going to get some action shots. Sometimes that works, but not all the time.
Instead, what I would do is I would use the feather toy to have them sit in one position and guide their gaze. So instead of them looking away from the camera, maybe they're looking off to the side or towards the camera. So instead of directly engaging them with the toy, use it as a way to guide their direction and their gaze.
Number five, use cat treats to get on their good side. Yes, any animal loves treats, but cats I found specifically really like these little tube treats. So if you can give them a bit of the tube treat, they will know, okay, a bit this person has the treats. Give them a little bit, step away, take some photos. They will be more attentive and directive towards you, but be warned as soon as you're done this tube, they will know and they will point their gaze somewhere else. And here's a bonus tip. Shoot when they are the most vocal. For many cats, this is about 20 minutes before they're supposed to eat. You'll notice they start meowing and pacing around the house. This is where you can get a really well-timed snap of a cat full meow, burying their teeth like a lion. Just don't try to get photos after the food has been put out because you don't want to annoy them or get scratched.
OK, now some tips for photographing dogs. Number one, get them exercised. Run around the block a couple times or take out their favorite toy or ball and let them play fetch for like 5-10 minutes before you start taking photos. This is when you're going to get their energy up. They're going to start panting. They get this nice big smile with the tongue hanging out and they look really, really, really happy after they've been exercised. Number two, get down on their level for a more interesting perspective. This is similar to the cat tip, but with dogs, because they stand a lot higher than cats, you can get the camera nice and low, shoot up towards them, and it's going to make them look like this big majestic beast.
Number three, use treats and squeaky toys to keep their attention and keep them happy. This might seem like an obvious one, but with dogs, there's a treat hierarchy of things that are like, OK, this is like a nice treat, versus maybe something like bacon, which is a high value treat. And dogs know the difference. So you can start off with kind of like the base level treats and when they start to get acclimated to that, you can kick it up a notch, pull out one of their favorite toys, or a more high value treat to reengage them and keep their attention. Number four, speak to them in a higher pitched kind of baby voice to keep them engaged and let them know that they're doing well. Dogs get acclimated to our voices really easily, but when you use a higher pitched voice, even if they don't understand the words, they understand that that voice is for them. Another example here using my lovely sleeping dog, if I'm speaking like this, he'll sleep through the entire thing. But if I start talking in a baby voice, "Hi. Hi, buddy. How's it going?" When I speak in that tone, he immediately knows that I'm speaking to him, so I keep his attention. Number five, use their favorite words. Like I said, dogs might not understand English, but they do know a few small select number of words that they've associated with a really good time. So for example, if I say banana, pineapple, orange juice, he's not going to pay attention. But if I say treat? Oh yeah, you like the treat? You like going for walks? What about car ride? You want to go to the dog park? He doesn't know many words, but he definitely knows those ones.
Number six, the well-timed squeak. This is one of my favorite tips and the most effective, but it comes with a caveat that if you overuse it, it almost immediately loses its effectiveness. I carry around a squeaky toy with me that I keep in my left hand. And when I'm shooting with my right hand, I can squeak to get their attention. The only thing is, after the first couple squeaks, they start to tune it out because they realize that it's a toy that they're not going to get. But if you wait and everything is lined up and use a very well-timed squeak, most dogs will tilt their head like this with pure excitement and curiosity, and you get these amazingly cute photos because of it. If you use these tips with everything else that I've taught in this course so far, you're almost guaranteed to get amazing shots of any type of pet.
That about wraps up the pet photography for a beginner's course. And before you go, I just want to leave you with two last things. Number one, like I said before, the most important thing is that you are present with the pet that you're photographing. Really be there with them. Don't be fiddling with the menus or the camera settings or lenses. You want to be there experiencing the moment with them and really understanding them so that you can get the best shots possible. Number two, practice is key. There's a fundamental rule with photography, and that is the more you practice, the more you take your camera out and take photos, the better you get. It is basically impossible to use your camera for years and years and get worse as you go. That doesn't happen. You get better with every photo you take. So grab your camera, grab some pet treats, and go take some photos.
And if you want to keep in touch with me and see all the cute photos that I'm out taking, go follow me on YouTube @justinveenema, or Instagram at @justin.veenema. And I hope that I get to see your photos in the future. Take care.
Rate this course
Your feedback helps us improve our content.
Complete any course and earn a unique badge to celebrate your progress. Collect them all as you level up your skills!