As an avid low-light landscape photographer, Milky Way scenes are among my absolute favorite subjects to image. To obtain high quality night scenes, the proper equipment is essential. There are plenty of videos and tutorials on the web describing the recommended gear. I want to devote this brief article to the unique and wonderful ability of the Sony α7S (and Sony α7S II) camera to help you compose night scenes in real-time.
If you’ve ever tried to take images in the dark, you know how frustrating it can be to get your composition “just right.” When I say dark, I mean dark as in a moonless night, far from civilization with minimal light pollution. You frequently need to resort to trial and error, moving and tilting the camera in small increments, all while taking many test shots. With the incredible high ISO capability of the Sony α7S camera, such troubles are a thing of the past. Here’s what I basically do:
1. I make sure my system is on a sturdy tripod and use a remote release. If I don’t have a method to trigger the shutter remotely, I use the timer function on the camera.
2. I set the lens aperture as wide open as possible (e.g., I set the aperture to f/2.8 on my 14mm f/2.8 lens).
3. My focus point is typically set to infinity. If my lens does not have an infinity mark or the mark is inaccurate, I magnify the live view image on a very bright star and manually focus until the light source is a tiny point (rather than a blurry blob).
4. After I’ve obtained critical focus, I put the camera on video mode and gradually bump up the ISO until the scene in front of me comes alive, and I can clearly see the milky way. It’s not uncommon for me to look down at my screen and notice the ISO value is at over 100K! I guarantee you’ll be blown away the first time you experience this for yourself!
5. Once satisfied with the composition, I switch to manual photo mode, dial down the ISO to a more reasonable value (eg, ISO 1600, 3200, 6400, etc.), and capture the scene.
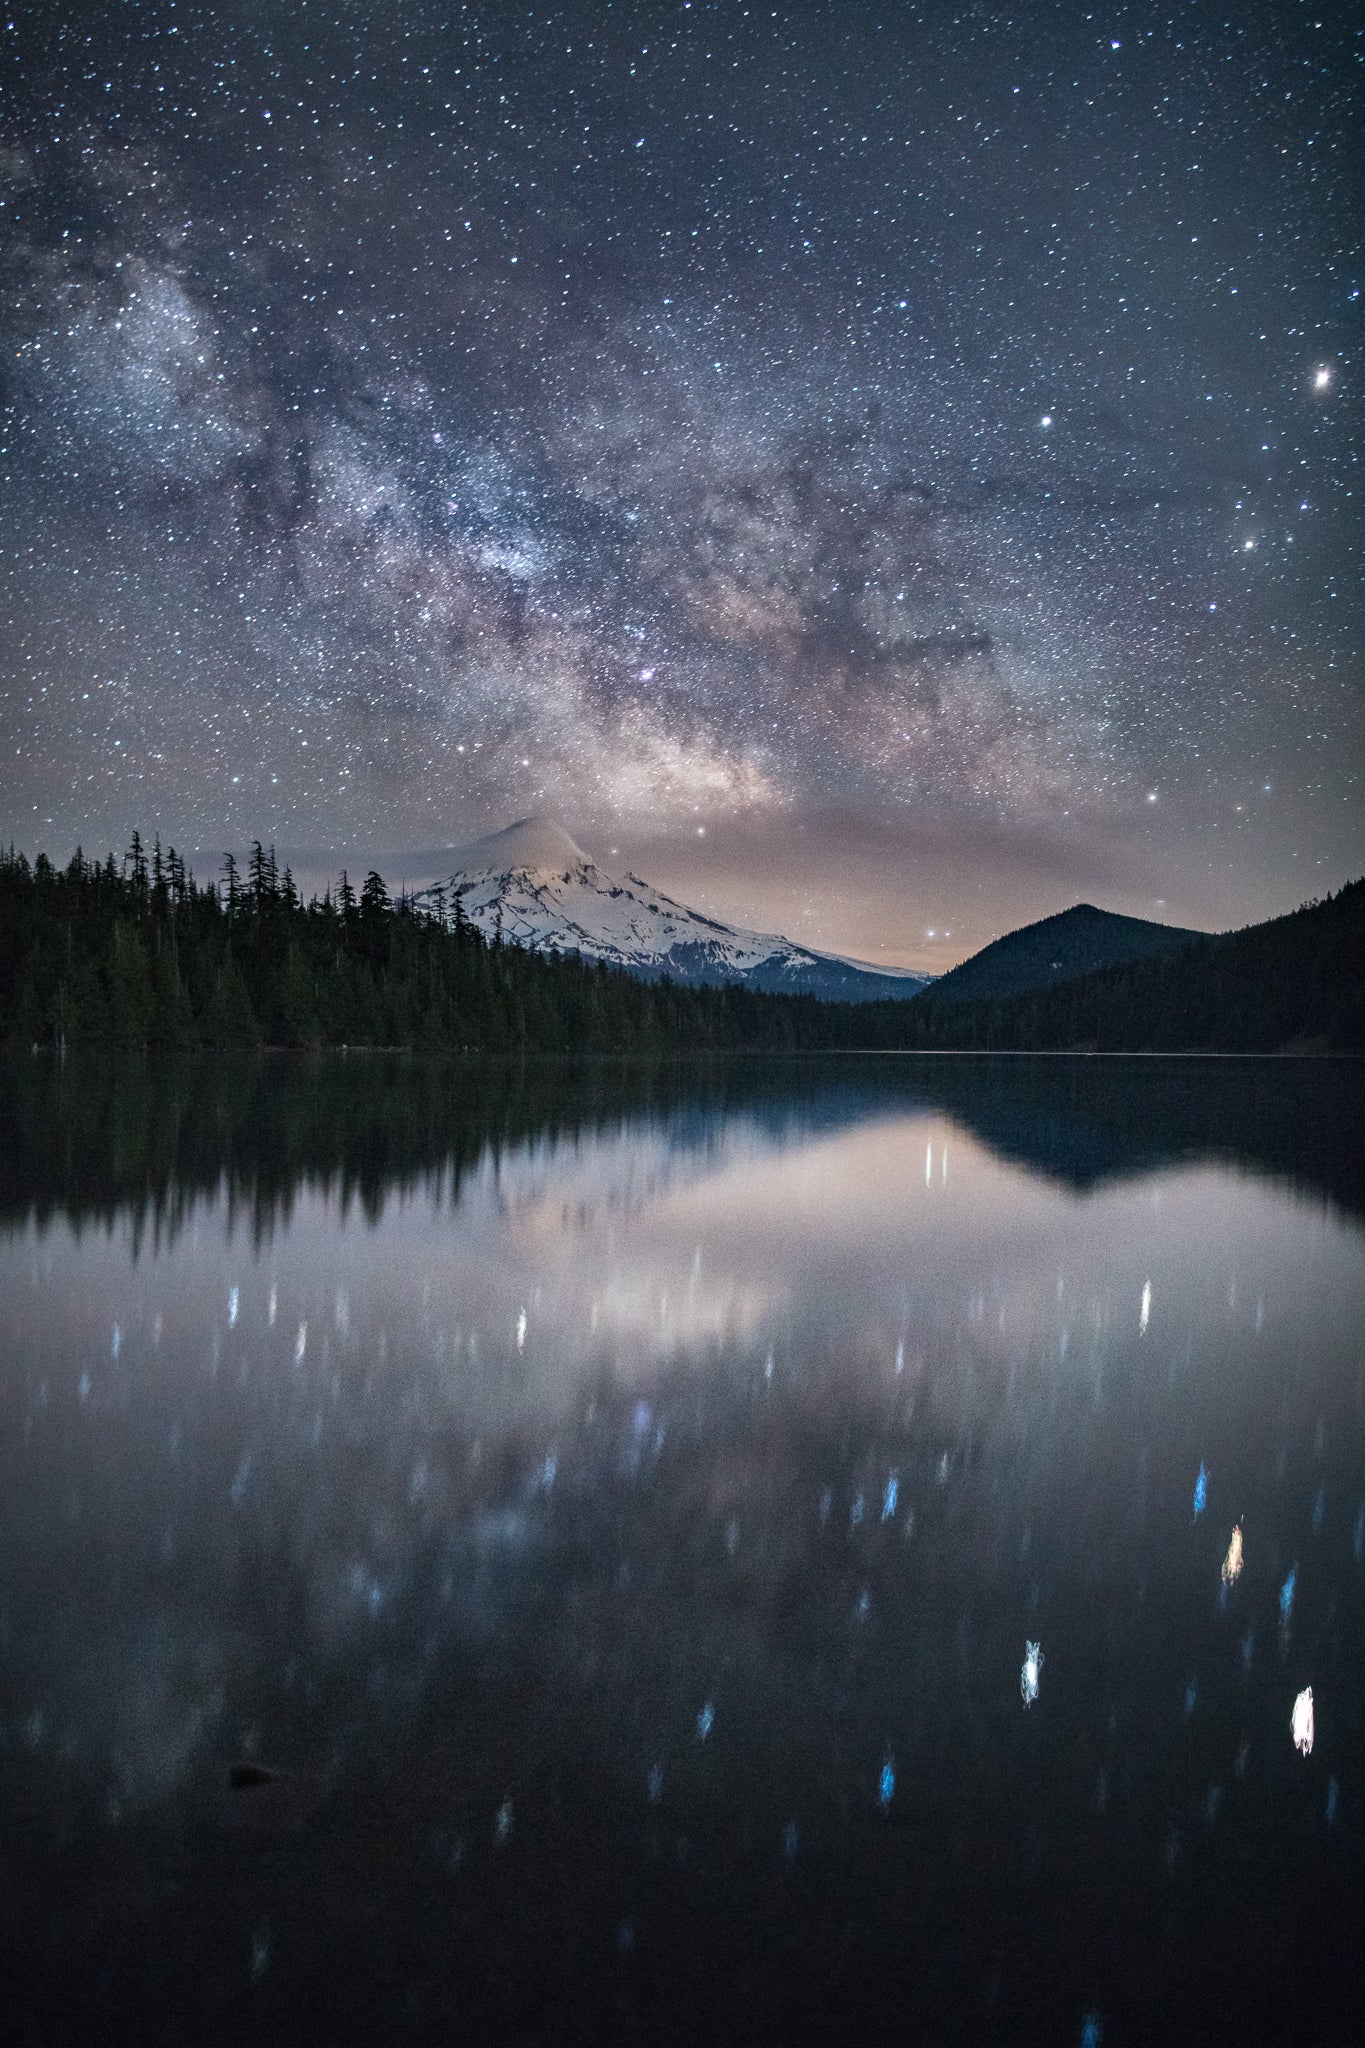
Sony α7S, 14mm f/2.8 lens. 25-seconds, f/2.8, ISO 4000.
The video below demonstrates exactly what I’m referring to in step 4. The photo above is the final result of entire process (the water surface wasn’t perfectly smooth which is why the star and planet reflections look the way they do in the foreground).
See more of Mahesh Thapa's photography at StarvingPhotographer.com. Follow him on Instagram @starvingphotographer


