Sony cameras are incredibly customizable and within the menus there are a number of powerful features that aren’t turned on by default. We’re looking at several of these hidden functions and capabilities that you might not know about but can change the way you take photos. We’re showing these “sleeper features” in a Sony α7R III with Firmware 3.0, so depending on your camera the actual menu screens might be a little different. And, as you make changes to your camera’s setup, have no fear. You can always reset it to the default state using Setting Reset in the toolbox tab.
Six lesser-known features in your Sony camera that you probably should be using, but aren't.
1. Focus Peaking
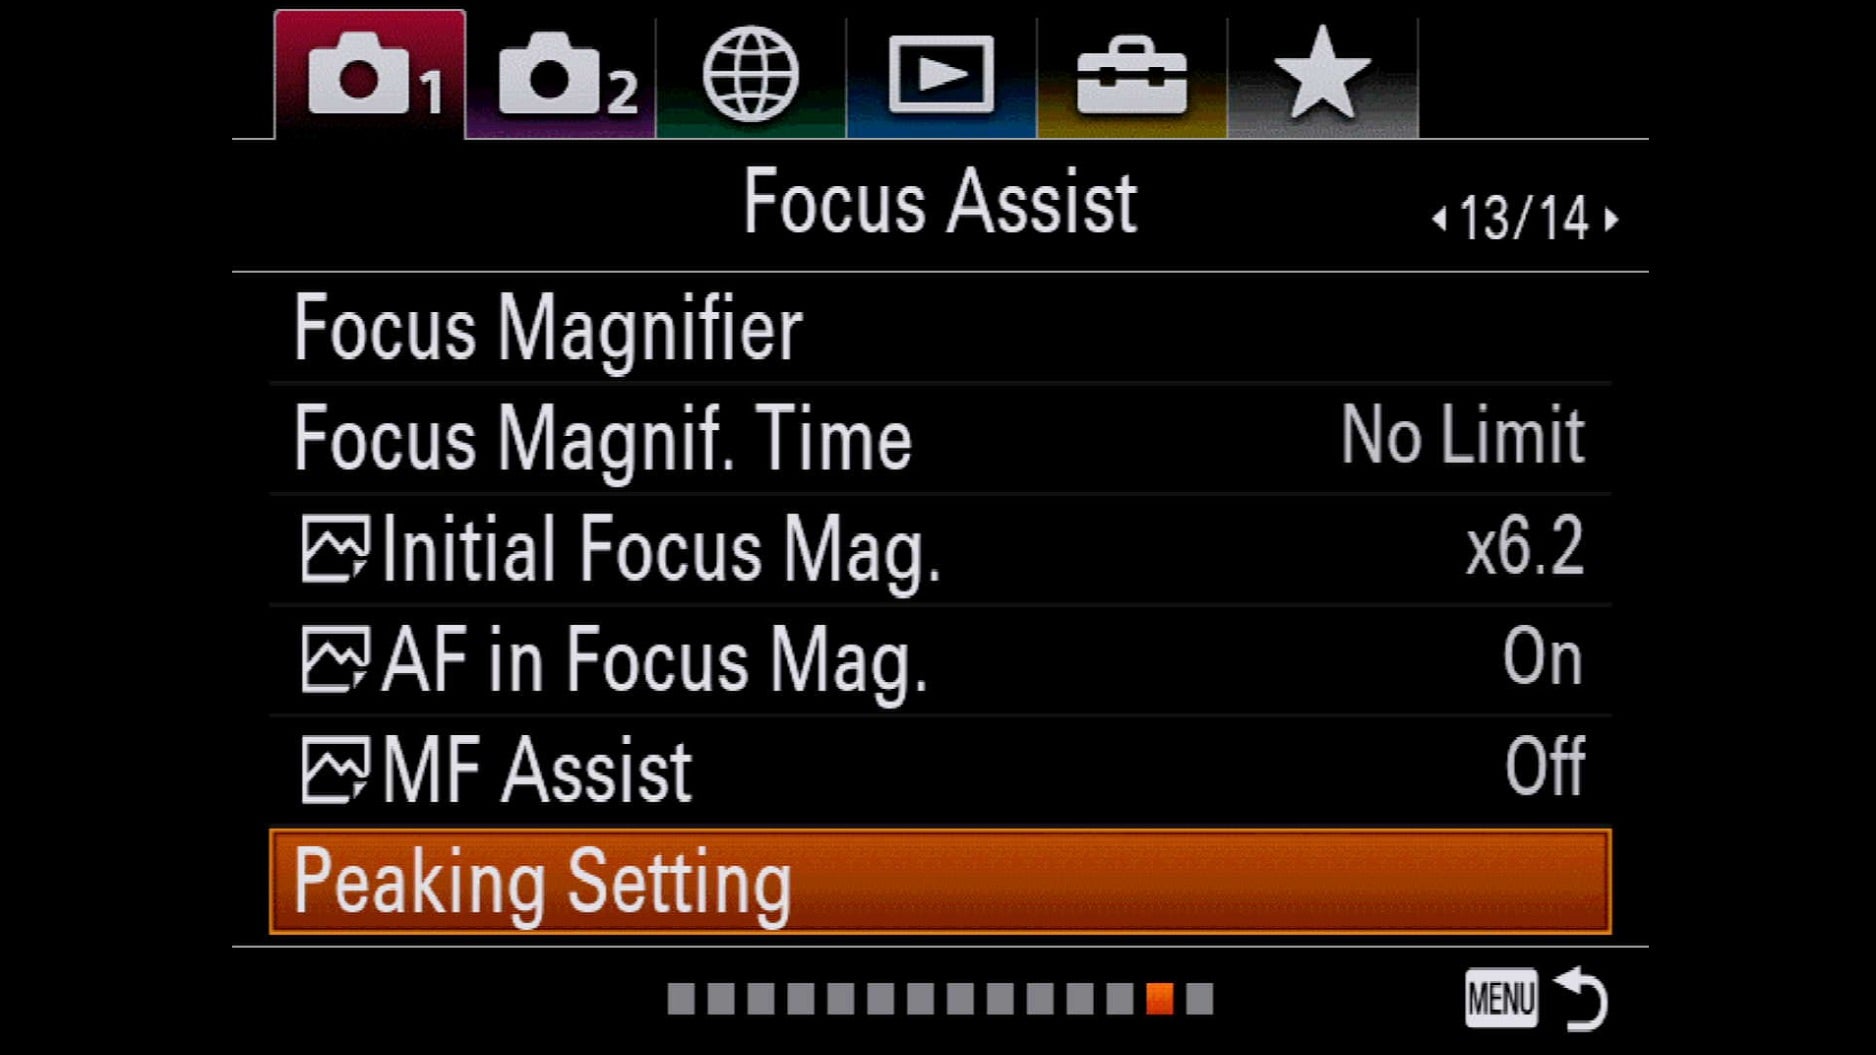
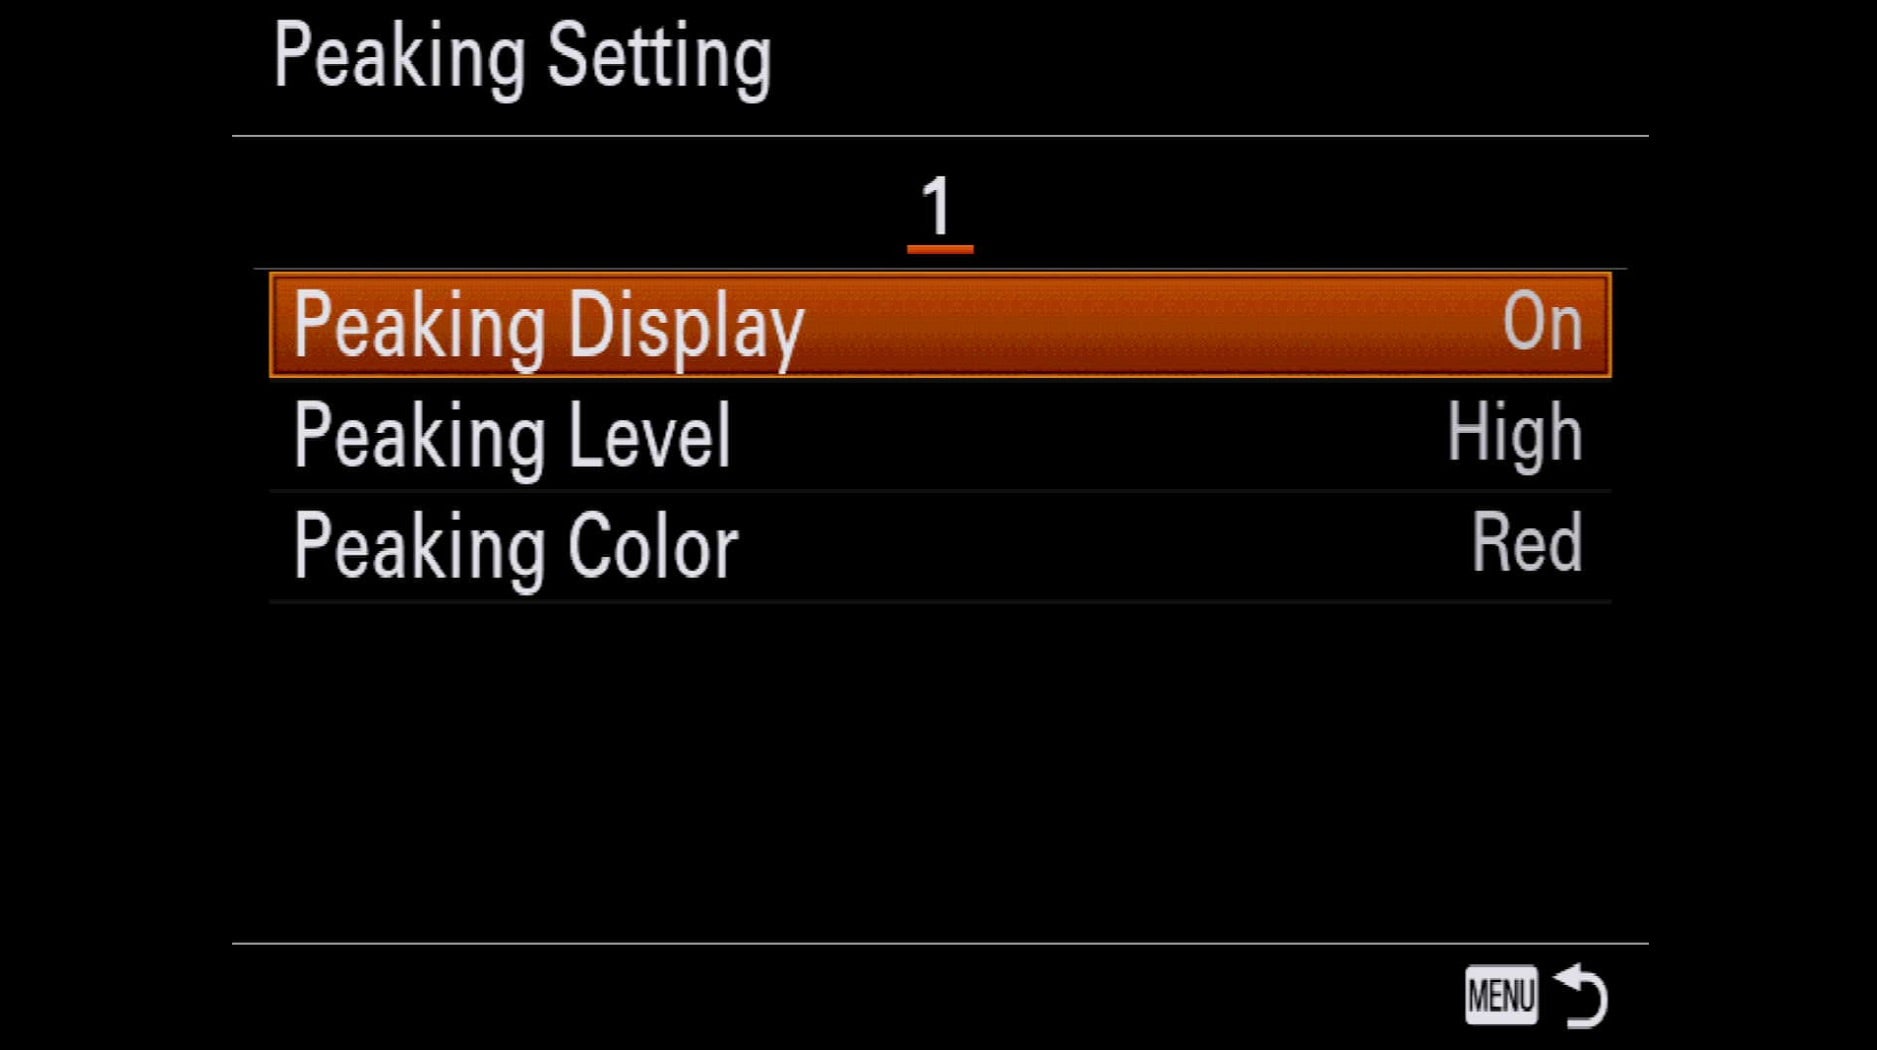
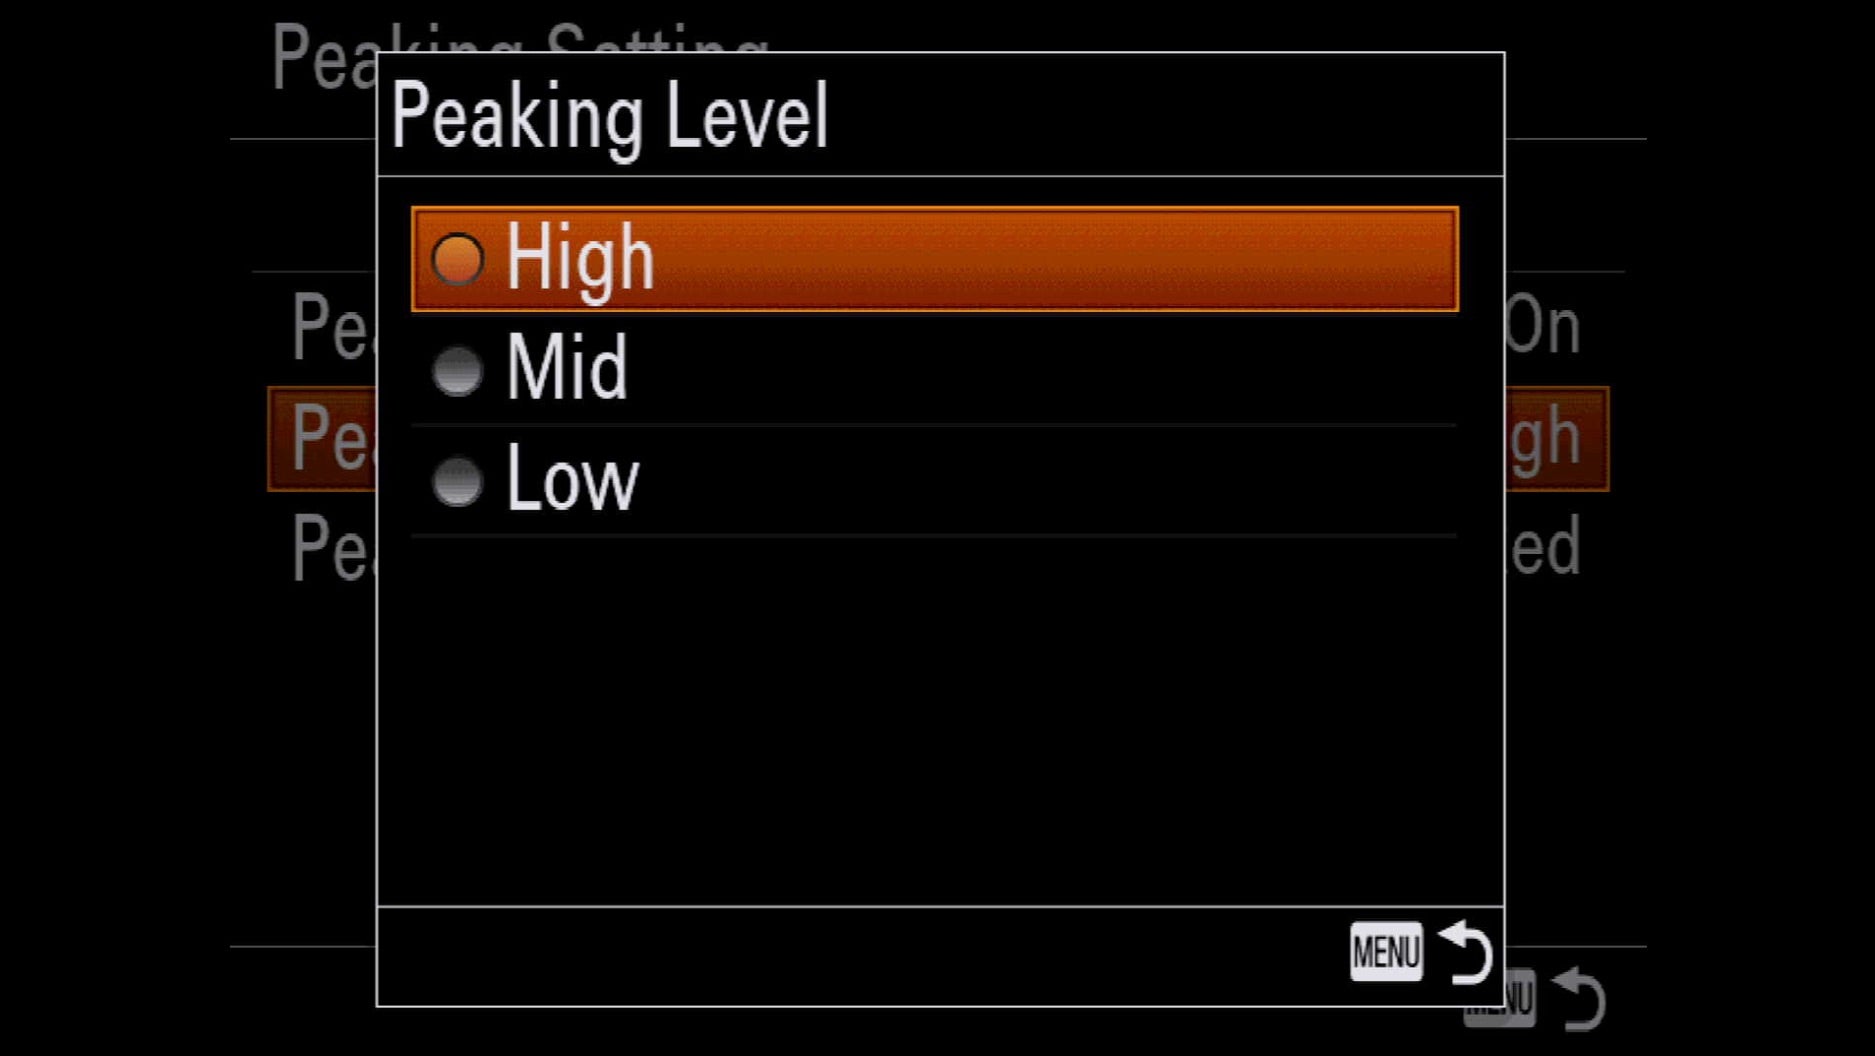
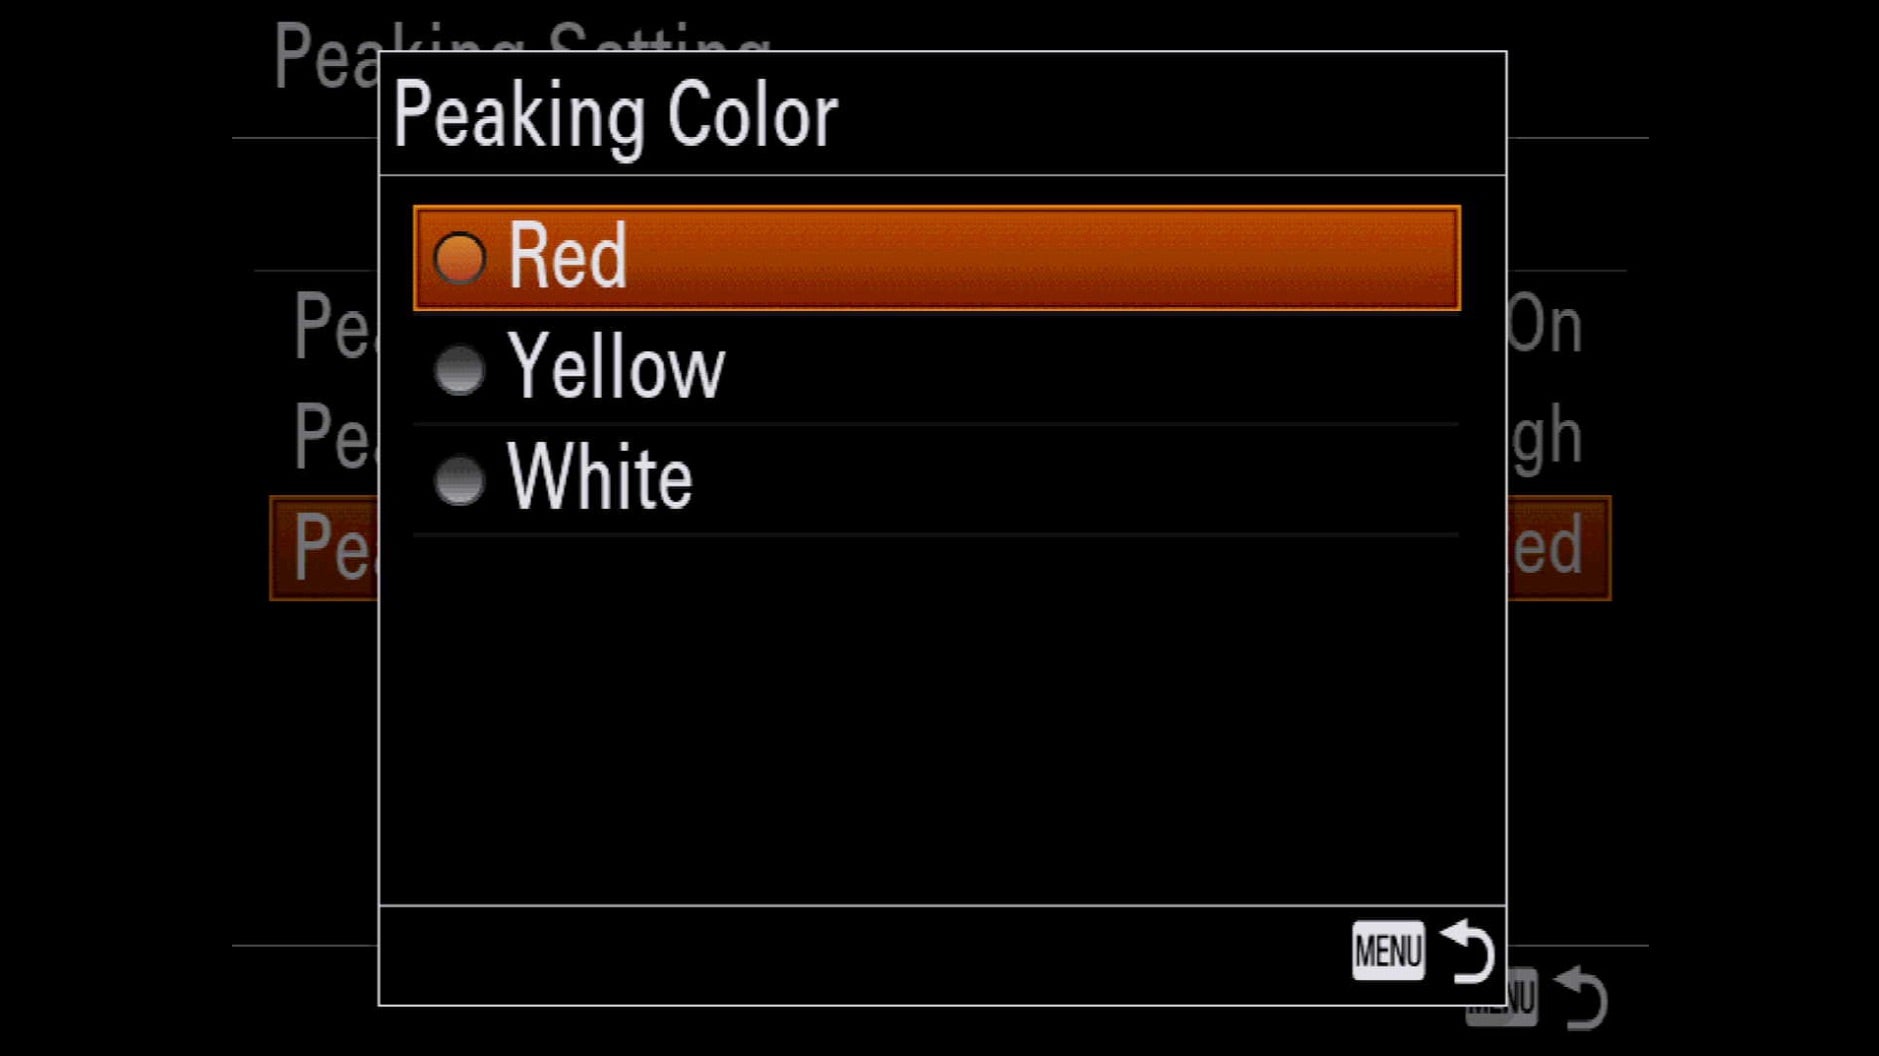
Focus Peaking gives you a color-coded indication within the viewfinder or on the LCD screen of what’s in focus in the frame. It’s incredibly useful if you’re in manual focus mode or if you’re using a manual focus lens. The peaking color can be set to red, white or yellow and it makes finding sharp focus very fast. You can set the peaking sensitivity to high, medium or low and you can use it in conjunction with MF Assist. By default the camera has MF Assist on so when you’re in manual focus, turning the focus ring gives you a magnified view. That can be distracting. Try turning MF Assist off and turn Peaking on, then set MF Assist to another button on the camera to have the best of all worlds. Go to Camera 1, screen 13 and select Peaking Setting (note MF Assist on/off is also on this screen), then set Peaking Display to On and choose the level and color of your choice.
2. Clear Image Zoom
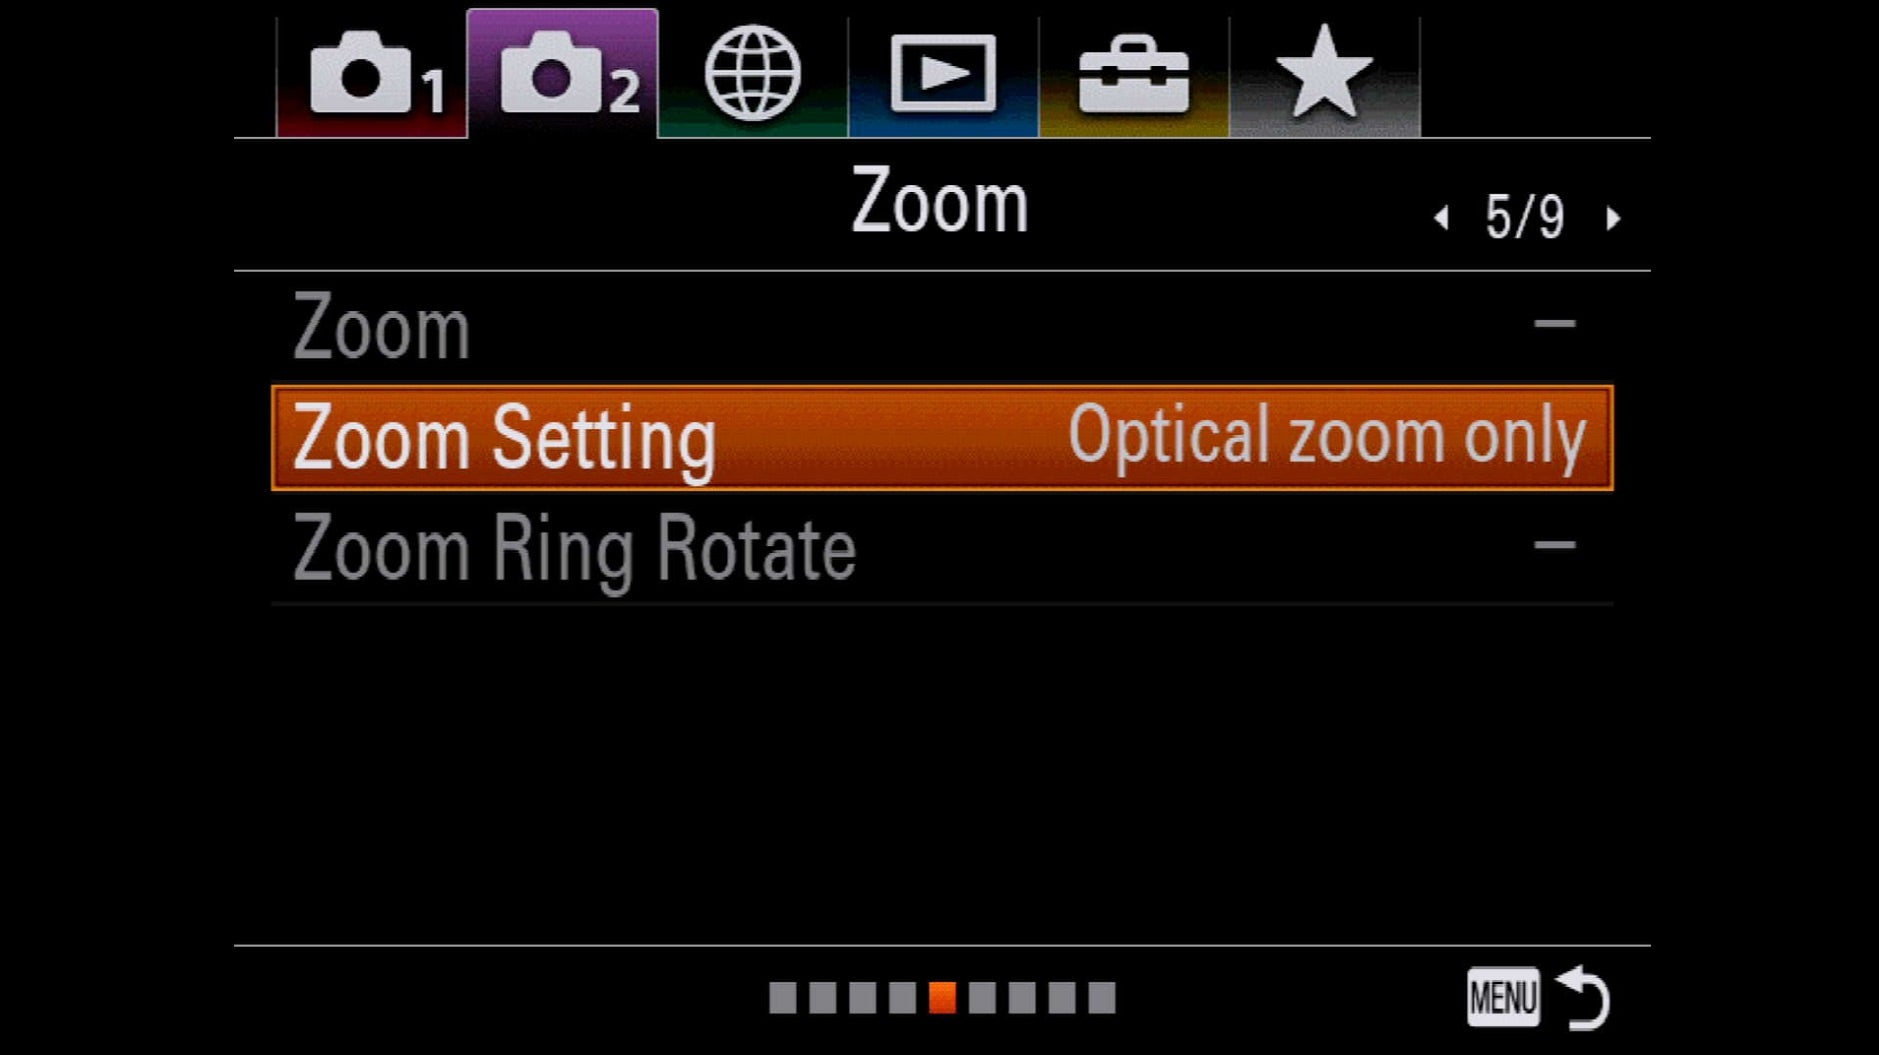
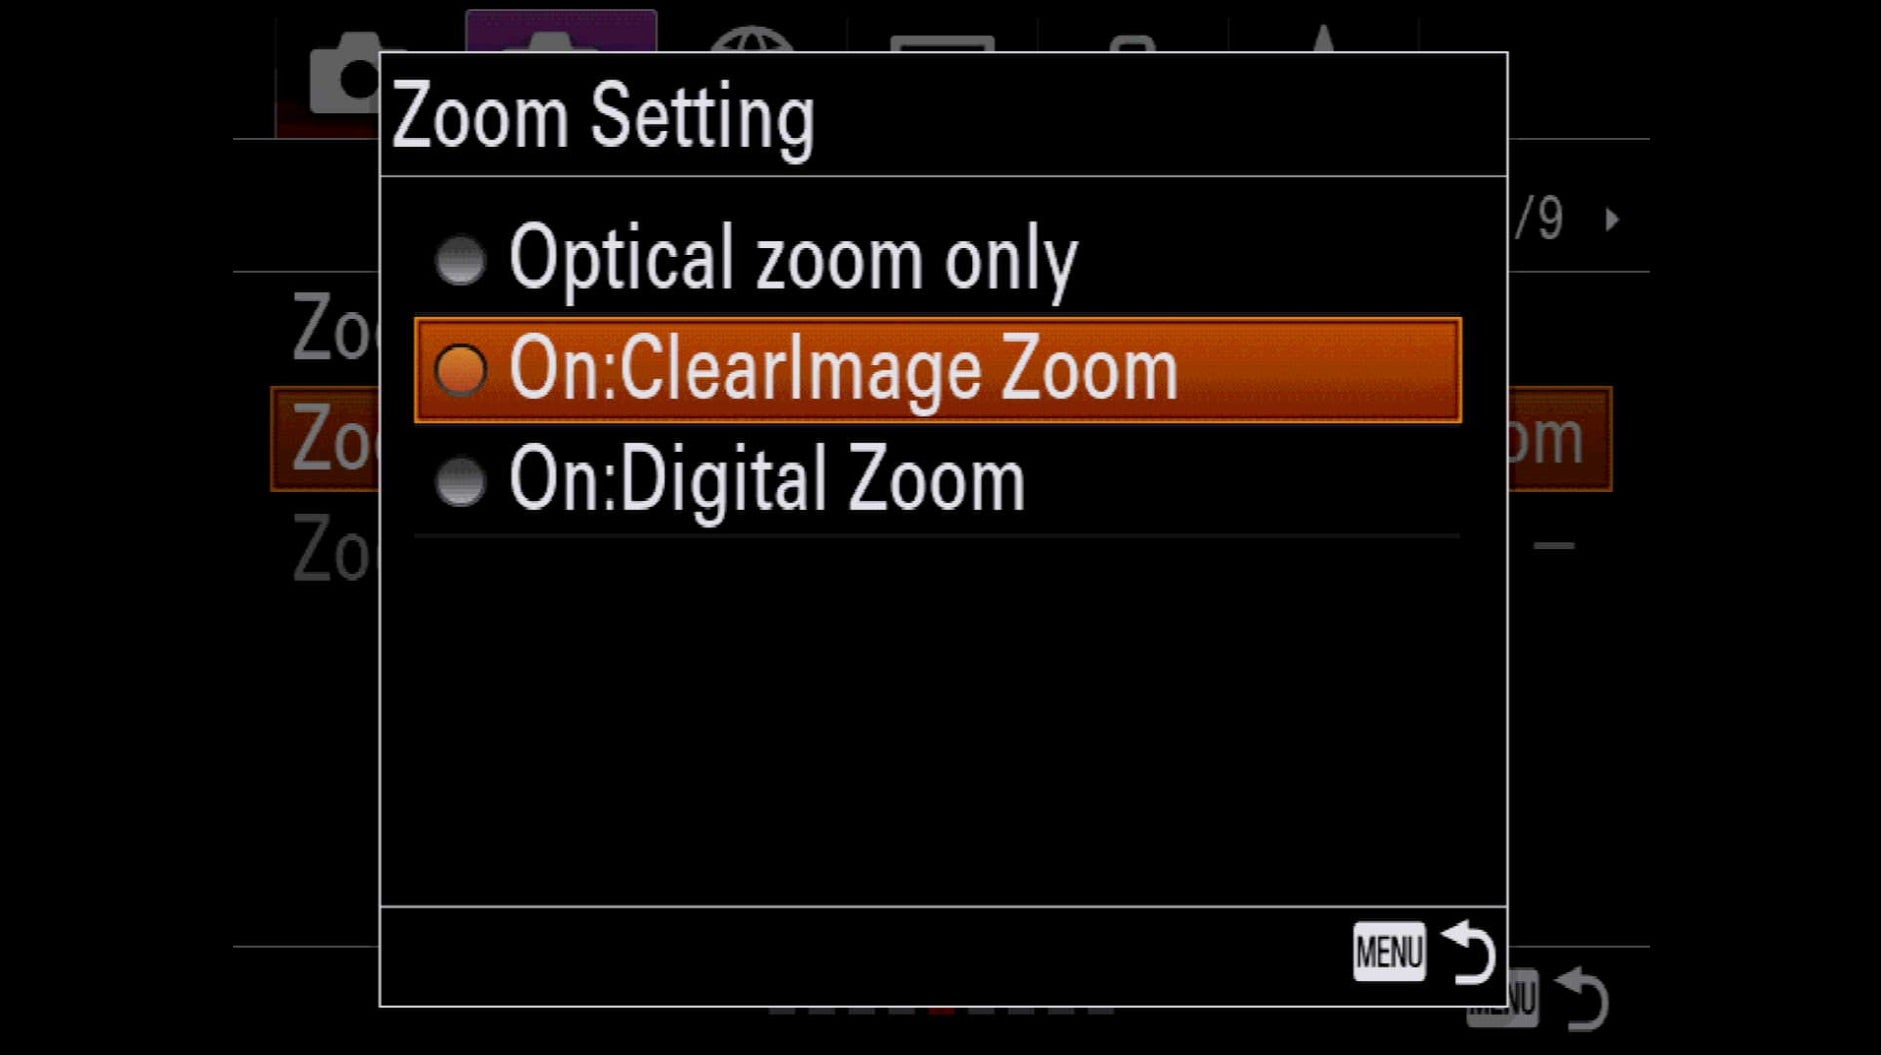
From the early days of digital cameras, the notion of “digital zoom” has drawn the ire of shooters who saw it as little more than a resolution- and image-quality-sapping gimmick. Sony, however, has redefined the possibilities of digital zoom with the Clear Image Zoom feature. Sony describes Clear Image Zoom as “a function that allows you to enlarge the still image with close to the original image quality. The camera first zooms optically to the maximum optical magnification, then employs Clear Image Zoom technology to further enlarge the image to additional 2x, producing sharp, clear images despite the increased zoom ratio.” Note, you can also use Clear Image Zoom with a prime lens so, for example, with a Sony 85mm f/1.8, you can get a Clear Image Zoom focal length of 170mm. Clear Image Zoom is pretty well hidden in the menu. Go to Camera 2, screen 5 and select Zoom Setting, then choose On: Clear Image Zoom.
3. Bright Monitoring
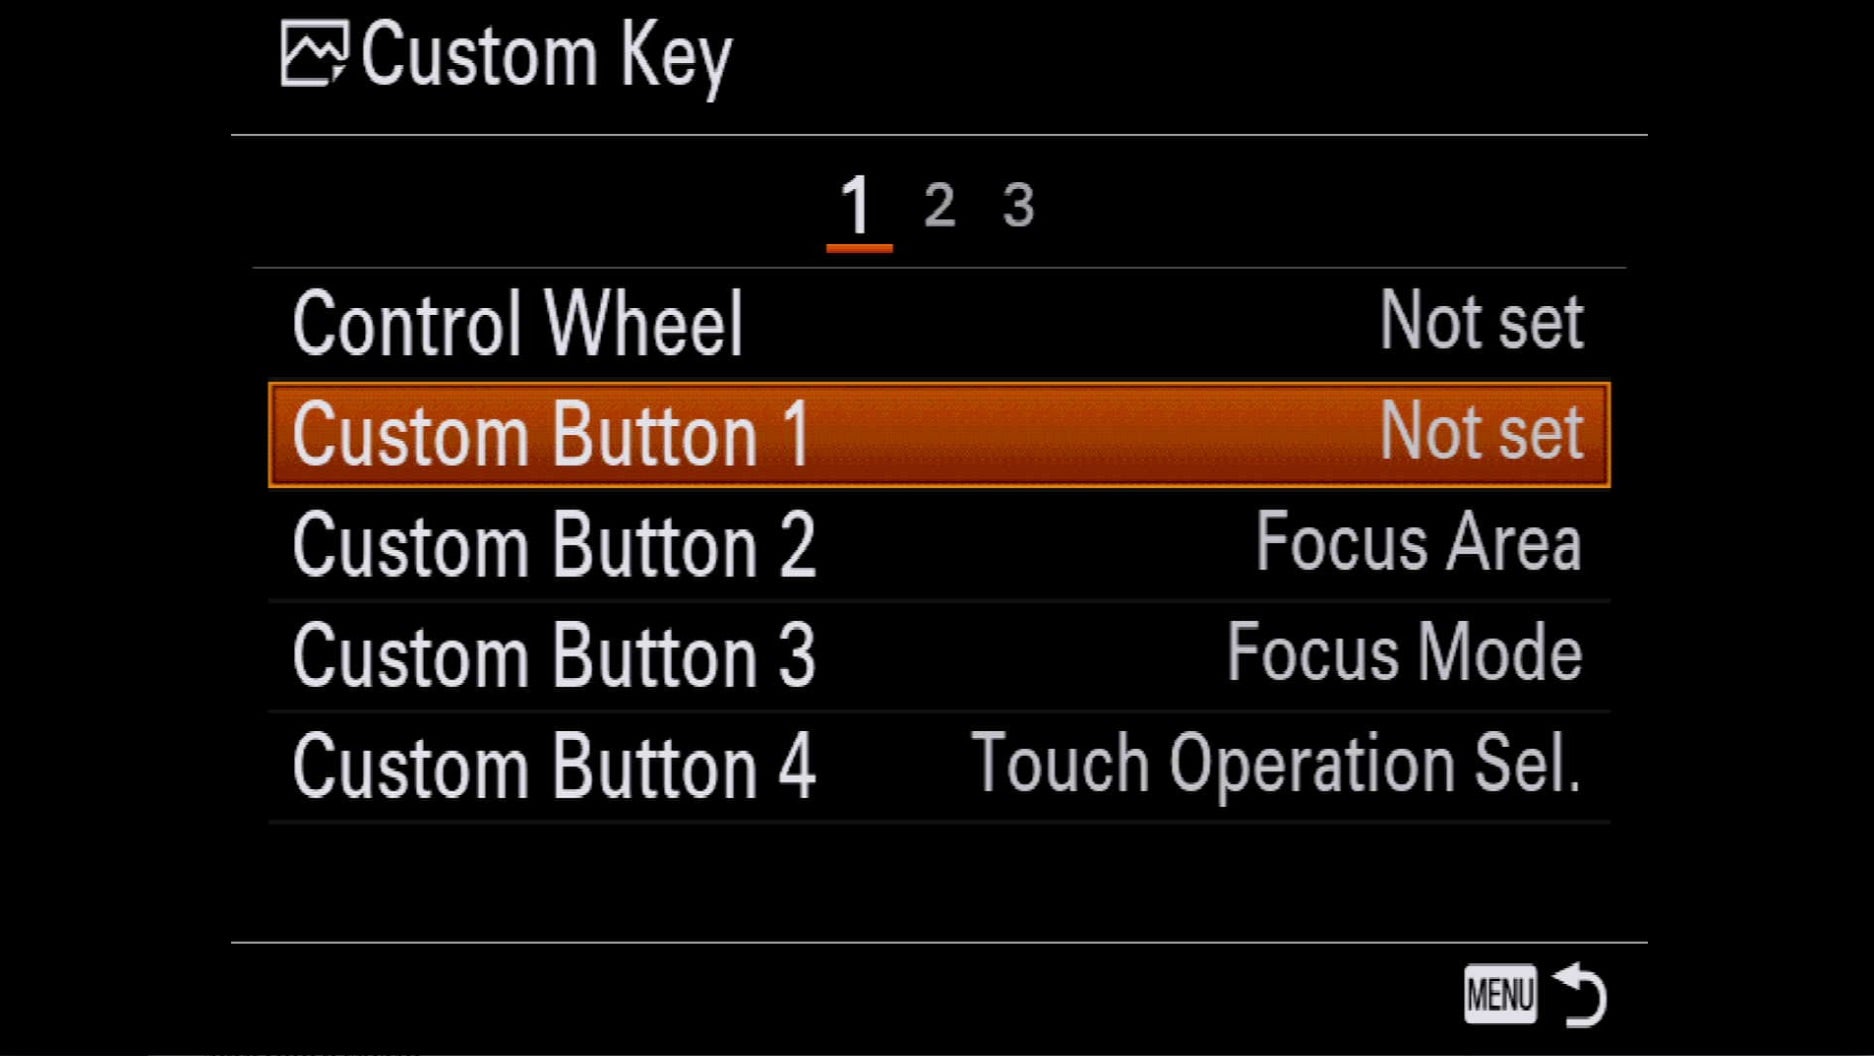
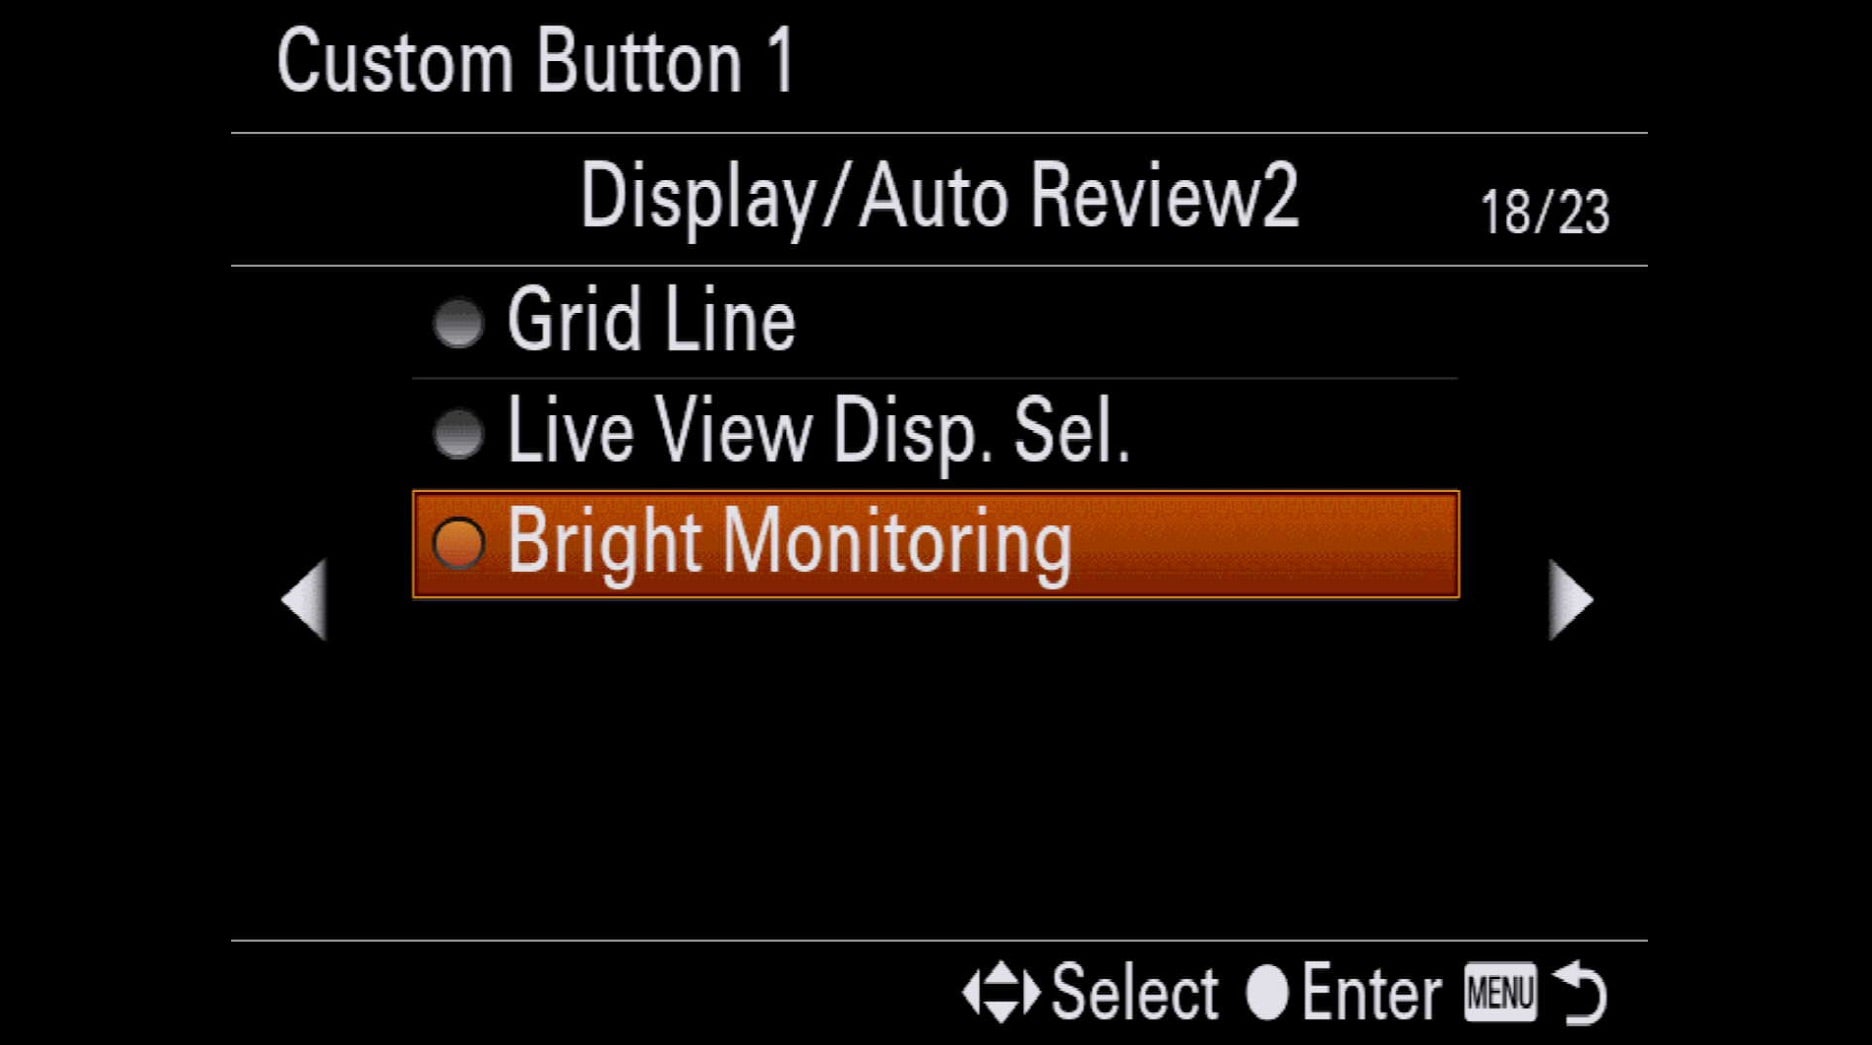
For night and astrophotography, Bright Monitoring is a game changer. This feature amplifies the image at night allowing you to compose in the dark as well as check critical focus in the frame before you shoot. You can set Bright Monitoring to a custom button by going to the still photography Custom Keys (Camera 2, screen 8 on an α7R III with Firmware 3.0) then choosing the button you want to assign and scroll through to screen 18 and select Bright Monitoring.
4. Custom Modes On Mode Dial
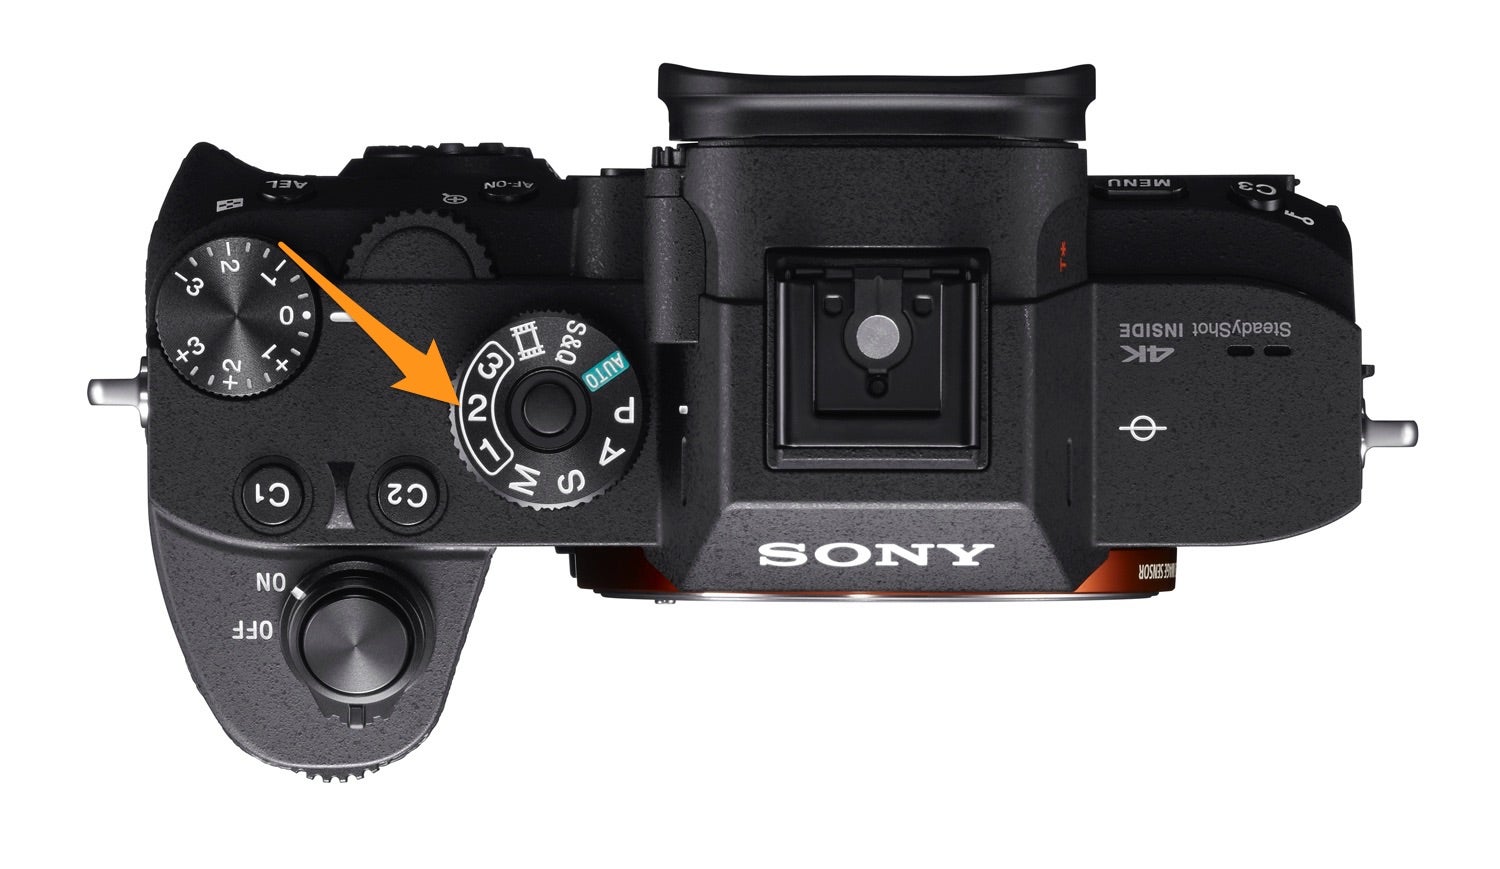
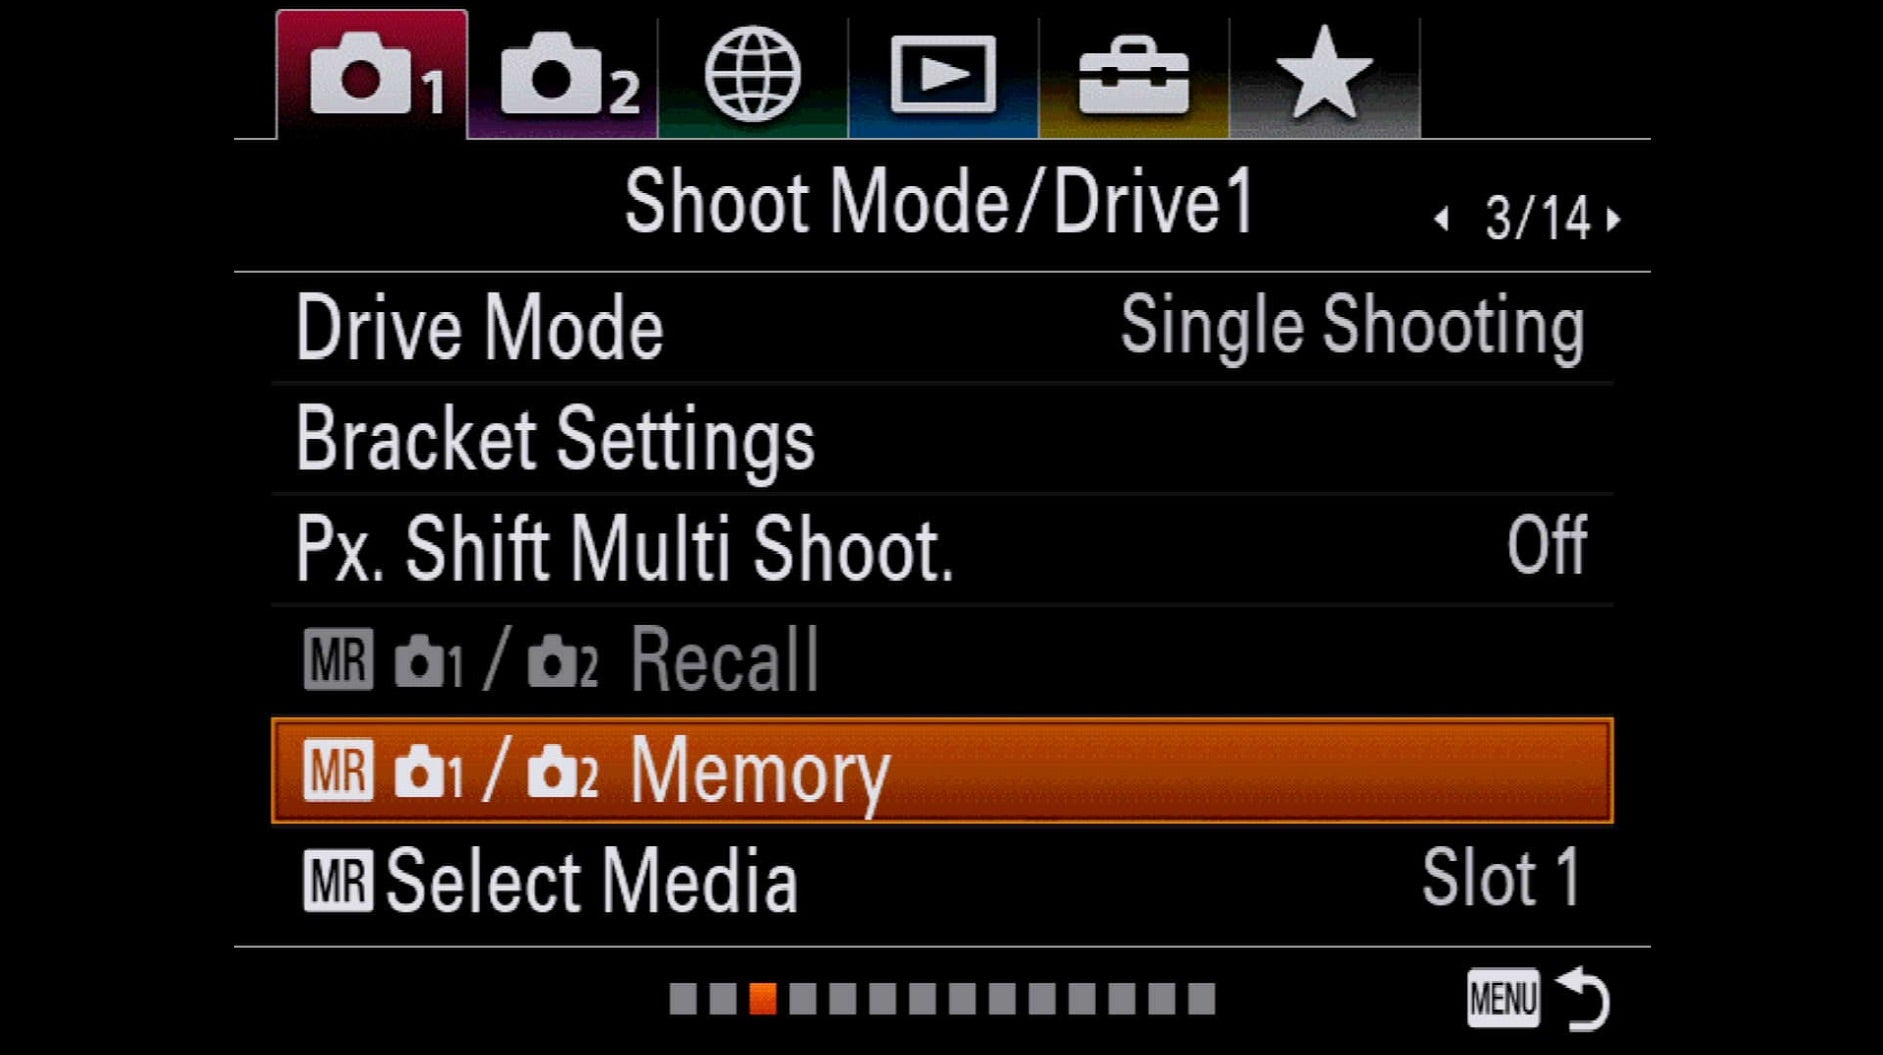
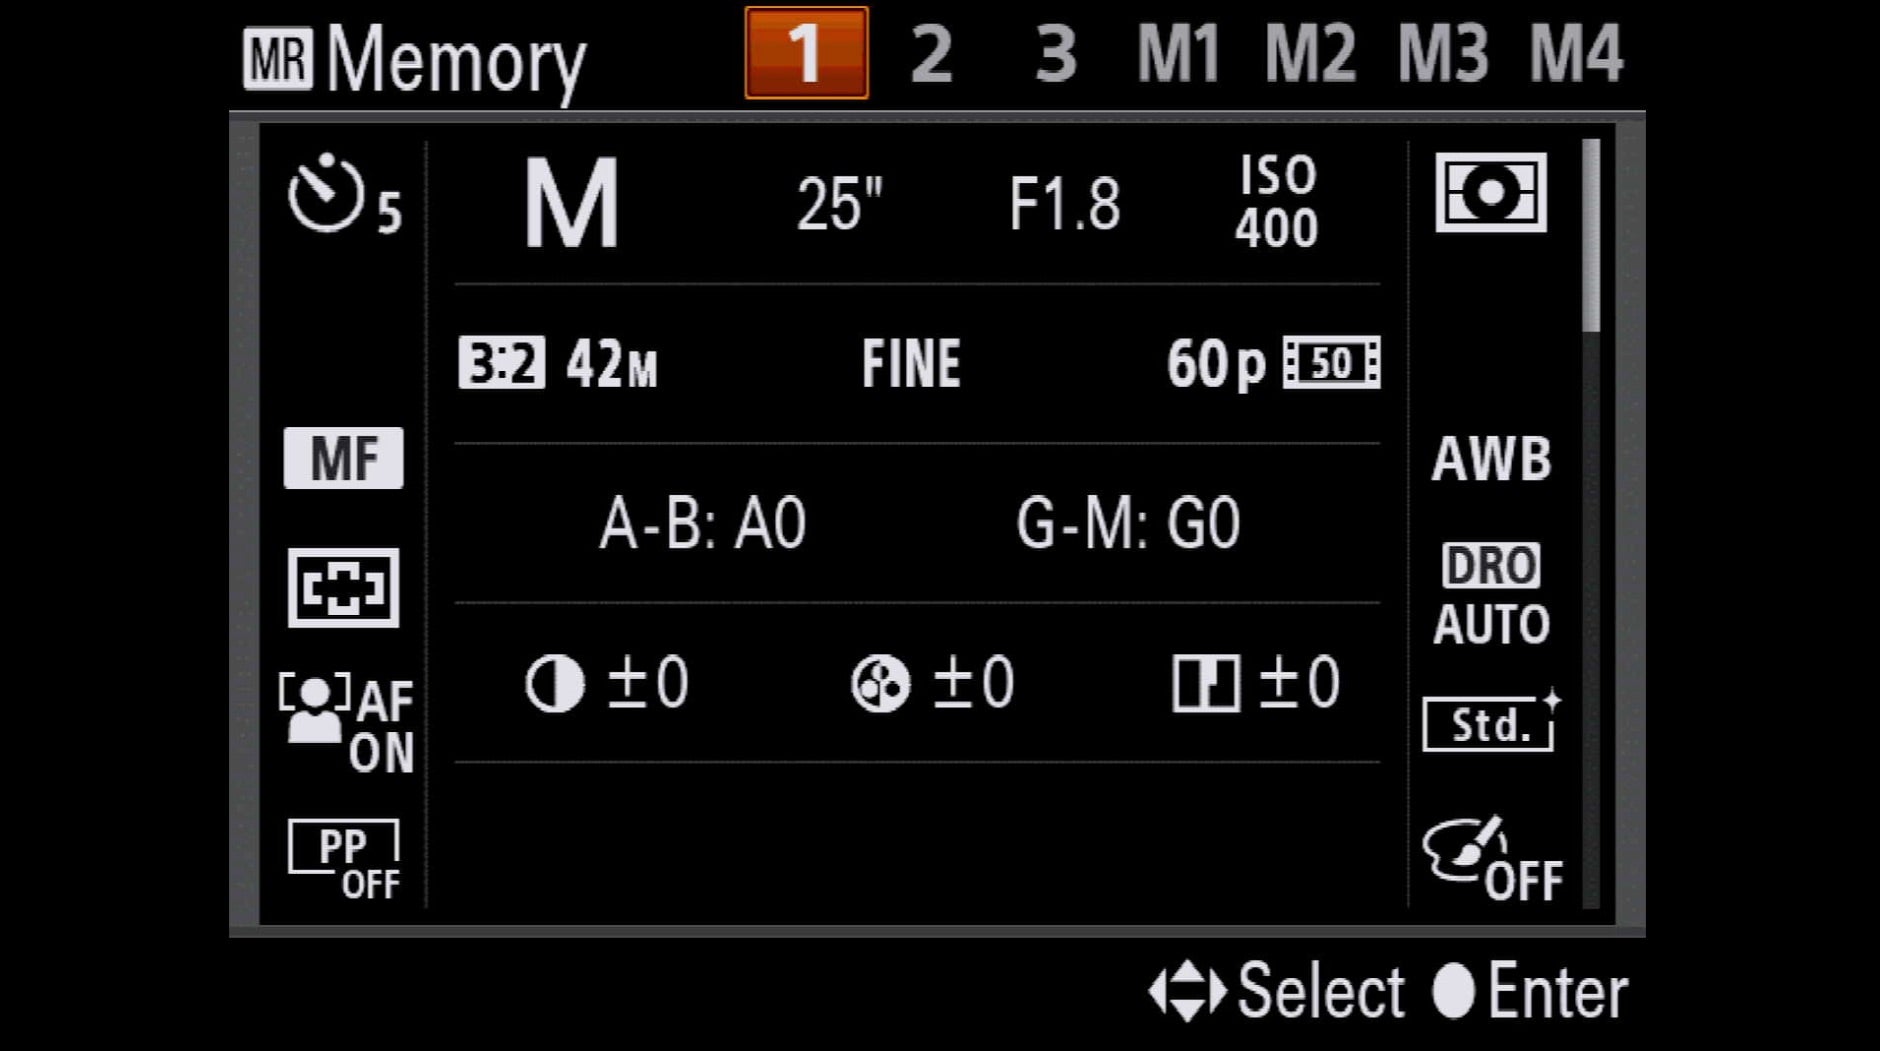
You can set buttons on the camera and many lenses to access different focus modes and other settings on the fly to make shooting efficient and accurate. In addition, you can access entire camera setup states on the main Mode Dial on top of the camera using the 1, 2 and 3 “Custom Modes”. For example, you can save your nighttime astrophotography setup, including manual focus and exposure modes, ISO, noise reduction off, RAW, Bright Monitoring, etc. to “1” and after a day of shooting landscapes or whatever, just select 1 on the mode dial and you’re completely set up for astro. The α7 III, α7 II, α7S II and α7R II have 2 of these Custom Modes and the α7R III and α9 have 3. To program the Mode Dial Custom Modes, set up the camera how you want it, then in the menu find the Shoot Mode/Drive 1 screen (here it’s shown in an α7R III with Firmware 3.0 in Camera 1 screen 3. Scroll down and select MR Memory then choose the Custom Mode where you want this setup saved. (note you can save additional setups to a memory card using M1, M2, etc.)
5. Focus Hold Button
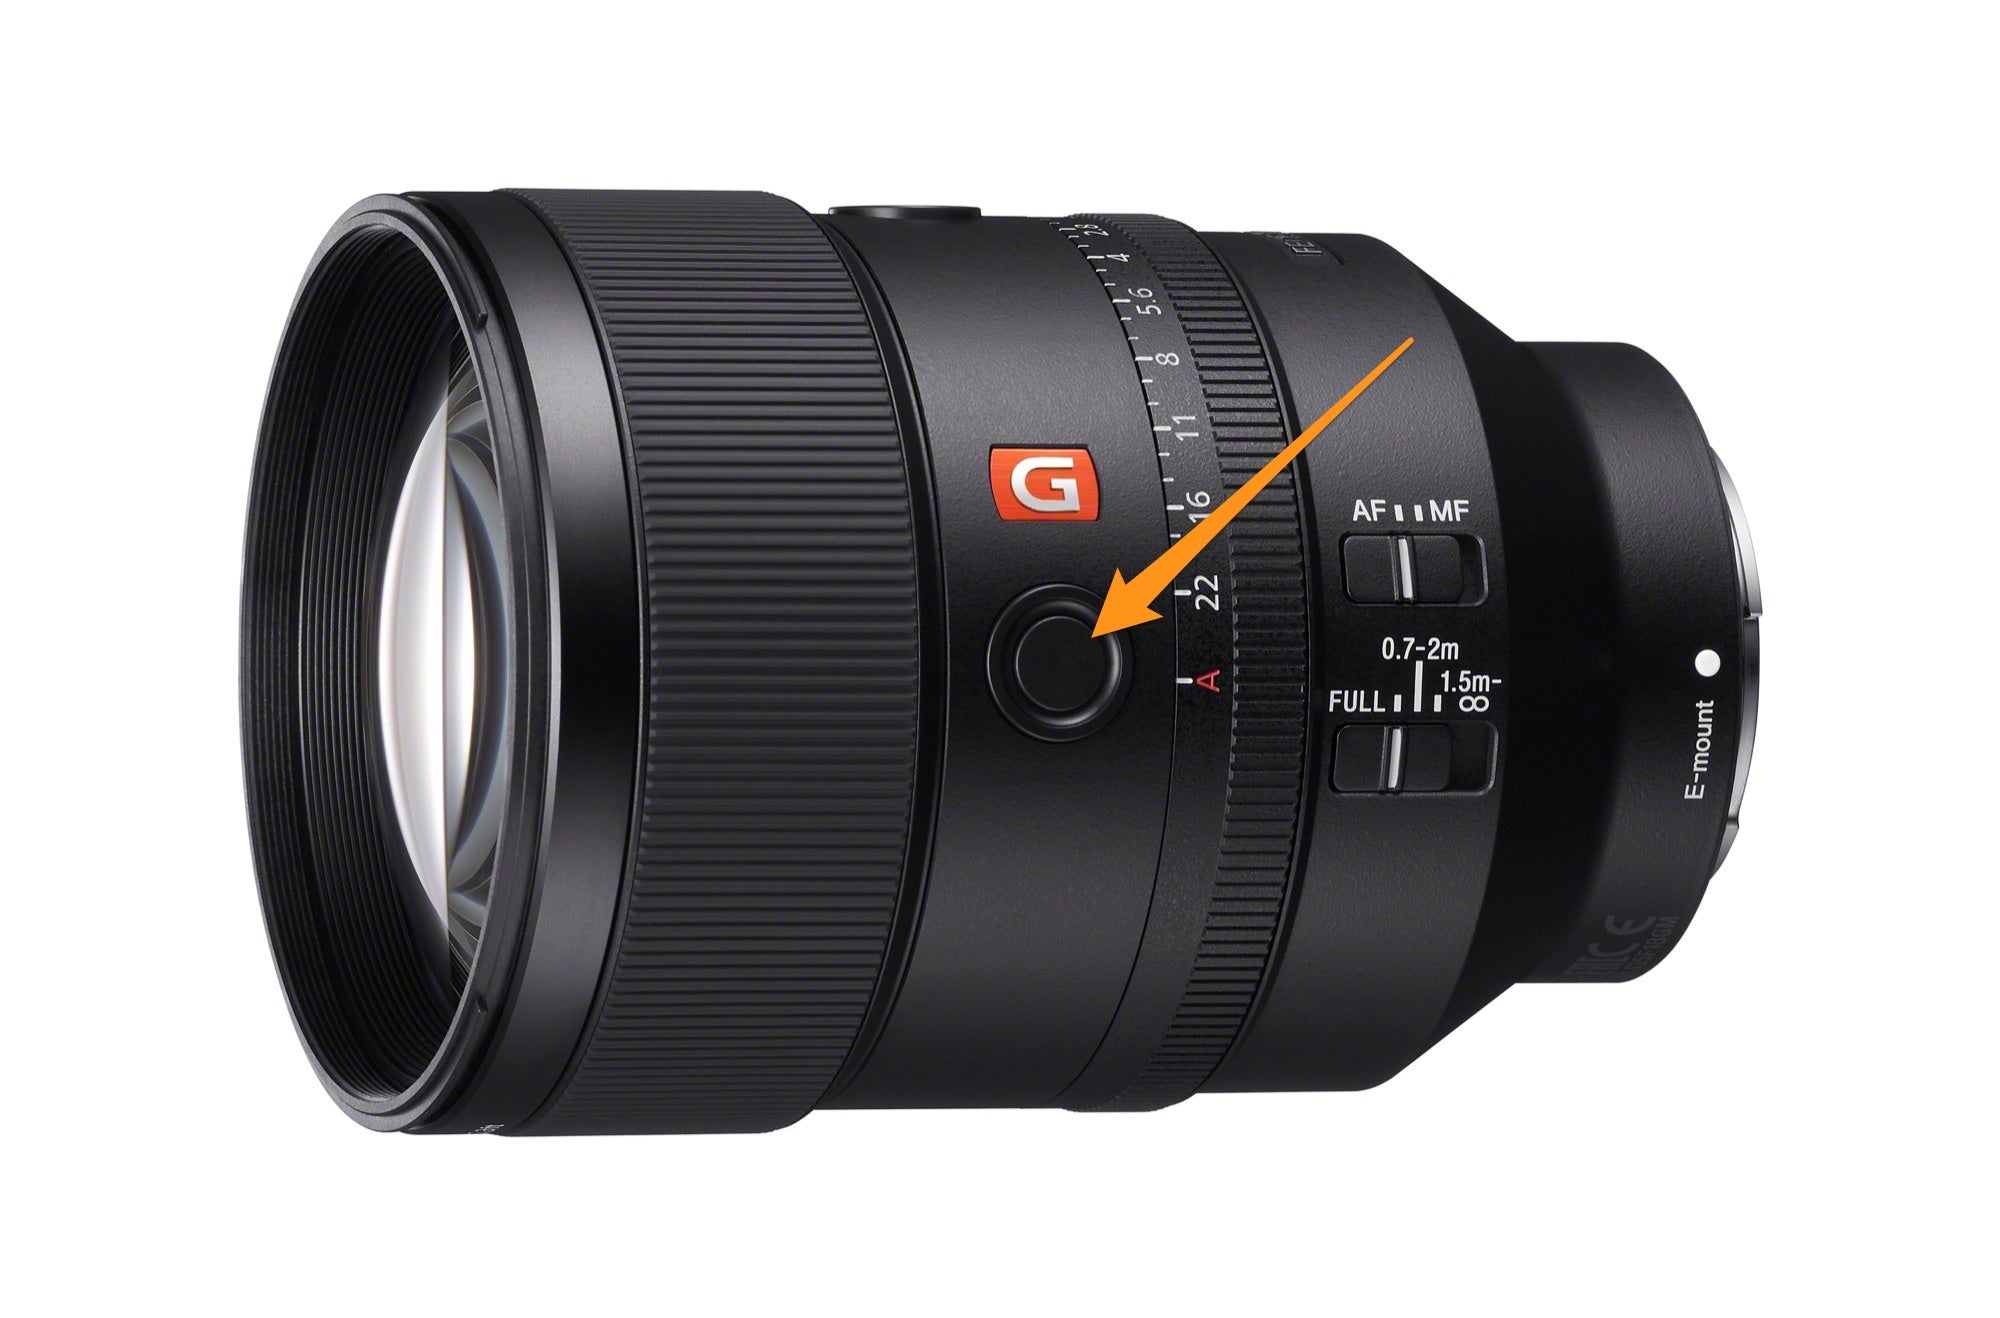
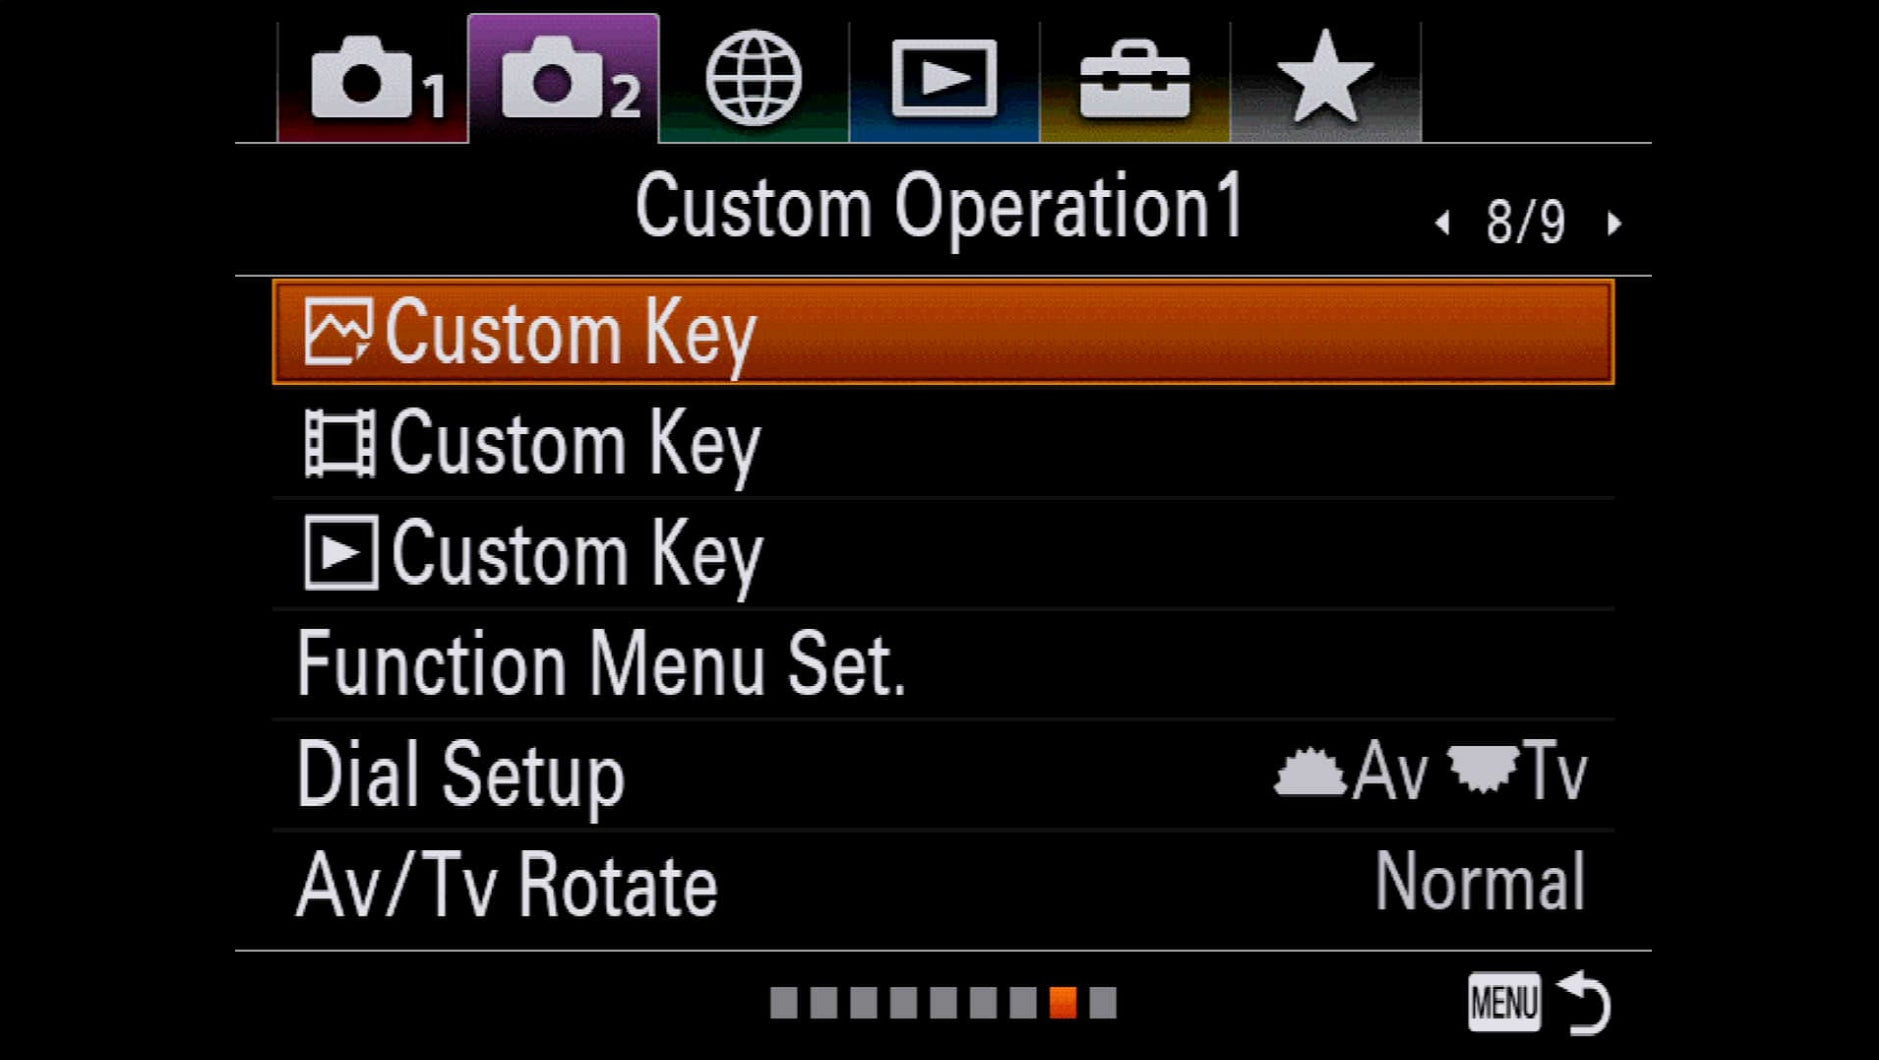
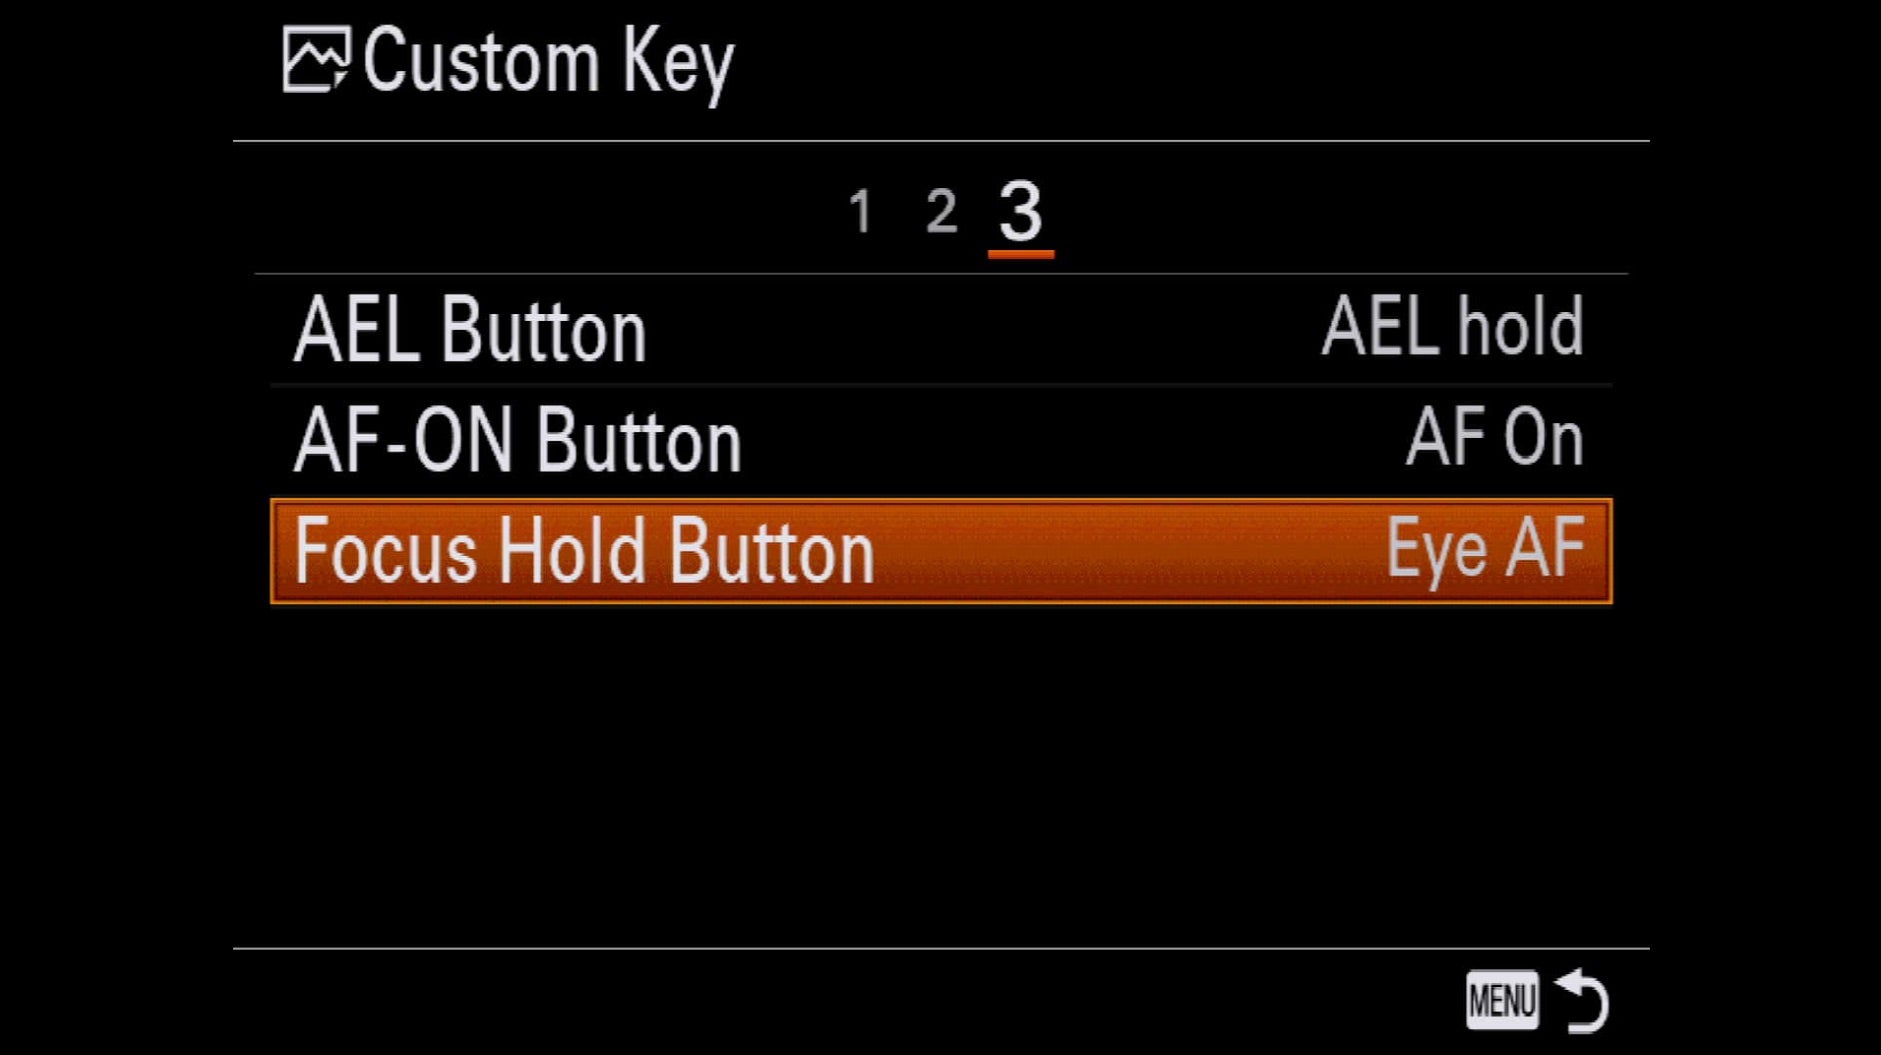
Many Sony lenses have a focus hold button on the lens barrel. As the name suggests, when depressed it holds focus. However, many shooters don’t realize that like buttons on the camera body, the Focus Hold button is programmable to do just about anything you want. For example, many pros set it to activate Eye AF. To program the Focus Hold button, go to Camera 2, screen 8 and select either the still photography or video Custom Key menu. Then go to screen 3 to select Focus Hold. From there you can assign whatever function you’d like to the Focus Hold button.
6. Fn Button Customization
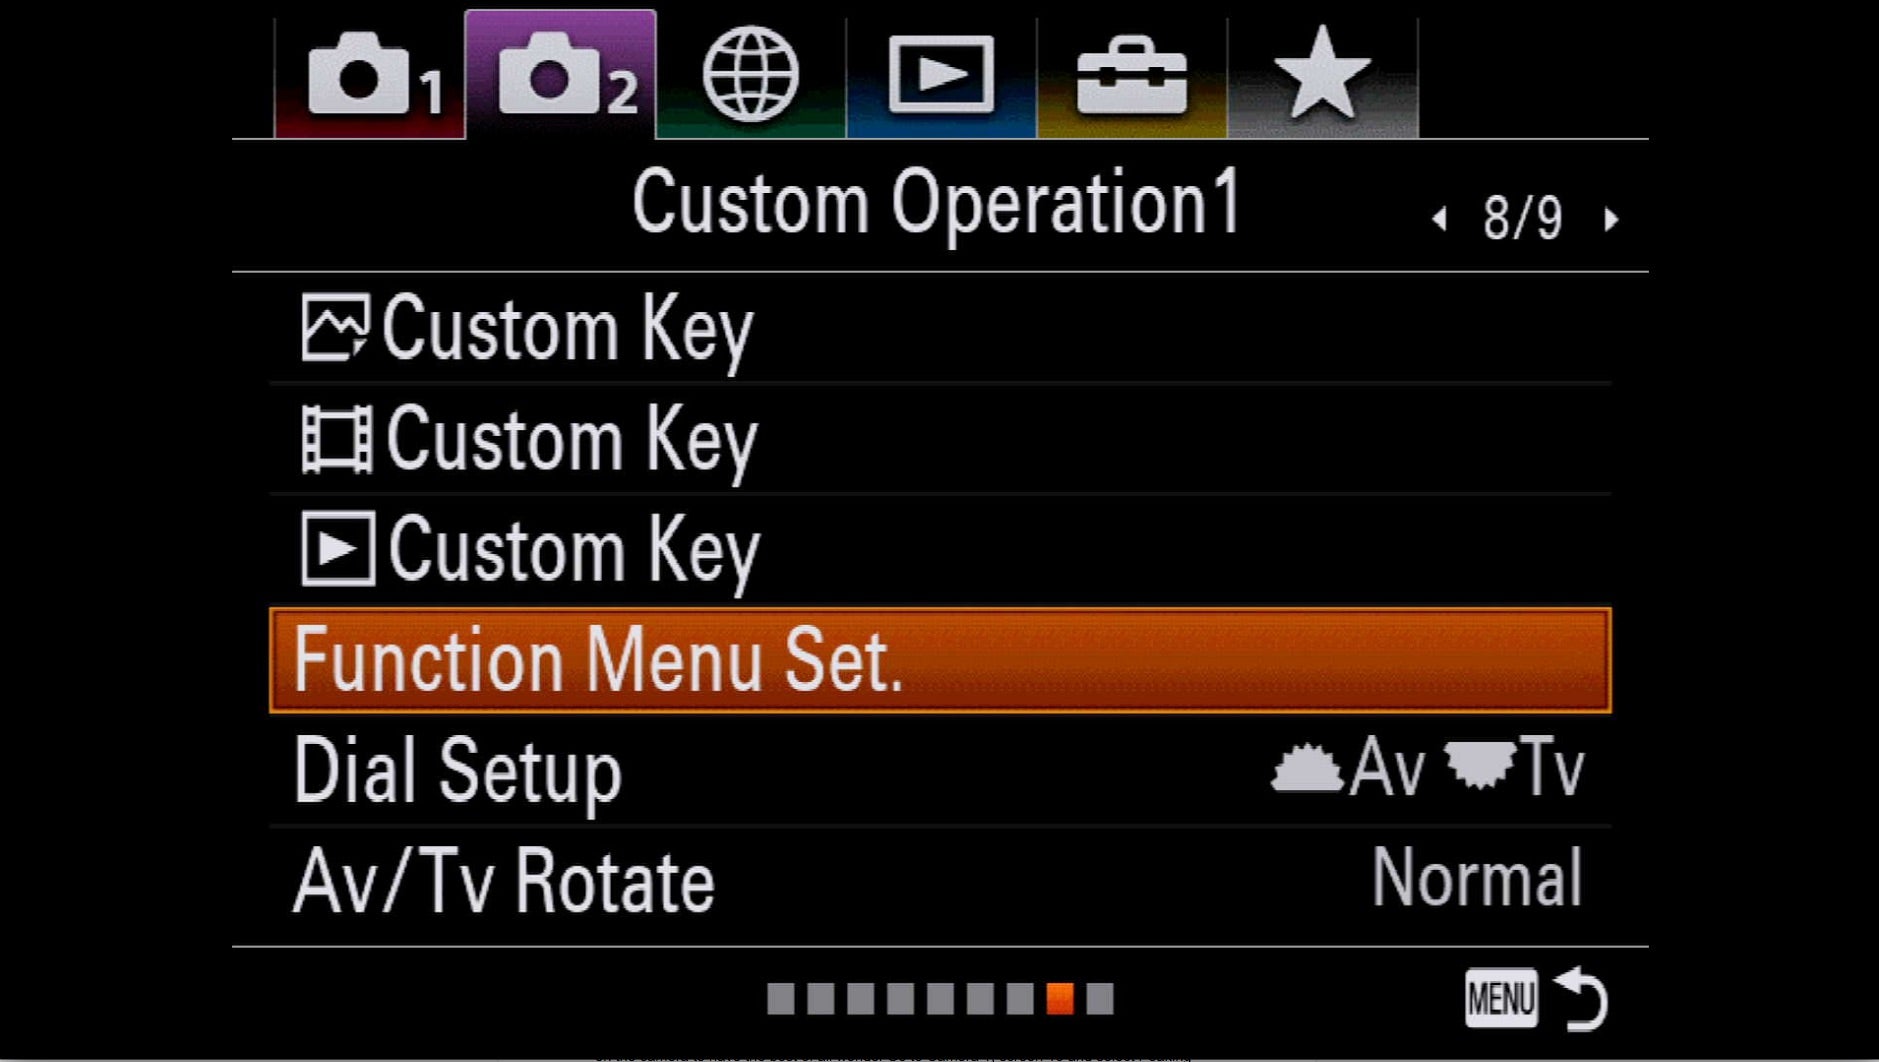
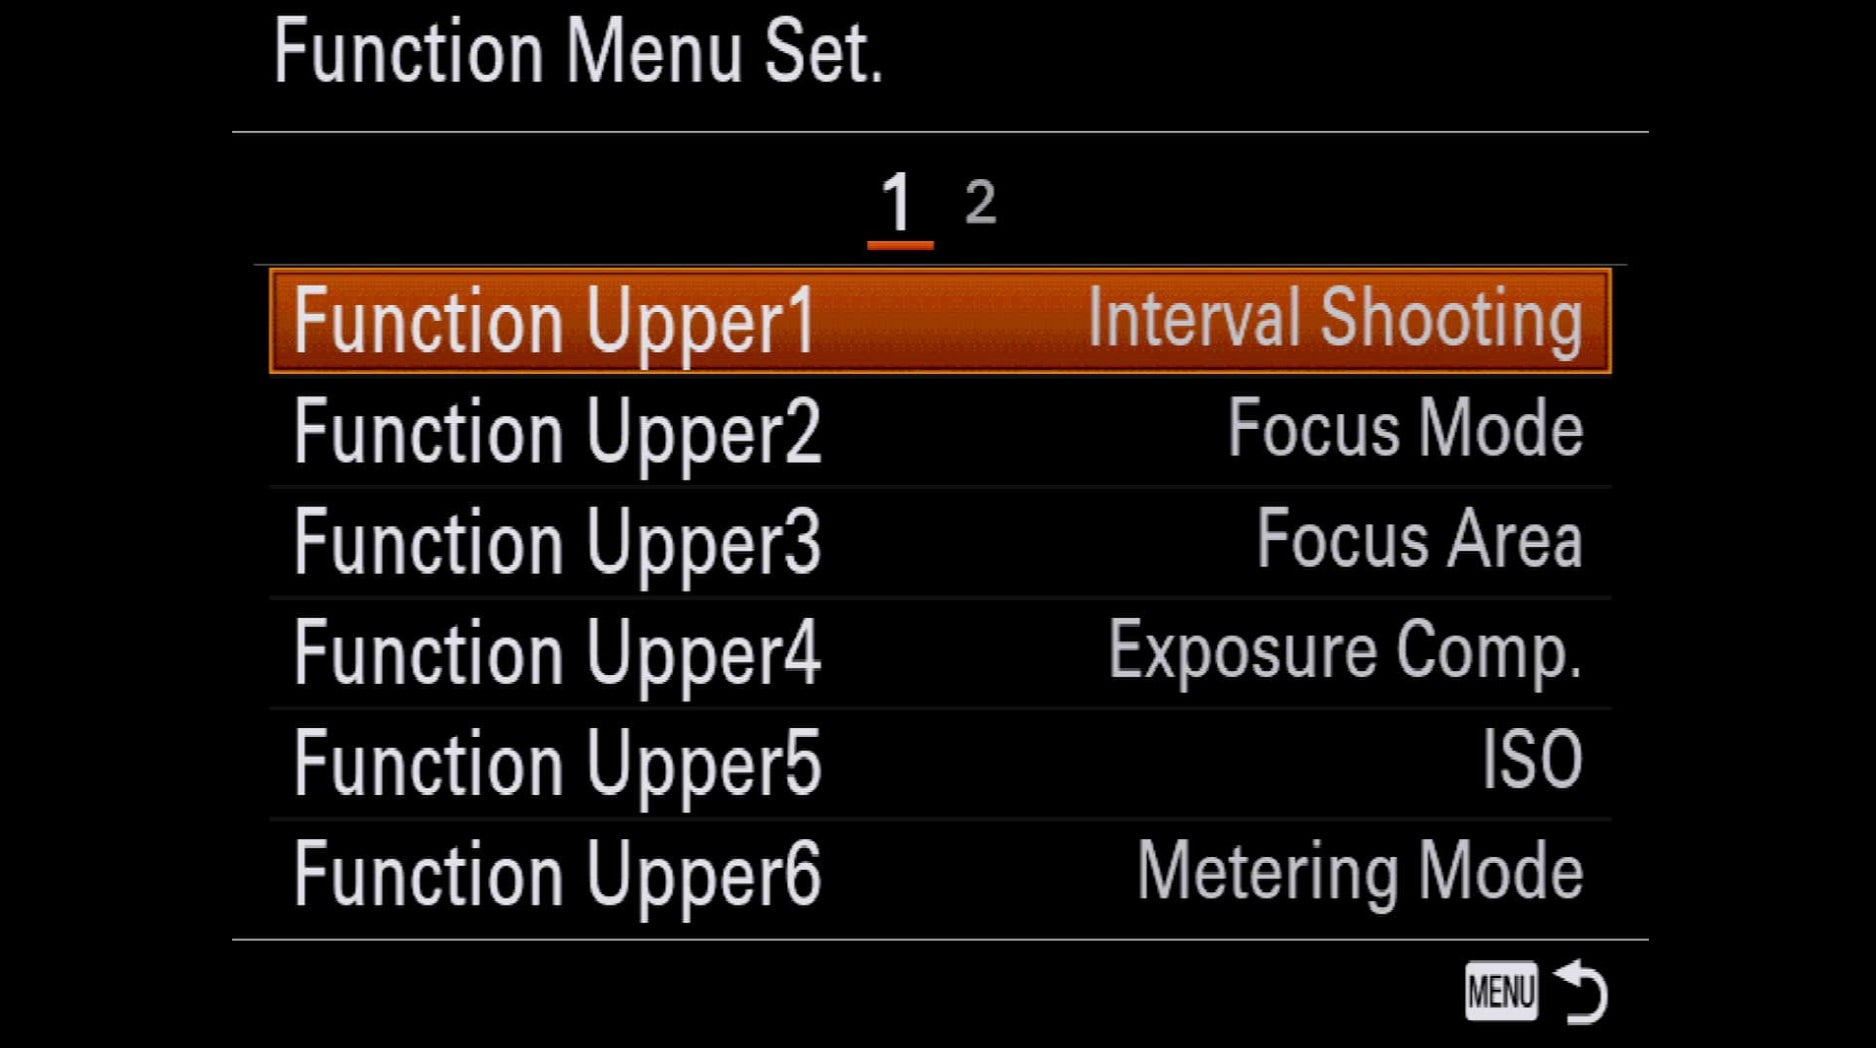
The Fn button on the camera back is a powerful tool that gives you instant access to 12 key camera settings such as Drive Mode, White Balance, ISO, Exposure Compensation, Focus Area, Metering Mode, etc. What you might not have known is that you can customize which 12 parameters you want access to. Go to Camera 2, screen 8 and select Function Menu Set, then choose a slot in the upper or lower row and you’ll see that you populate the Fn button settings with just about anything. So if you’re an occasional timelapse shooter, you might have Interval Shooting as part of your Fn button to have instant access to timelapse.
Fn Button Pro Tip: When you’re in the menus, you can speed up your navigation by using the Fn button to jump to the next main tab.


