Recent converts to Sony mirrorless cameras will find that there are a lot of incredibly powerful features. As you start using the camera, there will be some differences from the look and feel of your old DSLR.
To make your transition from DSLR to Sony mirrorless camera a smooth one, we spoke with Sony’s Kenta Honjo to create a sort of Quick Start Guide. Kenta walks us through several menu controls and how to set them to make your new mirrorless camera feel more like your old DSLR. The Sony mirrorless cameras are incredibly customizable and as you get more accustomed to yours and you experiment with the menus, you’ll likely change many the settings to match how you shoot. This guide will get you up and running comfortably in short order.
Please note that depending on your camera model and firmware, the exact location of menu items will vary slightly.
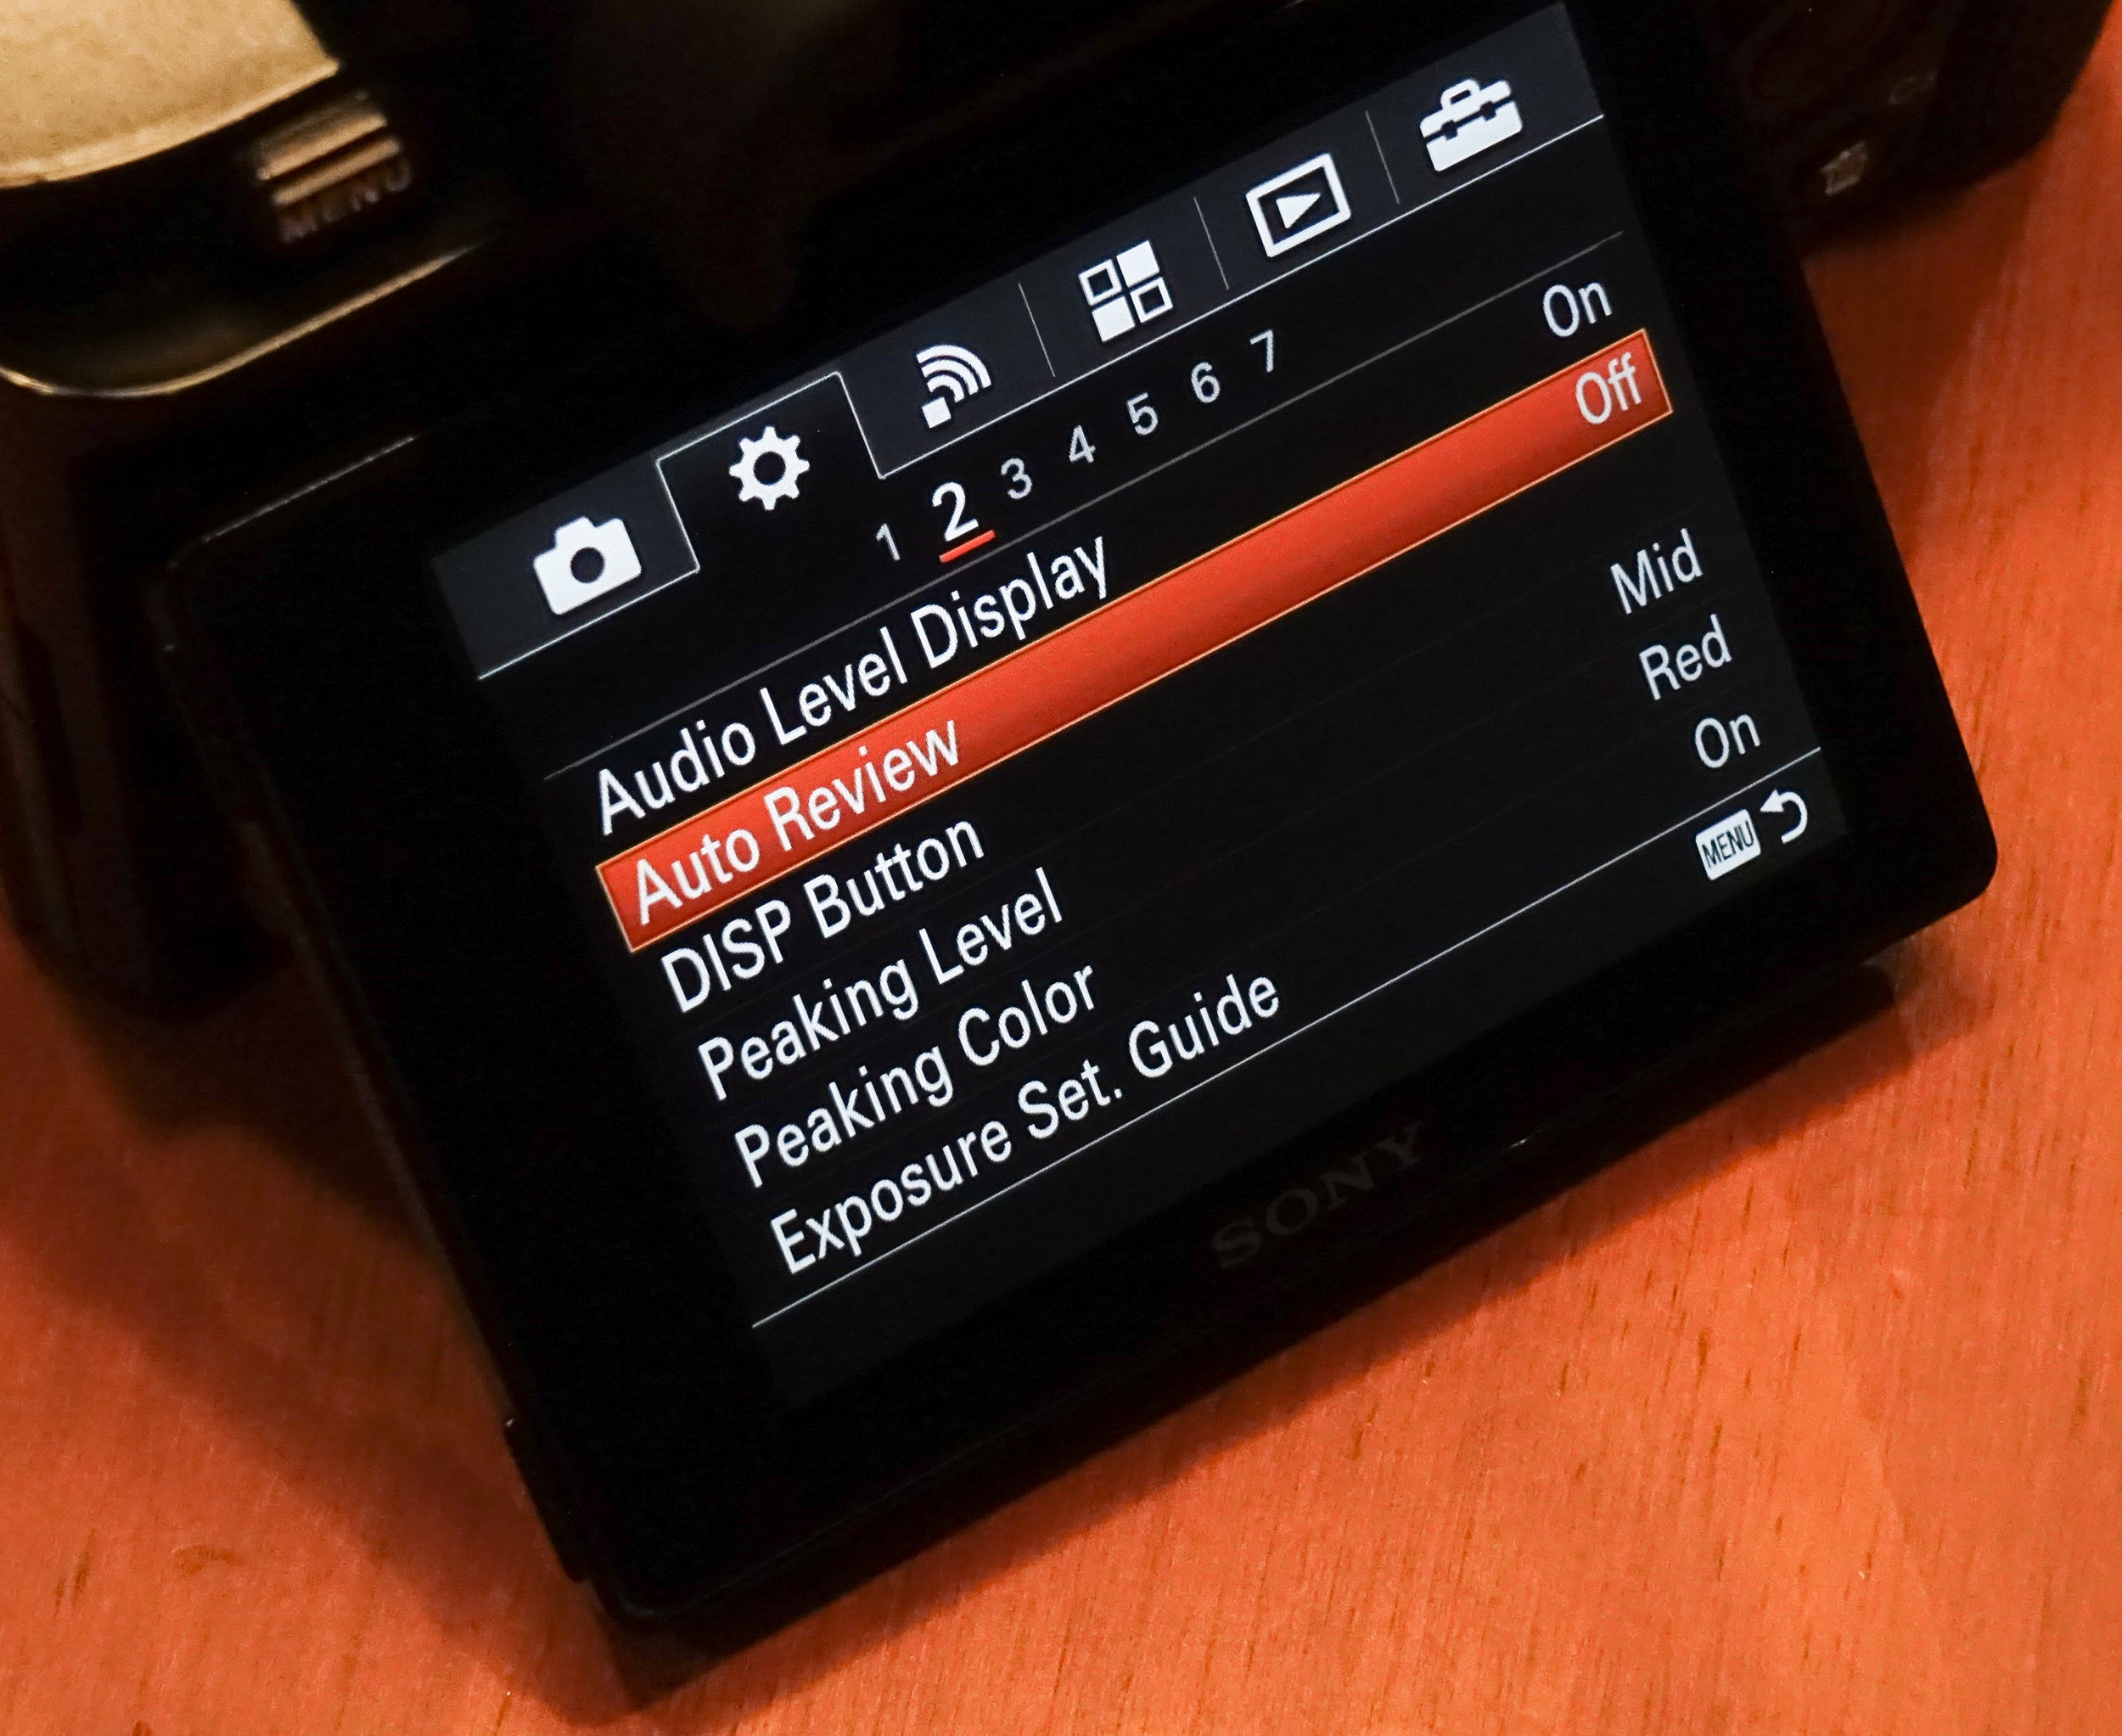
Auto Review
Alpha Universe: Thanks for joining us, Kenta. All of the Sony mirrorless cameras have a lot of features and capabilities that you won’t find on a DSLR. For new converts to mirrorless from a DSLR, where should they start?
Kenta Honjo: The first thing I always tell photographers moving from a DSLR to mirrorless is you want to turn the Auto Review off. Under the Gear Menu, the menu item is Auto Review. By default, Auto Review is on and what that means is whenever you take a shot, it’s going to show you the image for 2 seconds in the viewfinder. As a DSLR user, you're not used to seeing playback in the viewfinder. It’s a very unnatural experience so I highly recommend turning that off. If you're used to looking at the LCD every time you shoot then you can consider keeping it on, but if you're the type of photographer that keeps on shooting with your eye at the viewfinder, then turn it off. So that's number one and that's probably the most important thing.
Alpha Universe: The electronic viewfinder itself is going to be new to a DSLR shooter coming to a Sony mirrorless camera. Can you describe the difference?
Kenta Honjo: When you pick up a mirrorless camera for the first time, you immediately notice the electronic viewfinder and the reason is: you're seeing live view which is different than the DSLR’s optical viewfinder experience. One of the advantages of having electronic viewfinder is that you're able to see the effects of camera adjustments live in the viewfinder. With a DSLR’s optical viewfinder, when you change your exposure, what you're seeing in the viewfinder doesn’t change because it’s collecting the available light at the maximum aperture for that lens. So even if you close down the aperture for the actual exposure, you can't see that in the frame. The EVF’s live view is a great feature, but if you’ve never really experienced it, it takes some getting used to.
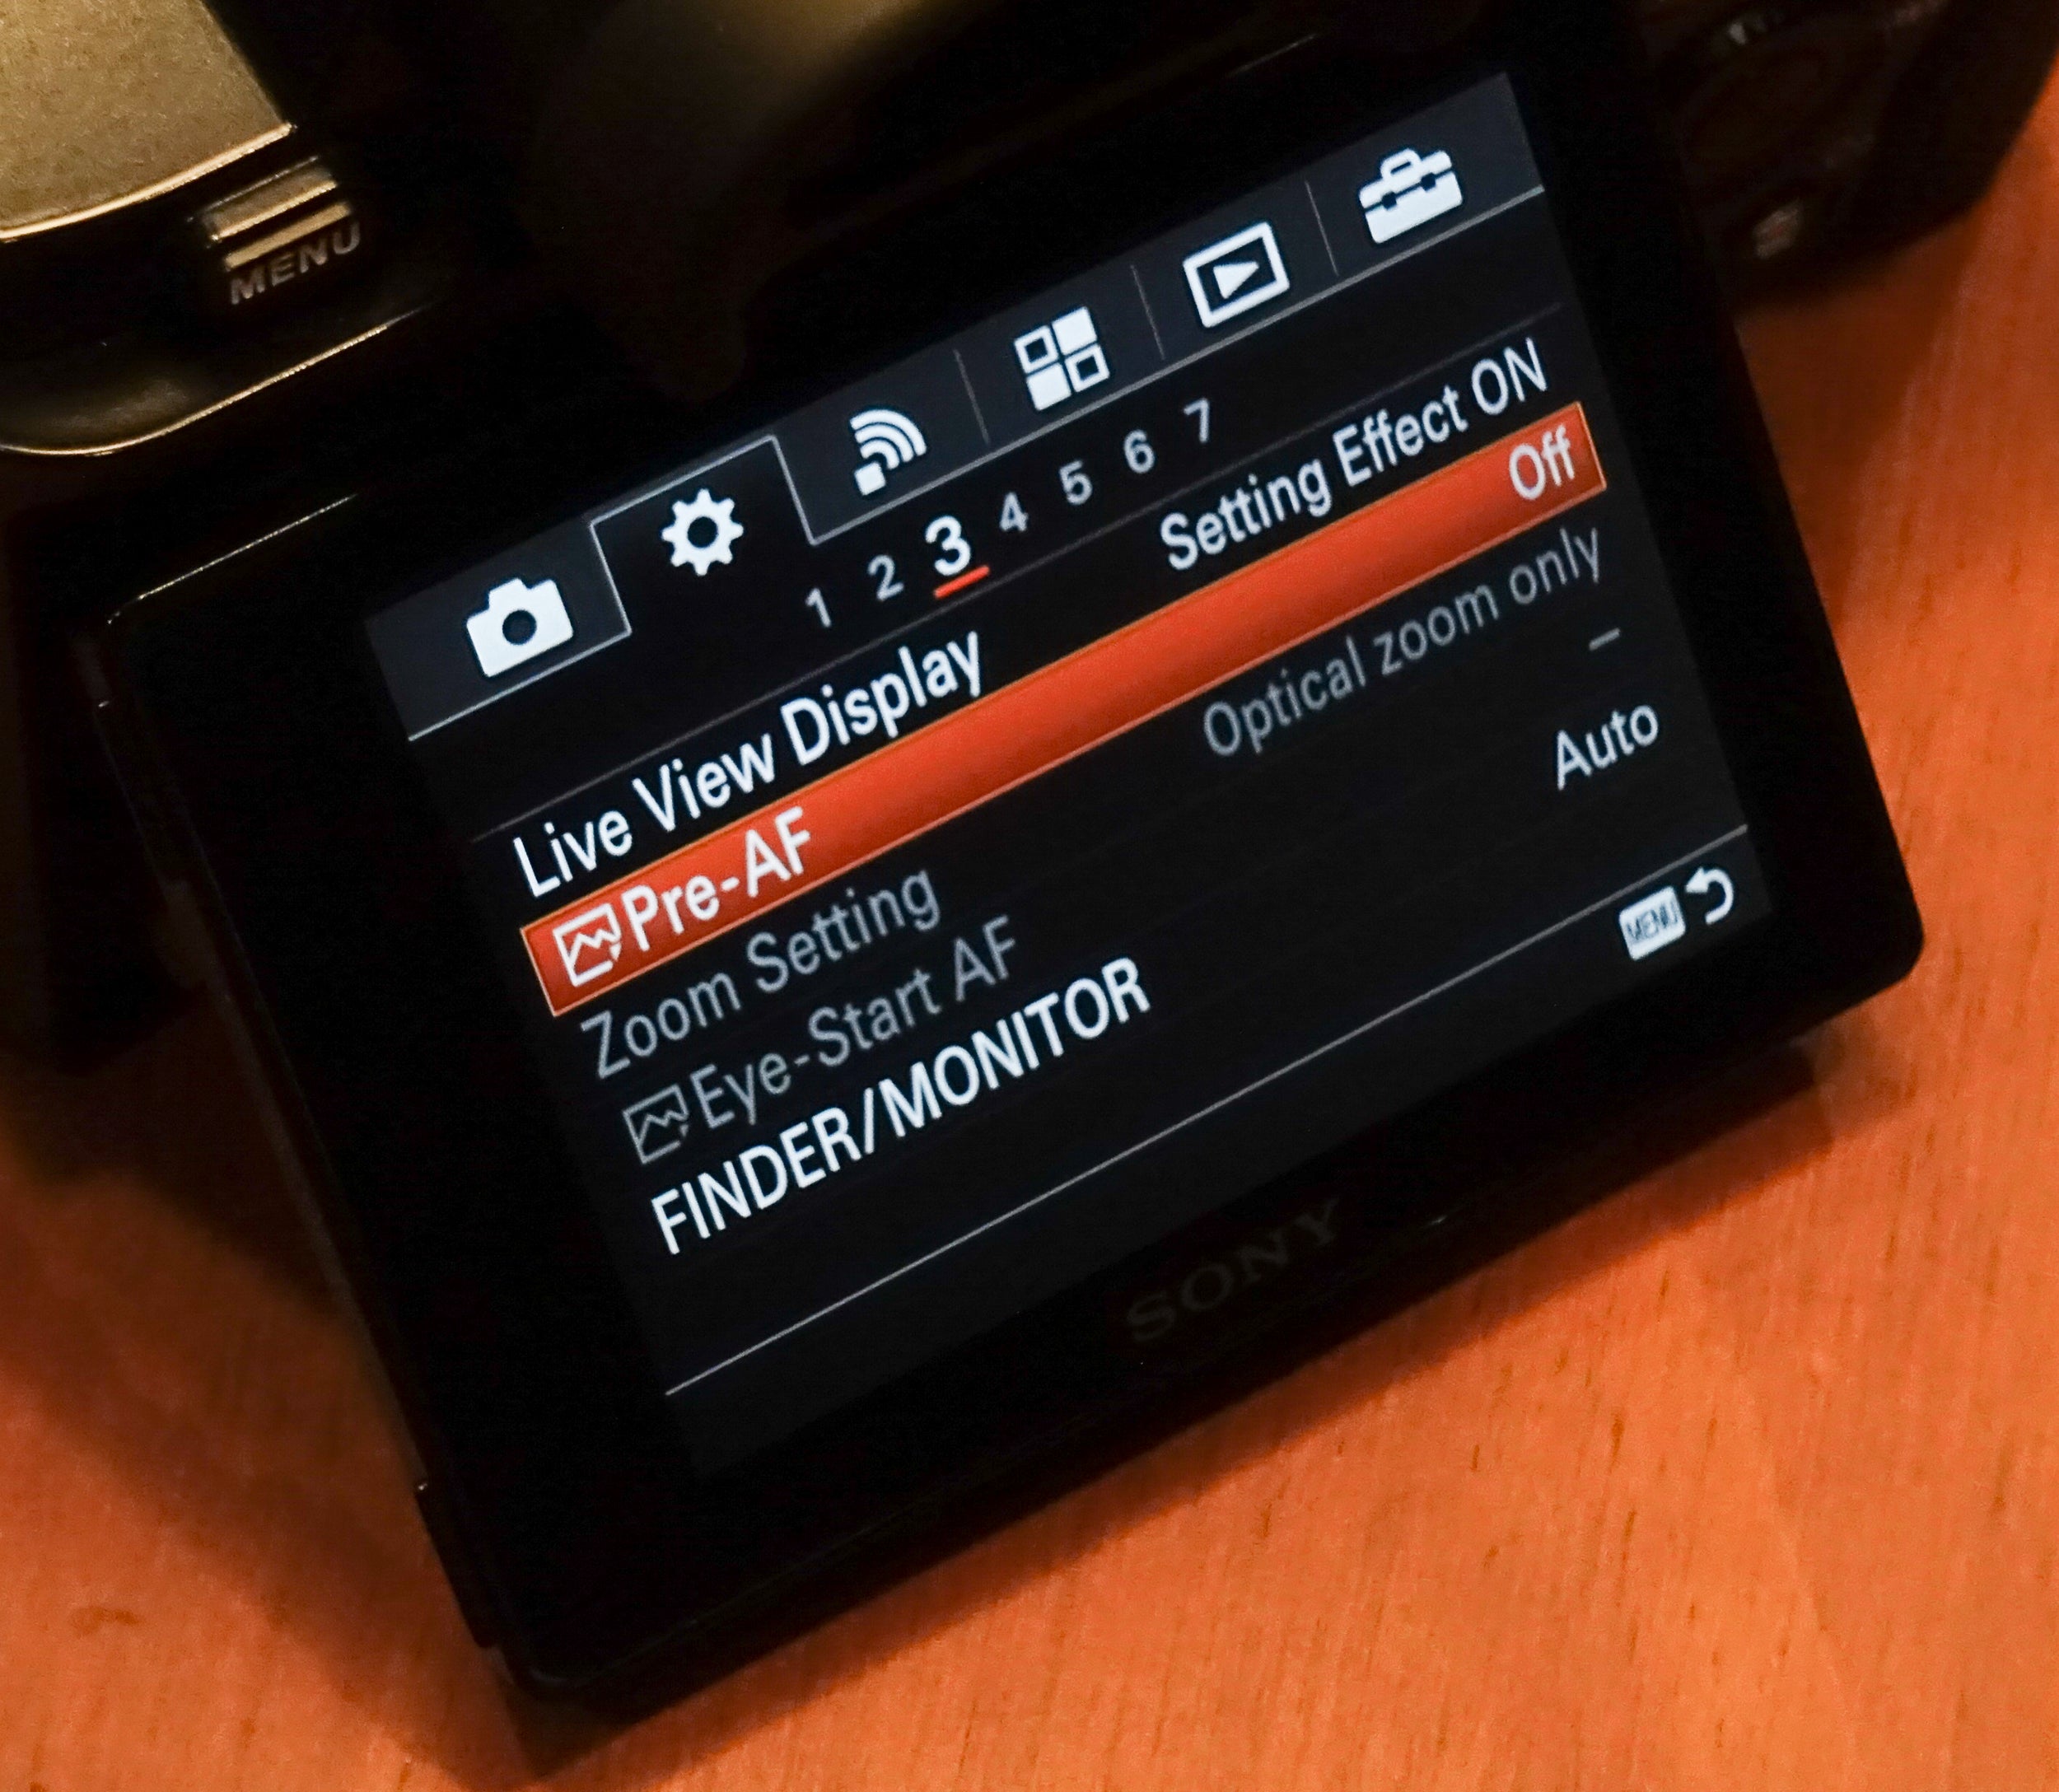
Pre AF
Alpha Universe: How do you suggest new mirrorless users tune the AF system?
Kenta Honjo: Photographers coming from DSLR systems might not be used to the AF system working on demand. On Sony cameras, by default the AF system is going to try to react as fast as possible so sometimes it’s going to move the AF when you're not actually half pressing the shutter button. Coming from a DSLR, you might want to turn that Pre-AF off. It’s under the Gear Menu. Set Pre-AF to off. That also conserves a little bit of battery power. Although I’m an experienced Sony mirrorless camera user, I tend to turn off Pre AF myself because I like to be in more direct control of the camera.
Setting Back Button & AEL Button
Alpha Universe: What about Back Button AF?
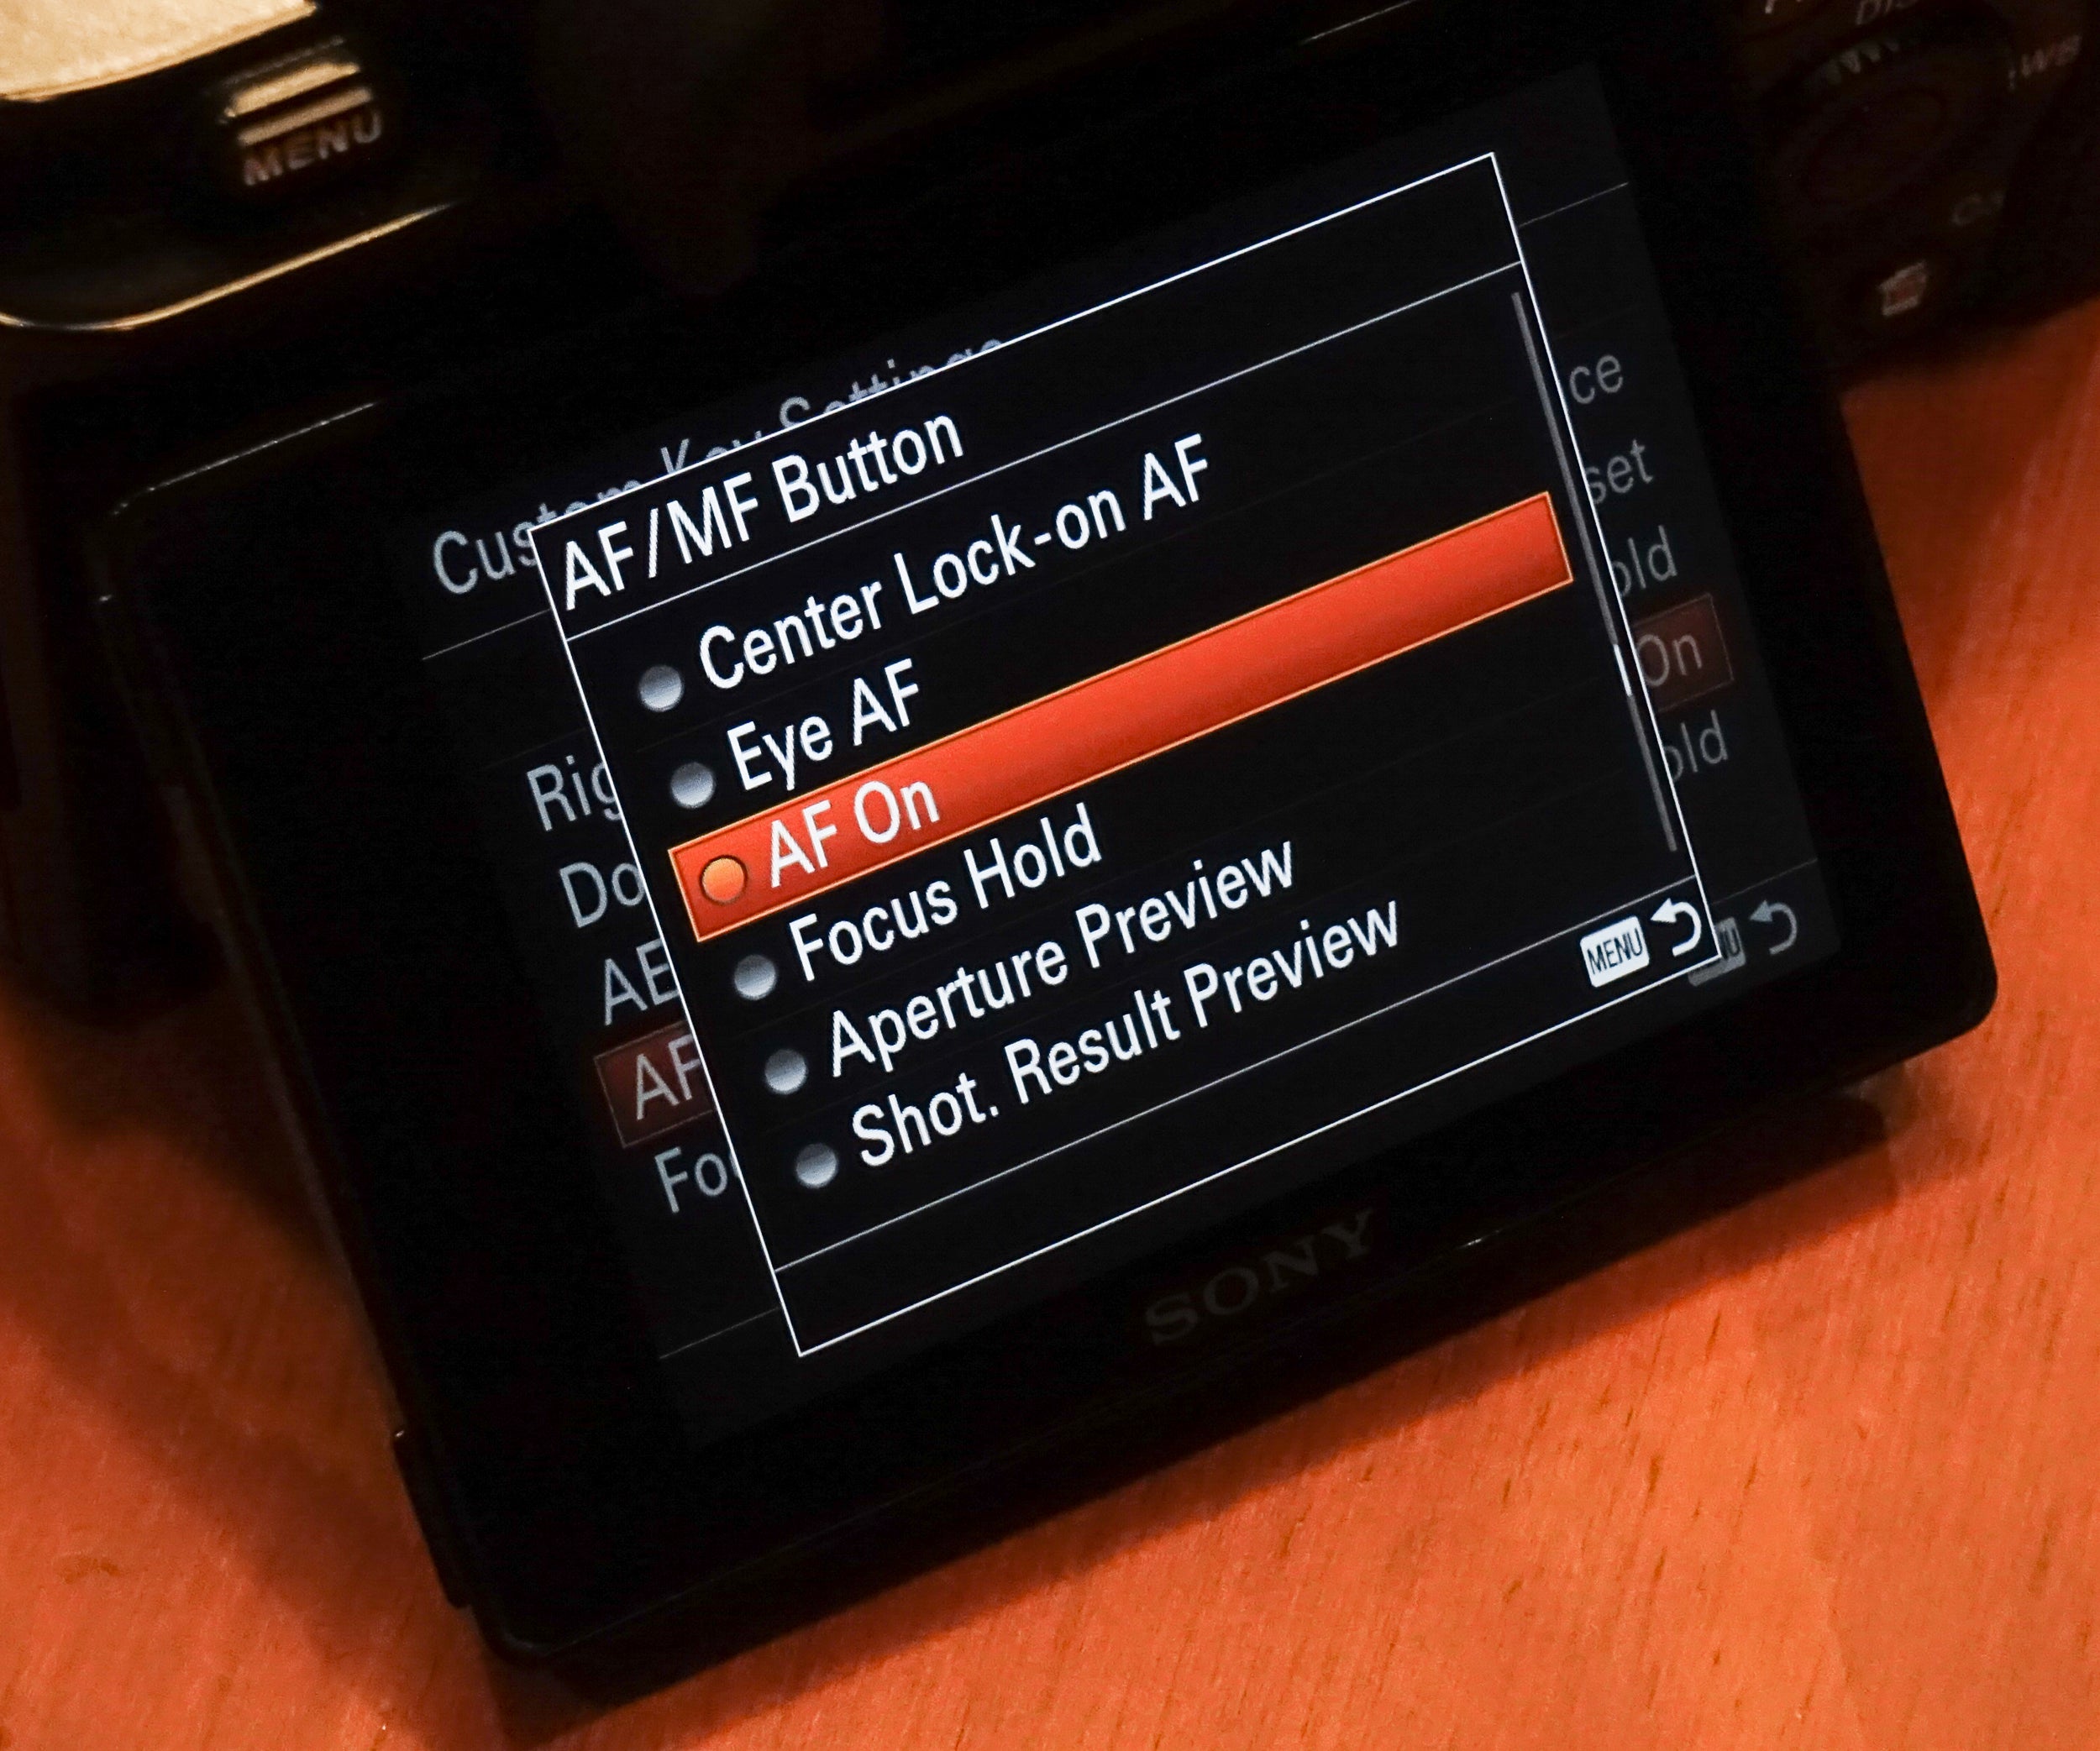
Kenta Honjo: Yes, a lot of Canon and Nikon users really rely on back button AF. Sony cameras by default have the AF activation as the half press on the shutter button and the back button as AF/MF, but you can change that. What I suggest you do is customize the AEL and AF/MF switch and button. Go into the menu and set it so that the AF/MF button is AF on. A lot of people like that, especially for shooting sports.
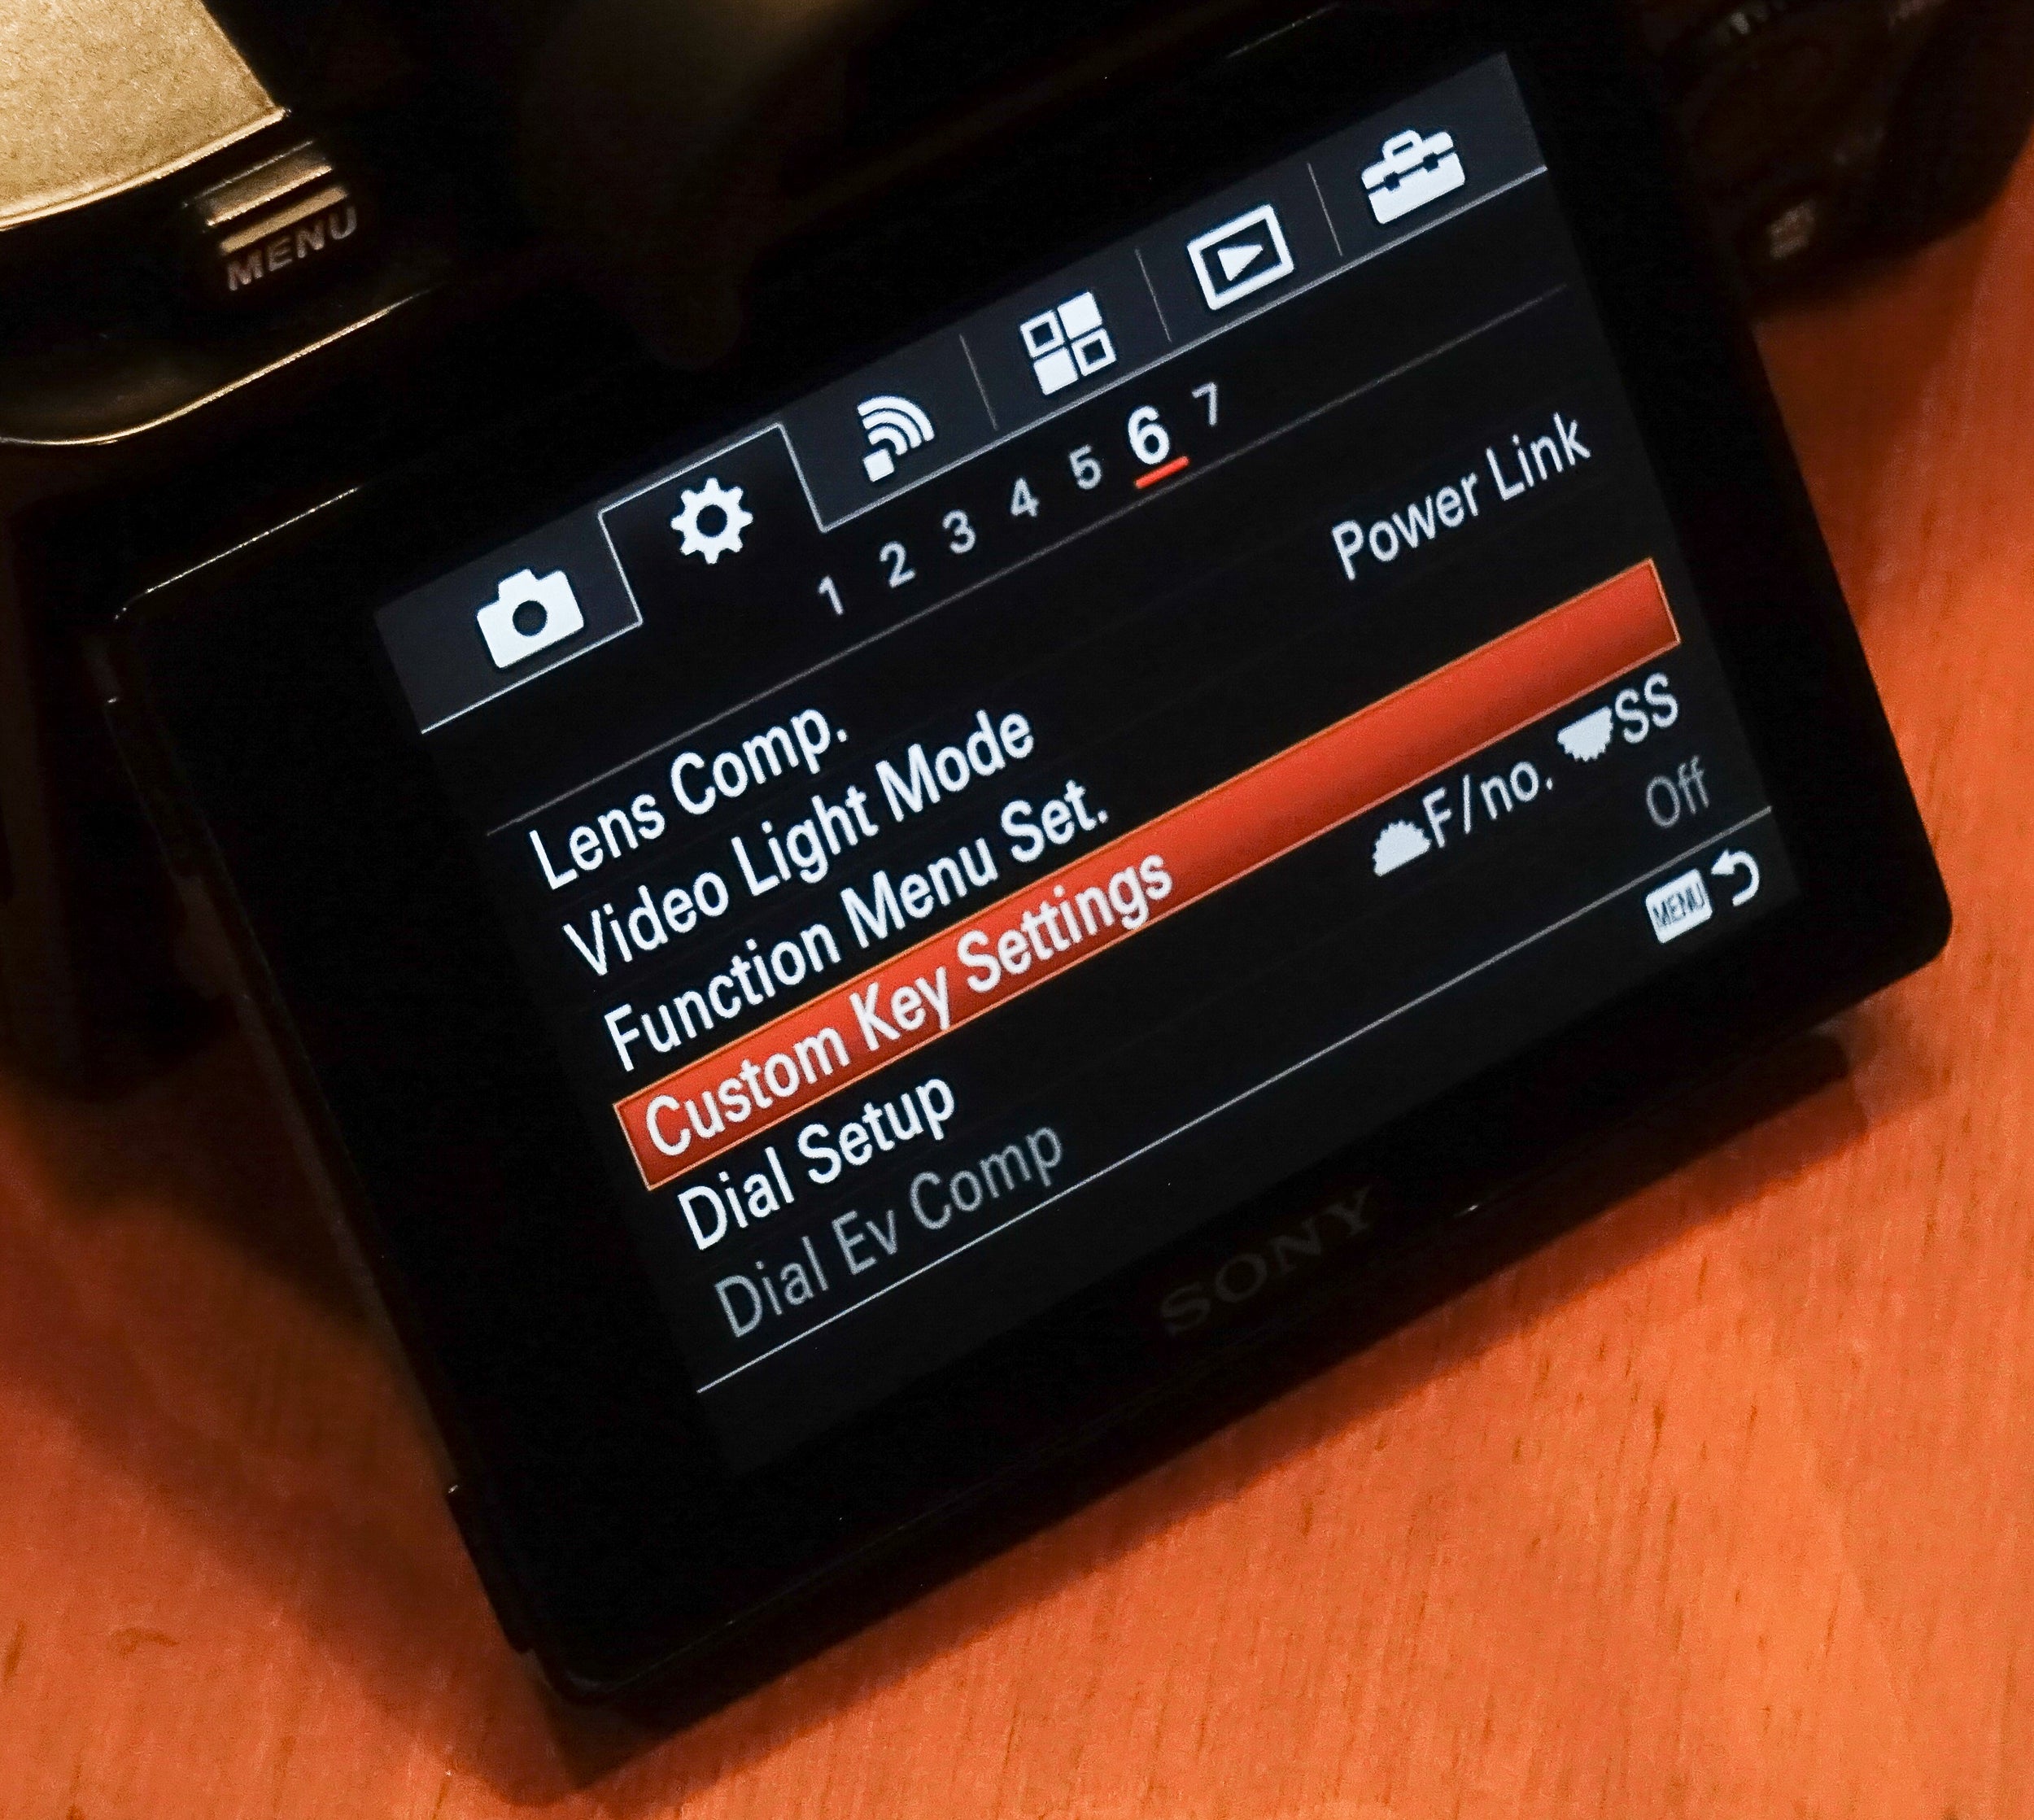
To customize the AEL and AF/MF switch and the AF/MF button, go to the Gear Menu and look for the Custom Key Settings. You’ll find the AEL Button and AF/MF Button settings here.
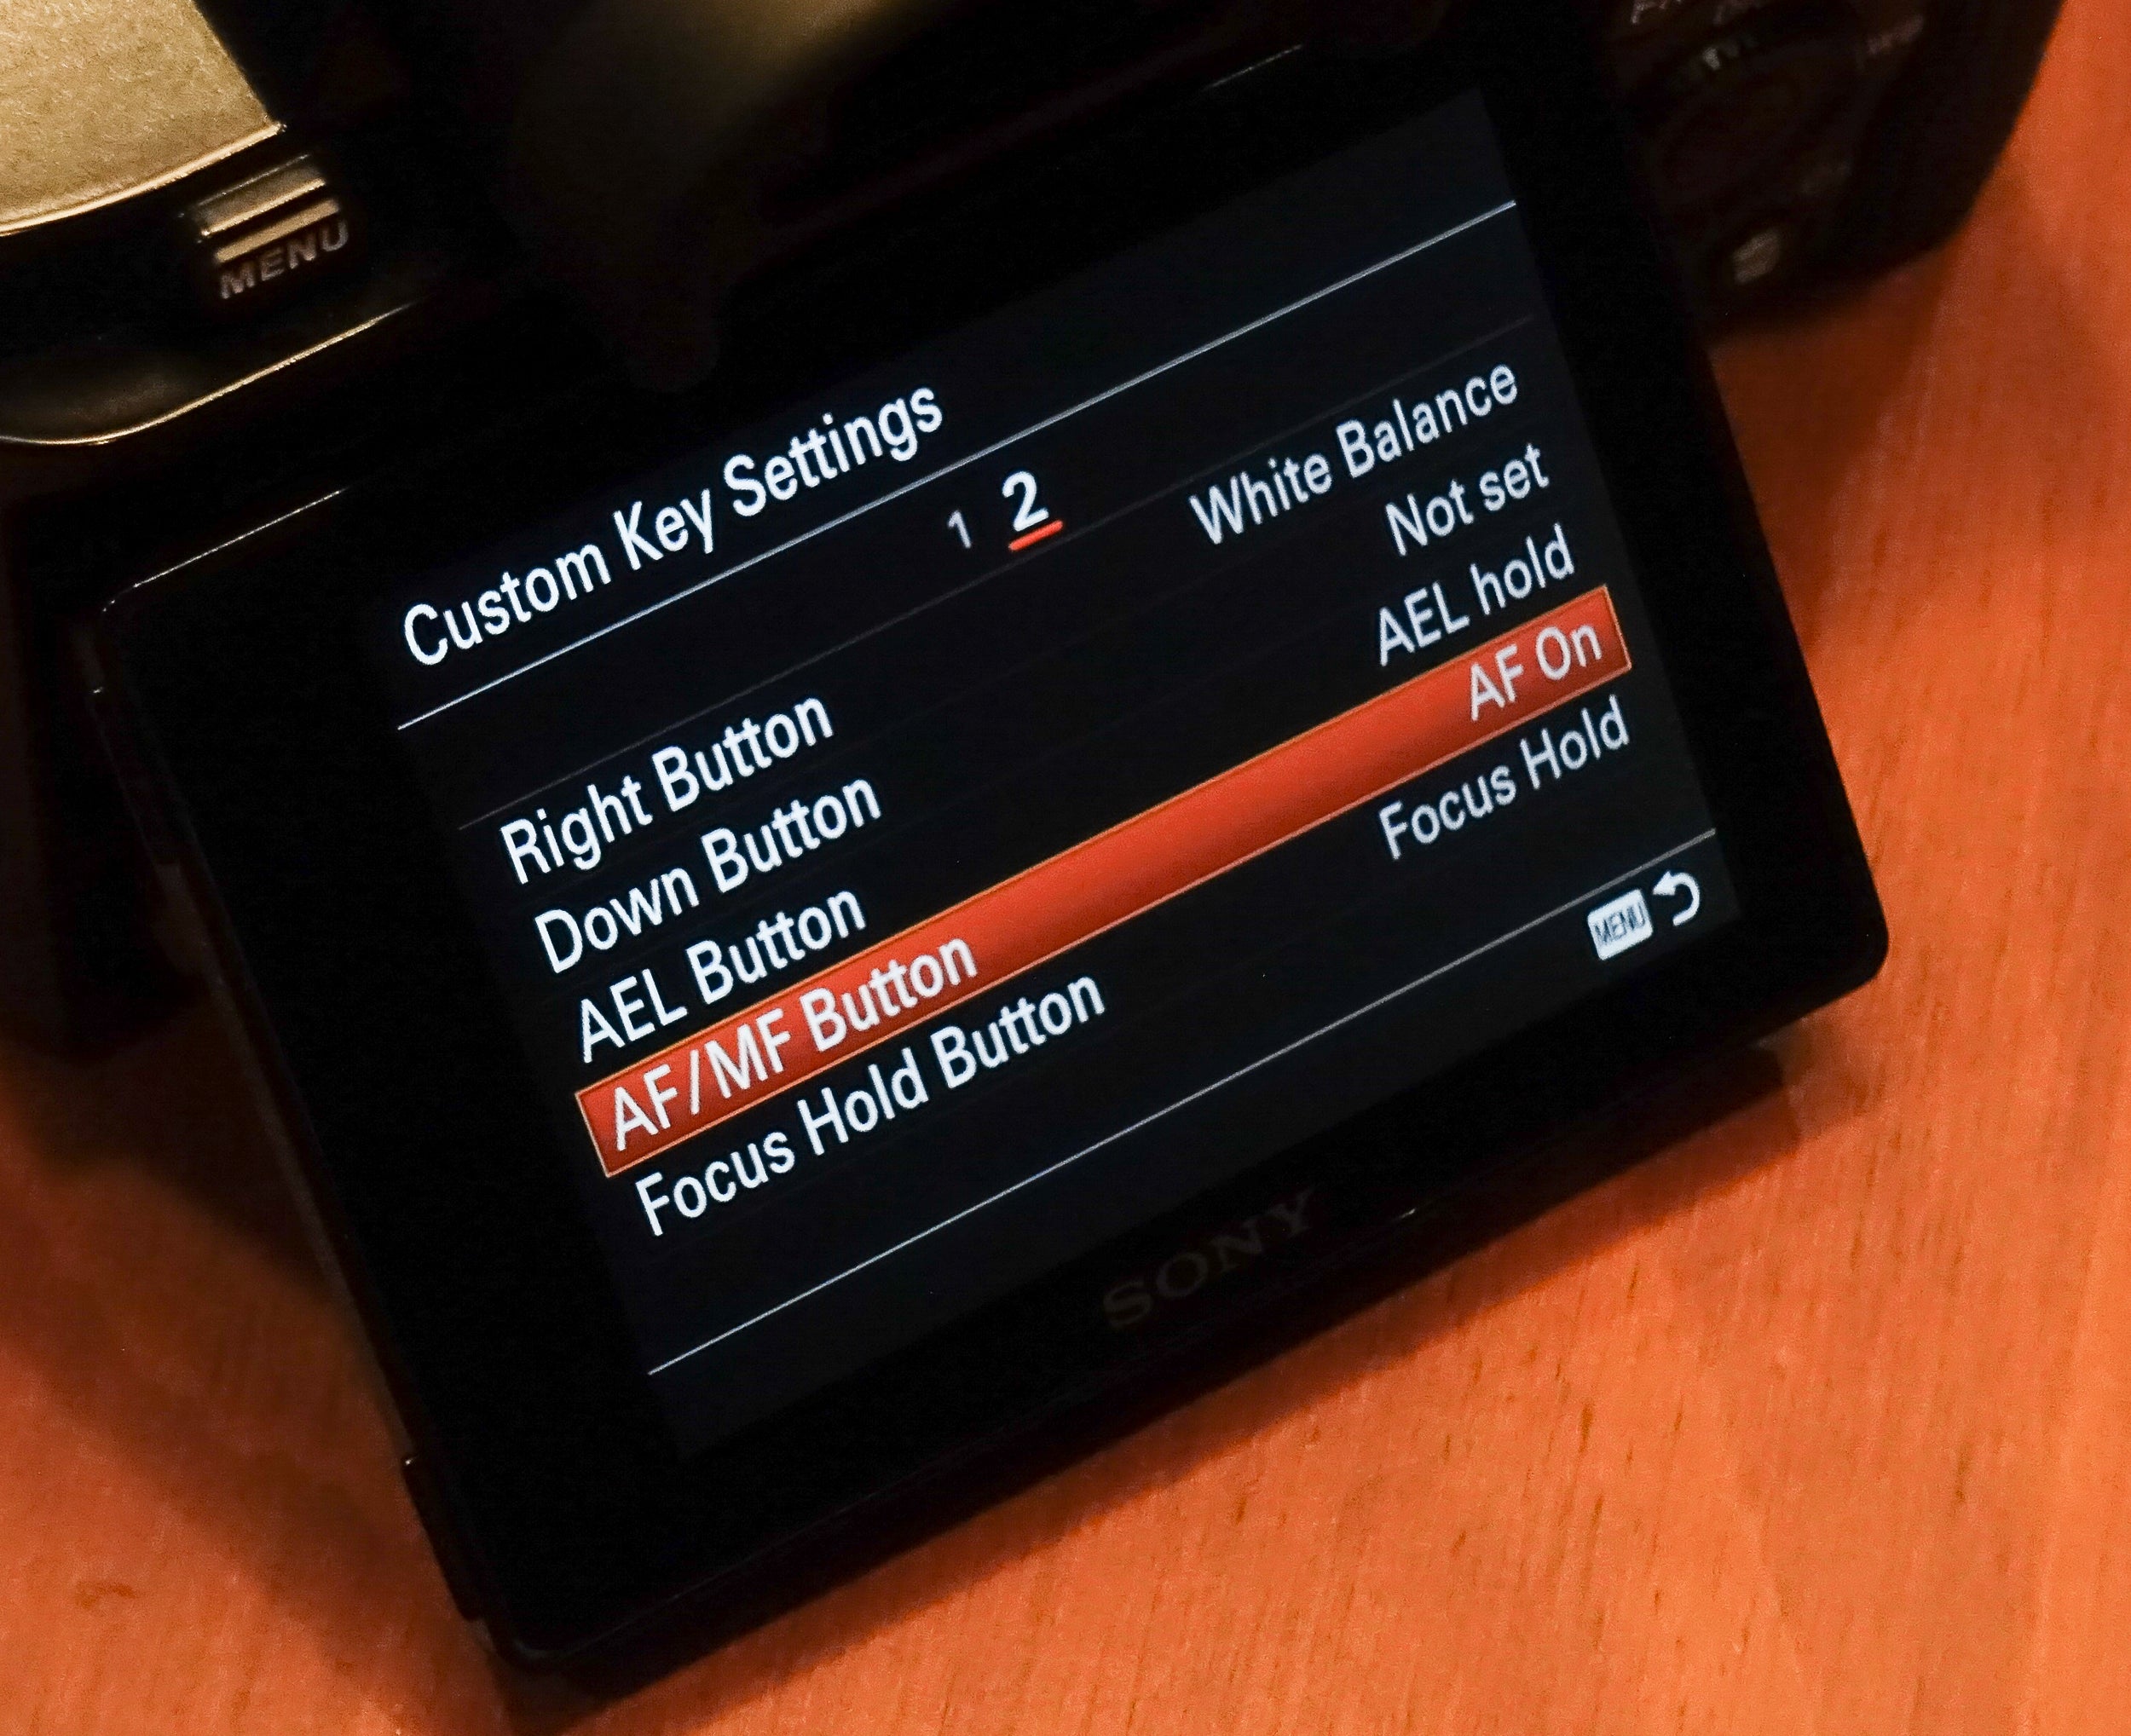
What I recommend is to set AF/MF Button to be Back Button AF and set AEL to be Eye-AF. This is up to your personal preference. AEL can be really useful so you might want to keep it as exposure lock.
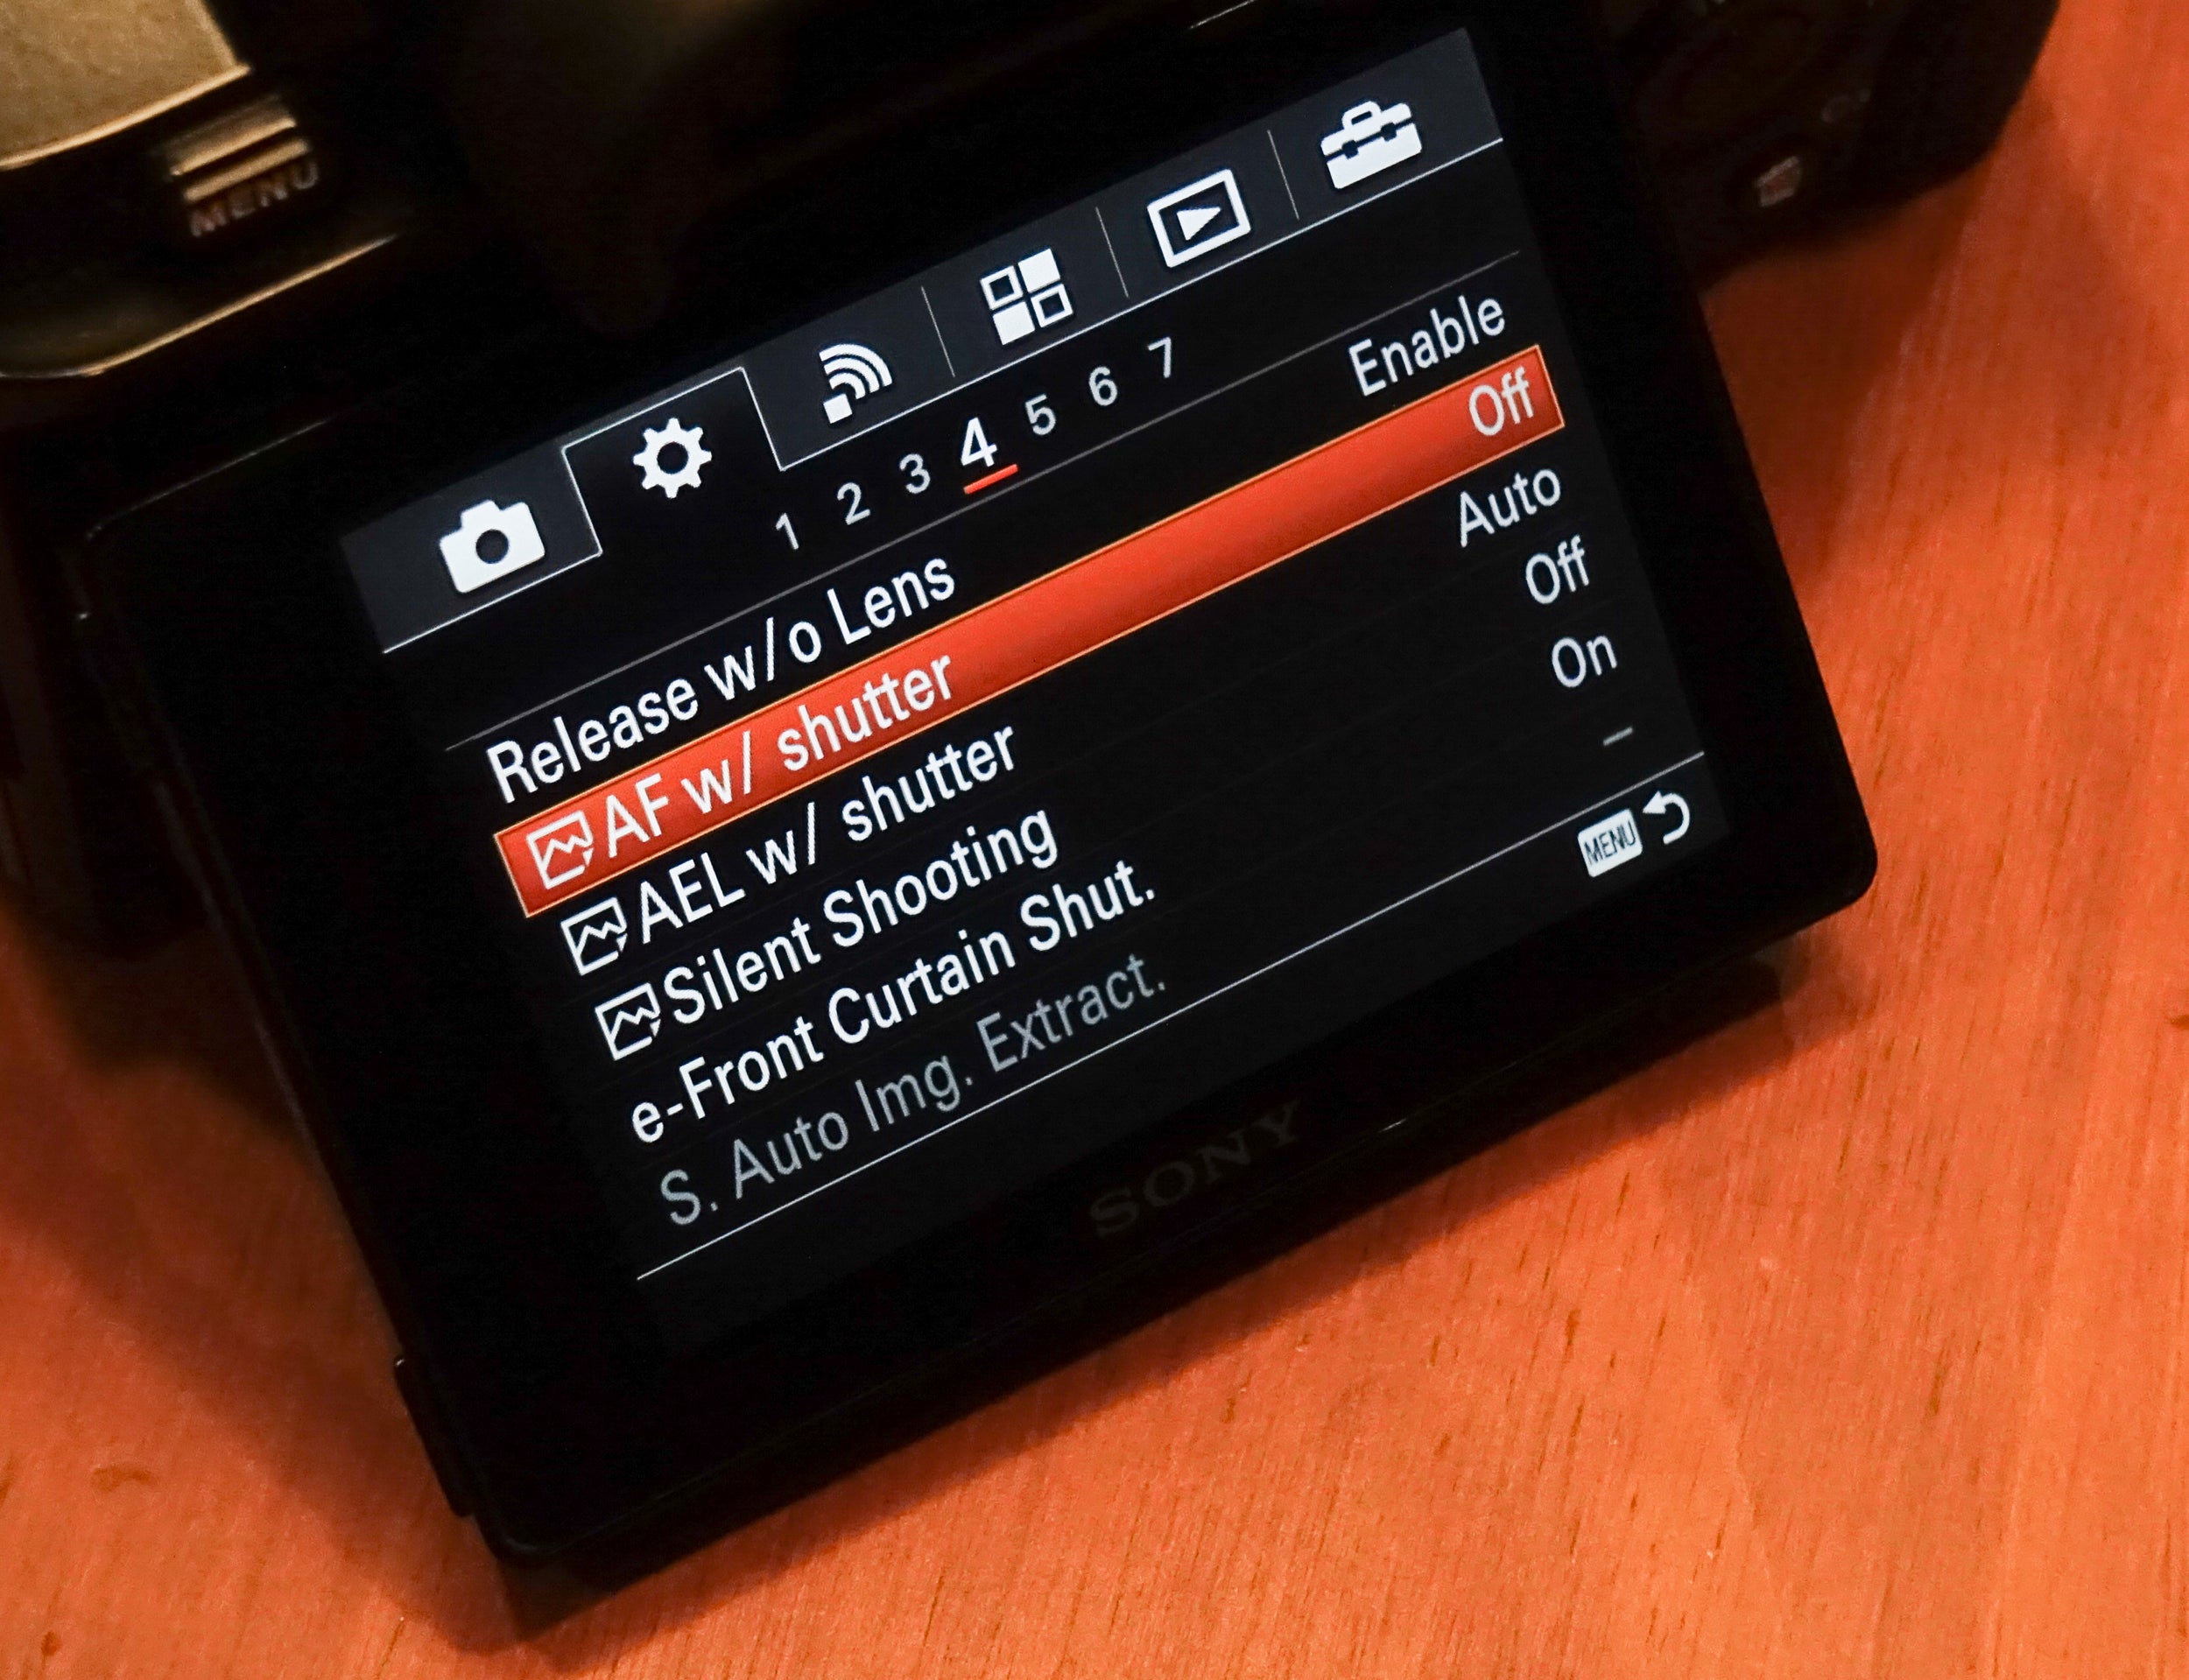
Note, once you’ve assigned Back Button AF to the AF/MF button, you’ll want to disassociate the AF activation with the half press of the shutter button. To do that, go to Gear Menu to find the AF W/Shutter option, and turn that off.
Eye AF
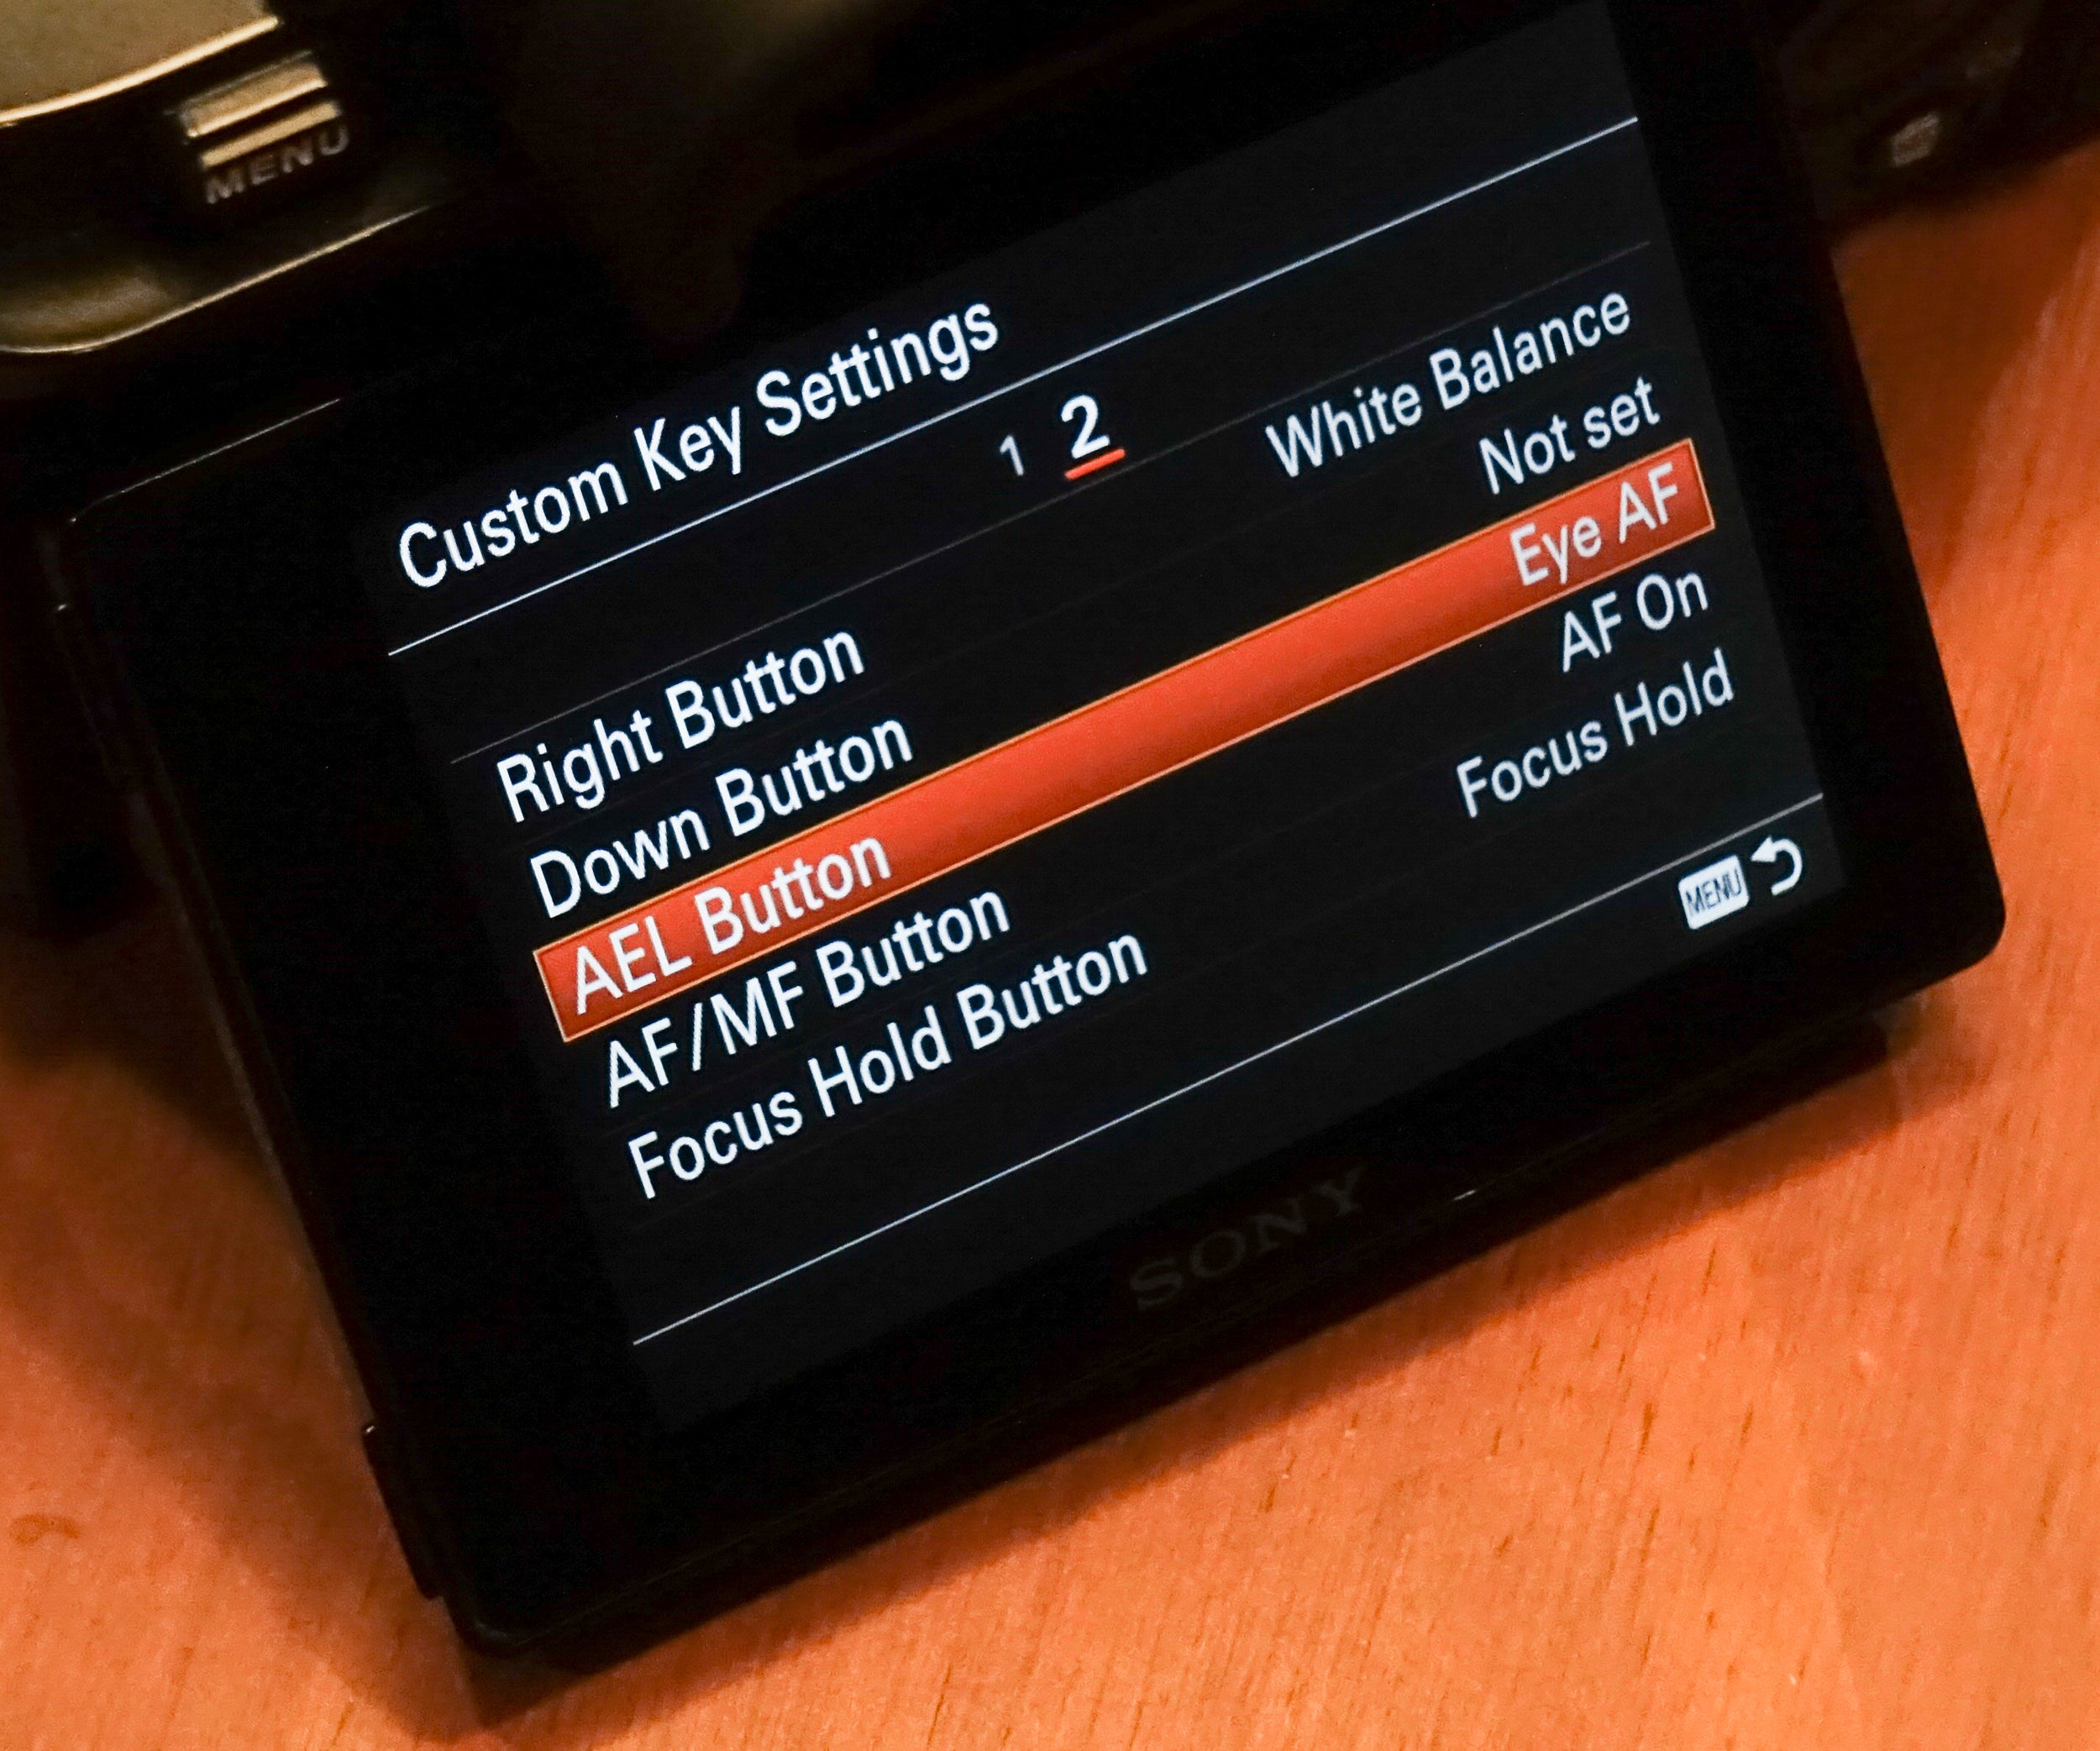
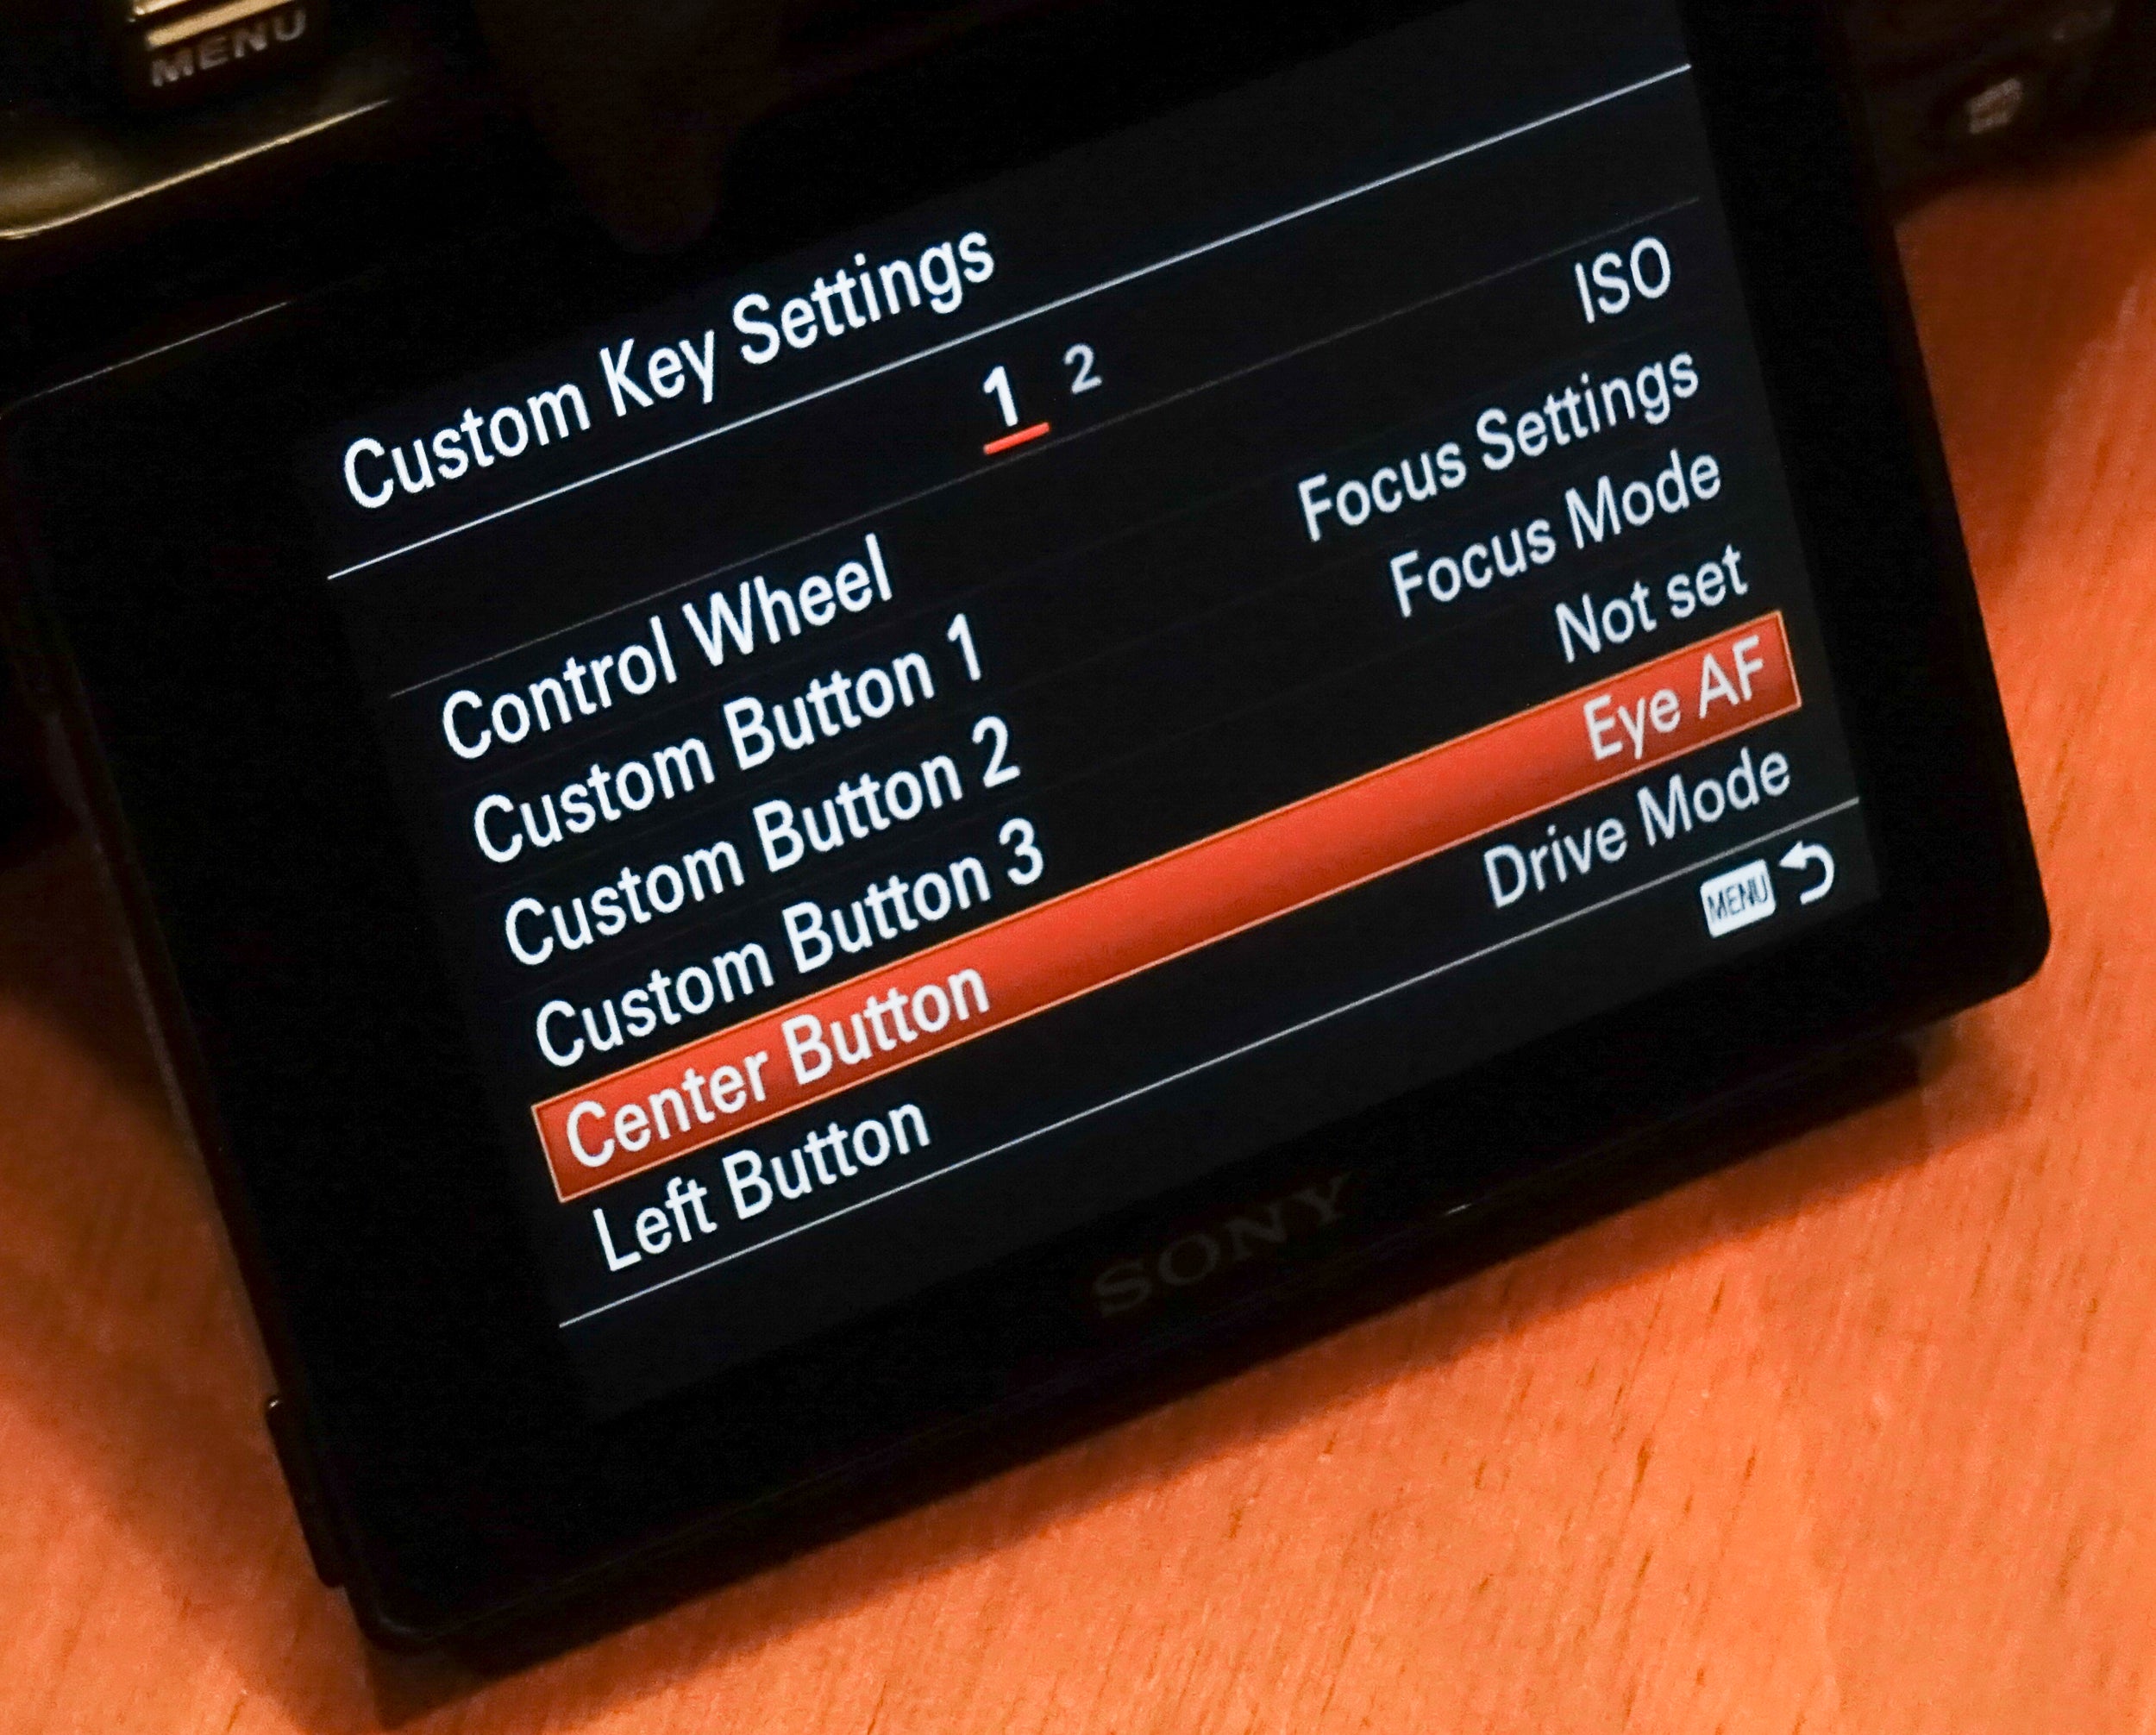
Alpha Universe: You mentioned Eye-AF. A lot of people set Eye-AF on the Center Button. Why do you suggest programing Eye AF on the AEL Button?
Kenta Honjo: The reason why is because a lot of photographers probably won’t use Eye-AF all the time. Its only for certain situations while the Center Button is really useful to change the AF points quickly, so I tend to separate that out. But it’s up the photographer because if you don’t use Back Button AF, then you can always set AF as the half press on the shutter button and Eye-AF on the Back Button.
You can hear more from Sony's Kenta Honjo in the Alpha Universe Podcast where he's a frequent guest in the Tech Talk segment.


