In more recent years RAW image converters have been able to use metadata to correct for certain lens issues. Namely, distortion, chromatic aberration, vignetting (light fall off) and sharpness issues. Meta data from the RAW file (Focal Length, Aperture, Focussing Distance and more) is compared to a table of lens parameters and then corrections made at pixel level to the image.
It’s important to note that lens corrections performed in this way cannot make a bad lens a good lens, but it can go a long way to improving an already good lens.
With that in mind, it’s a great tool to optimize your images.
Capture One & Lens Corrections
Capture One, like other RAW converters, also relies on tables of lens parameters but has an additional trick up its sleeve with regards to working with Sony cameras. Sony is one of the few manufacturers that embed enough data in the RAW file to correct for lens errors, without the need to compare to any tables of lens performance. This is what is shown as the Manufacturer Profile in Capture One’s Lens Correction tool.
Therefore, in Capture One you will see one of two things happen…
If the lens has been profiled by Phase One for Capture One, the lens model is named in the Profile menu.
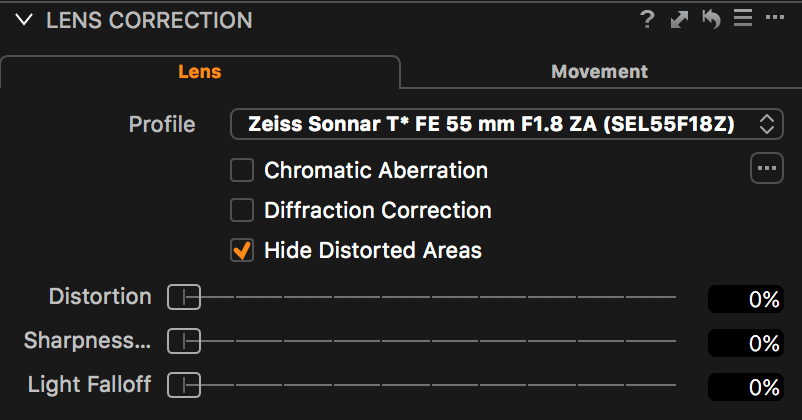
Lens Correction tool showing Phase One made profile
If the lens has not been profiled by Phase One for Capture One, the Profile menu shows Manufacturer Profile
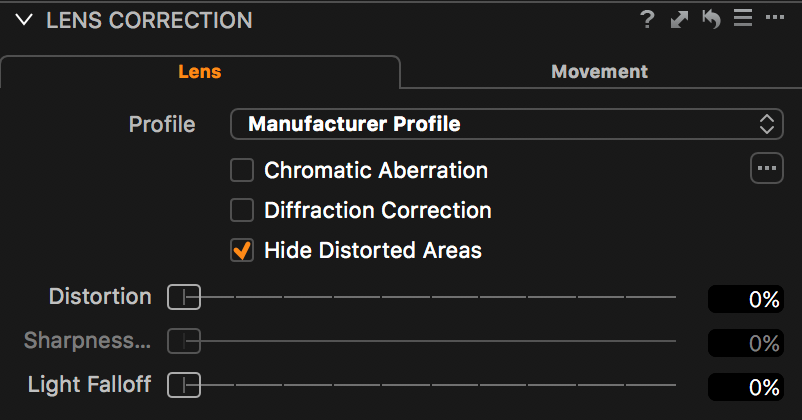
Lens Correction tool showing Manufacturer Profile
Is one better than the other? The right answer is that both methods will give you enhanced quality from your Sony lenses, which is the whole purpose! The Manufacturer Profile is certainly not to be thought of as a low rate solution.
What the Phase One made profile does additionally is also correct sharpness fall off, which is why the adjustment slider is greyed out in the Manufacturer Profile option.
By Default, and if available, Capture One will choose the Phase One made profile over the Manufacturer Profile because of the additional correction parameter.
The benefit of the Manufacturer Profile is that all of your modern Sony lenses are immediately supported in Capture One. You don’t have to wait for the lens to be profiled or be forced to use a generic profile.
Correction Possibilities
The adjustment sliders in the Lens Correction tool are fairly self-explanatory. They are…
- Distortion – Corrects for distortion, typically seen in wider angle lenses
- Sharpness Falloff – Corrects for softness towards the edge of lenses
- Light Falloff – Corrects for loss of light towards the edge of lenses (Vignetting)
By default, the values you see on the sliders may vary.
For heavily distorted lenses, for example the Sony FE 28mm, the Distortion slider if set to 100%.
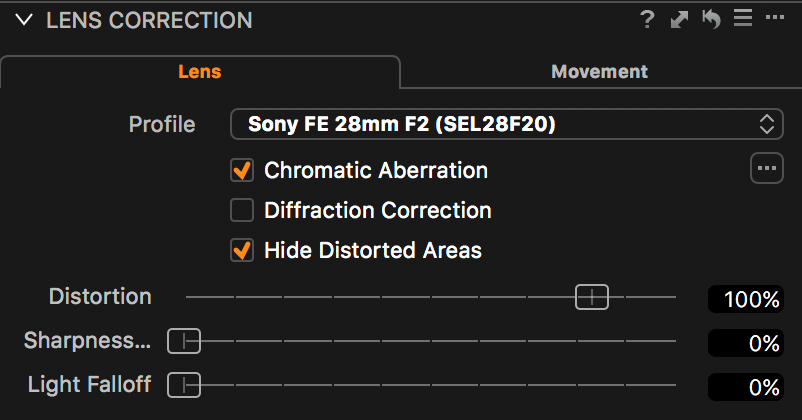
Lens Correction tool with the Sony FE 28mm
For lenses that have very low distortion, for example the Zeiss 55mm ZA the distortion slider will be set to zero. There is virtually no benefit to adjusting it to 100%
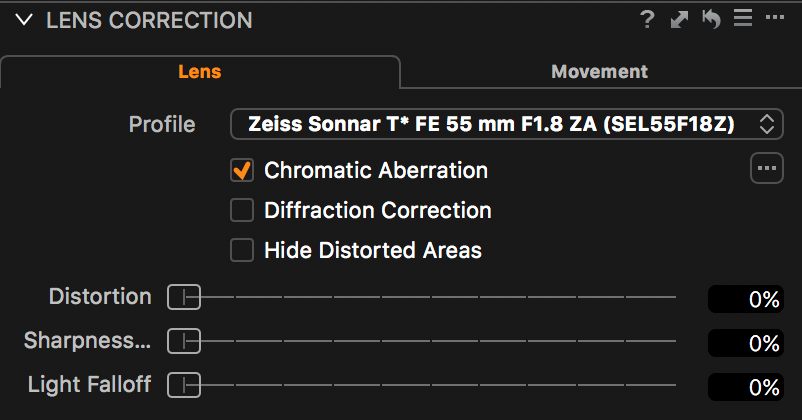
Lens Correction tool with the Zeiss 55mm ZA
There are also two further check boxes correcting for…
- Chromatic Aberration – Light splitting into Red, Green and Blue channels showing as halos around high contrast areas
- Diffraction Correction – Correcting for loss of sharpness when using smaller apertures, typically f11 and upwards
As no two lens and camera combinations are completely identical (Sample Variation) there is an additional option to correct for Chromatic Aberration for your exact camera and lens combination.
Click on the “…” to the right of the Chromatic Aberration check box and choose to Analyze the image.
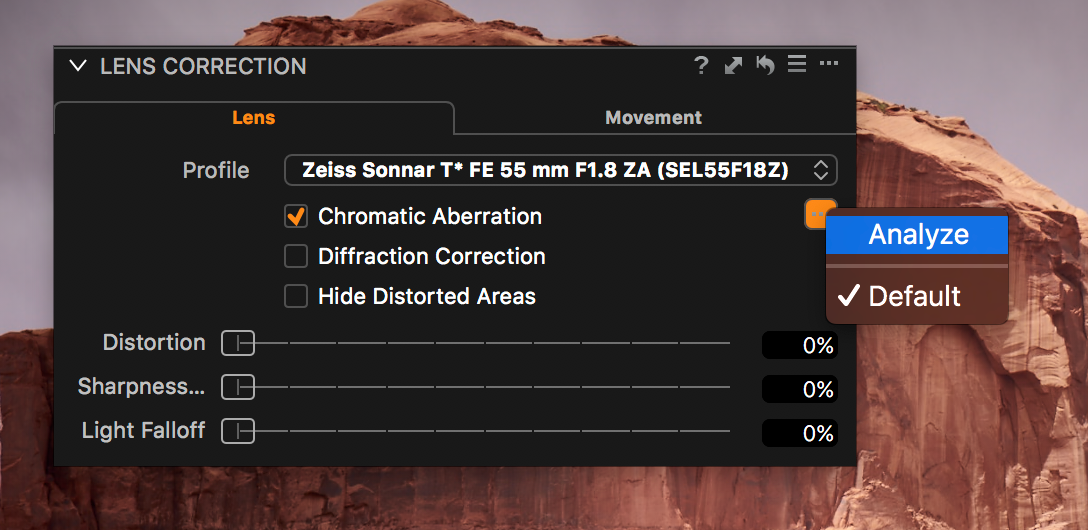
Chromatic Aberration Analysis
Capture One will rapidly asses the image for Chromatic Aberration and apply a bespoke correction. This can be done on a selection of images, simply select all your images first and choose the Analyze option on one image. All images will be corrected.
Diffraction Correction uses a different kind of sharpening to specifically correct for softer images when using smaller apertures. Smaller aperture entrances cause the light to be disturbed as it enters the lens, causing a reduction in sharpness.
By default, this option is always off. Images with this option checked on will take longer to process, but it can significantly improve the sharpness. As mentioned before, there is no benefit when shooting with larger apertures. Check the box on and off with the image zoomed at 100% to see if there is an improvement.
If you prefer to have full control over what corrections are applied to your images, you can always choose to disable all lens corrections. Click on the tool sub menu (the “…”) and choose Disable default lens corrections.
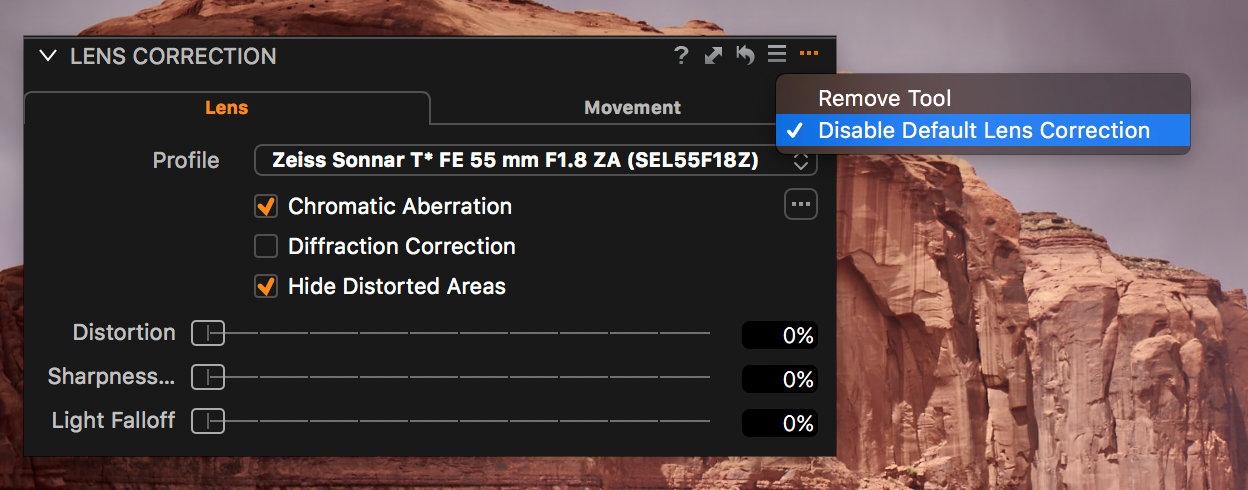
Disabling all Lens Corrections
This will only apply to additionally images coming into your catalog or session, not to current images.
The good news is, if you do nothing after reading this article, you are still getting the benefit of default lens corrections either with a Capture One Profile or Manufacturer Profile. Your images are better for it, with minimum effort!


