On Monday, August 21, the United States will be the only country to view the solar eclipse in its entirety. The last time the whole country was witness to the sun completely disappearing behind the moon was in 1918. Due to the rarity and beauty of this event, many photographers are going to want to capture it. While it’s exciting to experience, it’s important to remember to protect yourself and your gear when photographing this natural phenomenon. We have compiled some resources to help you get the photographs you want – and safely:
Plan Your Location and Be Ready
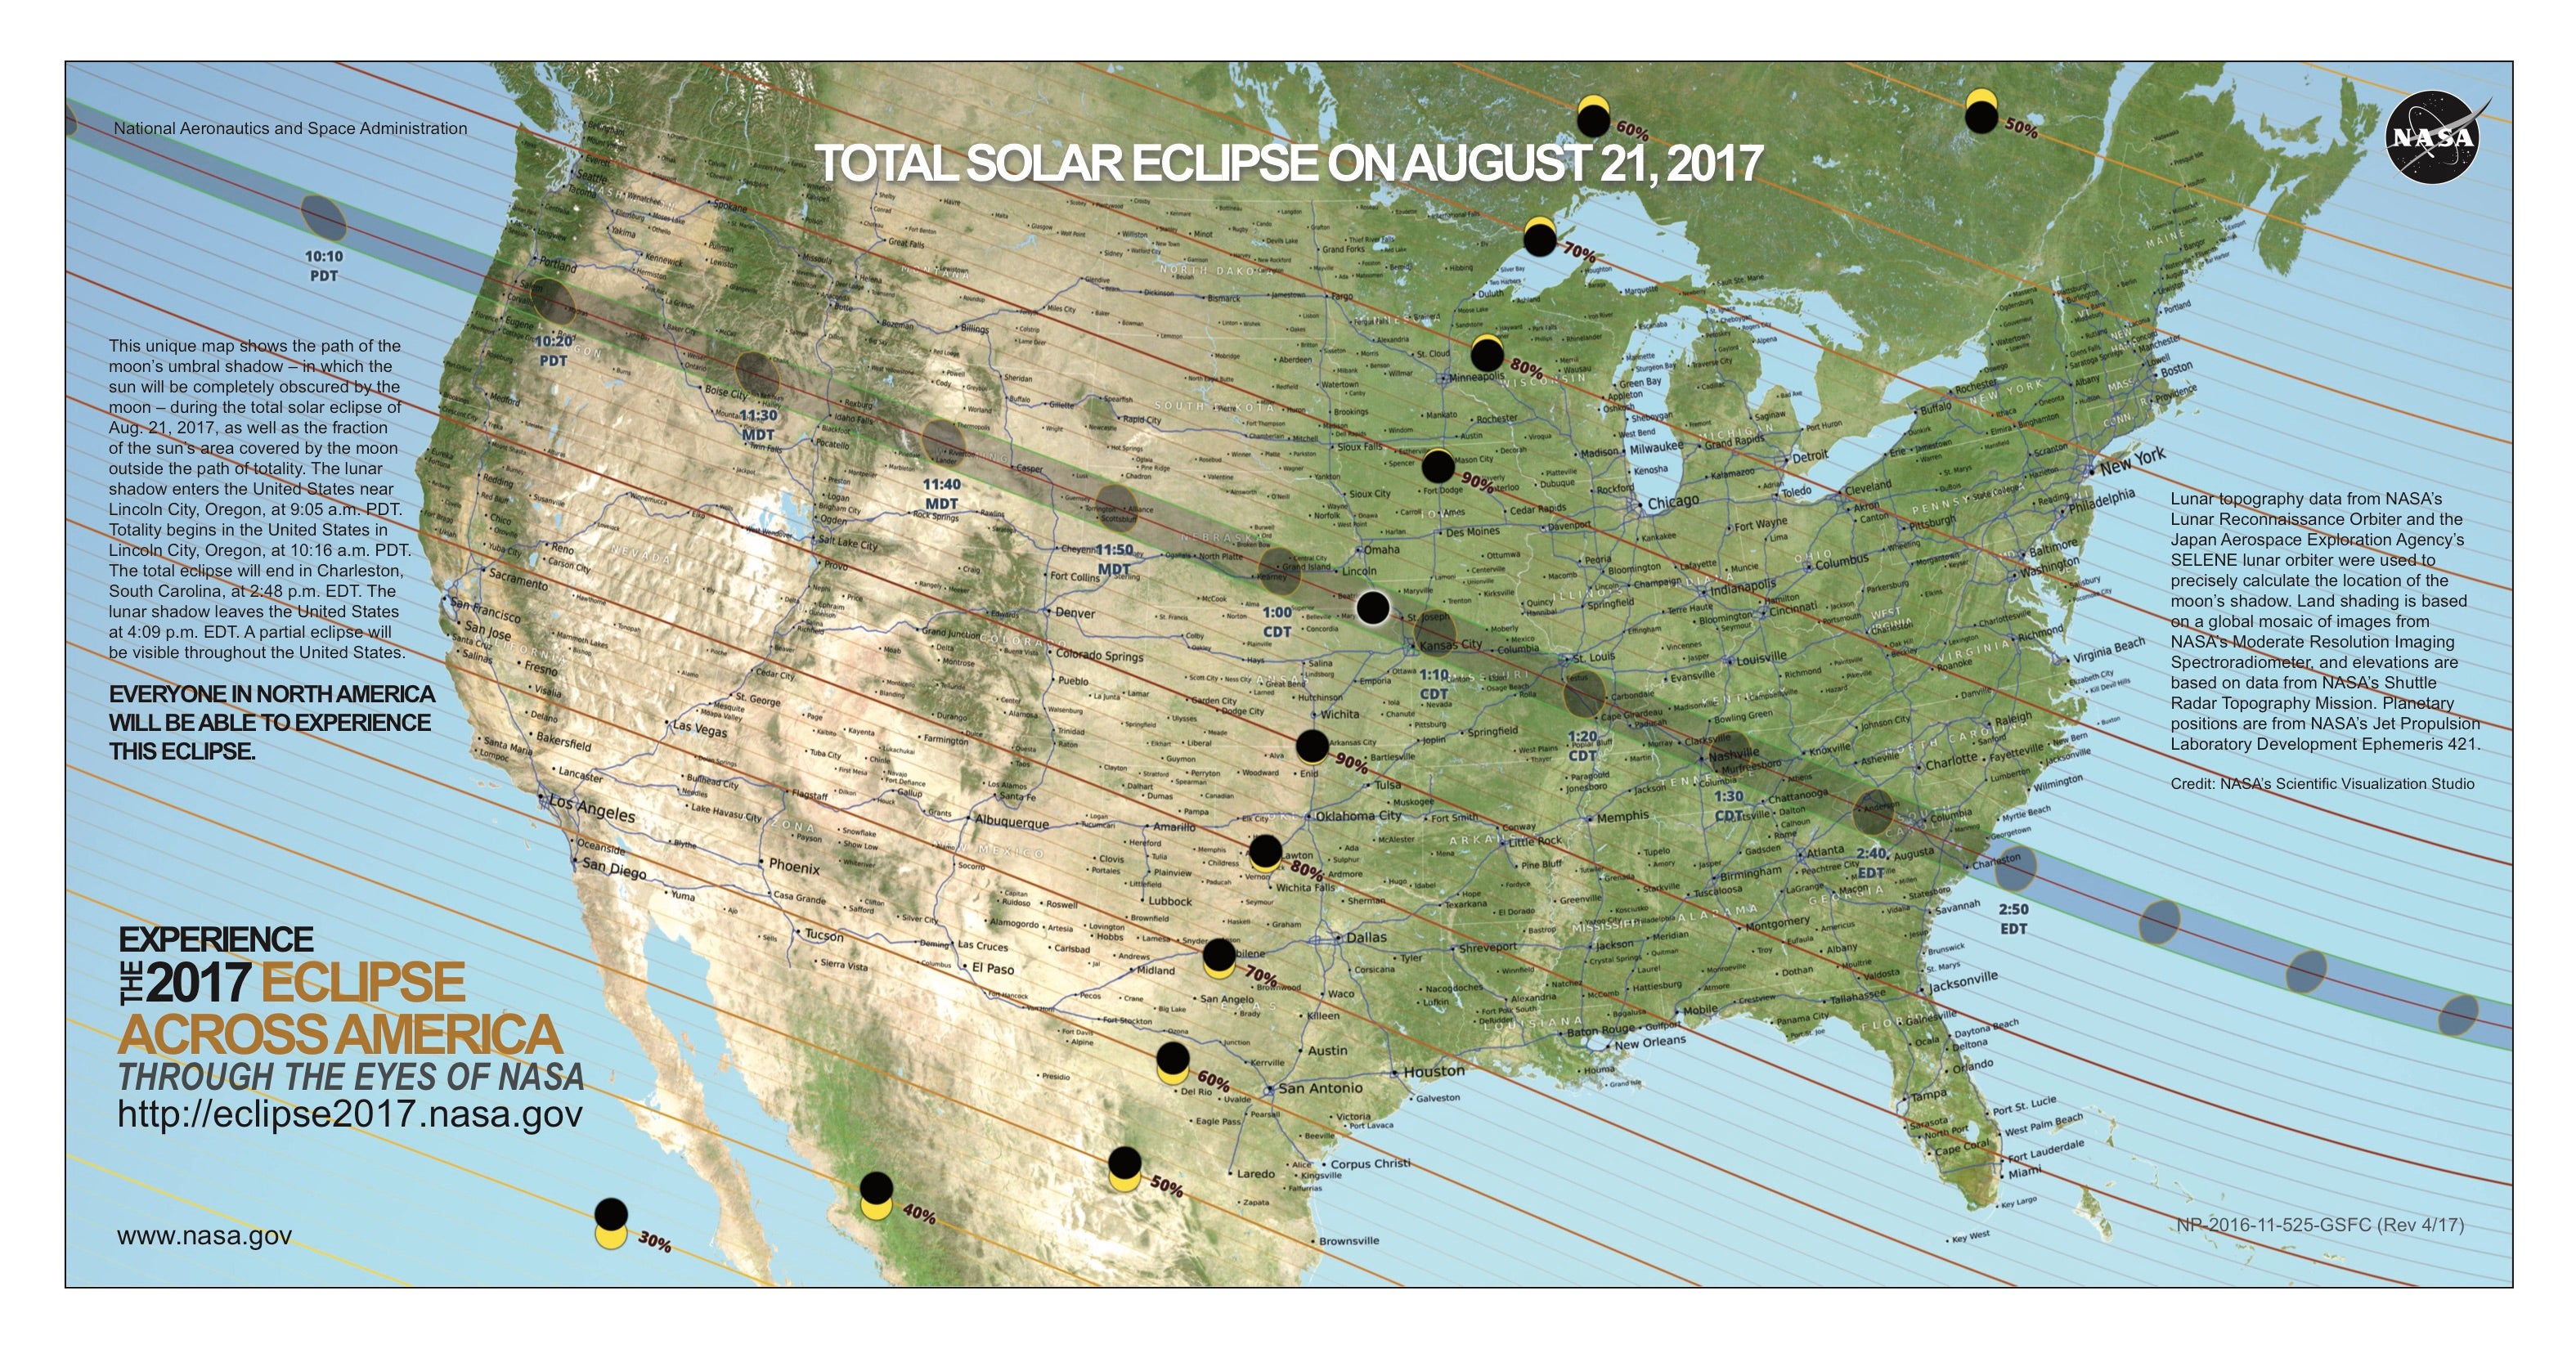
The eclipse in its totality isn’t an event that lasts forever, or even for three minutes! You definitely want to be set and ready to shoot well ahead of its start to ensure you don’t miss it. Make sure your camera is steady on a tripod and that you’ve done your research on your location and positioning. GreatAmericanEclipse.com is a great resource listing the best places to see the eclipse.They recommend paying attention to the weather and being prepared to be flexible:
“Wherever you go, every eclipse viewer should have a plan for mobility. Even in the sunniest locations, you don’t want to be caught under a cloud during the precious two minutes of totality. Pick a location with a good and uncrowded highway system that you can use to relocate the day before, the morning of, or the hour before the eclipse if weather threatens. The total solar eclipse will be such a spectacle that you won’t regret making the effort to find a clear viewing location.”

Map Courtesy of NASA. Click the top left corner to enlarge.
Protect Yourself
You definitely need to have solar eclipse glasses during the event in order to protect your eyes. NASA says, “The only safe way to look directly at the uneclipsed or partially eclipsed sun is through special-purpose solar filters, such as “eclipse glasses” or hand-held solar viewers. Homemade filters or ordinary sunglasses, even very dark ones, are not safe for looking at the sun; they transmit thousands of times too much sunlight.”
You can refer to the American Astronomical Society (AAS) list of manufacturers and authorized dealers of eclipse glasses and handheld solar viewers that are compliant with the ISO 12312-2 safety standard.
Choose Your Lens
You might not be totally sure which lens you want to use to capture the eclipse. DPReview.com suggests it all depends on what you're going for – “If you want the sun as your main subject, you'll obviously want a longer lens. To really capture big detail in the corona and the object itself, you'll want a lens with a focal length of around 500mm; between 400 and 600mm at least."
They also suggest using the moon to size things up ahead of time. "Something to keep in mind is that during totality the sun turns black, and is surrounded by this ghostly corona, so the spectacle of the object itself is this black disk with this white glow around it. That black disk is the size of the full moon, so take whatever your camera equipment is, take whatever your lens is and go out and photograph the next full moon. See if whatever size dot that appears. If that’s interesting to you, then great – that’s the lens to use."
Protect Your Gear
You do not want to point your camera at the sun for any length of time without a solar filter on your lens. With a mirrorless camera, you don't run the risk to your eyes that you would looking through a DSLR pointed at the sun (mirrorless cameras show the image in the viewfinder on an EVF), but you'll need a filter that allows long exposure times while preventing damage to the camera’s imaging sensor and lens.
LensRentals.com says, “Solar filters affixed to the end of your lens block 99% of the sun’s light from entering into your telescope or camera. You cannot take a usable photo without a solar filter. The two most popular type of solar filters are aluminized polyester and black polymer (both plastic). Both are excellent choices for the eclipse photographer on a budget, come in multiple sizes to fit your lens, and are about 20 dollars.”
What about neutral density (ND) filters and what’s the difference between those and a solar filter? They say, “Depending on what optical density (how dark the filter is) you choose, ND filters only block 10%, 20%, etc. of the sun’s light. That is not nearly enough to protect your camera or capture a usable photo. Sure, you can stack about 5 to 8 ND filters to achieve the 99% block of incoming light, but now you’ve given up most of the optical quality of your lens resulting in blurry and unusable photos. This is where a solar filter comes in. A single solar filter blocks 99% of the sun’s light while maintaining sharpness and clarity.”
Bottom line – you need that solar filter to protect your camera’s sensor and lens. Don’t go without it.


