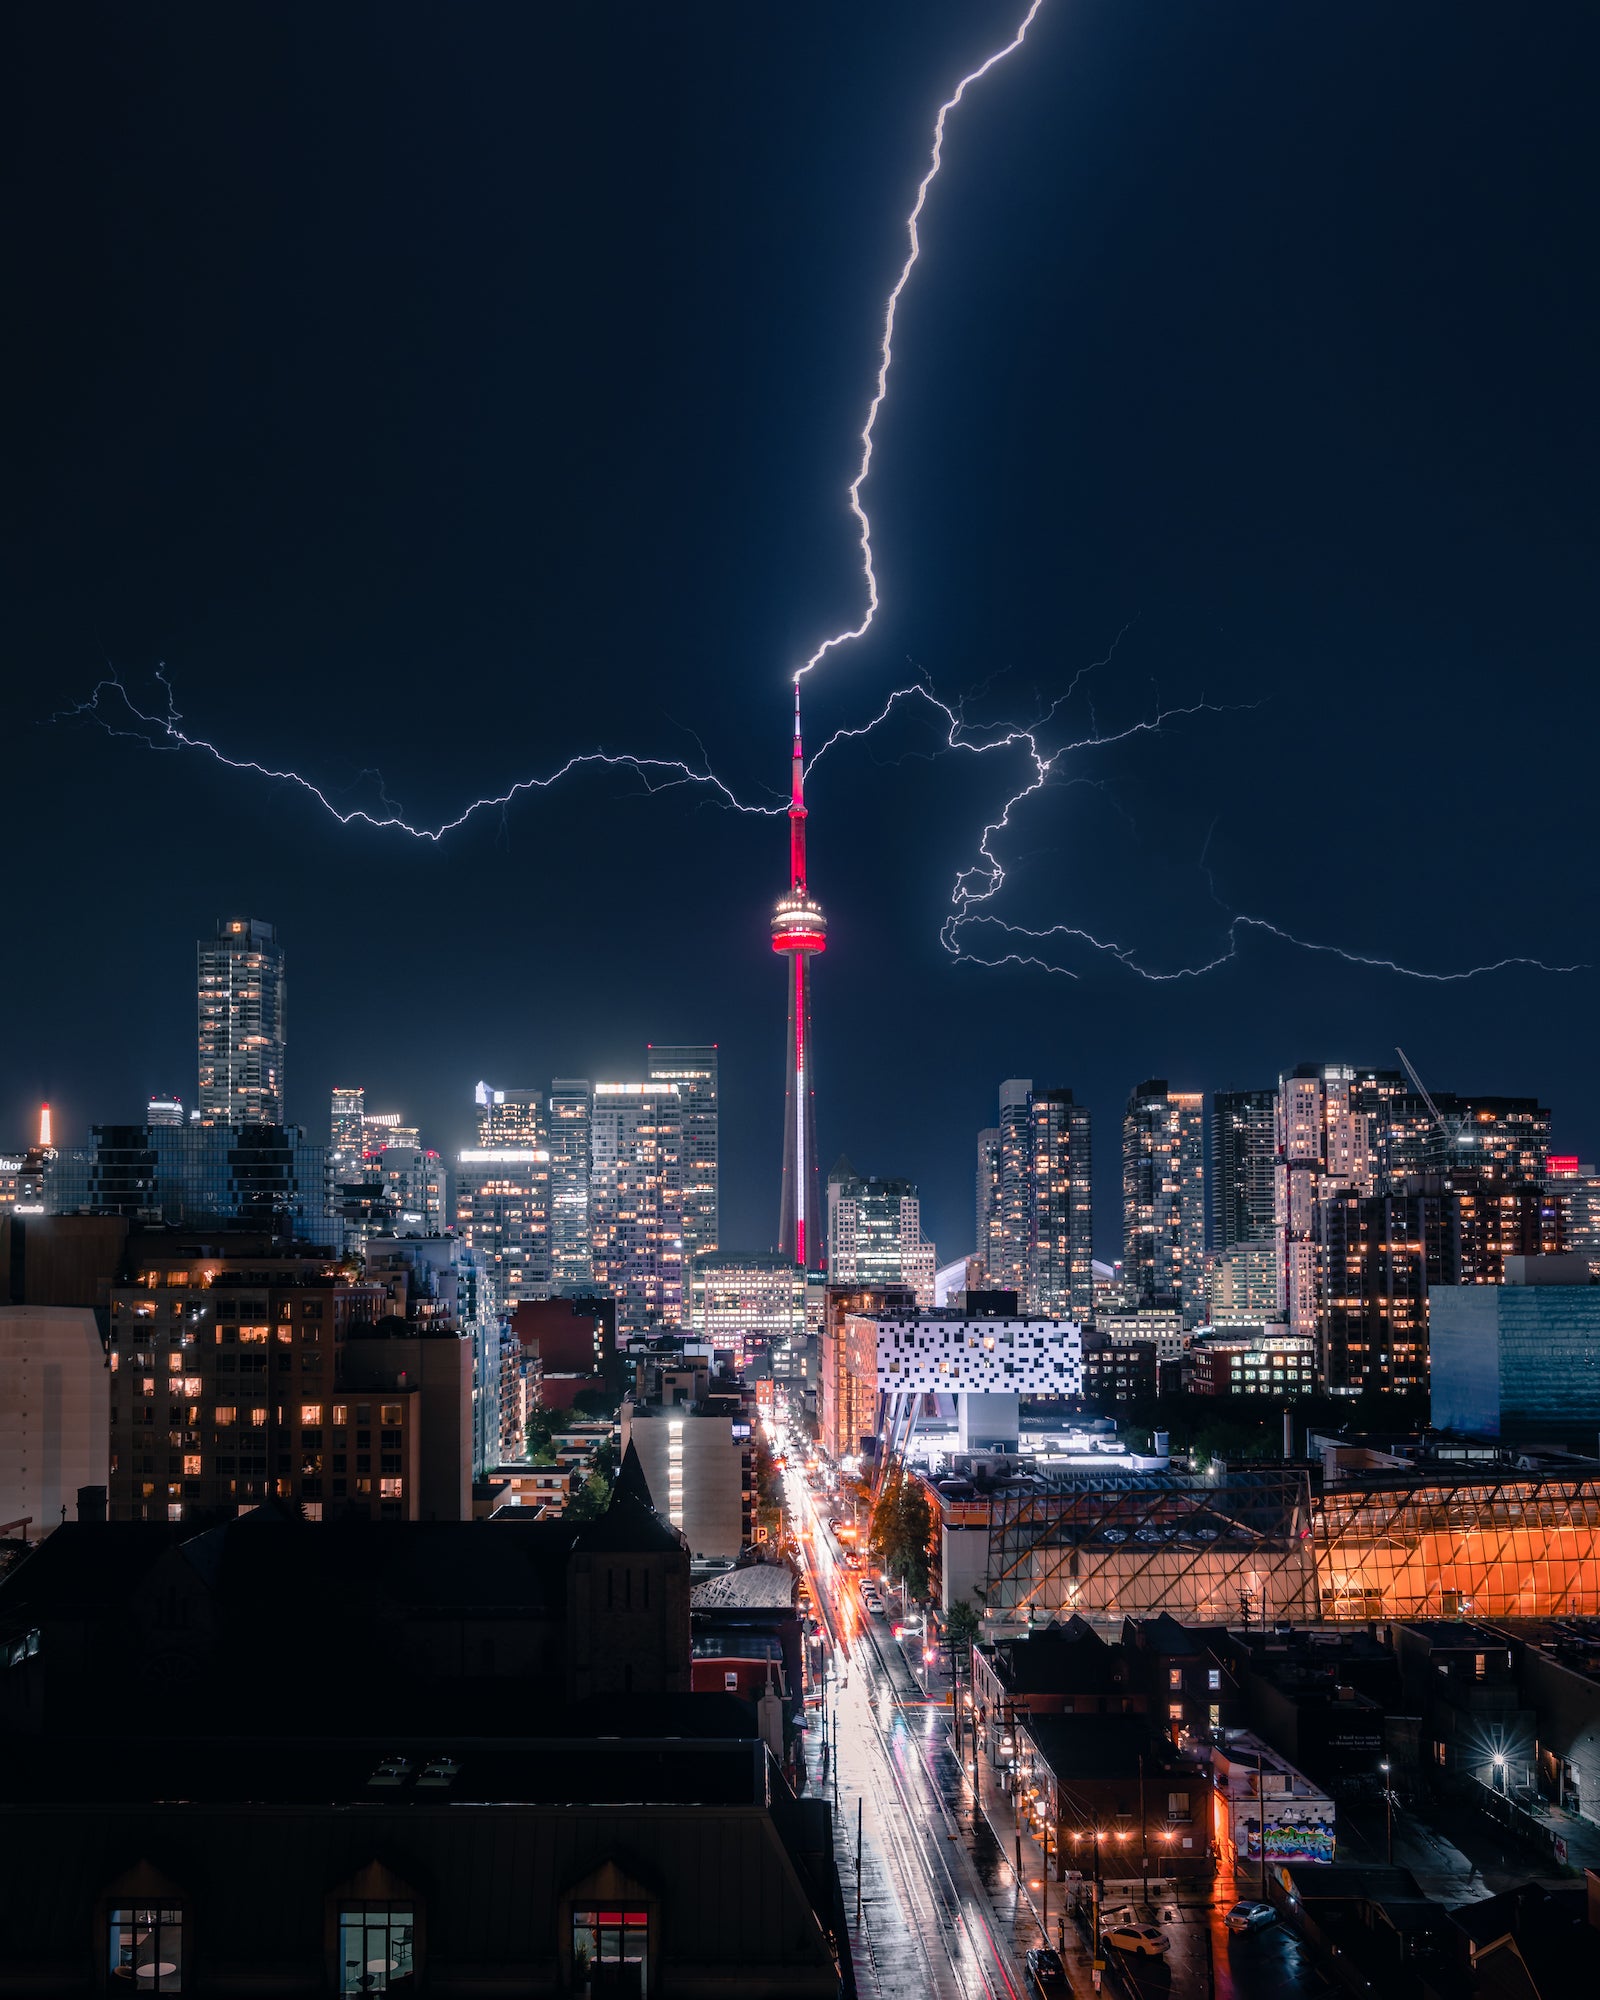
Tyler McKay (@tylersjourney) is a street and cityscape photographer based in Toronto. His work is vibrant and bold. In it you will see plenty of neon lights giving life to the streets of Toronto with a specific moody undertone, as he aims to be out during adverse weather conditions. Because he conquers the weather most would prefer not to be in, the photos he creates of the city are unique and offer new views and perspectives, much like the image of the CN tower being struck by lightning below. We connected with McKay to learn more about how he captured this image with his Sony Alpha 7R III and Sony 24-70mm f/2.8 G Master. Keep reading as McKay explains the story behind the shot.

Photo by Tyler McKay. Sony α7R III. Sony 24-70mm f/2.8 G Master. 8-secs., f/7.1, ISO 125
Street and cityscape photographer Tyler McKay explains the story behind this electric image of the CN Tower he created using his Sony Alpha 7R III and Sony 24-70mm f/2.8 G Master.
The Scene
This image was shot on an apartment rooftop patio I found in downtown Toronto. I picked this location because it had perfect leading lines of the road that leads your eye to the CN Tower where I was waiting for the lightning to strike. This shot was important for me to capture because it was a bucket list shot I always wanted to add to my portfolio.
The Gear
I used my Sony Alpha 7R III paired with the Sony 24-70mm f/2.8 G Master lens for this image. I used this lens because of its sharpness and I needed a wide 24mm lens in order to capture all of the lightning strike. The height of the CN Tower and lightning comes from so high up it's important to be equipped with a wide angle lens.
The Shot
The most important part about this image is getting it very sharp so I made sure to dial in my manual focus to get a sharp focus of the city skyline. This image was shot using a tripod to keep the long exposure stable, I then ran a vertical timelapse with an exposure of eight seconds and a one-second interval in between each shot. Between every single image I would have to wipe the rain from the lens to prevent having a blurry image. After about three hours I ended up with only two sharp lightning strikes that you see here in the image.
The Edit
My post-processing workflow started in Adobe Lightroom for these two lightning strikes. I adjusted my temperature and exposure first then I fine-tuned my colors with the hsl sliders. After this I took the two edited images and stacked them as layers using an image stacking technique in Adobe Photoshop with Blend Mode Lighten then touched up and cleaned any areas that looked off.
See more of Tyler McKay's work on Instagram @tylersjourney.


