Great news for existing Capture One users and those of you yet to make the switch, Capture One 11 has a host of new features to benefit Sony users. If you have yet to experience Capture One with your Sony camera, here is a brief description of what’s available and the difference between them.
Capture One Pro For Sony – Industry leading RAW conversion, professional adjustment tools, asset management plus tethered capture capability and remote camera control.
Capture One Express For Sony – Industry leading RAW conversion, simple adjustment tools and asset management.
Both versions benefit from performance enhancements and faster Catalogs, while Capture One Pro For Sony gets new tools, a whole new way to work with Layers and more.
If you get a new Sony α7R III on the first day it’s available in stores, Capture One already has RAW file support and tethered capture support for the camera. So, if you’re stuck with a way to work with your new α7R III and want to see the benefit of Capture One’s RAW conversion and creative possibilities, you’re covered.
Also, all of your Sony lenses are supported for corrections immediately in Capture One with Sony’s Manufacturer Profile (see our article on lens correction here).
What’s New In Capture One 11?
Capture One 11’s improvements can be broken down into three different categories.
Layers
Work locally on your images by drawing masks with brushes and gradients. Capture One 11 adds more masking tools, higher performance and more compatible adjustment tools.
Annotations
Annotate your images in Capture One by adding handwritten notes and drawings directly on your images. Use it to remember what caught you in the moment, make notes to share with your Retoucher, or simply jot down a reminder for yourself for later.
Performance
Overall improvements in editing speed, importing images, color improvements and Catalog performance – especially for larger collections.
Lau Nørgaard from Phase One gives a quick overview of the new features in this short video:
A Deep Dive Into Capture One 11
Layer Centric Application
With every adjustment tool now being capable of working locally, it made sense to reconsider how we think about Local Adjustments in Capture One. Therefore, the previous Local Adjustments Tool Tab with the locally-compatible tools has gone, in favor of a new tool called “Layers”.
The Layers tool now appears in the Exposure, Color and Details tool tabs so you always have access to your Layers.
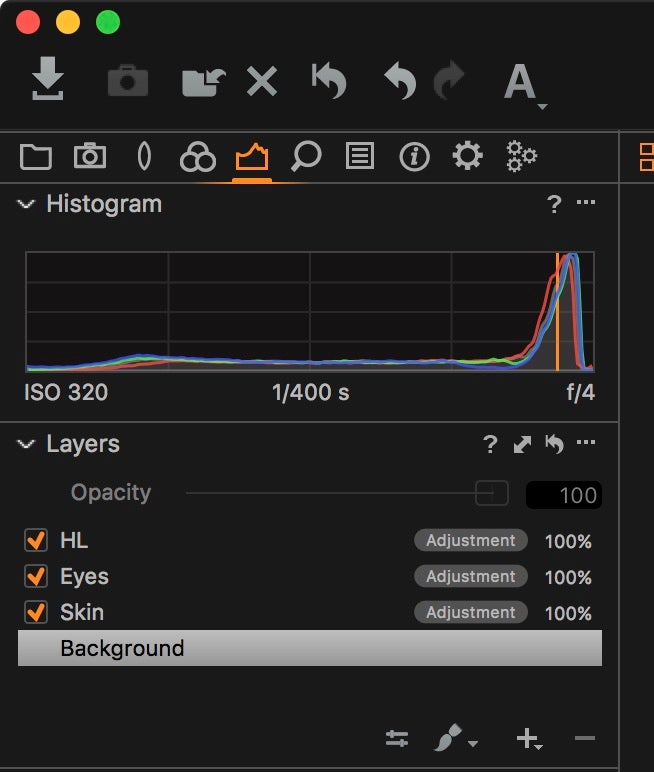
The New Layers Tool
New Layer Features
1, Each layer can have varying “Opacity” (this is aside from Masks being able to be drawn with varying opacity). You can control the impact that a certain layer has by using the Opacity slider in the Layers tool.
2, Clicking the “+” button in the Layers tool reveals a new option to add a “Filled Layer.”
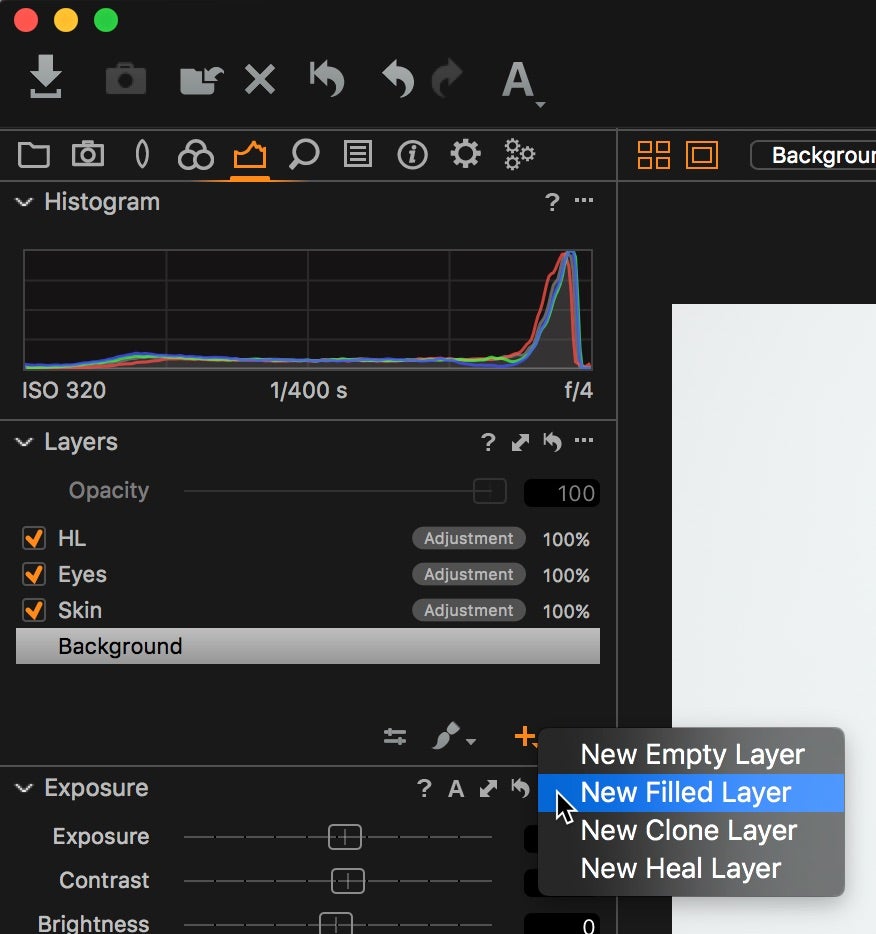
New Filled Layer.
This is a very useful addition if you want to add, for example, a Color Grading layer with the Color Balance tool and you want to have the ability to modify the grade with the Opacity slider or simply disable it later.
3, The submenu of the Layers tool includes two new ways to edit the mask after it’s been drawn. Feather Mask and Refine Mask.
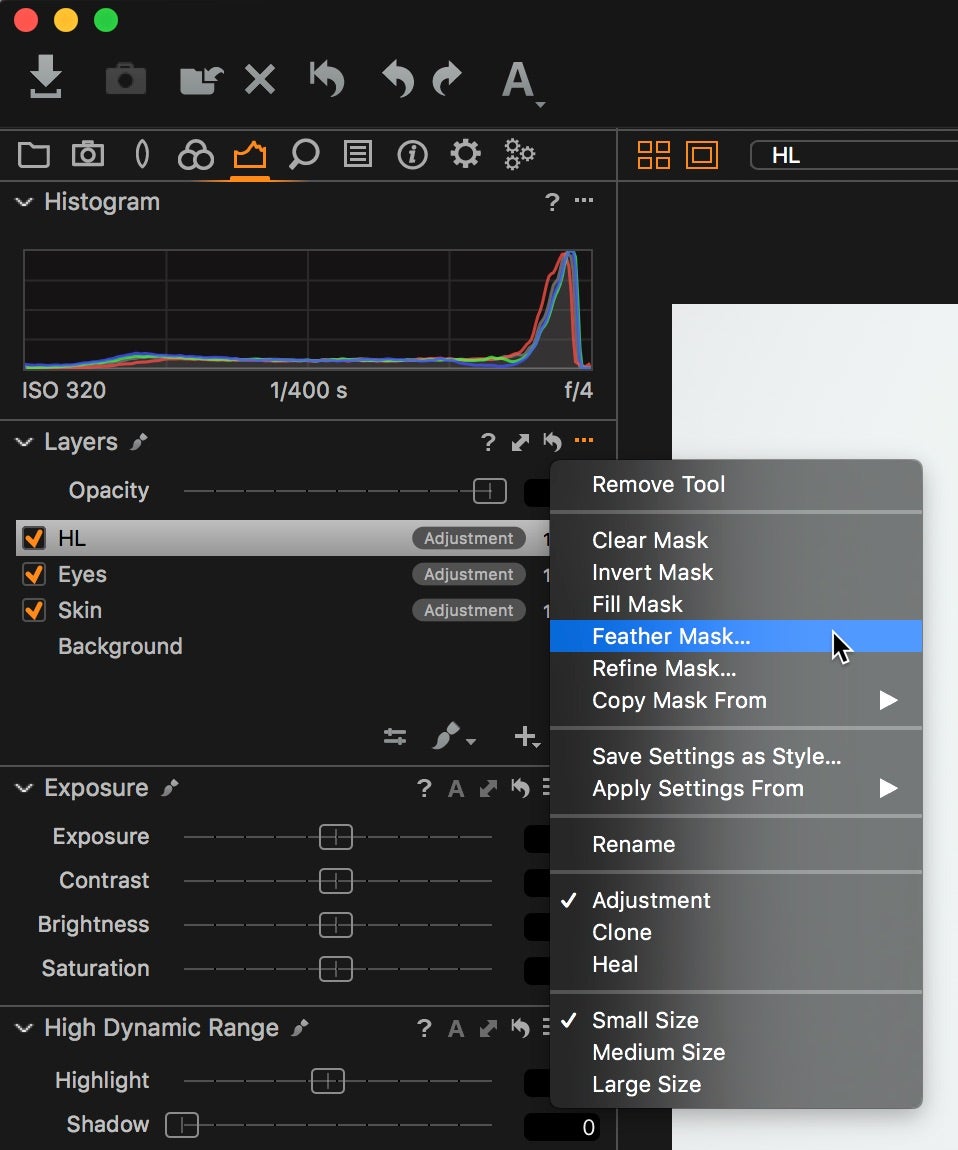
Layers Sub Menu
If you have drawn a mask with too hard of an edge, then Feather Mask will simply soften it for you.

Feather Mask
Refine Mask uses a smart algorithm to improve the quality of a mask after it’s been drawn. It can be used to improve an Auto Mask, to pick out complex objects from the background for example, or to improve on a mask made by the Advanced Color Editor.
To help visualize masks better when refining and feathering, the mask can also be set to greyscale.
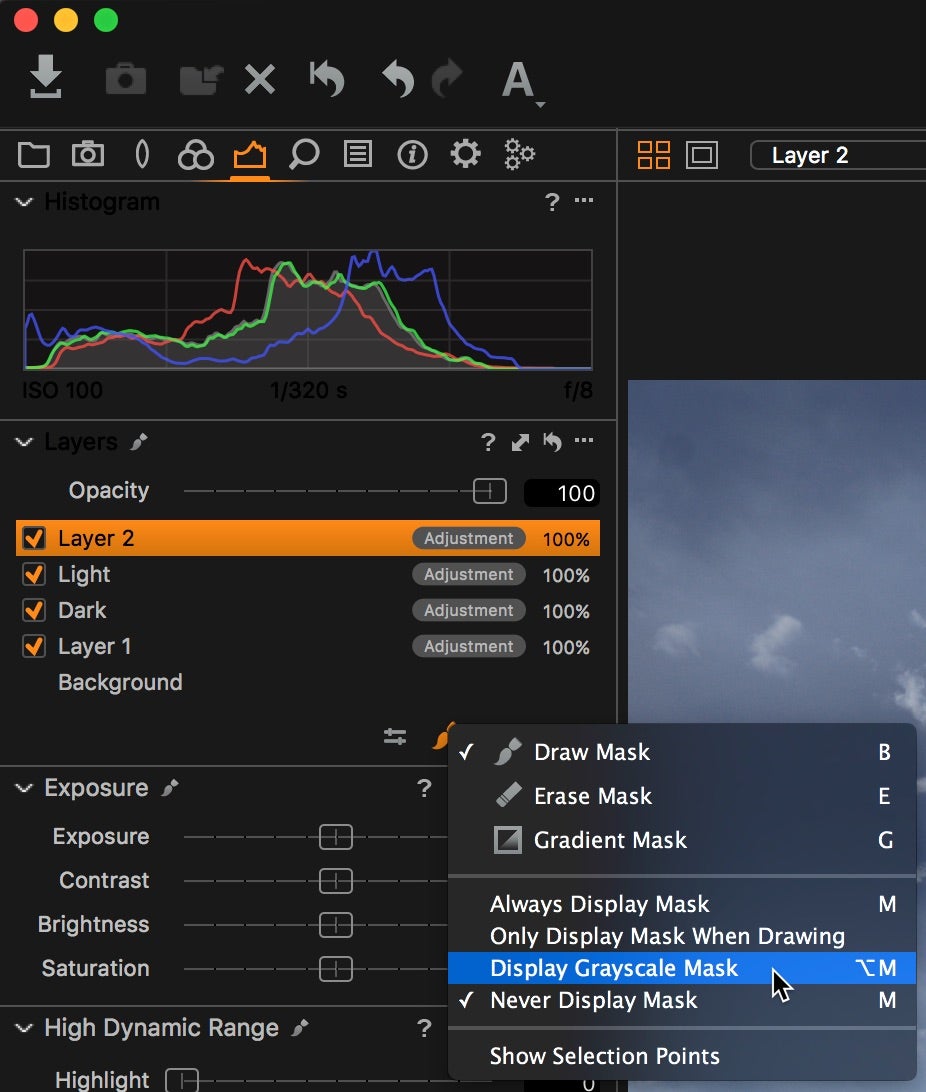
Greyscale mask option
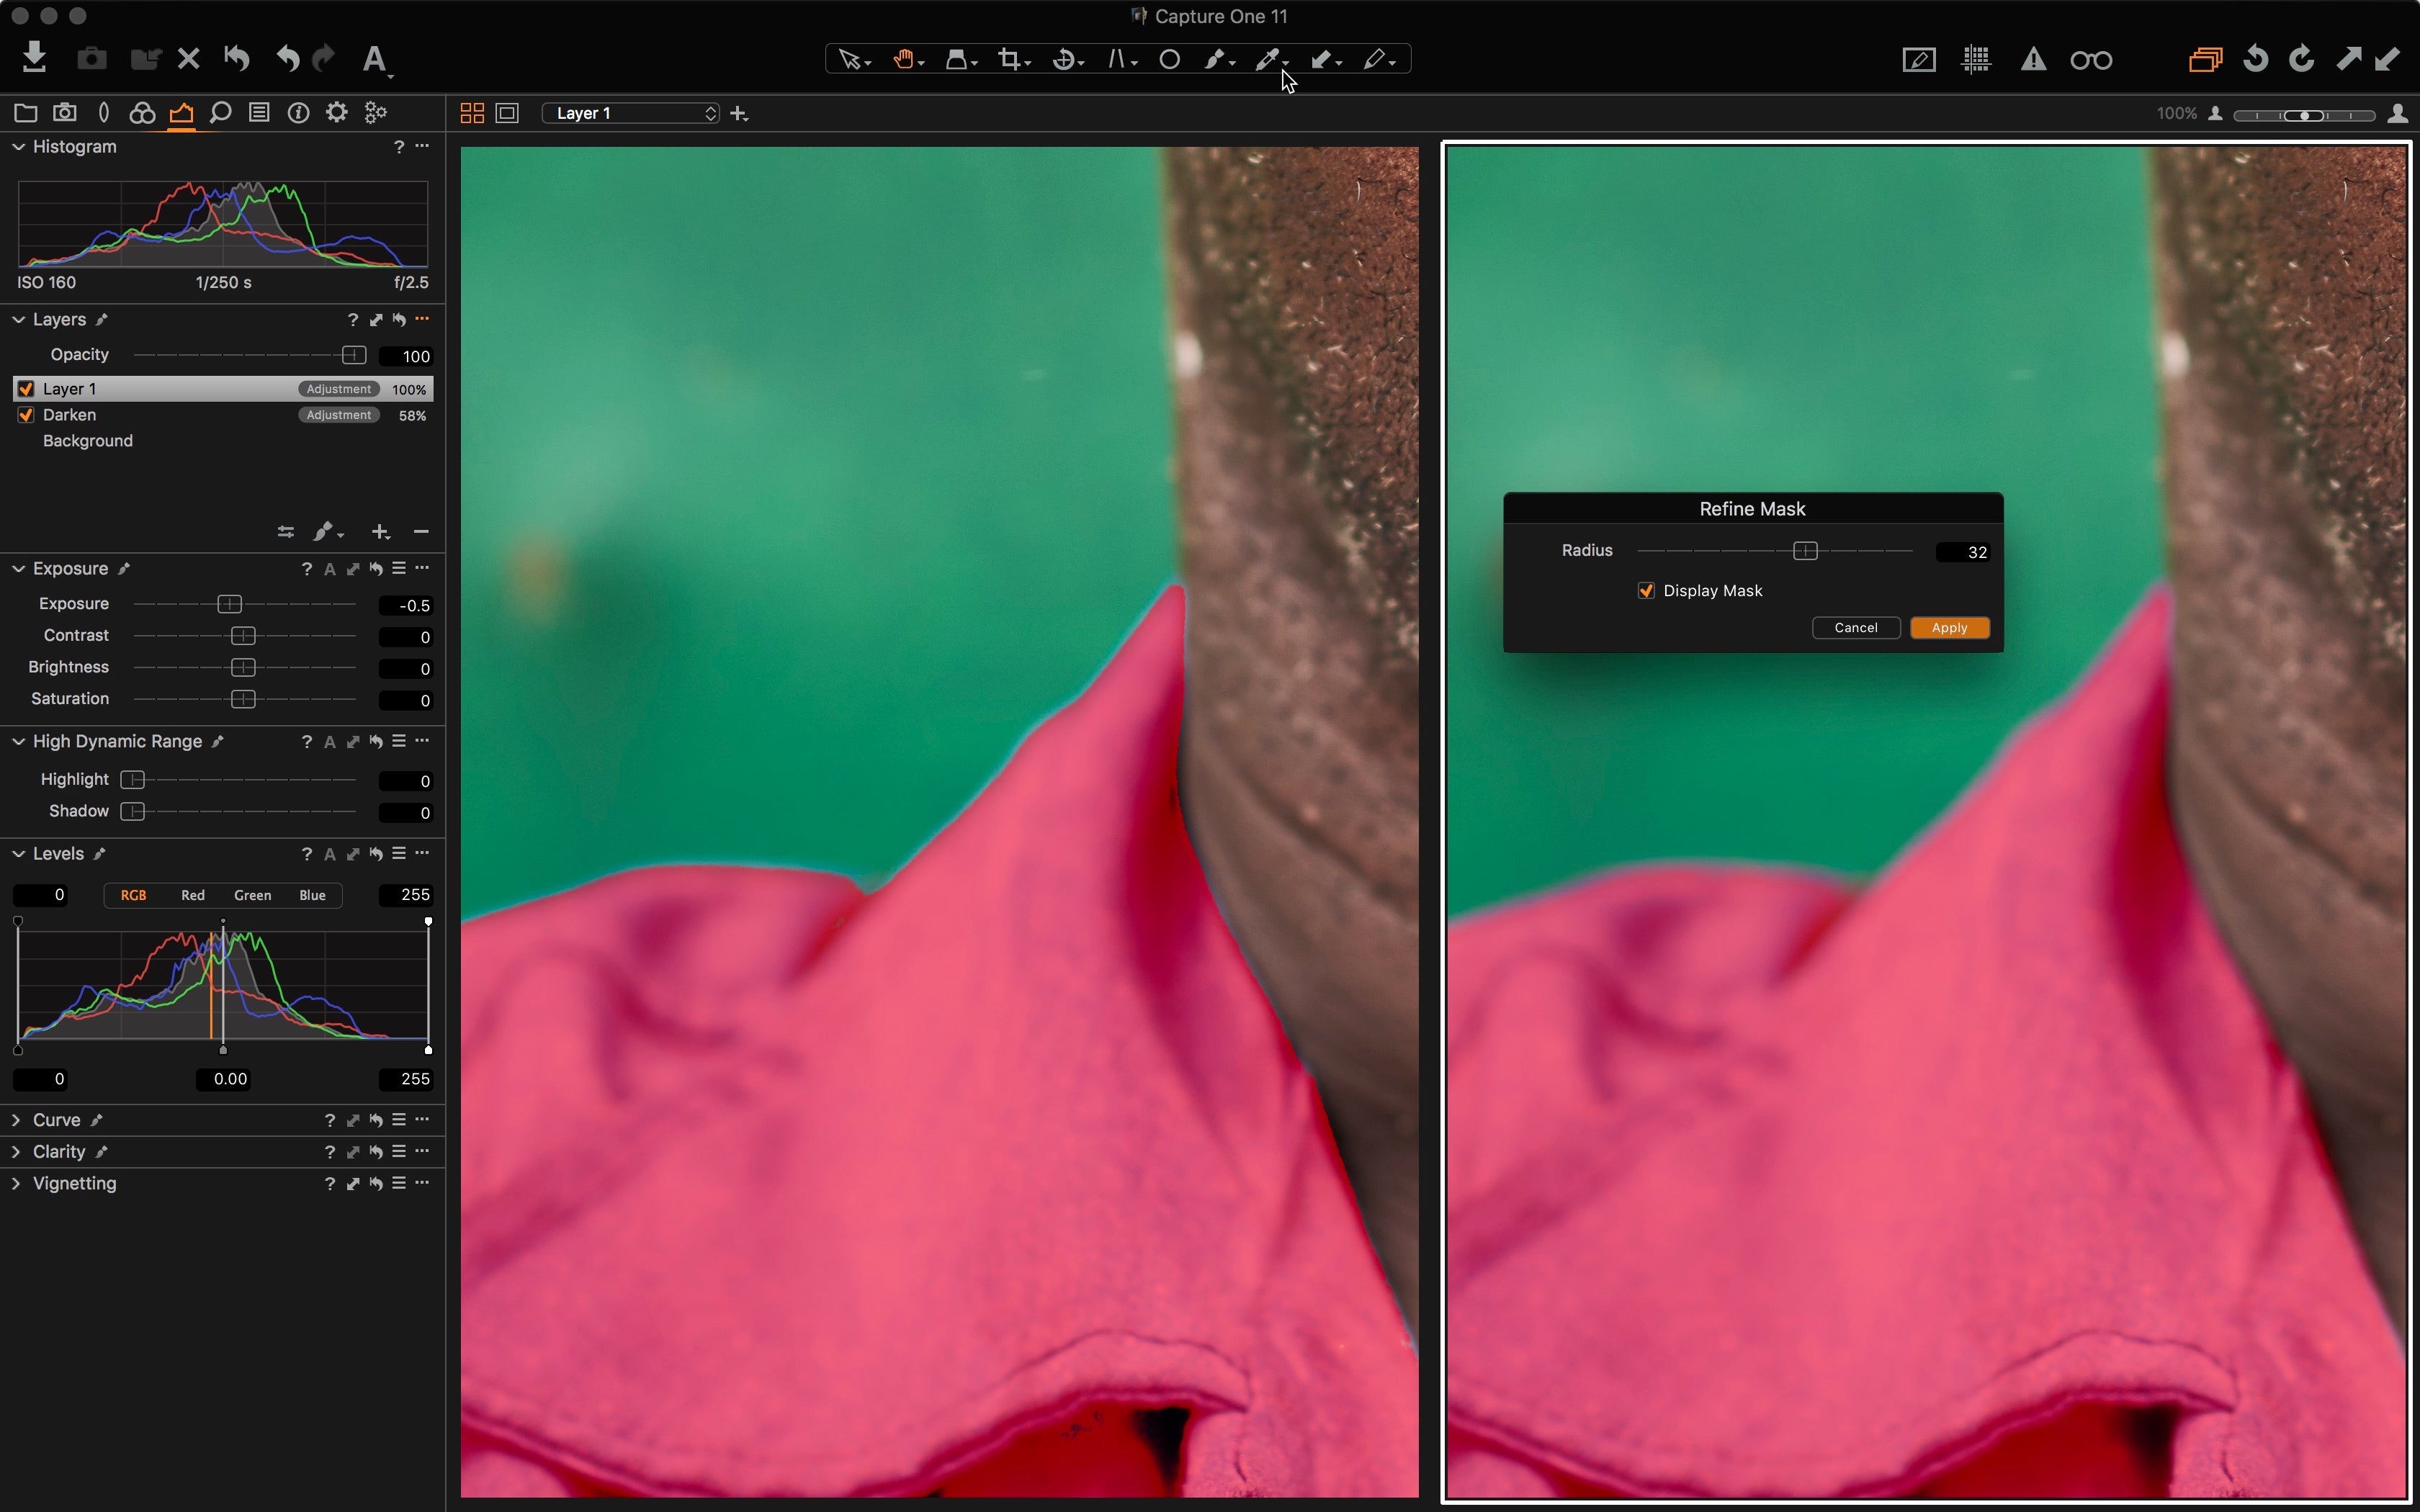
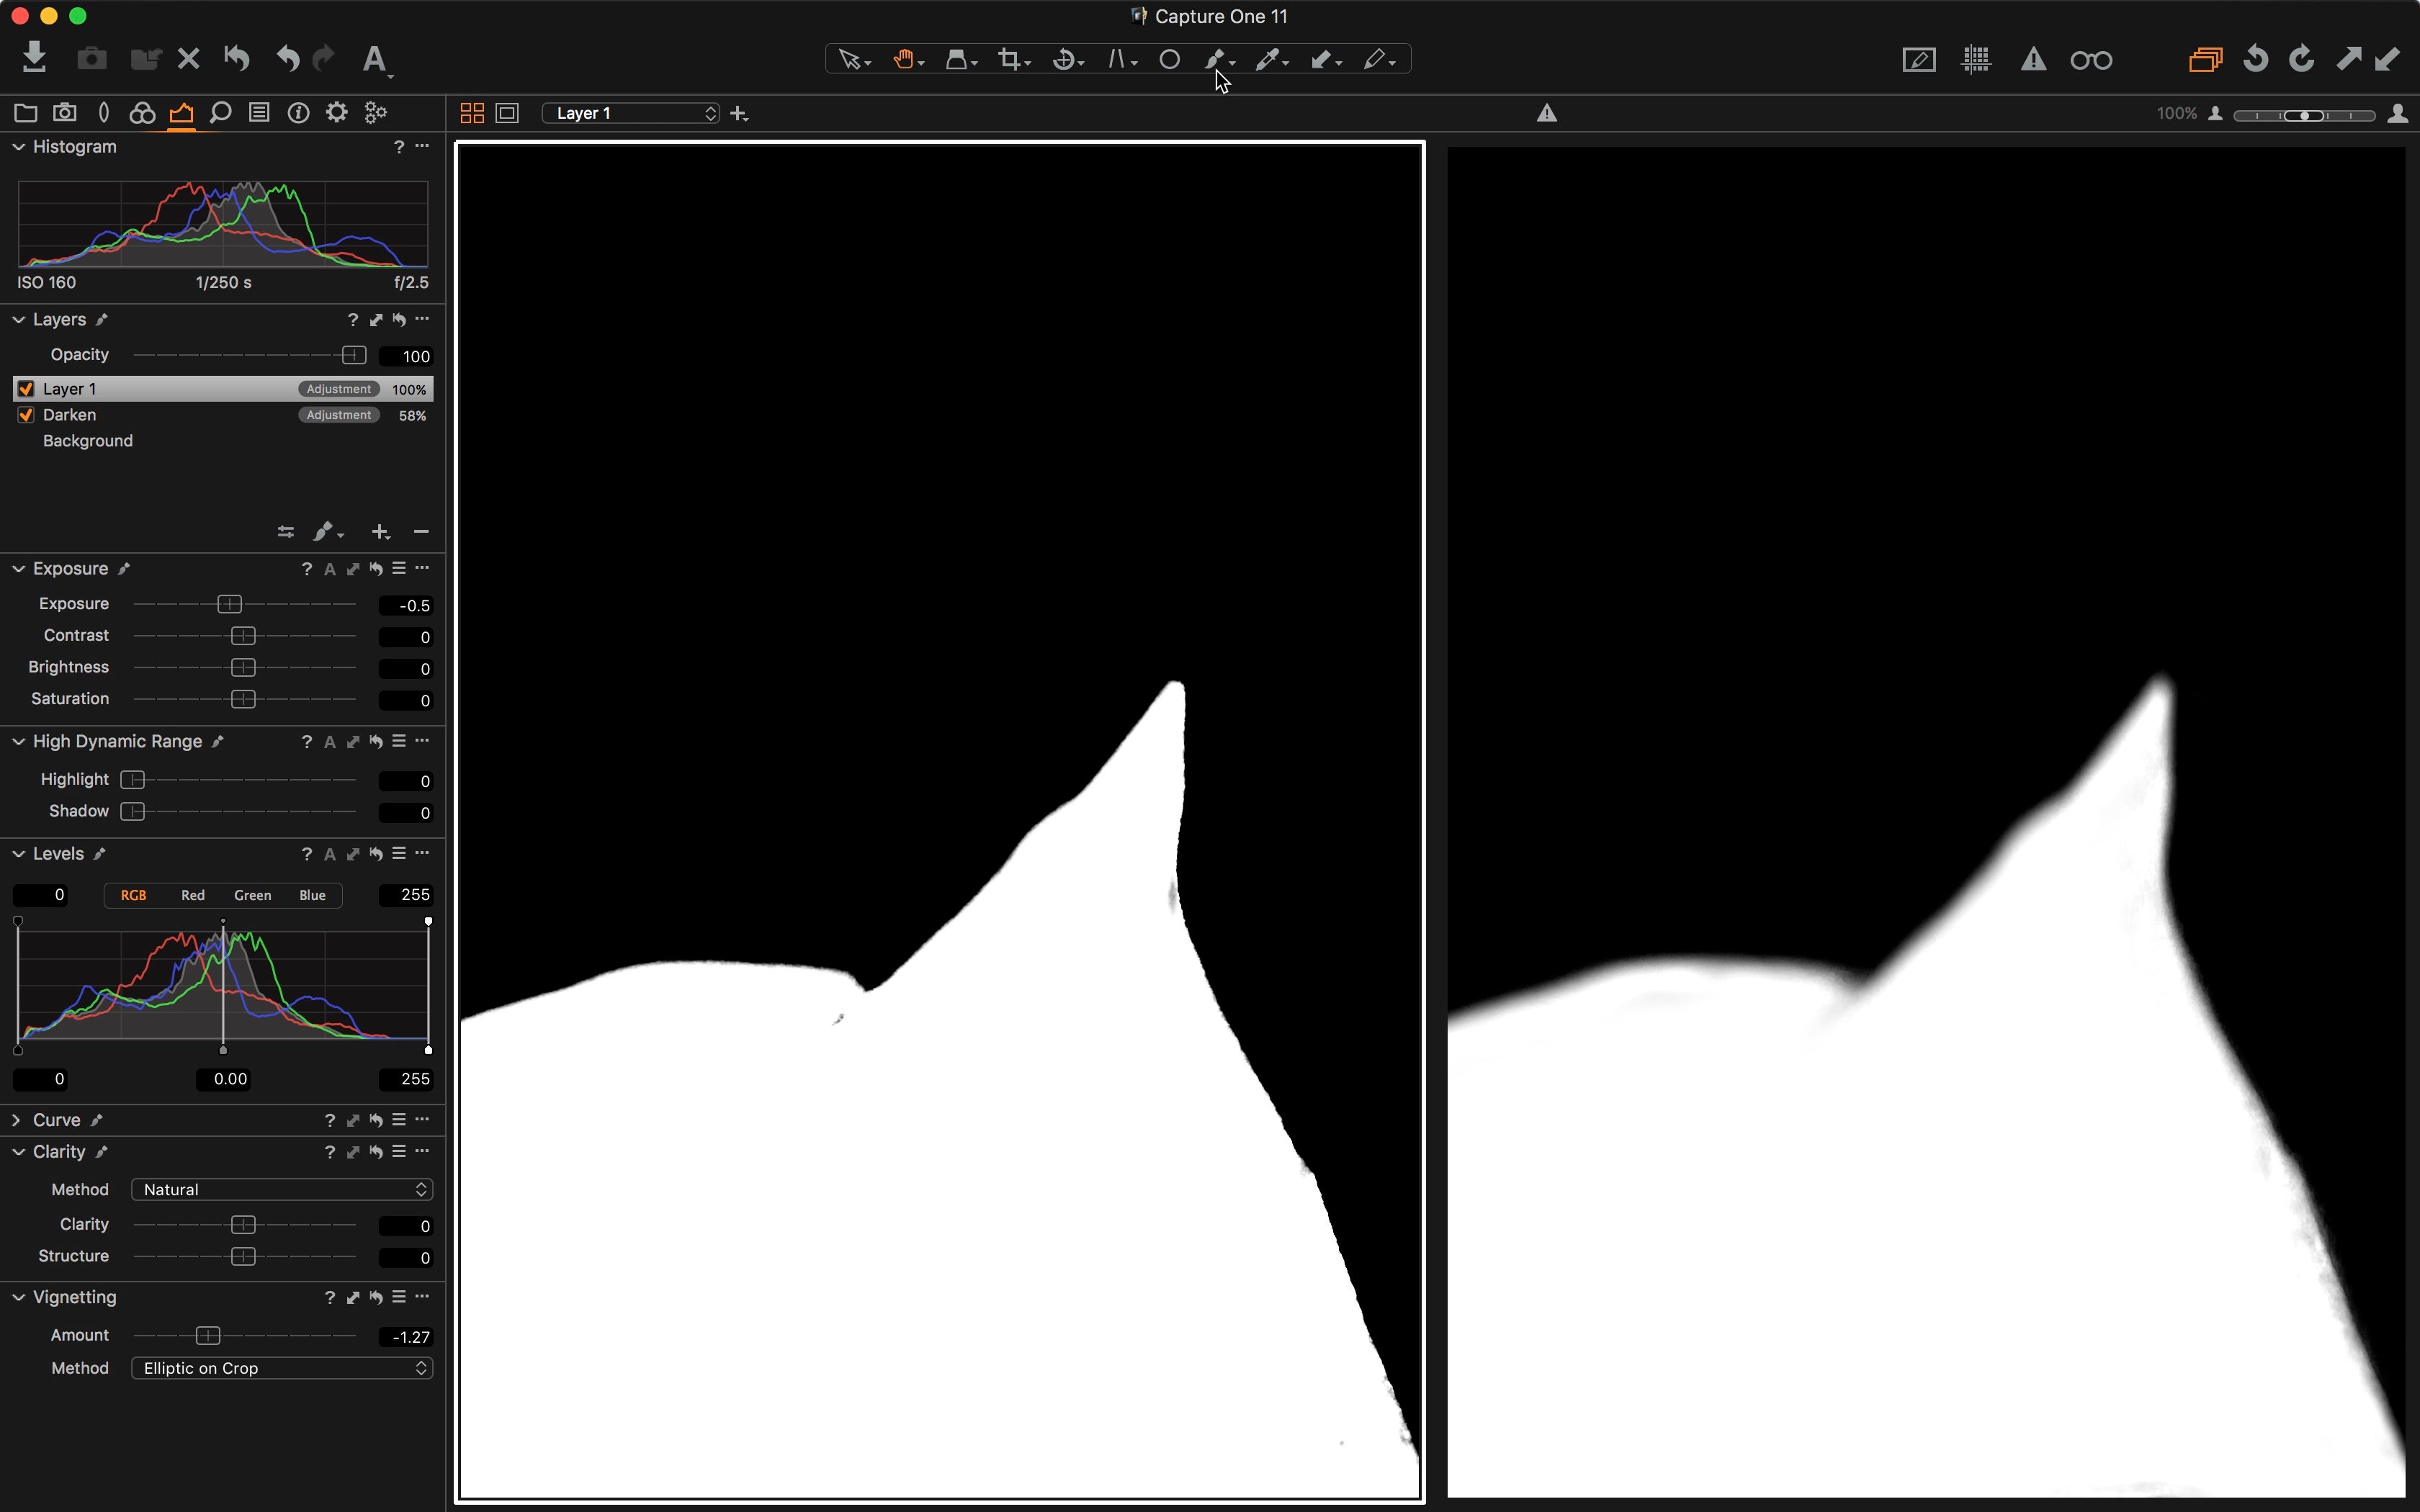
Mask viewed as greyscale. The mask on the right has been refined by a small amount. You can see the positive benefit with the much smoother edge and gradual transitions.
4, Also in the Layers tool sub menu, settings can be applied from one of your Styles or Presets, effectively giving you a Styles Layer, which you can moderate with the Opacity slider.
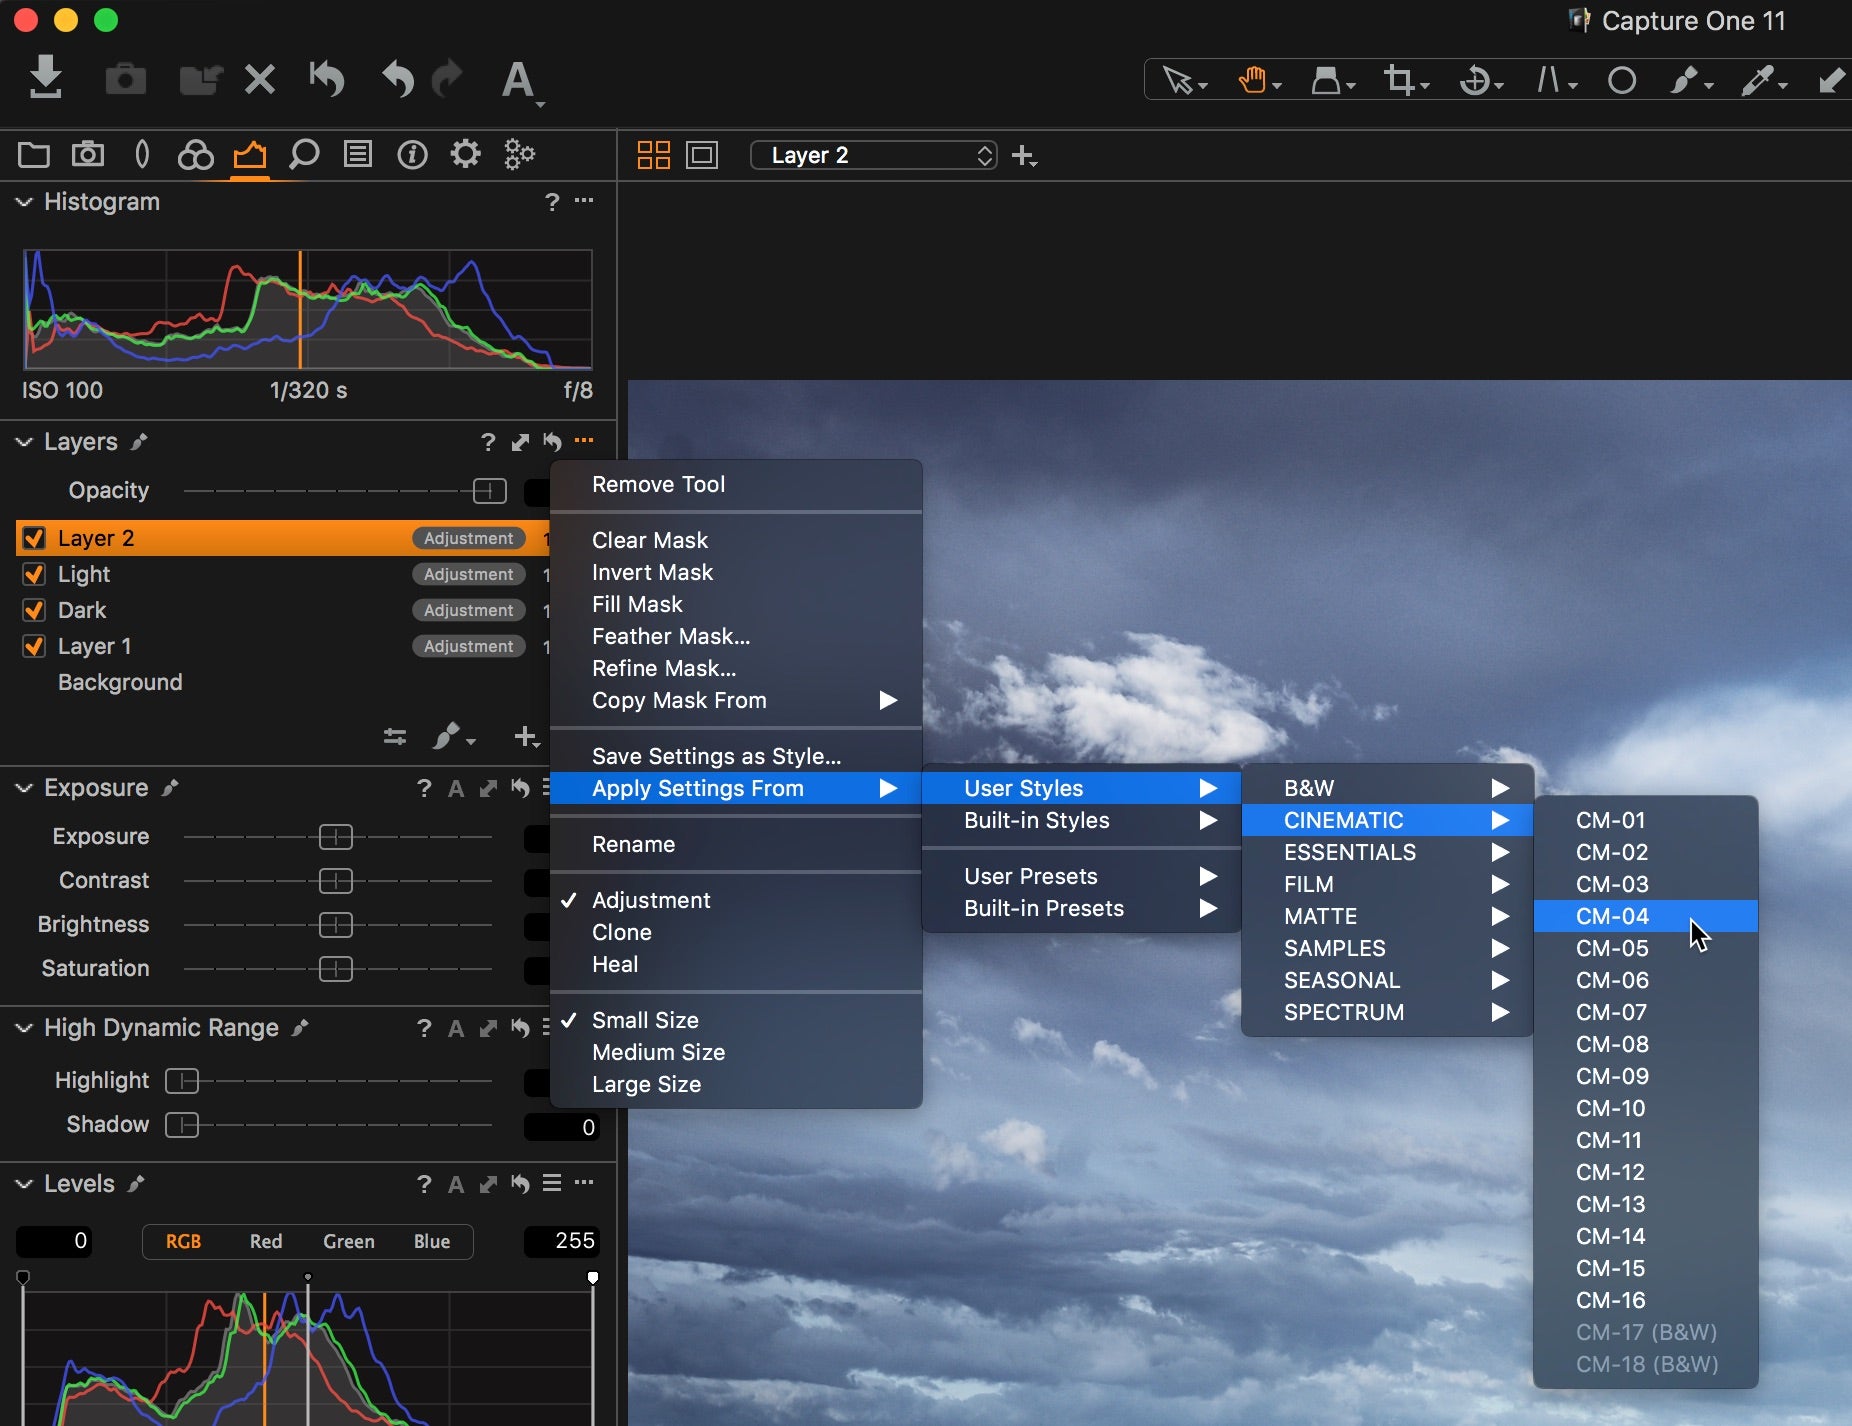
Adding a style as a layer
Performancewise, mask drawing speed is improved. It’s now much smoother to draw masks especially when you have a lot of layers in play.
Annotations
Capture One is often used in environments where multiple people are collaborating on a shoot and the final images. Annotations make this easy by being able to note on the image directly.
You’ll find the Annotations tool in the Metadata tool tab.
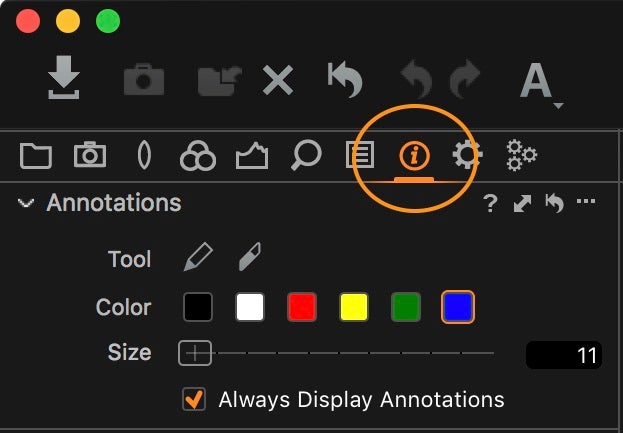
The Annotations tool in the Metadata tool tab. The tool is comprised of two cursor tools, Draw and Erase, a color picker and a Size slider.
The option Always Display Annotations can also be toggled on and off with a shortcut in the Toolbar. Annotations will not show if the annotations cursor tools are not selected, unless you have Always Display Annotations on.

Display Annotations toggle
To annotate an image, it really couldn’t be any simpler. Pick the Draw Annotations cursor tool (Use I for the default keyboard shortcut), choose a color, adjust the size of the brush and begin to annotate.
To delete an annotation, switch to the Erase Annotations tool (Use Y for the default keyboard shortcut) and swipe over any annotation to remove it.
To remove all annotations, simply click the Reset icon in the Annotations tool.
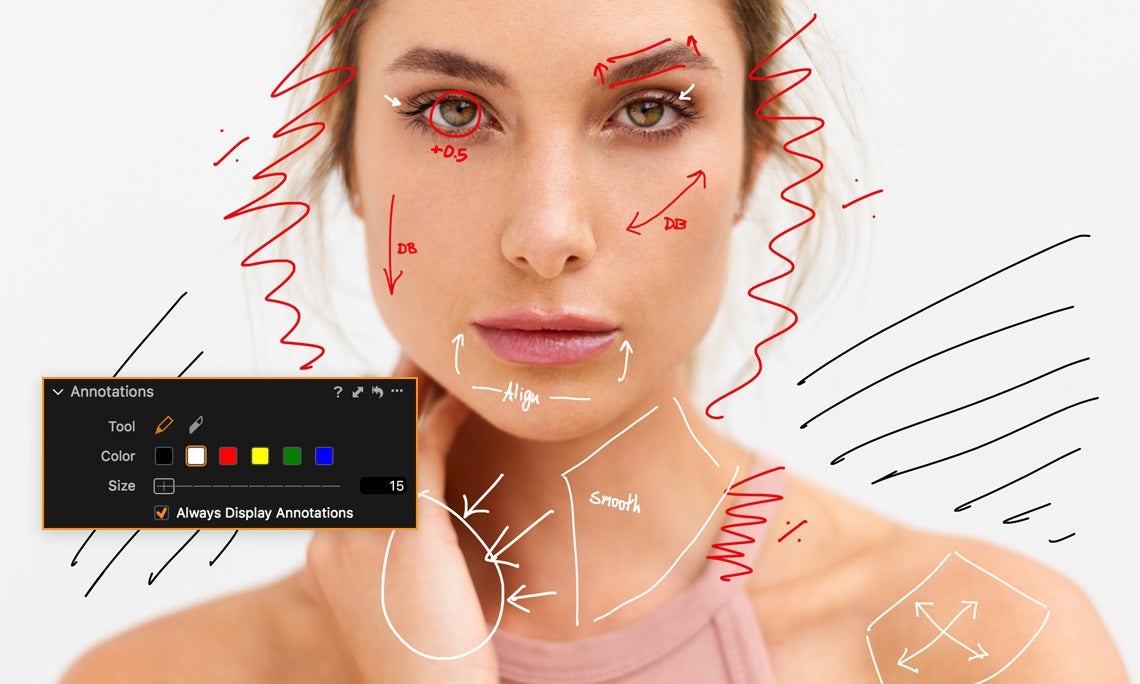
An annotated image.
Sharing Annotations
If you are sharing a RAW file with another peer and you want them to see your annotations, the easiest way to do this is via an EIP (Enhanced Image Package) file. The EIP format is simply the RAW file with any adjustments and metadata. Choose File>Export Images>Originals…
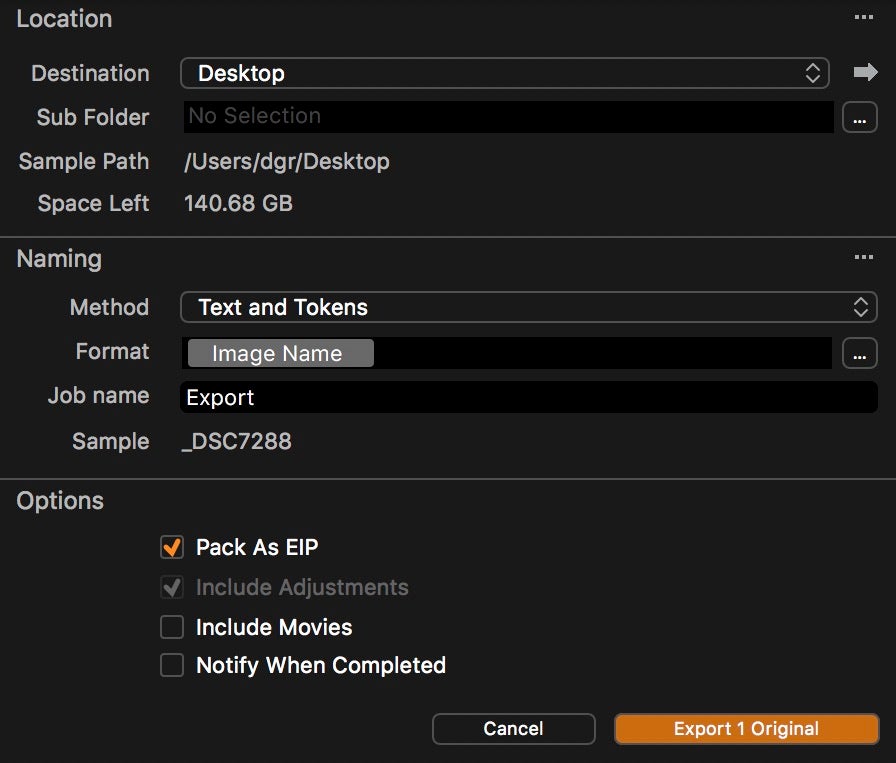
Exporting an EIP file.
Make sure the Pack as EIP box is checked. Then send the resulting EIP file to the person you need to collaborate with. If they import the EIP in Capture One 11, they will be able to see any annotations you’ve added.
Creating a Process Recipe for Annotations
If you are sharing a finished RAW conversion from Capture One, then you can easily process the RAW file to a PSD file, with an Annotations layer.
Make a new Recipe in the Process Recipes Tool, by clicking the + button and make sure the Format is set to PSD.
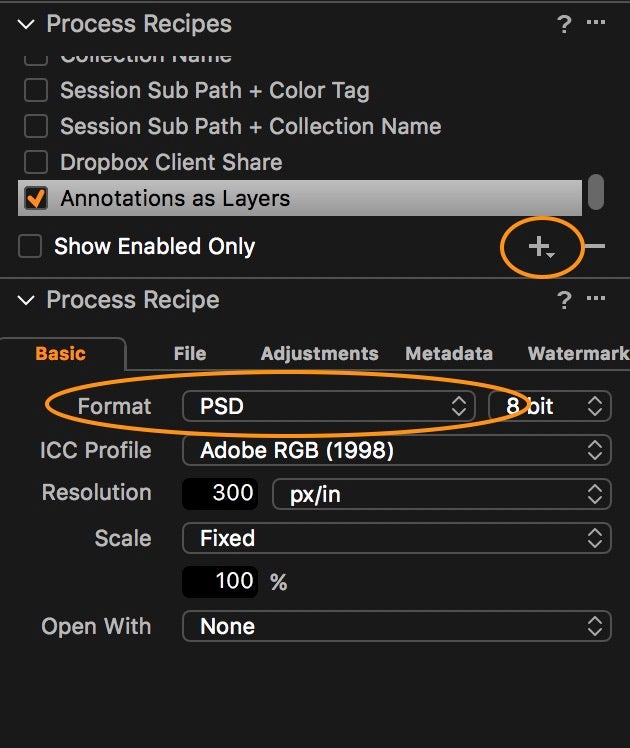
Setting up the Process Recipe
In the Metadata tool tab, make sure Annotations (as Layers) is checked.
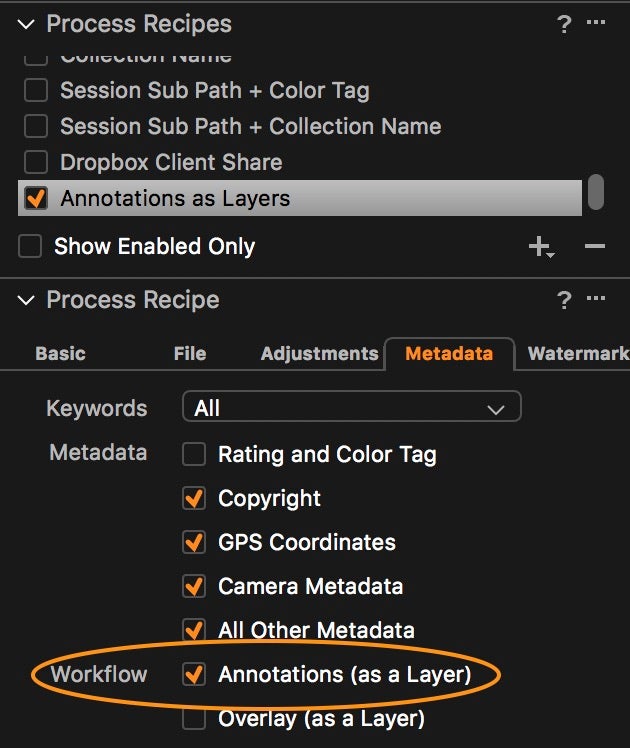
The Metadata tool tab.
Now, when processing out, your image will have an additional layer, just for annotations!
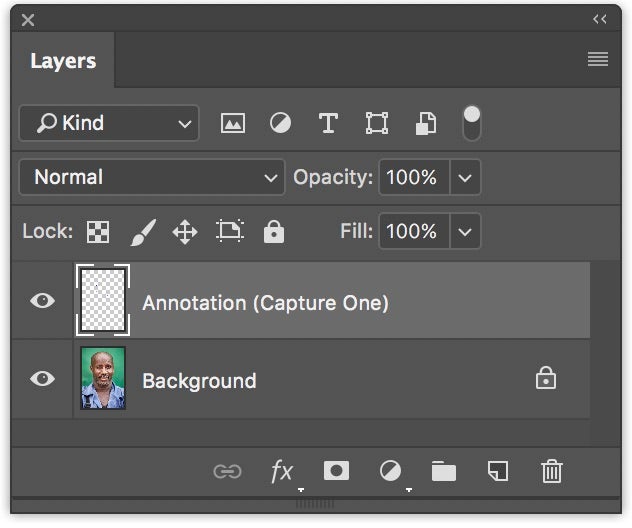
Photoshop Layers Tool (Note – PSD is the only format supported to show Annotations as a separate layer.)
Performance
As mentioned at the start of the article, everything is swifter in Capture One 11, from drawing masks to making adjustments.
Also under this “umbrella” there are some internal changes to Capture One’s Catalog system, making larger catalogs open and perform much better. When importing, duplicate images will be recognized to avoid doubling up with the same image in your catalog. Finally, backup and restore routines have been much improved.
Capture One 11 is available today
Capture One Express for Sony is completely free for a lifetime.
To see if your Sony camera is compatible check this link. It more than likely is.
Capture One 11 is available on a fully featured 30-day trial at www.phaseone.com/download for both Mac and PC.
You can buy Capture One Pro for Sony outright for $79USD.
If you have an older version of Capture One Pro Sony, you can upgrade for $69USD.
See all buying options at www.phaseone.com/store
About the author:
David Grover is a Capture One expert based in the UK. In addition to writing a weekly column for Alpha Universe, he runs the Capture One weekly webinar series on Capture One Pro and produces a series of video tutorials on Capture One as well.
To get started using Capture One 11 take a look at these videos:
