Music photography isn't easy. Lighting is all over the map, there are plenty of physical obstacles and the artists on the stage aren't going to hold still for you. We connected with Sony Artisan Chad Wadsworth to learn how he sets up his Sony mirrorless cameras for success.
Shoot In RAW
The first thing I do is just make sure the camera is set up for RAW. Generally, for almost any type of concert photography I want to make sure I’m configured to maximize the available light. Concerts are generally low-light situations so I'll shoot with faster lenses, and for the camera itself, I'll set up with RAW as opposed to JPEG to maximize the range I’ll have available in the file. I touch just about every file, every image that I take, and RAW gives me that extra malleability in tough lighting conditions.
AF Controls
Second I like to customize the buttons and so I have consistency between all of my cameras. That's an important thing. As you switch between camera bodies at a shoot you want to make sure that your muscle memory is dialed in to make the changes on all those different cameras. Here’s how I set up the buttons on all of my Sony cameras (NOTE: Depending on your specific camera model, features may be in a different menu location than we are showing here):
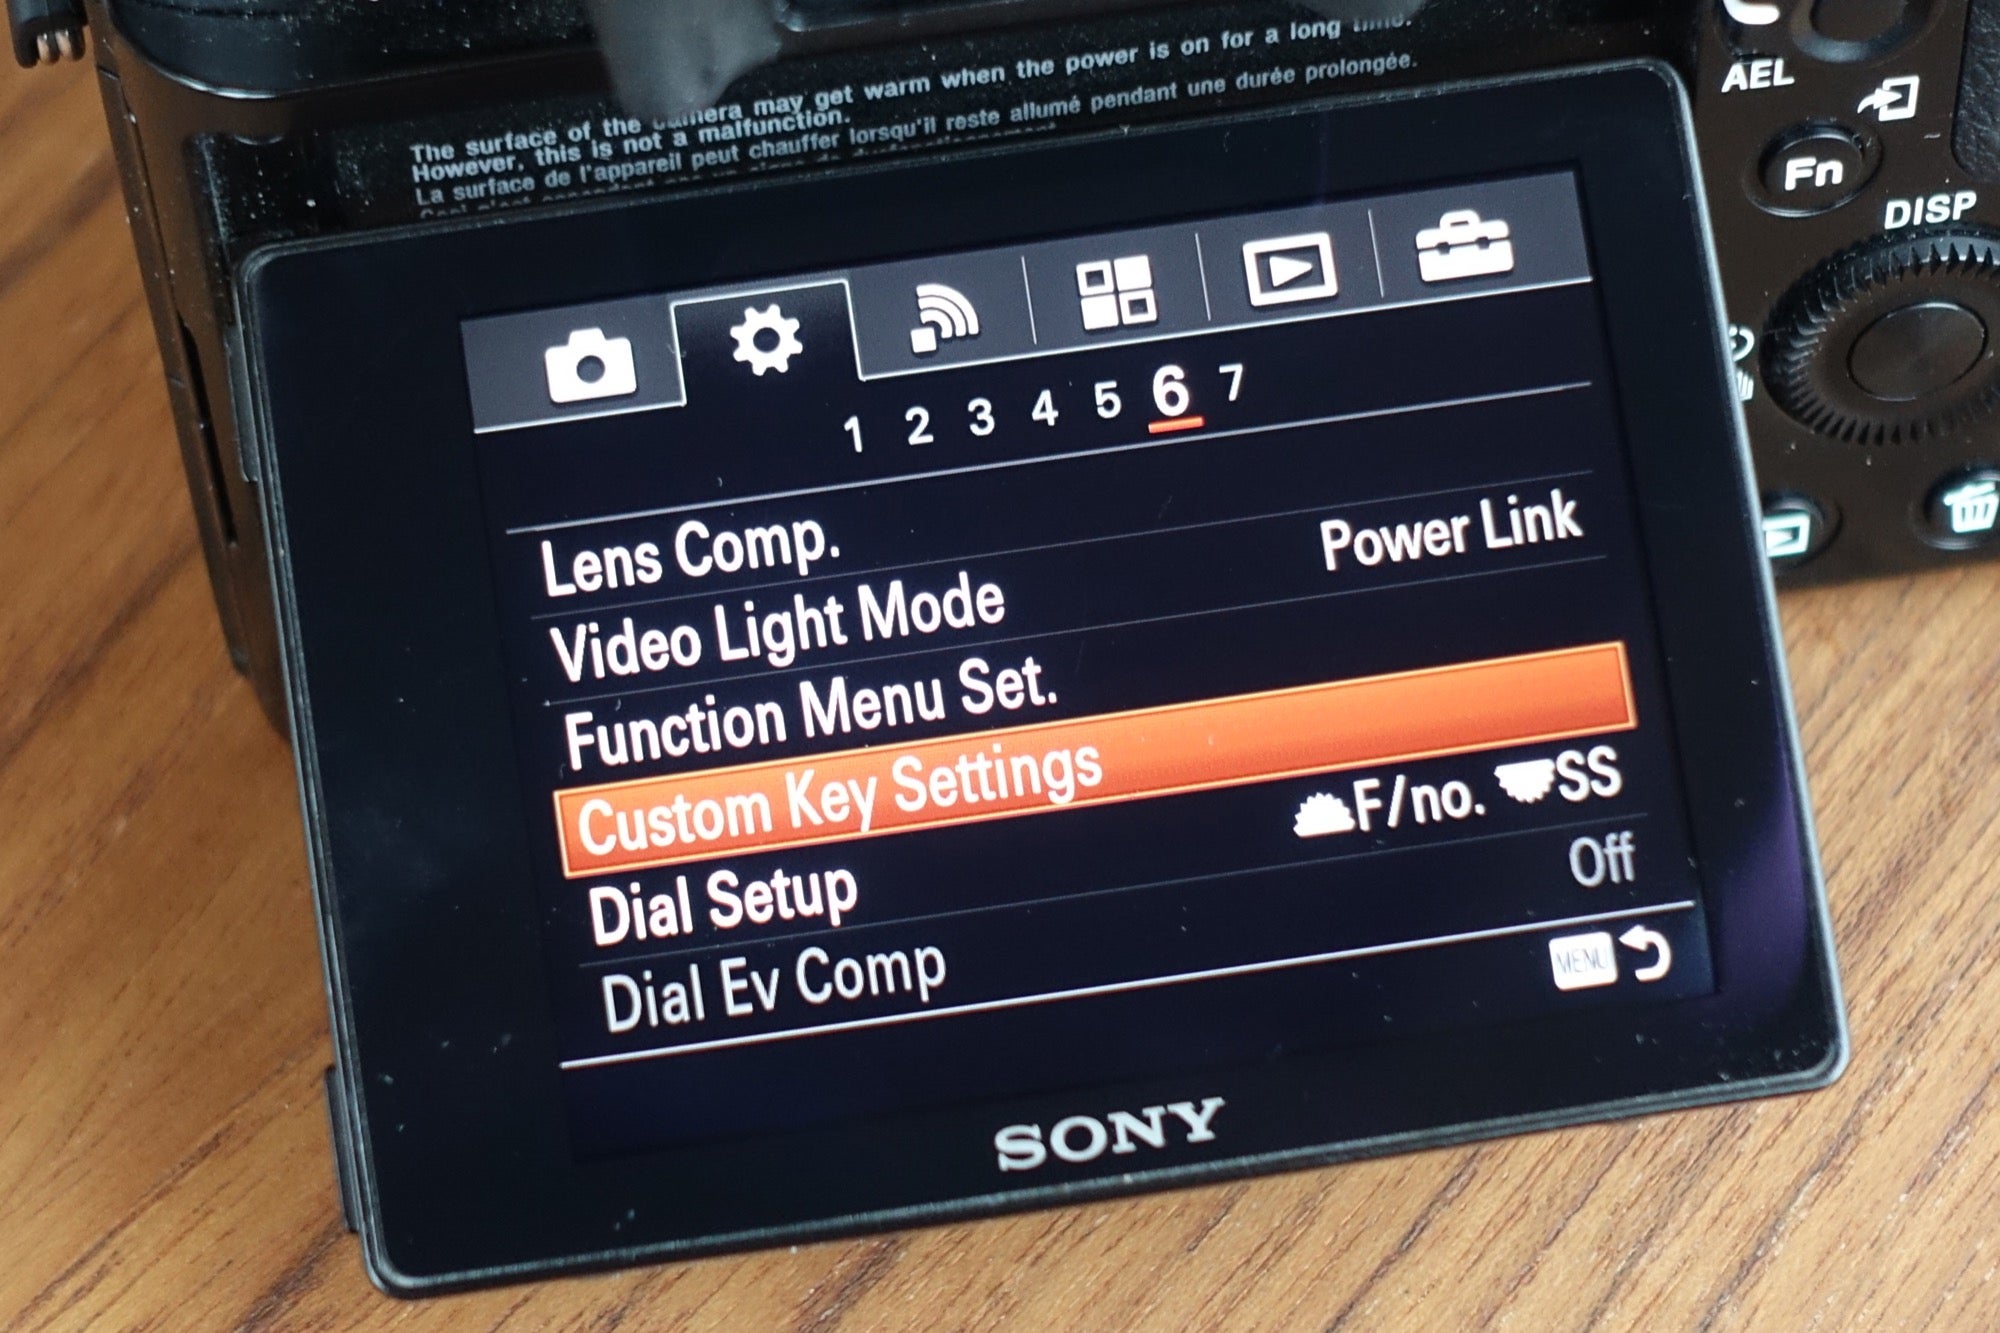
Starting with the Custom Key Settings...
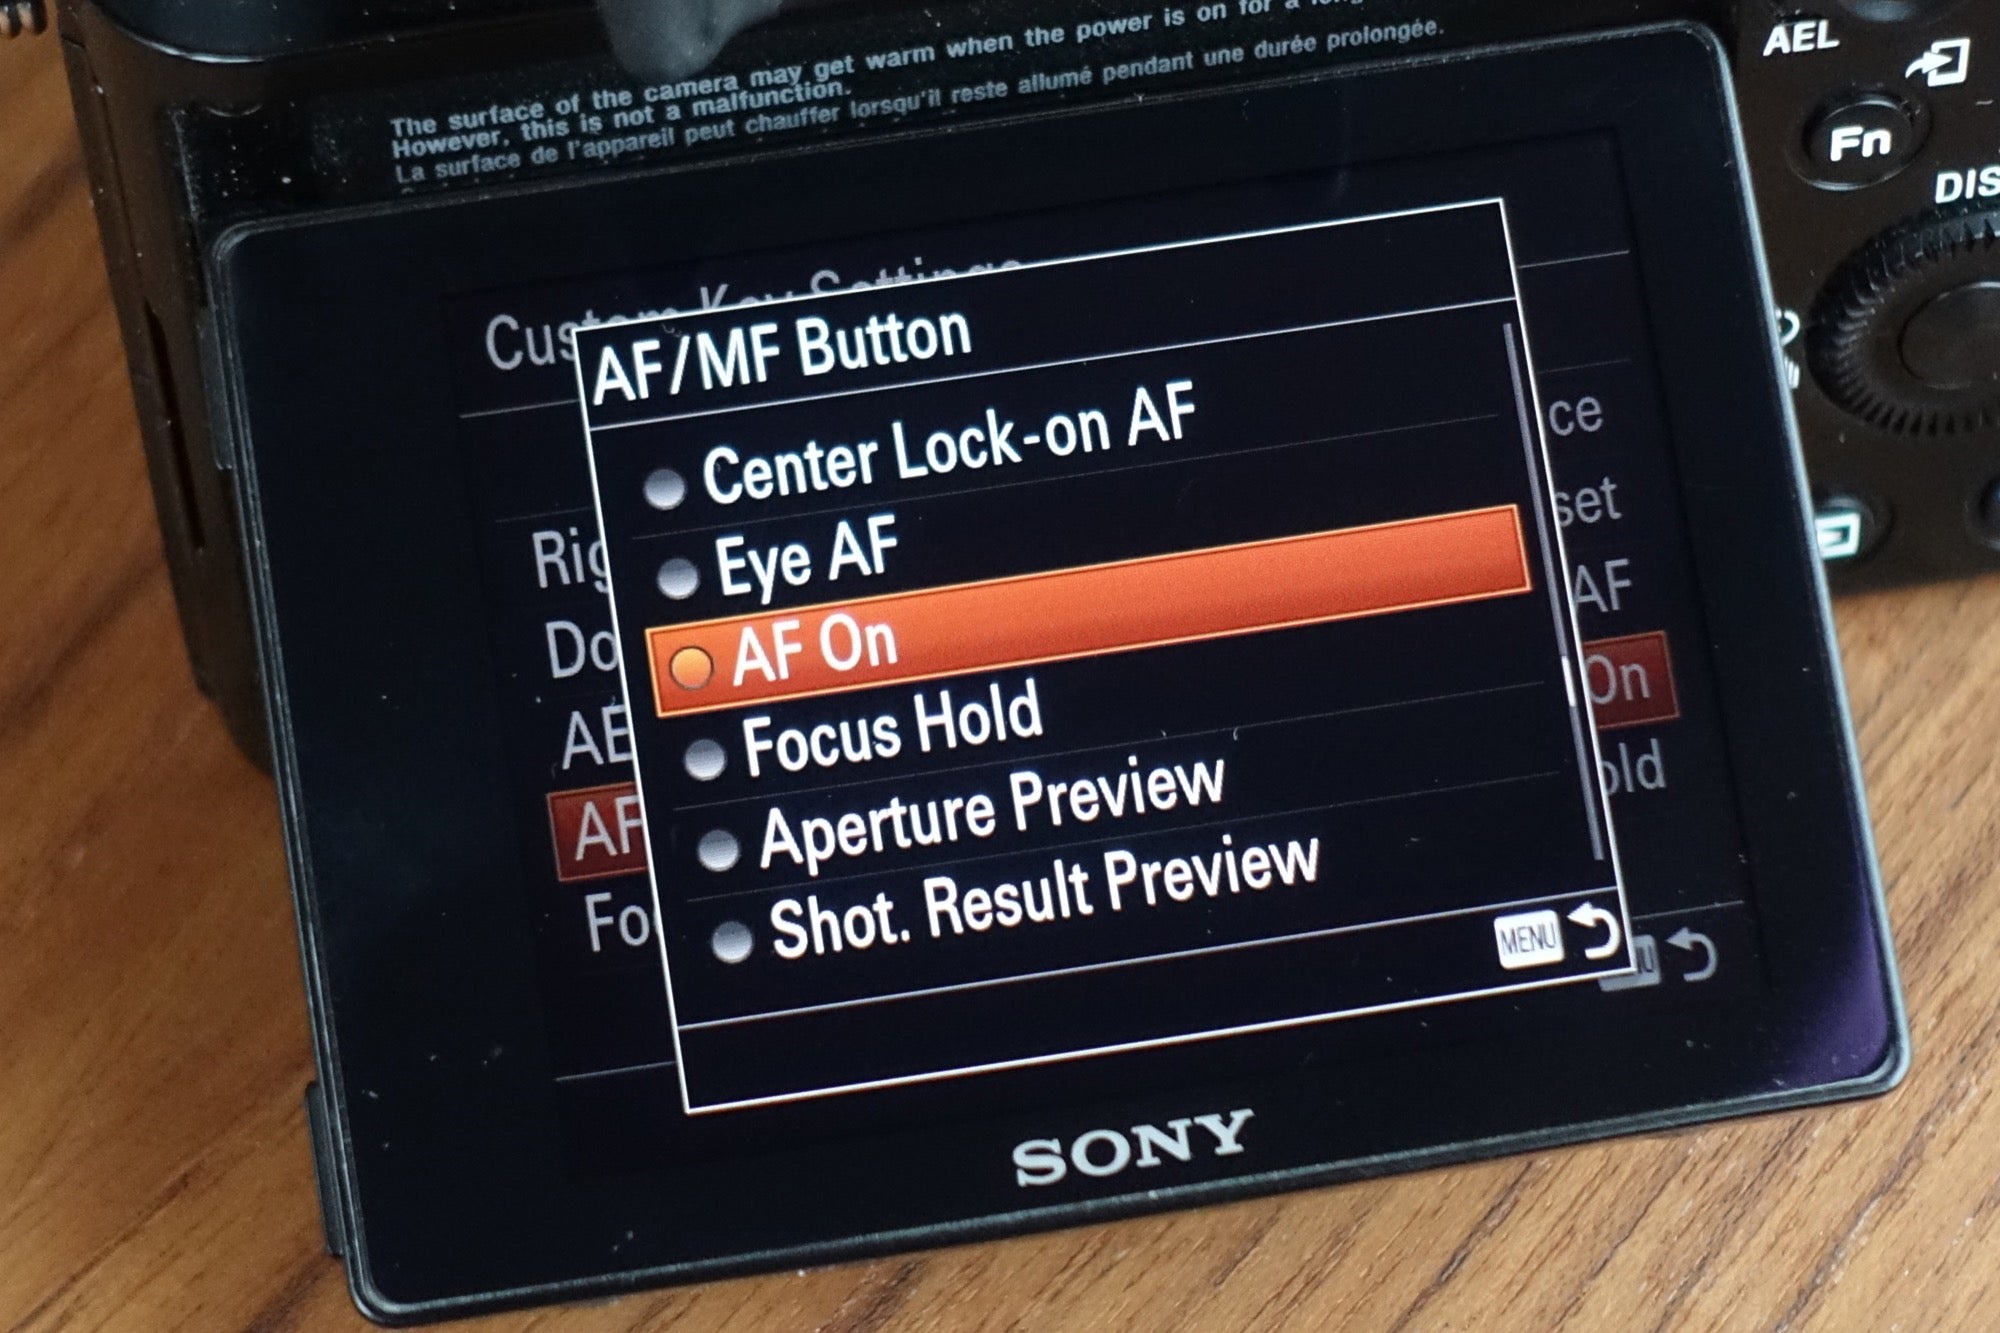
Most importantly, I enable the Back Button MF/AF to turn on the autofocus.
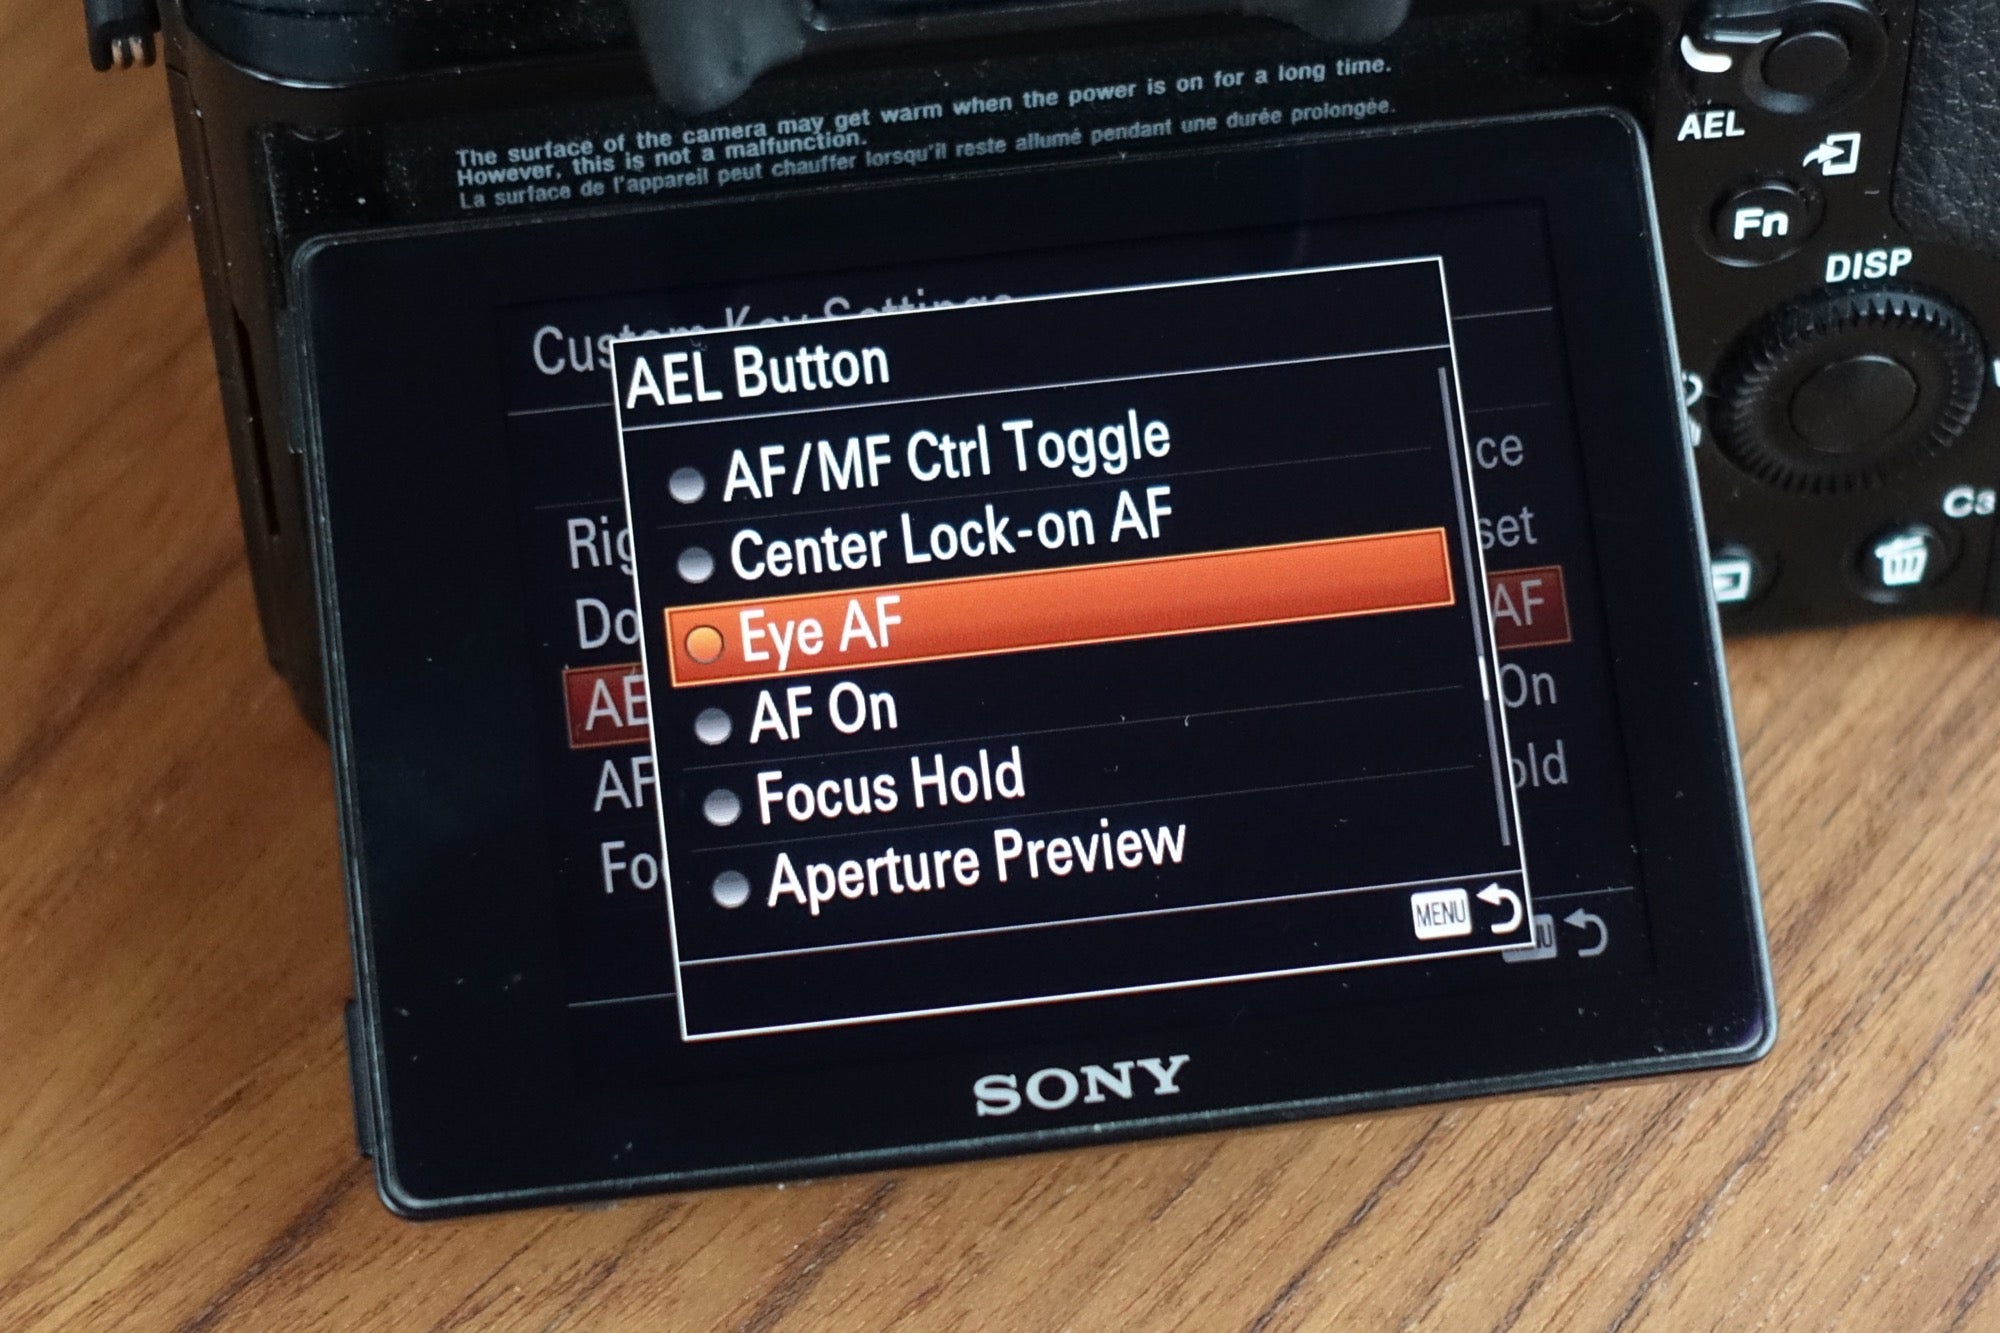
Next, I'll set the AEL button on the back of the camera (the same button, but with the switch on AEL) to Eye Auto Focus. It’s a great feature that will lock-in focus on the eye. (See more about Eye AF here.)
Those back button settings give me a bunch of different options with just the flick of a switch.
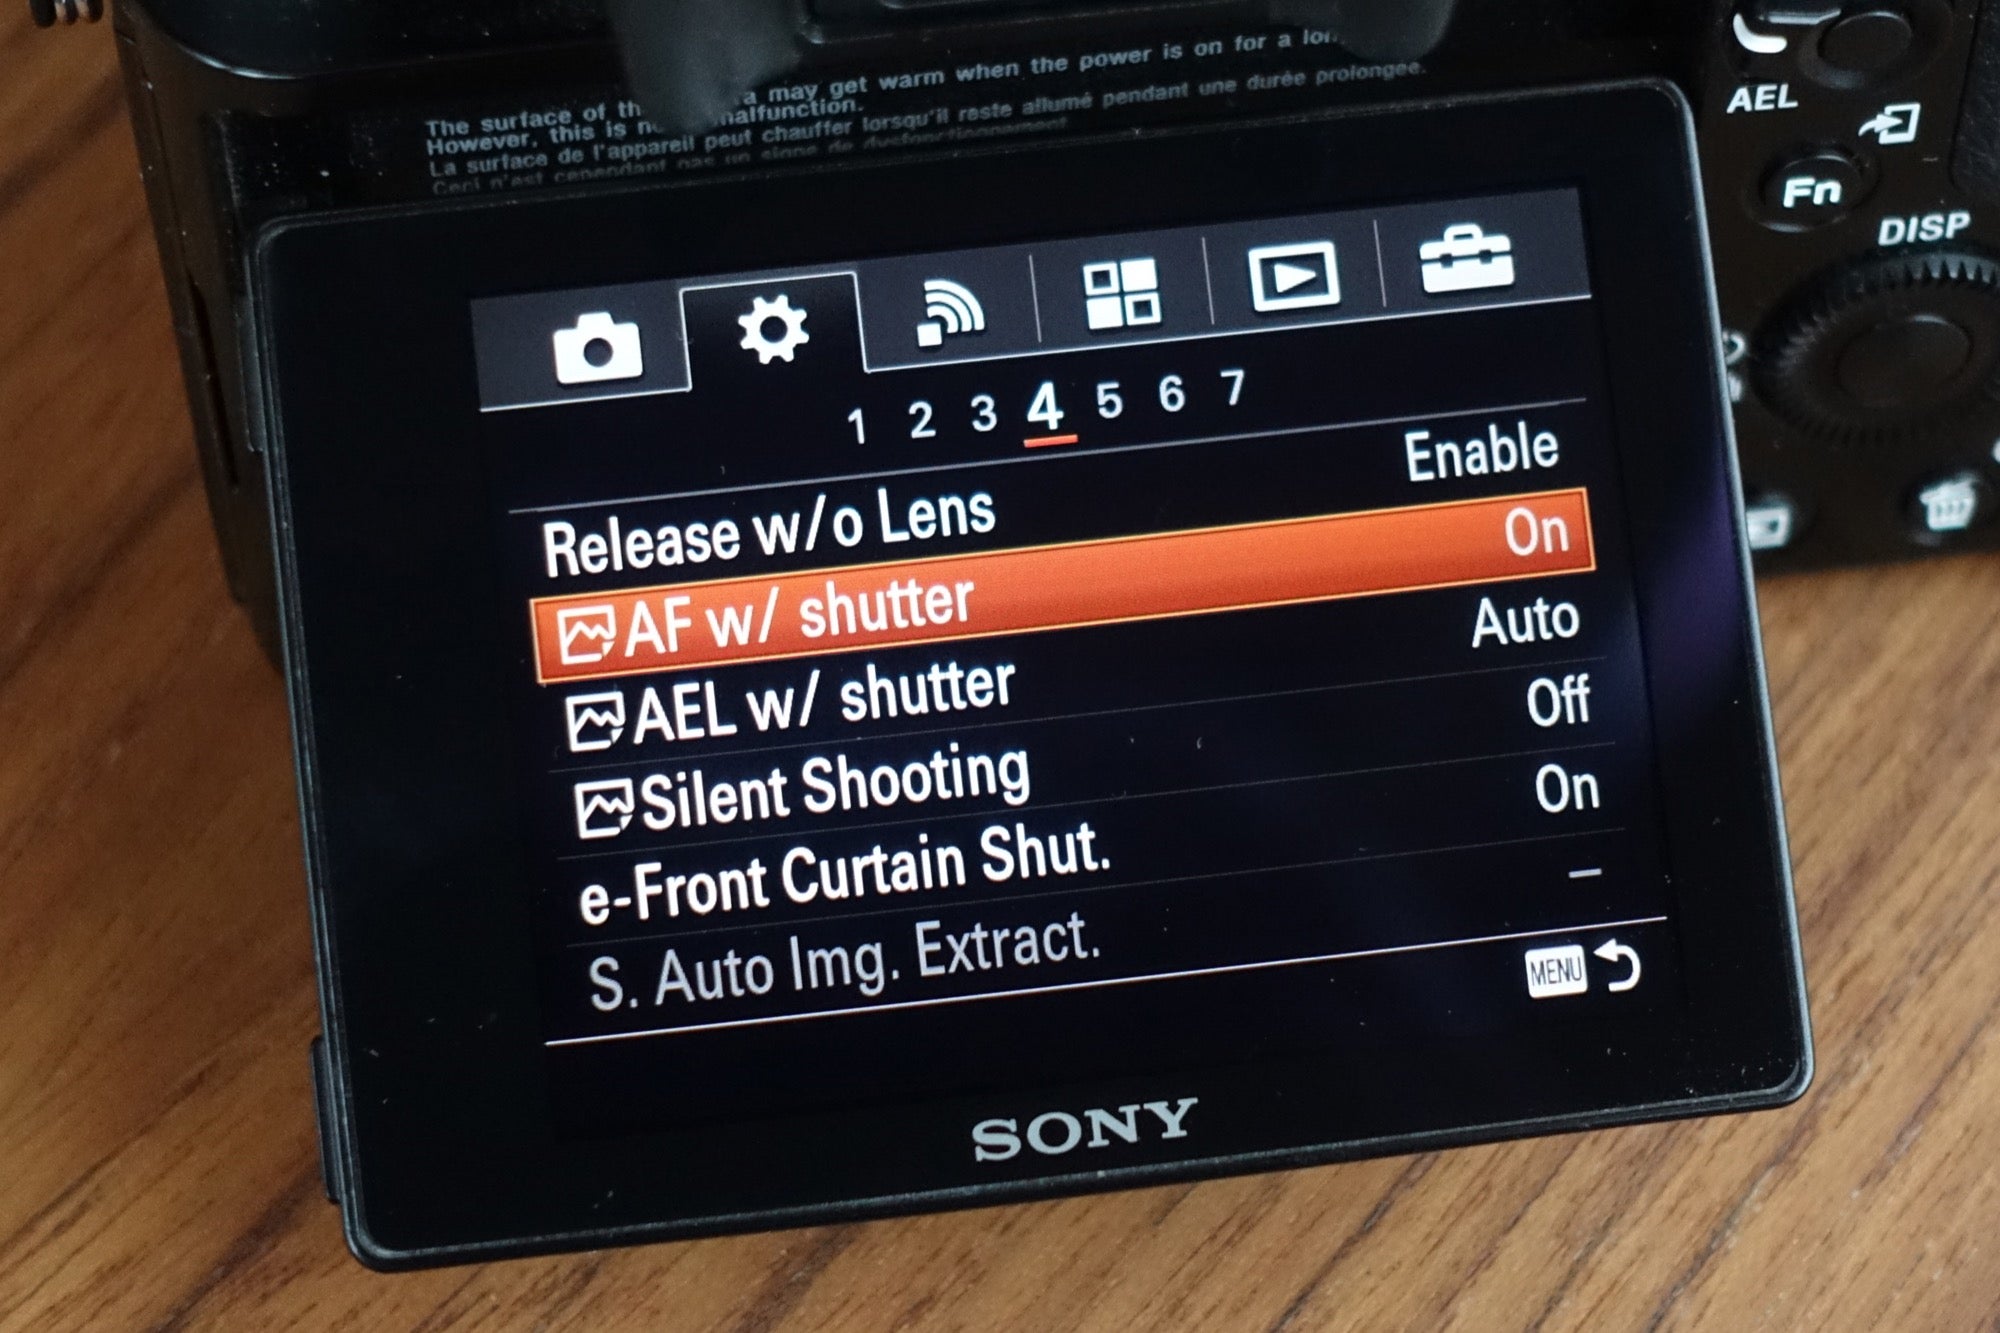
I keep the shutter button AF on. Some people will turn that off completely because they just want the auto focus to be set to the back button, but I like having both. Here’s an example of why. Say I want to be in Eye AF mode. I've got the AEL switch down so if I hit that back button, it'll focus on your eye. Now say the conditions change and I realize that the system's not going to be able to find your eye because something happened with the light or the performer put a hat on or just something happened where it's not a good fit for that mode. Then, all I have to do is just use my index finger on the traditional shutter button and that will be traditional AF.
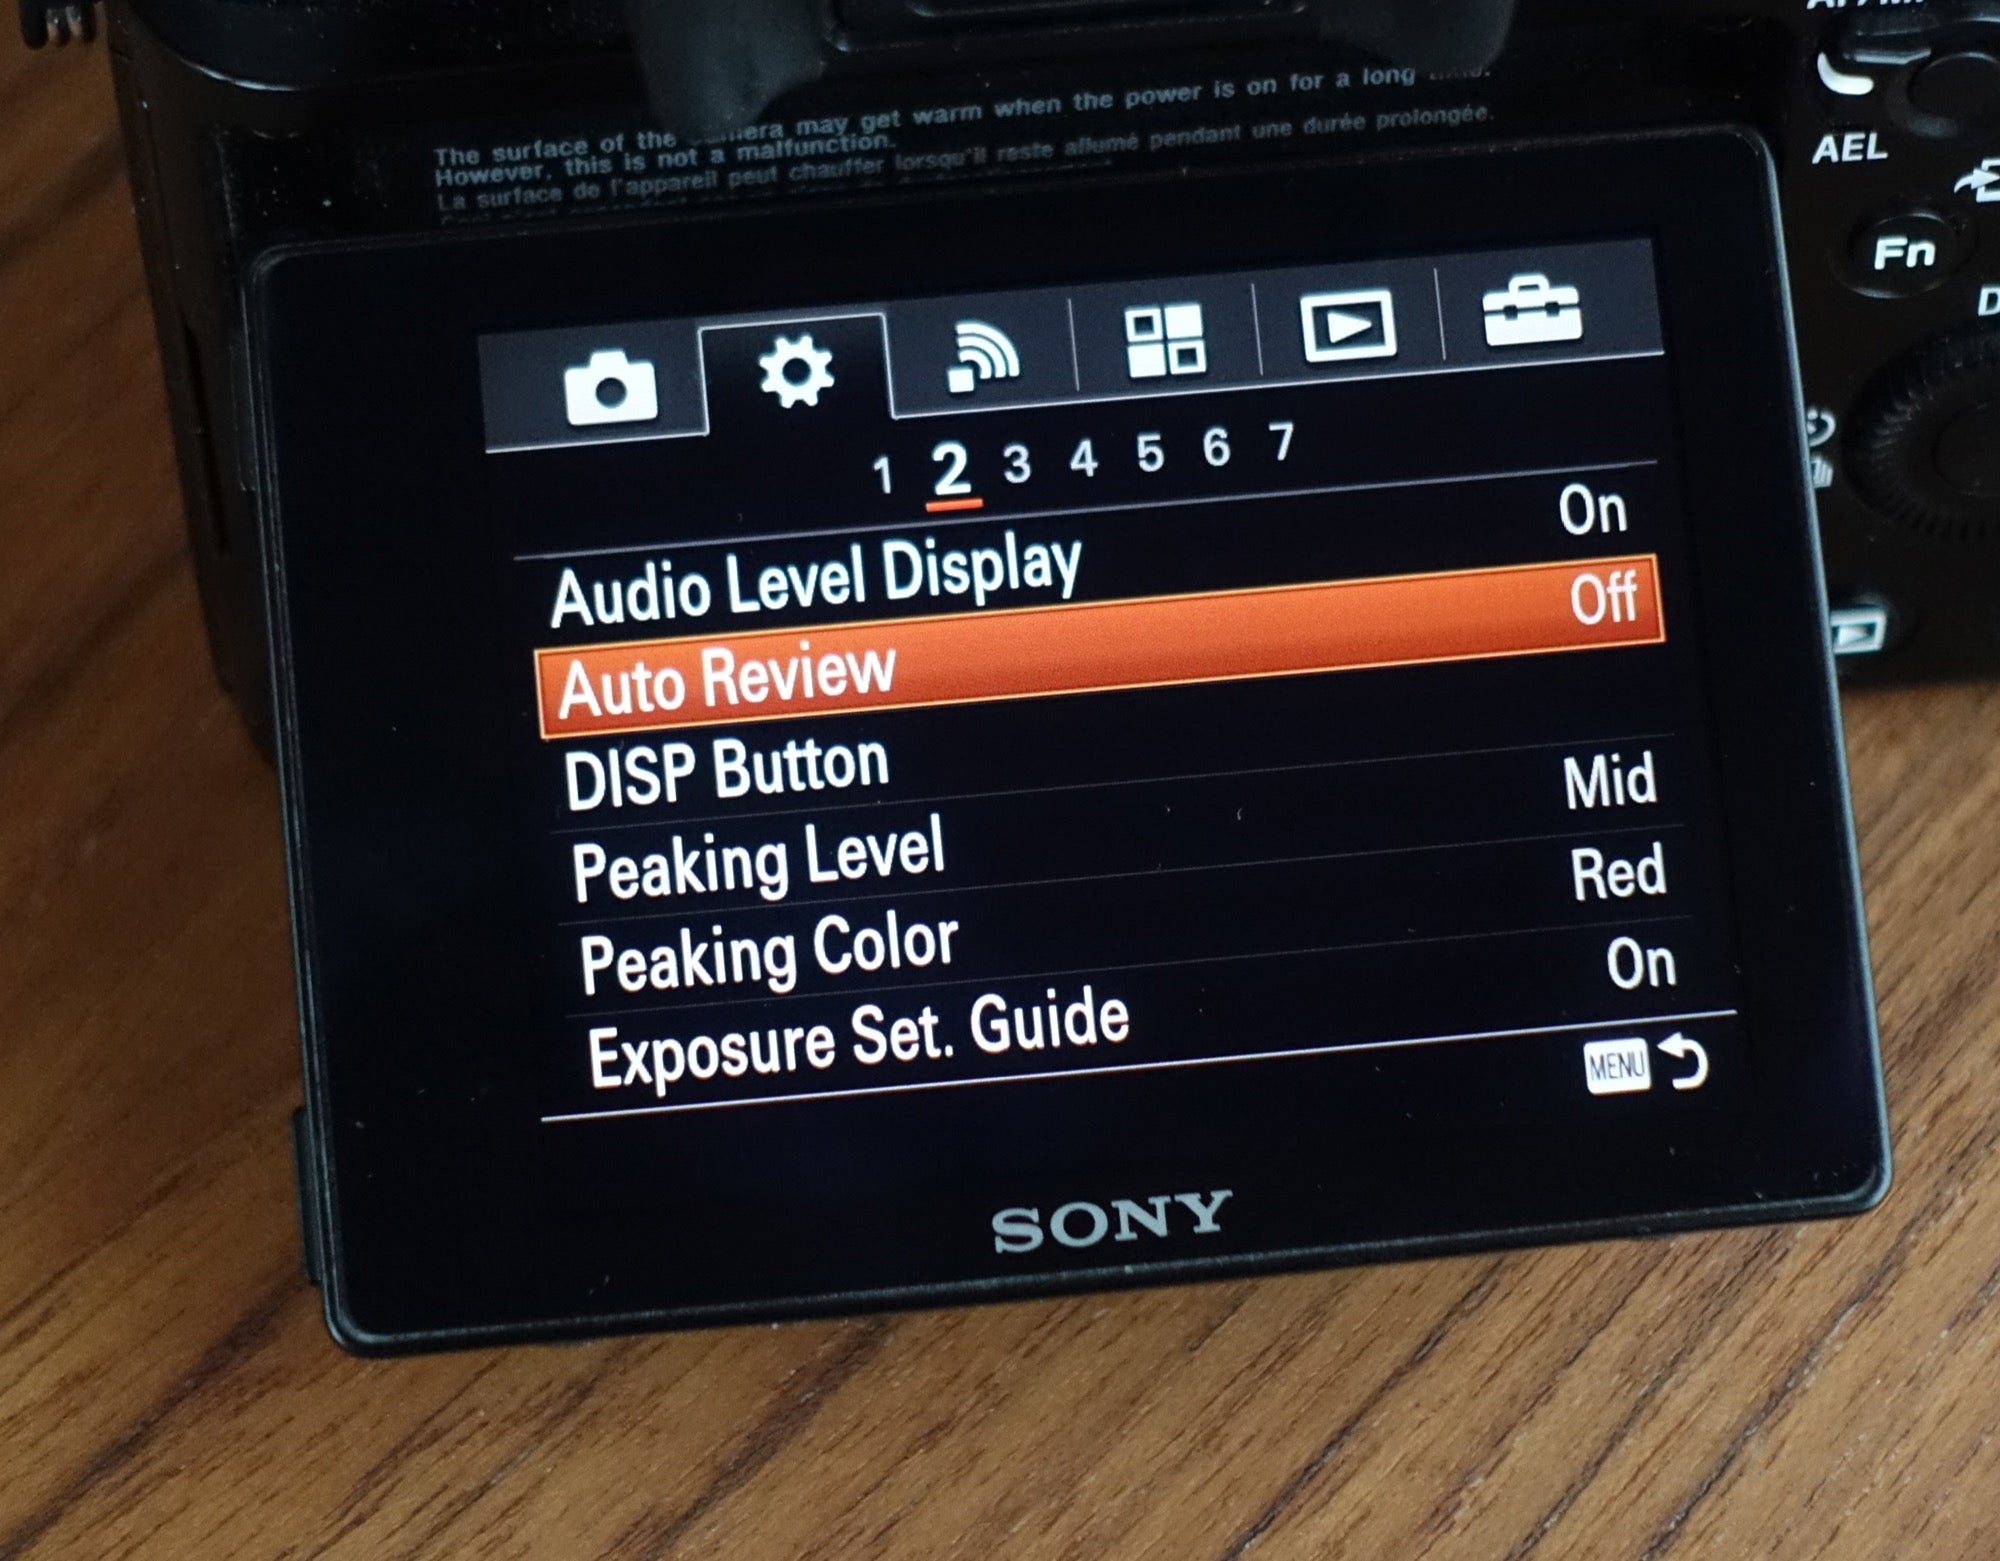
Auto Review Off
I always turn off Auto Review. I want to keep seeing reality as it happens and the auto review just kind of takes me out of the moment. I can see where it's a very helpful tool for situations if you need that immediate feedback, but for me, I generally turn that off right away.
IBIS With Fully Manual Lenses
Lastly, I want to mention a setting I use with some of my lenses. Because I use some manual-focus prime lenses with no electronics in them there’s important consideration with the In-Body Image-Stabilization system (IBIS). You don't want to have your IBIS set for a 25 millimeter lens if you're using a 200 or vice versa. With a Sony lens and some others, there are electronic connections that tell the camera the focal length and so the camera's IBIS system knows the proper setting.
When I’m using a manual lens that doesn't have electronic connections I have to tell the camera what focal length to set. I use the C2 button to tell the camera whether I want auto or manual image stabilization. When I press that button I get a quick menu pops up and I tell it, for example, when I'm using a manual lens.
Then the C4 button which is the trash can, I use to set the focal length of the lens that I'm using. Now that's a setting that most people probably aren't going to use, but for those that are using manual focus lenses or a solution like I talked about with the adapter, it's very important if you want to set the correct focal length to your manual focus lens.


