Few subjects test a shooter’s skill quite like birds in flight. Nailing the shot requires fast reflexes, impeccable technique, and an absolute mastery of wind and light. Few know this better than 80-year-old Arthur Morris. With 43 years in the field, the creator of BIRDS AS ART has built a world-renowned career capturing nature’s most dynamic moments. Below, Artie breaks down the essential skills – from reading the sky conditions and light to choosing and dialing in your Sony gear – to help you land crisp, keeper-quality flight shots.
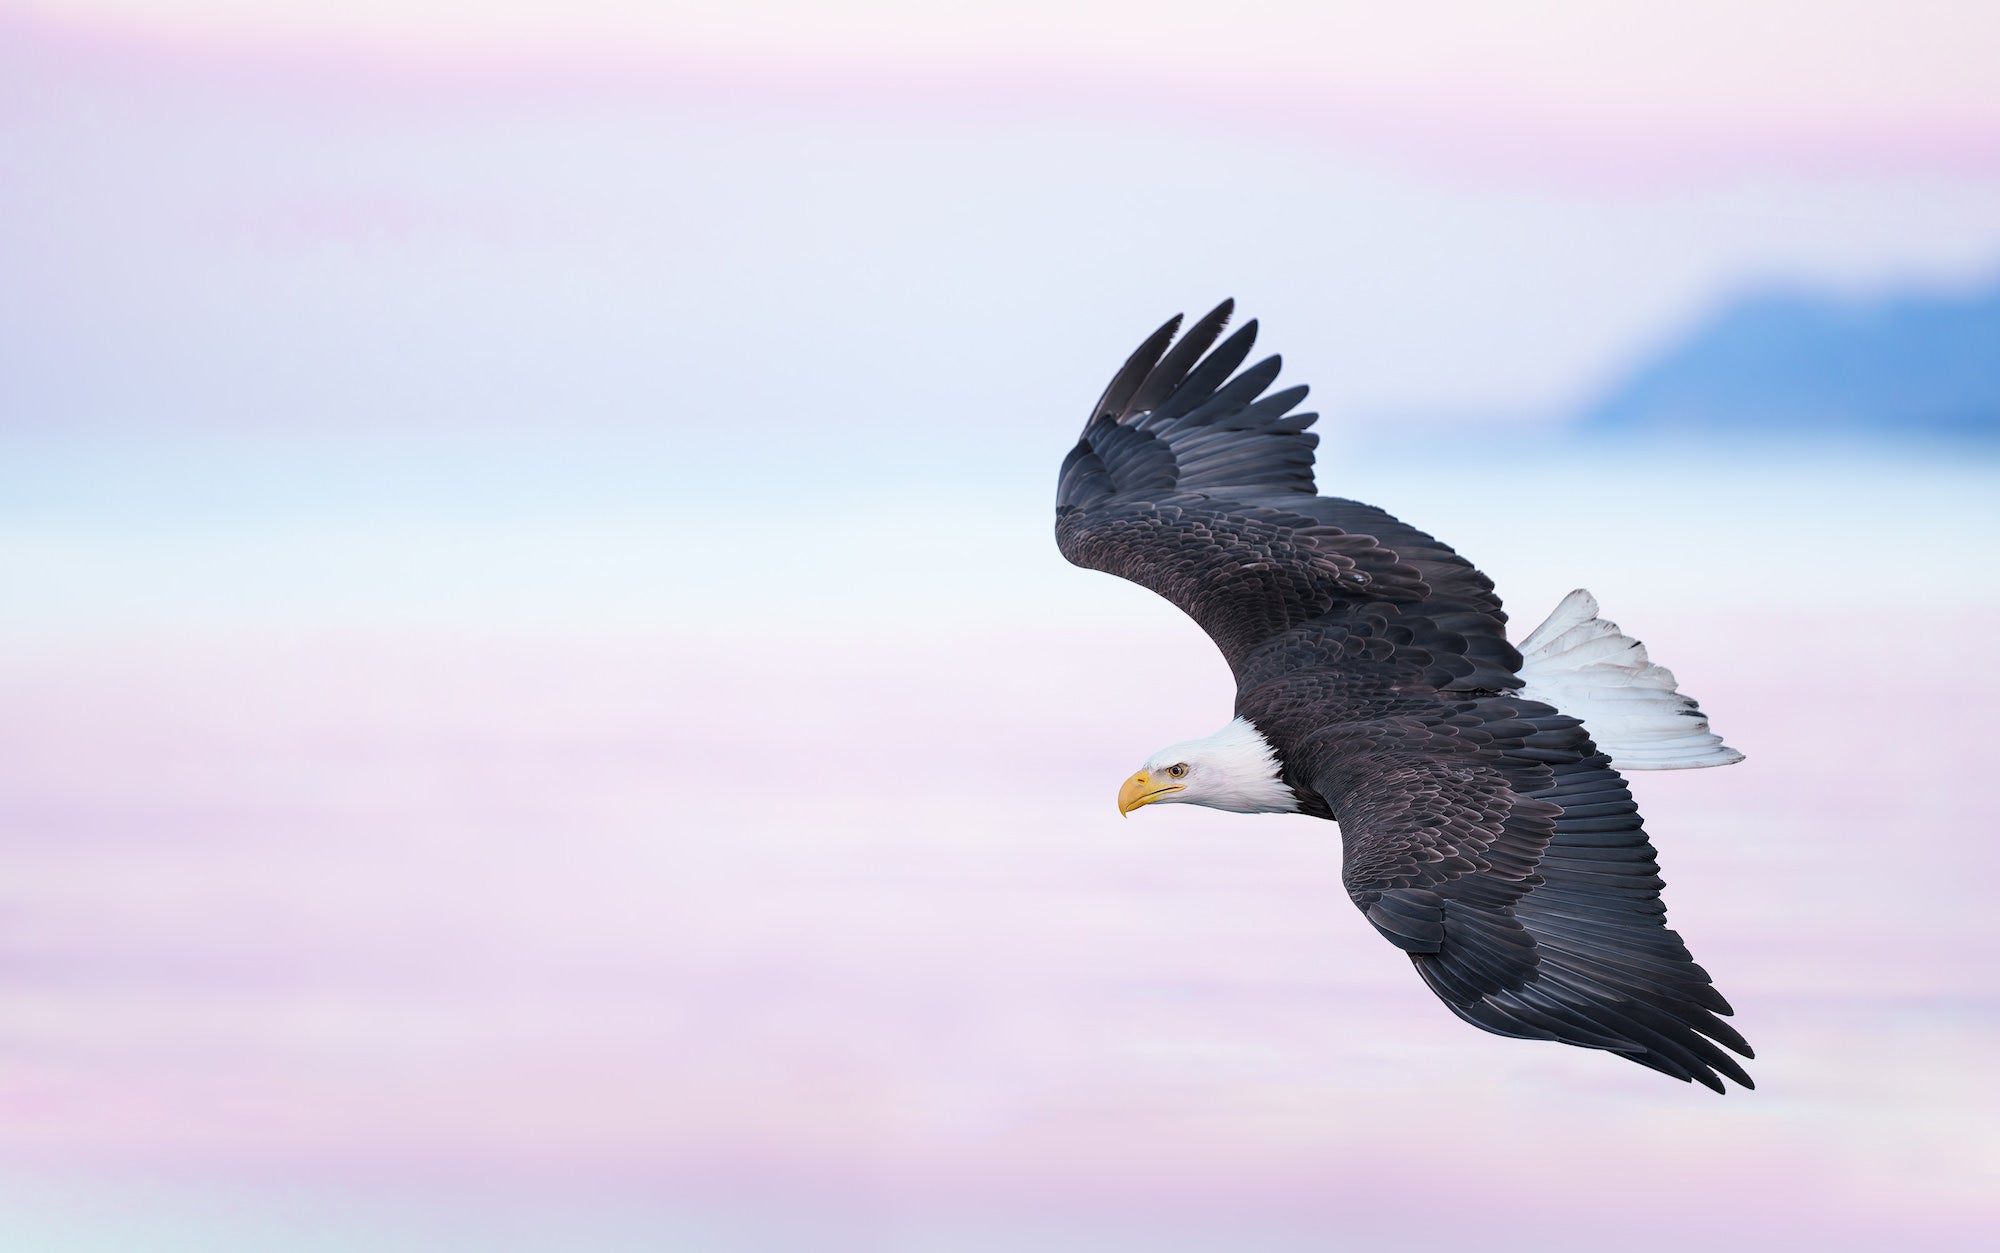
"Bald Eagle in pink pre-dawn light, Kachemak Bay, Homer, Alaska. Tracking: Zone AF-C with Bird Eye-AF enabled. On clear mornings, the sky opposite the sunrise will often yield lovely pink light. Fast lenses with f/2.8 apertures are ideal for low-light conditions. Flat flight poses that show the dorsal wing surfaces can be quite pleasing. The Sony 300mm f/2.8 GM is the lightest by far in its class and produces razor-sharp flight images with either teleconverter." Photo by Arthur Morris. Alpha 1. 300mm f/2.8 G Master. 1/2500-sec., f/2.8, ISO 3200
Understanding Wind Direction & Sky Conditions
Like airplanes, birds almost always take off, fly, and land directly into the wind. Because of this, your best general strategy is to keep the wind at your back.
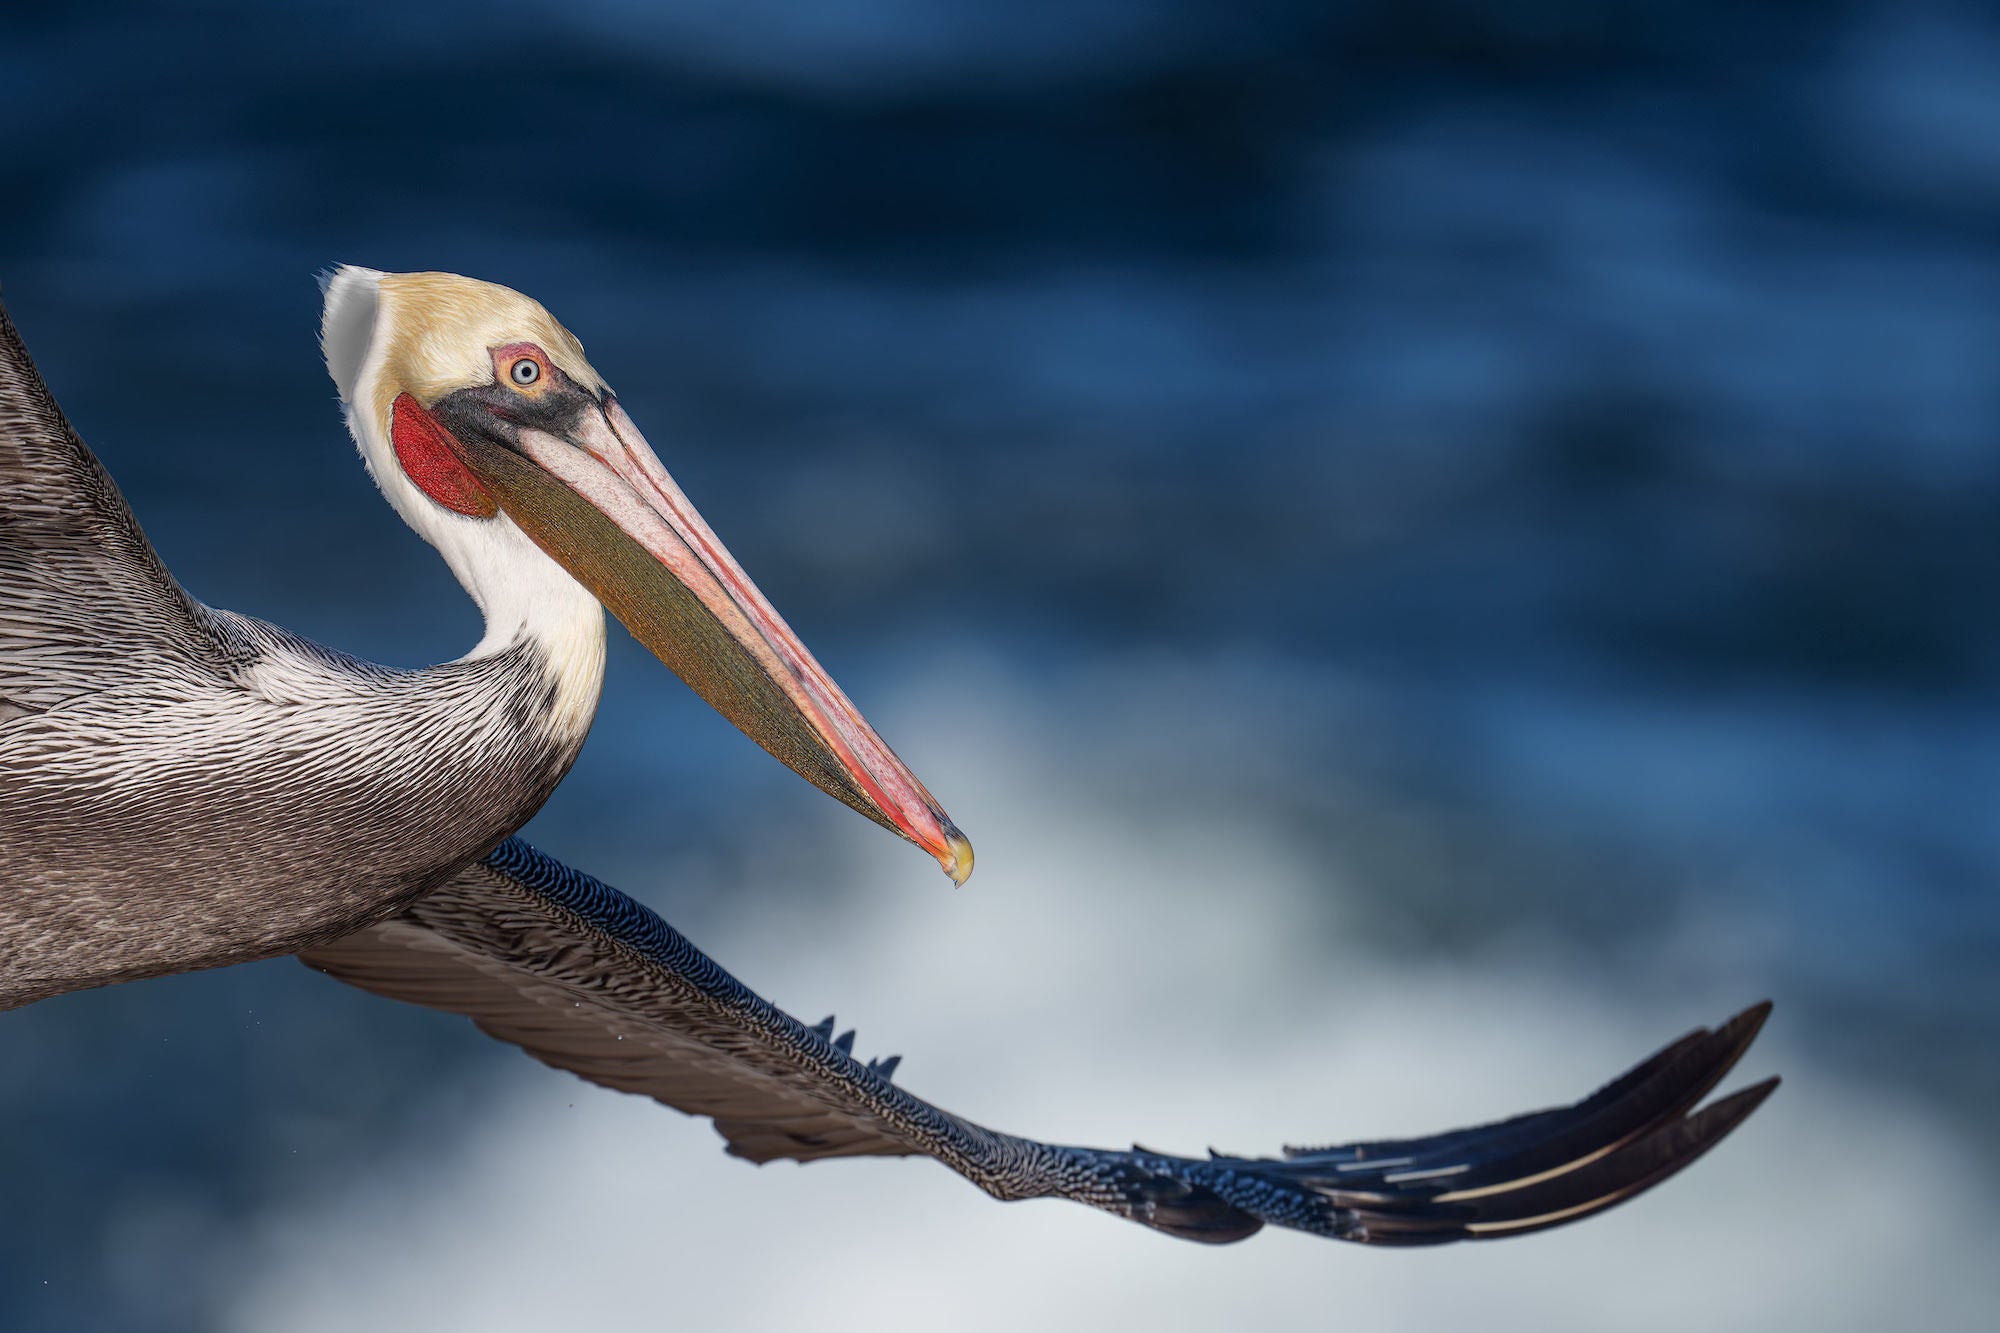
"Brown Pelican Pacific-race in flight, La Jolla, California. I used the Levered-clamp FlexShooter Pro and Robus RC-5570 tripod. Wide/AF-C with Bird Eye-AF enabled. Though the wide AF pattern will track the bird’s eye anywhere in the frame it is best to acquire focus with the bird’s head in the center of the frame and then re-compose as needed (with slow flying birds)." Photo by Arthur Morris. Alpha 1 II. 600mm f/4 G Master + 1.4x TC. 1/4000-sec., f/5.6, ISO 640
On Clear Days: Stay On Sun Angle
My number one rule for bird photography on clear days is simple: point your shadow at the bird (unless you are intentionally shooting backlit scenes or silhouettes). You want the sun coming right over the top of your head. By staying on sun angle, you can reduce or eliminate the harsh shadows that ruin many flight images.
- The Perfect Scenario: With the sun rising in the east, you want a wind with an easterly component (east, northeast, or southeast). In the late afternoon, you want a wind with some west in it.
- The Challenge: If the wind is coming from the west in the morning and you properly keep the sun behind you, the birds will take off, fly, and land directly away from you. Trying flight in wind-against-sun conditions makes front-lit flight photography extremely challenging. At times you might get lucky with a bird turning, banking, or simply flying the “wrong” way.
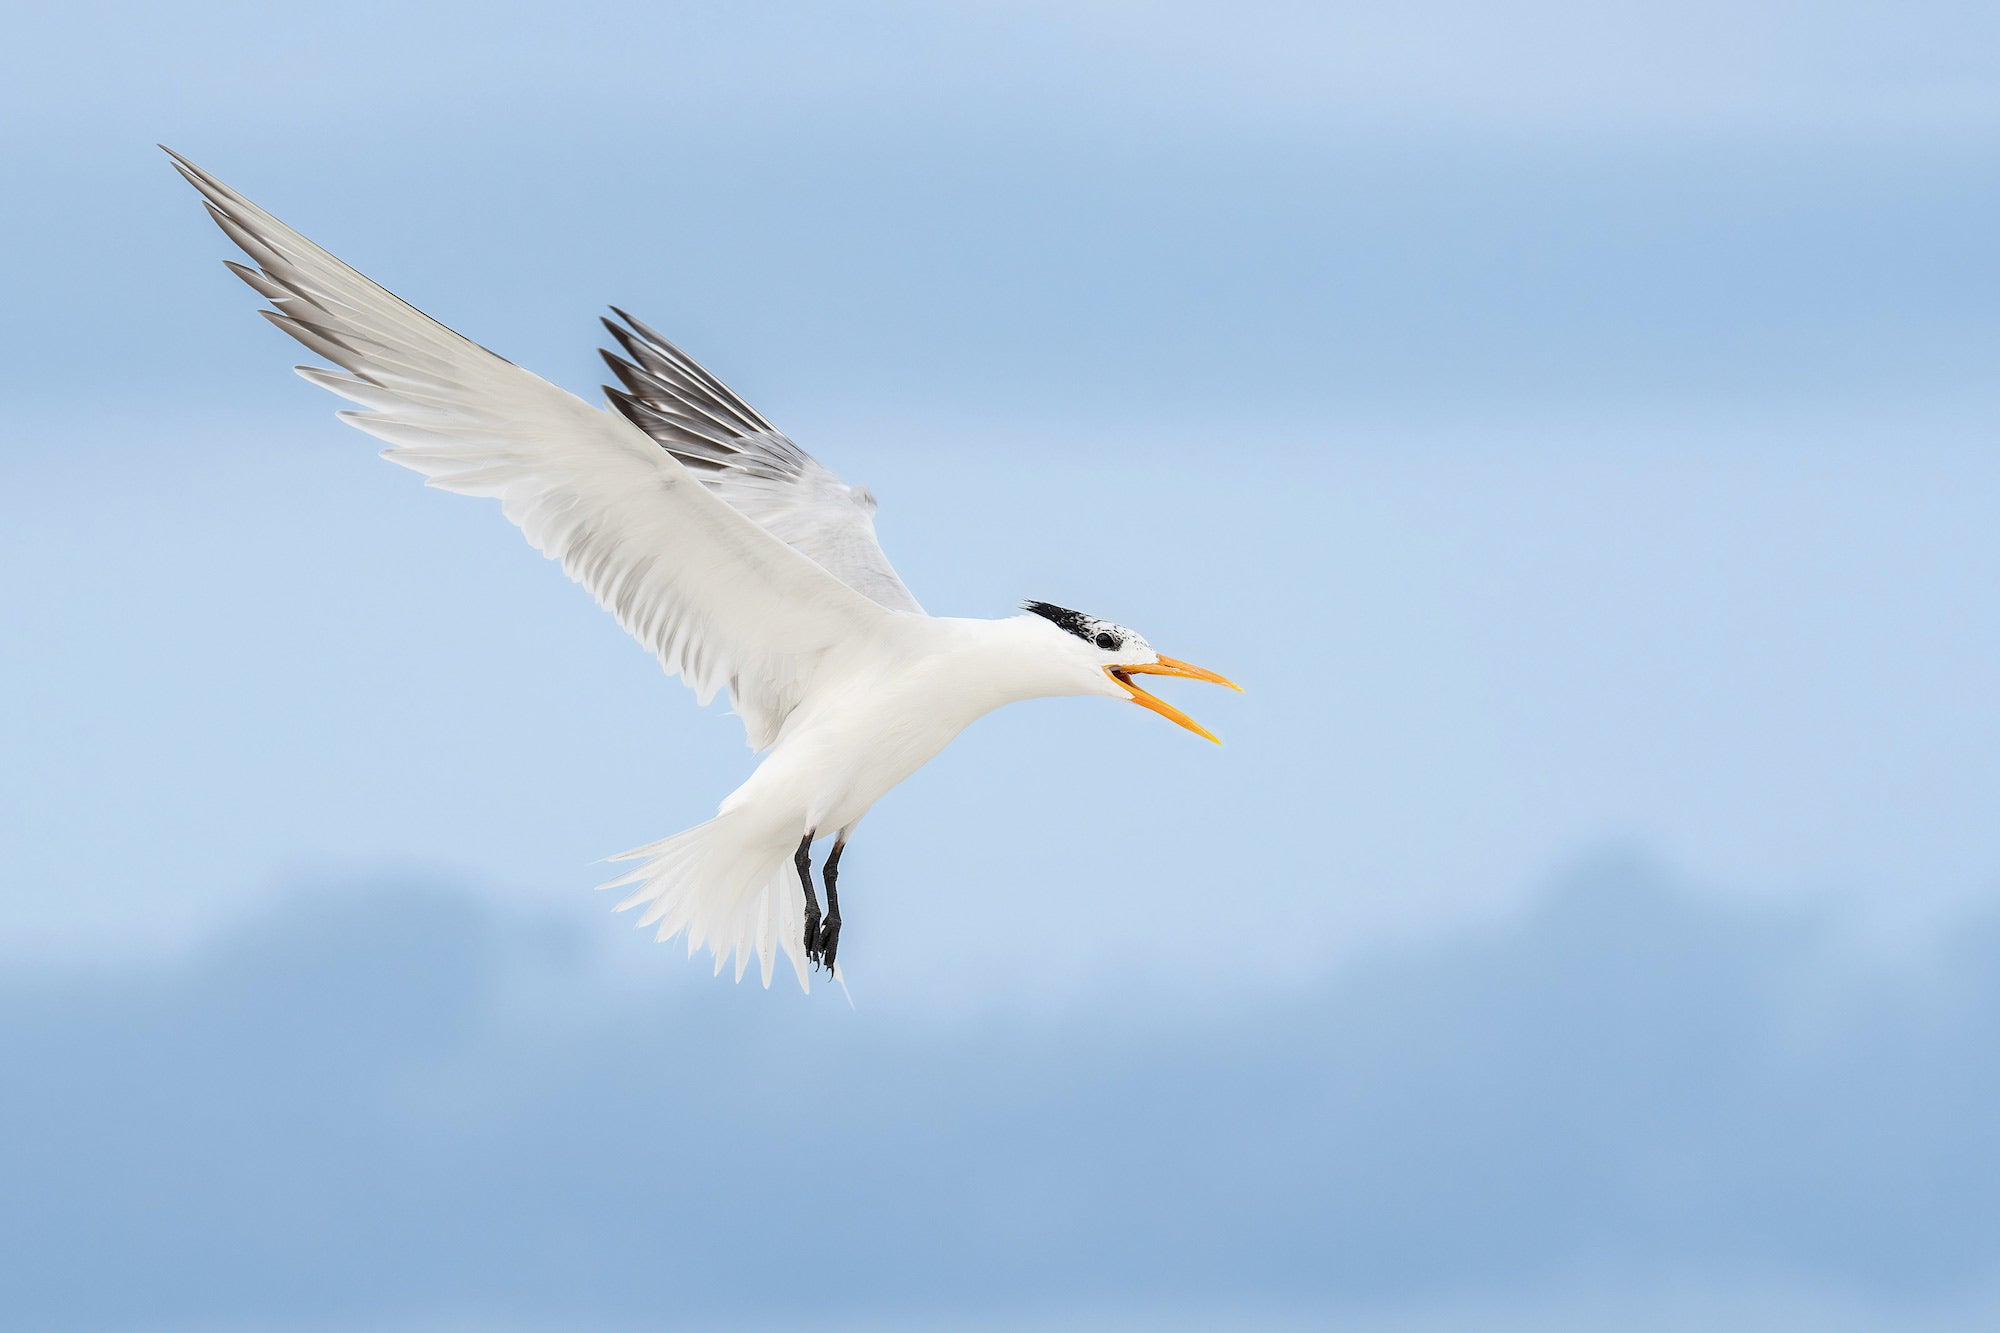
"Royal Tern calling to its chick on the beach, Huguenot Memorial Park, Jacksonville, FL. This lens features a convenient Smooth/Tight adjustment ring that prevents lens creep when carrying the setup with the lens pointed toward the ground. It is a superb flight lens that will be an absolute game-changer due to its incredible versatility." Photo by Arthur Morris. Alpha 1 II. 100-400mm f/4.5 G Master. 1/3200-sec., f/5.6, ISO 1600
On Cloudy Days: Wind Over Sun
On overcast days with no shadows, the sun angle no longer matters. Keep the wind at your back to ensure the birds are flying toward you. The best news? No underwing shadows!
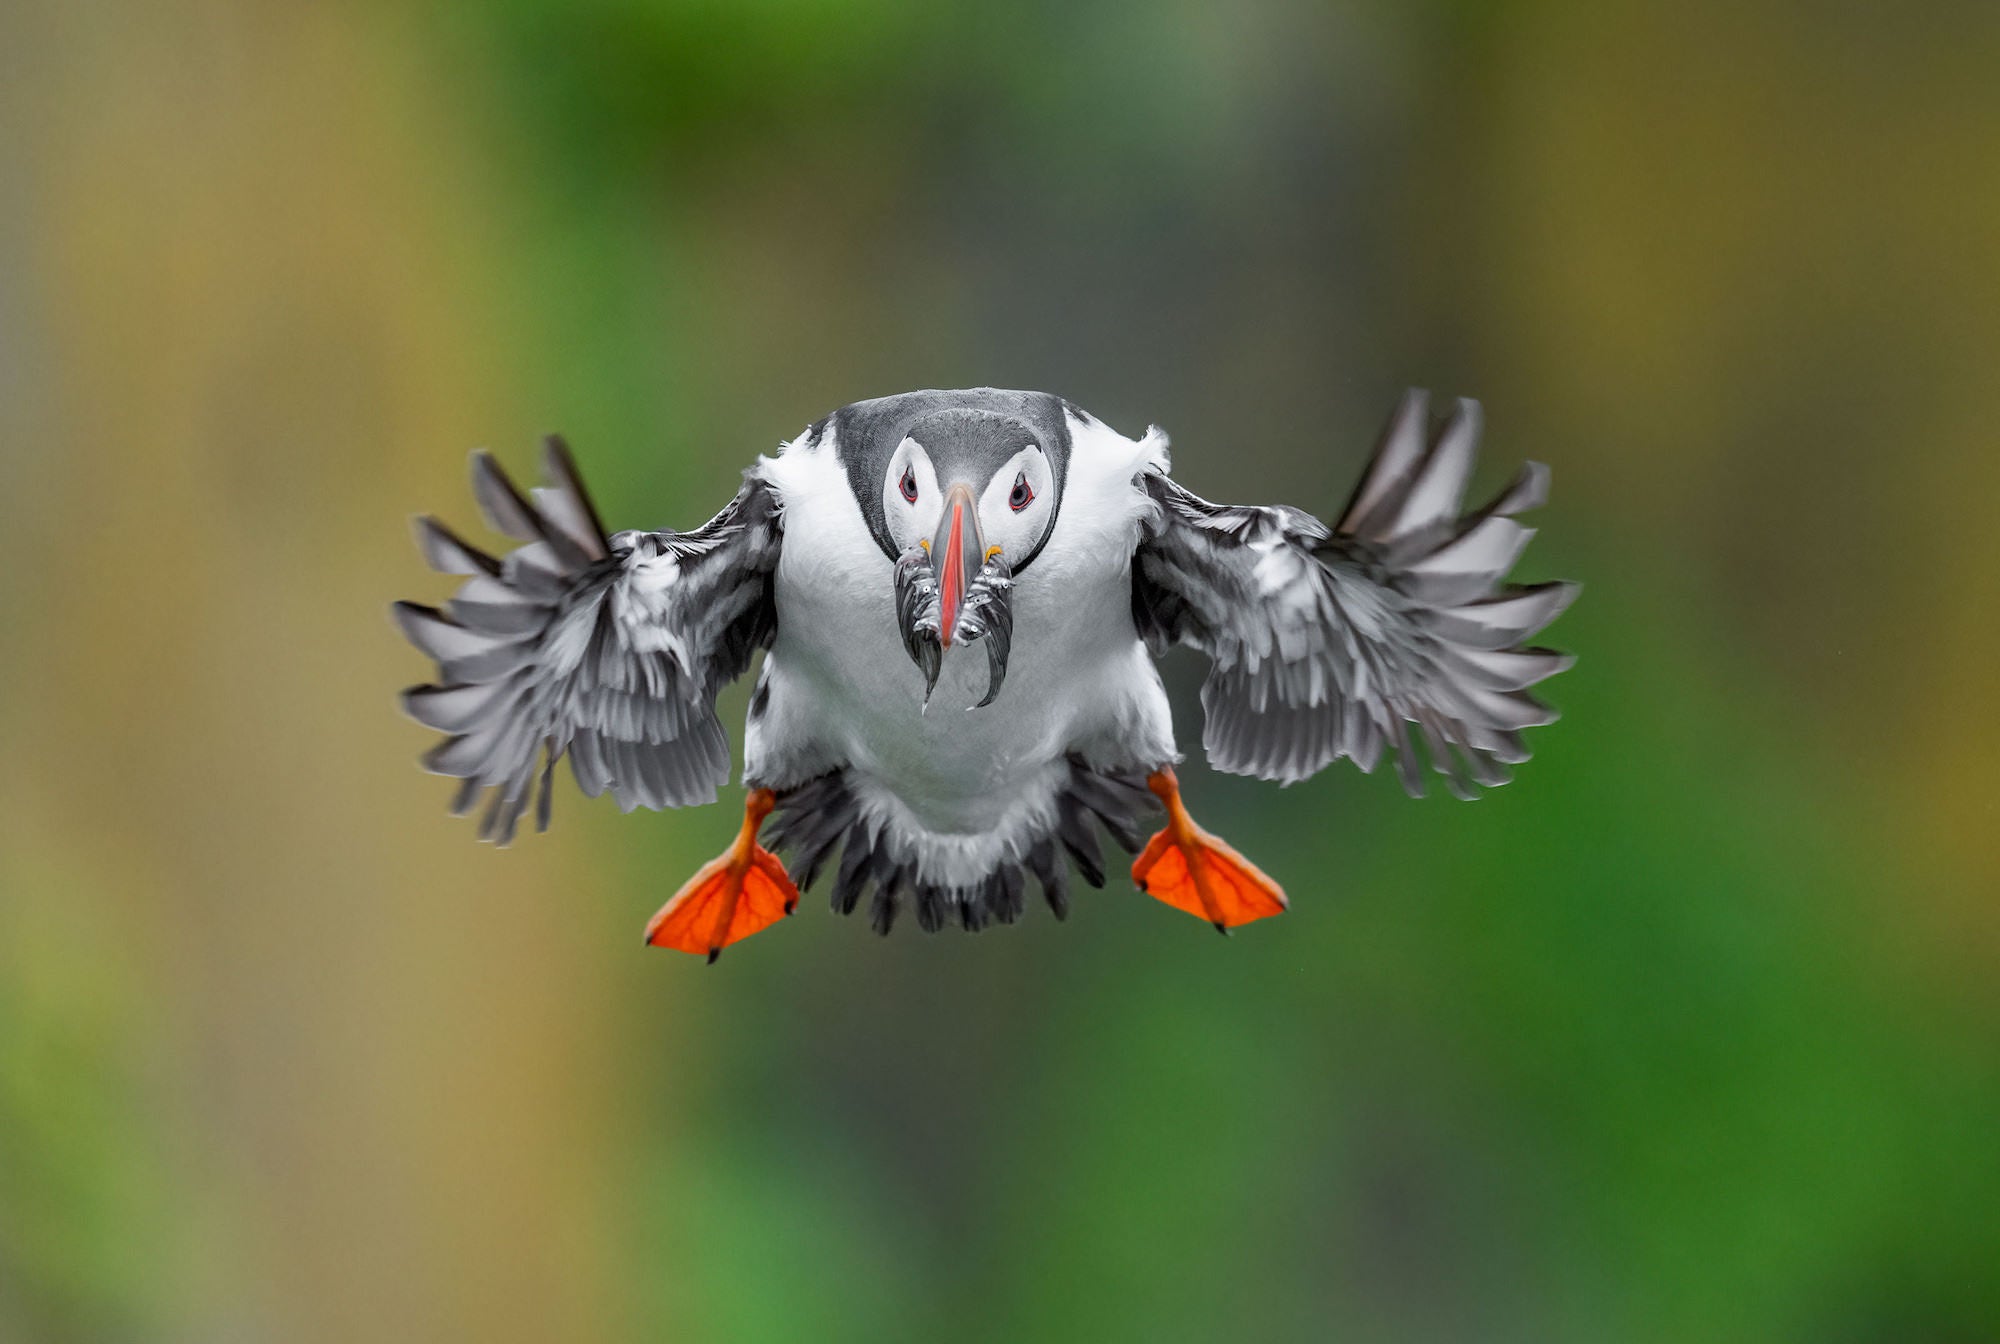
"Atlantic Puffin with fish for its chicks in the burrow, Grimsey Island, Iceland. Captured with the levered-clamp FlexShooter Pro and Robus RC-5570 tripod. Long, fast super-telephoto lenses can offer dreamy, out-of-focus canvases in part because of their superior bokeh. An equally important factor is a large distance from the subject to the background." Photo by Arthur Morris. Alpha 1. 600mm f/4 G Master. 1/2500-sec., f/4, ISO 2500
From DSLR Frustration To Mirrorless Perfection
For decades, I wanted to be a competent flight photographer but autofocus (AF) with DSLR bodies simply was not up to the task. Once I tried Sony mirrorless in 2017, I was well on my way. Today, I own and use two Sony Alpha 1 II bodies; when I make an unsharp image, I know that it is due to operator error.
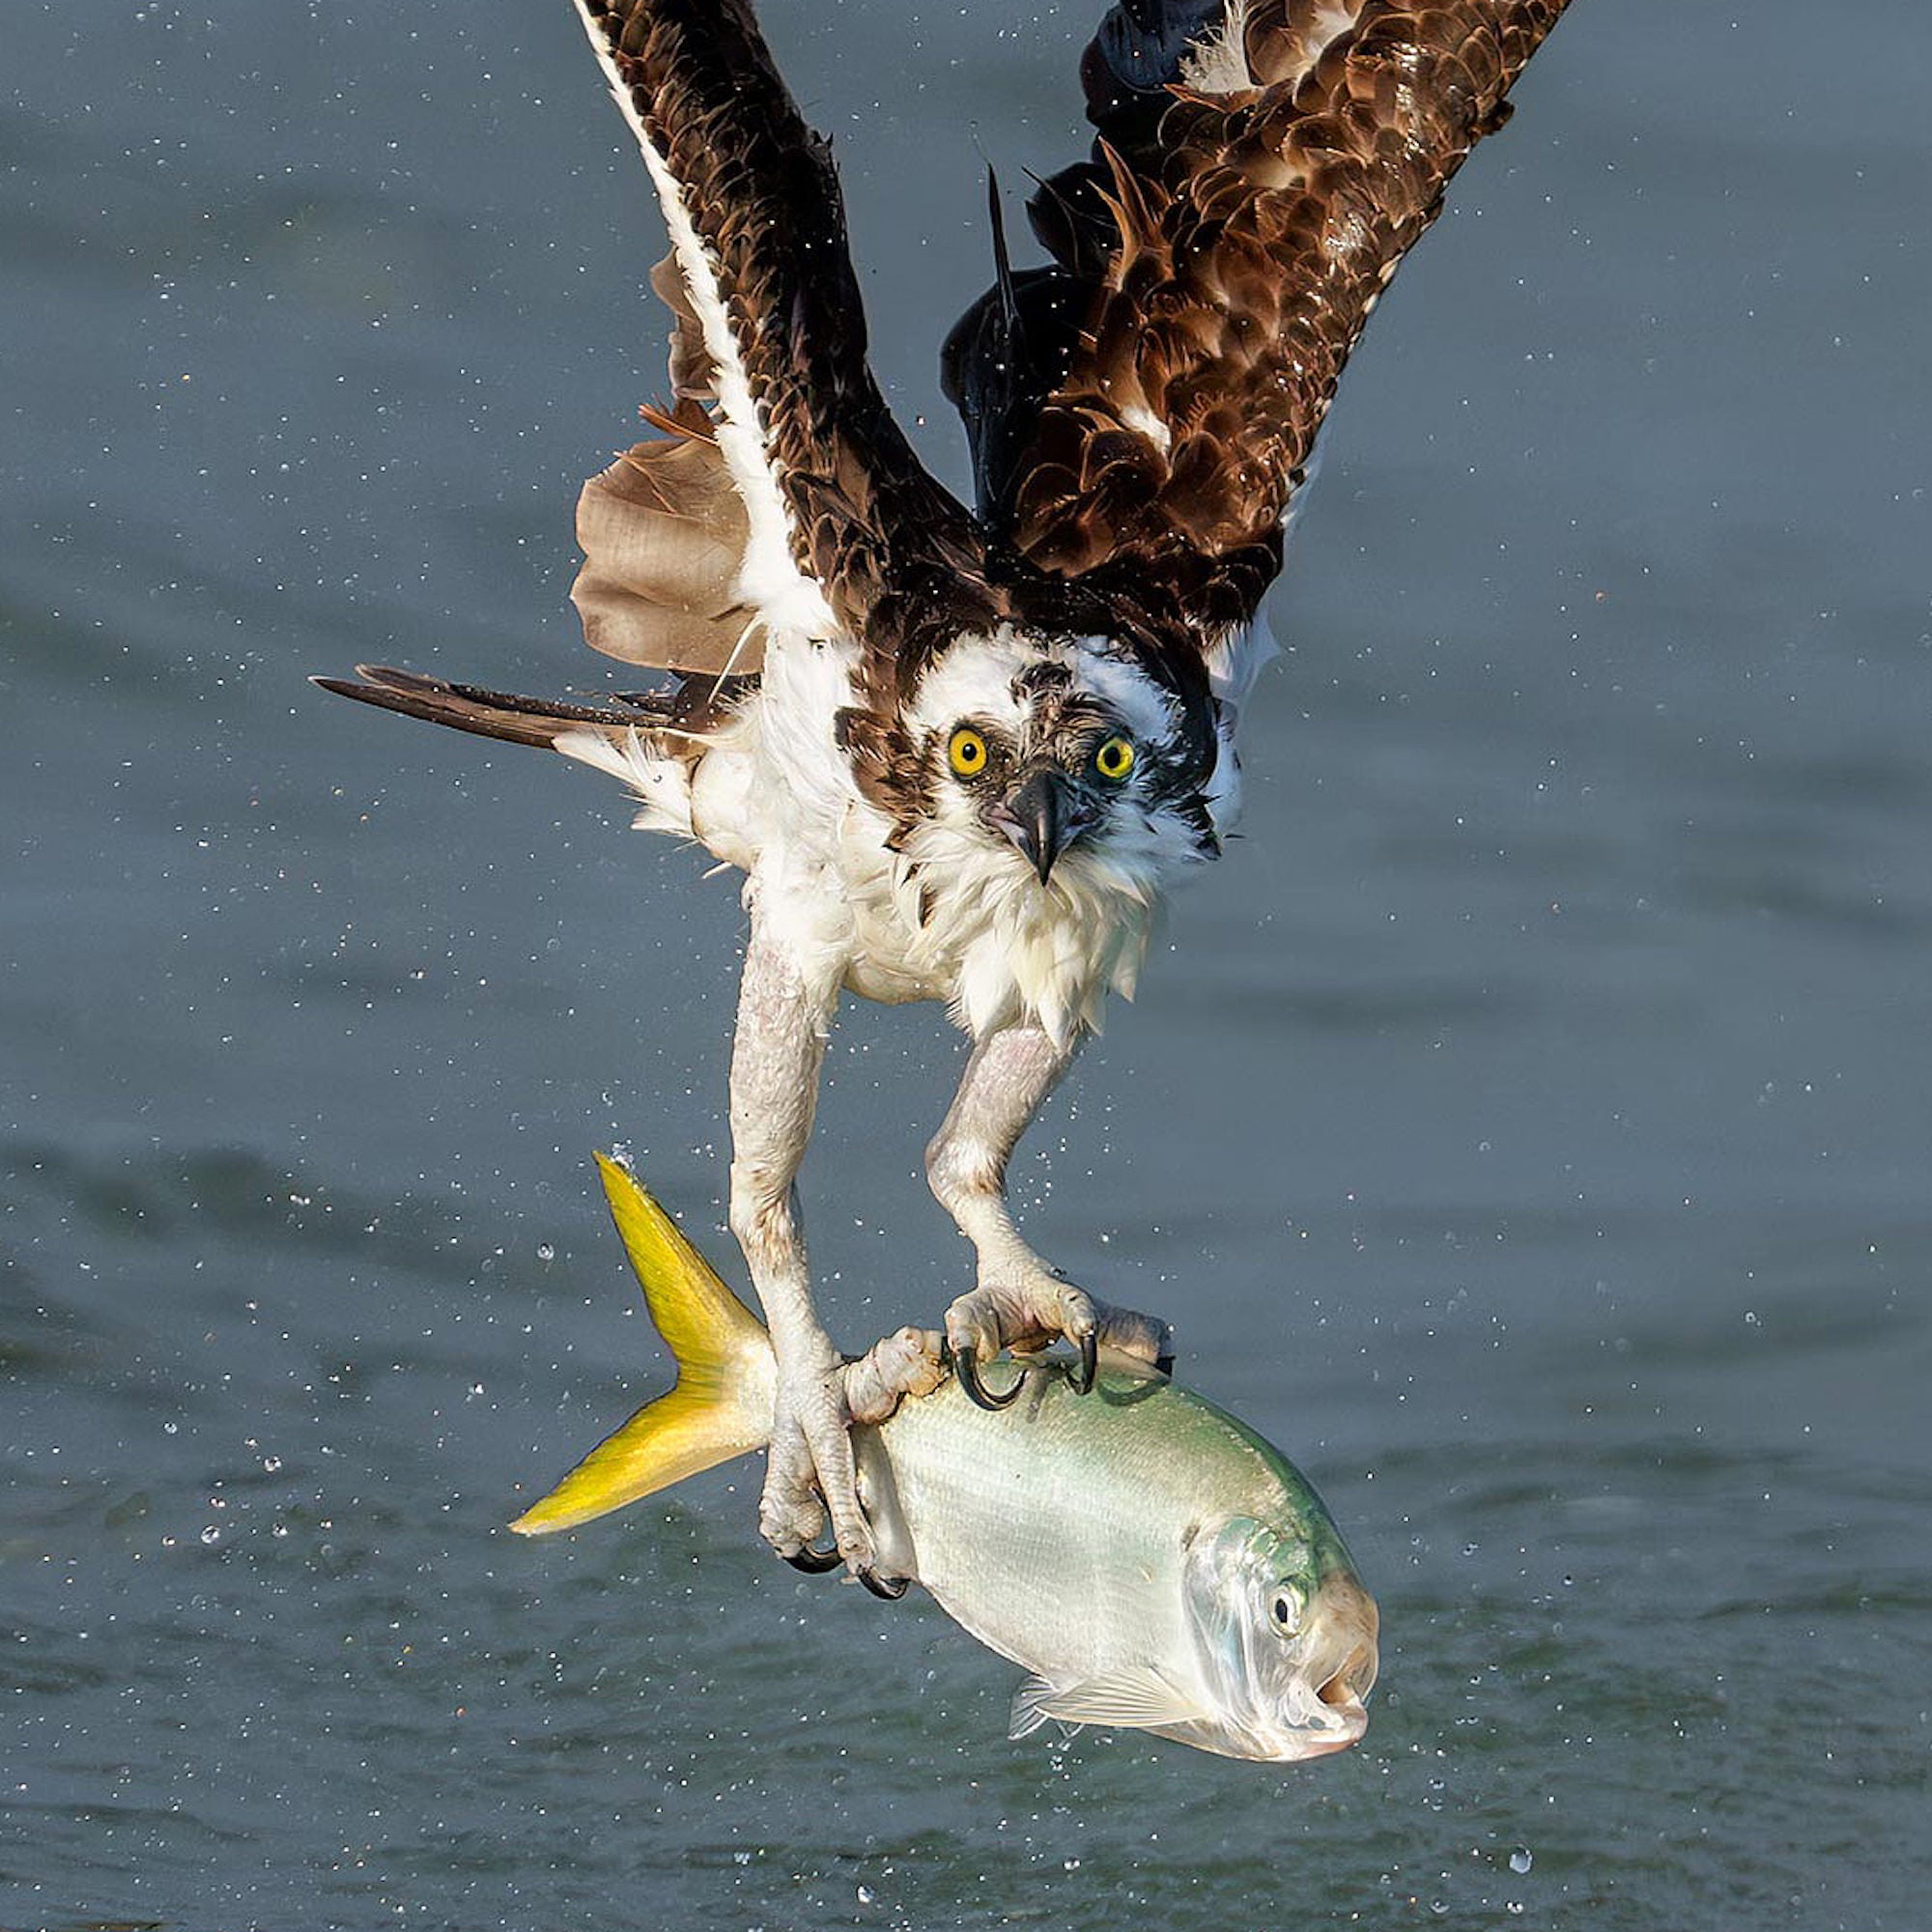
"Osprey with Yellow-tailed Menhaden, Sebastian Inlet, Florida. Captured with the Levered-clamp FlexShooter Pro and Robus RC-5570 tripod. Tracking: Zone AF-C with Bird Eye-AF enabled. Ospreys flock to the inlet in the fall to dive on hordes of migrating fish. By adding a 1.4X TC to a 600mm lens, your focal length is increased to 840mm, giving you additional reach while costing you one full stop of light." Photo by Arthur Morris. Alpha 1. 600mm f/4 G Master + 1.4x TC. 1/3200-sec., f/5.6, ISO 800
What You Need in Your Sony Alpha Camera Body:
- A science-fiction-like autofocus system that is capable of consistently tracking bird’s eyes, faces, and heads and enables you to create tack-sharp images.
- A blackout-free electronic viewfinder (EVF). A camera that reads data off the sensor fast enough to simultaneously feed the EVF and write to the memory card offers a completely uninterrupted, real-time live view. This allows you to pan smoothly with a flying bird and keep it centered in the frame.
- Lightweight and a comfortable grip for hours of hand-holding.
- A minimum frame rate of 30 frames per second (fps) to capture the absolute peak of an erratic wingbeat cycle.
- Lots of customizable buttons and dials so make things as easy as possible for you in the field.
- A variety of autofocus (AF) settings and patterns to cover a wide range of situations.
- Zebra technology allows properly configured cameras to consistently deliver perfect exposures, no matter how challenging the situation.
- Superb RAW files greater than 50 megabytes (MB) that feature incredible detail and vibrant, accurate, color. Large file sizes allow for substantial cropping when needed.
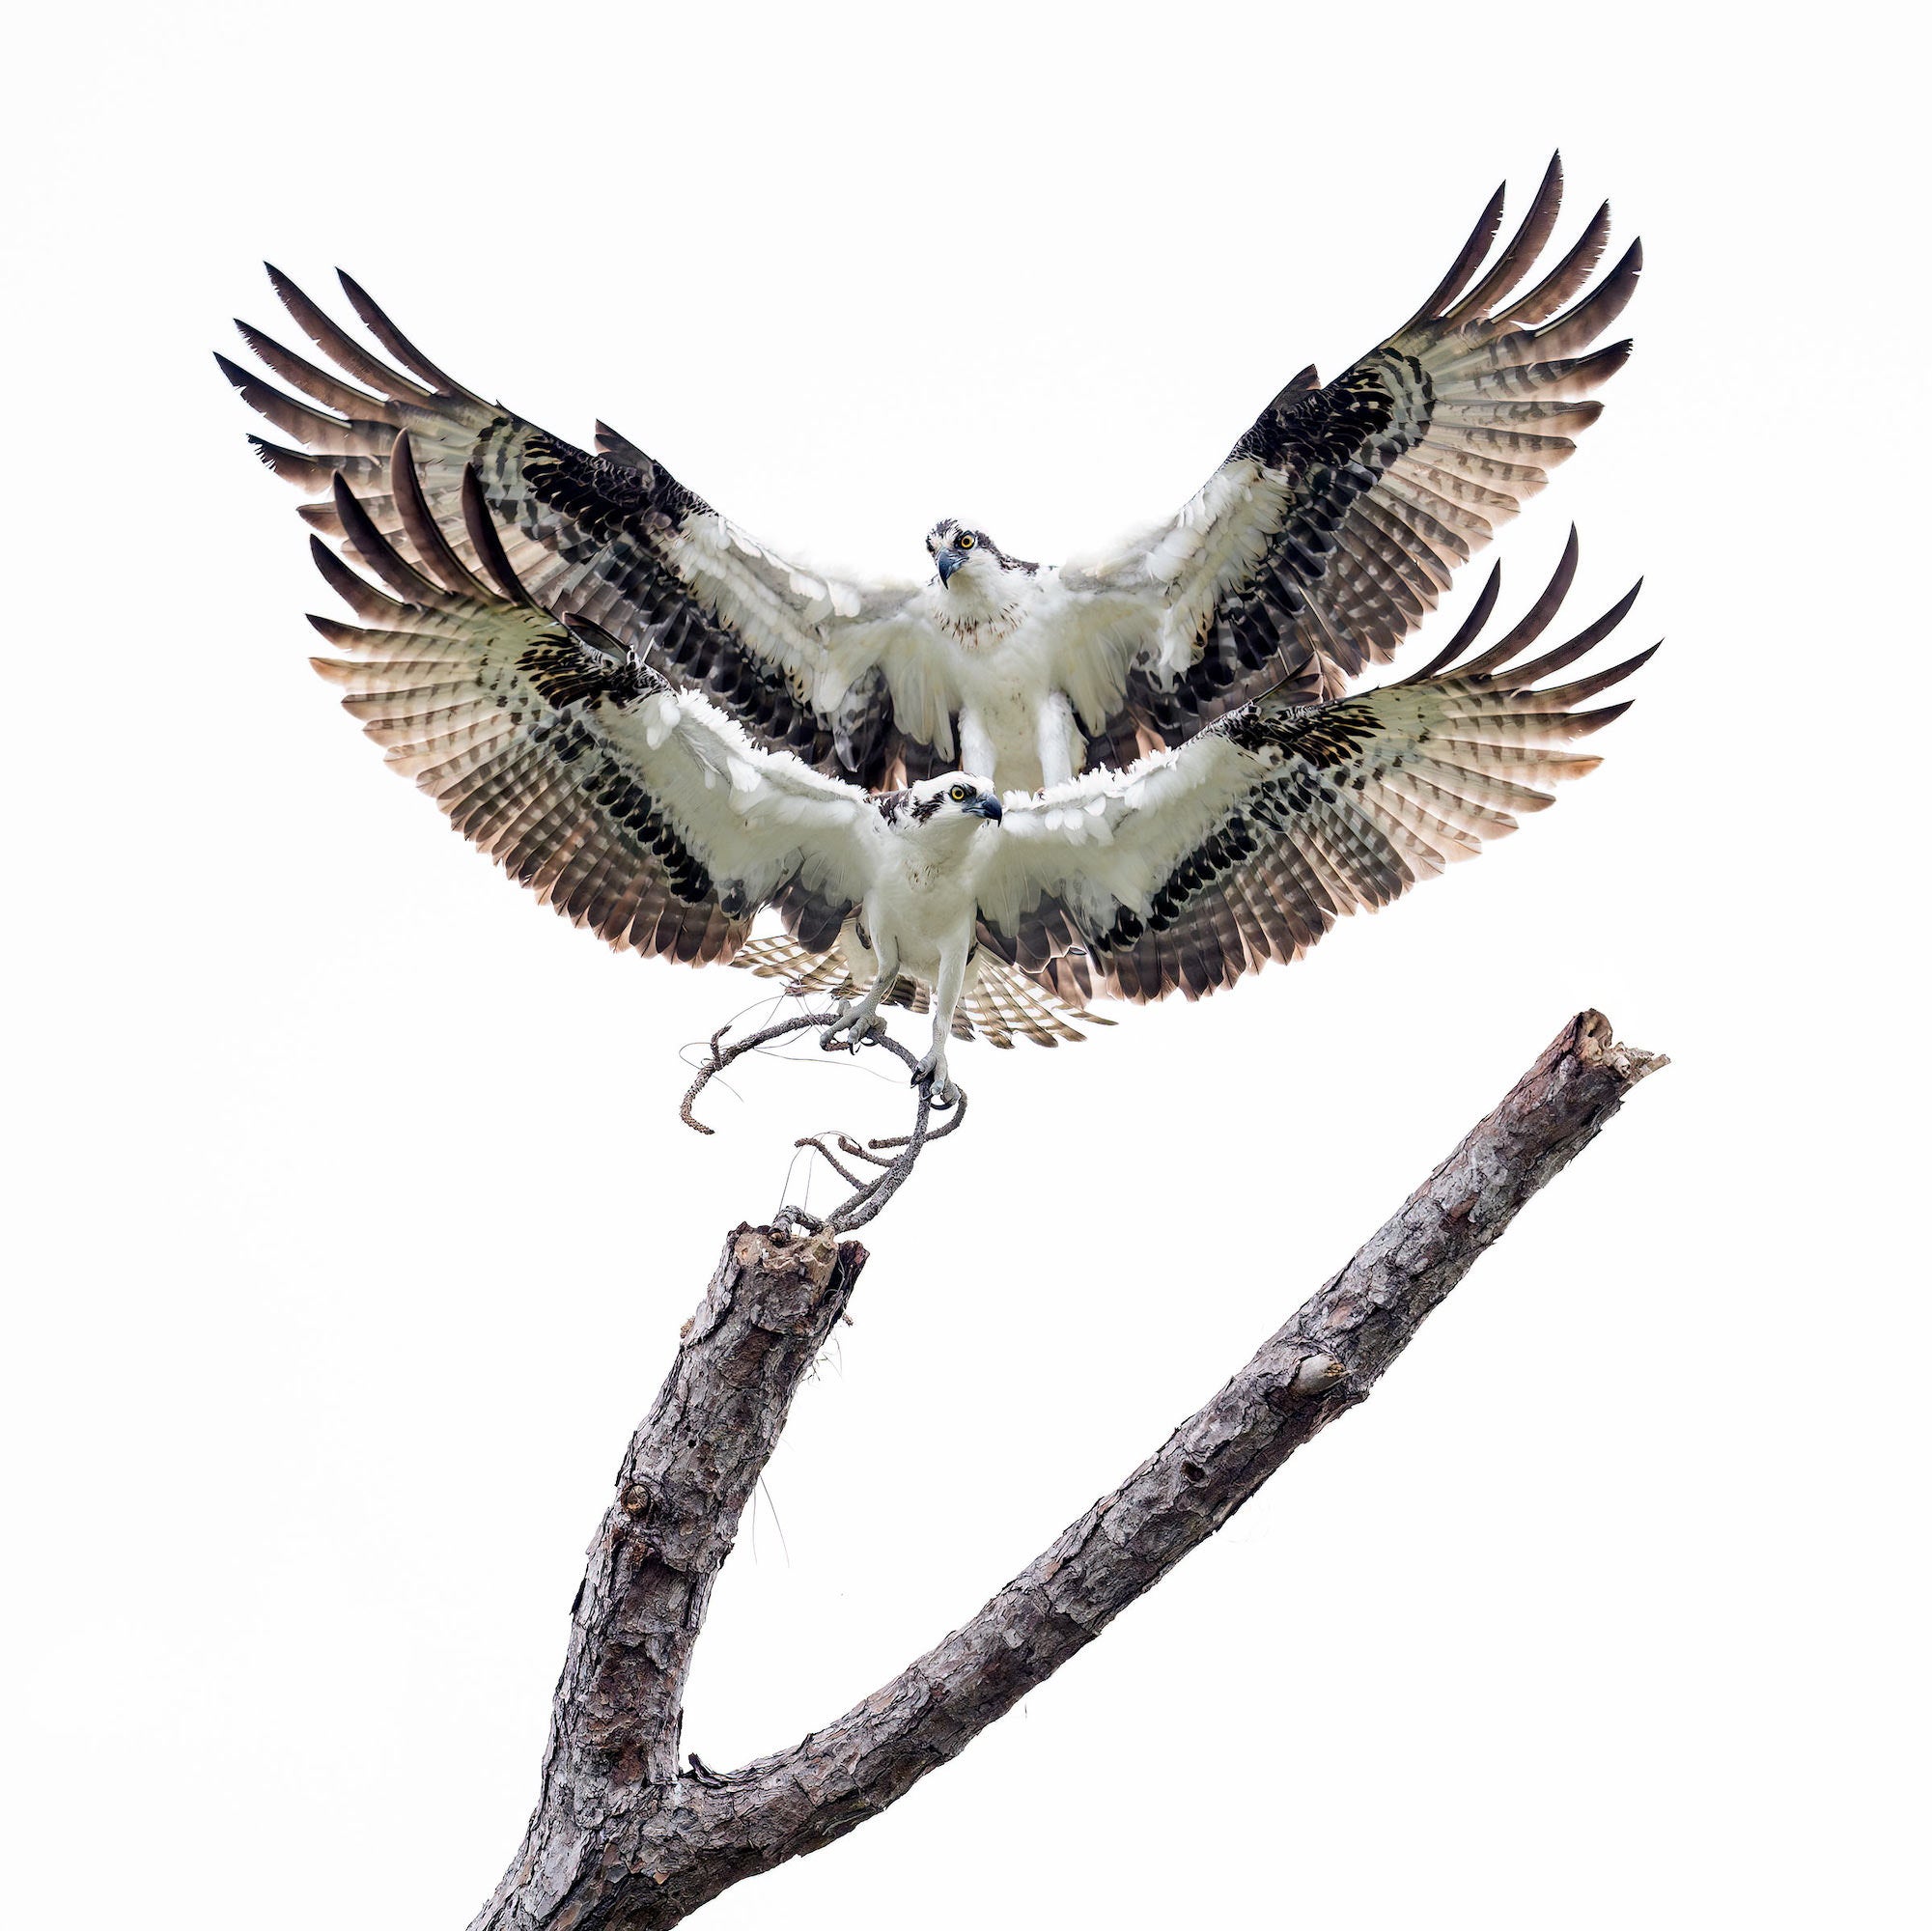
"Osprey pair with sticks for their nest, Indian Lake Estates, Florida. Captured handheld. Tracking: Zone AF-C with Bird Eye-AF enabled. I was trying out my new lens for the first time on a very cloudy morning. These birds had just finished copulating when they took flight and flew down together to a lower perch. With my Alpha 9 III set to 120 fps, I was able to capture a single frame that depicted the perfect moment." Photo by Arthur Morris. Alpha 9 III. 300mm f/2.8 G Master. 1/3200-sec., f/2.8, ISO 1250
Sony Super-telephoto Zoom Lenses For Flight Photography
Sony offers an excellent variety of super-telephoto zoom lenses that are ideal for flight photography as they allow you to zoom in and out as needed. All of these lenses feature an internal zoom design – the physical length of the lens does not change as you zoom thus keeping it perfectly balanced for smooth and efficient handling. The OSS stands for Optical Stabilization System.
Sony FE 70-200mm f/2.8 GM OSS II: This lens is spectacular for shooting the larger birds species in flight at close range. Its ultra-wide f/2.8 aperture is a lifesaver in low light, allowing for blazing-fast shutter speeds while keeping your ISO relatively low.
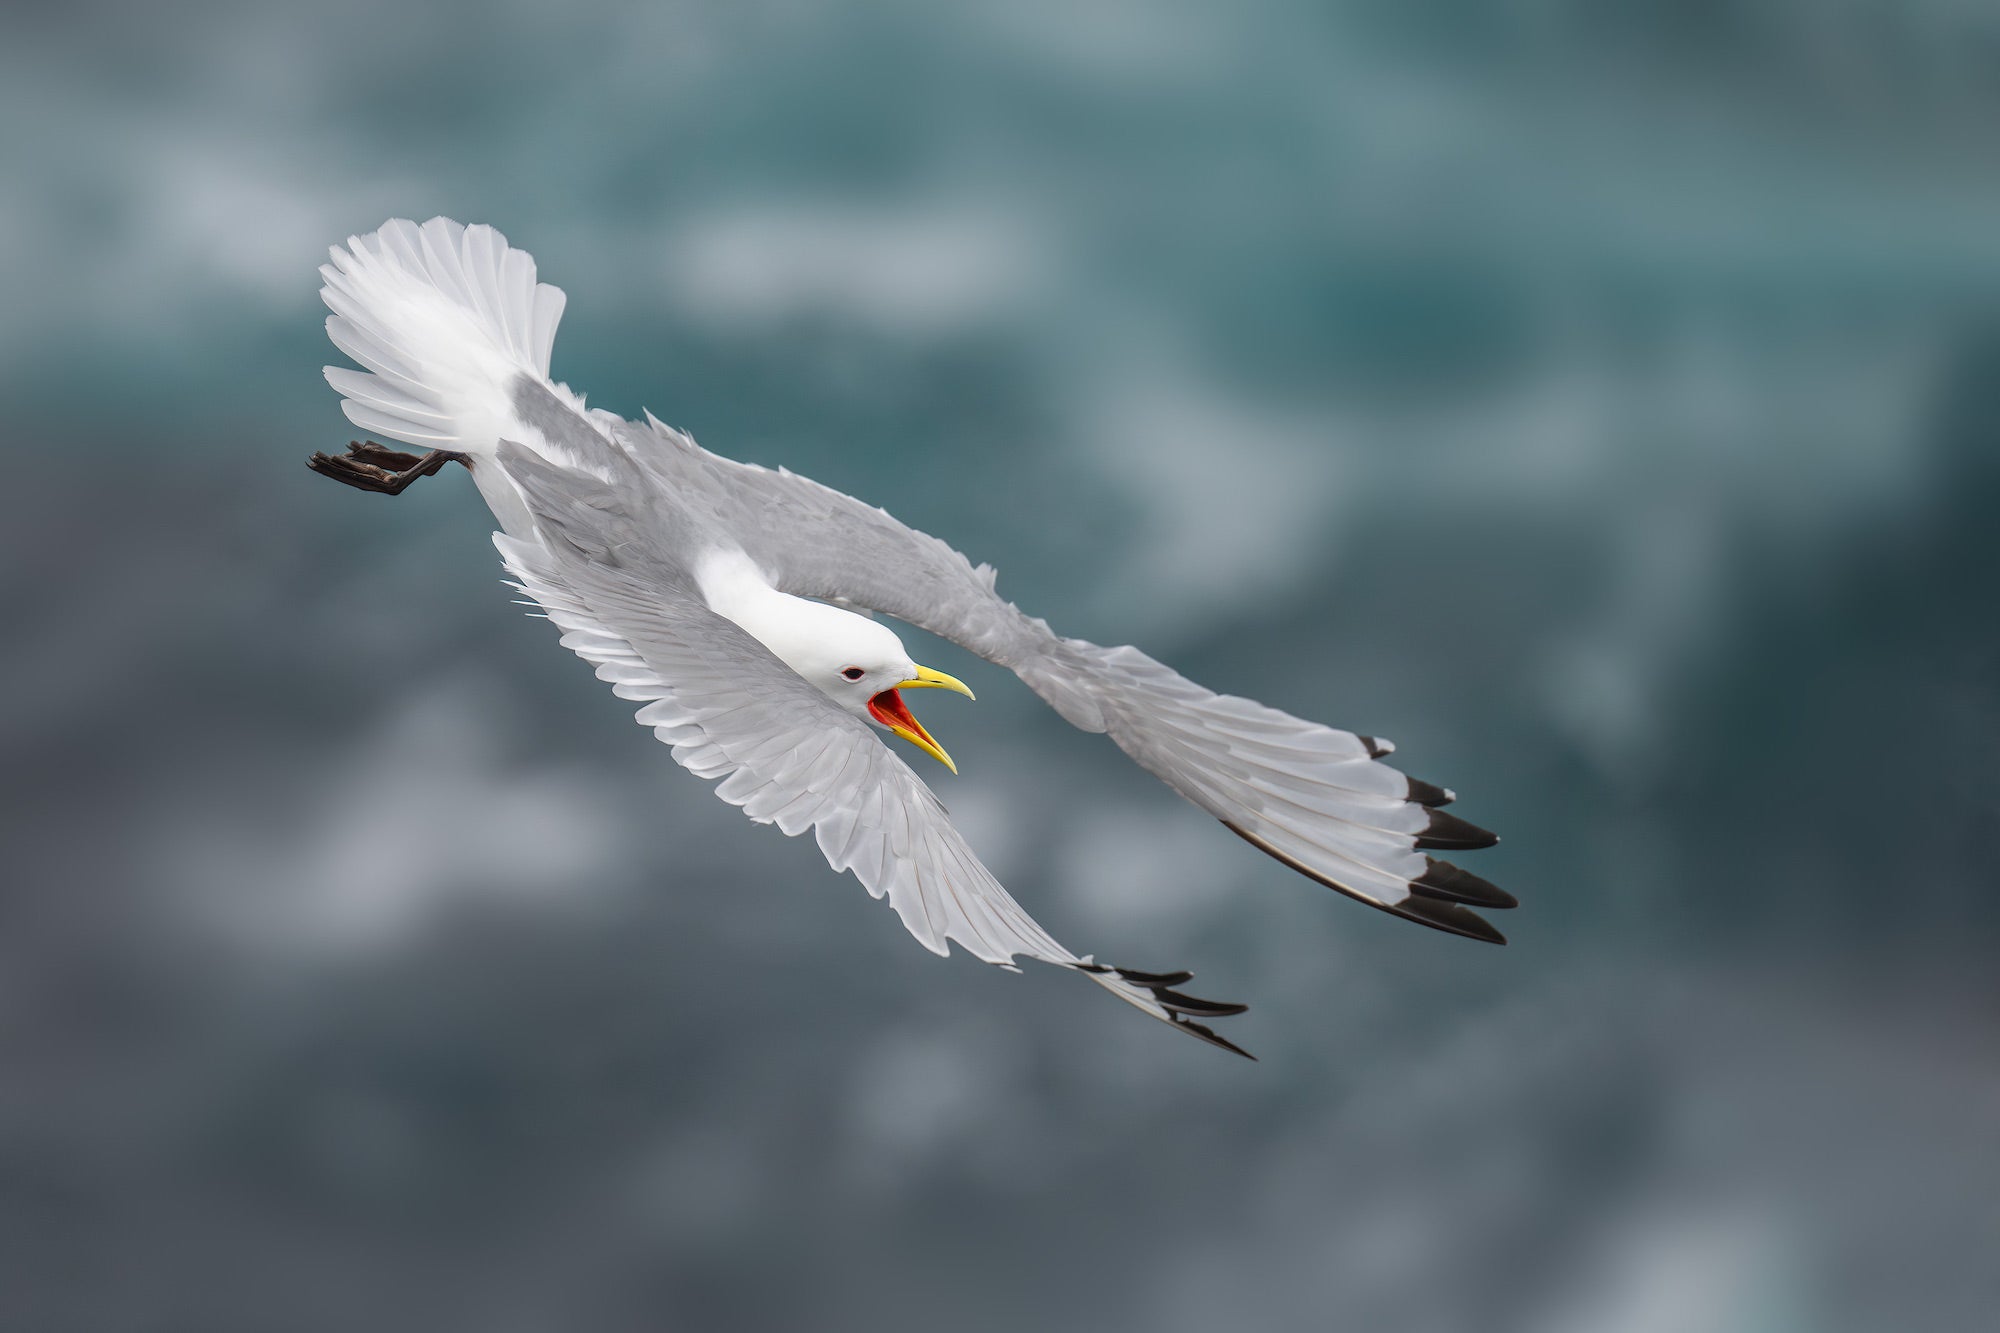
"Black-legged Kittiwake screaming, Grimsey Island, Iceland. The bird was upset because its chick had died; it kept flying back to the cliff screaming in a heart-wrenching attempt to wake up its baby. With its small size and light weight, this lens is ideal for flight and action at close range." Photo by Arthur Morris. Alpha 1. 70-200mm f/2.8 G Master II + 1.4x TC. 1/3200-sec., f/4, ISO 1000
Sony FE 100-400mm f/4.5 GM OSS: This recently released lens just might be the ultimate flight lens for all but the most distant subjects. Boasting a constant f/4.5 aperture and a remarkably fast internal tracking system, it is relatively light and can be handheld by most photographers. When you need a bit of extra reach, it pairs beautifully with the Sony FE 1.4x Teleconverter.
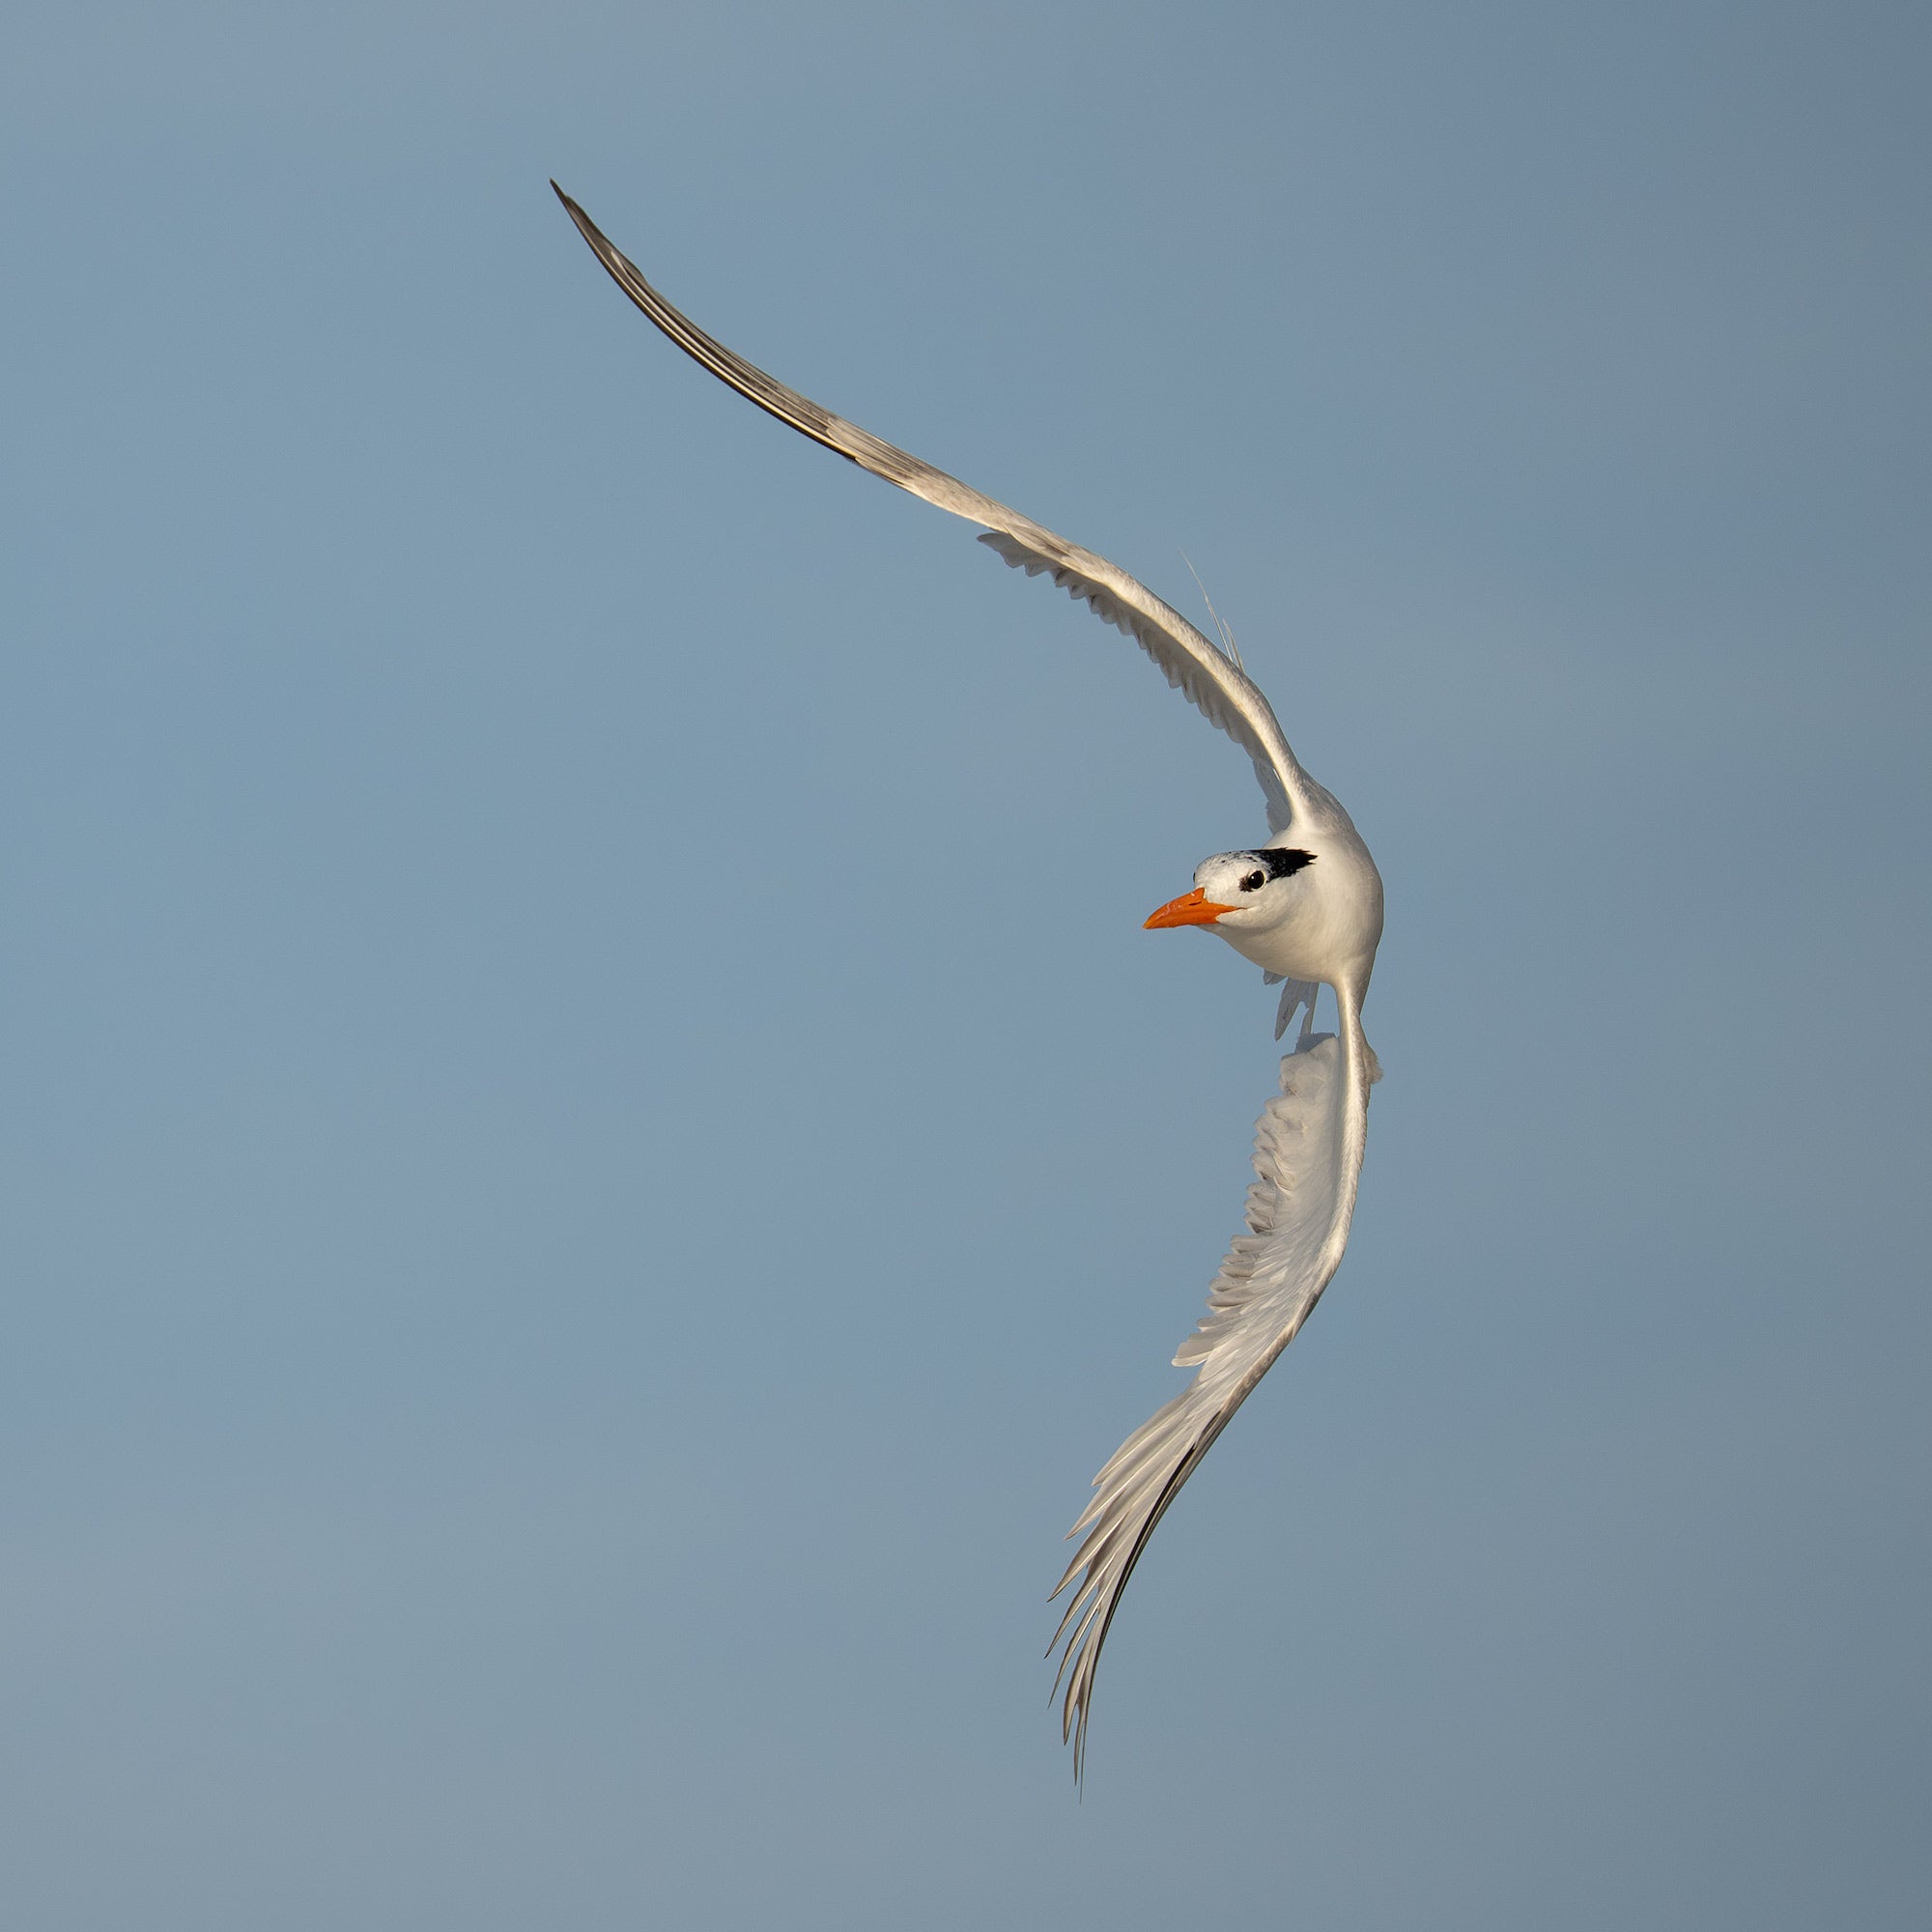
"Royal Tern turning in flight, Huguenot Memorial Park, Jacksonville, FL. This lens is light enough for most photographers to handhold all day and fast enough for most flight photography with its constant f/4.5 aperture. The reverse-C flight pose here is quite unusual and appealing. As is always the case, Sony’s Zebra technology made getting a perfect exposure child’s play." Photo by Arthur Morris. Alpha 1 II. 100-400mm f/4.5 G Master. 1/5000-sec., f/4.5, ISO 640
Sony FE 200-600mm f/5.6-6.3 G OSS: This economical powerhouse has deservingly been the most popular Sony super-telephoto lens for years. It is incredibly versatile, offers fantastic reach at the long end (600mm), and is light enough for most folks to handhold during a long session in the field.
Sony FE 400-800mm f/6.3-8 G OSS: The longest zoom in the lineup, the 400-800mm is larger and heavier than the options above. With its narrower f/8 aperture at the long end, it often requires bumping up your ISO when shooting fast action. While some photographers can comfortably handhold it, I use mine most often on a Robus tripod or monopod. In the right hands, this lens is a deadly weapon for both flight and general bird photography.
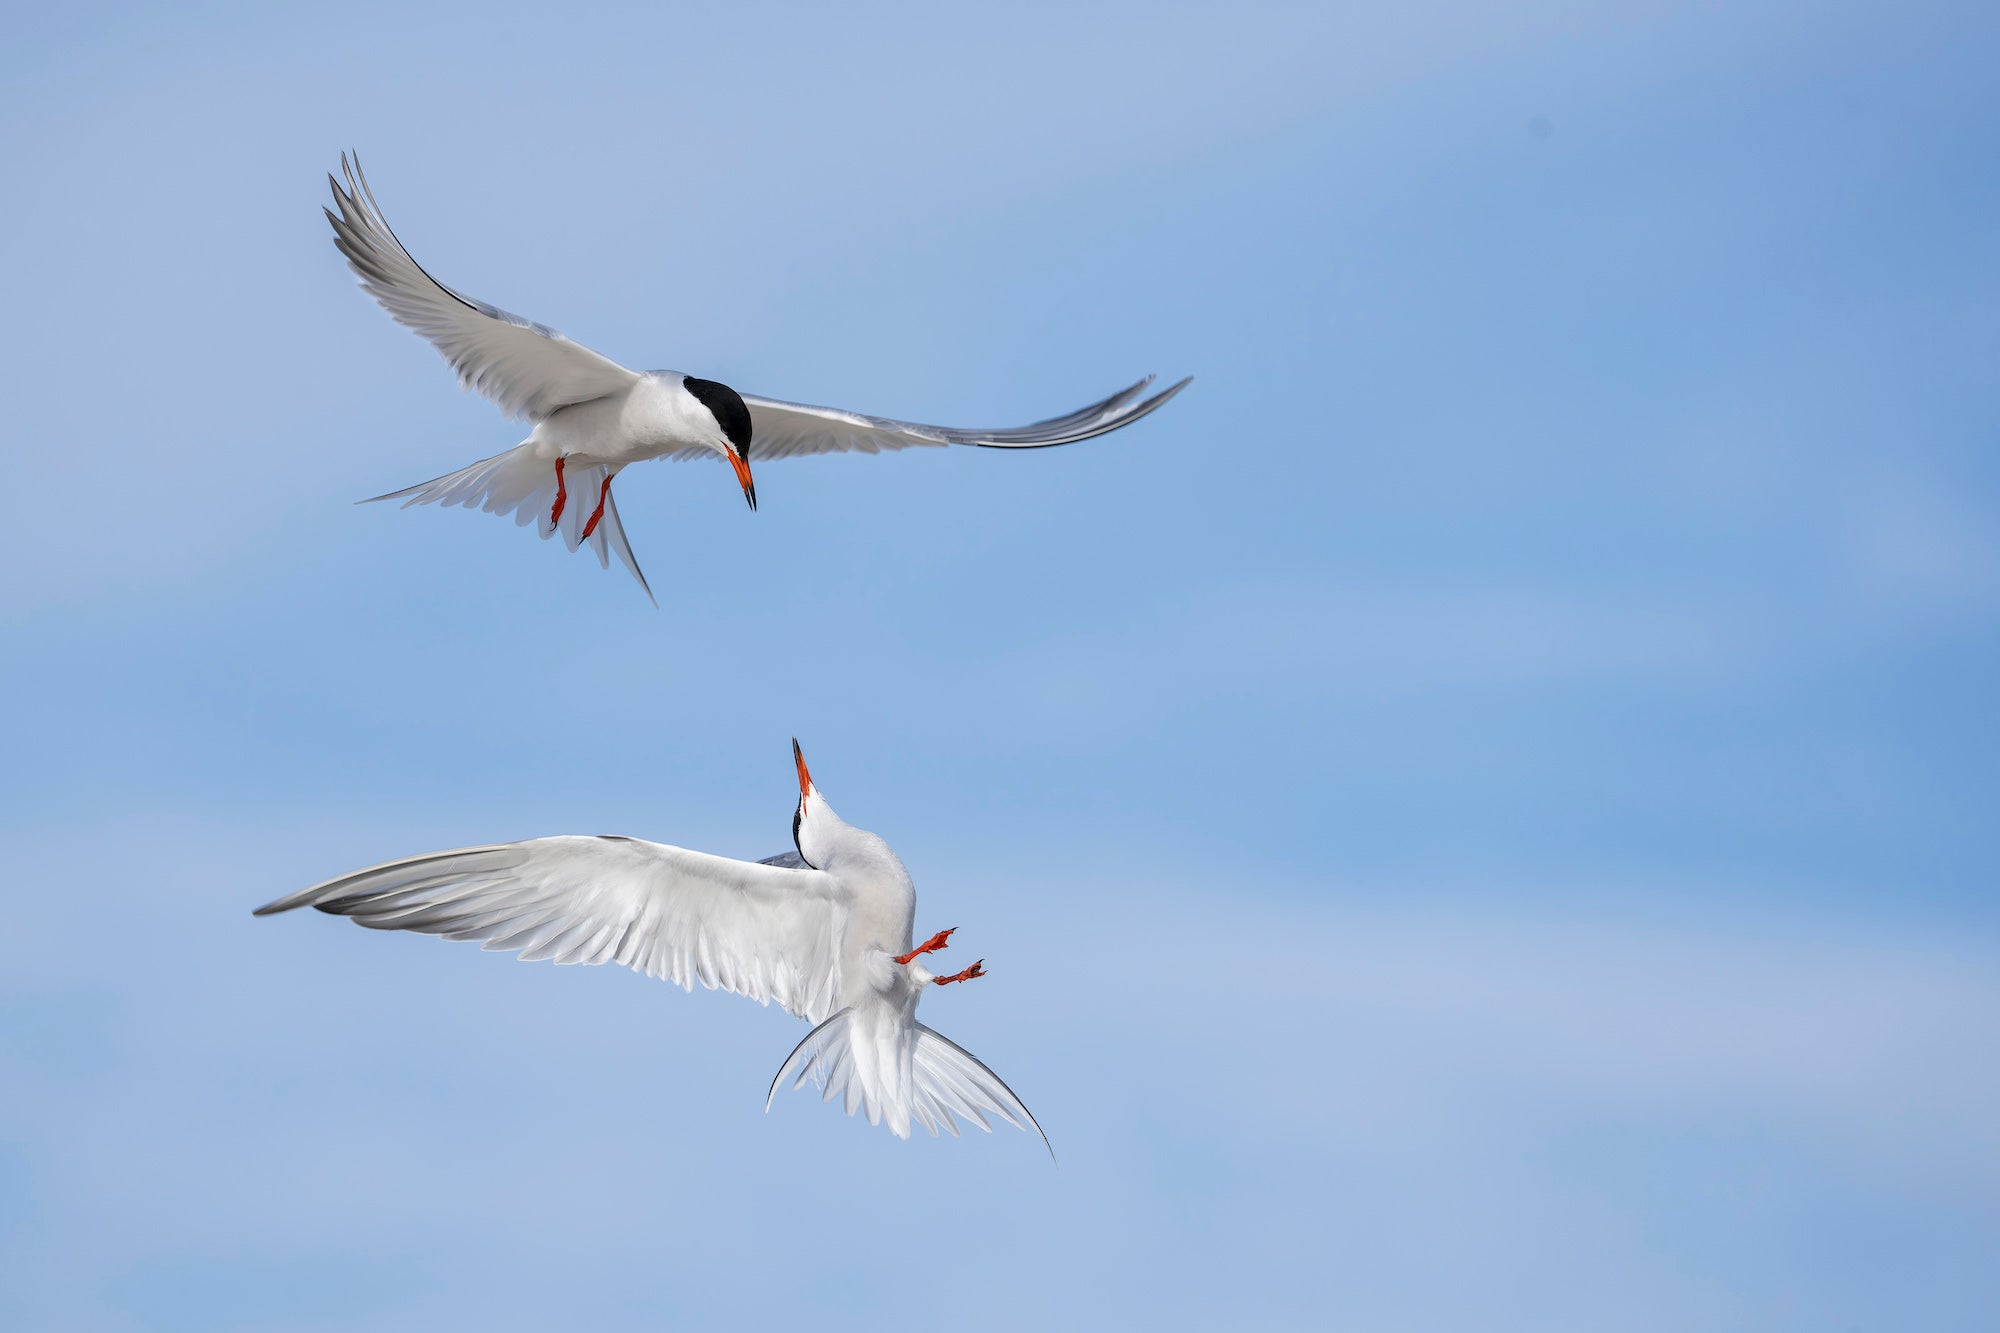
"Common Tern midair squabble, Nickerson Beach Park, Lido Beach, NY. Seated on dry sand, I used a handheld setup. All but one of the Sony FE super-telephoto zoom lenses – including this one – feature an internal zoom mechanism; the length of the lens does not change as you zoom in or out. Being able to quickly zoom out while maintaining accurate focus saved the day with this image!" Photo by Arthur Morris. Alpha 1 II. 400-800mm f/6.3-8 G. 1/4000-sec., f/8, ISO 1600
Sony Prime Super-telephoto Lenses For Flight Photography
Sony offers three prime super-telephoto lenses that are ideal for avian flight photography. All are Grand Master (GM) lenses with wide apertures that offer great light gathering capabilities. And they all can produce razor sharp images alone or with either teleconverter.
Sony FE 300mm f/2.8 GM OSS: At only 3 lbs, 10.7 oz this is the lightest 300mm f/2.8 lens by far. With its light weight and small size, it is eminently-holdable by just about everyone. When combined with the Sony 1.4x Teleconverter, the resulting 420mm f/4 outfit might be my all-time favorite flight rig.
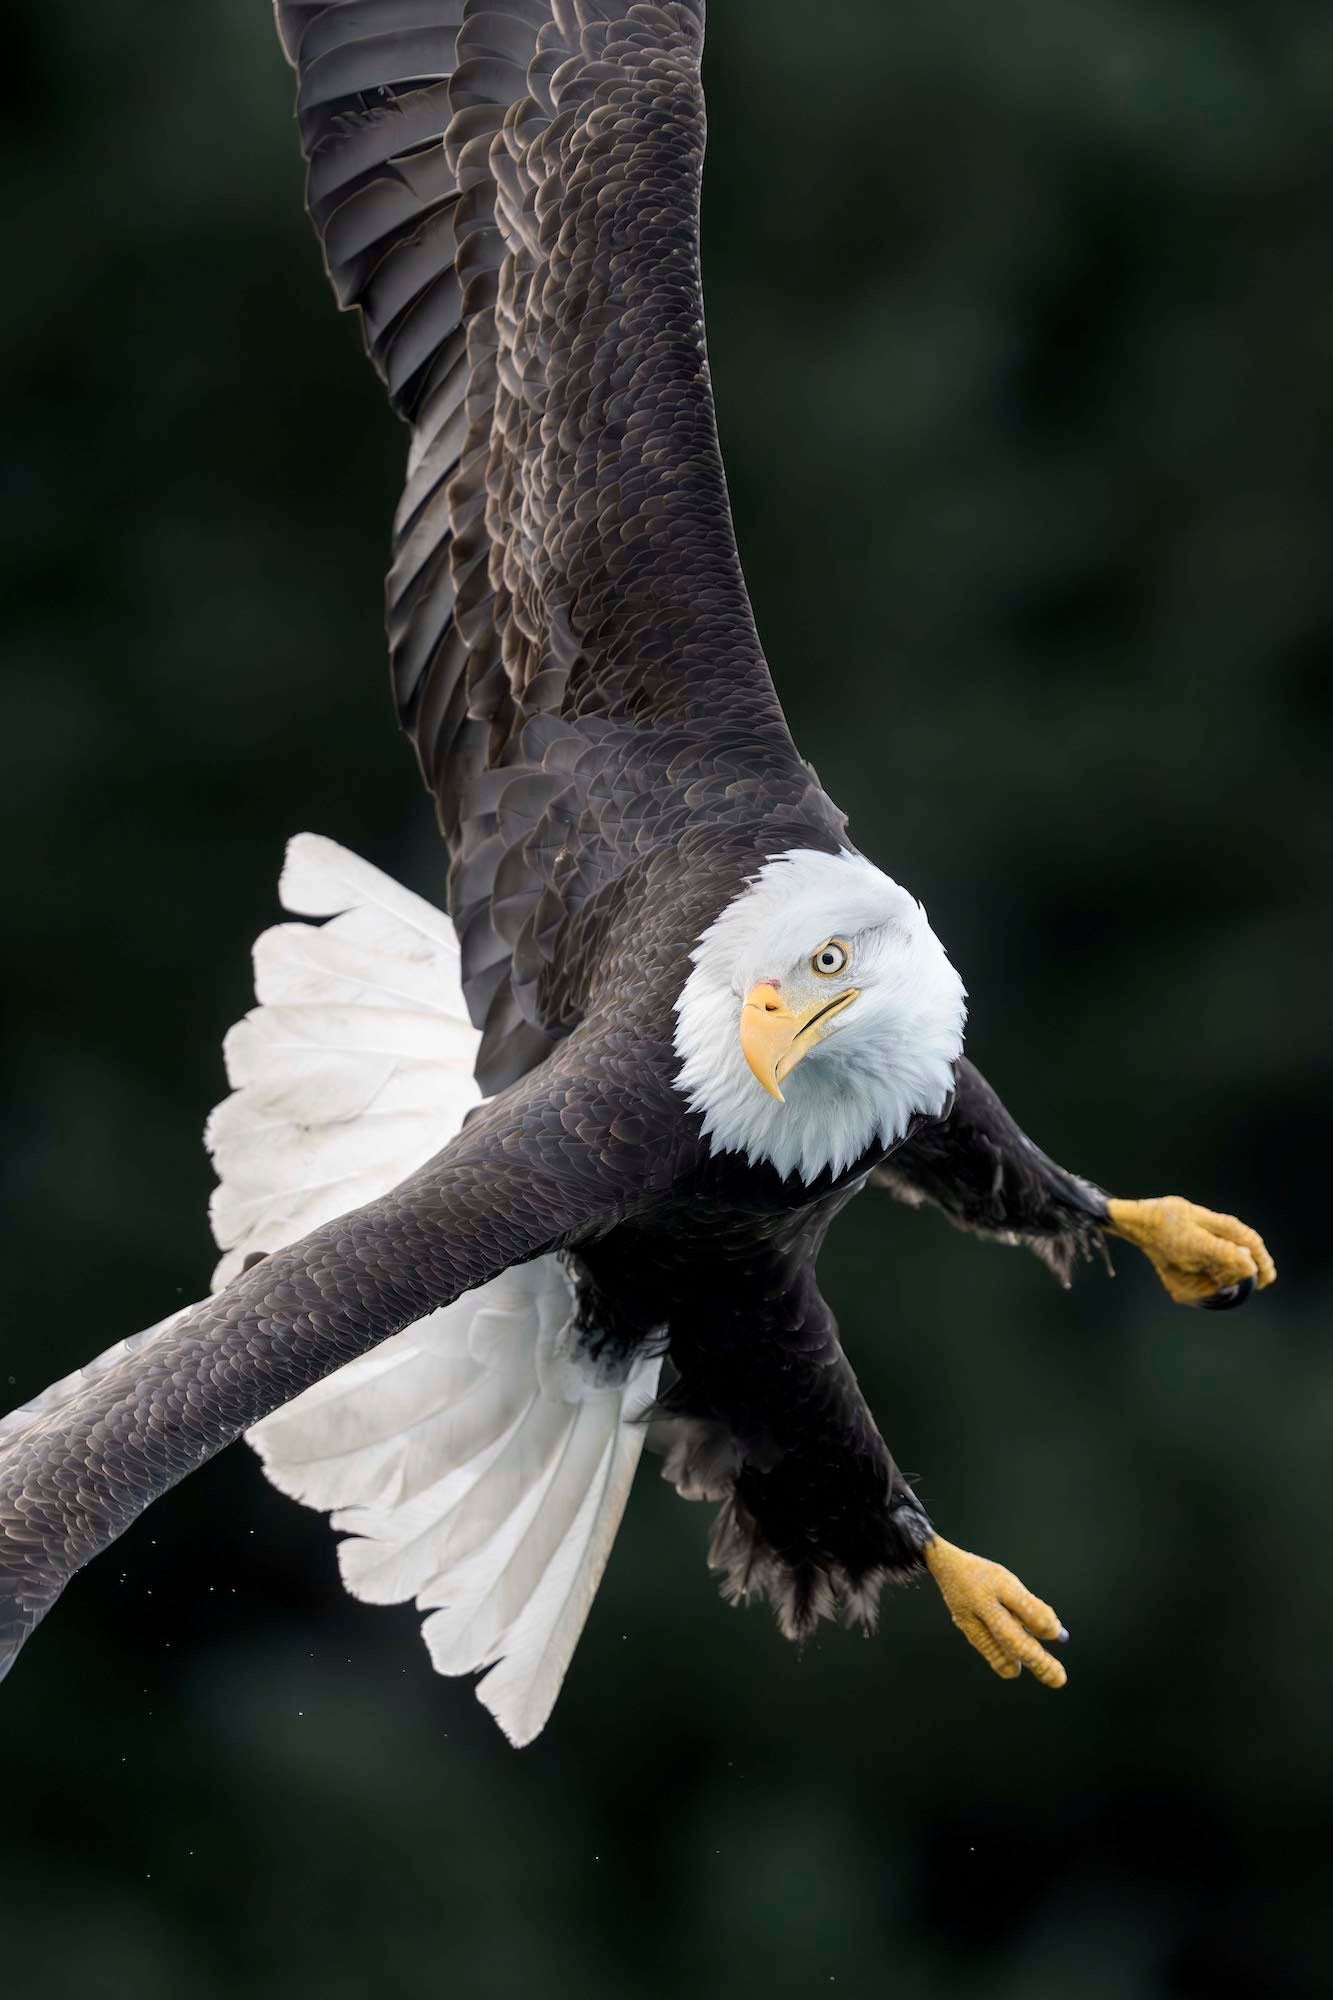
"Bald Eagle turning in flight, Kachemak Bay, Homer, AK. Wide/AF-C with Bird Face/Eye AF enabled. The 300mm f/2.8 paired with the 1.4X TC yields a 420mm f/4 setup that is easily one of my all-time favorite flight photography rigs." Photo by Arthur Morris. Alpha 1 II. 300mm f/2.8 G Master + 1.4x TC. 1/3200-sec., f/4, ISO 3200
Sony FE 400mm f/2.8 GM OSS: Though this super-fast, super-sharp lens is well balanced and is also the lightest in its class at about 6lbs, 10 oz with the hood, it is hand-holdable only by a small group of strong bird photographers. Many use it with a monopod, or with a Robus tripod in low light.
Sony FE 600mm f/4 GM OSS: The 600mm f/4 lenses have long been the weapons of mass destruction for countless top-flight bird photographers. Though Sony's version is remarkably light for its class, most folks will still need to work with this great lens supported by a tripod. That said, rules are meant to be broken; I have a very skilled friend who routinely shoots small sandpipers in flight handheld at 1200mm (by pairing the 600mm with the Sony 2x Teleconverter) and creates amazing images. While I use mine on a tripod for flight photography most of the time, I have recently begun handholding it while seated. Sitting down means I do not need to raise the heavy lens nearly as far from the rest position as I do when standing, saving my energy for when a bird flies into range.
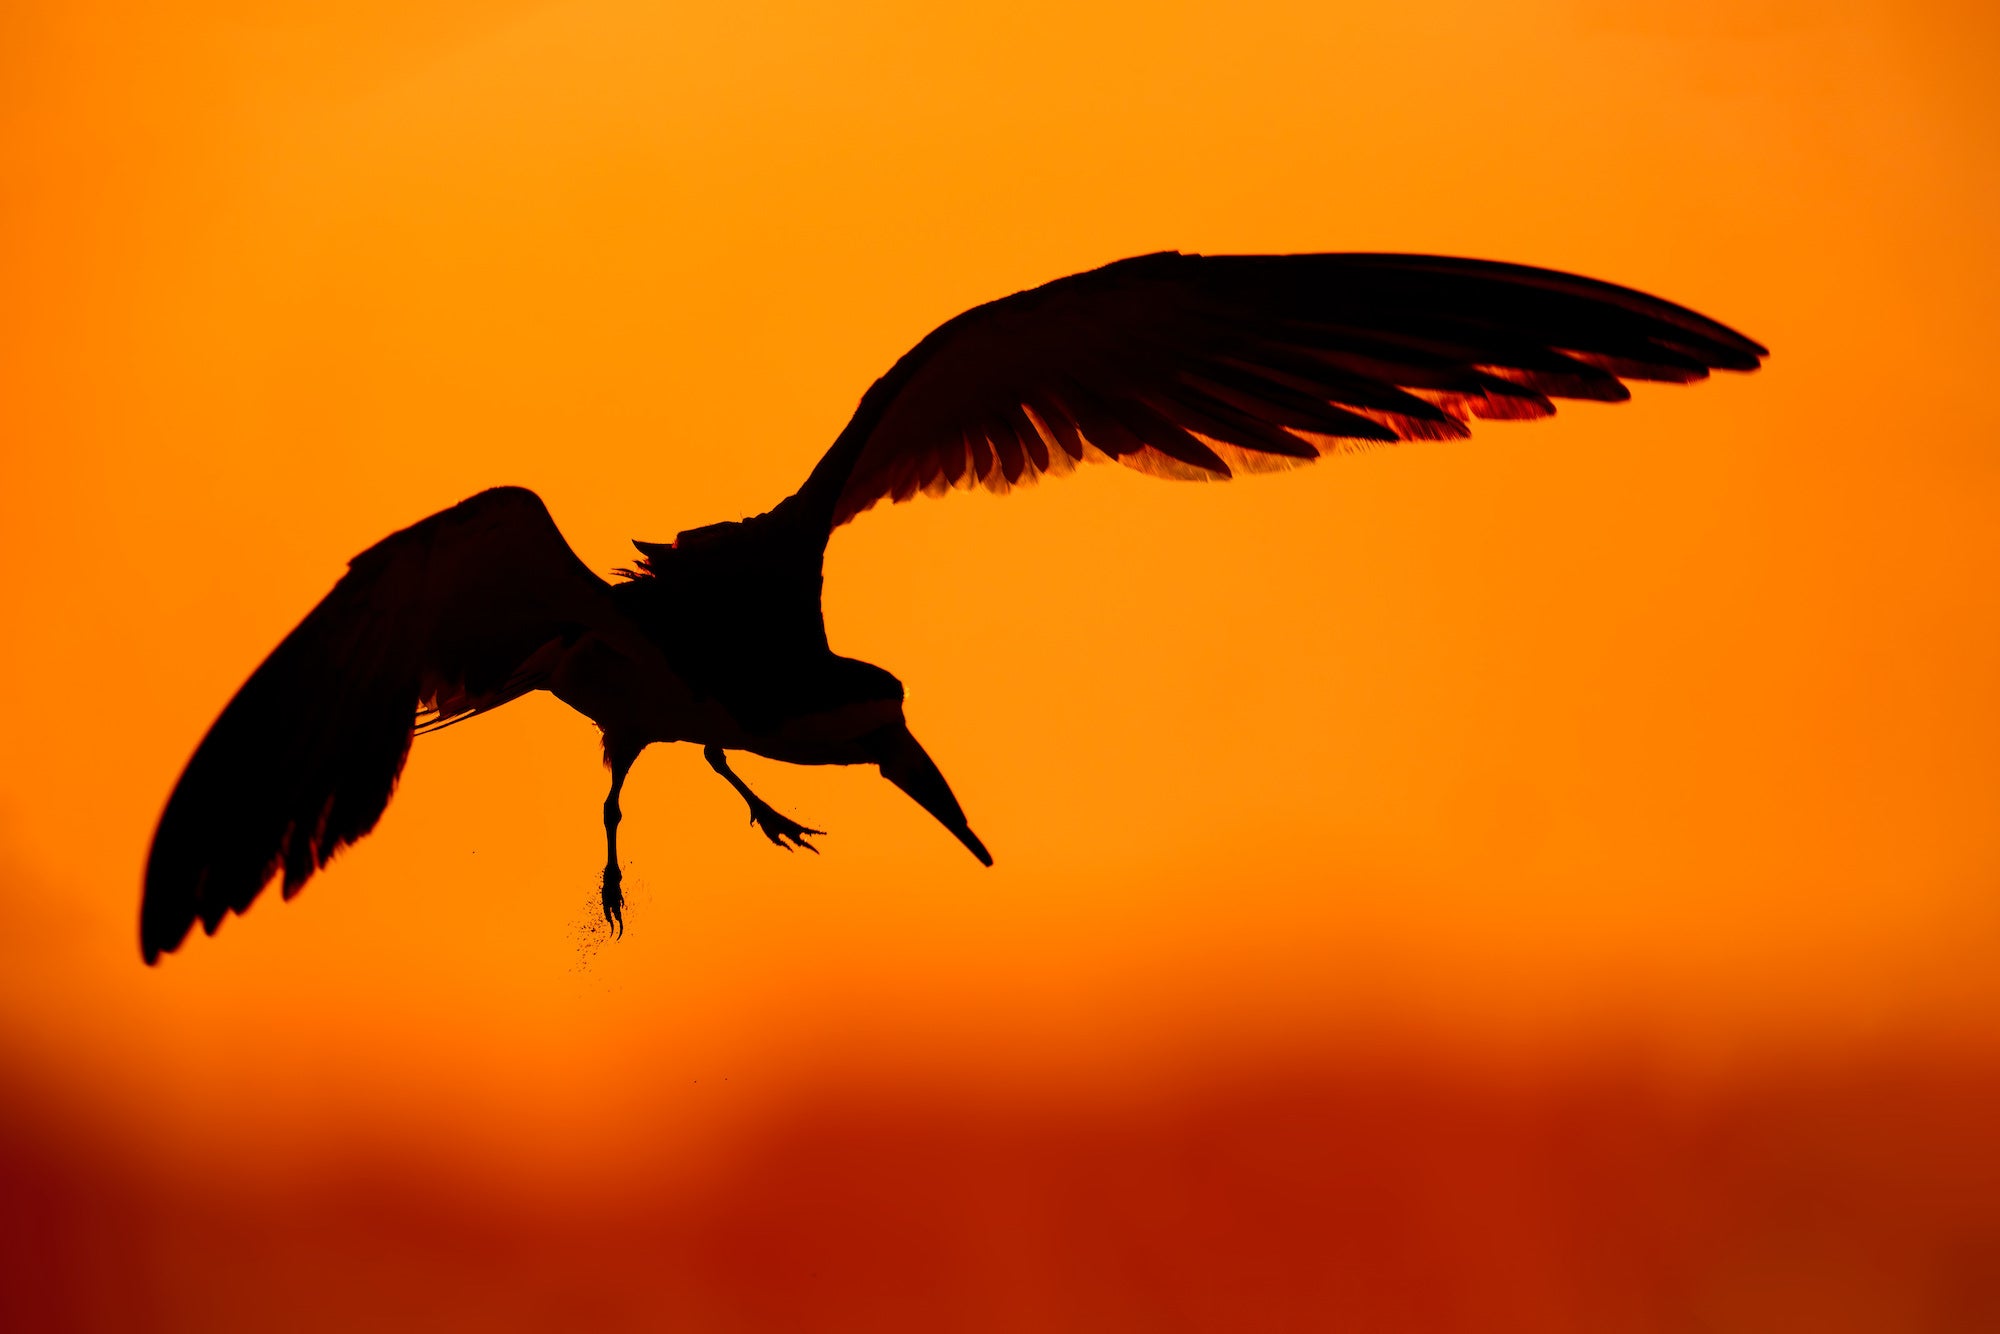
"Black Skimmer Taking Flight at Sunrise, Nickerson Beach Park, Lido Beach, NY. While seated behind my lowered tripod, I used my setup all mounted on a Robus RC-5570 tripod with a Levered-clamp FlexShooter Pro. Wide/AF-C with Bird Eye-AF enabled. Though shooting flight off a tripod is not my forte, I managed to keep this bird in the frame as it lifted off very early on a foggy morning. Most bird photographers sleep too late!" Photo by Arthur Morris. Alpha 1 II. 600mm f/4 G Master + 2x TC. 1/2500-sec., f/8, ISO 1250
Handholding For Flight
Handholding a super-telephoto lens for flight photography enables you to acquire focus quickly and pan smoothly with your subject. That, however, is true if and only if you can comfortably manage the size and weight of the lens for extended shooting sessions. If you cannot, your lens must be supported by a tripod or a monopod. I have injured my shoulders, elbows, and wrists on numerous occasions by trying to play hero and handhold a 400mm f/2.8 or 600mm f/4 for hours on end.
When shooting flight off a tripod, I use a Levered-clamp FlexShooter Pro head and make sure to set up my Robus tripod tall enough so that I do not have to stoop to get my eye to the viewfinder. After that, it is simply a matter of practice, practice, and more practice.
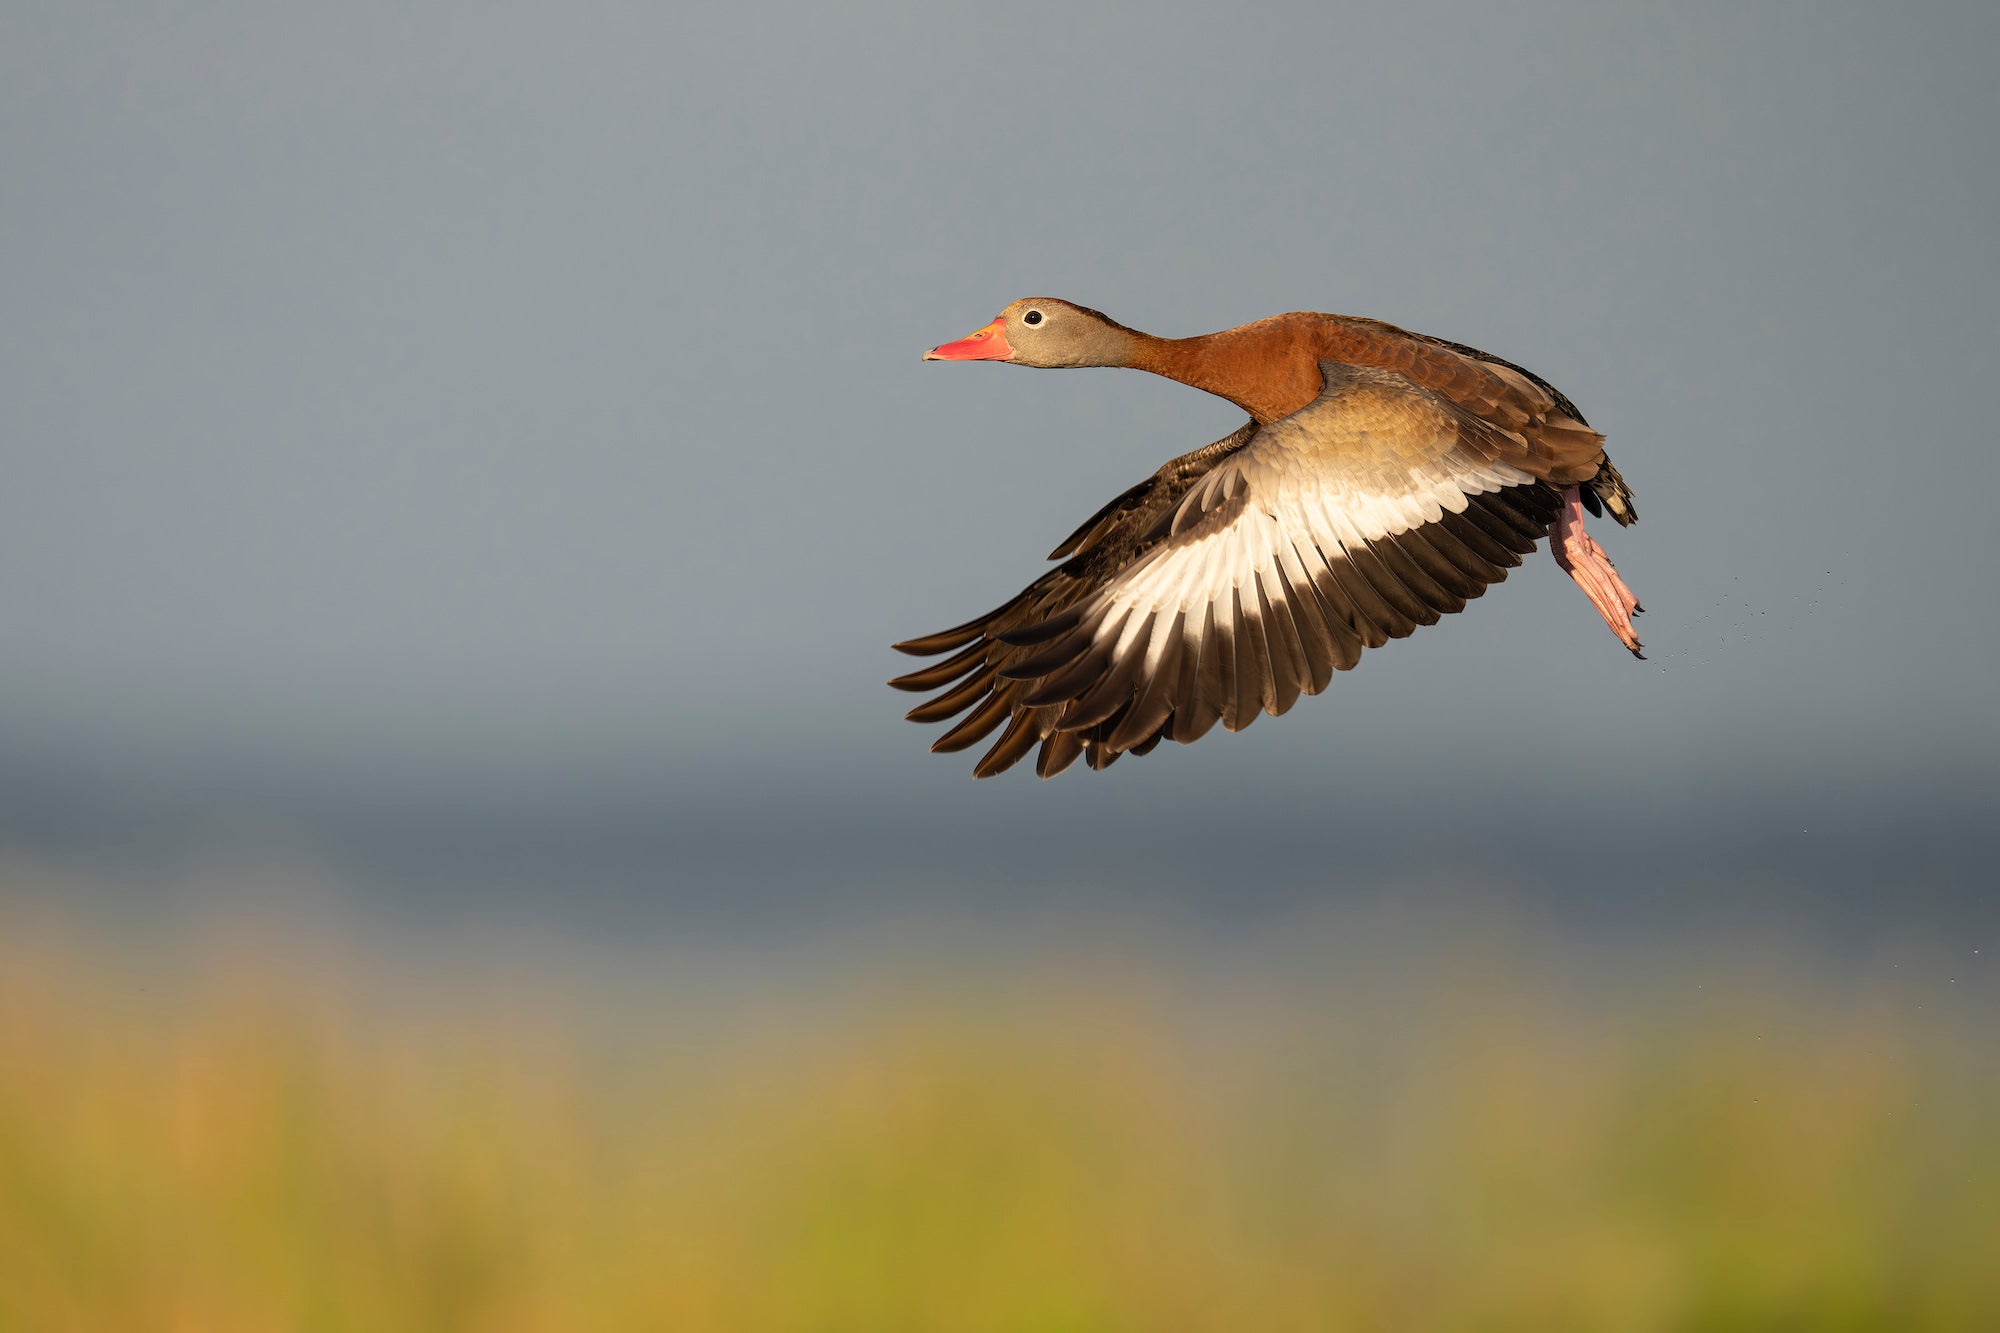
"Black-bellied Whistling Duck taking flight, Indian Lake Estates, FL. Seated on a sturdy plastic milk crate, I shot this handheld. Wide/AF-C with Bird Eye-AF enabled. This image is a fine example of the wings-fully-down flight pose. I originally had the lens on my lowered tripod, but the Levered-Clamp FlexShooter Pro head allows me to unmount the big lens in a second and handhold it whenever a good subject flies by." Photo by Arthur Morris. Alpha 1 II. 600mm f/4 G Master. 1/3200-sec., f/4, ISO 1000
Autofocus (AF) Patterns
All modern mirrorless camera bodies offer a plethora of AF patterns. The first thing you need to do is limit your choices in the camera menu so you can quickly switch to the exact pattern you need in the field. I generally keep only three patterns active.
My first choice for flight photography is (non-tracking) Wide with bird face/eye tracking enabled. This covers practically the entire frame and will keep even erratically flying subjects in focus as long as you keep them somewhere in the frame. Next up is Tracking: Zone with bird face/eye tracking enabled. With either of these patterns, it is best to acquire focus with the bird’s head centered in the frame to make life much easier for the eye tracking technology.
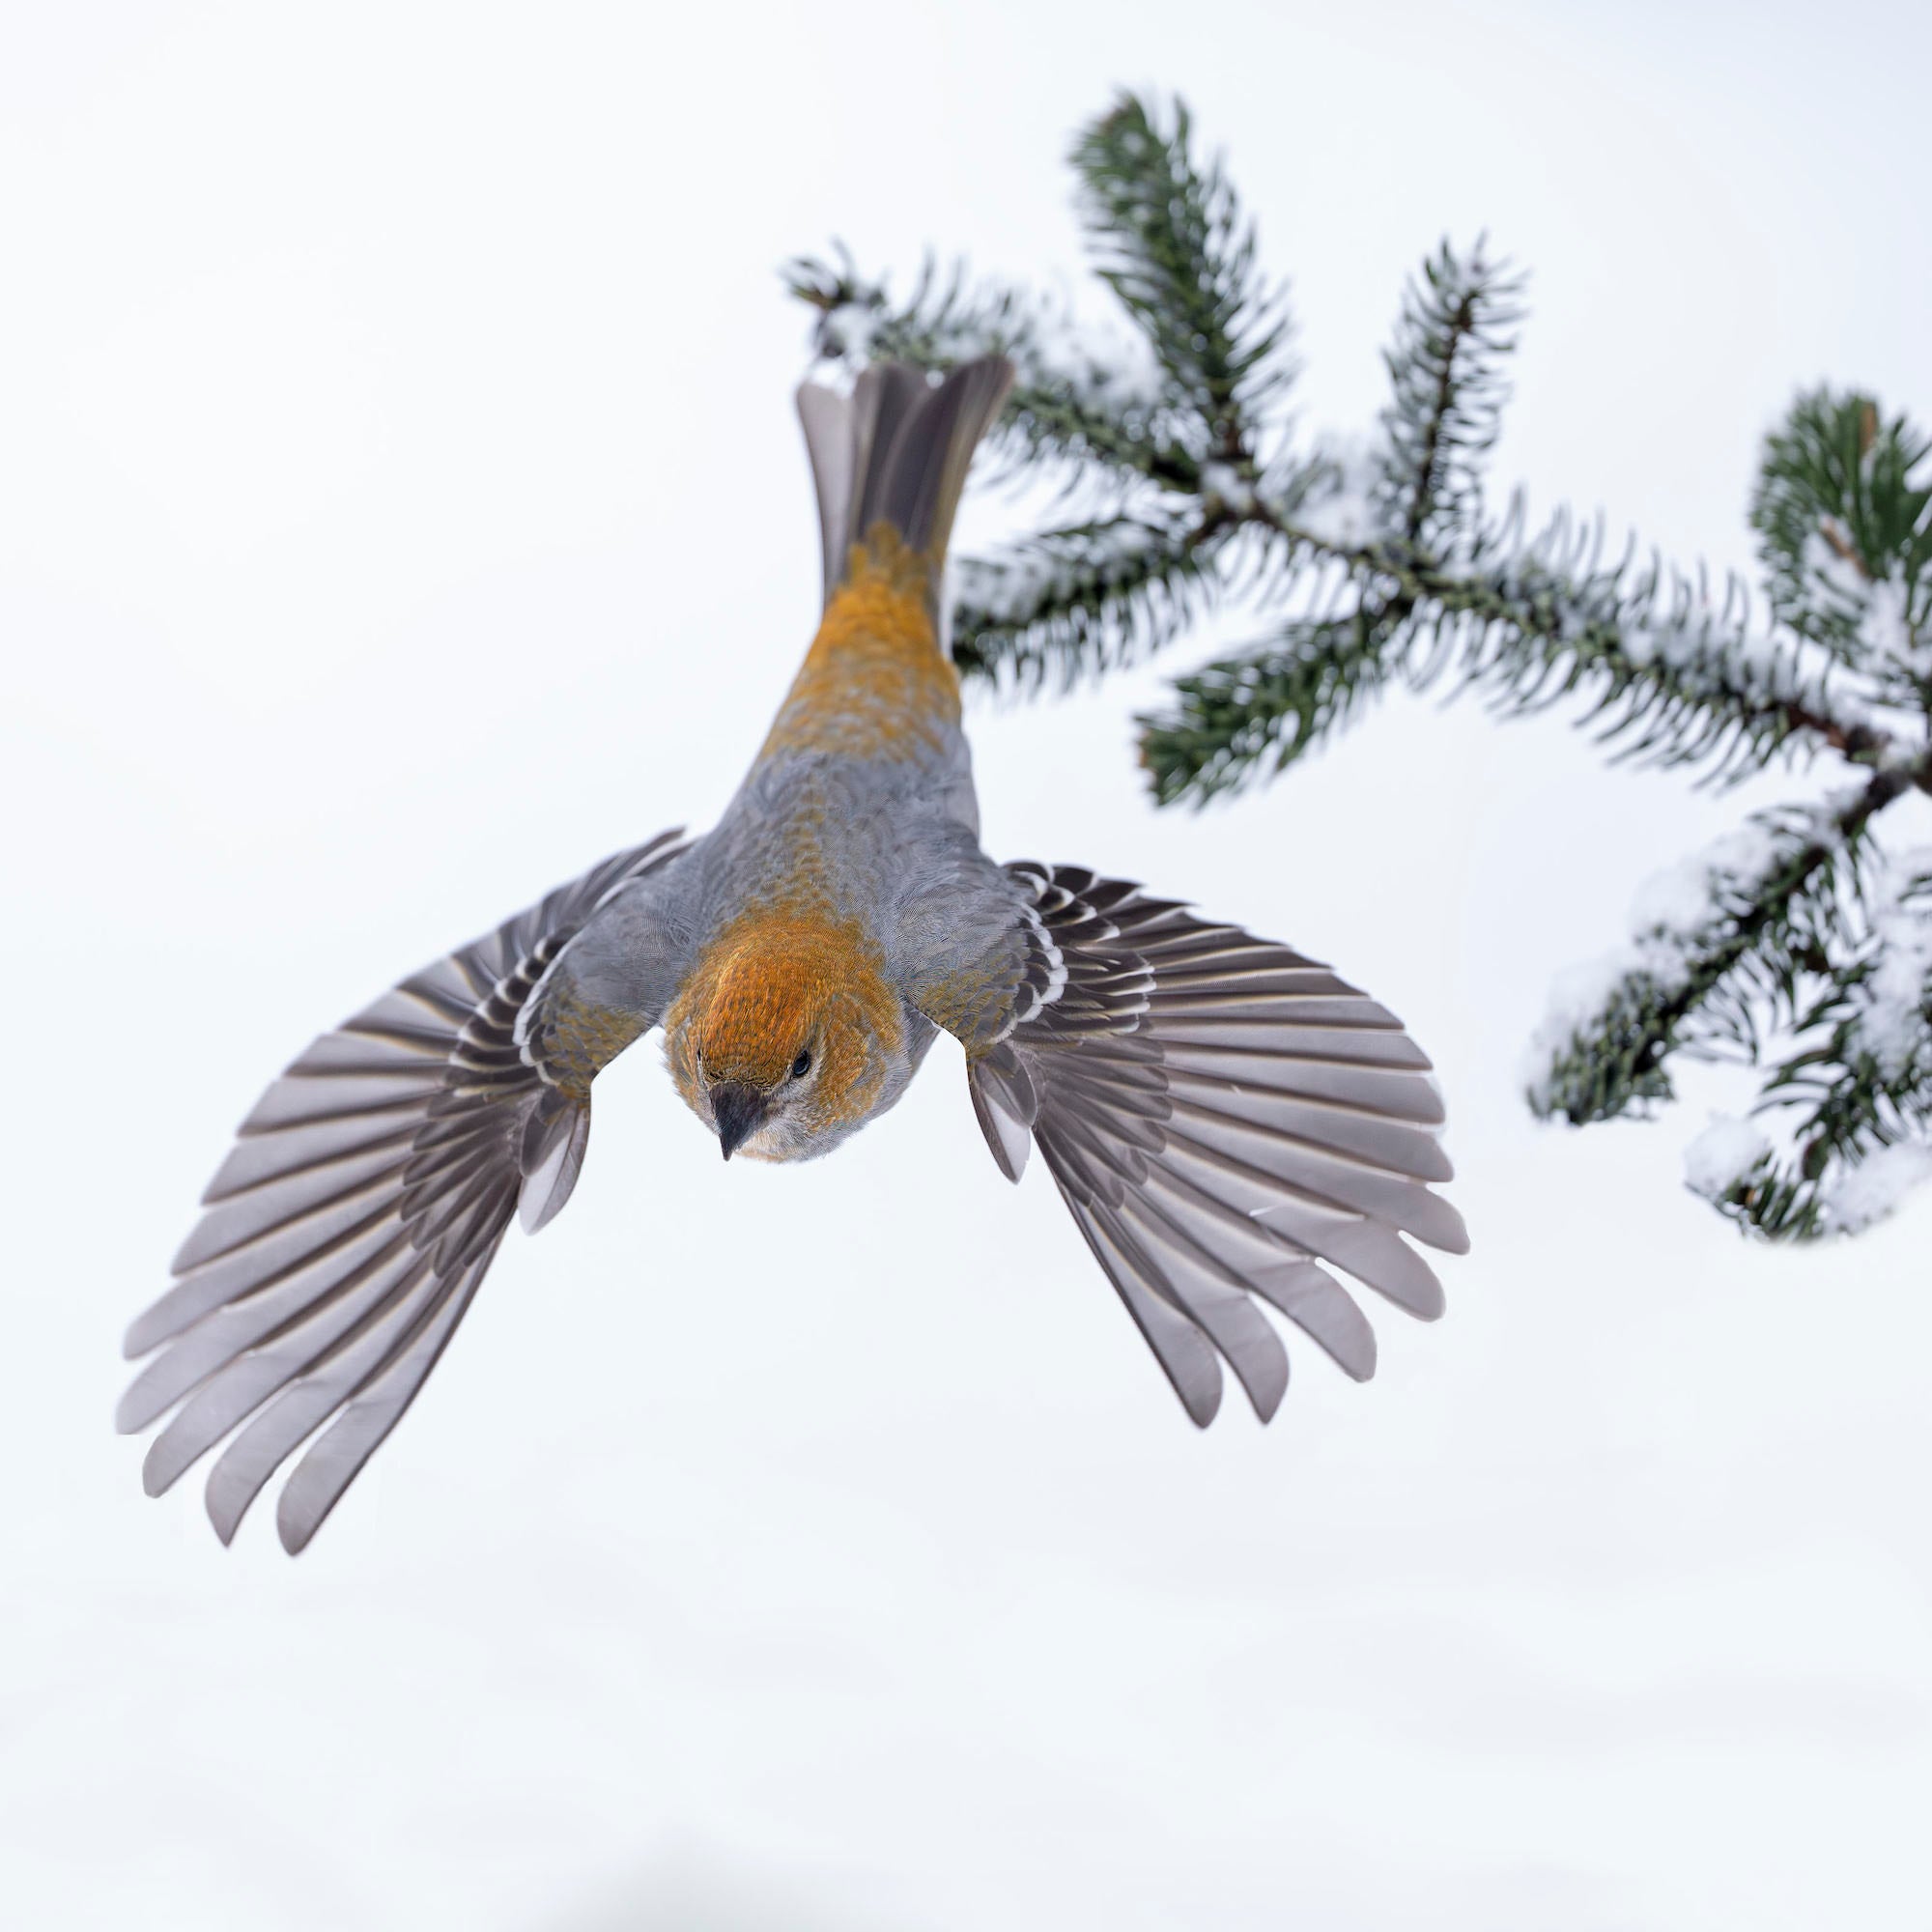
"Pine Grosbeak taking flight, Anchor Point, AK. Standing at full height, I used a tripod. Wide/AF-C with Bird Eye-AF enabled. When I was a Canon Explorer of Light for 19 years, I often dreamed of a science-fiction-like autofocus that could track the eye of a small, fast songbird. With Sony, I found just that." Photo by Arthur Morris. Alpha 1 II. 300mm f/2.8 G Master. 1/6400-sec., f/2.8, ISO 6400
Though I rarely use Tracking: Spot (S) with bird face/eye tracking enabled for flight shooting, others use it with great success. However, I do use it often for general bird photography when there are multiple subjects in the frame or when I am shooting through tall grasses.
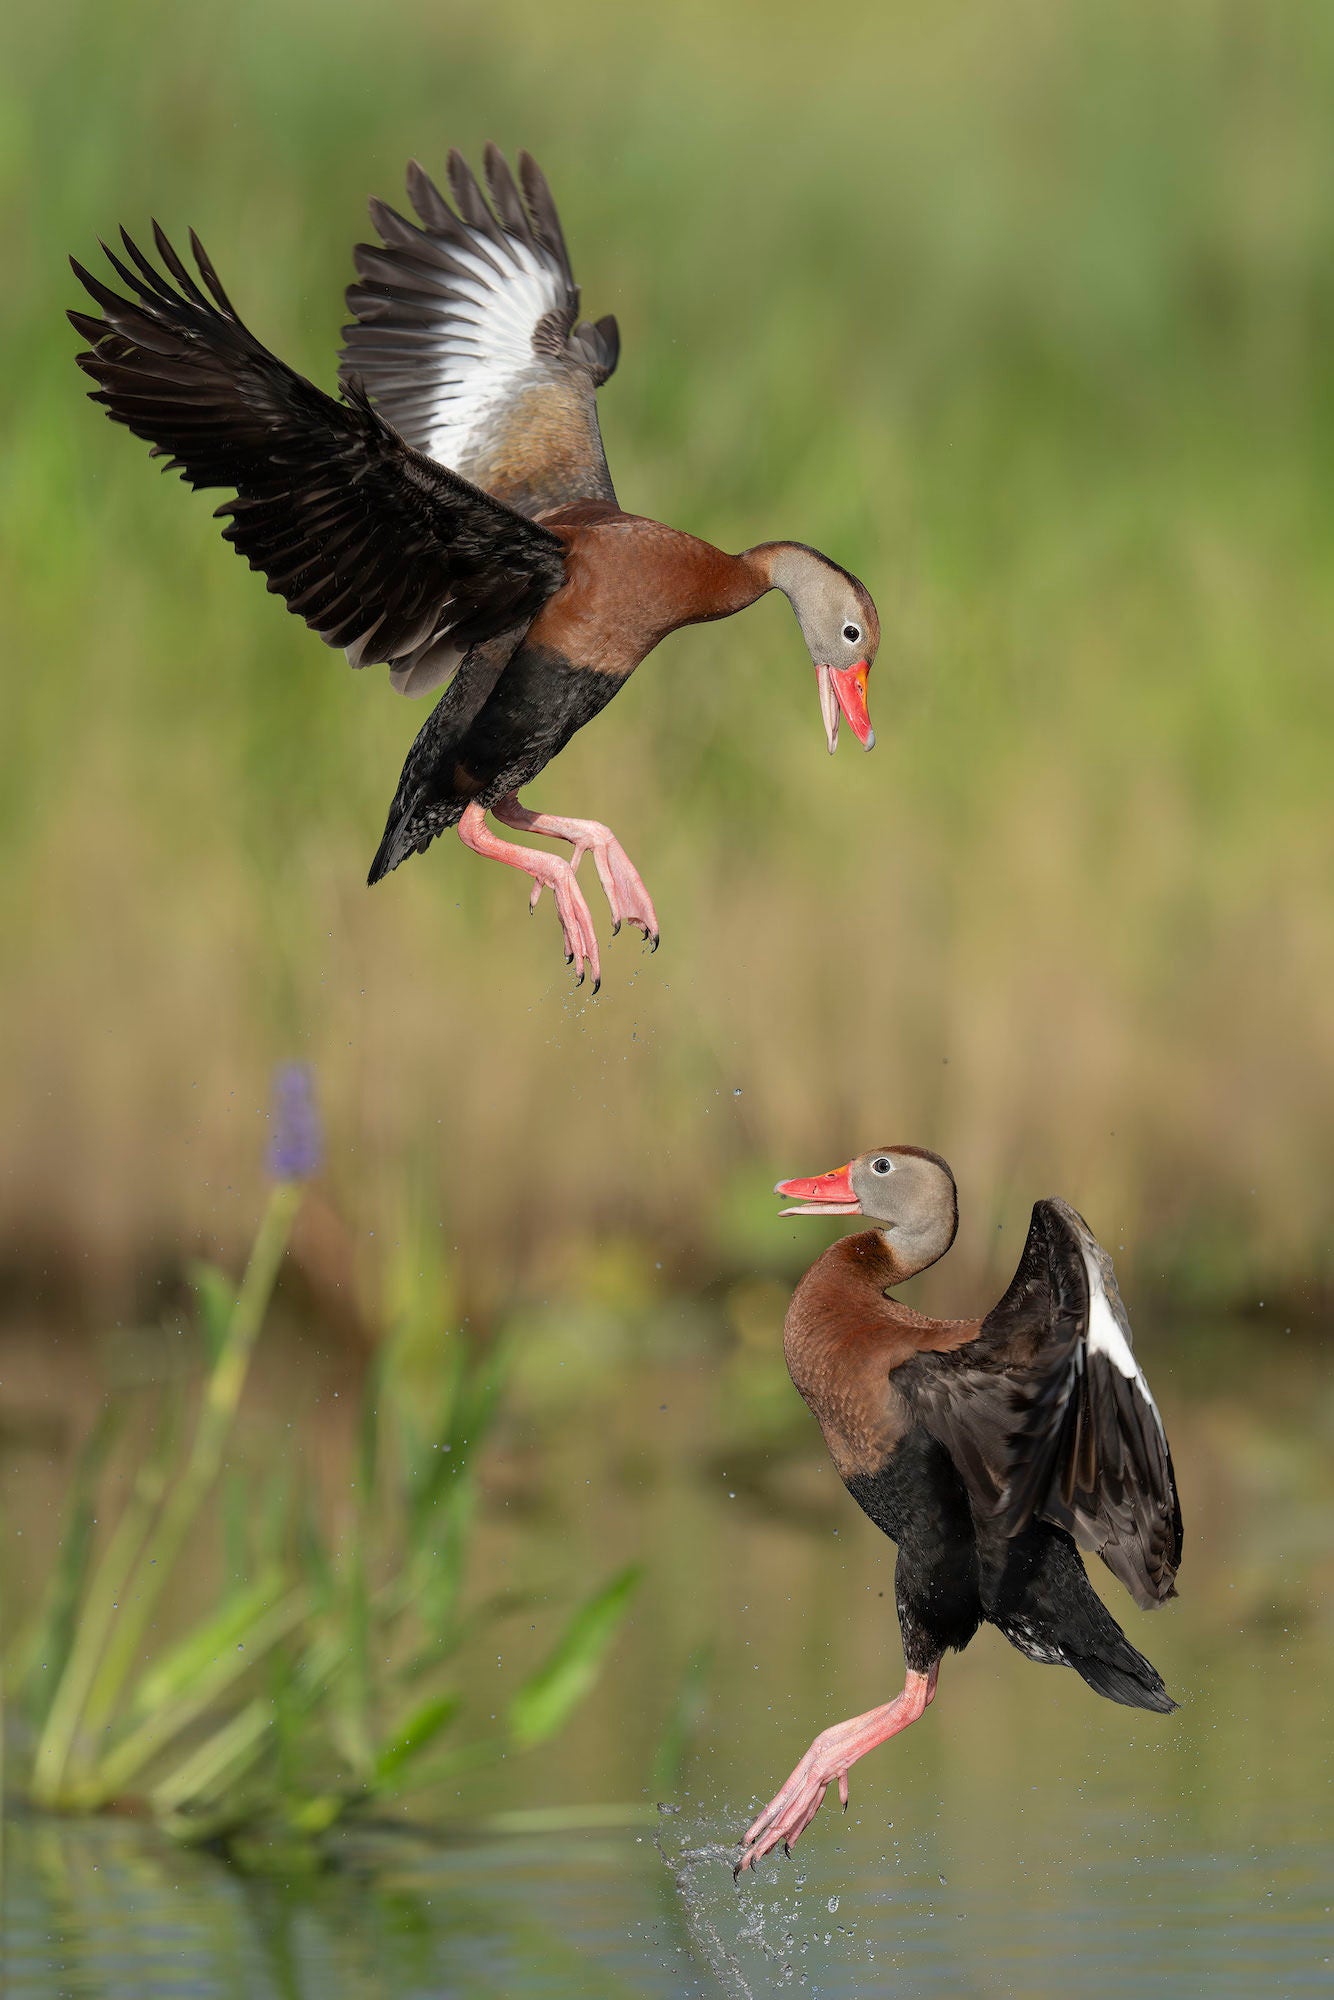
"Black-bellied Whistling Ducks squabbling, Indian Lake Estates, FL. Seated on a sturdy plastic milk crate behind my flattened tripod setup in four inches of water. Settings were Wide/AF-C with Bird Eye-AF enabled. With the lens just above the water, I worked off the articulated rear monitor, as there was no way to get my eye to the viewfinder. Though I make sure to have my reading glasses on so that I can see the active AF points, there are times – such as when unexpected action like this occurs – that you simply need to trust your camera’s AF system and fire away. The Alpha 1 II’s superb 50-megapixel files allowed for this vertical crop from a horizontal original." Photo by Arthur Morris. Alpha 1 II. 600mm f/4 G Master. 1/4000-sec., f/4, ISO 640
Flight Focusing Tips
For 99% of flight photography, it is best to set the Range Limiter switch on your lens to Not Full by sliding the switch all the way toward the camera body. This prevents the lens from hunting down to its Minimum Focus Distance (MFD) and dramatically speeds up Initial Focusing Acquisition.
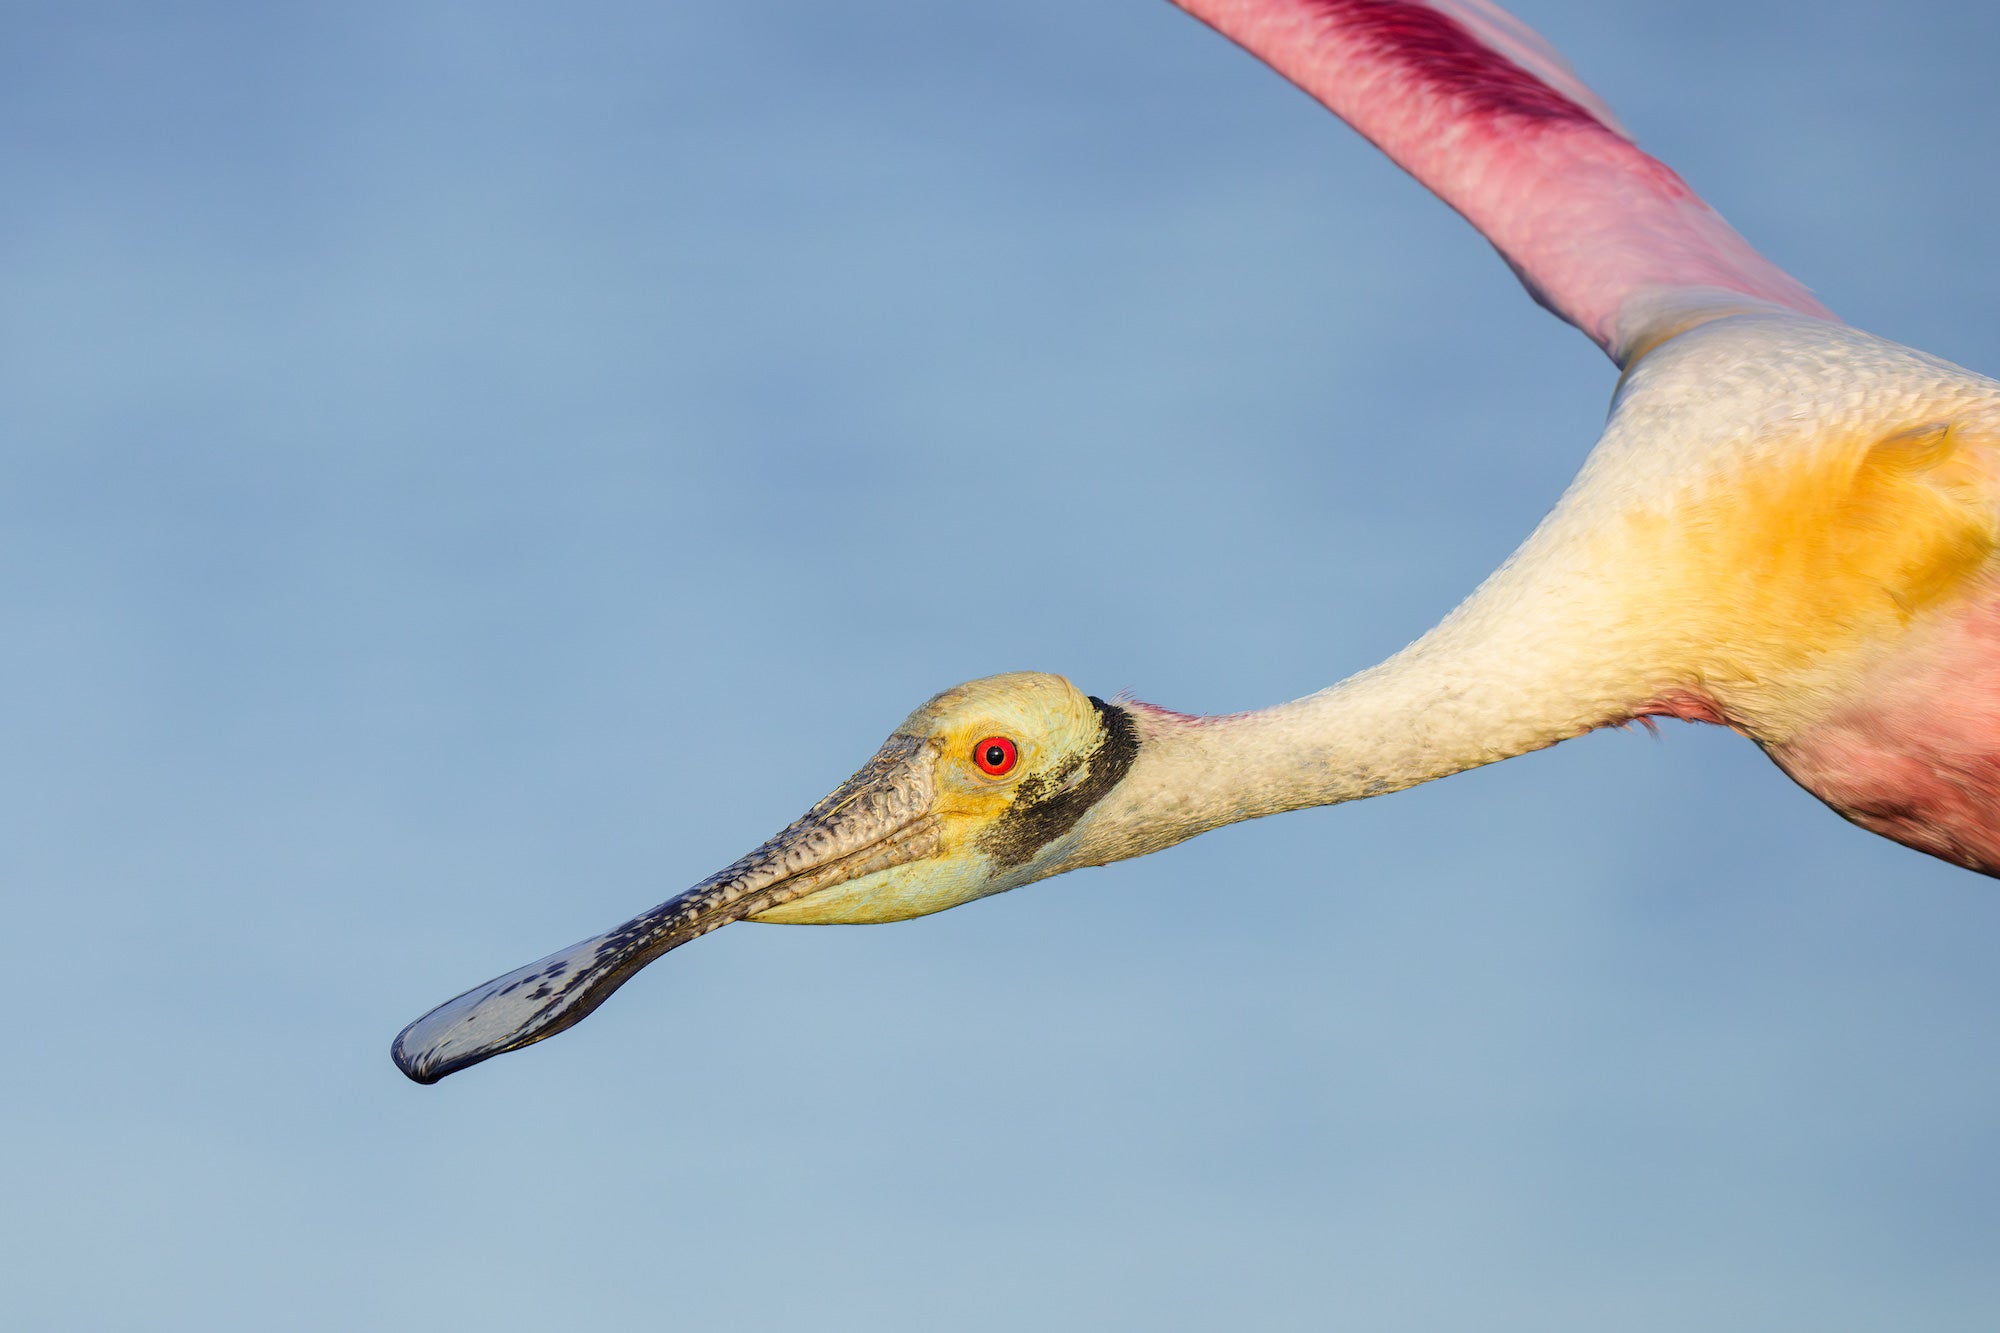
"Roseate Spoonbill, Fellsmere Grade Recreation Area, FL. Captured handheld at 800mm. When I first borrowed this lens at Stick Marsh, I didn't think it would be very practical. Boy, was I wrong! It opened up a whole new world of flight images, including incredible tight flight-head portraits. Unlike most other systems, Sony's autofocus can maintain eye tracking even at extremely close range. Just make sure to set the lens range limiter switch to Full when attempting shots like this. Though I can handhold this setup for short sessions, I more often use it on a monopod or tripod." Photo by Arthur Morris. Alpha 1 II. 400–800mm f/6.3–8 G. 1/3200-sec., f/8, ISO 2500
In the same vein, make it a habit to pre-focus at the expected distance. If birds are flying by at 50 yards, but your lens was last focused at 15 feet, the AF system might be completely blind when you raise your rig. To prevent this, focus on something roughly 50 yards away, release the shutter button, and wait. By keeping your lens "in the neighborhood," the AF system can lock on instantly when the next bird flies into position.
Shutter Speeds & Apertures For Flight Photography
I almost always work at the wide-open aperture to provide the fastest possible shutter speed. Flying birds are generally far enough away that depth of field is a non-issue.
When shooting flight on sunny days, I want to work at a minimum shutter speed of 1/3200-sec. In fact, 1/4000-sec. or 1/5000-sec. is even better. Ideally, for small, fast songbirds, you’ll want to be close to 1/8000-sec. to completely freeze the action.
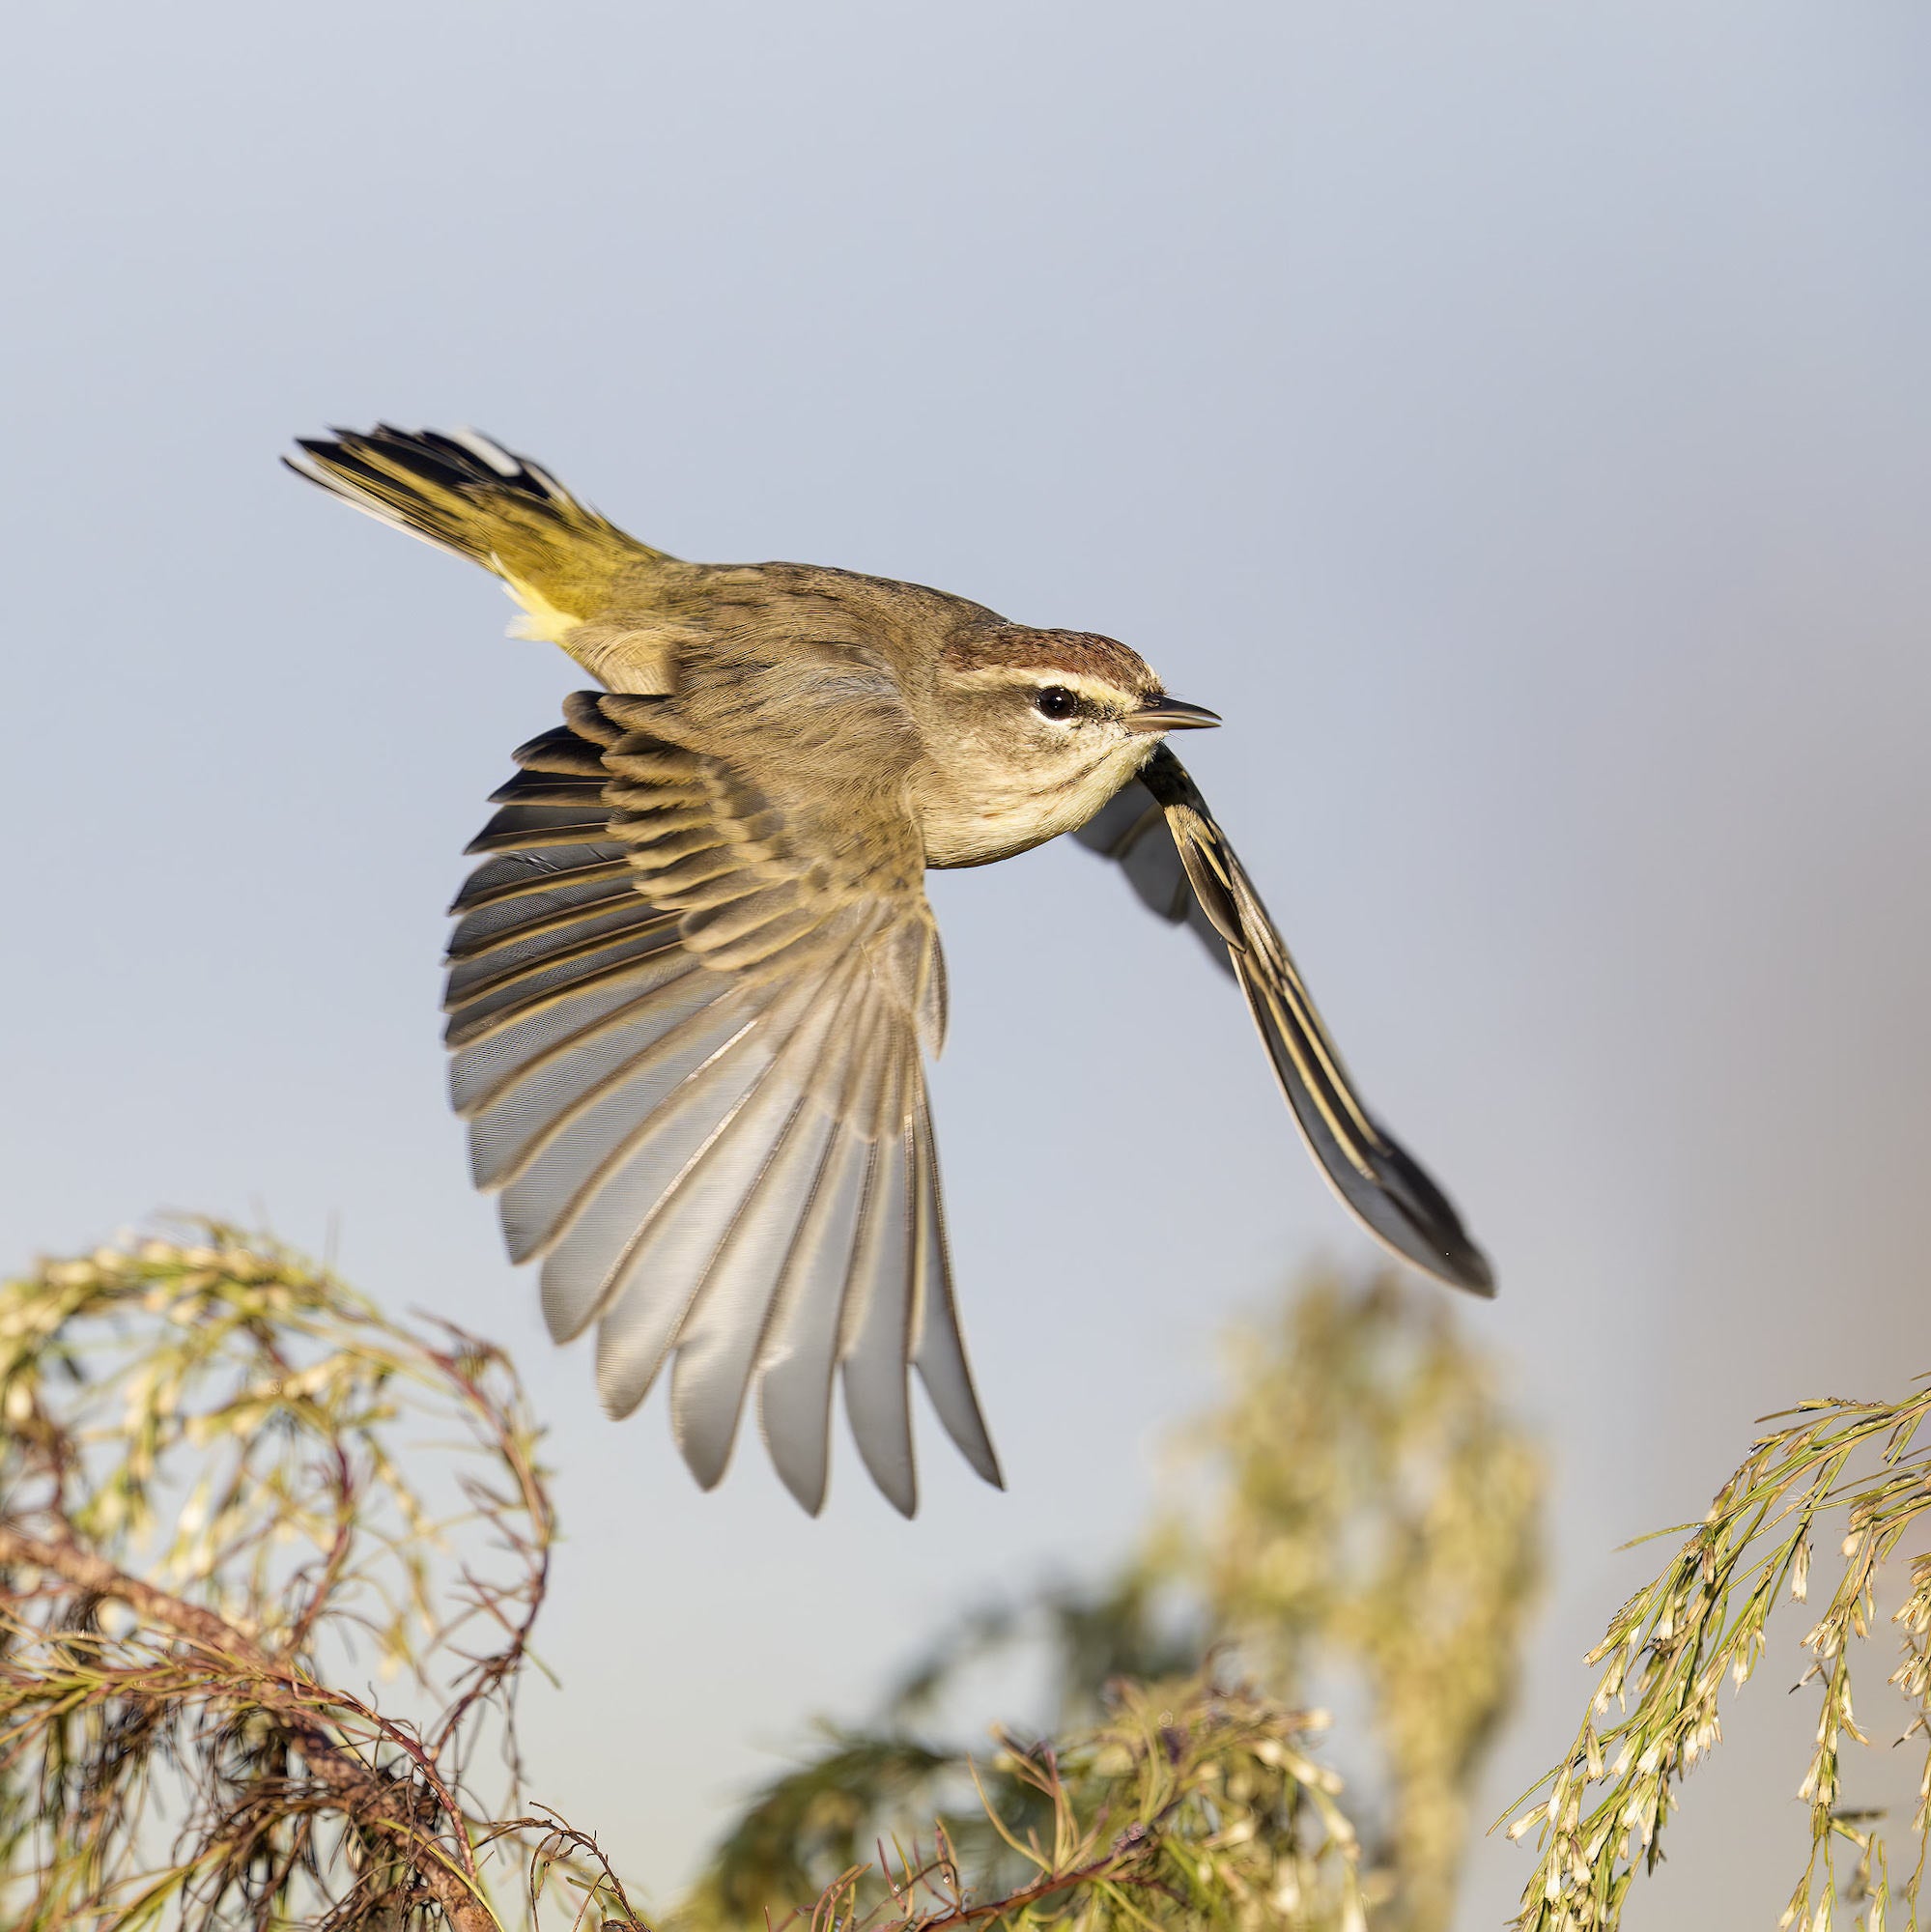
"Palm Warbler taking flight, Indian Lake Estates, FL. From the driver’s seat of my SUV with the BLUBB (Big Lens Ultimate BeanBag). Tracking: Zone AF-C with Bird Eye-AF enabled. Pre-Capture with the Sony Alpha 1 ii actually enables you to create images that you missed. As long as you are half-pressing the shutter button, the camera stores image files that are then saved when you release the shutter." Photo by Arthur Morris. Alpha 1. 600mm f/4 G Master + 1.4x TC. 1/4000-sec., f/5.6, ISO 2000
On cloudy days, I will often drop down to 1/1600-sec. or 1/2000-sec. to keep the ISO at a reasonable level.
Conversely, when creating intentionally blurred images to convey a sense of motion, you can work as slow as 1/60-sec. or even 1/30-sec. and still get the bird's eye sharp – provided you pan perfectly with your subject.
What Makes A Special Flight Image?
So, you have a great Sony rig that enables you to create hundreds of sharp flight shots. If you are skilled and a bit lucky, you might walk away with one or two truly spectacular images from a long session. But what is it exactly that makes a flight image stand out from the crowd?
- Dynamic Poses & Wing Positions: Look for the wings fully up, fully down, or for flat flight when the bird is angling toward you. Banking, turning, calling, or carrying prey adds immense drama. Images where the bird’s head is cleanly separated from its body and wings are ideal.
- Pixel-Level Sharpness: The eye must be tack-sharp.
- Pleasing Backgrounds: If you are shooting against the sky, a scattering of soft clouds can add depth and texture. If you are shooting low against trees or vegetation, the background should complement the subject rather than distract from it.
- Flawless Lighting: Look for even lighting on the entire bird with few or no harsh shadows.
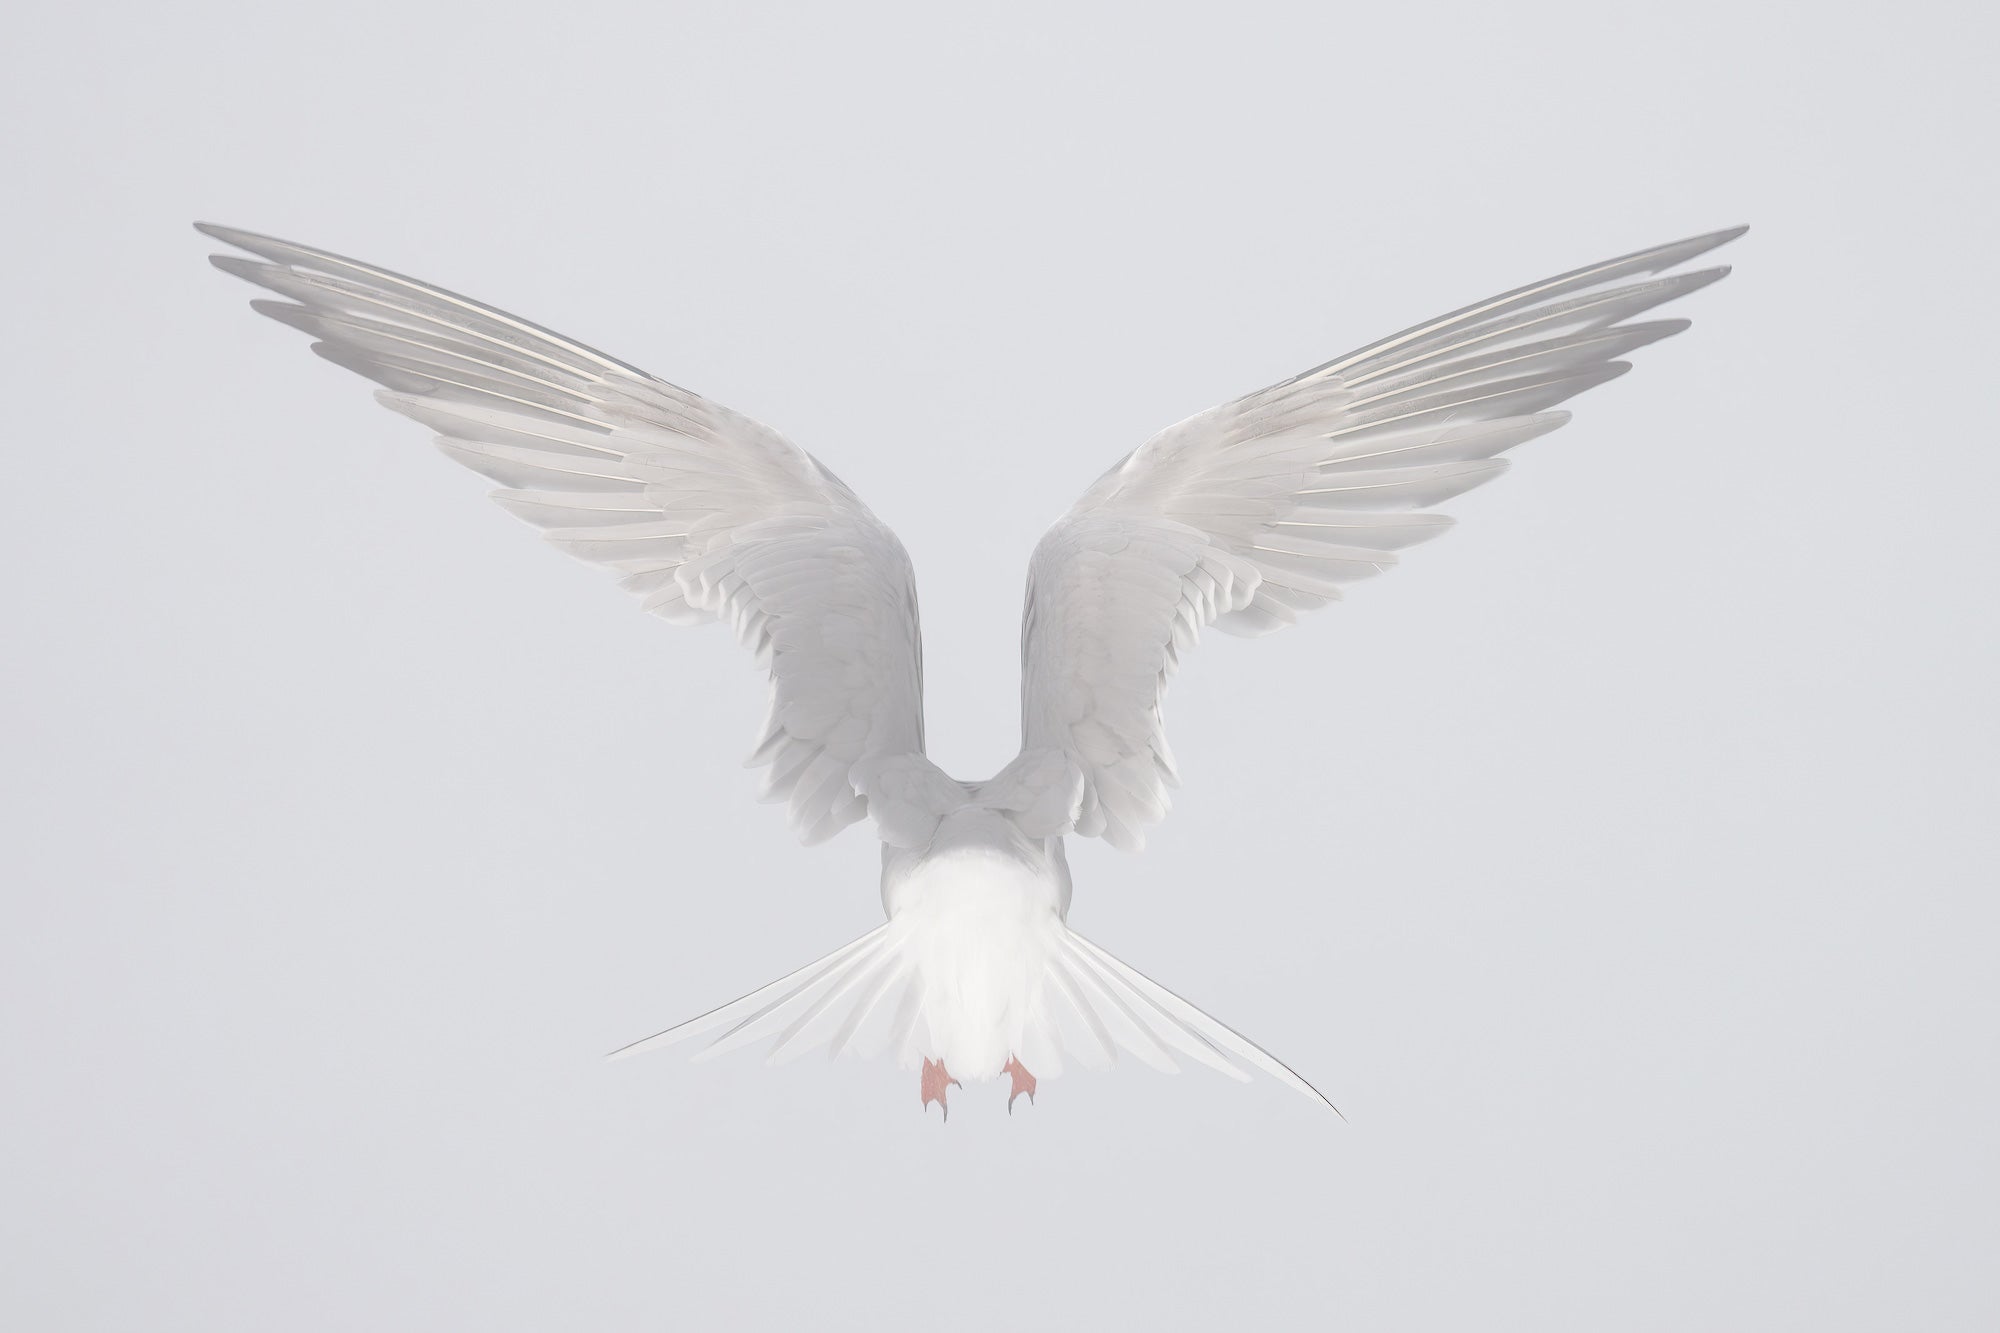
"Common Tern kiting, Nickerson Beach Park, Lido Beach, NY. Working in wind-against-sun conditions, I shot this handheld. Rear flight shots can be quite angelic. Though most would assume that f/8 on a foggy morning isn't feasible for flight photography, the sensor of the Alpha 1 II handles high ISO noise beautifully." Photo by Arthur Morris. Alpha 1 II. 400-800mm f/6.3-8 G. 1/3200-sec., f/8, ISO 2000
About The Author:
Arthur Morris is a freelance bird photographer, educator and tour leader with 43 years of field experience. His most fitting credit line: BIRDS AS ART. Visit and subscribe to his educational blog at BIRDSASART-Blog.com and explore his online store at birdsasart-shop.com. He co-authored The Complete and Quintessential Guide to Photographing Birds in Flight with Arash Hazeghi PH.D.
Interested in learning more about bird photography?
–Take our free Bird Photography course on Alpha Camera Academy
–Explore more bird photography articles
–Check out our list of Best Lenses for Bird Photography