For me, the most memorable skyline photographs are those with a colorful sky and well-lit buildings. This combination, however, is almost impossible to capture in a single exposure because the sky is typically most colorful around sunset, whereas the buildings appear well lit sometime later. Building lights are most conspicuous after some of the natural ambient light has vanished. So, how do we capture the beauty of a vibrant sky while maintaining a nighttime look to the skyline? Read on, and I’ll show you how I do it using an updated-for-digital double-exposure technique.
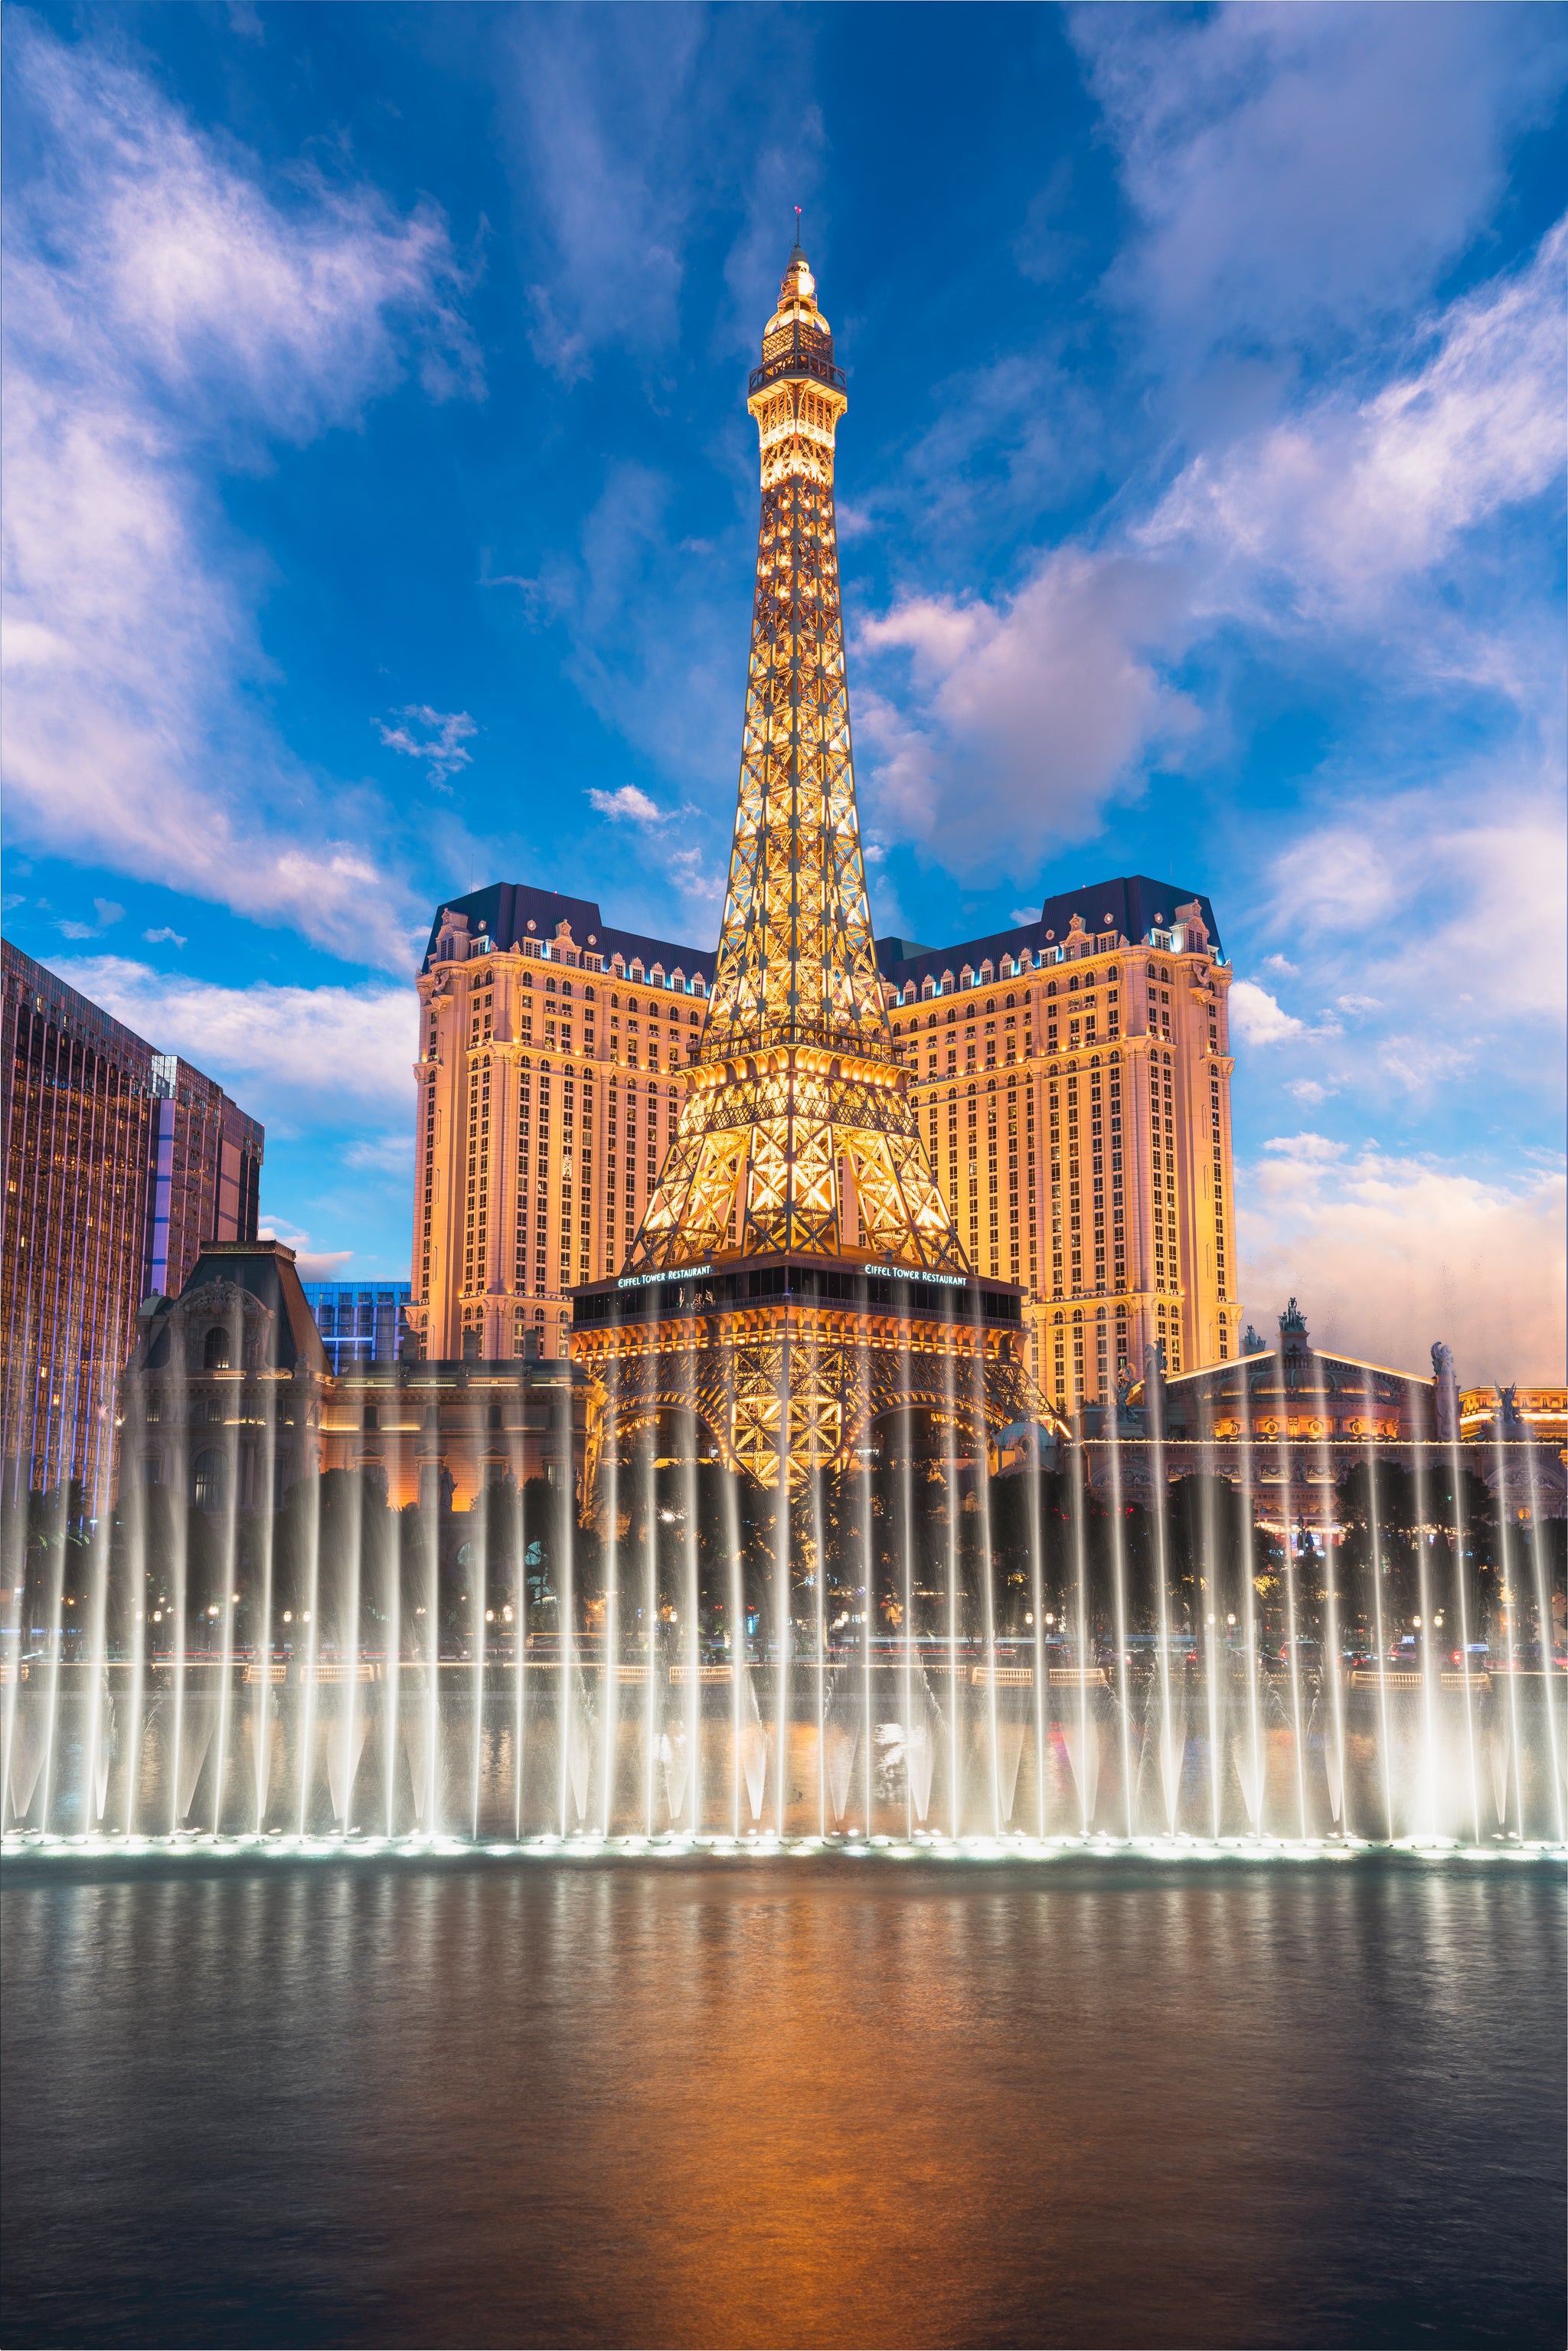
Sony α7R III. Sony 16-35mm f/2.8 G Master lens, 5 stop ND filter. Sky: 5-seconds, f/8, ISO 100. Buildings: 1.6-seconds, f/8, ISO 100.
Setup And Image Capture
Arrive at your location with plenty of time to set up and find your favorite spot. Make sure you’re using a very steady tripod – I can’t stress this enough. Pick your spot, compose the image, and wait. A remote release is highly recommended, so you don’t have to actually touch the camera to take a picture. If you’re using a DSLR, enable the mirror lockup feature to minimize tiny vibrations from the camera’s mirror movement. A mirrorless camera like my Sony α7R III is inherently steadier for this kind of shot because it doesn’t have the problem of camera shake due to mirror movement. If you haven’t figured it out already, the goal is to have the camera as steady as possible.
As the sun begins to set, take pictures periodically to capture the changing colors in the sky and clouds. It’s difficult to judge when the sky colors are “just right.” So, don’t be stingy with your memory. Click away!
Typically, about twenty to thirty minutes after the sun has set, the building lights will begin to stand out. Take a few more exposures. When you’re happy with the nighttime look to the skyline, you’re done. Pack up and head home to process your masterpiece.
The Digital Darkroom
I use Lightroom to organize my photographs and make minor adjustments such as exposure, clarity and vibrancy. For major edits requiring layers, I use Photoshop. Below are the two images (fig. 1 and 2) I used to make my final shot. The two shots were obtained 25 minutes apart. The first shows a beautiful sky but not much definition in the buildings. The second offers brightly lit buildings but lacks an interesting sky. The text and step-by-step 10-minute video below outline the steps I took to arrive at the final photograph.
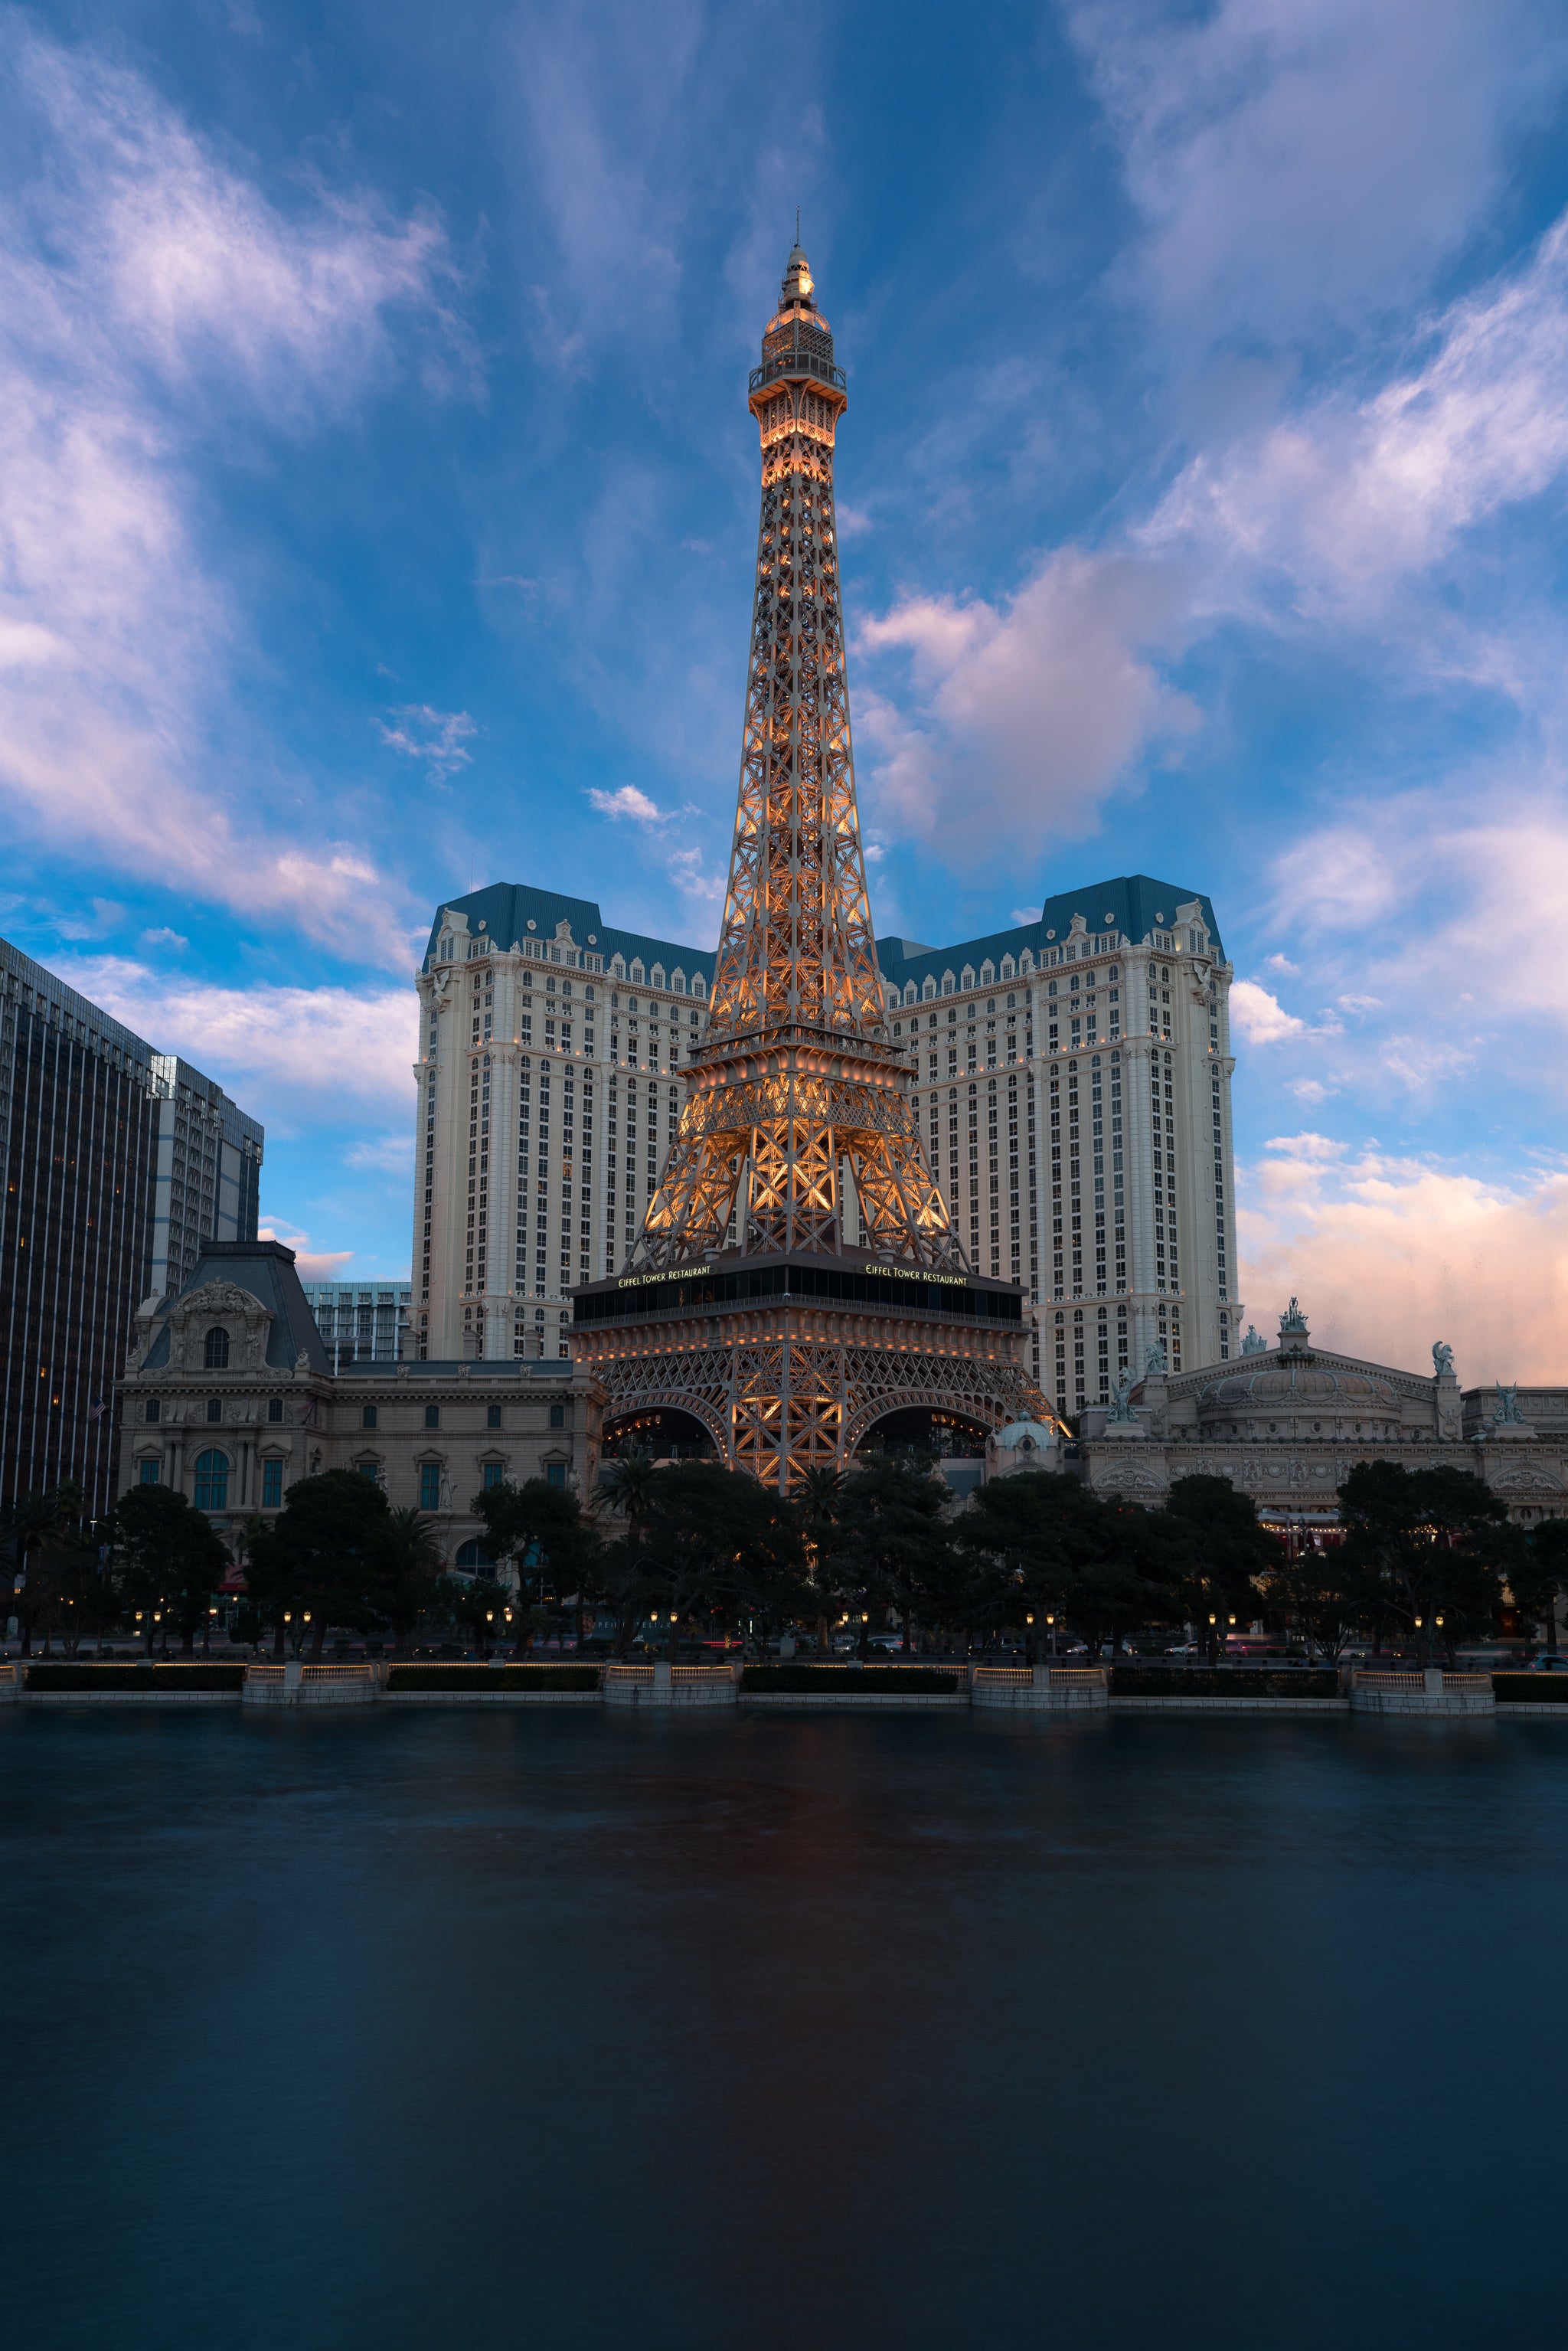
Fig. 1, "Sky." Sony α7R III. Sony 16-35mm f/2.8 G Master lens, 5 stop ND filter. 5-seconds, f/8, ISO 100.
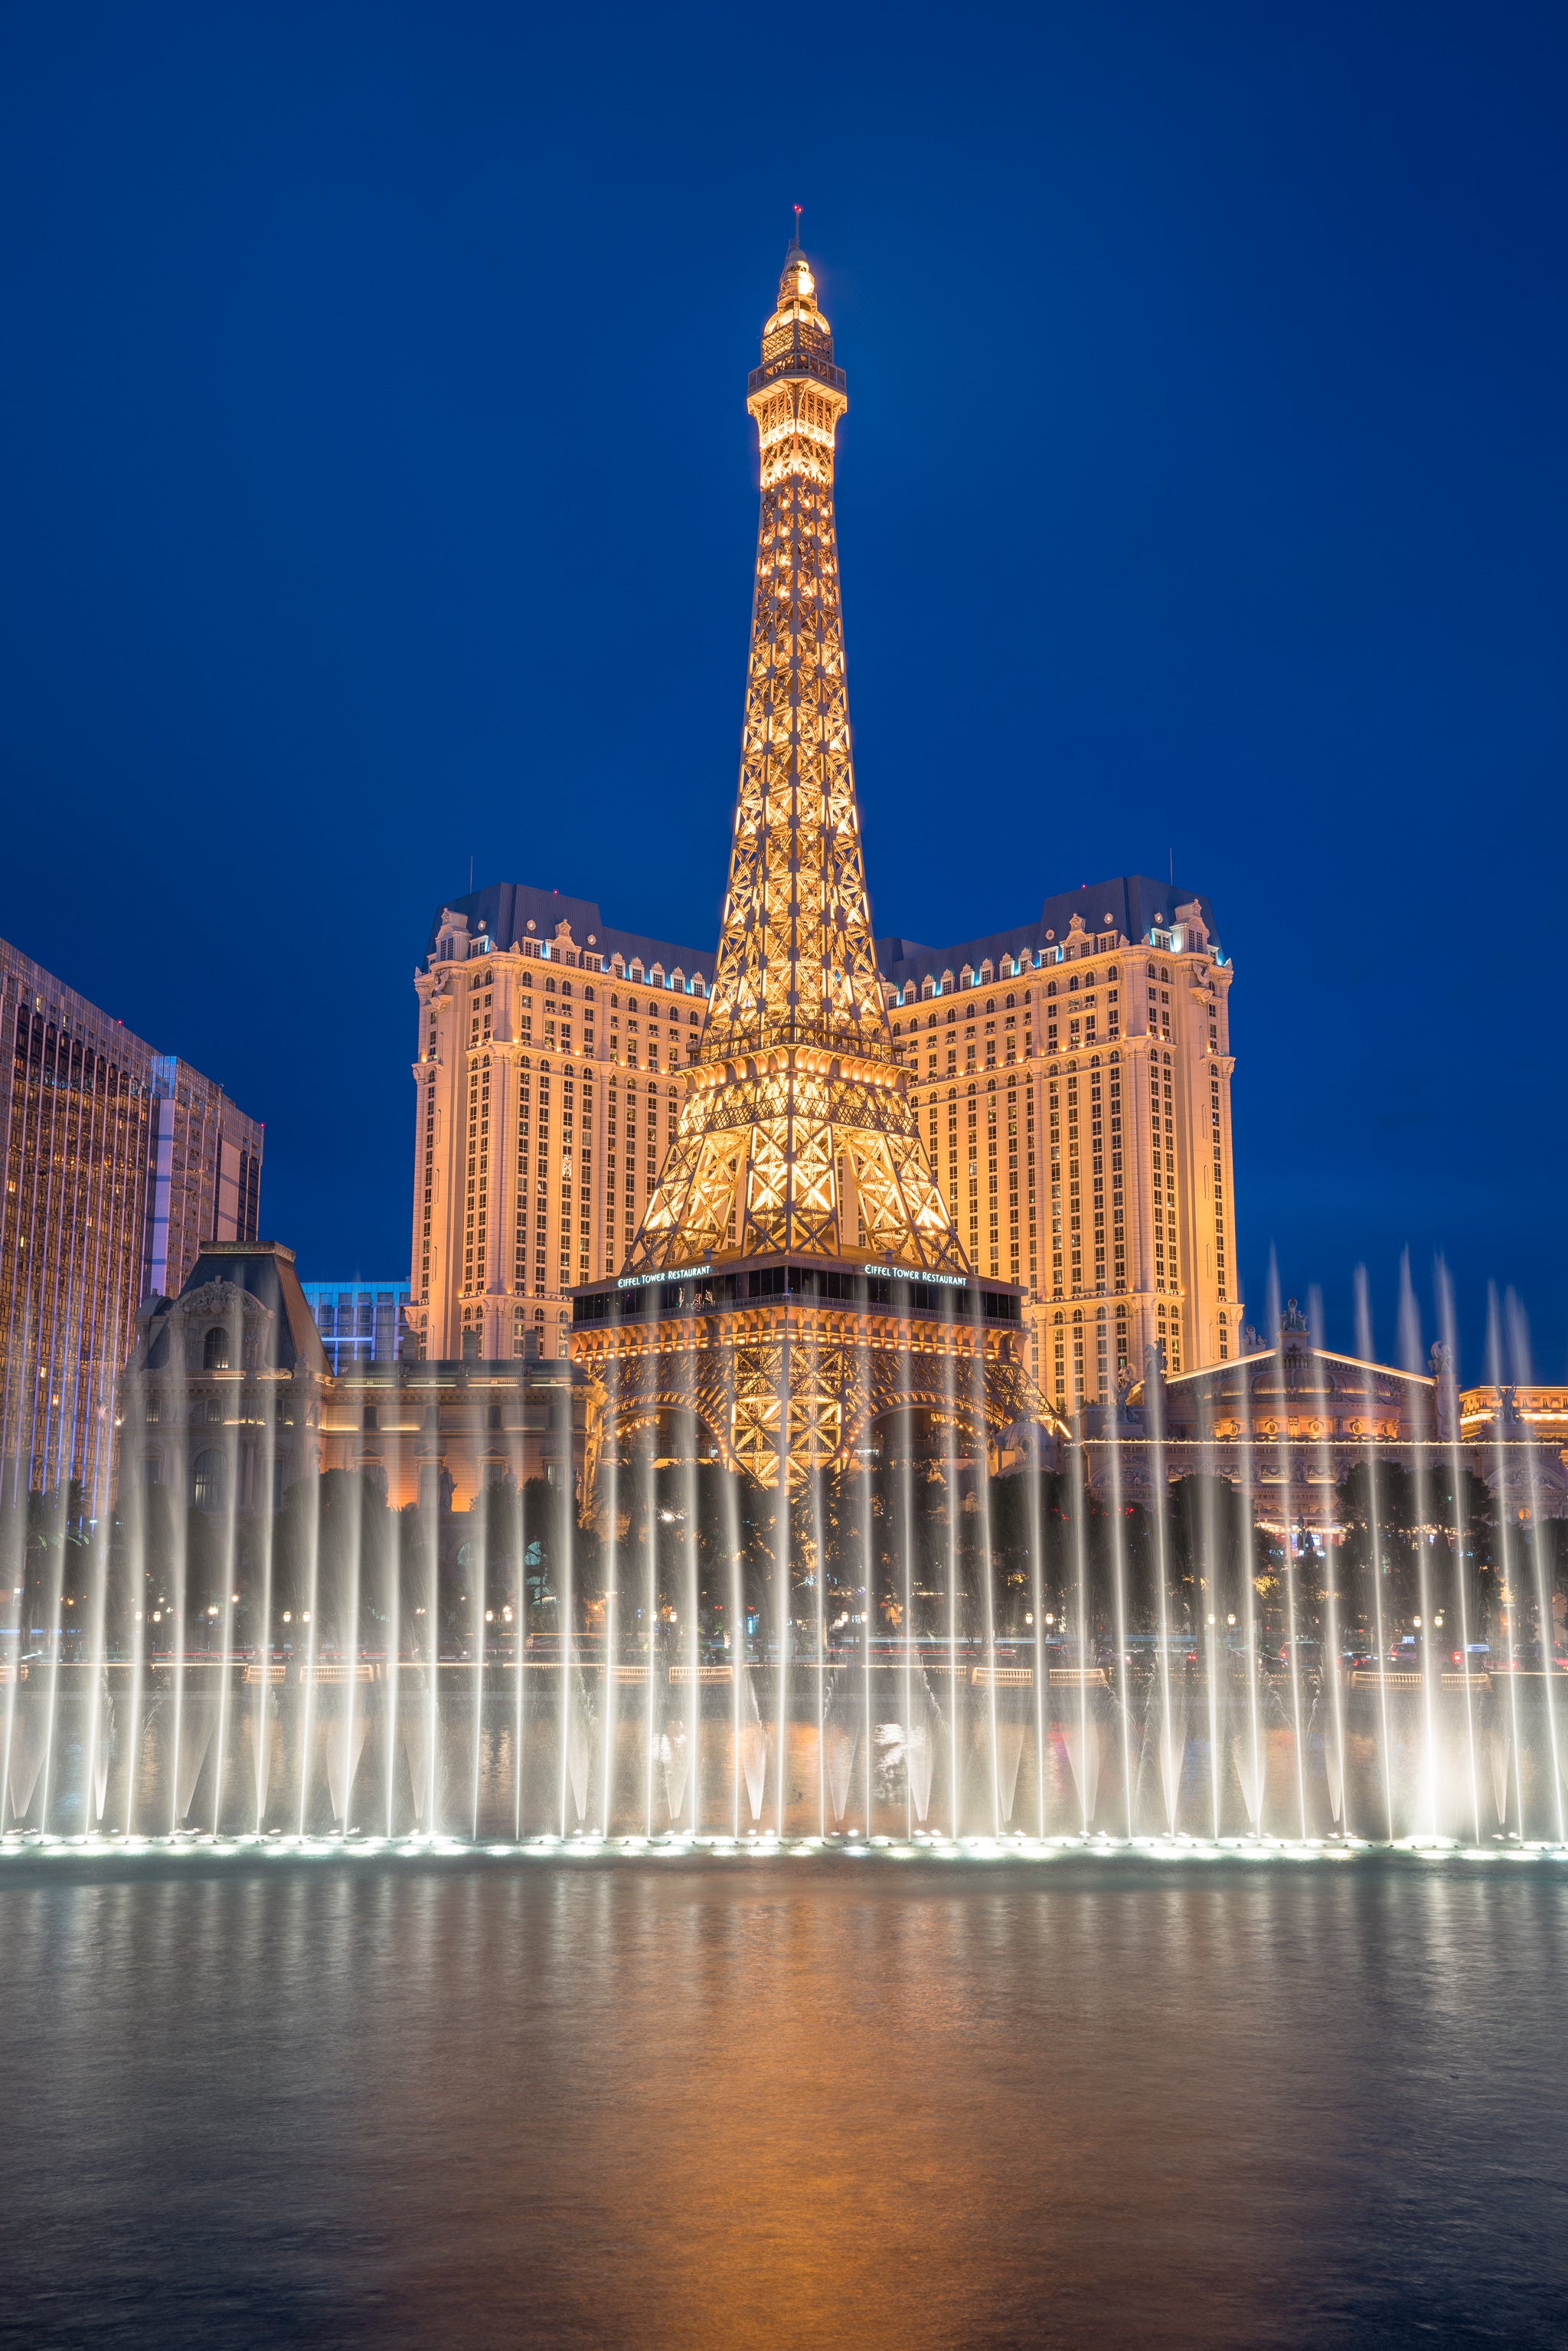
Fig. 2, "Night." Sony α7R III. Sony 16-35mm f/2.8 G Master lens. 1.6-seconds, f/8, ISO 100.
Step 1: Open both images in Photoshop as layers.
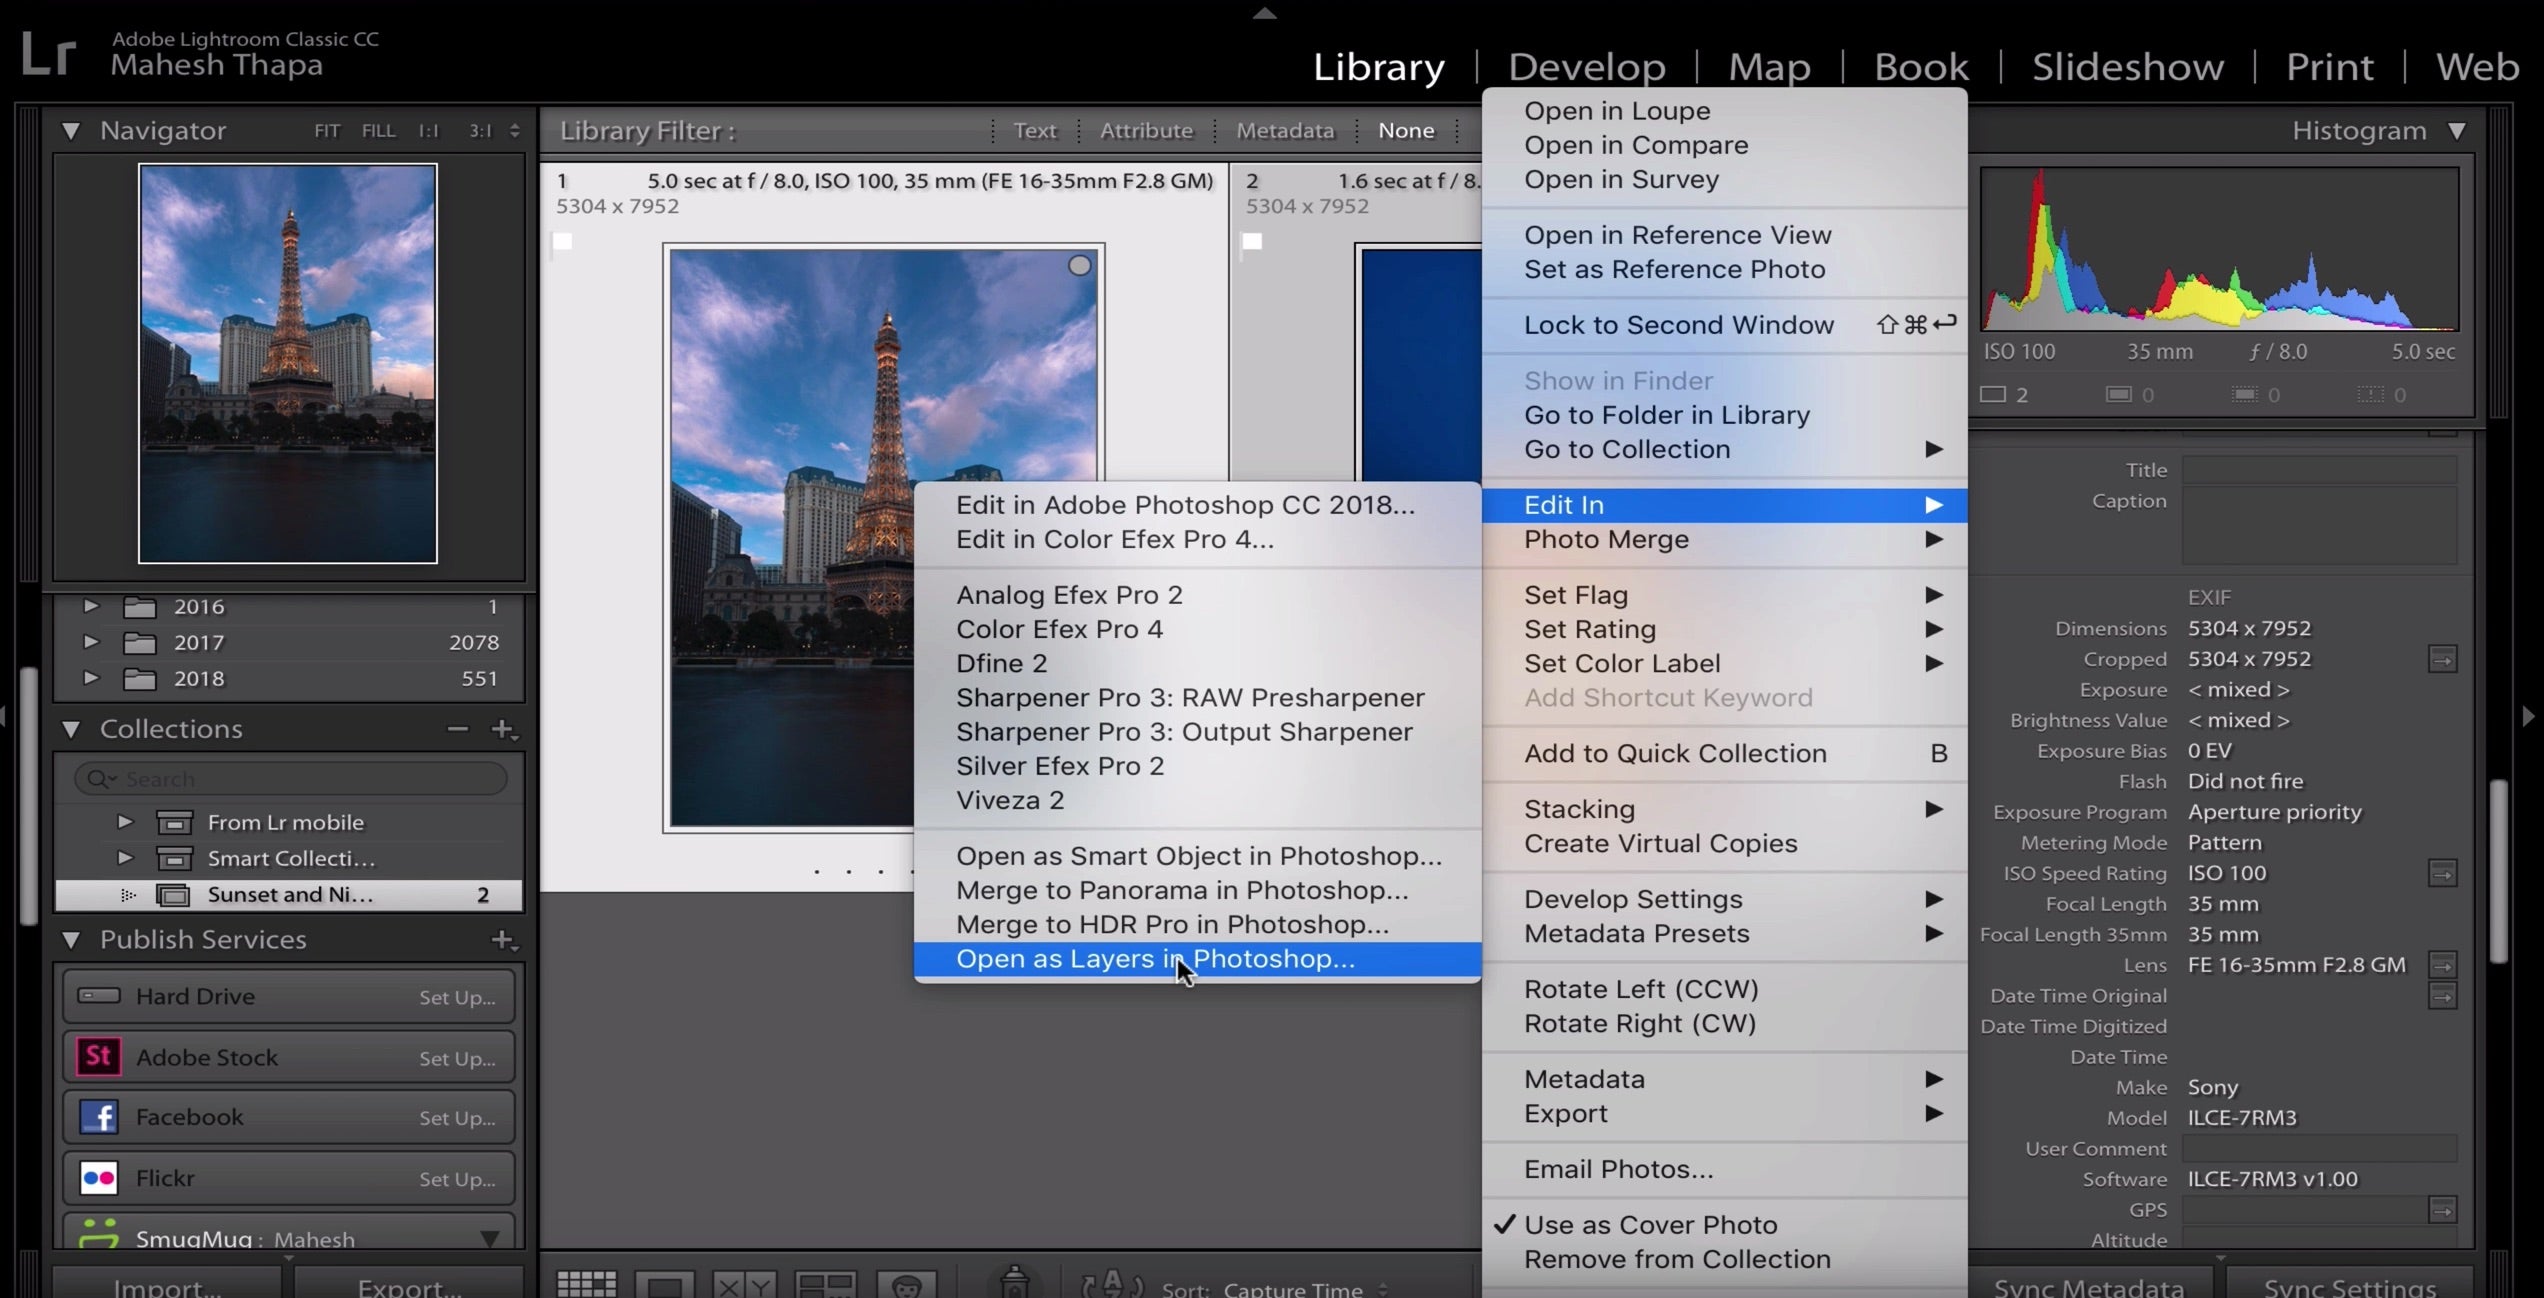
In Lightroom the two best images are selected. Then Select Edit In and Open As Layers in Photoshop.
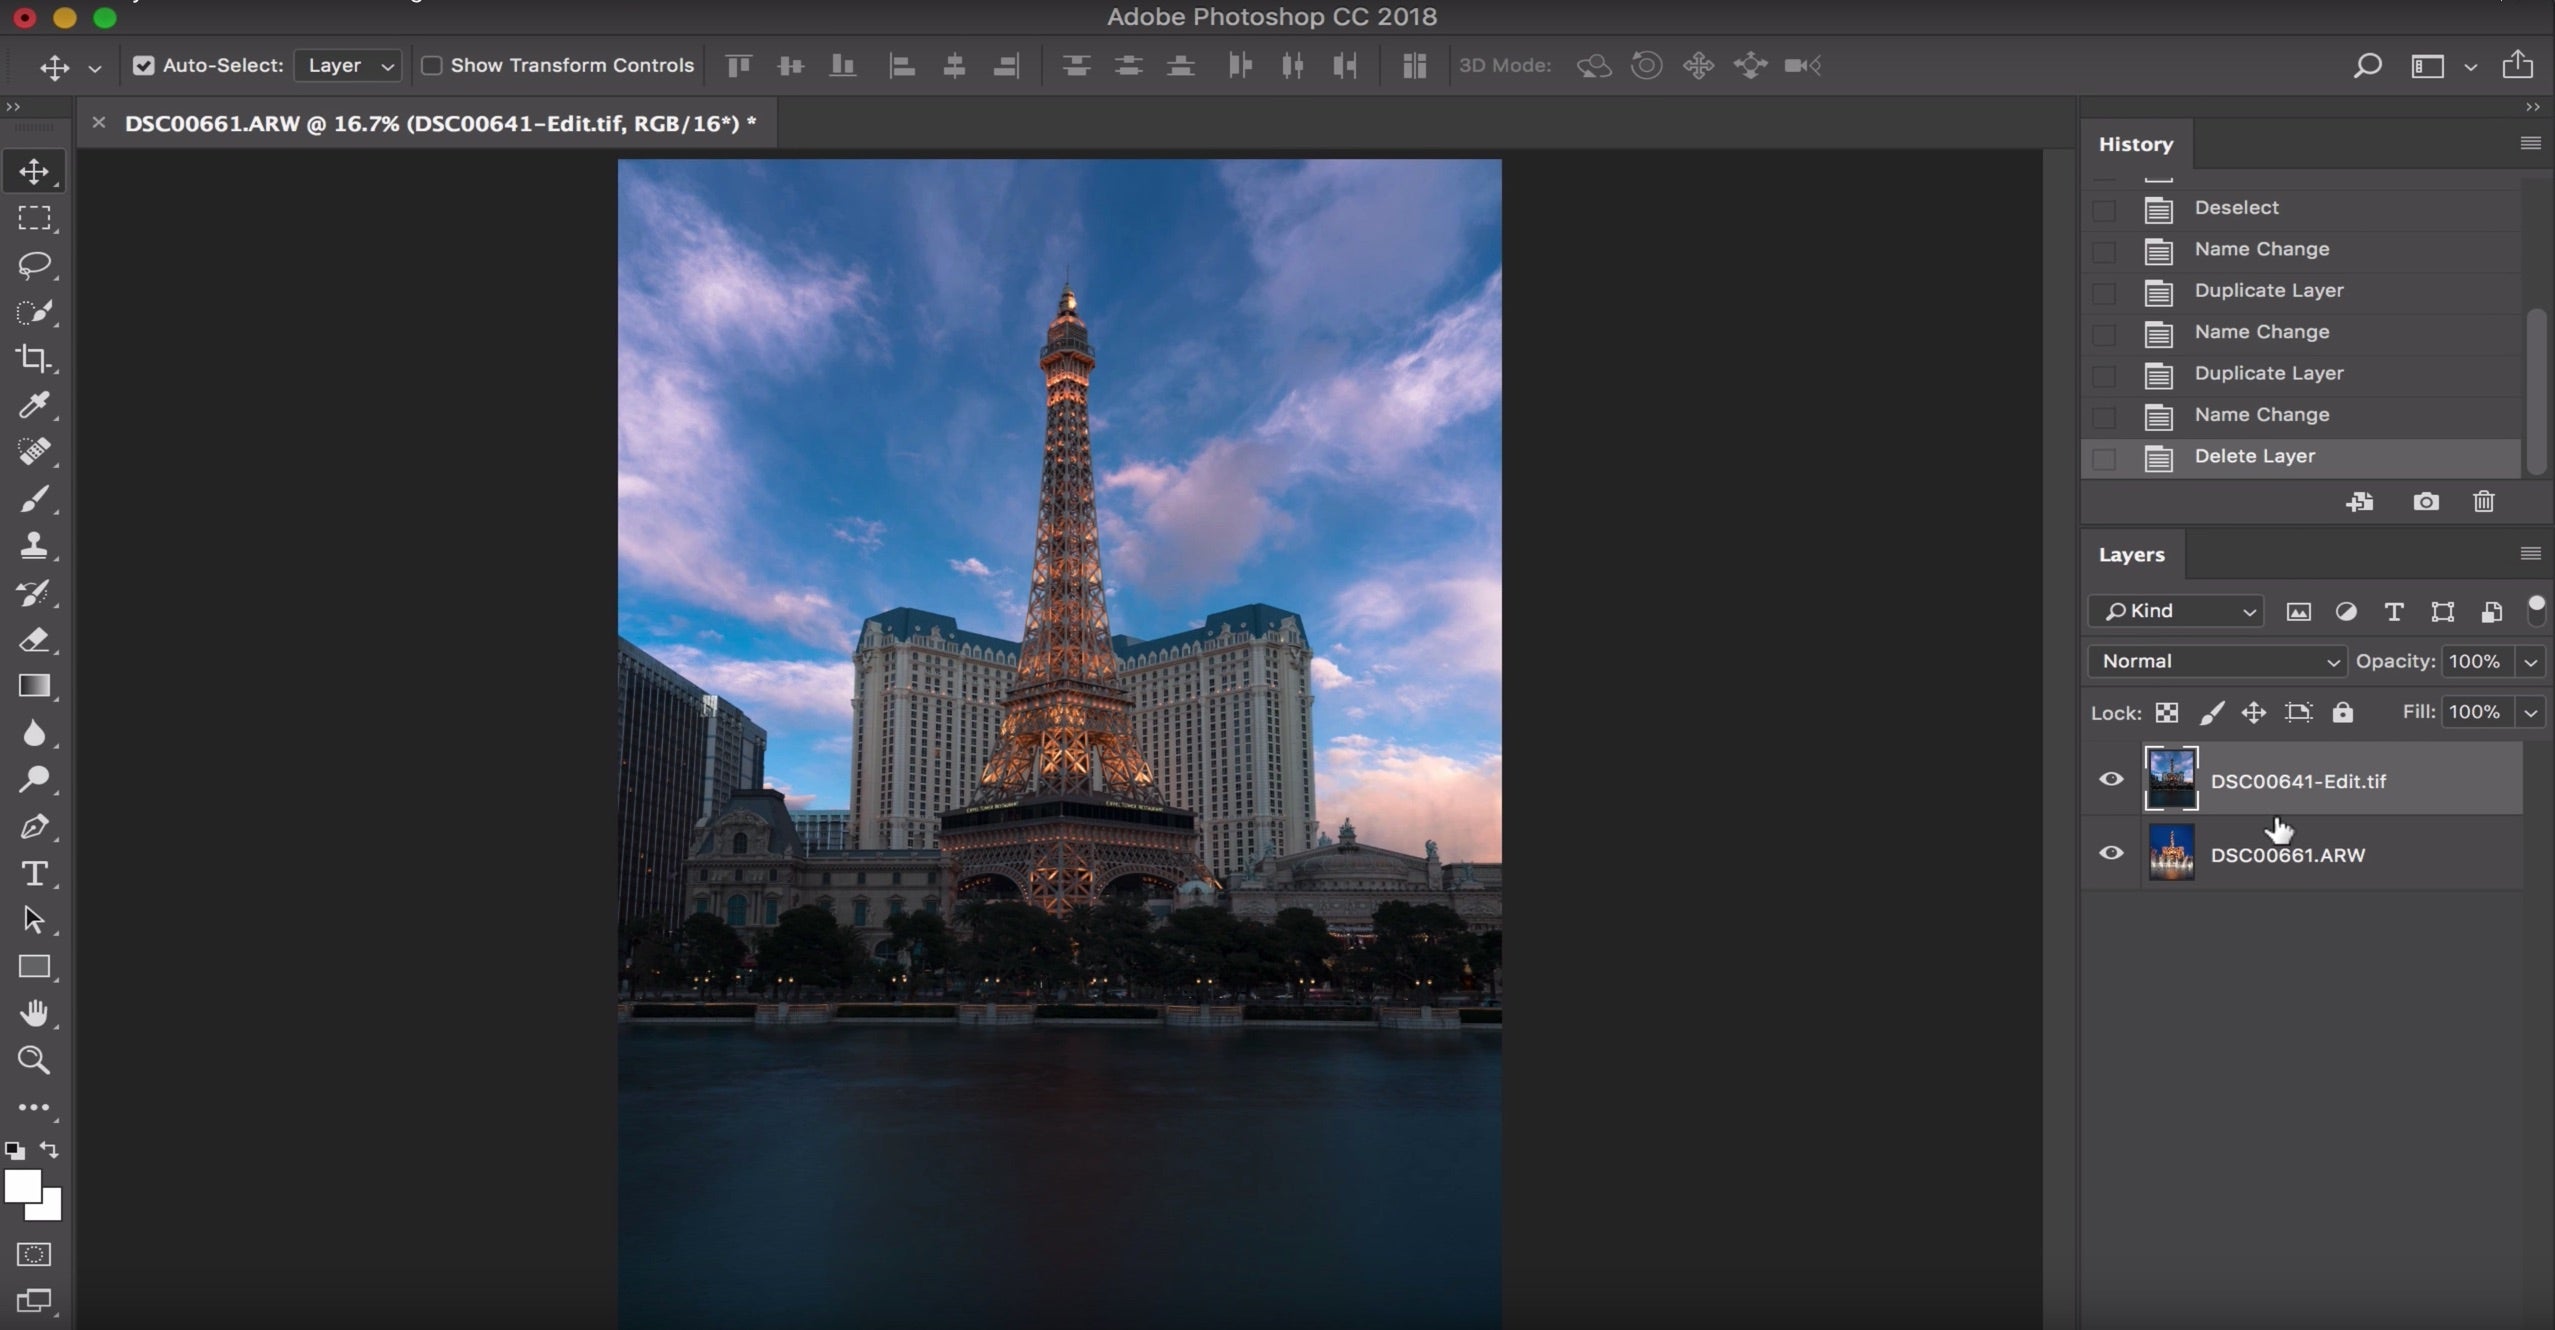
The images in Photoshop are on top of each other as layers. You can toggle the layers on and off to confirm they are both there.
Step 2: Auto align the layers.
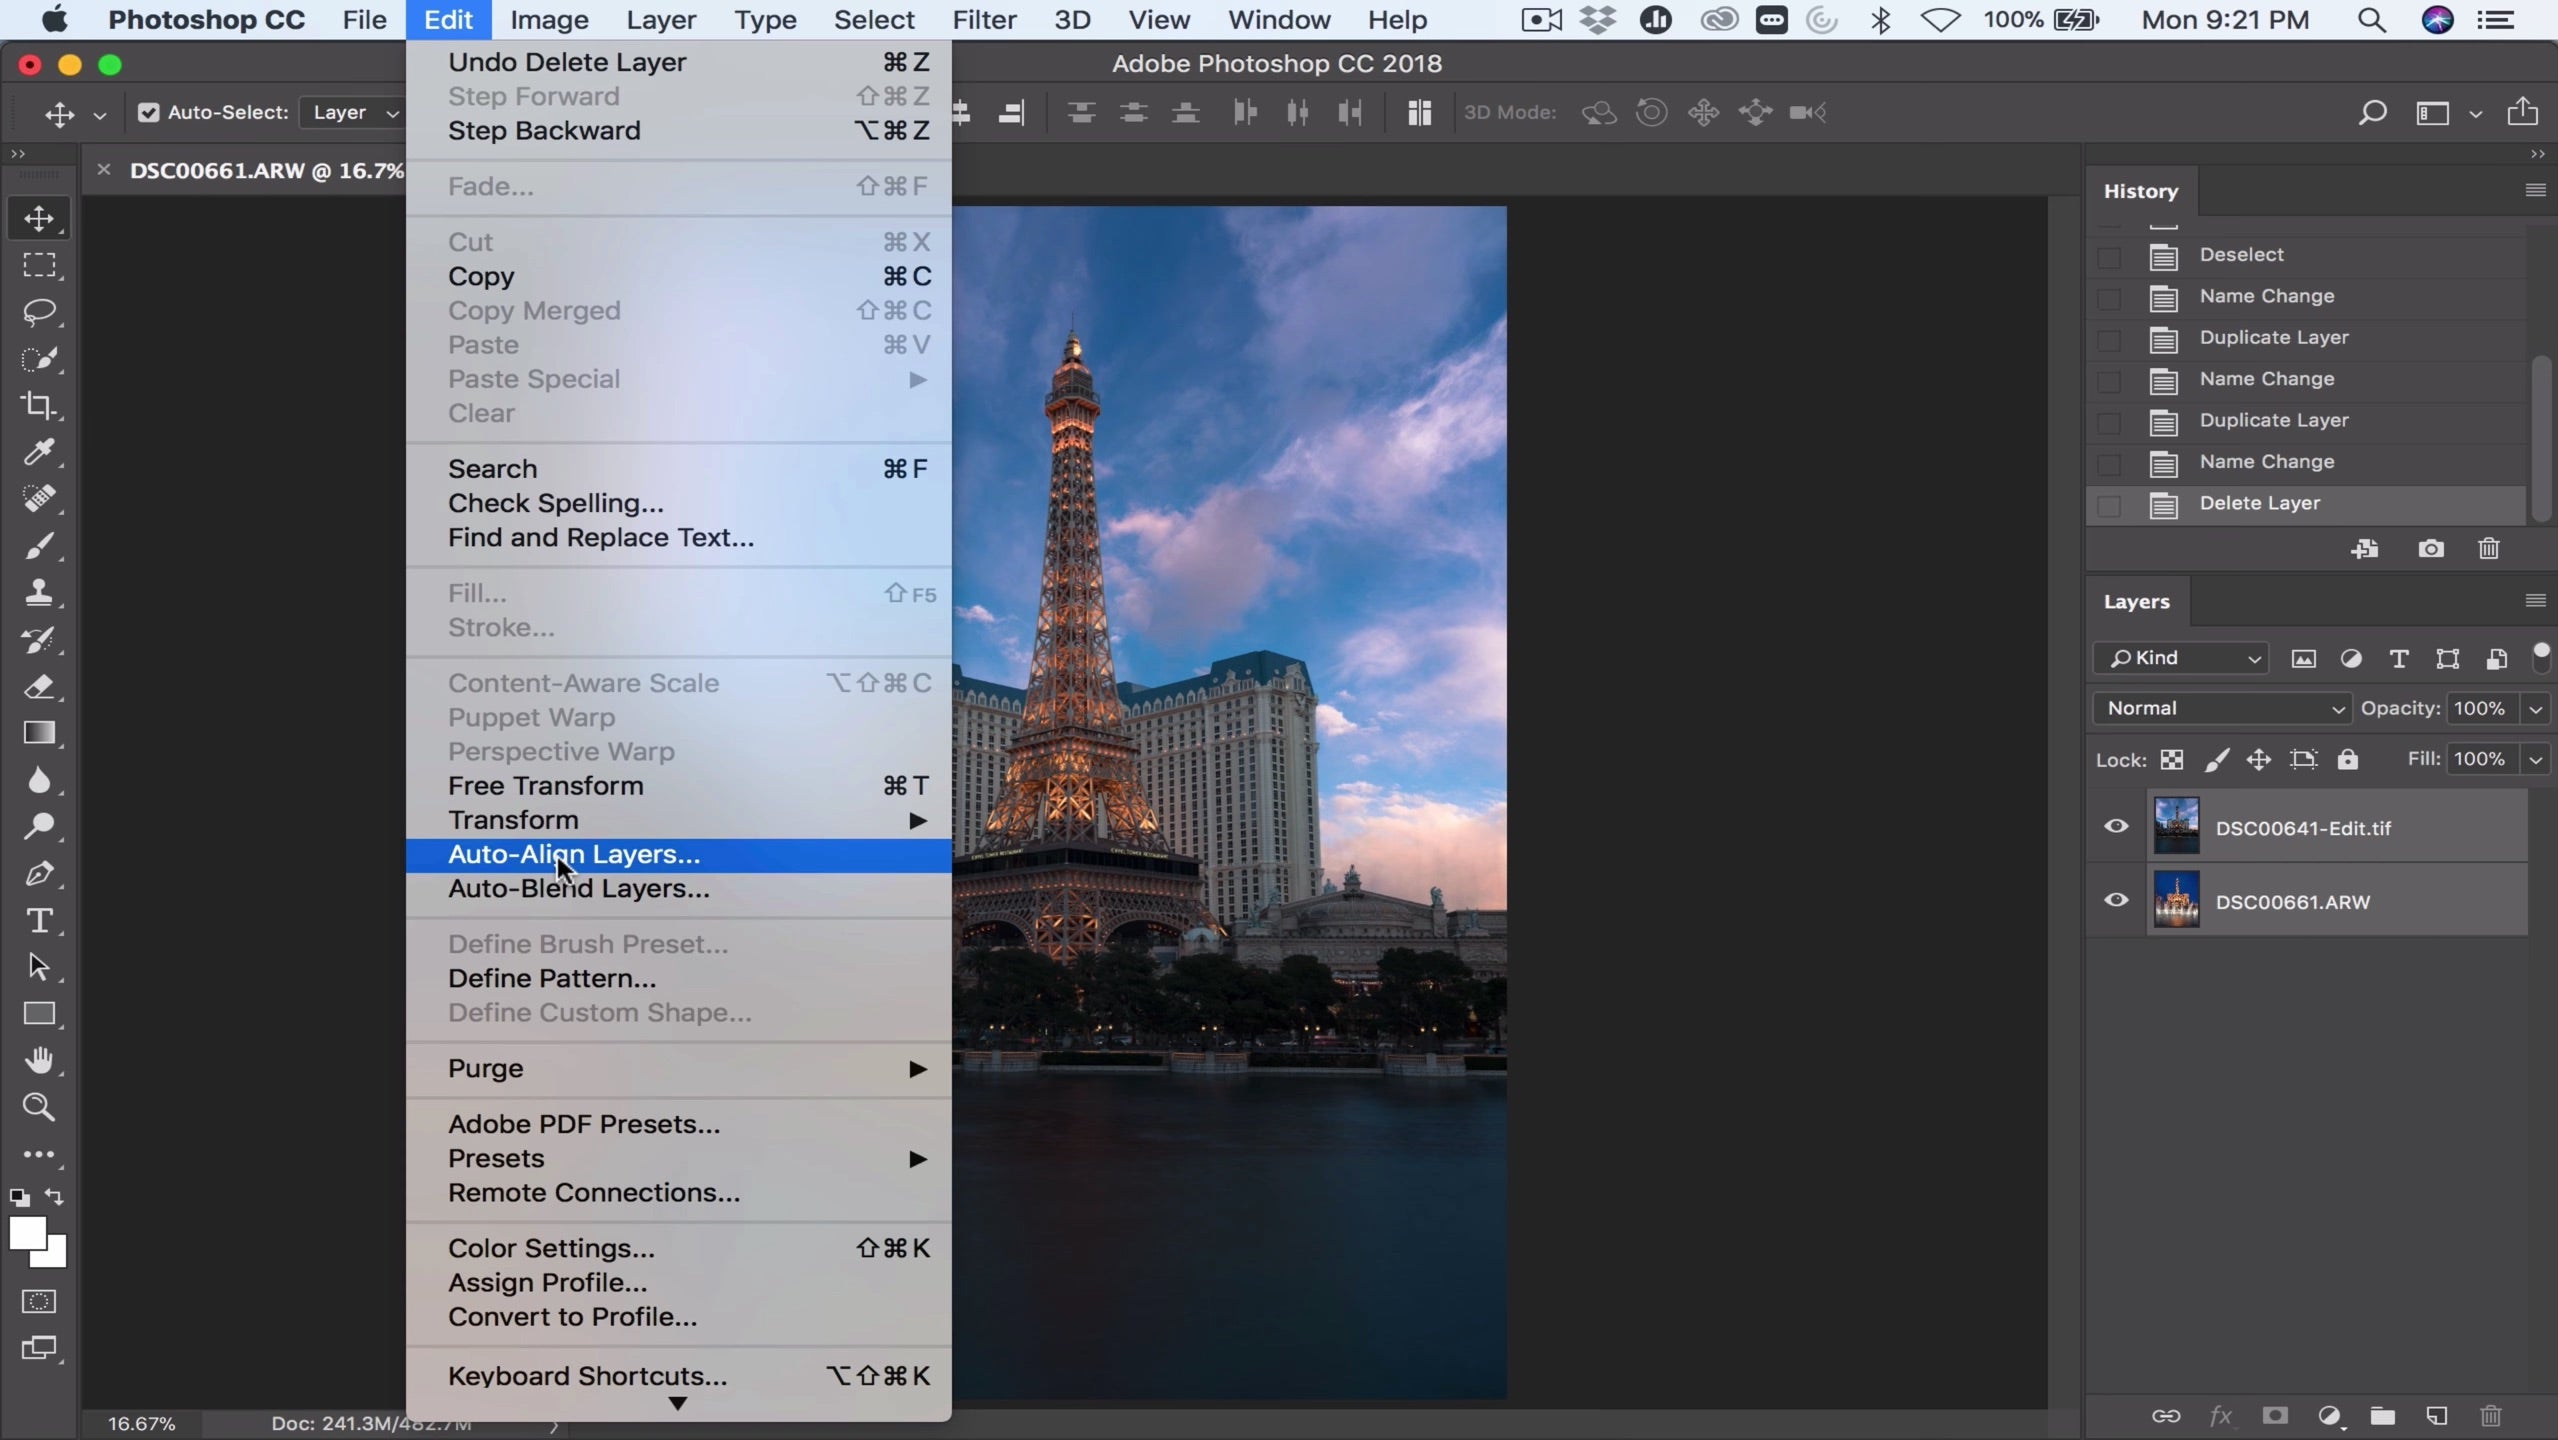
Select Edit > Auto-Align Layers to use Photoshops auto-alignment tool.
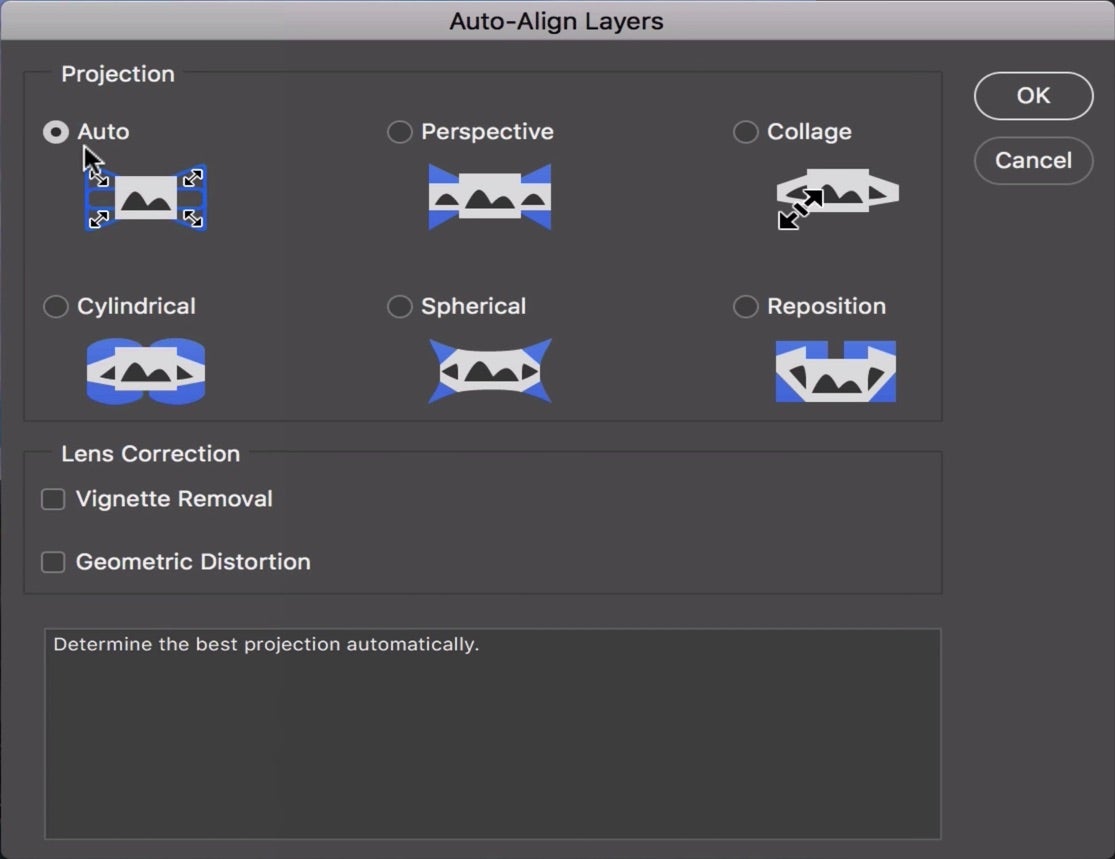
Auto usually works very well, but you can fine-tune depending on your particular photo.
Step 3: Change the blending mode for the “sky” layer to “lighten”. The resulting image should show the buildings’ lights “shining through” to the “sky” layer.
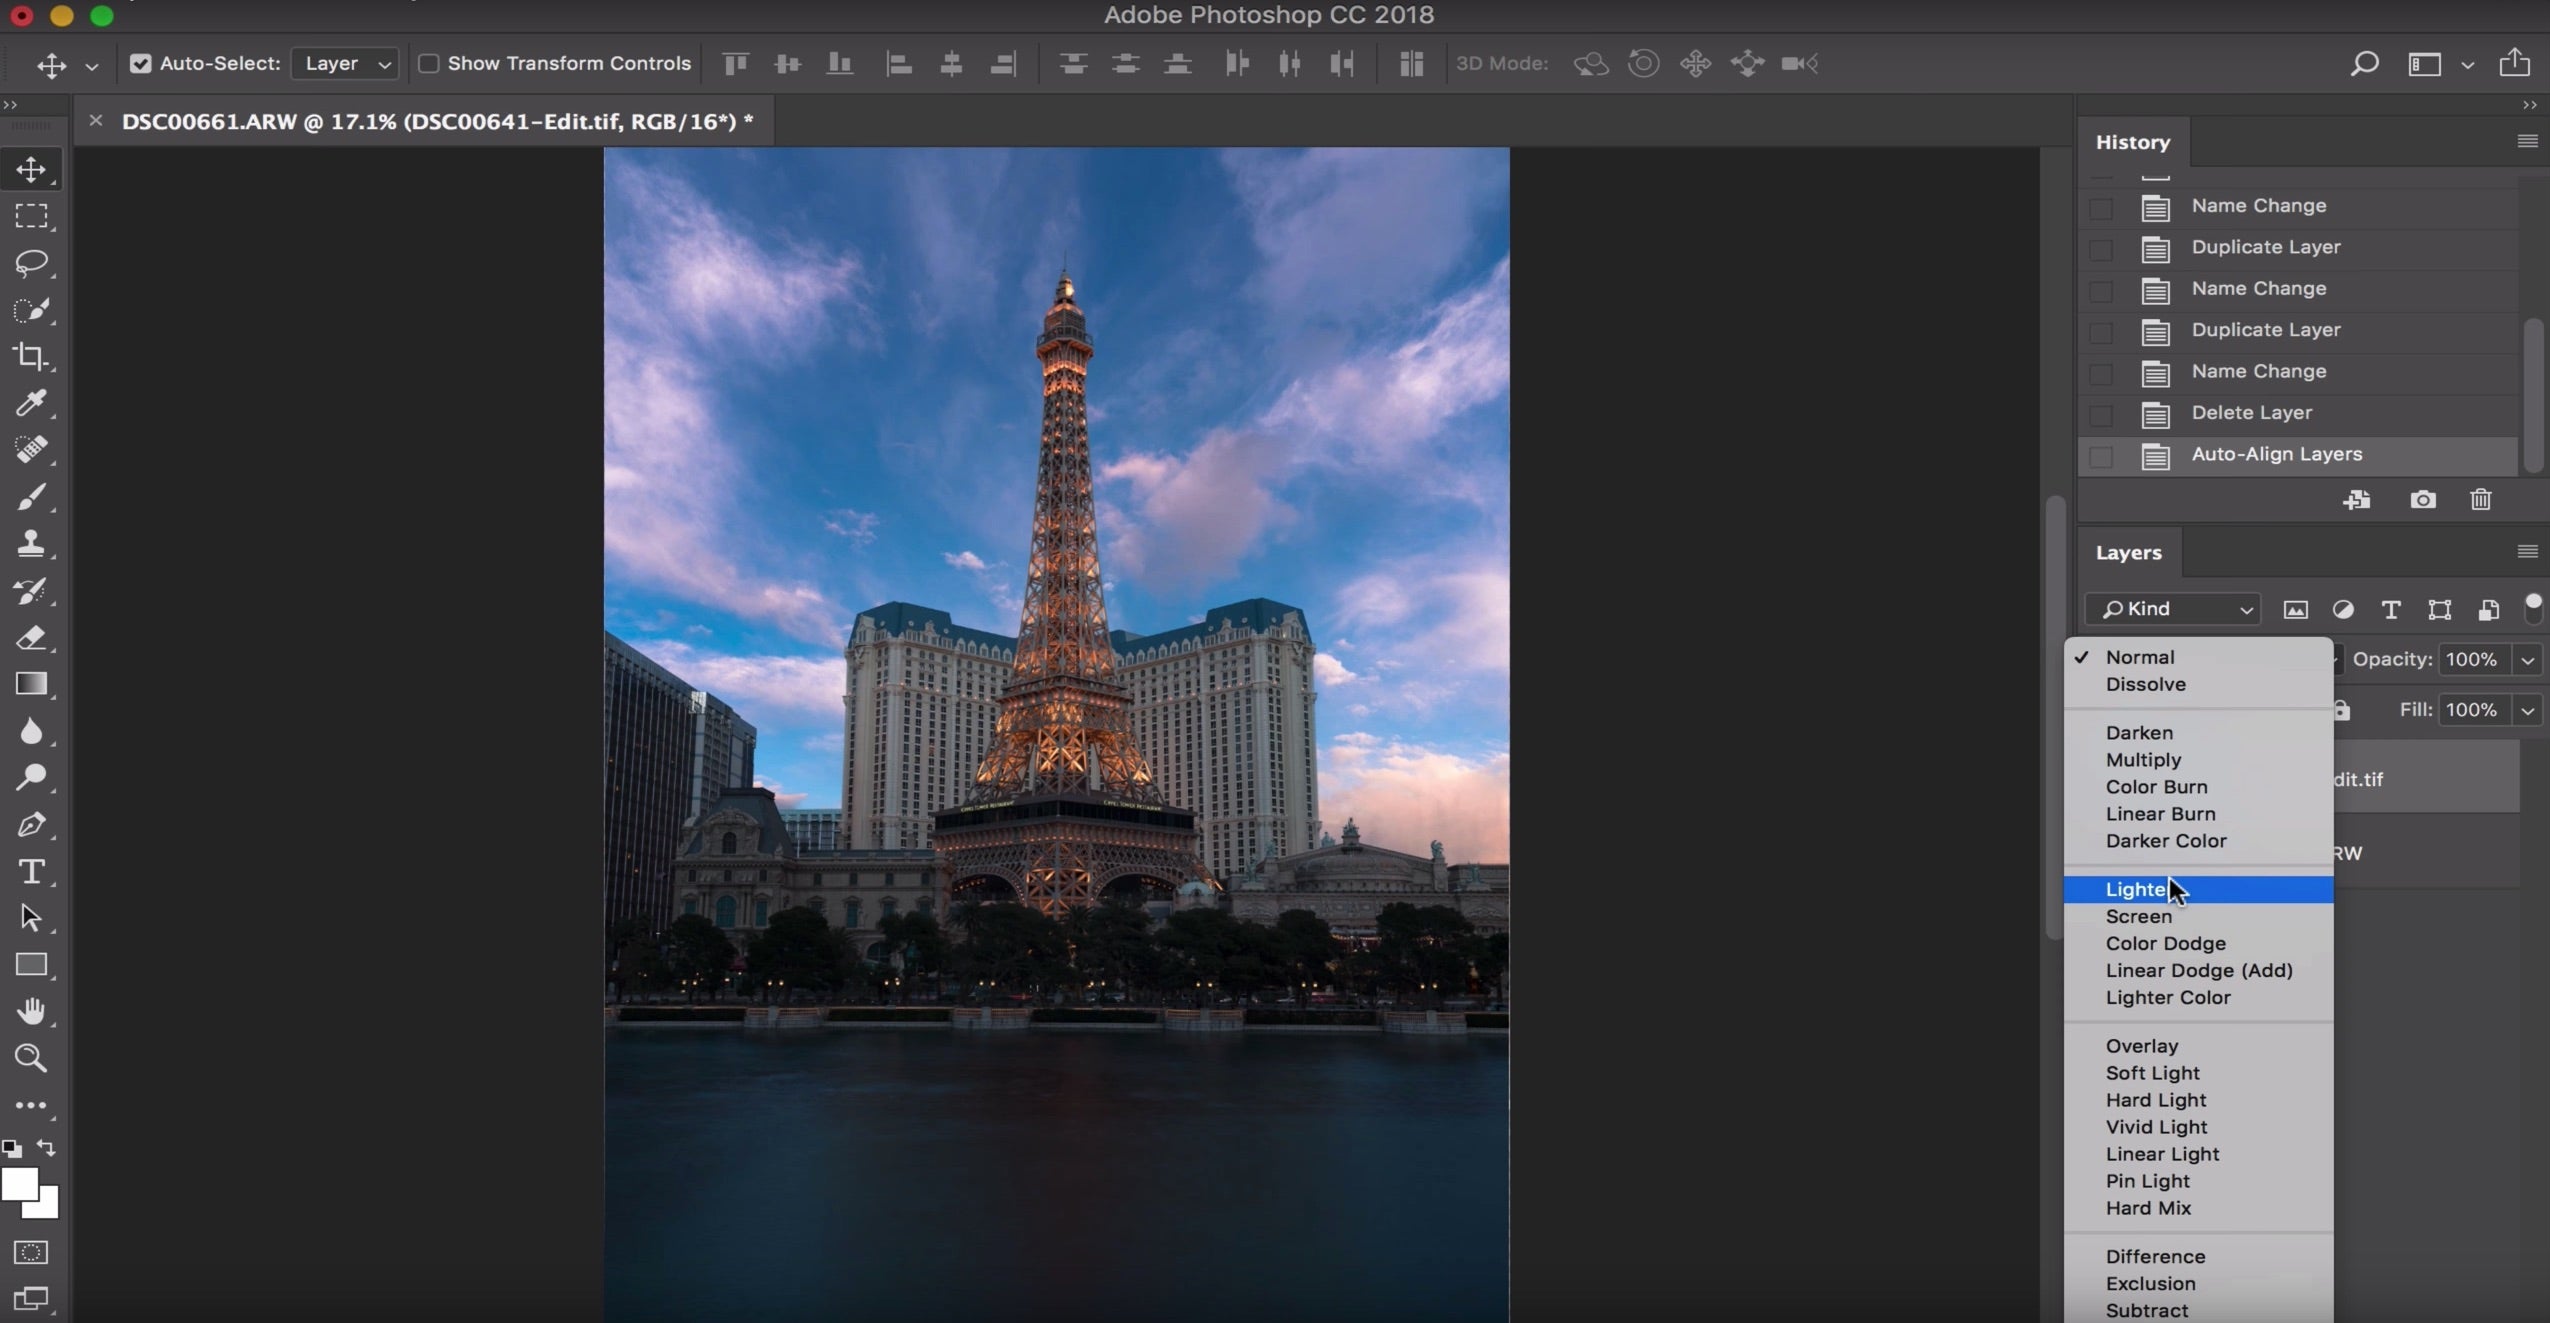
This is literally one-click simple. Select Lighten and Photoshop chooses the brighter pixels from each layer.
Step 4: Adjust the curves to bring out some “pop” and add overall contrast.
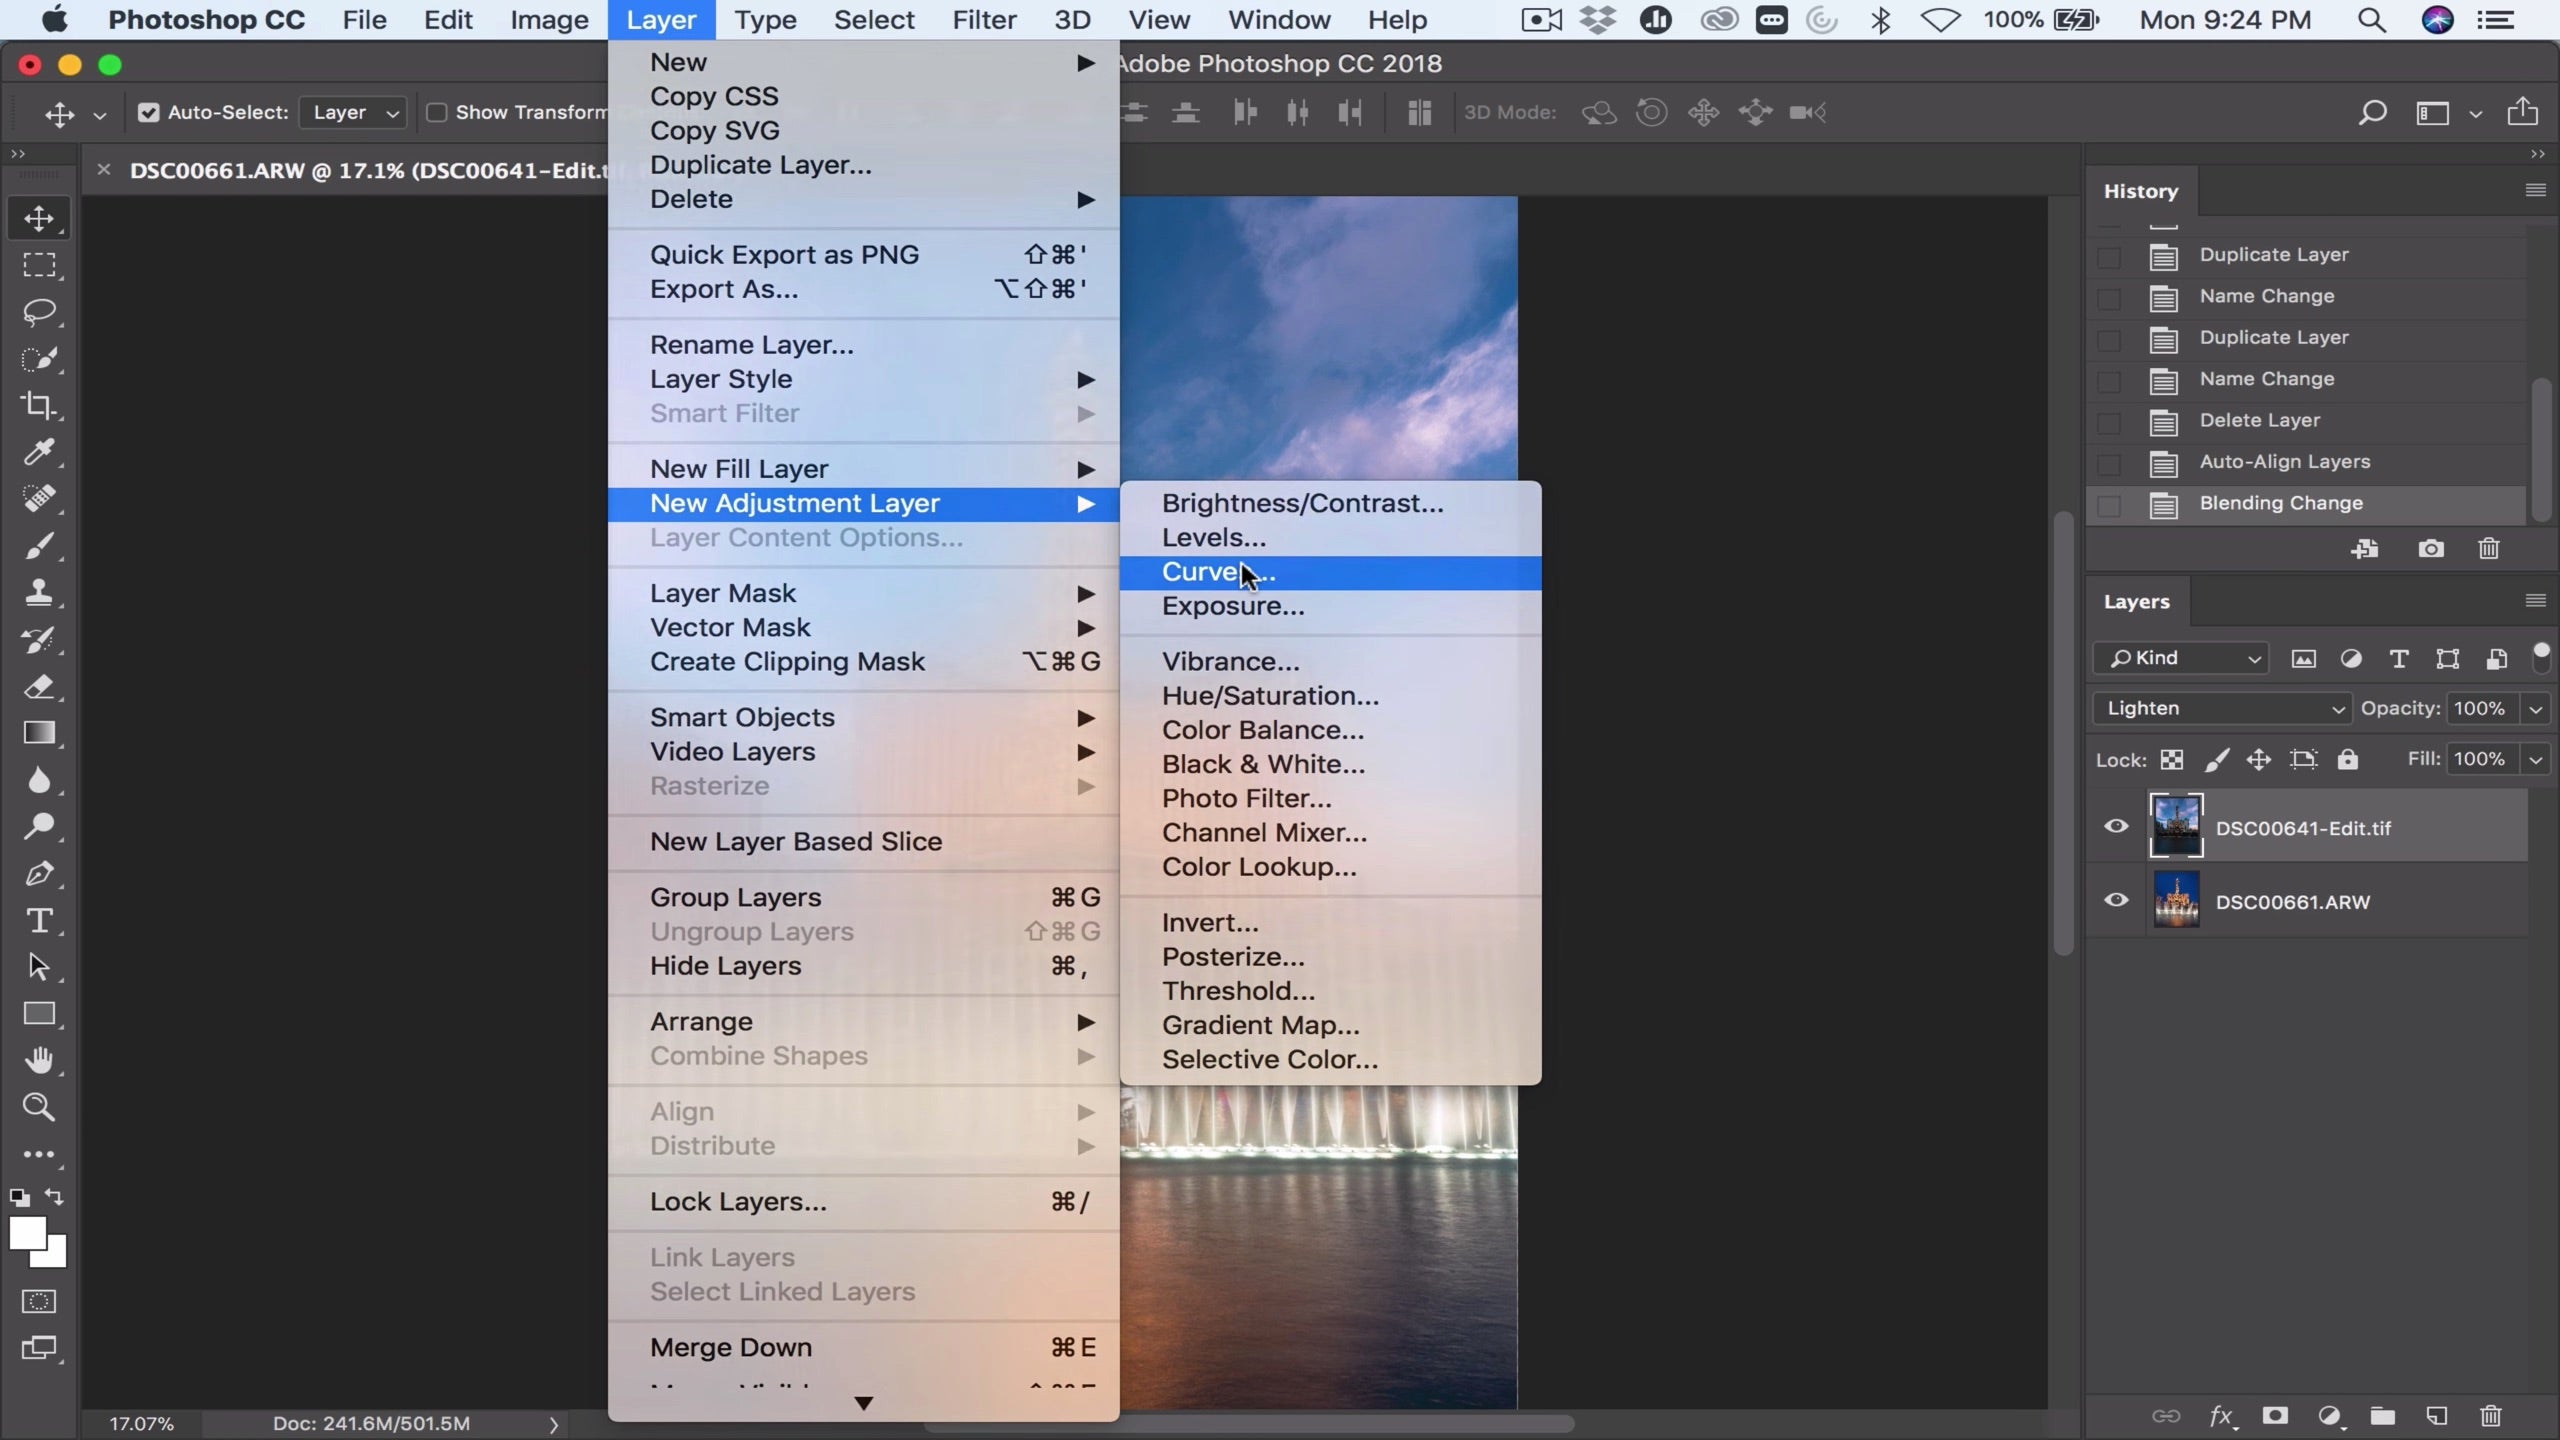
To fine-tune the contrast go to Curves.
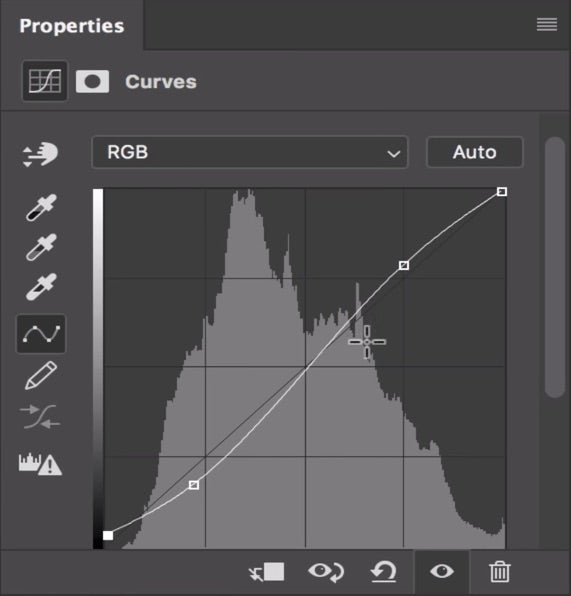
Then watch the effect on the image as you make adjustments.
I hope you have found this tutorial helpful. Happy shooting and have fun!


