Randy Wei (@randy_simplelife) got into bird photography back in 2014. During the day, he works as an industrial design director, but after work, he likes to walk into nature with his camera and lens. We came across this fun shot he took of a red-shouldered hawk and a frog and connected with him to learn more about it. See how he captured the image below using the fast tracking capabilities of the Sony α9 and the Sony 400mm f/2.8 G Master lens.

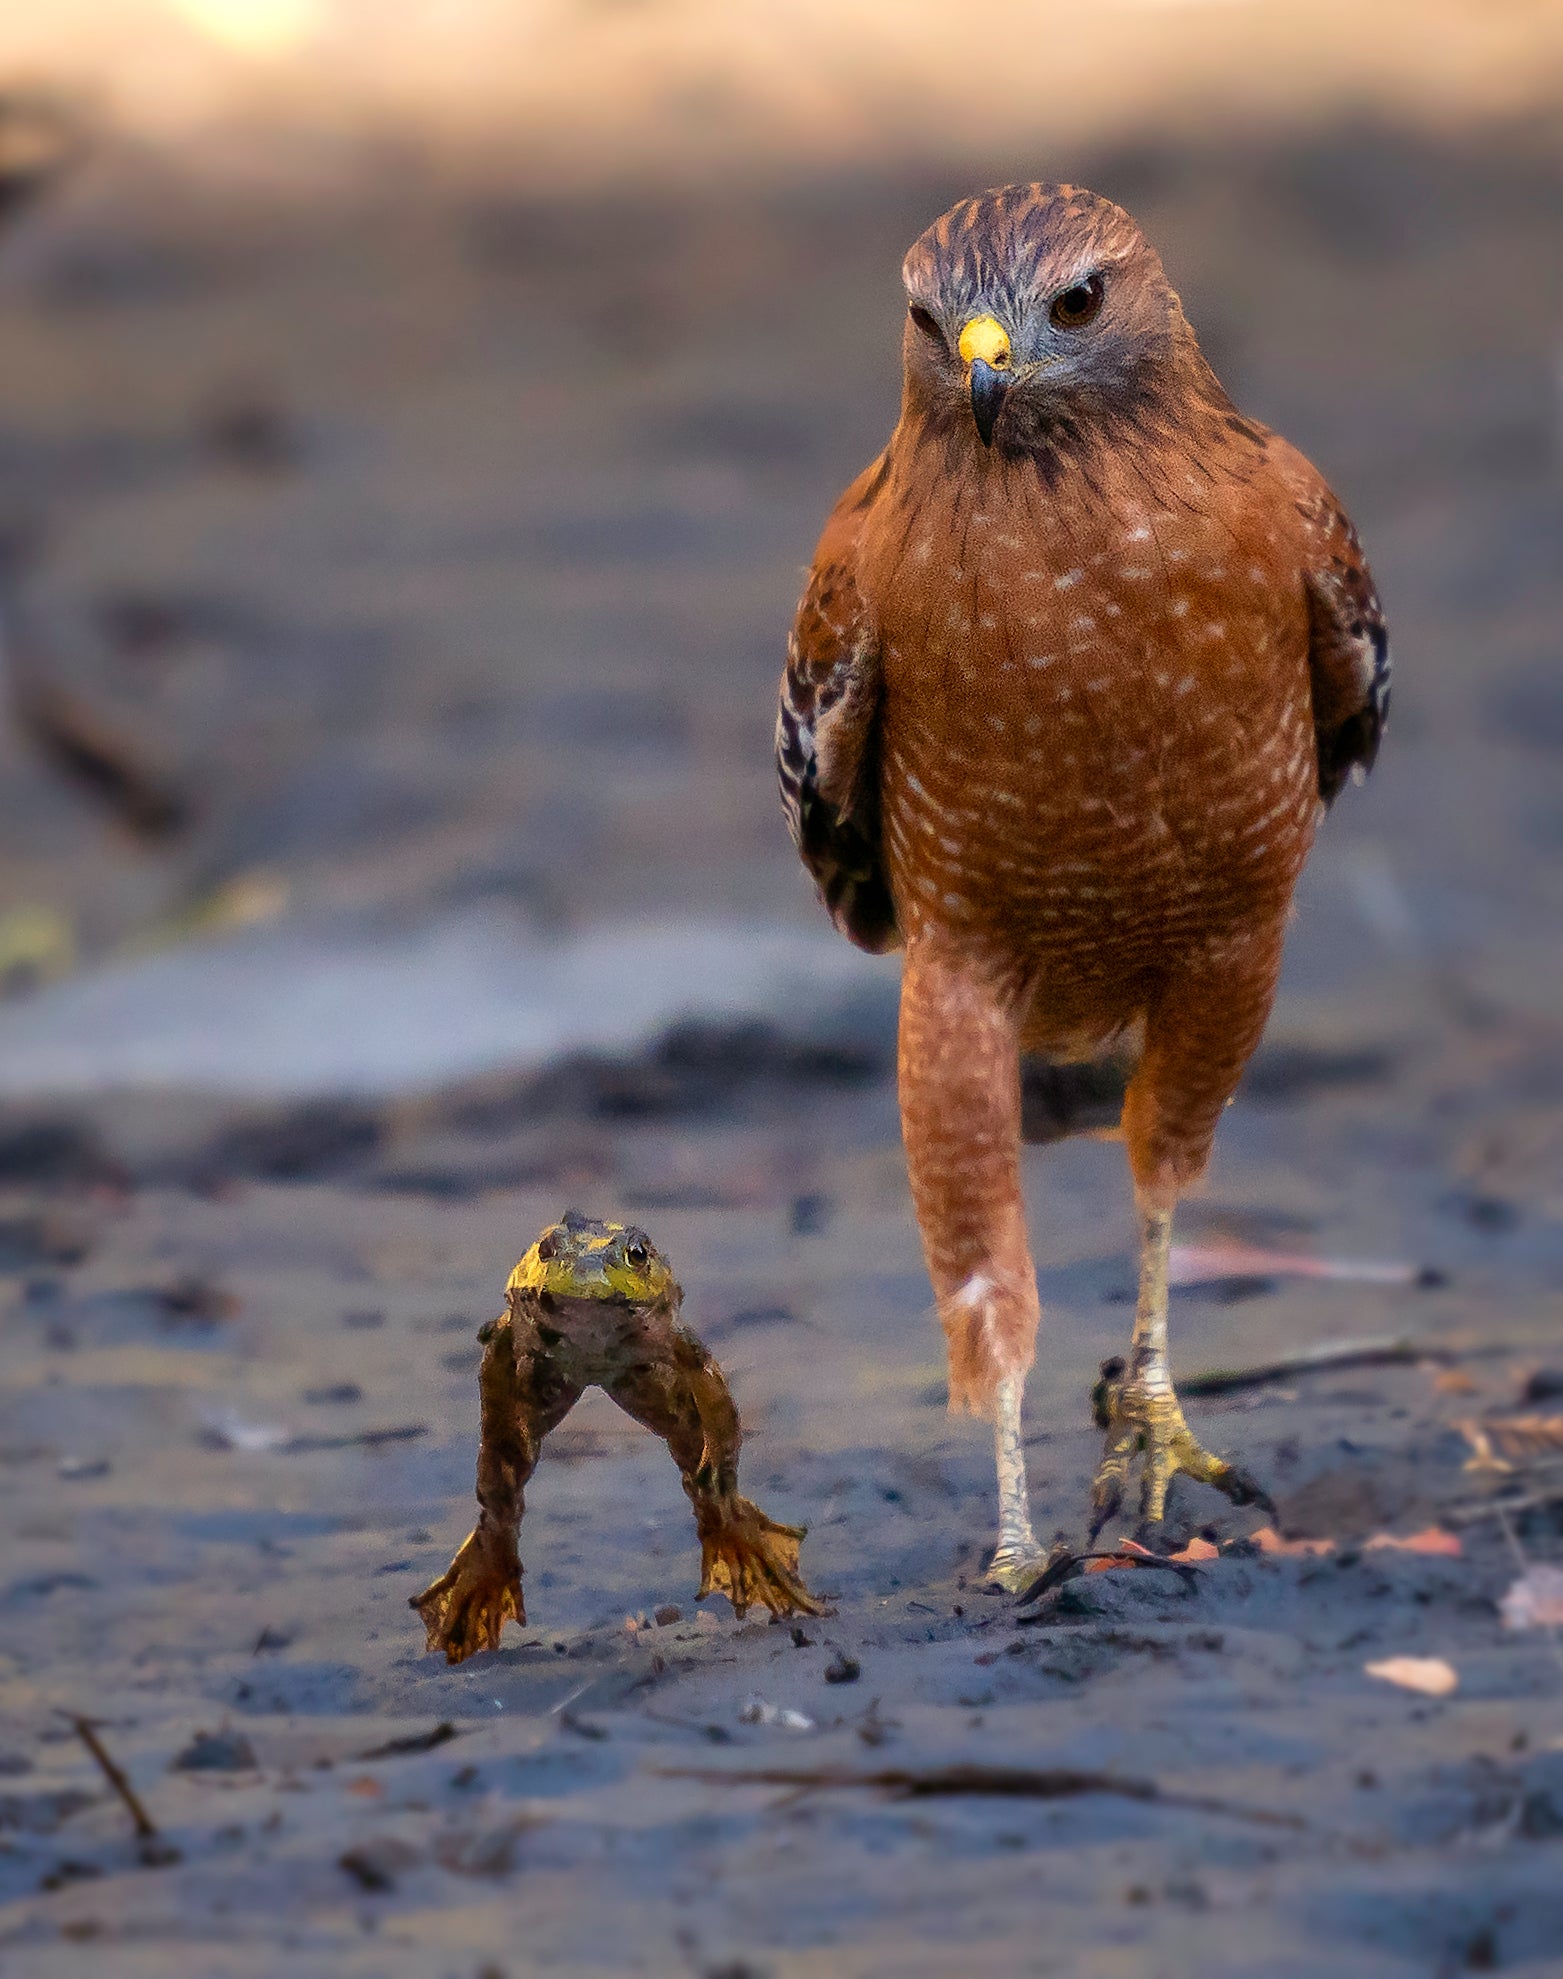
Photo by Randy Wei. Sony α9. Sony 400mm f/2.8 G Master. 1/1600-sec., f/5.6, ISO 2000
See how bird photographer Randy Wei captured a funny moment between a hawk and a frog with the Sony α9 and the Sony 400mm f/2.8 G Master.
The Scene
I was shooting in a local park and my original target was to get a photograph of a hooded merganser. All of a sudden, a red-shouldered hawk appeared and landed in the mud under the shade. Then I started to see this hidden frog appear and begin to slowly start hopping toward the water. As the frog hopped, the hawk just stared at it without much action. I fired as many shots as I possibly could of these two in frame without much thinking, and this one appeared as if they were walking together. Well, that’s the shot, I thought!
Gear & Camera Settings To Get The Shot
I used the Sony α9 and Sony 400mm f/2.8 G Master lens to capture this image. I switched from Canon and Nikon to Sony, mainly because of the superior tracking and how important it is for my work. I also love that there is no blackout on the viewfinder and I know exactly how much I need to add or take away for white balance compensation from the viewfinder. The Sony 400mm f/2.8 G Master happened to help me a lot in this low light situation.
I had a tripod and 2X extender for this photo to increase my stability and reach. I locked my ISO at 2000 – I always want it to be as low as possible. In this case, I set the f-stop at 5.6 and the shutter speed at 1/1600-sec to barely lock the motion, and so I let the ISO be at the lowest it could be in that situation.
Post-Processing
I used Lightroom to mainly crop the photo and adjust the brightness/shadows. Then I brought it into Photoshop to de-noise, bring up the saturation and sharpen.

