This article is part of a series on post-production workflow with Capture One. As a Sony camera owner, you get Capture One Express (for Sony) with your purchase. This series of articles will show you how to get more out of the software. Of course, you don’t have to be a Sony shooter to make use of these tips. They’re for anyone who wants to use Capture One.
It's fair to say that none of us have a totally even skin tone, even in a studio setting when makeup comes into play, there will be some unevenness. Sometimes it's fine, but when you have to devote post production work in Photoshop to fix deviations in our natural pigments, it can be tedious and time-consuming.
Capture One’s Color Editor
So how can Capture One help you quickly and easily even out skin tones for portraits, headshots and more?
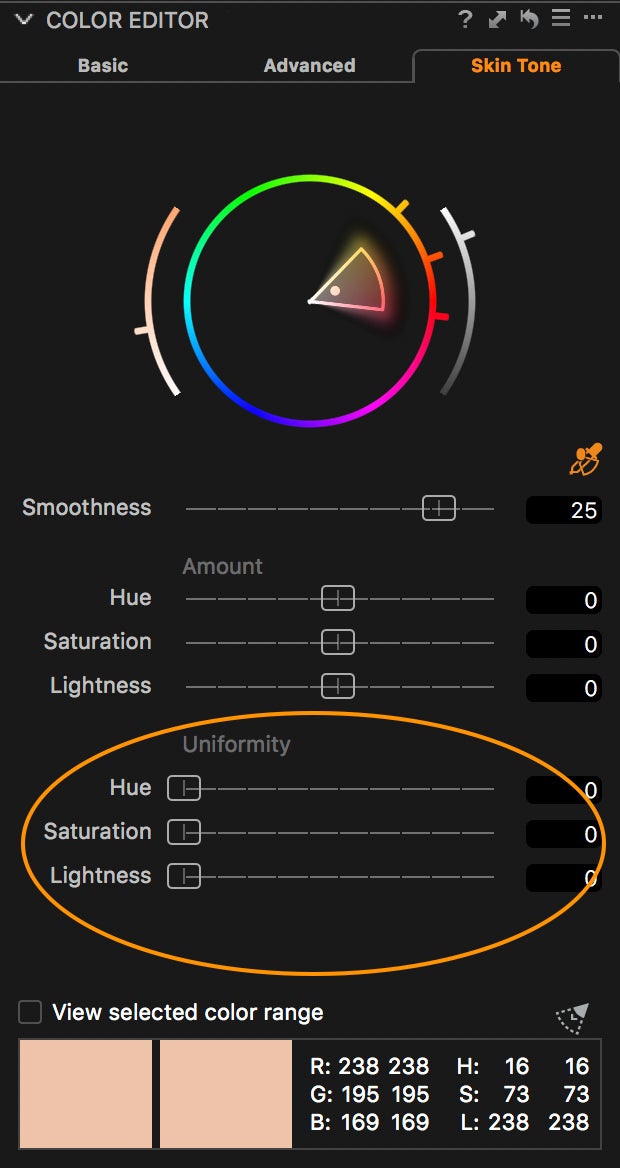
The Color Editor is a very powerful tool for manipulating and editing color. It's extremely precise and powerful. And there's a hugely powerful section of the Color Editor – The Skin Tone tab.

Skin Tone tab in the Capture One Color Editor. The Skin Tone Tab is specifically designed for editing skin tone and has additional sliders for Uniformity, highlighted here. These sliders are a great solution for quickly and easily perfecting skin tone. It works best when used in conjunction with a Local Adjustment.
See the step by step in this short video to see how to do it:
About the author:
David Grover is a Capture One expert based in the UK. In addition to writing a weekly column for Alpha Universe, he runs the Capture One weekly webinar series on Capture One Pro 10 and produces a series of video tutorials on Capture One as well.
If you're just getting started with Capture One, check out this tutorial.

