This article is part of a series on post-production workflow with Capture One. As a Sony camera owner, you get Capture One Express (for Sony) with your purchase. This series of articles will show you how to get more out of the software. Of course, you don’t have to be a Sony shooter to make use of these tips. They’re for anyone who wants to use Capture One.
Capture One is unique in that you can manage your images in two different ways. Either with a traditional “Library”(or Catalog in Capture One terminology) or a Session.
I personally don’t want to use a Catalog on the road for a few reasons:
- I don’t have access to my main image hard drives, so I would be creating another Catalog and then merging Catalogs later.
- Out of all the images I shoot, I certainly won’t keep 100% of them (sadly), so I feel it’s a little pointless to import all of them into my main Catalog, just to delete a bunch of files immediately thereafter.
- I’ll often make quick exports on the road to post to social media or create postcards and I want all my exports in one convenient place with the RAW files.
- I want an easy way to backup all my images and adjustments throughout the trip and transfer them to my main hard drives when I get back home.
The good news is, a Session allows me to do all of this. Creating a new Session in Capture One is as simple as File>New Session. By default, four folders are created:
- Capture
- Selects
- Output
- Trash
All of these are in one master folder with the name of your Session.
The most basic Session workflow goes like this:
- Import captures to the Capture folder.
- Move the best images to the Selects folder.
- Process those images as TIF, JPEG etc to the Output folder.
- Send rejects to the Trash folder.
Here’s what my Session looks like in the MAC OS finder.
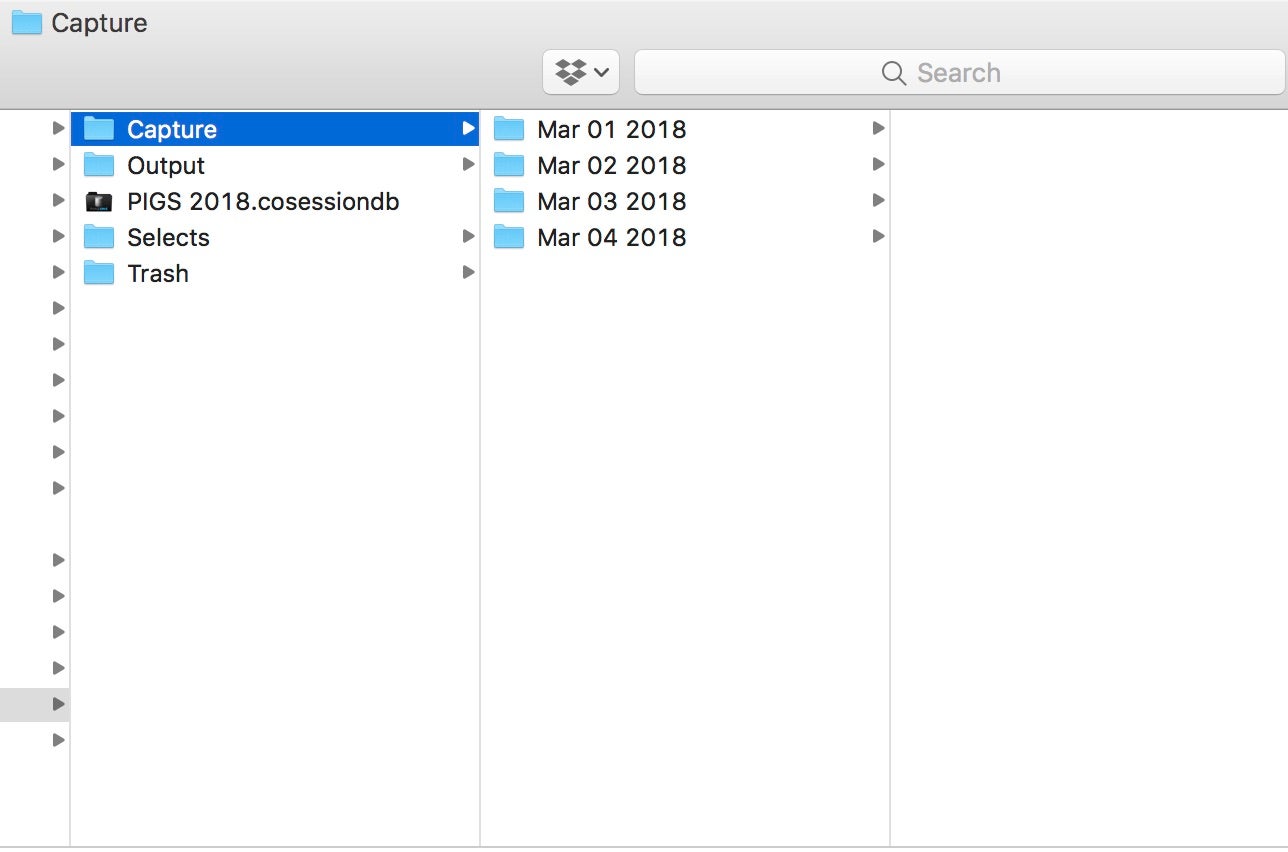
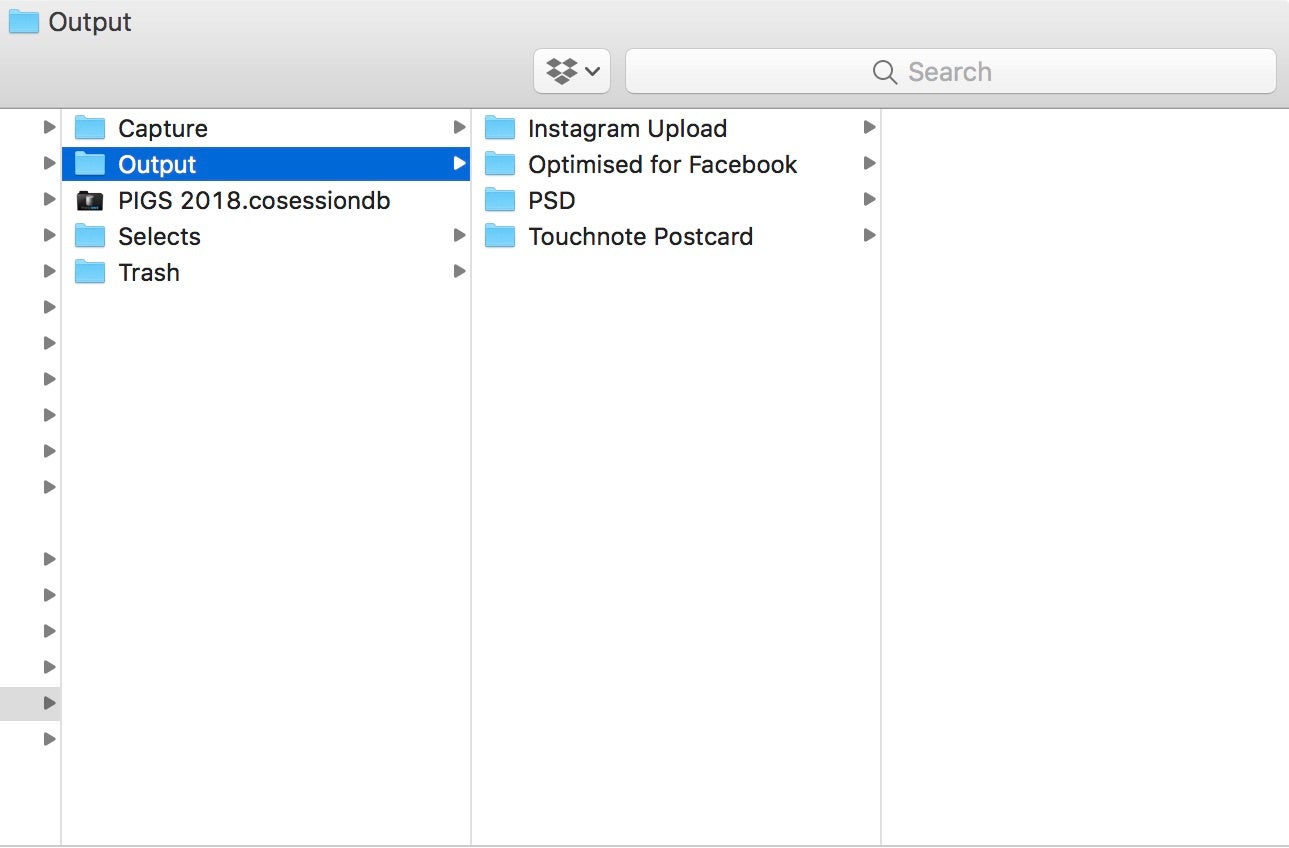
Fig 1 & 2 – The Session Structure
Notice that my Capture folder is divided into different days of the trip and the Output folder by different Output types. More on that in a moment!
Additionally, a Session can be much smarter if needed and you can invoke the use of Smart Albums and other ways of searching and filtering if you desire.
Importing by Date
As you see above, I like to split up my imports by the date I shot them. This makes it easy to browse images by date, especially if I don’t get the chance to import every day.
In Capture One’s import dialog (File>Import Images), the second section defines where your images are going to be imported to, from the Source (i.e the memory card).
By default they’ll go to the Session folder, but I like to designate the Capture folder and then a “token” which will sort the images by their respective dates.
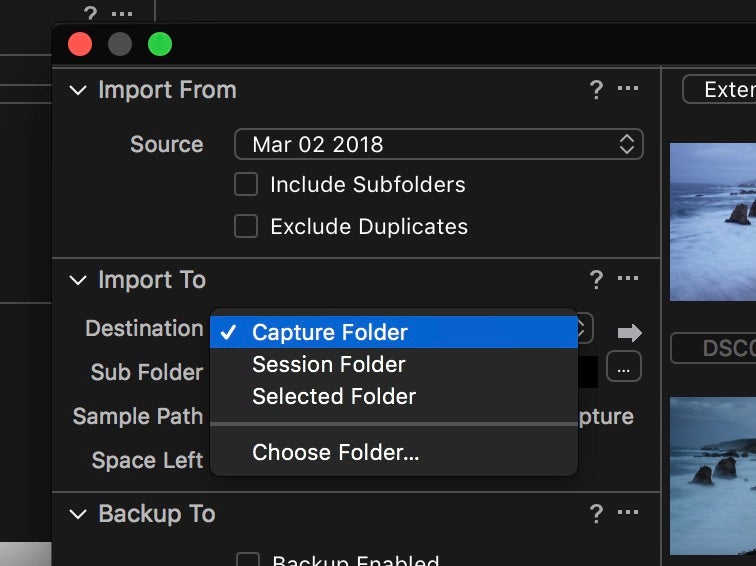
Fig 3 – Switching to the Capture Folder
The name of the “token” I want is called “Image Date.” If I start to type that in the Sub Folder Field, Capture One will suggest matching tokens. “Image Date” will check the meta data of each image that’s imported and create a folder based on the date it was captured.
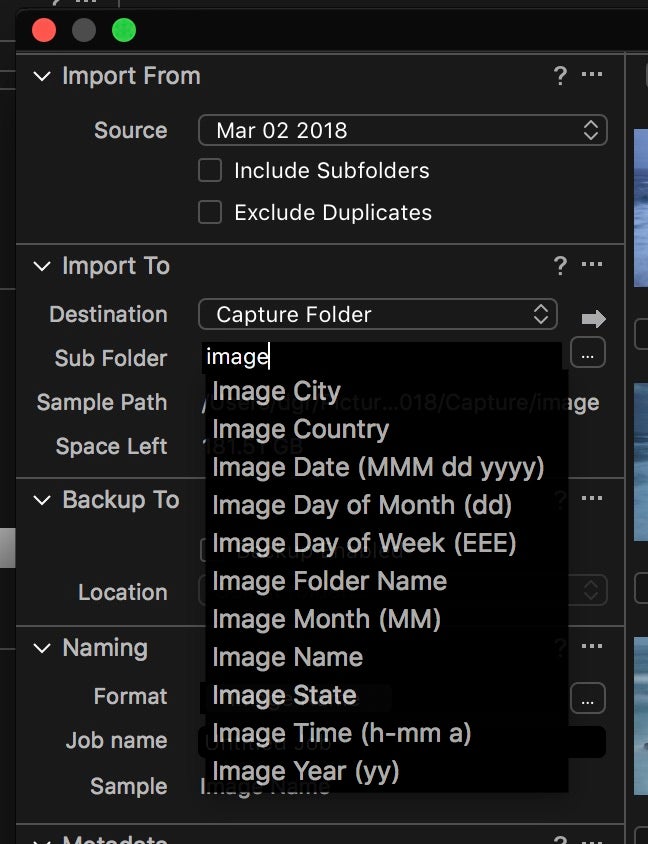
Fig 4 – Choosing a token
If you want to change the date format, click on the small triangle in the token and select a different one.
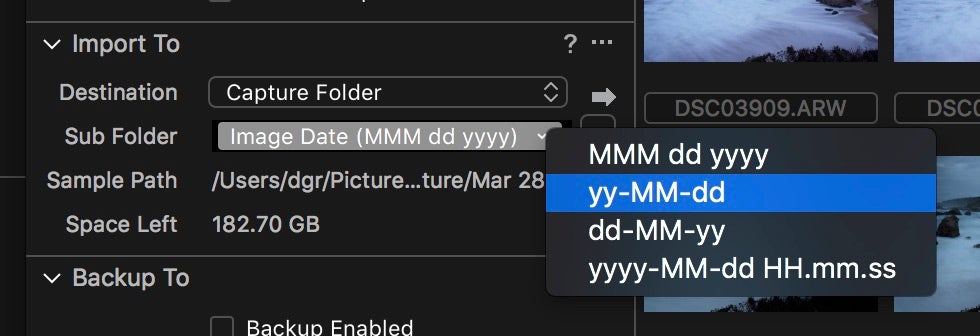
Fig 5 – Choosing a token format
Once the import has finished, all images are conveniently sorted as you saw before.
One final step is to add these additional folders as “Favorites” in the Capture One Session. This means that I can navigate to them quickly and any Smart Albums I create will also search in these folders as well as the default Session folders.
Either click the “+” button to add a favorite or drag them from the Mac OS finder or Windows Explorer.
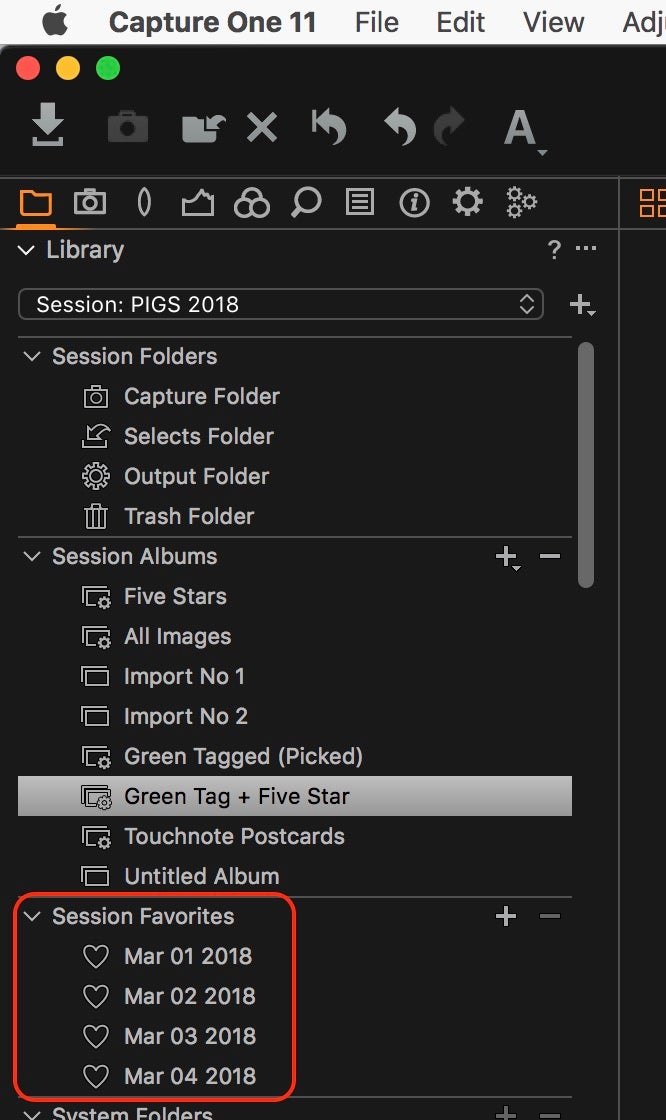
Fig 6 – Adding folders as Favorties.
I go through a similar process for Exports.
In Capture One’s Output Tool Tab you will find all the relevant tools for Processing. Highlighted in the screen grab below is another Sub Folder token, “Recipe Name." This simply means that exported images will be sorted into folders with the name of the recipe.
By default, images will go to the Session Output folder, and now in this case, into a folder based on the Process Recipe name.
This is really handy if you are using multiple export recipes at once.
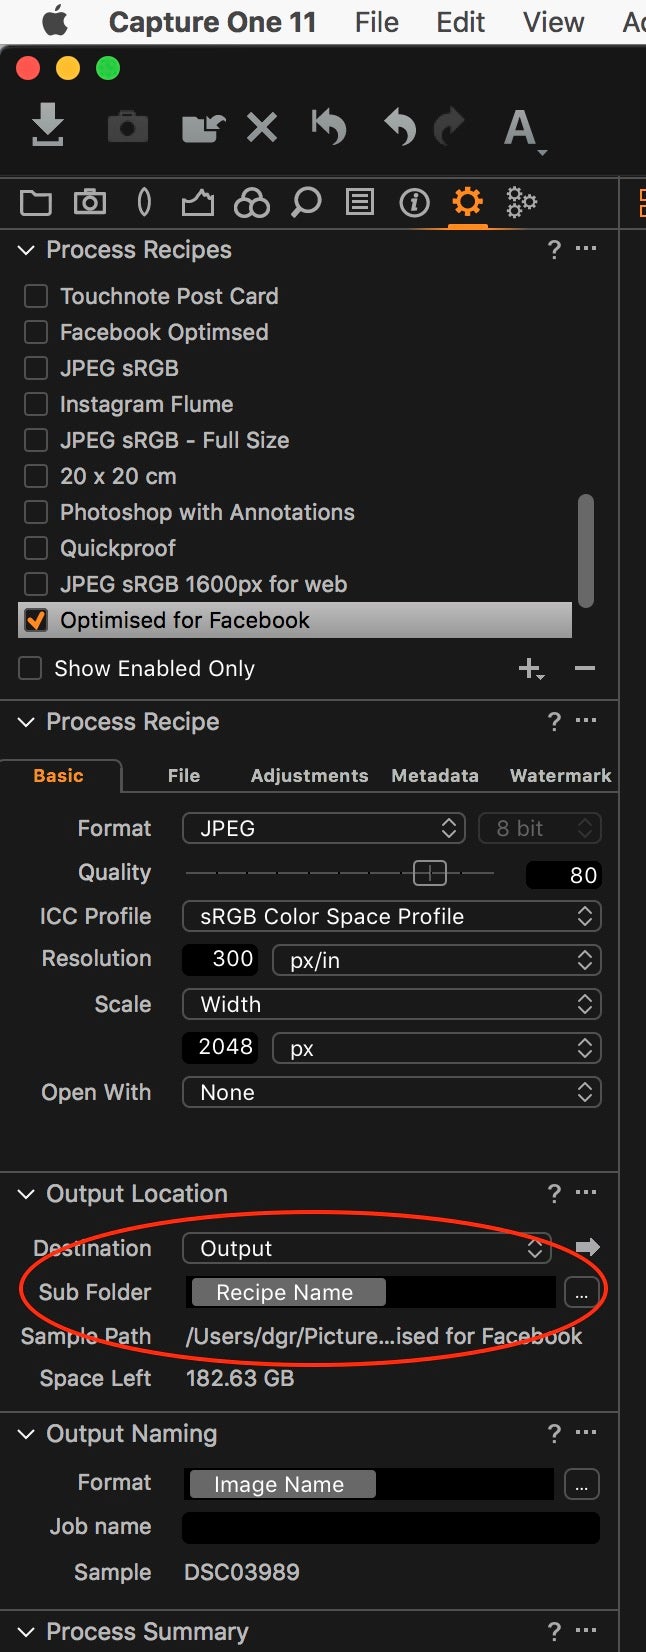
Fig 7 – Capture One’s Output Tool Tab
If you want to dig deeper into Session organization and workflow, watch this video which follows this exact principal and images from the same trip. It also covers Smart Album organization.
Also, when I get home I do integrate the final images into my main Catalog. To see how I do that, you can check out this blog post where I go through that process.
And finally, here are some images from a trip I took with the Sony α7R III, all processed in Capture One for Sony with no additional work in Photoshop. I really enjoyed the additional megapixels of the α7R III over what I am used to. It gave me more flexibility with cropping and the potential to make some really nice, large prints. One thing I was very pleased about was finding barely any performance difference in Capture One between my smaller α7 files (my previous camera) and the larger α7R III files.
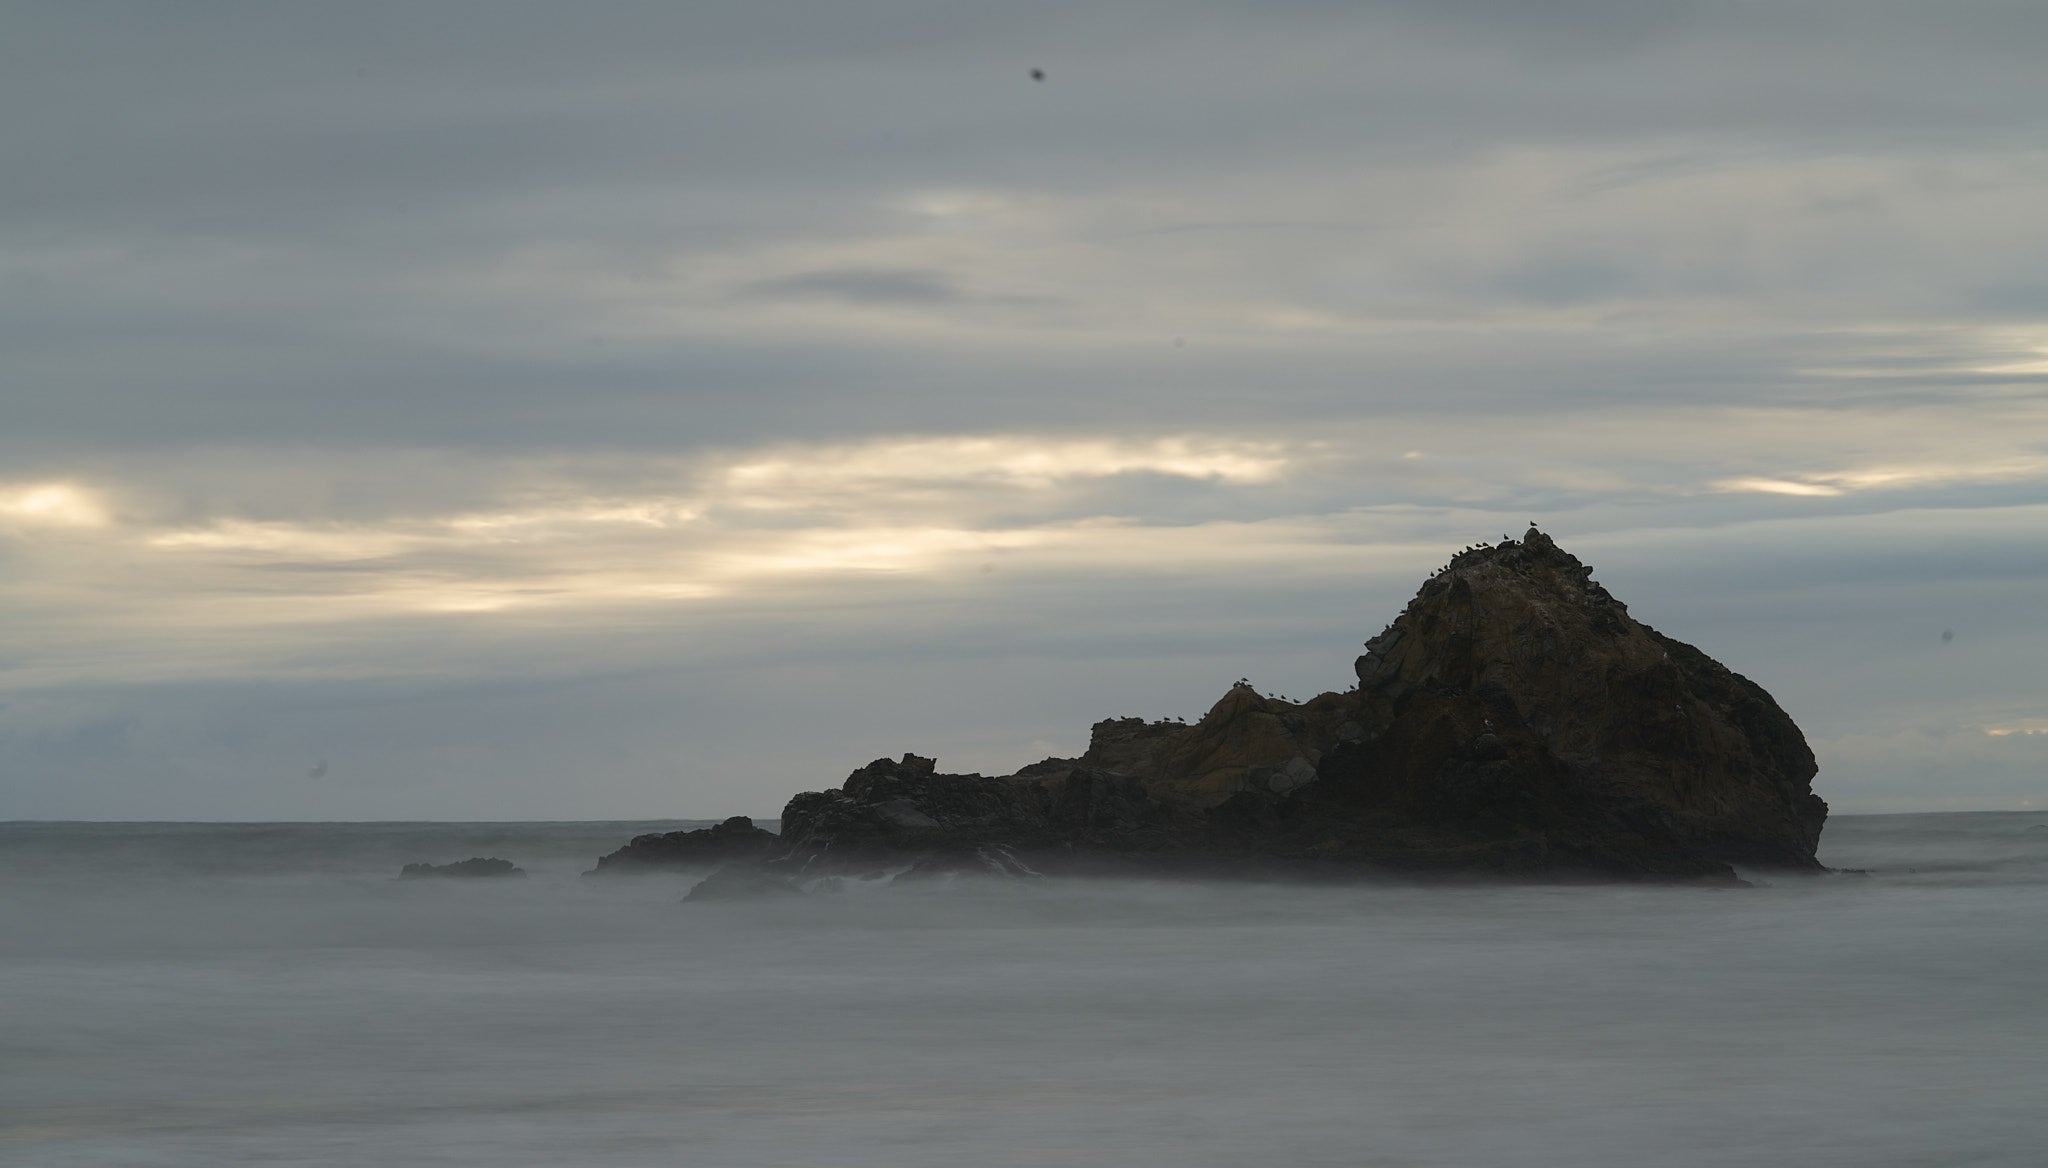
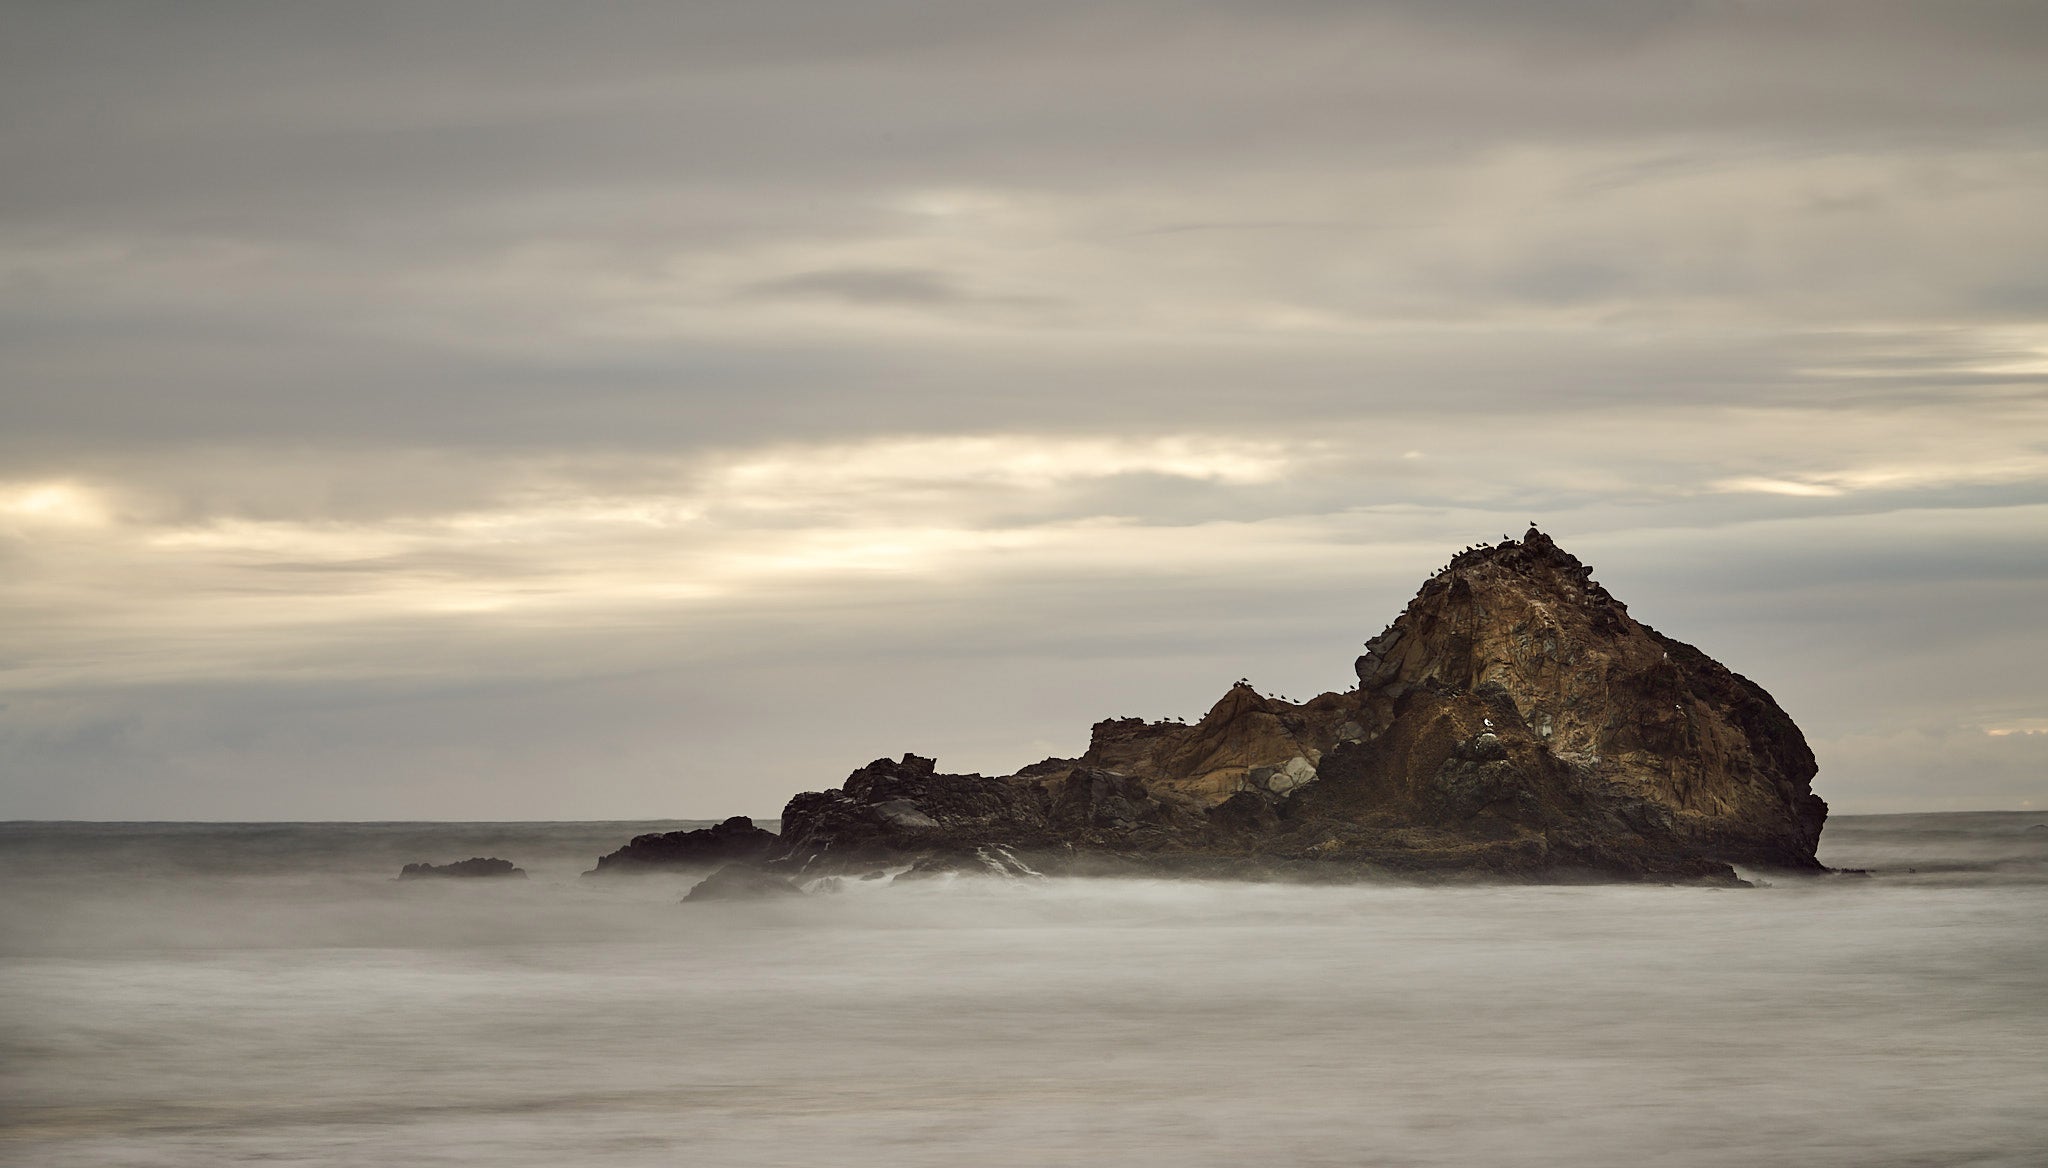
Photo by David Grover. Sony α7R III. Sony 90mm f/2.8 G Macro lens. 8-seconds, f/16, ISO 50. Top image is straight out of camera. Grover processed the image on the road to its final form above.
Capture One Express For Sony is available free for most Sony camera owners. You can see if your camera is supported and download Capture One for Sony here.
About the author:
David Grover is a Capture One expert based in the UK. In addition to writing a weekly column for Alpha Universe, he runs the Capture One weekly webinar series on Capture One Pro and produces a series of video tutorials on Capture One as well.
To get started using Capture One 11 take a look at these videos:

