Our sun goes through cycles of increased and decreased intensity and it's currently approaching peak activity for the current solar cycle (see the NOAA Space Weather Prediction Center website HERE) . That means more chances to see and photograph auroras at night and, if you have the inclination and a few essential pieces of gear for safety, the dramatic activity on the face of the sun itself. When we saw some of his images on the CloudyNights forums, we connected with Alan Strauss to learn more about how he does it using some off the shelf items made for viewing the sun safely and his regular, unmodified Sony Alpha 7 III mounted on a small amateur telescope.
Strauss doesn’t even really consider himself an astrophotographer. The director of the University of Arizona's Science Sky School and Mt. Lemmon Sky Center says his involvement with the hobby of amateur astronomy is 99.8% visual. “It's not taking images,” he explains. “I'm an amateur astronomer and I like to look through my telescopes at night, and obviously in the daytime at the sun, when it's clear out, because it is the only star we can see any detail on, which is kind of cool.”
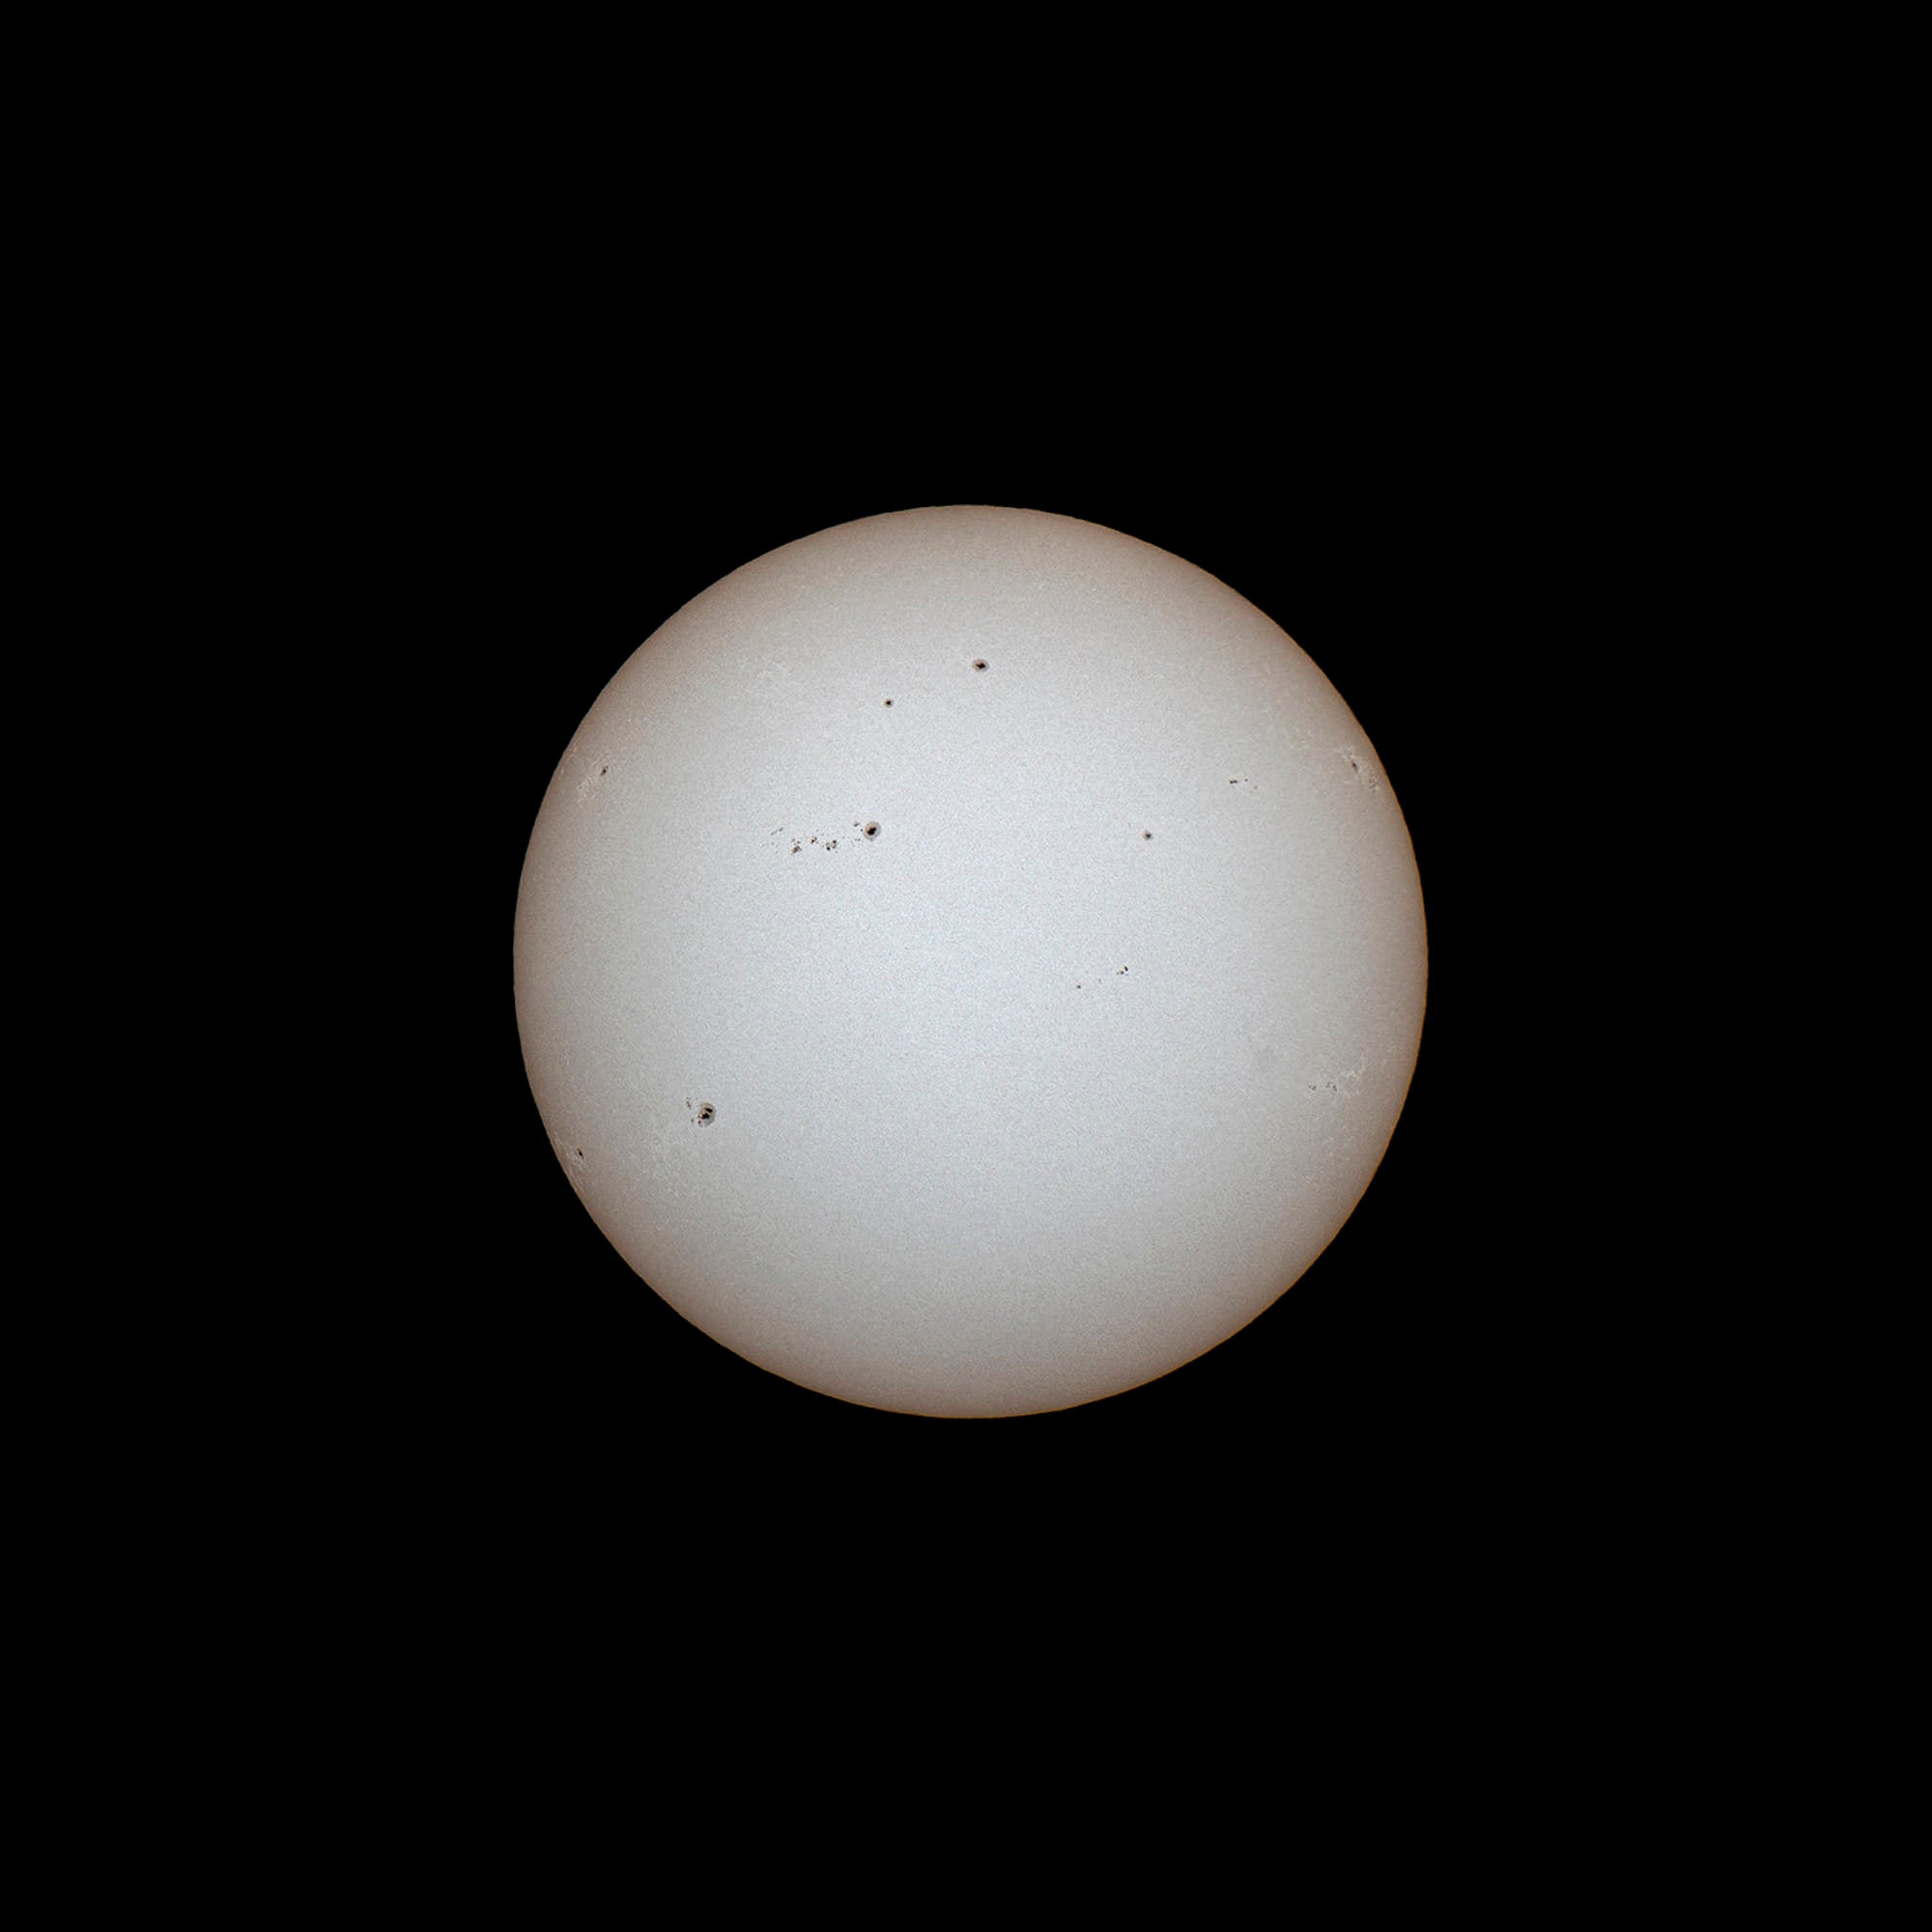
Photo by Alan Strauss. Sony Alpha 7 III. 1/1600-sec., ISO 100
Using a Sony A7 III, an adapter for a small telescope and some devices to reduce the sun’s intensity, Alan Strauss captures the beating heart of our solar system.
As Strauss says, his hobby of astronomy isn’t really about the photography part of it. He actually likes to draw what he sees in his telescope first. “I make sketches of the sun quite often,” he says. “So if I'm out there and I'm drawing sun spots and stuff, suddenly I’ll think, ‘Oh I should take a picture, it's a pretty cool day out there.’ Or if the atmosphere is pretty stable and it’s a calm morning, that lends itself to a better photo. There’s not much you can do with a blurry image, especially when you are like me and have very little interest in post-processing of any kind. But I don't take pictures of the sun with any regularity. It'll just strike me one day.”
Strauss’ Solar Photography Setup
When he sees that the conditions to photograph the sun are right, how does he actually take such clear images of it? He uses the Sony Alpha 7 III, but since the sun is overwhelmingly bright (and potentially dangerous) to look at, Strauss explains that first you have to attenuate the light in order to observe it with a telescope. It's critically important to knock down the intensity of the sun before the light reaches your eyes or your camera’s sensor. Strauss says there are many ways to do this, but he uses a device called a Herschel Prism attached to his 4-inch 102mm f/7 amateur telescope.
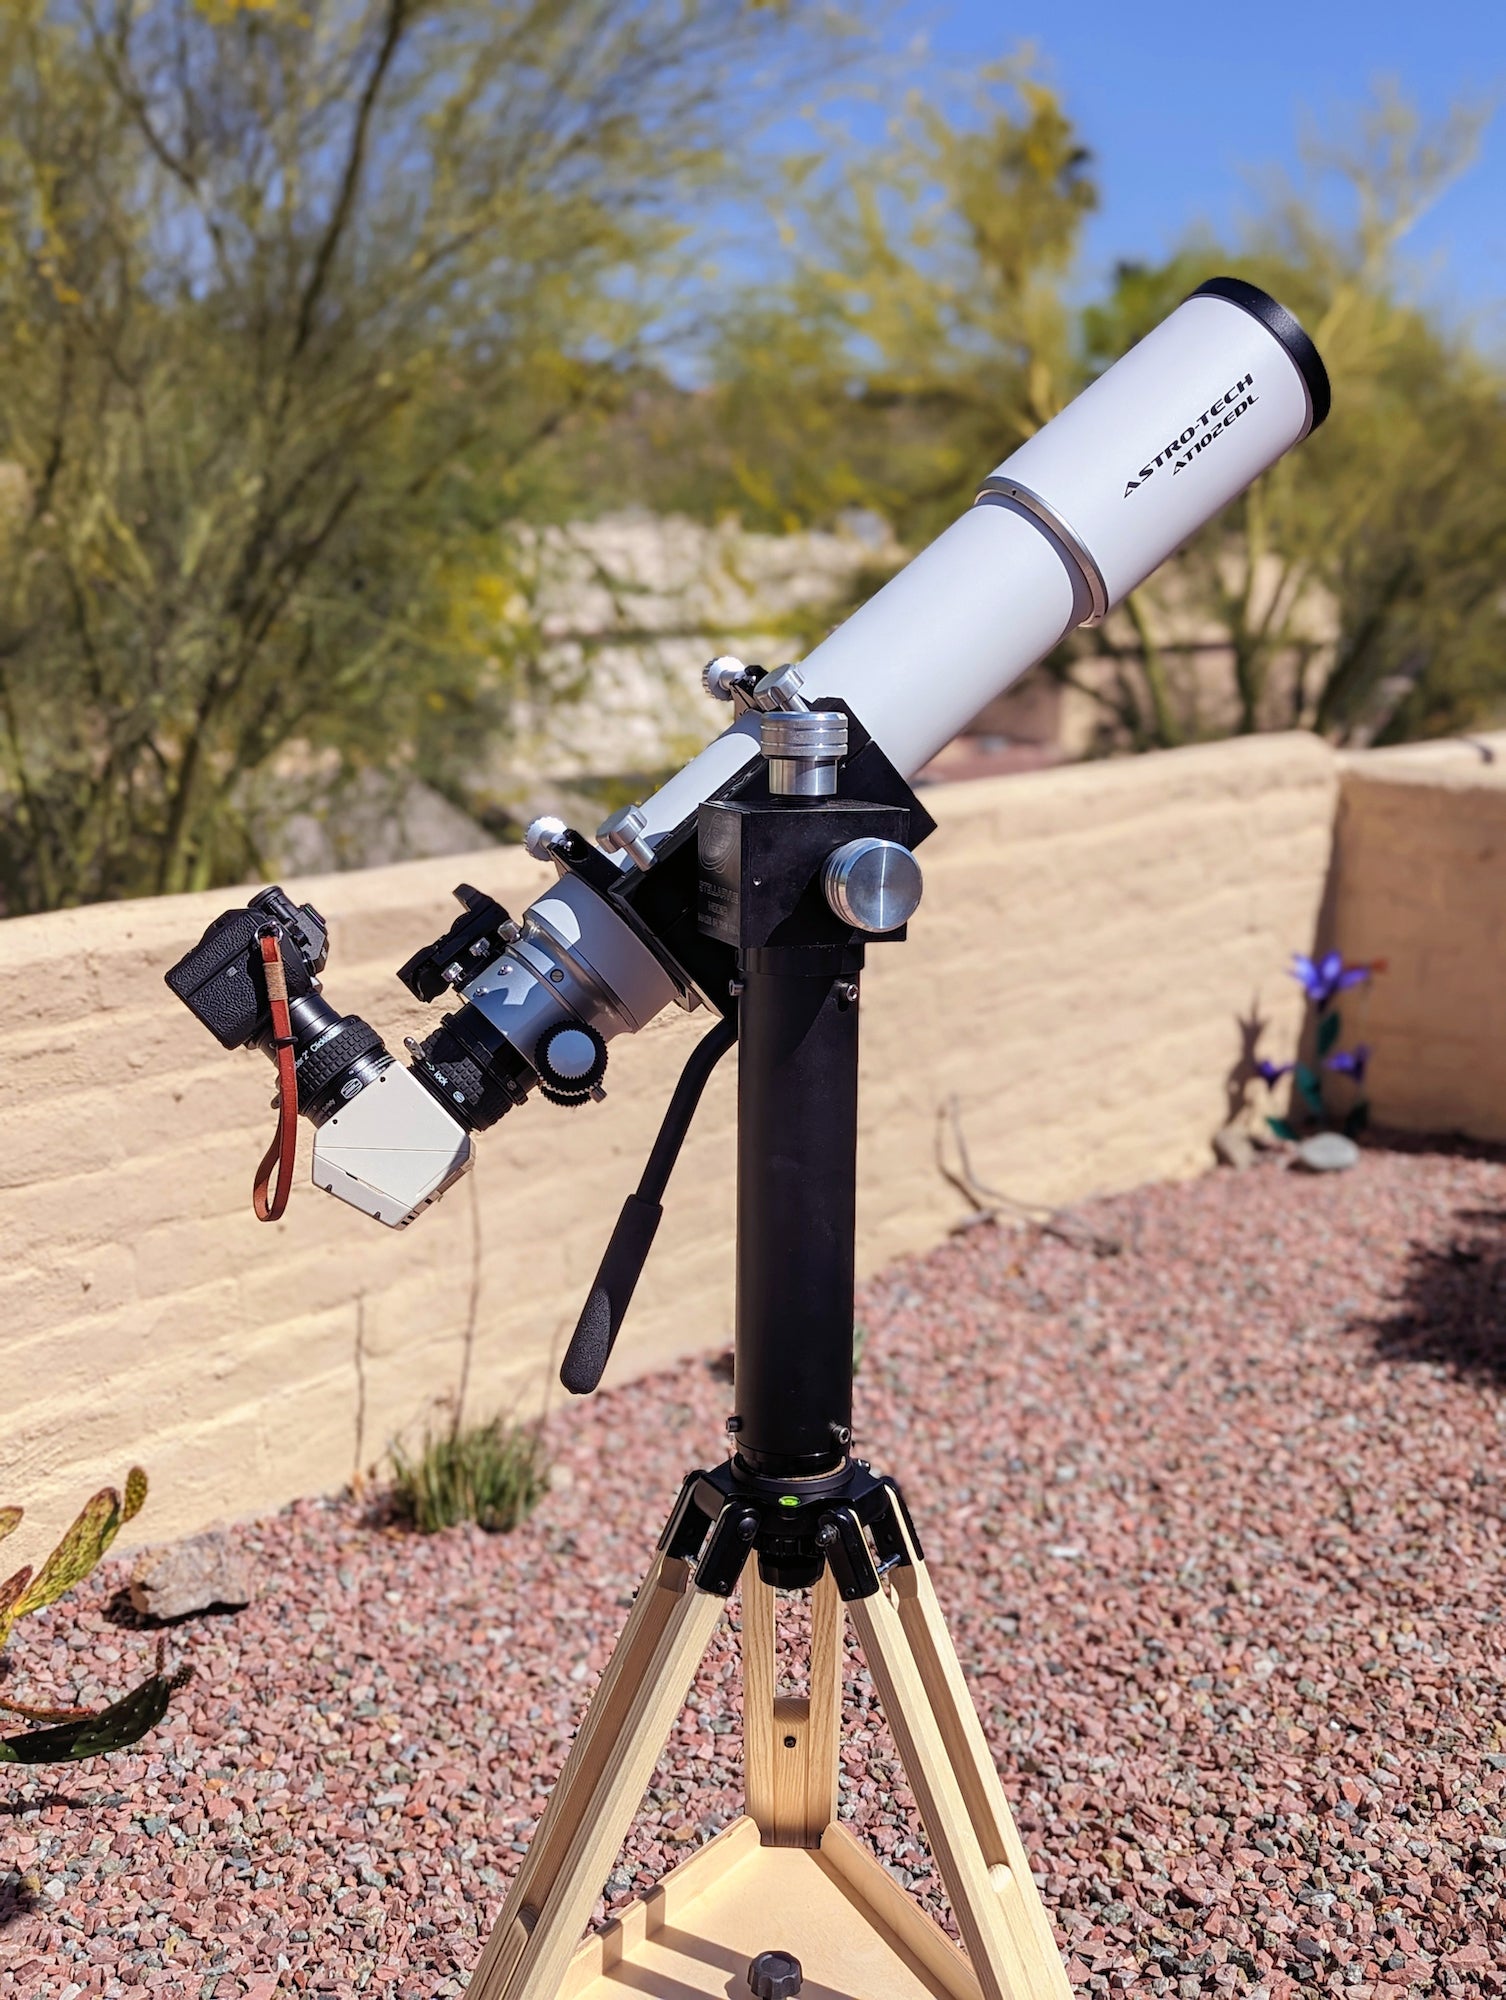
This image shows Strauss' rig for photographing the sun. The telescope is a popular Astro-Tech 102mm f/7 refractor and at the back end of the tube, the white unit is the Herschel Prism. Using an adapter, the camera is inserted into the Herschel prism instead of an eyepiece.
“My telescope is a doublet refractor," he explains. “At night, you're using eyepieces to bring the image of the stars to focus with this type of telescope." For viewing or photographing the sun, you need to add a special device or a combination of devices to reduce the sun's intensity. NOTE: Do not try this without the proper tools to reduce the sun's intensity! "You can do two things to safely view or photograph the sun," Strauss explains. "You can place a filter that's especially designed for solar viewing over the front of the refractor or lens. That filter is essentially a glass or a film that has a very, very intense neutral density so that's going to take out over 95% of the light coming from the sun. But even that's usually not enough for comfort, visually. You wouldn't want to be looking at even 5% of the energy from the sun.” Solar filters for visual use typically have an optical density of 5.0 which allows about 0.0001% of the sun's energy through. Strauss continues, “But those front-mounted filters really don't provide the sharpness and resolution that the device that I use provides. I use what's called a Herschel prism. It goes into the back of the telescope and it dramatically reduces the intensity of the light hitting it.”
Those lenses in Strauss’ refractor telescope act as a window so they don’t get hot, but they do focus that energy from the sun to the back end of the telescope. (Strauss says think if you ever used a magnifying glass to burn paper. The magnifying glass didn't get hot, but the focused beam started a fire.) So where that light comes to focus all of the energy from the sun is very intense. The Herschel prism refracts most of that light out of the optical path. “About 95.5% of the light passes through that prism and hits a ceramic heat sink to dissipate the heat,” he explains. “But about 4.5% of the light is reflected off the face of that prism up to your eyepiece. So if you're using it visually, as opposed to with a camera, what you would do is put a polarizing filter at the base of the eyepiece so that you could further dial down the brightness to a comfortable level and look at the sun.” The Baader Herchel Prism comes with a 3.0 ND filter to reduce the 4.5% of solar energy to 0.0045% and then the polarizing filter allows you to sort of fine tune the remaining light that is coming through.
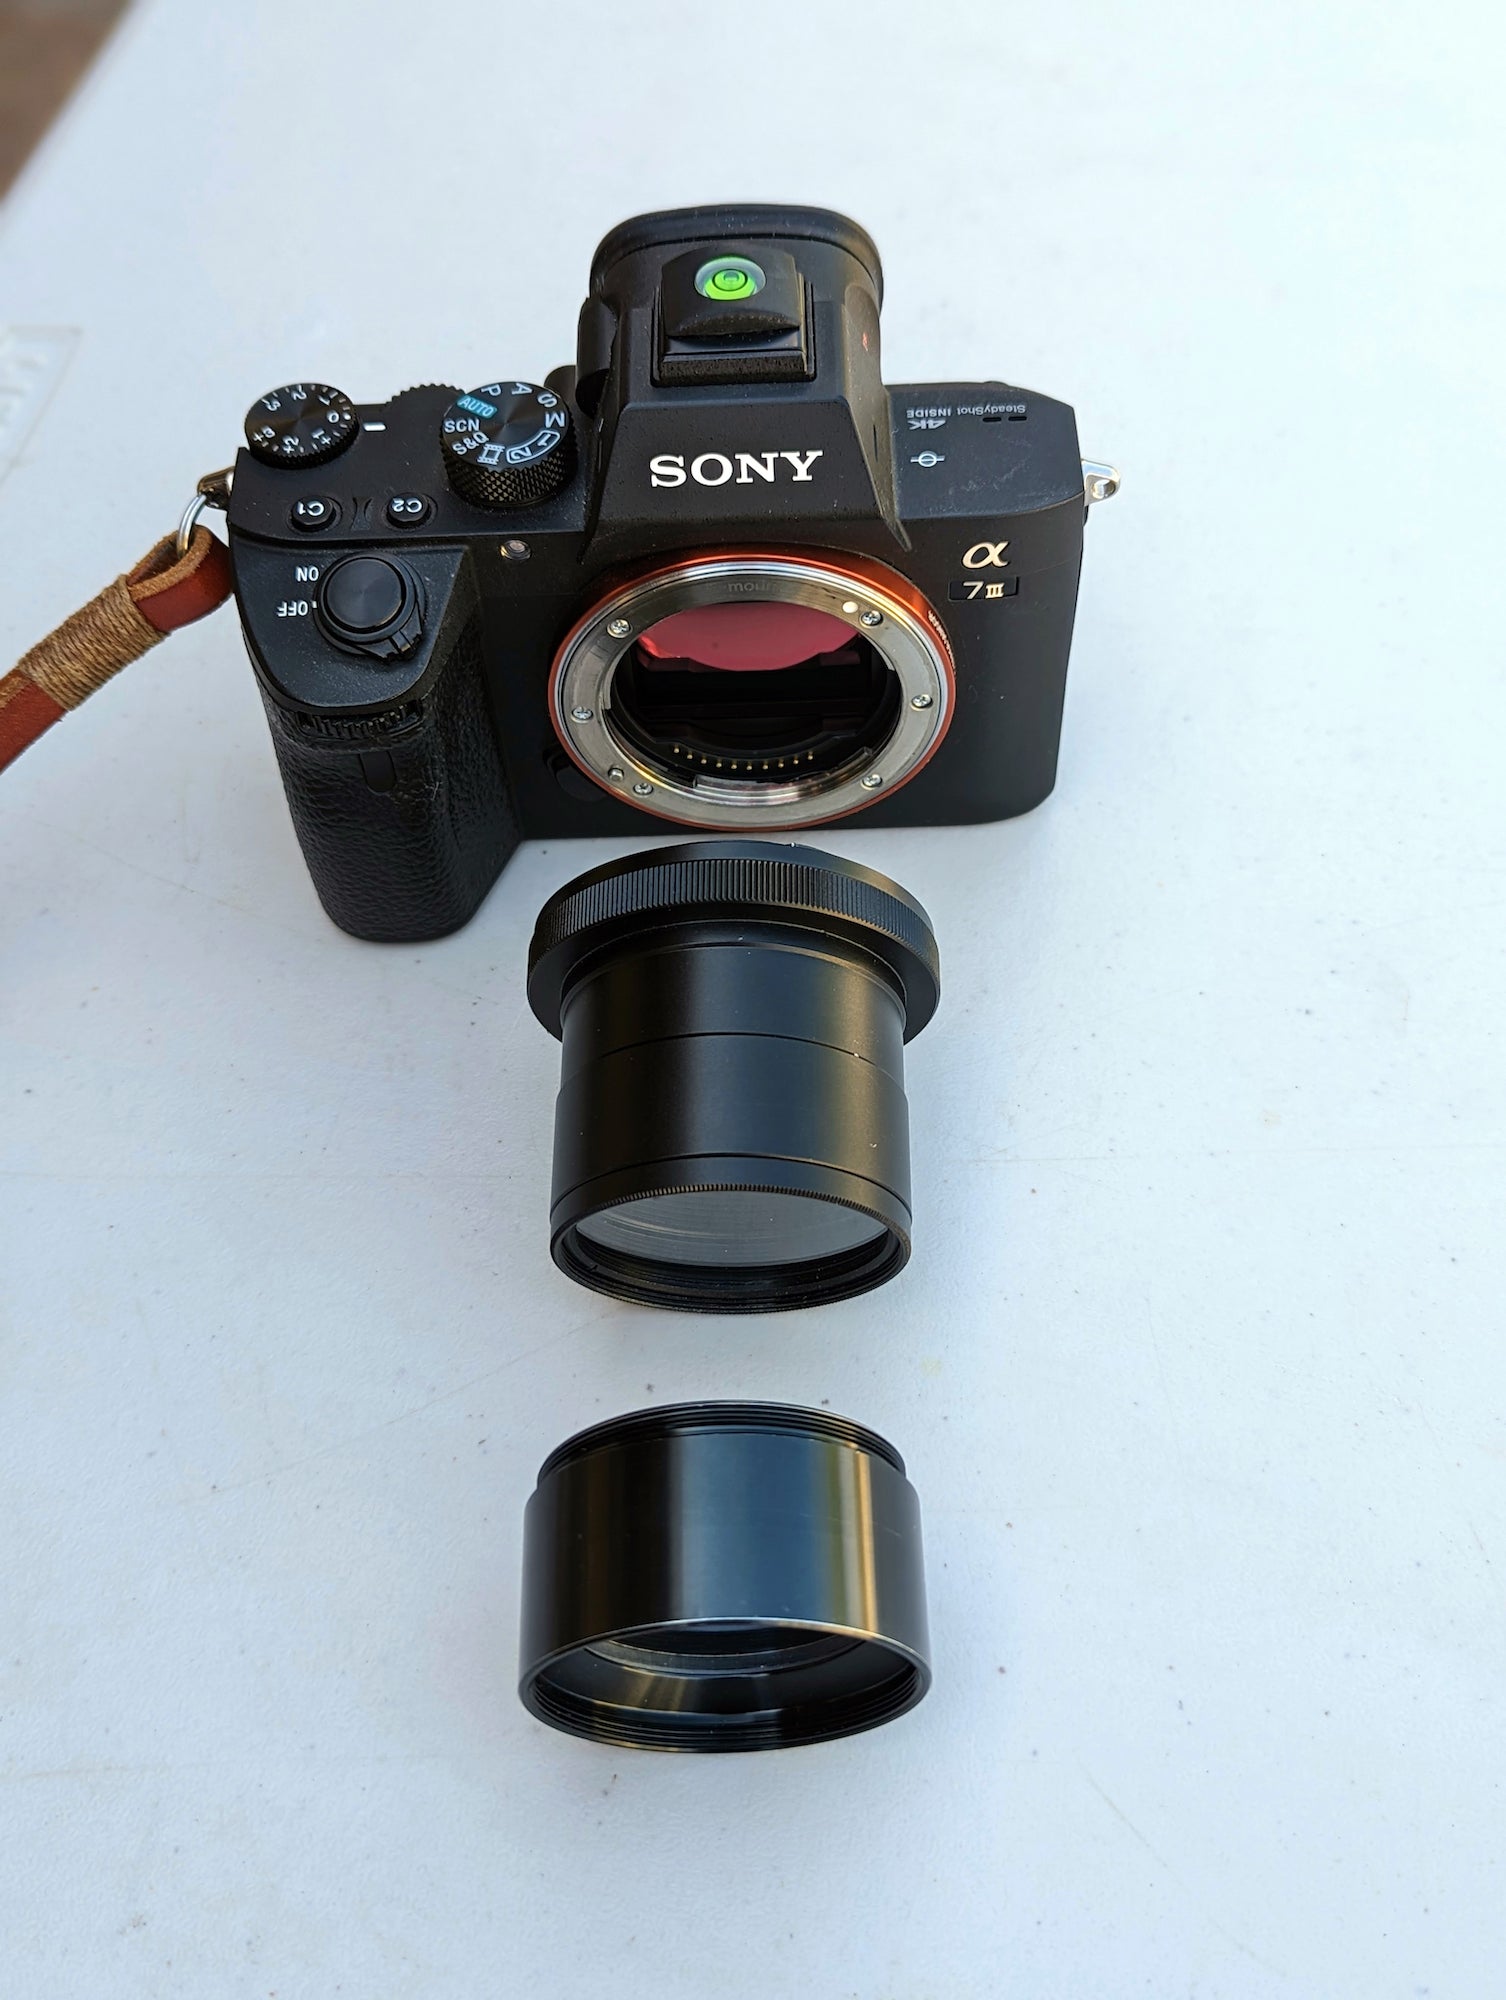
Strauss' camera setup consists of the camera, the adapter which replaces the lens (it's simply an empty tube with an E-mount fitting at one end and threads at the other end), then a 2x barlow lens. The adapter and barlow lens are 2” diameter which is a standard telescope eyepiece size so they can fit in the telescope in place of an eyepiece. The barlow is essentially the same as a 2x extender that one would use with a camera lens. It approximately doubles approximately the image scale.
For photography, Strauss uses a few attachments to take the place of a standard camera lens on his Sony Alpha 7 III. He uses a T-ring and a "nosepiece" and a 2x barlow lens that are the same diameter as a standard telescope eyepiece to mount the camera to the Herschel Prism just like an astronomy eyepiece. Then he places his Sony Alpha 7 III (without a lens) directly in place of the eyepiece.
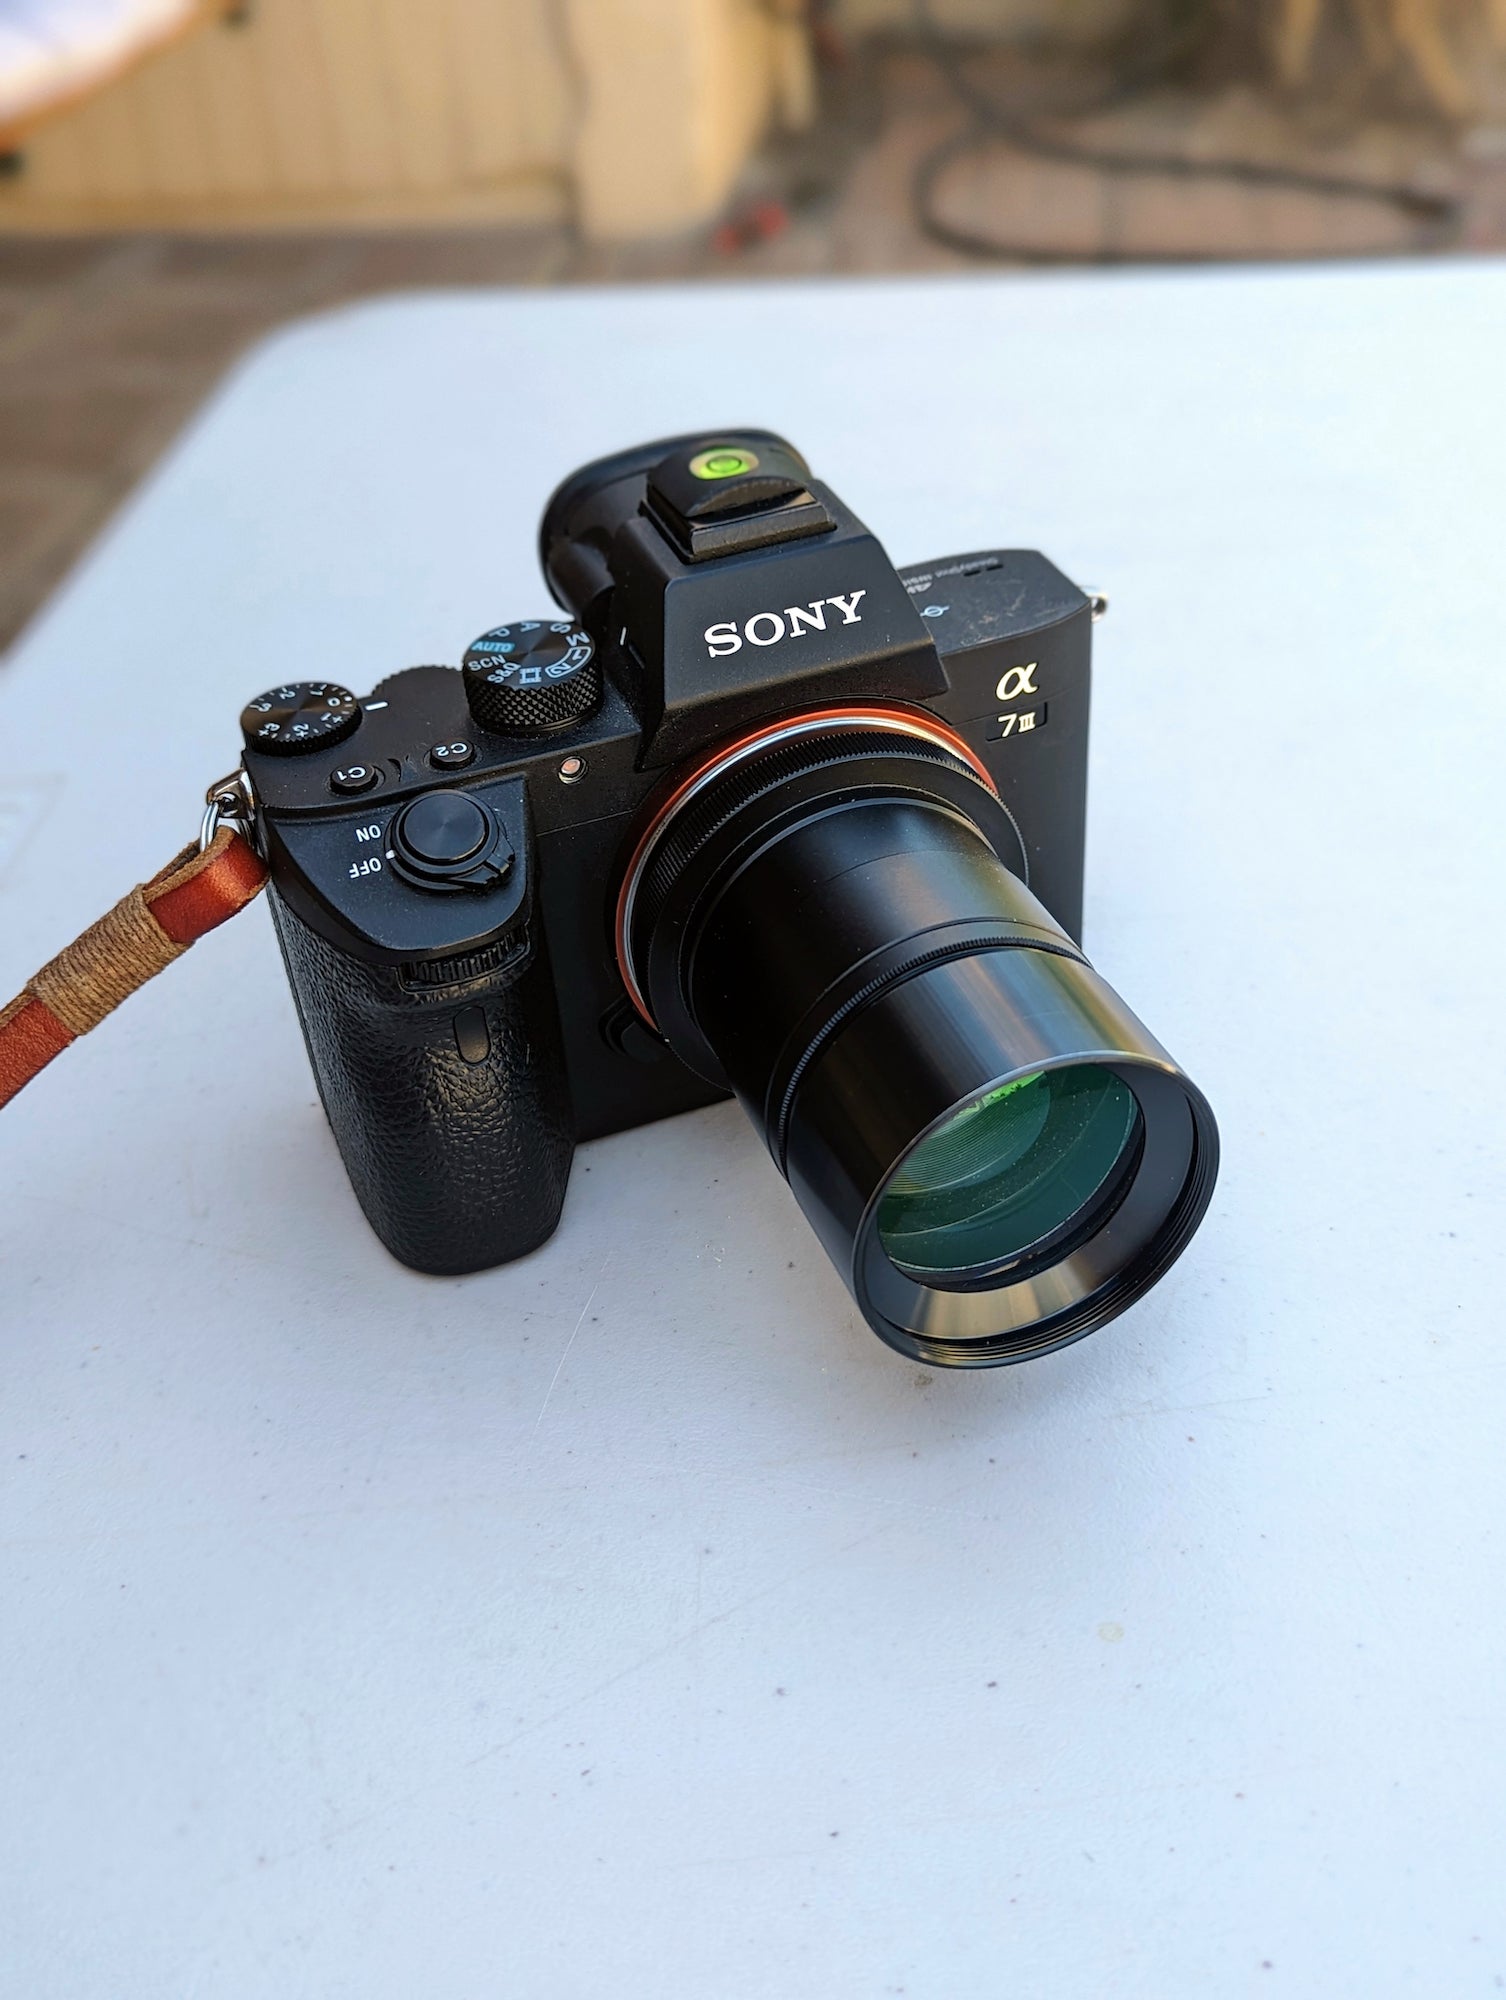
This shows them all connected and ready to insert into the telescope.
Settings For A Sharp Solar Image
Since Strauss is replacing a standard photography lens with his telescope rig, he can’t change the focal ratio. With the telescope that ratio is fixed, so instead he relies on just adjusting his settings manually depending on the current conditions. “Generally I use a shutter speed of 1/1000-sec. or even 1/2500-sec. to try to get a really short exposure if I can get away with it.”
Why does he want such a short exposure? Strauss explains, “The Earth’s atmosphere is very turbulent. That's why stars twinkle at night. The light from those stars is being refracted as it comes down through the atmosphere and every little bend results in the light just bouncing around and the star twinkling. It's much, much worse in the daytime because of the solar radiation, the heating.
He continues, “If you look at the sun through a telescope that set up for solar viewing, once it’s past about 10:00 a.m., it's shimmering almost like it's underwater because of the effect of the earth's atmosphere. It's kind of like a mirage. The shorter the exposure, the more you can kind of freeze out those atmospheric effects and get a sharper image. But sometimes if you’re having to go extremely short, then you’re going to have to crank the ISO up a little more for the sensitivity. It's really a bit of trial-and-error every single time.”
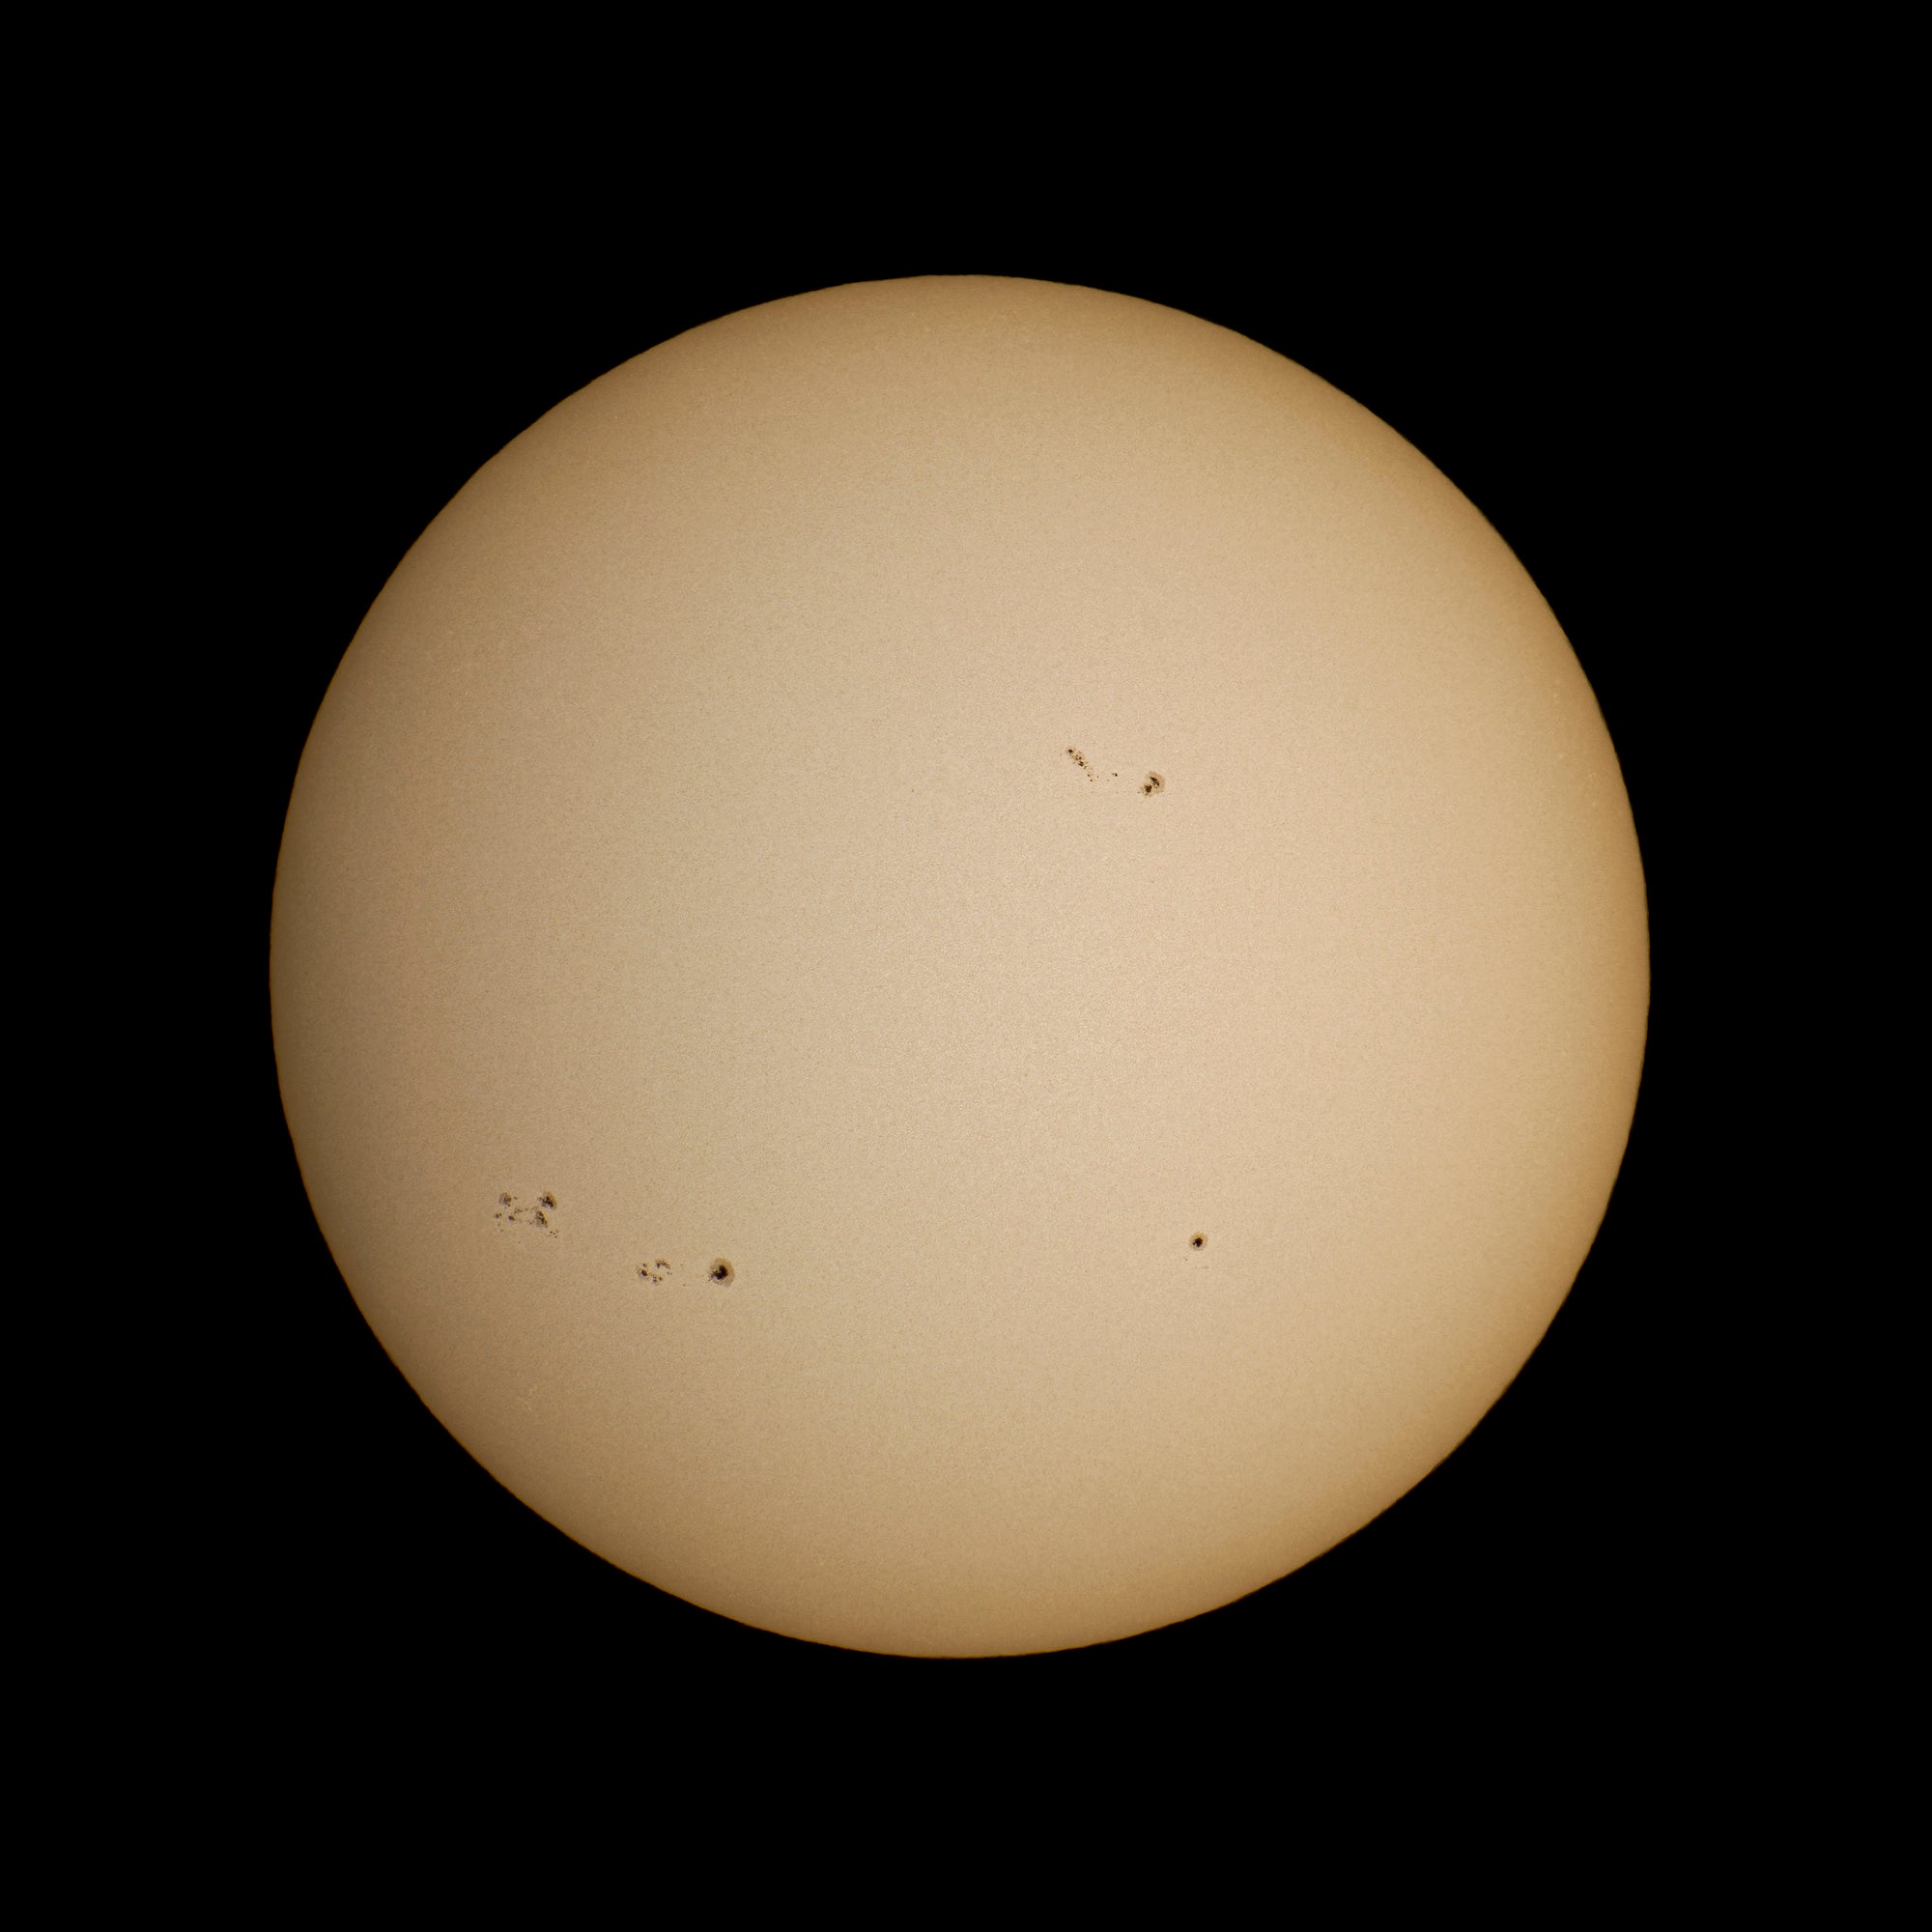
Photo by Alan Strauss. Sony Alpha 7 III. 1/2500-sec., ISO 100
“Lucky Imaging”
Strauss puts the camera to the telescope and, using the electronic viewfinder, he magnifies the image 10x to find focus. “The more turbulent the atmosphere is, the harder it is to get that focus dialed in because you’re looking through all of that turbulence.” Strauss then sets a short delay on the shutter release so that it takes out any vibration from him pressing the button.
“I'll get it in there, I'll try four or five shots with the shutter set for a short delay, and that's it,” he says. “Then I go look at the images on the computer and choose the one that's the sharpest from the get-go. And honestly, in that one minute when I'm making the five exposures, I can get one that's really sharp and I can have four where you can't even see the sunspots because the atmosphere blurred the sun so much.”
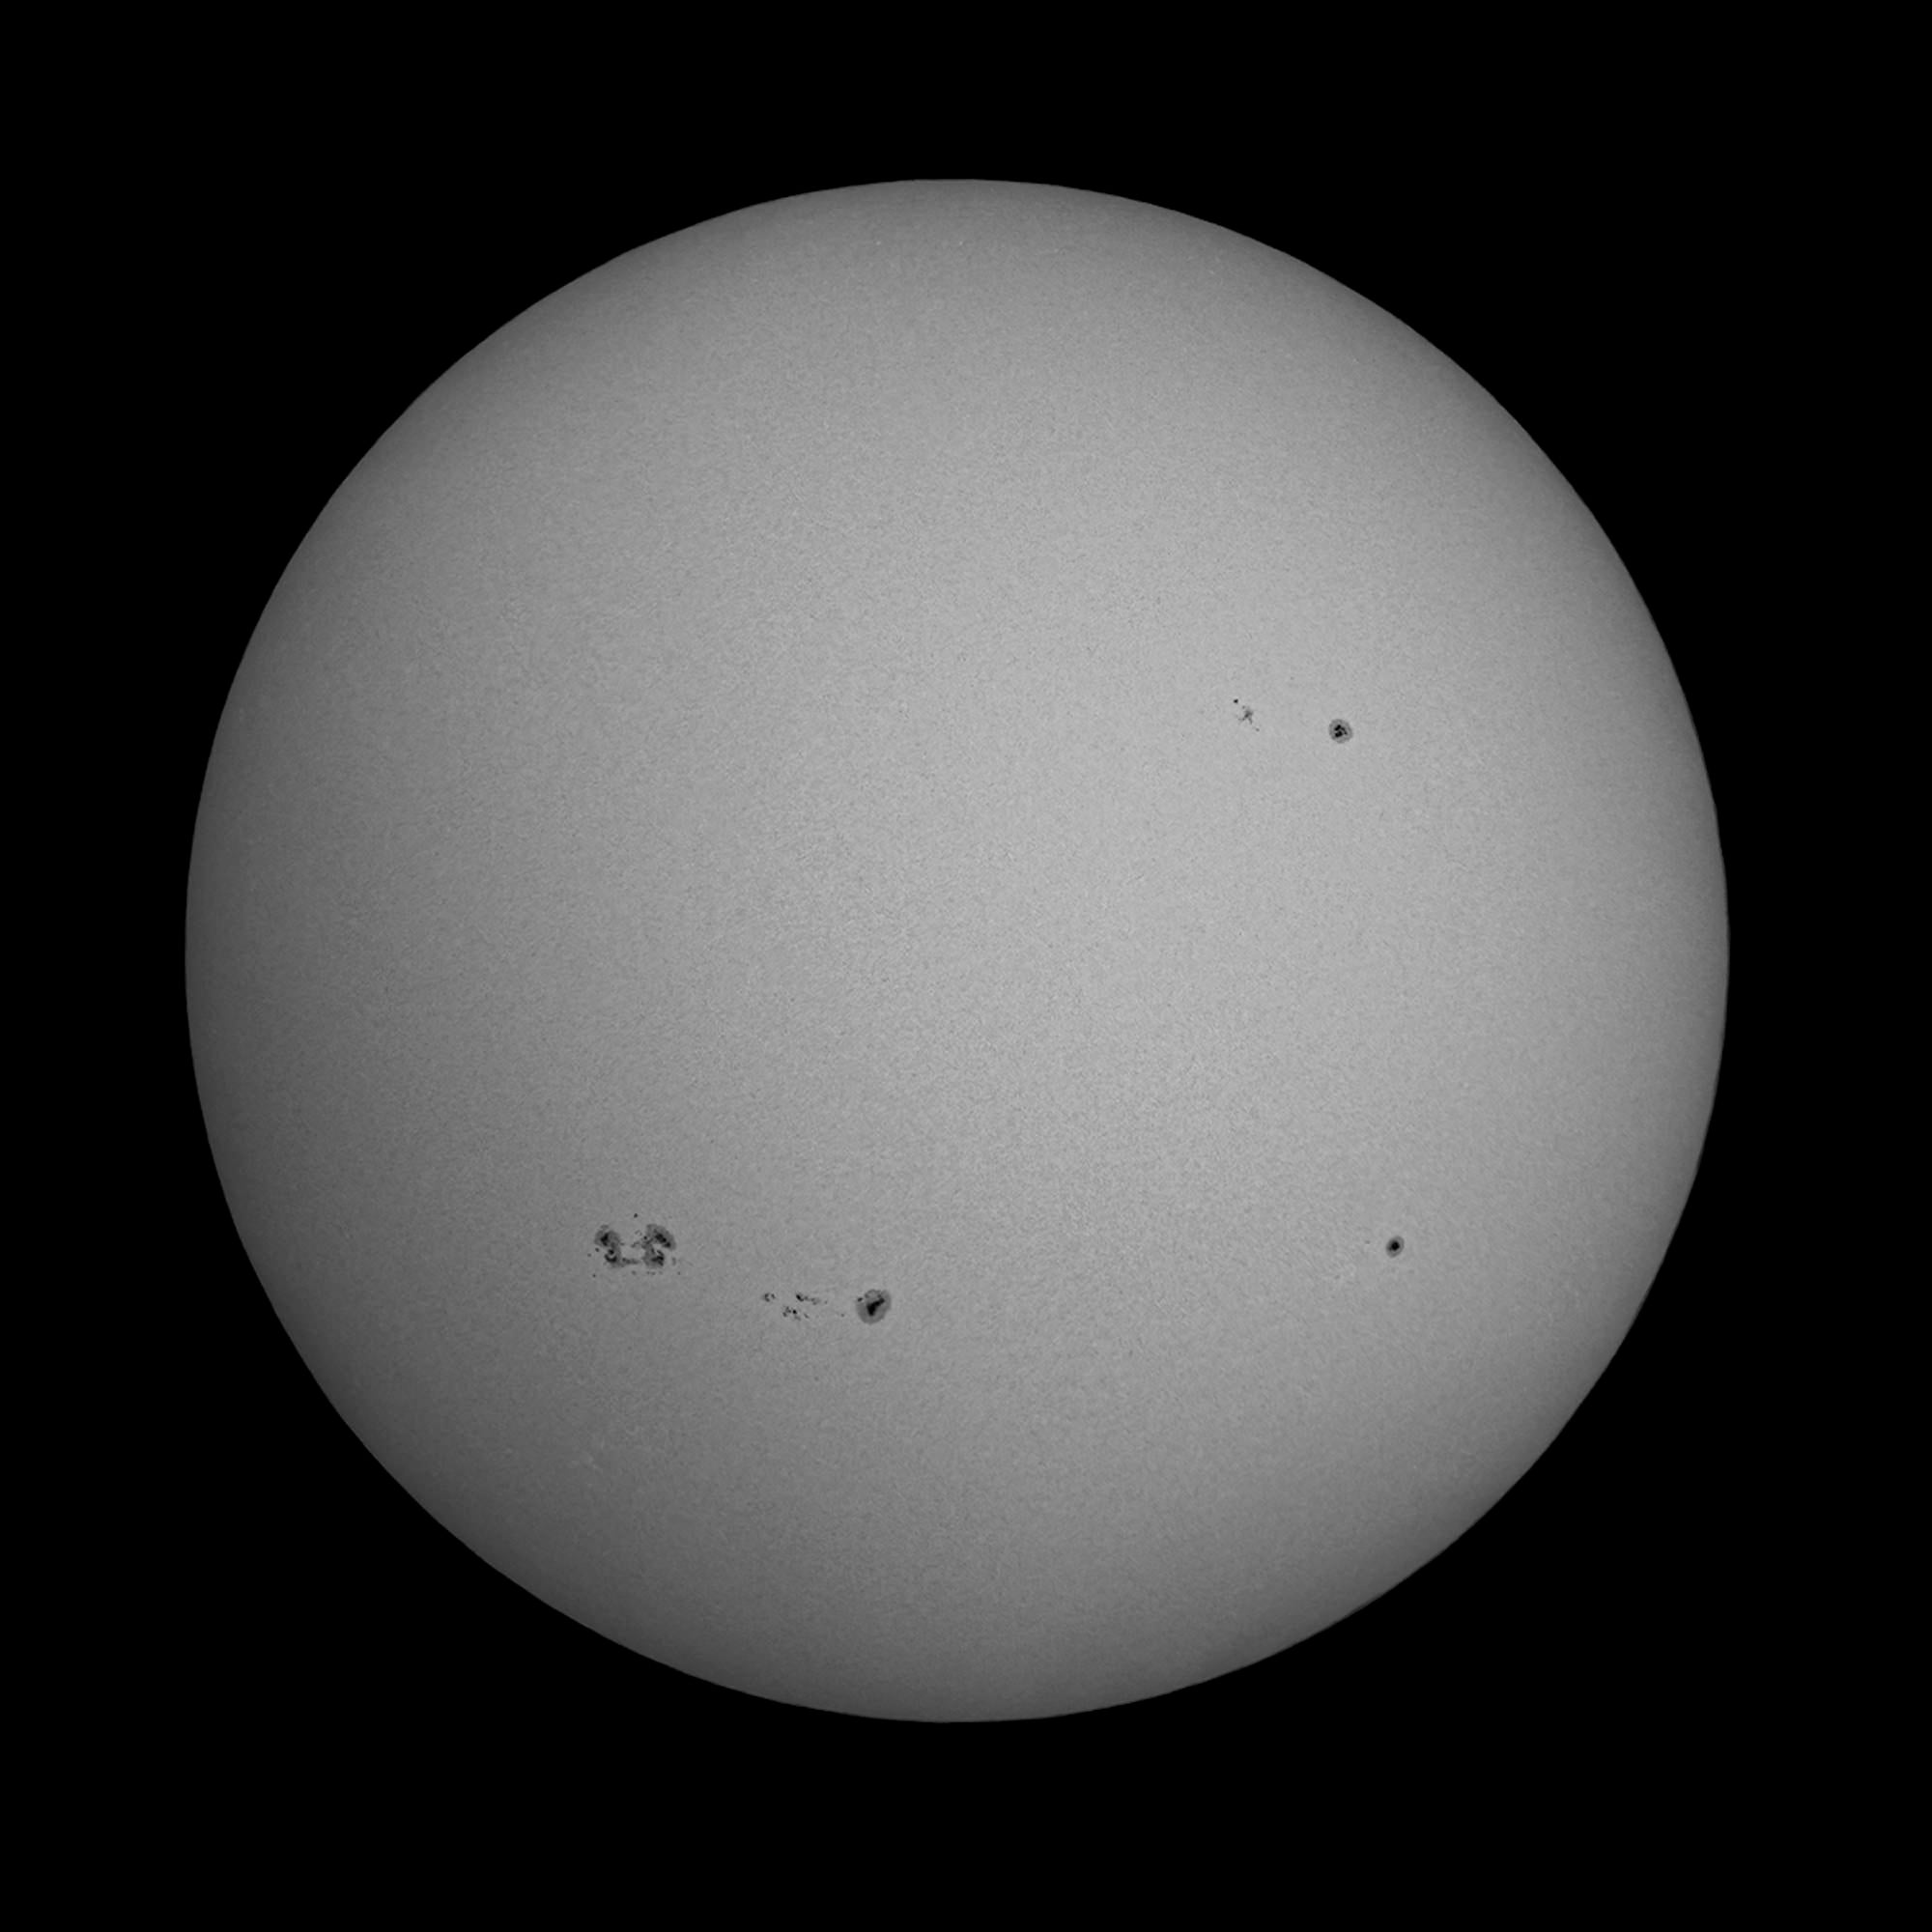
Photo by Alan Strauss. Sony Alpha 7 III. 1/2500-sec., ISO 100
“So I like to call it ‘lucky imaging.’ I’m not trying to take 100 images hoping to get the perfect one. For me it’s just if it works, it works. Then with my photos sometimes I might then play with the contrast or sharpening slightly in Photoshop, but sometimes that can create certain artifacts so I'm much more a fan of just the natural image that I get.”


