My name is Suwandi Chandra (@suwandicphoto) and I started my photography in 2007 when I was still working in Des Moines, Iowa as a software developer. On a trip to Alaska in 2010 I fell in love with the vast and wild nature of Denali National Park, and the wildlife and the peacefulness that came with it. So I decided to pursue more nature, landscape and travel photography. As I gained experience and built my portfolio, I was fortunate to be given the opportunity by a photo editor to contribute and write as a freelance photographer for magazines like Lonely Planet Traveller, Jetstar Asia, Singapore Airlines/SilkAir, Korean Air, Qatar Airways, Garuda Indonesia Inflight Magazines. On a trip through the US southwest, I had an opportunity to photograph the iconic Antelope Canyon. Because of the controlled access, the omnipresent dust and the steady stream of people through the well-known canyon, not to mention the challenging lighting conditions, photography within Antelope Canyon is not easy to say the very least. Shooting with my Sony a7 III and Sony 24-105mm f/4 G lens, I used everything at my disposal within the camera and lens in the canyon.
How this photographer used his Sony α7 III & 24-105mm f/4 G to overcome no-tripod rules, difficult lighting, crowds and limited time in Antelope Canyon.

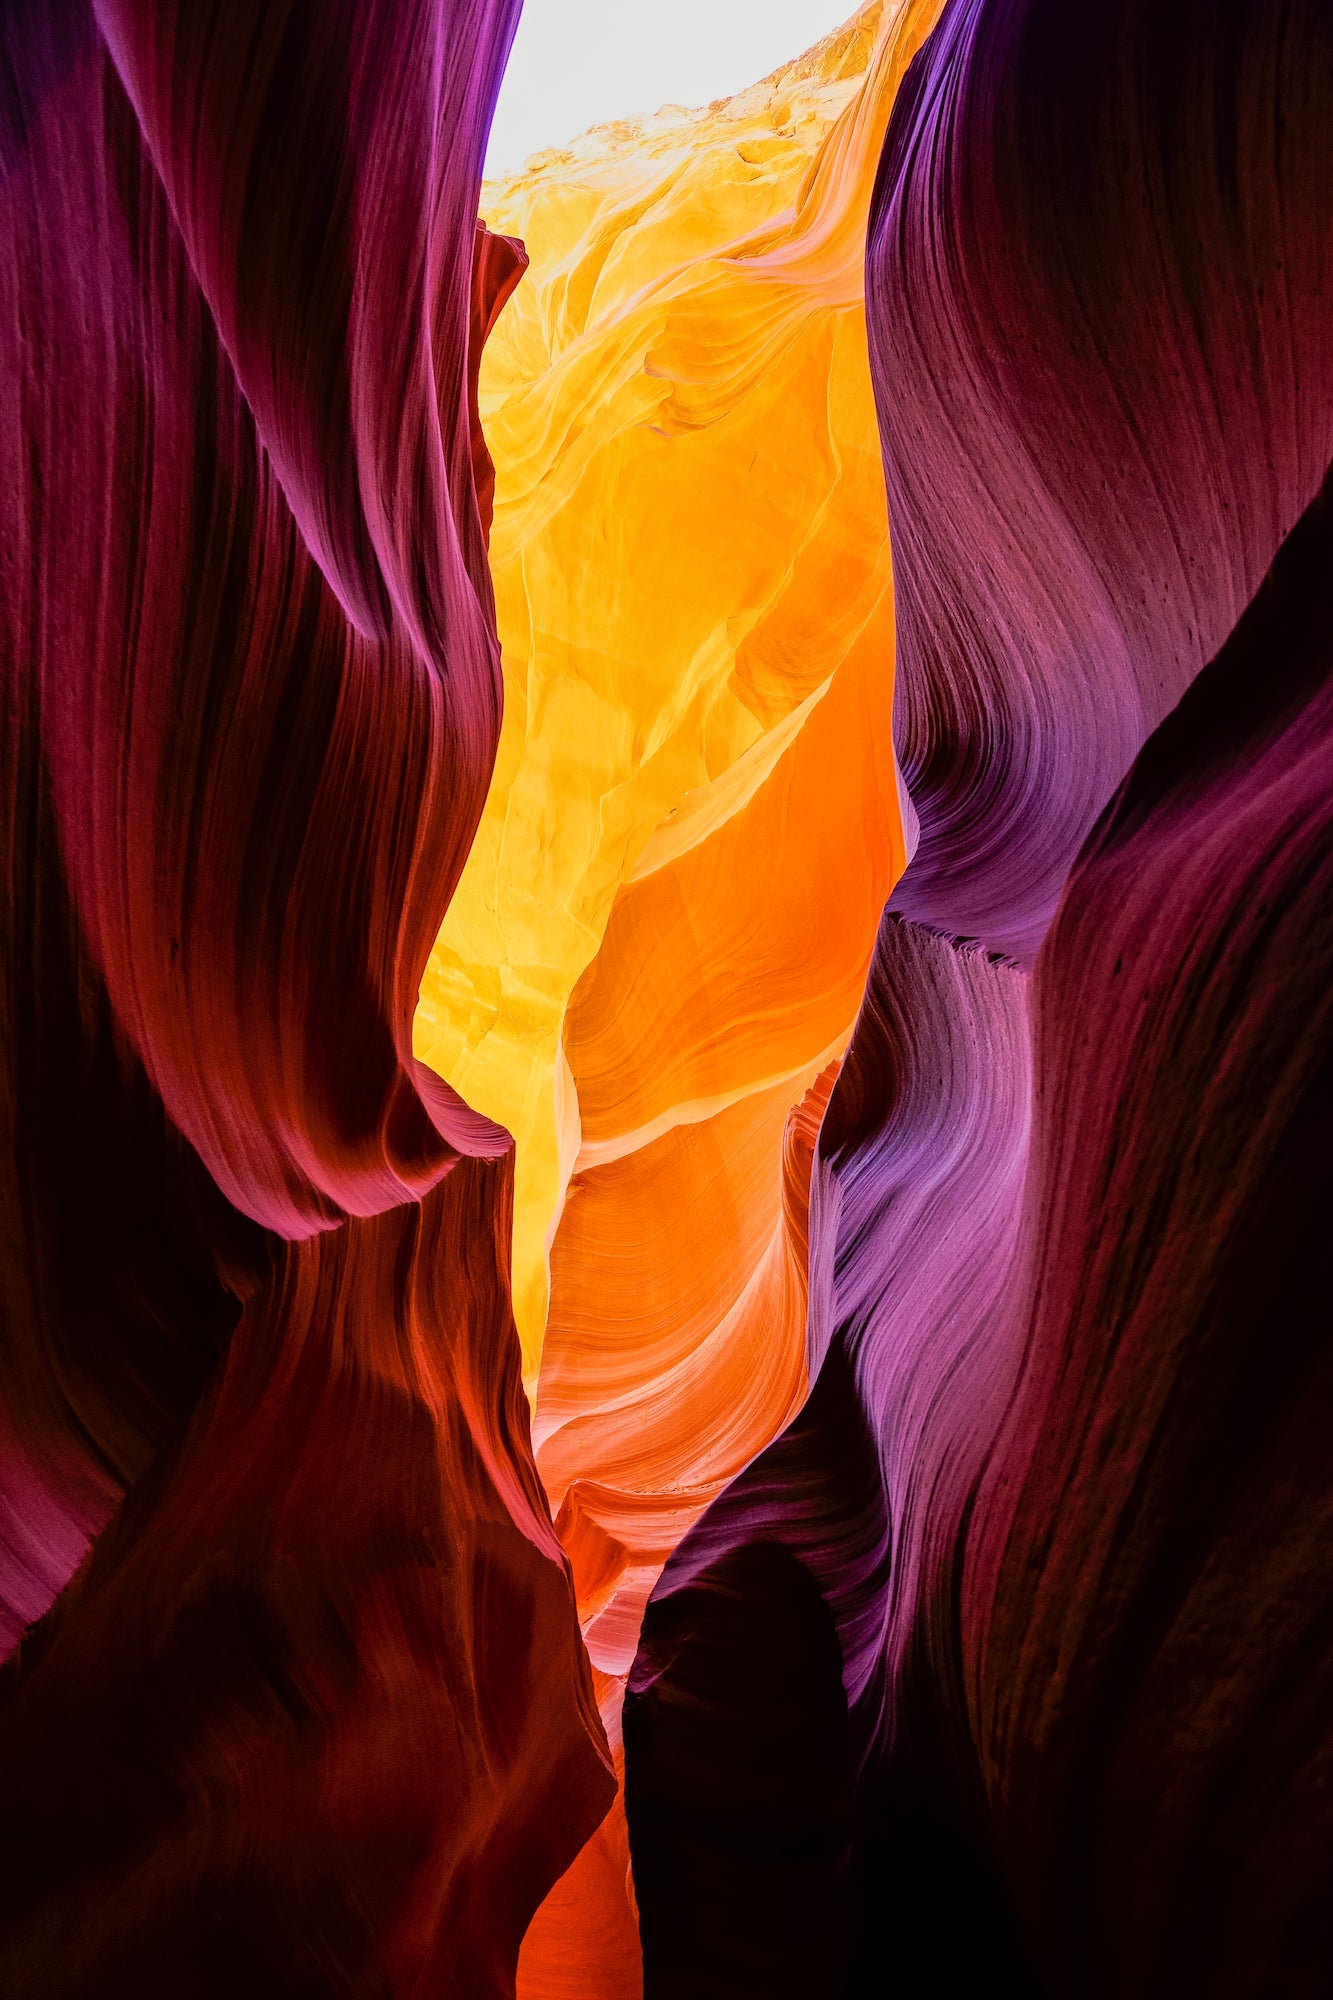
Photo by Suwandi Chandra. Sony α7 III. Sony 24-105mm f/4 G. 1/30-sec., f/8, ISO 640
Location & Inspiration
In Summer 2018, it was my first trip using my Sony Alpha α7 III. The α7 III was my first Sony camera and I decided to push its capabilities during a trip to Arizona and Utah. The desert southwest is an excellent place to test a camera's performance because of the extreme conditions and magnificent landscape. It was my second day of a 10-day road trip across these two beautiful states. I wanted to head to Lower Antelope Canyon after spending my morning at nearby Horseshoe Bend for the peaceful sunrise.
Because of its popularity among tourists, I decided to book my slot to explore Lower Antelope Canyon early. Since I travel alone, I was able to get the spot. With so many tourists, the time to explore this magnificent canyon peacefully was limited and hard to come by, so I had to be well prepared and work quickly for the best moment when I had the chance.
My Camera & Lens
I was using a Sony α7 III to capture this photo. The very dusty environment is not suitable to change lenses and the pace they move visitors through the canyon is quite fast so you’re afforded only a short period of time to explore this place, I had attached the Sony 24-105mm f/4 G lens which would give me a good range to work with and save me from having to try a lens change in the canyon. At 24mm, I was able to capture a wider perspective (24mm) inside this very narrow canyon.
How I Got The Shot
During the first part of the tour, I was just snapping around in order to familiarize myself with the surrounding environment. The guide actually helped many participants to get the best angle in order to get the best photos from the tour. At first, I tried to do the same as everyone, but I soon realized I needed to change my approach in order to get a photo that was unique. So, at the last part of the tour I decided to slow down to be the last one to take my image. I came across this narrow opening which shows the different textures and colors of the canyon walls on both sides with the upper ceiling of the canyon which was illuminated by the midday sun and changed its color into golden yellow. This shows the contrast and wide range of possibilities from this amazing place. I was extremely happy with the result, even though I got shouted at multiple times by my guide to hurry up.
Since using a tripod is prohibited in this dark canyon, I pushed the ISO and to get a shutter speed for a sharp photo handheld – the combination of OSS is the 24-105mm G lens and the α7 III's in-body stabilization definitely helped me get sharper images. The high dynamic range of the α7 III’s sensor also helped me preserve the details of the canyon in the shadow and highlights, even using a high ISO. This particular image was captured at 24mm, 1/30-sec at f/8 and with my ISO set to 640.
I was actually directing my camera upwards to find a different perspective. Then I came across this narrow opening to the ceiling of the canyon that really showcased the texture and contrasting colors between the walls and the ceiling as a result of sun illumination from above. I was able to capture several photos with horizontal or vertical variation of this corner of the canyon. I always shoot RAW to be certain I get all of the visual information that the camera and lens can capture in the exposure.
Post-Production
My style of photography is focused on always trying to get the best exposure in camera to minimize my post-processing time. I always use Sony Imaging Edge software to process my RAW image to correct the white balance, noise reduction, shadow/highlight or DRO setting before exporting the image as my final photo. Using the software for my RAW processing helped me preserve the vibrant colors of this canyon.


