Several of you asked me about Long exposure Tilt Shift photography. It sounds fancy and intimidating, but it’s more fun than intimidating :)
These days, the Canon 24mm TS-E f/3.5 is the lens I shoot mostly with. Why is that? Because it is an extremely sharp wide angle lens, which is great for architectural and landscape/seascape photography, but not only.
It also does TILT and SHIFT. What are these? Well, you can find very detailed descriptions online, but let’s try and keep it simple for now by considering one after the other.
SHIFT: prevents distortion, allows panorama stitching
This is probably the most used feature of these lenses. The very large image circle allows to shift the lens, and consequently the field of view without tilting the camera sensor up or down. And that is whole the secret. When taking architectural pictures, pointing the camera up (resp. down) will introduce distortion, and lines will converge up (resp. down; see pictures 1 and 2). You HAVE to keep the sensor leveled in order to keep perspectives right and vertical lines perfectly parallel (see picture 3 in after the stitching paragraph below).
Exaggerated distortion showing converging lines when the sensor is tilted up (left) or down (right), not long exposures:
The other big advantage of using a shift lens is that photographing panoramas could not be easier. The procedure is very simple: set up the camera and field of view so there is no distortion and converging lines, take the first picture, leave the camera as is but shift the lens (therefore the field of view) so there is 30% to 50 % overlap between the consecutive images, take a new photograph, repeat the procedure. Most of the time I will take 3 to 5 pictures like this (I like to have ~50% overlap in the successive images), and use Adobe Photoshop or Kolor Autopano to stitch the images together. At the end of the day, you get a very large image file that allows you to print huge panoramas, and the effective field of view in the end is much larger than any wide angle lens you could use, without distortions caused by fisheye lenses. If you ask me: no drawbacks, only advantages :) But bear in mind that such large picture files require powerful computers and a decent amount of RAM memory to process.
On a more technical point of view, you will need a sturdy tripod, ballhead and bubble or electronic if you want to have perspectives as good as possible or photograph panoramas like the one below. A perfect alignment is not mandatory, but it makes the stitching software do a better job, and will reduce the amount of post-processing work required.
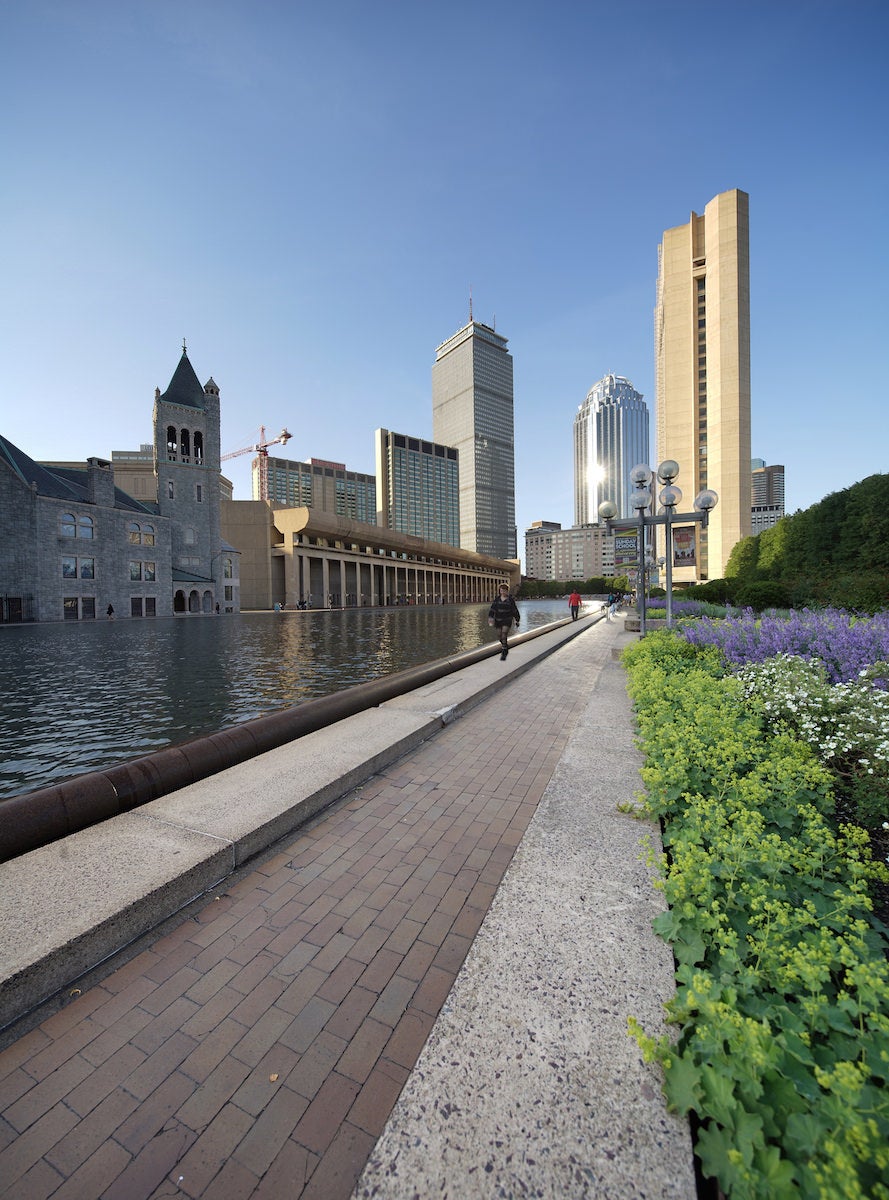
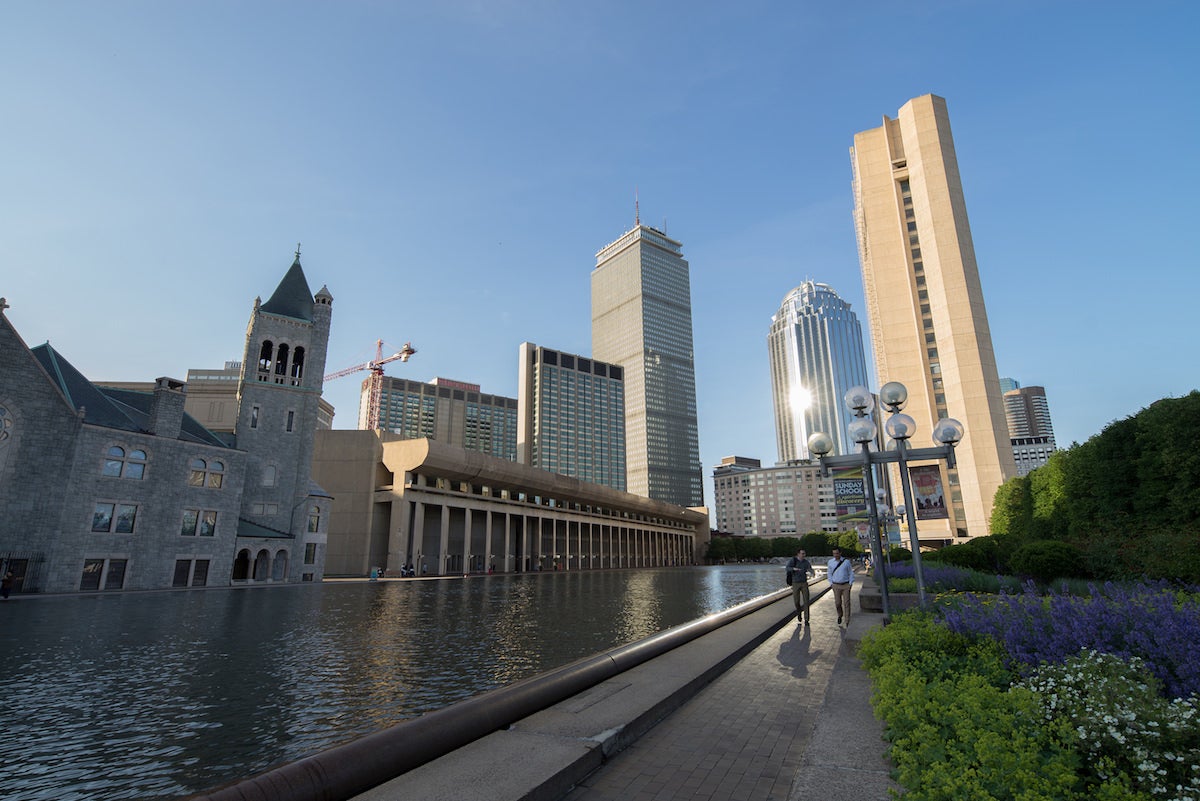
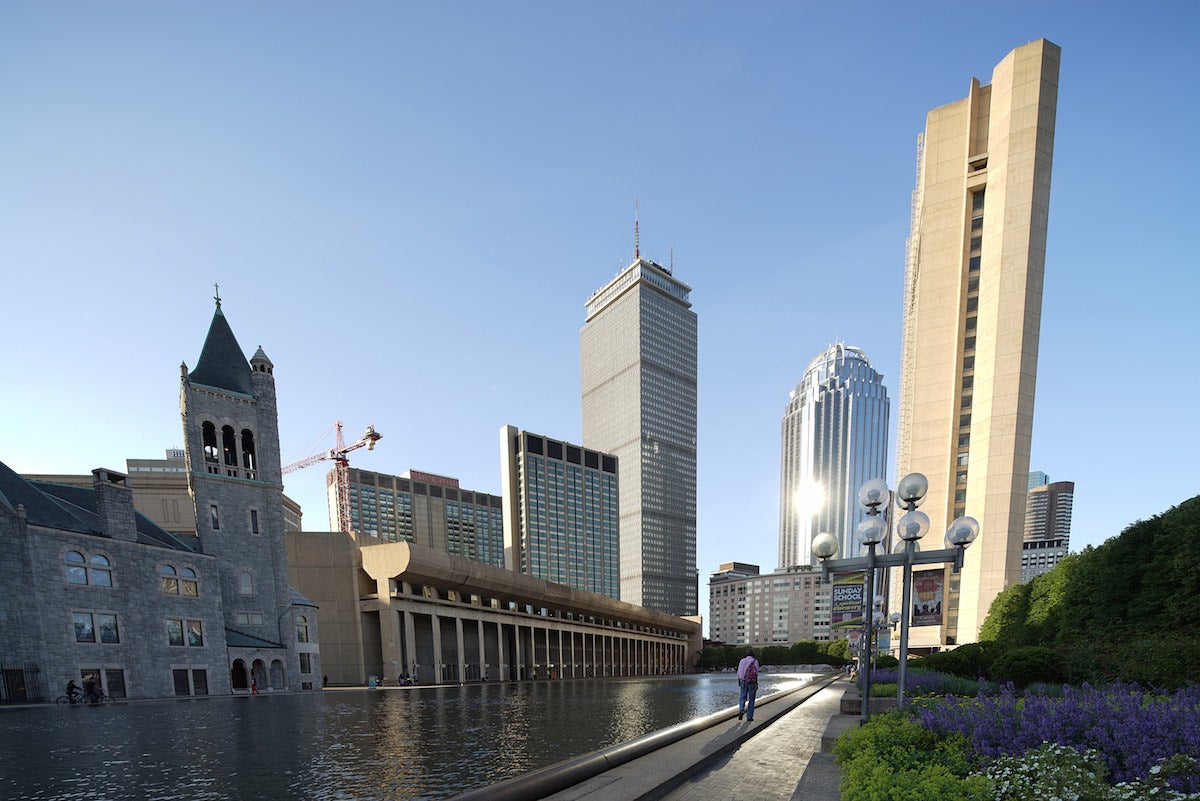
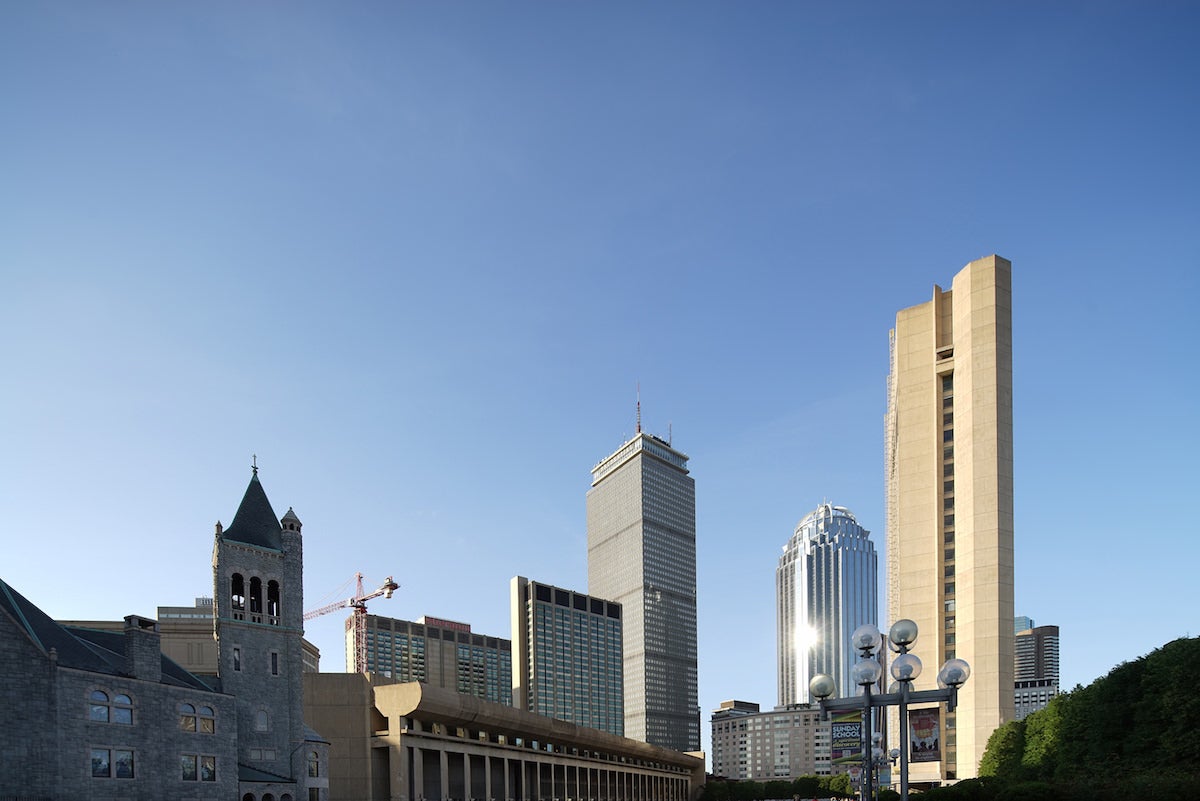
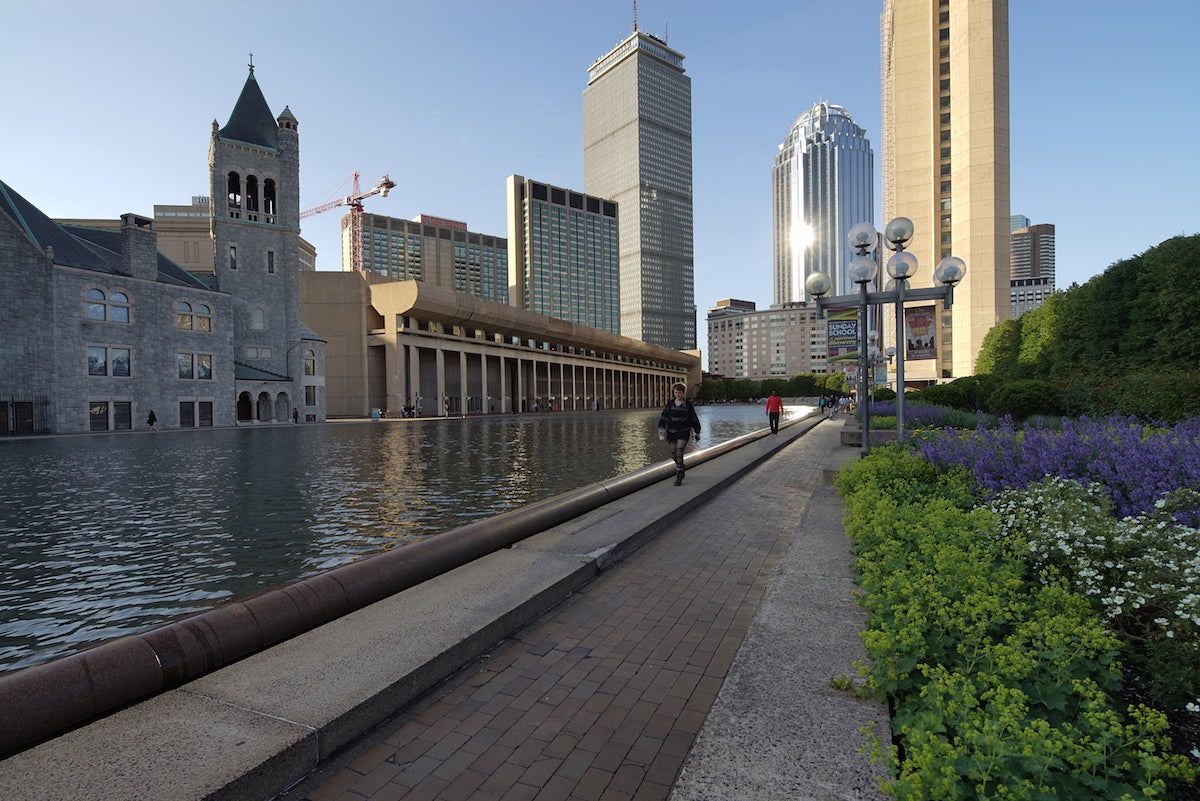
Long exposure raw images before stitching: (photographed at the Christian Science Center esplanade in Boston MA)
And finally, here is the Raw image after stitching: