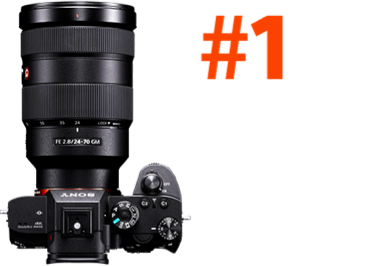
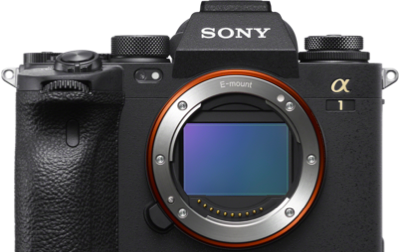
In Chicago, when the weather is right, we get some intense stormy skies. And when it happens t the right time of day the lightning over the city is stunning to see. Fortunately, I have a decent view of the skyline from my balcony, which is also covered to protect me from the rain and keep my gear and lens dry. If you’re going to be shooting storms, it’s extremely important to do it from a safe place (I love capturing a good storm more than anyone, but no shot is worth getting hit by a bolt of lightning!). This particular night, an especially active cloud was rolling east over Lake Michigan, firing a lightning strike off every few seconds, consistently. These types of clouds make it very easy to catch a strike, and also make for really compelling timelapses if they’re shot correctly. Shooting from my balcony with my Sony α7R IV & 24-70mm f/2.8 G Master lens, here's how I made this one.
From camera setup to post-processing, Mike Meyers (@mmeyers76) takes us through his steps for a lightning timelapse with his Sony α7r IV & 24-70mm f/2.8 G Master.
Camera & Lens
Since picking up my α7R IV, I’ve done more timelapses than ever (thanks to the built-in intervalometer). You can set up for a timelapse in less than a minute, so you don’t have to worry about missing anything. Given the distance of the cloud from me and the amount of city in the foreground I wanted to include in the timelapse, I knew my Sony 24-70mm f/2.8 G Master was the best option. I grabbed it and got to work. This goes without saying, but a sturdy tripod is your best friend during a timelapse. You want to make sure your shot is completely locked down and you don’t have any camera shake or movement.
How To Compose For The Anticipated Lightning Strikes & Set The Intervalometer For Success
Composing The Timelapse
The clouds and lightning are obviously the main feature of the timelapse, but including a good amount of the city in the foreground is essential to making a compelling piece of video. I approach the composition just like I would for any photograph, then zoom out maybe another 10-20% to account for any cloud movement and any “camera movement” I want to add in post. Once you start your timelapse, you’re locked into that frame – so you want to make sure your frame is big enough to capture the action over the span of the timelapse. In this case, it would be about 35 minutes.
My Camera Setup For The Timelapse
Matching The Interval With The Shutter Speed
For me, the key to capturing a great lightning timelapse is matching the interval with the shutter speed – and also taking into account the time between strikes. You want to try to capture a strike with every shot. I’ve seen clouds that fire every second for hours – but those are extremely rare. A really active cloud might fire once every 5-8 seconds. This cloud fired about once every 3-5 seconds. So, I knew I wanted to set my interval to capture a shot every five seconds. That means I’d also want to set my shutter speed to five seconds.
The logic behind it is this – I want to minimize the amount of time my shutter is closed. If you’ve ever shot lightning before, you know that the best bolts seem to strike between shots. By setting my interval at five seconds and my shutter speed for five seconds, my camera will start taking the next shot immediately after it finishes taking the last shot. This means that I rarely miss any strikes.
Interval Mode & Number Of Shots
Now that I know my interval and shutter speed, I need to figure out the rest of my settings and get started. The first thing I do is turn interval mode on. I have it set as the first item in my “My Menu” custom list. Once that’s on, I set the number of shots at 1000. I normally never need more than 15s of timelapse video (which translates to 360 shots), but I like to give myself the option of letting it run longer if I’m still capturing compelling images. The camera does the math for you and displays this, but if you’re curious on how to calculate the number of images you need to make a certain length of completed video, just multiply the length of video you want in seconds by 24 (15s x 24 fps = 360 images). We’ll get into this a little more later.
Exposure
Next I expose for the scene. Since it was already pitch black out, I didn’t need to worry about changing lighting conditions and could shoot on full manual mode. We’d already established I needed a 5s shutter speed. To correctly expose for light and keep my ISO low, I chose f2.8 and ISO 125. If I had objects closer to my lens, I might have gone with a higher f-stop (and ISO) to make sure more of the scene was in focus. But given the long distance from even the closest object, I was confident in everything in the scene being sharp enough at f2.8.
White Balance & Focus
I picked a white balance I liked (I believe around 3700K), set my focus and began shooting. Be SURE to set your focus to manual and make sure you are in focus. This locks in your focus for the duration of the timelapse. There’s nothing worse than capturing images for an hour only to realize your focus was off. Trust me on this…it’s a mistake you only make once.
Post-Production
Importing & Batch-Editing
After I’ve captured my images, I import them into Lightroom for processing. Since the lighting conditions didn’t change because it was the black of night, batch editing is easy. I find the frame with the brightest strike and make my editing adjustments to make the edit look exactly how I want it, then I copy the adjustments. Then I find a frame with no lightning and paste those adjustments to make sure that looks good as well. If it does, I select all 360 shots and click “Sync” to paste the edit adjustments to every shot.
Exporting & Sequencing
Now it’s time to export. Export your images as a custom sequence in the dropdown menu. The minimum resolution for a 4k video is 4096 pixels on the long edge. To keep processing and file size lighter, I minimize my exported images to a long-edge pixel length of 4096. Once all my files are exported, I import those images as a sequence into Adobe Premiere, where they form the movie. Given that these images have all been batch edited in Lightroom, you won’t need to do much to them as far as basic correction. But feel free to adjust as needed.
Adding Dynamic Movement & Sound Effects
Adding a little bit of “camera” movement to give the effect that the camera was moving slightly during the shoot will make your final timelapse video much more dynamic. You’ll notice in this video it appears my camera is panning a bit from left to right, but in reality, it’s completely locked off on a tripod and this effect is achieved entirely in Premiere. This is another reason I zoom out 10-20% of what I’d consider to be the “perfect frame” when I set up my timelapse. I can then set my scale to zoom in to the video 10-20% or so, and pan across it by setting different key frames on the first and last frame of the video. In this case, I set the first keyframe to the very left of the zoomed-in video, and set the last keyframe to the very right edge of the zoomed-in video. This is what gives it that panning effect.
You won’t have any sound to the video, obviously, since they’re just 360 images strung together. So I like to add some thunder and rain sound effects to recreate the experience of what it felt and sounded like while I was shooting. Soundsnap and Epidemic Sound are both great options for sound effects.
Then just export the movie to your desktop and you’re good to go!
See more of Mike's work on Instagram @mmeyers76.


