


Professional portrait photographer and Sony Artisan of Imagery Scott Robert Lim often leads workshops to educate photographers on how to properly light your subjects for portraiture. He’s already shared his magic formula for soft portrait lighting with us, and now he’s taking it a step further by diving into a three-light setup – main, fill and background. “As you become more comfortable with lighting, you should work your way to this three-light setup,” he explains. “You really need to know how to do it like the back of your hand because you can do so much with it. “It’s an amazing foundation that you can establish a career on. If you master this basic setup and learn to do it at your studio, or on-location like at someone’s office, then you can set yourself up for a nice career.” Keep reading as we connect with Lim to learn more about the three-light setup and how to do it.

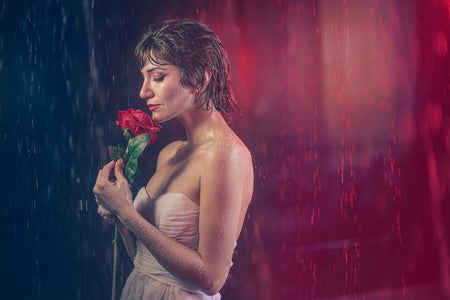
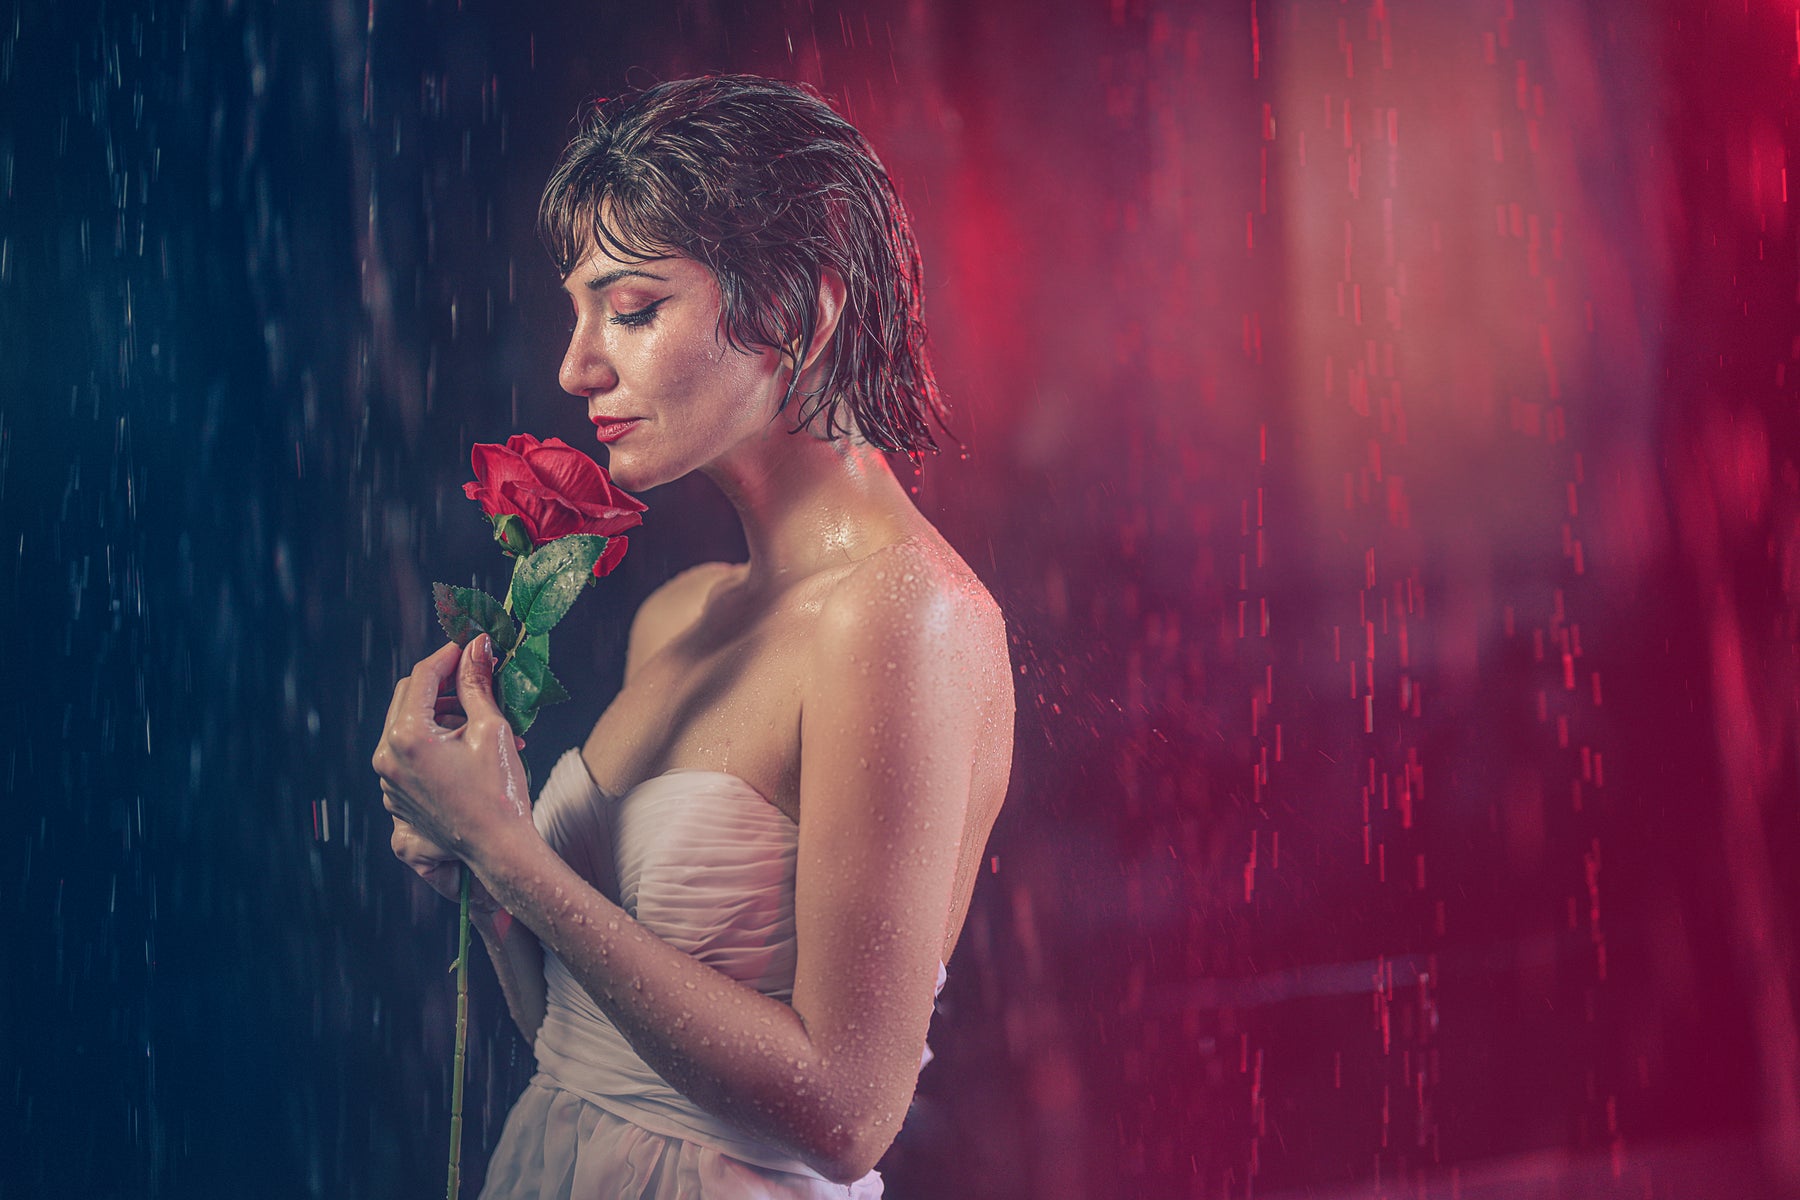
Photo by Scott Robert Lim. Sony Alpha 7 IV. Sony 50mm f/1.2 G Master. 1/200-sec., f/8, ISO 100
“This classic lighting setup is an amazing foundation that you can establish a career on.” – Portrait photographer, educator and Sony Artisan Scott Robert Lim
Eliminating Ambient Light
Lim says that what’s nice about this basic three-light setup is that its concept gives you an excellent foundation from which to build. “Especially when it comes to the studio since you have full control,” he says. “It's very easy to do because once you have your setup, then you can repeat it anywhere in the world at any time, and you can get results anytime, anywhere. That's the great thing about shooting in the studio. You can control the outcome and create very, very consistent results.”
He continues, “When you have very little or no ambient light to go against, you don’t need a very bright system at all. You could even use constant lights at this point. You can use a very low cost system because you don’t need a lot of light to overcome the ambient light in the room.”
Now of course you aren’t always going to shoot at a location where you can control the ambient lighting, so Lim has some tips for getting your gear properly set when trying to reproduce the look while shooting on location. “You can still produce the look anywhere on location, but the wildcard is that you have to worry about the other light in the room. Say if you’re taking portraits for a volleyball team and you’re shooting in a big gym and you can’t turn the gym lights off.”
When you run into a situation like this, Lim says that first you don’t want to have any kind of lighting set up. When you look at the back of your camera (Lim uses the Sony Alpha 1 and Sony Alpha 7 IV) or through your Viewfinder, it should be completely black. “You shouldn’t be able to see anything and that’s how you get your zero setting,” he explains. “This is where you need to start because you don’t want that ambient light to affect your subject. I recently did a big photo shoot at this dinner reception and there was a lot of light floating around that I couldn’t turn down. So when I’m in a situation like that, I set my camera to ISO 100 and f/11, a high f-stop. Shutter speed doesn't really matter, but you should keep it under 1/200-sec. That's great for your typical indoor location with a lot of lighting.”
He continues, “Now, when you're shooting at f/11 and ISO 100, your lights have to be fairly strong. You will probably need a 300-watt light. I would recommend having something like that so you have enough power to overcome the ambient lighting in the room.”

Photo by Scott Robert Lim.

BTS photo
Light #1 - The Main Light
Lim’s basic three-light setup includes a main light, rim light and background light. After you eliminate the ambient light, you want to set each of these lights up one at a time so you don’t confuse yourself. First up is the main light and Lim says when setting it up, you need to make sure it doesn’t travel past your subject and light up the background. Why? Because you want to independently control the light on your subject and the light on your background. “You want full control,” says Lim. If I'm photographing my subject and I have light on my subject and that light spills over to the background, I can no longer control the light on the background and get it the way I want it.”
This is where Lim’s magic formula for soft portrait lighting comes in. “Generally the distance from your main light to your subject is the same distance that the light is going to travel behind your subject,” he explains. So if the main light is three feet from your subject, it’s going to travel three feet behind your subject and then drastically fall off. That means I better pull my subject away from the background at least three feet. I usually like to stay six feet away just to make sure no light from my main light reaches that backdrop. If you double the distance just to be safe you can ensure the light won’t travel behind the subject and light up the background.”

Photo by Scott Robert Lim.
Lim generally positions this light off to the side, at 45 degrees from the subject. He fixes the positioning of it until he can see a short shadow, meaning a shadow on the cheek that is closest to the camera. The positioning of this light will change depending on where the nose is on your subject. “For example, if you're doing a straight on full profile shot and the subject’s nose is pointing straight toward the camera, you're going to have to pull that light over to the side more.”
He continues, “But let's say their nose is turned to the right while their eyes are looking at the camera, I always say it’s a good rule to have the nose positioned toward the light. Then you can look for that placement of the light to get a little bit of shadow on the cheek.”
Light #2 – The Fill Light
Now that you have your first light, the main light, to create some shadow on your subject, it’s time to introduce the second light: the fill light. The purpose of the fill light is to control how dark the shadow is on your subject from the main light. “You use this second light or reflector to control how dark you want that shadow,” Lim explains. “You might not want any shadow at all, so you can just fire the second light to eliminate that. Or you might like the shadow but want to just brighten it up a bit, so you can use the fill light to control that shadow.”

Photo by Scott Robert Lim. Sony Alpha 7R III. Sony 55mm f/1.8. 1/160-sec., f/4, ISO 640
Once you have your first two lights set up, Lim says your background should look completely black. “If the background is not black at this point, then guess what? Your main light or your secondary light is hitting the backdrop and lighting it up. It's affecting your backdrop. So you have to either move the light closer to your subject, or you have to pull your subject further away from your backdrop.”
#3 - The Background Light
With your first two lights set and your backdrop entirely black, you can now introduce your third light: the background light. “Take another light and light your backdrop according to what you want,” says Lim. “You should be shooting in manual with your ambient light setup – around 1/125-sec. or 1/160-sec., f/11 and ISO 100. If you're using a white backdrop and you don't want any shadows there, you want a pure white, you could set your flash up to light the backdrop with it.”
Lim says if you want to get sophisticated and color your backdrop with gels, you shouldn’t use a white background. “A white backdrop for color is terrible. It’s counterintuitive. You would think you could put any color on it but it actually reflects all of the colors. The best thing to use is a medium gray or even black if you want to make it dramatic. I personally love using dark backdrops because when I shine a colored light on that dark backdrop, that pigment really comes out.”

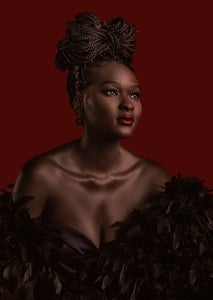
Photo by Scott Robert Lim. Sony Alpha 1. Sony 55mm f/1.8. 1/200-sec., f/2.8, ISO 100
Depending on how bright you want that color on your backdrop will determine how high you should set the power for your flash. The brighter you want your background, the higher you would want to turn up your flash. “With these three lights you have full control, which is what lighting for portraiture is all about. You can build off of this foundation to create beautiful, dramatic portraits anywhere.”
See more of Scott Robert Lim’s work on his Alpha Universe Profile and on Instagram @scottrobertlim.

