“Luck is what happens when preparation meets opportunity.” – Seneca
When darkness settles in for the night and the sky fills with stars, I always begin the ritual of switching my gear over to night mode. This typically involves reaching for my beloved Sony a7S. The α7S is a night sky monster, considered by just about everyone as the best camera for photographing the stars because of its ridiculous low light capabilities. I seriously feel like I’m cheating when using this camera. It’s that good. With the α7S, I can easily shoot long exposures at extremely high ISO levels with amazing results. With that said, here’s the story of how I got this shot of Delicate Arch in Arches National Park...
I began teaching photography workshops a few years ago and the American Southwest quickly became one of my favorite locations to take students. Moab (in northeast Utah) is an incredible location for landscapes that houses two national parks, a state park and countless other locations that you can just hike or walk up to. During a workshop to this area back in June of 2015, we made the hike out to Delicate Arch. This arch is arguably the most iconic location in all of Utah, and because of that there can be upwards of 100-200 other photographers and tourists there to see it at sunset. This isn’t a terrible thing really, you just embrace the chaos and work around it. The magic though, at least in the summer, begins after the sun sets and the light fades away. As soon as that sun hits the horizon, 99% of the crowd leaves to make the 1.7 mile hike back to their cars.
If you’ve never been to Delicate Arch, here’s a quick rundown: The arch sits atop a very unique “bowl” formation. In June, the Milky Way will be in perfect position just a couple hours after sunset. To get the Milky Way inside the arch, you’ll need to be down inside the bowl. To get the Milky Way above the arch, stay up on top, on the rim of the bowl. This evening, I sent the workshop group (along with my co-instructor Mike) down into the bowl while I stayed up top to light paint the arch for them. The idea here is that each student will start a 30 second exposure, and during those 30 seconds I'll “paint" the arch with a flashlight (or in this case, my headlamp).
I knew I wouldn’t have time to run back and forth trying to get my own shots up there, it just wasn’t in the cards. That’s fine though, because I’m not there to get my own shots, I’m there for the students. So in an effort to at least come out with something, I decided to set my α7S up on my tripod and do a timelapse. This is super easy because I use the Sony PlayMemories Time-lapse app which I have downloaded into my camera. I set up my composition, started the time-lapse, left the camera behind and hoped for the best.
A Quick Primer On Milky Way Photography Settings
If you’ve never photographed the night sky, I highly encourage you to make plans for doing it this coming summer. It’s one of the most rewarding subjects I’ve ever photographed because it’s such a fun challenge and so different in terms of settings and techniques.
To get a great shot of the Milky Way, you need to start thinking in terms of allowing the most light possible into the camera’s sensor. It’s going to be very dark outside, after all. The three tools to get enough actual exposure are your camera’s aperture, shutter speed and ISO. For aperture, you want it to be wide open. If you can get f/4, f/2.8 or wider, you’re set. It can be done with smaller apertures if necessary, but bigger aperture is usually better. For shutter speed, you typically want around 20-30 seconds. At 30 seconds, you will most likely see a small amount of movement in the stars but this doesn’t bother me. If it does bother you, try 20 seconds instead but just remember that you won’t get as many stars at 20, because you won’t be gathering as much light. For ISO, you want to start at ISO 1600. That said, my Sony α7S can go much, much higher so I typically shoot around ISO 4000-12000. The advantage of shooting at extremely high ISO levels is that you will end up with a brighter RAW file. The less you have to push the pixels in post, the cleaner the final image will be in terms of noise. With a super-dark image, you’ll have to really push the shadow and black sliders up which will cause the pixels to degrade rather quickly. With a brighter image, very little will need to be done.
If you’d like to go deeper, I have an entire ebook dedicated to photographing the sky called Sunset & Beyond: A Photographer’s Guide to Sunset, Twilight and the Night Sky. Use coupon code “sonyalpha” at checkout for 30% off!
The Result of Preparation, Opportunity and Crossed Fingers
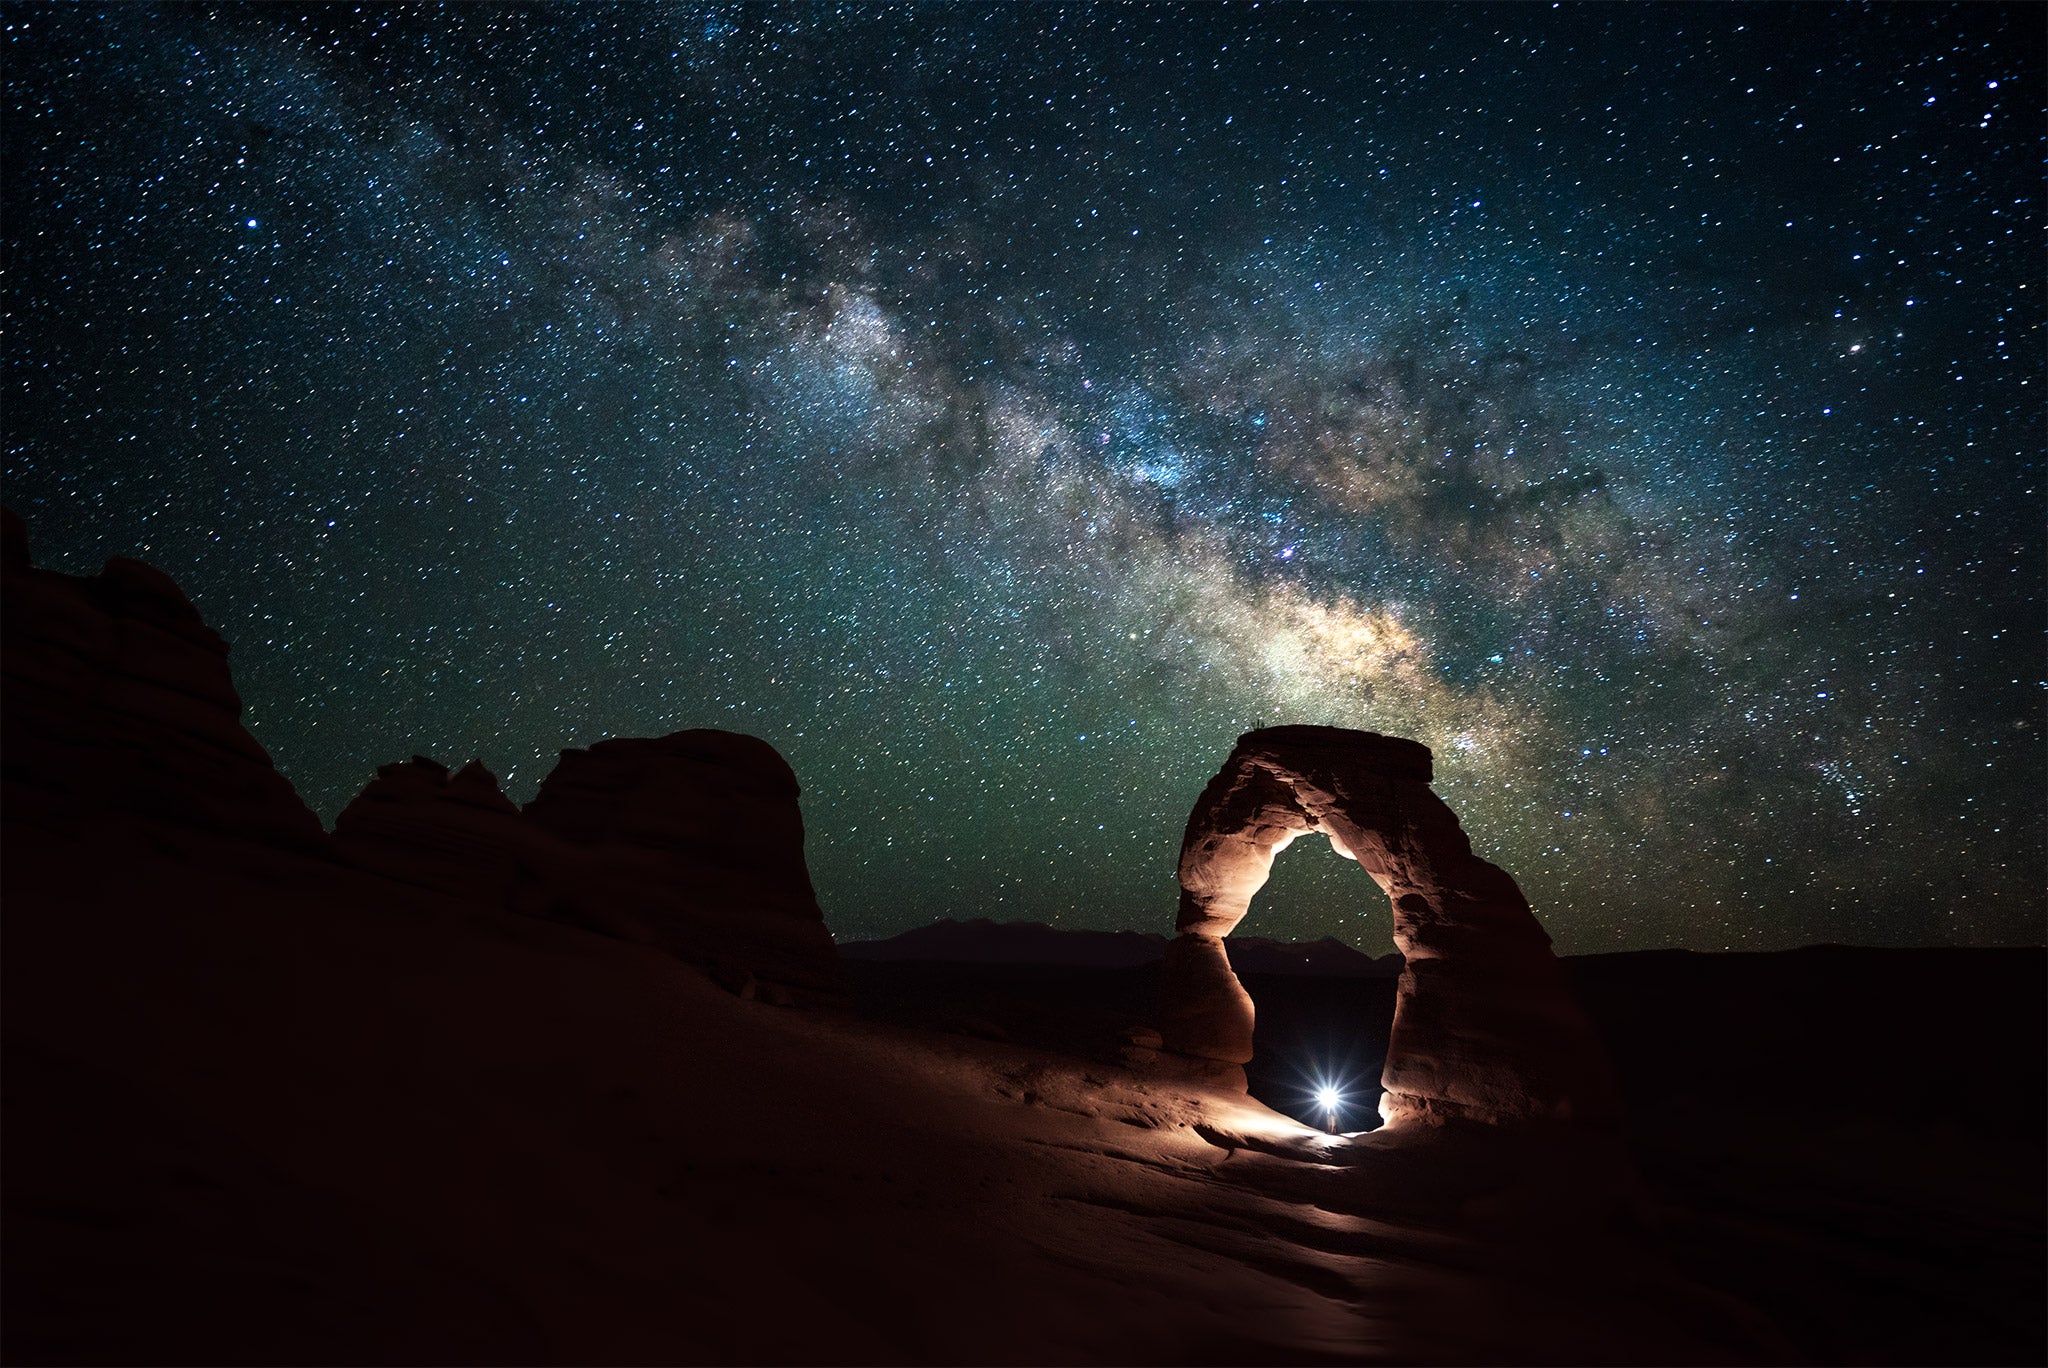
Like I said before; all I did for the photo shown here was set my α7S on my tripod, switch it to time-lapse mode and walk away. My settings were f/4, ISO 4000 and 30 seconds. The camera would take a 30 second exposure, wait 1 second and then take another, until I stopped it. When I walked over to light paint the arch for the group below, I had no idea when my camera was taking a shot or at what stage of the exposure it was in. I just had to hope for the best. Sure enough, about 70-80% of the shots were totally black except for the Milky Way. Most of the time I was just sitting beneath the arch, lights off, waiting for the group to get their settings ready to take a shot. Then Mike would use his walkie-talkie to countdown the shot and tell me when to start painting the arch.
At some point during the night, I started painting the arch with my headlamp by standing beneath the arch and looking up. This made me a silhouette beneath the arch with the Milky Way behind me. For a few of those shots I ended up looking toward my own camera (not on purpose) and for those shots, it caused the starburst effect that you in the shot above.
When I scrolled through the shots after we were done and came across this shot, I was ecstatic to say the least! A shot that I didn’t even plan for ended up being my all time favorite shot from Delicate Arch that I’ve taken.
For a full walkthrough of how I post processed this photo that goes over blending a couple layers together and my techniques for making the Milky Way pop, I have a video tutorial titled Light Painting Delicate Arch - Start to Finish. Just use that same coupon code “sonyalpha” for the same discount!

