Let’s start with the given that lightning is dangerous, but if “safety first” is a criterion for intelligence, photographers are stupid. It’s impossible to be 100 percent safe photographing lightning, but the more you understand lightning, how to avoid it and maximize your safety in its midst, the greater your odds of surviving to take more pictures. And not only does a healthy respect for lightning’s fickle power make you safer, understanding lightning will also help you anticipate and photograph lightning.
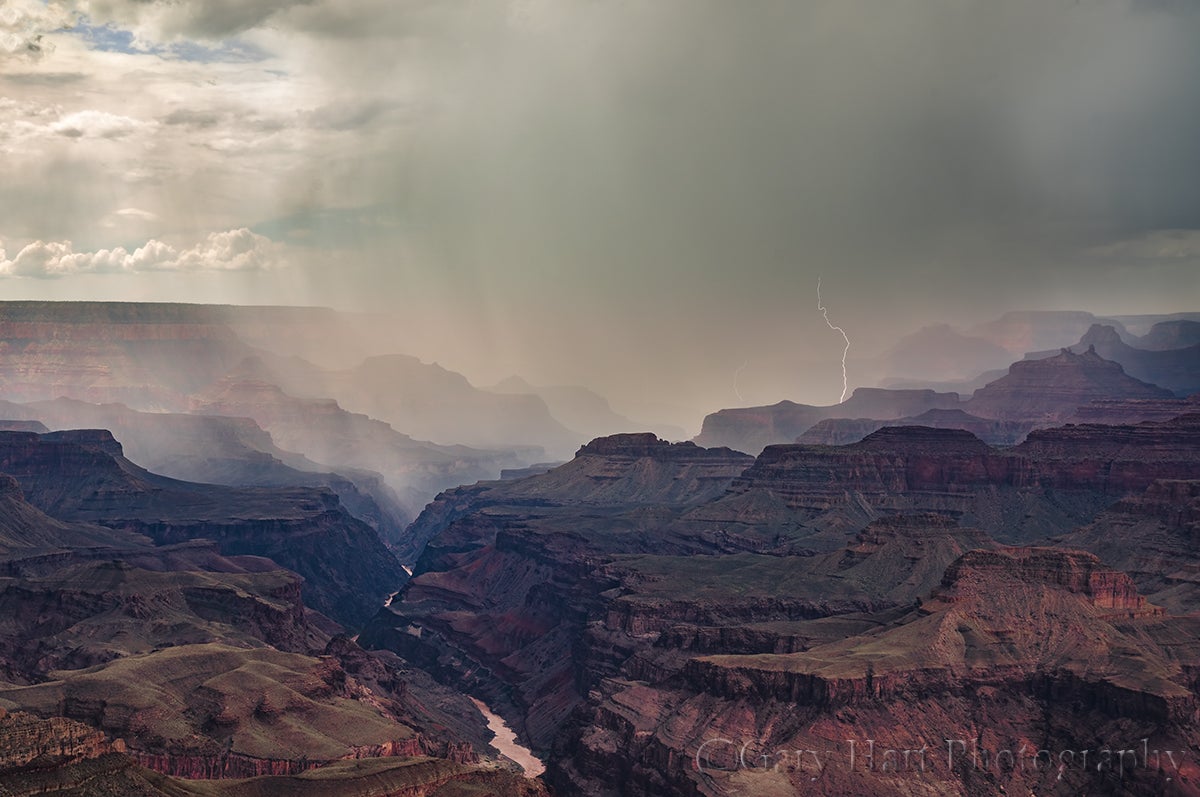
Sony α7R II, Sony FE 24-70mm f/4 lens, 1/13-sec., f/11, ISO 50
THE SHOCKING TRUTH ABOUT LIGHTNING
Lightning is an electrostatic discharge that equalizes the negative/positive polarization between two objects (when you get shocked touching a doorknob, you’ve been struck by lightning). The convective air motion (convection is up/down circular flow caused when warm, less-dense air rises, cools and becomes more dense, and finally falls and repeats the process; convection is also what causes bubbling in boiling water) in a thunderstorm transports positively charged molecules upward and negatively charged molecules downward. Because opposite charges attract each other, the extreme polarization (positive charge at the top of the cloud, negative charge near the ground) is quickly (and violently) equalized: Lightning.
With lightning comes thunder, the sound of air expanding rapidly (exploding) when heated by a 50,000 degree lightning bolt. The visual component of the lightning—the flash or bolt that you see—travels to you at the speed of light, over 186,000 miles per second (virtually instantaneous regardless of distance). But lightning’s aural component, thunder, only travels at the speed of sound (a little more than 750 miles per hour—a million times slower than light).
Knowing that the thunder occurred simultaneous with the lightning flash, and that they travel at different speeds, we can infer that the farther we are from the lightning, the greater the time elapsed between the arrival of the lightning and thunder. And since we know how fast both travel, we can compute the approximate distance the lightning struck from our location
At 750 miles per hour, thunder will travel about a mile in about five seconds, so dividing by five the number of seconds between the lightning’s flash and the thunder’s crash give you the lightning’s distance in miles (divide the interval by three for the distance in kilometers). If five seconds pass between the lightning and the thunder, the lightning struck about one mile away; fifteen seconds elapsed means the lightning struck about three miles away.
LIGHTNING SAFETY
The 30 people killed by lightning in the United States each year had one thing in common: each didn’t believe he or she would be struck by lightning when they started whatever it was they were doing when they were struck. The surest way to be safe in an electrical storm is to be in a fully enclosed structure or metal vehicle, away from open windows, plumbing, wiring, and electronic devices (ideally, 100 miles away). But since that would preclude our ability to photograph lightning, we need to find a middle ground.
While there’s no completely safe way to photograph lightning, there are steps to improve your odds of surviving to enjoy the fruits of your labor. This is where more knowledge comes to the rescue. Most lightning strikes within a six mile radius of the previous strike. So, if less than thirty seconds elapses between the flash and bang, you’re too close. And since “most” doesn’t mean “all,” it’s even better to allow a little margin for error. Thunder isn’t usually audible beyond ten miles, so if you can hear the thunder, it’s safe to assume that you’re within the range of the next strike.
But if you do find yourself caught outside in an electrical storm, with no available shelter, try to do as many of the following steps
Avoid water
Avoid high ground
Avoid exposed areas
Avoid metal or electronic objects
Avoid tall objects such as trees and open structures (and tripods)
Stay at least fifteen feet from other people
If you’re surrounded by trees, position yourself near shorter trees, as far from trunks as possible
Do not lie down
Crouch with your feet together and your hands covering your ears
A lightning strike is often preceded by static electricity that makes your hair stand on end and an ozone smell (best described as the smell of electricity—I think of bumper cars at the amusement park or the smell of my electric slot cars when I was a kid)—if your hair starts to stand up and/or you notice a distinct odor that could be ozone, follow as many of the above steps as you can, as quickly as possible (often you’ll only have time to crouch).
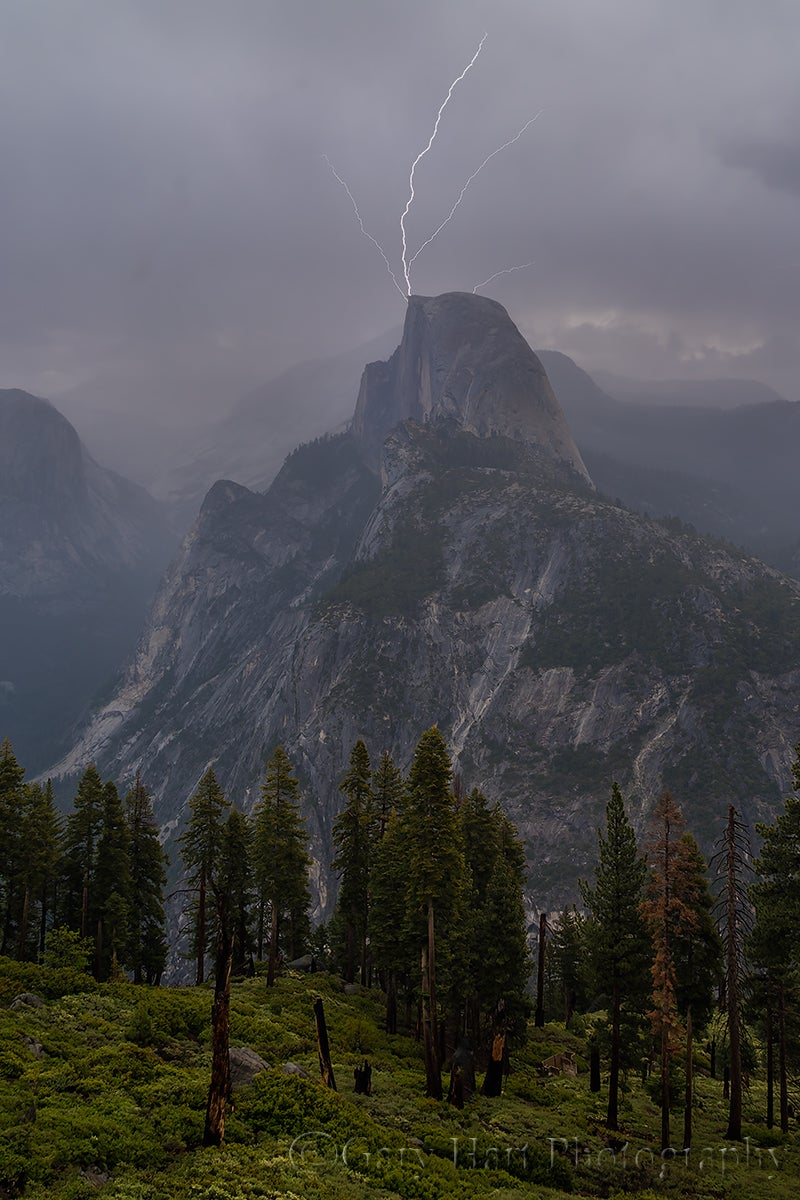
Sony α7S, Sony FE 24-70mm f/4 lens, 0.4-sec., f/11, ISO 50
PHOTOGRAPH LIGHTNING WITH A LIGHTNING SENSOR
Armed with an understanding of lightning and the steps to improve your safety, you’re ready to think about photographing it. Until recently, most lightning photography was either at night, when a long exposure will capture as many strokes that occur while the shutter’s open, or the product of pure luck—the shutter just happened to be open when the lightning fired.
Daylight lightning
Daylight lightning is difficult because if you’re relying on your reaction time, the strike will almost certainly come and go before you can react (people who claim success with this technique have usually captured a secondary or tertiary bolt). But now we have lightning sensors, which can detect and respond much faster than any human can react.
A lightning sensor attaches to your camera’s hot shoe and connects via a special cable to the camera’s remote-release port. When engaged, it fires the shutter immediately upon detecting lightning.
There are many lightning sensors from which to choose. I went with the Lightning Trigger from Stepping Stone Products.
A good lightning sensor should detect lightning at least 20 miles away. And you can count on a lot of extra clicks—for every click with lightning in my camera’s field of view, I get many clicks caused by lightning not visible to me, or outside my camera’s field of view (better too sensitive than not sensitive enough). But when lightning does fire somewhere in my composition, I estimate that my Lightning Trigger clicked the shutter at least 95 percent of the time.
But even firing in response to a visible bolt doesn’t ensure a successful image—sometimes the bolts are so short that the camera can’t click fast enough. This is a limitation of your camera, not your sensor—some cameras are significantly faster than others (more on this later). In general, the more violent the storm, the greater the likelihood of bolts with long duration and/or multiple strokes that significantly increase your odds.
Exposure settings
The daylight lightning shutter speed sweet spot is between 1/15 and 1/4 second—faster shutter speeds risk completing the exposure before some or all of the secondary strokes fire; slower shutter speeds will wash out the lightning (which is why you can’t just put on a neutral density filter and dial in a long exposure to capture daylight lightning).
Achieving daylight shutter speeds around 1/8 second isn’t always easy. I shoot in Manual mode, use a polarizer, often at ISO 50 and f/16 or smaller. Of course exposure will vary with the amount of light, and you may not need to go to such extremes if you’re shooting into an extremely dark sky. You can also use a neutral density filter to slow the shutter speed, but take care not to slow the shutter speed beyond 1/4 second and risk washing out the lightning entirely. And if you’re in manual mode (as I am), be aware of the rapidly changing light in a thunderstorm—an exposure that worked five minutes ago might be all wrong now.
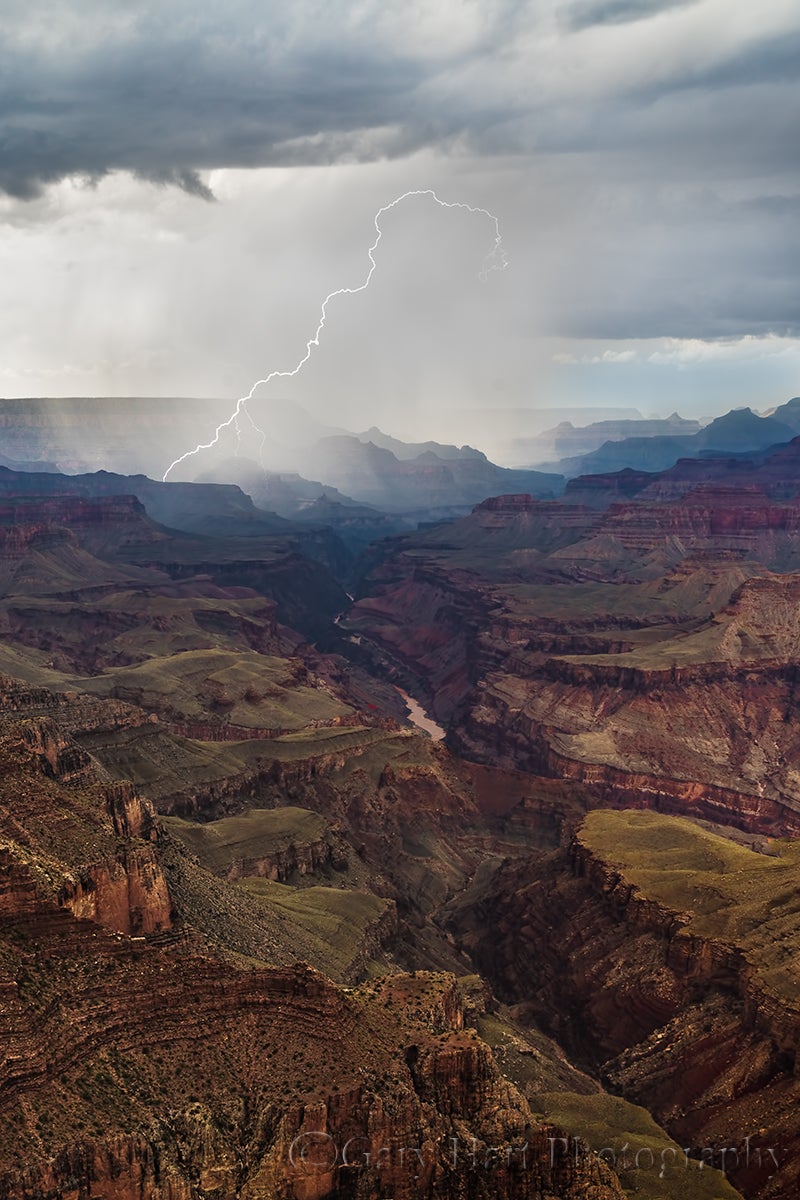
Sony α7R II, Sony FE 24-70mm f/4 lens, 1/13-sec., f/11, ISO 50
Shutter lag
Because shutter lag (the time elapsed between the press of the shutter button and the shutter opening) is death to lightning photography, you’ll want a camera with as little as possible shutter lag. Too much delay, and the bolt will be gone before the camera clicks. (Using shutter speeds in the 1/15 to 1/4 second range, there’s no concern that your shutter will be too fast.)
Shutter lag is one area where the Sony mirrorless cameras shine—after years of shooting Canon, and working with Nikon and other camera brands in my workshops, I’m pretty confident that the Sony mirrorless bodies are the fastest, often by a large amount.
Ideally, you’ll want a camera with shutter lag faster than 60 milliseconds. Somewhat slower shutter lag won’t shut you out completely, but the slower your camera, the lower your success rate will be.
The best resource I’ve found for camera shutter lag times is www.imaging-resource.com. In the Camera Review section, look for the Pre-focused time on the Performance tab (though I can’t guarantee that any sensor but the Lightning Trigger is able to pre-focus).
Regardless of the camera you’re using, there are a couple of things you should do to do to minimize shutter lag:
Turn off autofocus. Even with back-button focus (focus not tied to the shutter button), on some cameras autofocus will initiate a brief communication between the lens and camera that will slightly delay response. If you must autofocus, go ahead and do it each time you recompose, then turn autofocus off as soon as you’re focused.
Though the Lightning Trigger documentation suggests Aperture Priority, I recommend manual exposure mode to eliminate any metering when the shutter trips (again, this could vary with the camera).
Turn off any pre-click detection, such as face-recognition. (Noise reduction settings shouldn’t matter, since that’s a post-click function.)
It may very well be that your camera isn’t slowed with these features enabled, but since it’s virtually impossible to get camera manufacturers to commit to a camera’s performance at this level (and despite the wealth of self-proclaimed experts who claim to know), I think it’s wise to minimize your chance for problems by simplifying your camera’s capture process as much as possible.
OTHER EQUIPMENT
Other essential or recommended equipment*:
A sturdy tripod (and despite what you might have heard, you’re no safer with carbon fiber than you are with aluminum)
Rain gear that will keep you dry from head-to-toe
An umbrella for shielding your camera and lightning sensor (many sensors, including the Lightning Trigger, aren’t waterproof) while composing and shooting in the rain
Lens hoods to reduce the raindrops that might mar the front element of your lenses
Neutral density filter and/or polarizer to slow shutter speed
A garbage bag (my choice) or rainproof camera jacket (haven’t found one I like) to protect your camera
Extra lightning sensor batteries (better safe than sorry)
An infrared remote to make sure the sensor is functioning (I sometimes borrow the remote from the hotel)
A towel (also borrowed from the hotel)
While I don’t recommend risking staying out when the thunderstorm is on top of you, there will be times when the rain sneaks up on you (I’ve had to leave my camera out in a downpour when a too-close bolt chased me to shelter).
GETTING THE SHOT
My goal is to photograph lightning that’s happening somewhere else. In other words, if I’m in the storm, I’m too close. For example, places like the rim of the Grand Canyon and Yosemite offer vantage points with expansive views that allow me to photograph thunderstorms from many miles away (which of course still doesn’t absolutely guarantee safety).
Do your homework
Before attempting a lightning shoot, research potential vantage points and familiarize yourself with the weather patterns in the area you’d like to photograph. It’s possible that most storms in your area will tend to form at around the same time of day, and move in the same direction—this knowledge will definitely improve your odds.
What to look for
The greater the vertical distance raindrops rise in the clouds, the greater the potential for the extreme polarization that’s conducive to electrical activity. So look for towering thunderheads—the higher the better. I also look for gray curtains of rain hanging beneath dark clouds, which is usually an indication of where the cell is most active.
Composing to maximize your chances
The wider your composition, the greater your odds of capturing lightning somewhere in your frame, but the smaller the lightning will appear. I also try to anticipate the highest point from which the lightning might originate and take care to include enough cloud to get all of the stroke.
My general approach is to identify the most likely lightning source (rain curtain) and find the best composition that includes it. I tend to start wider to ensure success, then tighten my composition once I’m fairly confident I captured something. If you’re not sure, stay loose with your composition and crop later. Don’t forget to try some vertical compositions.
Be aware that electrical storms can move quite quickly, so monitor the storm you're photographing, and the sky around you in all directions, closely and continuously. Not only will this enable you to adjust your composition to account for a cell’s movement, it can save your life when an active cell threatens your location.

