Cinemagraphs are cool. Really cool. If you’re not familiar with the term, a cinemagraph is essentially a hybrid between a still image and a motion clip. It’s a photo that has a moving element in it. When done well, cinemagraphs have the power to grab the viewer’s attention and hold it, drawing them into the scene. In this article, we’ll show you how to do it well.
The process of making a cinemagraph is to choose a video frame as a still image and place it on a layer above the video. Then you mask out the areas where you want motion to show through. For our example, we’re using 4K video shot with a Sony α6300. It’s important to use 4K to get the best results.
Cameras & Camera Settings
Cinemagraphs are short looping video clips with subtle or partial motion that have more in common with still photos than videos. In the past, these videos were viewed as motion gifs with a limited color palate and small file size. Social networks have embraced video files and movies now autoplay and loop by default. This allows for the creation and display of full 4K cinemagraphs using a Sony mirrorless camera like the α7 series or the α6300.
When creating a Cinemagraph, set it up the same way you would a still photo. Because the goal is to isolate and repeat motion, a tripod is important. It doesn’t have to be a specialty video tripod because you are locking off for Cinemagraphs and not moving the camera. I use a Benro Travel Angel carbon fiber tripod with a Really Right Stuff BH-30 ballhead for most of my Cinemagraphs. If I need a heavier duty tripod I use a Benro Series 2 Tripod and S4 video head.
Light the shot just like you would a still photo with continuous lights or using natural light. Photographers know how to light still images and a cinemagraph is just a still that moves. Because I’ve been doing hybrid photography since 2008, I left strobes behind and moved to continuous lights years ago. I can’t remember the last time I used strobe lighting and I don’t even own an on-camera flash. I’ve used Profoto and K5600 HMIs which both accept Profoto accessories like the fantastic beauty dish. I mostly use Fiilex LED lights and a Stellar compact fluorescent ring light. Fiilex lights are dimmable and color tunable between tungsten and daylight, so I can mix and match natural and continuous in almost any lighting situation.
Think of the video file like a JPEG for editing/color correcting purposes. Shoot as close to final look as possible. Then tweak it like you would a JPEG in Photoshop. Choose the white balance and picture profile in camera. I often do a custom WB in camera for the video.
Sony sensors are amazing in very little light so it’s easy to shoot at ISO’s of 640, 800, 1200 and higher. Like my friend and Zeiss Ambassador Gregg Waterman says about shooting high ISO with Sony: “ISO is now just a number that hardly affects image quality”.
4K captures more detail. Even if your output is going to be 1920 x 1080, shooting 4K gives you more to work with.
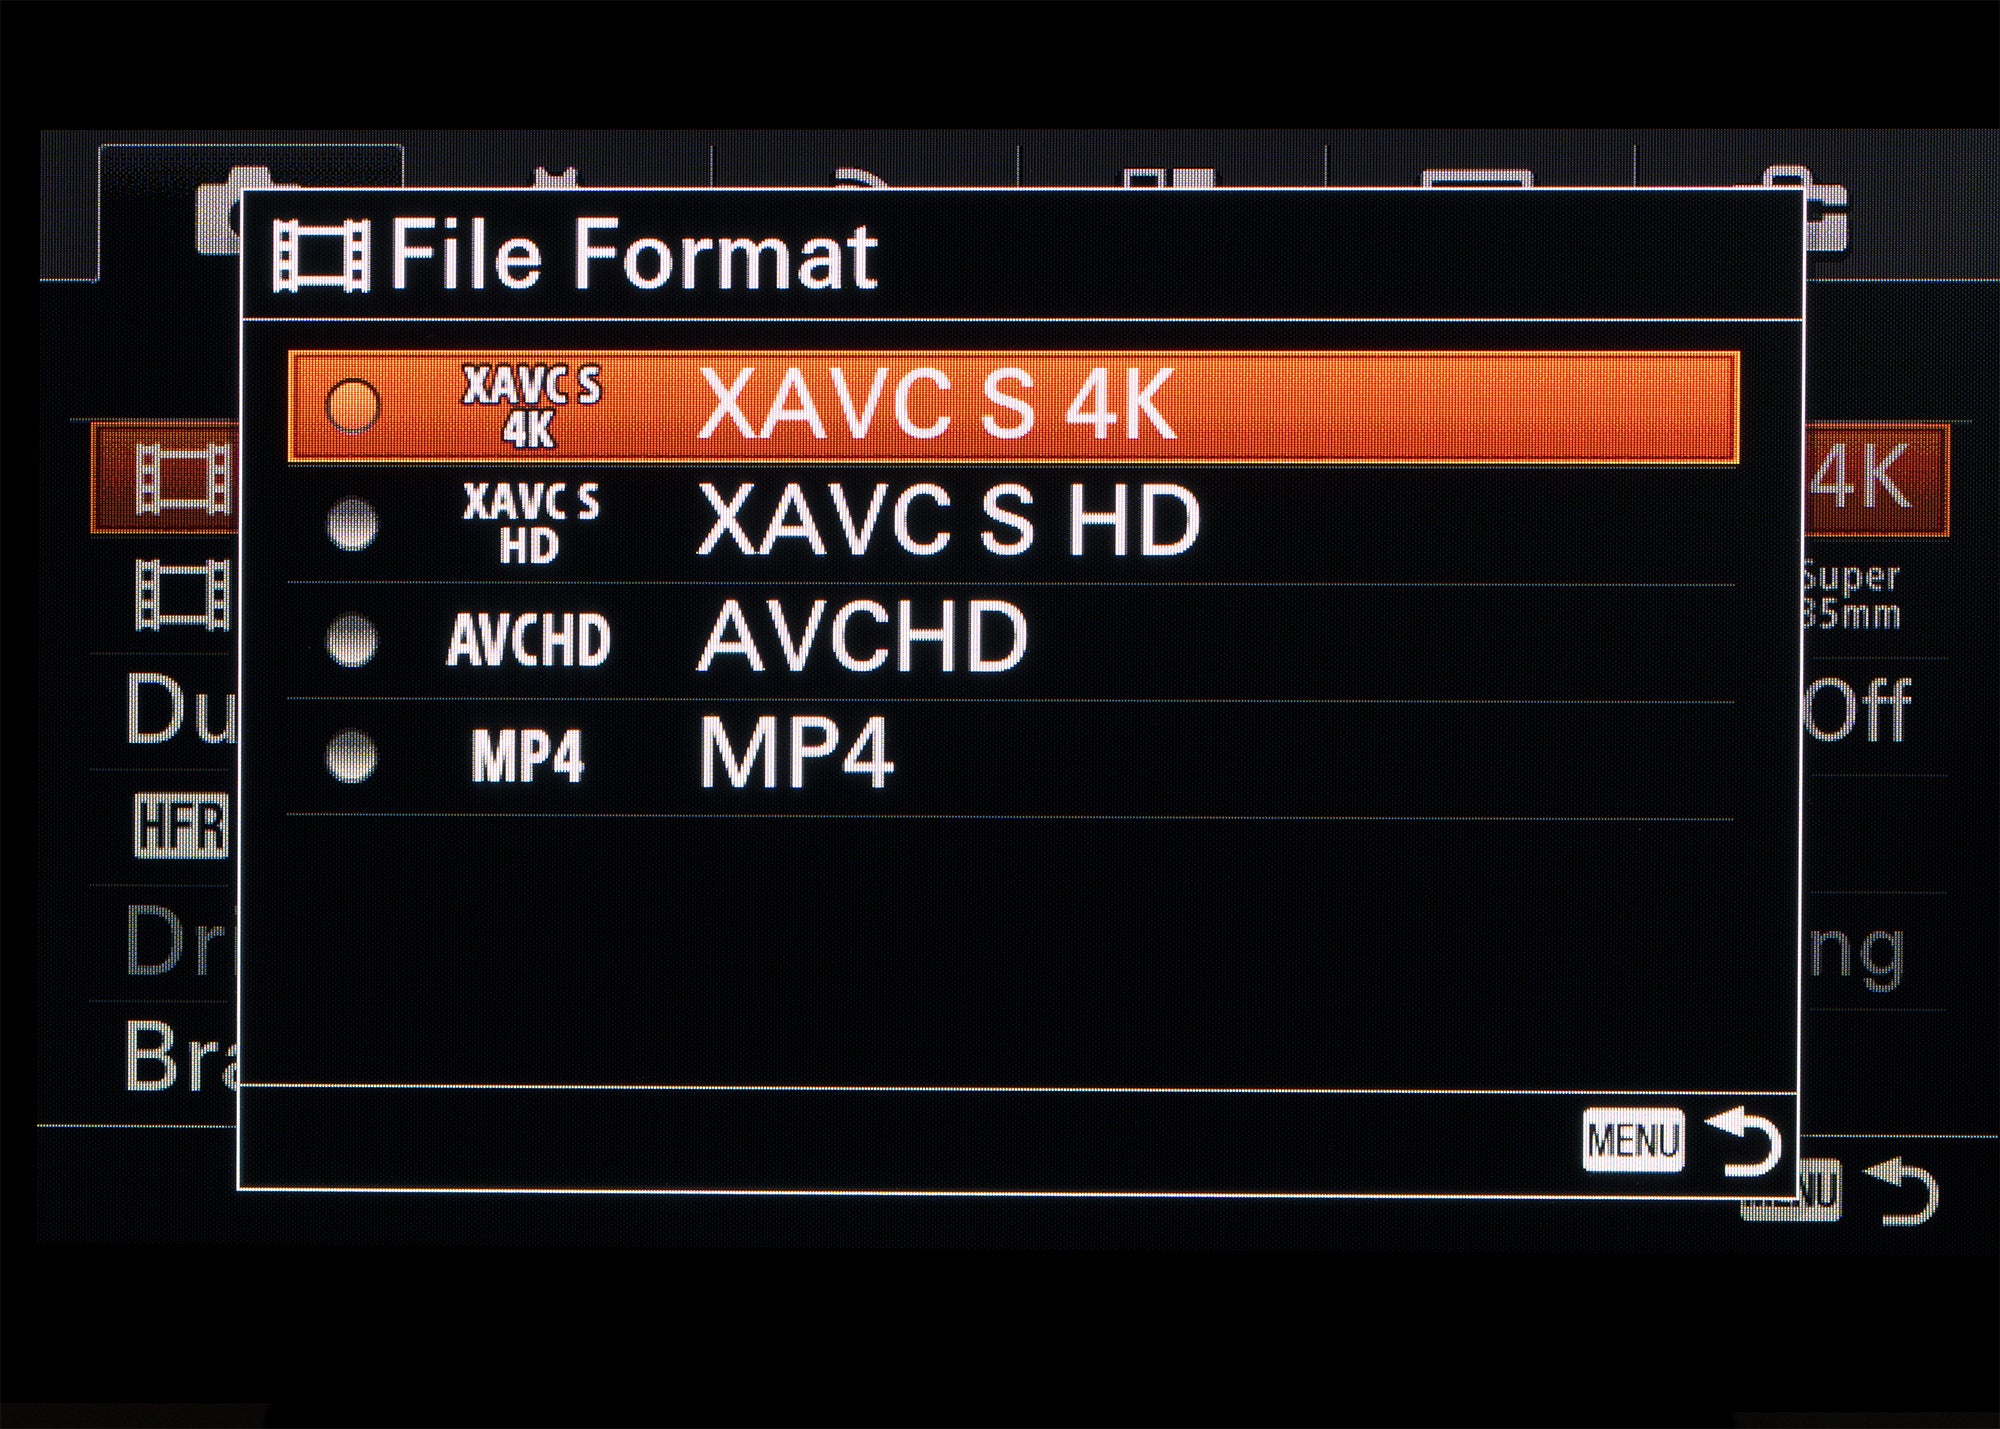
For professional video results, you will want to shoot in manual mode. To do so, go to the “Camera Menu” and select “Manual Exposure” from the “Movie/HFR” setting.

Formula for Film like Video Capture
Shutter Speed = 2x Frame Rate
24 x 2 = 48 or 1/48th second or closest setting of 1/50th
Shutter speed is not considered an exposure tool for video, it’s an effect. Exposure is controlled with aperture, ISO, and by using neutral density filters. If you are outdoors shooting wide open (f/1.4) with a slow shutter speed (1/50th of a second), you’ll probably need a neutral density filter to help darken the scene and control exposure.
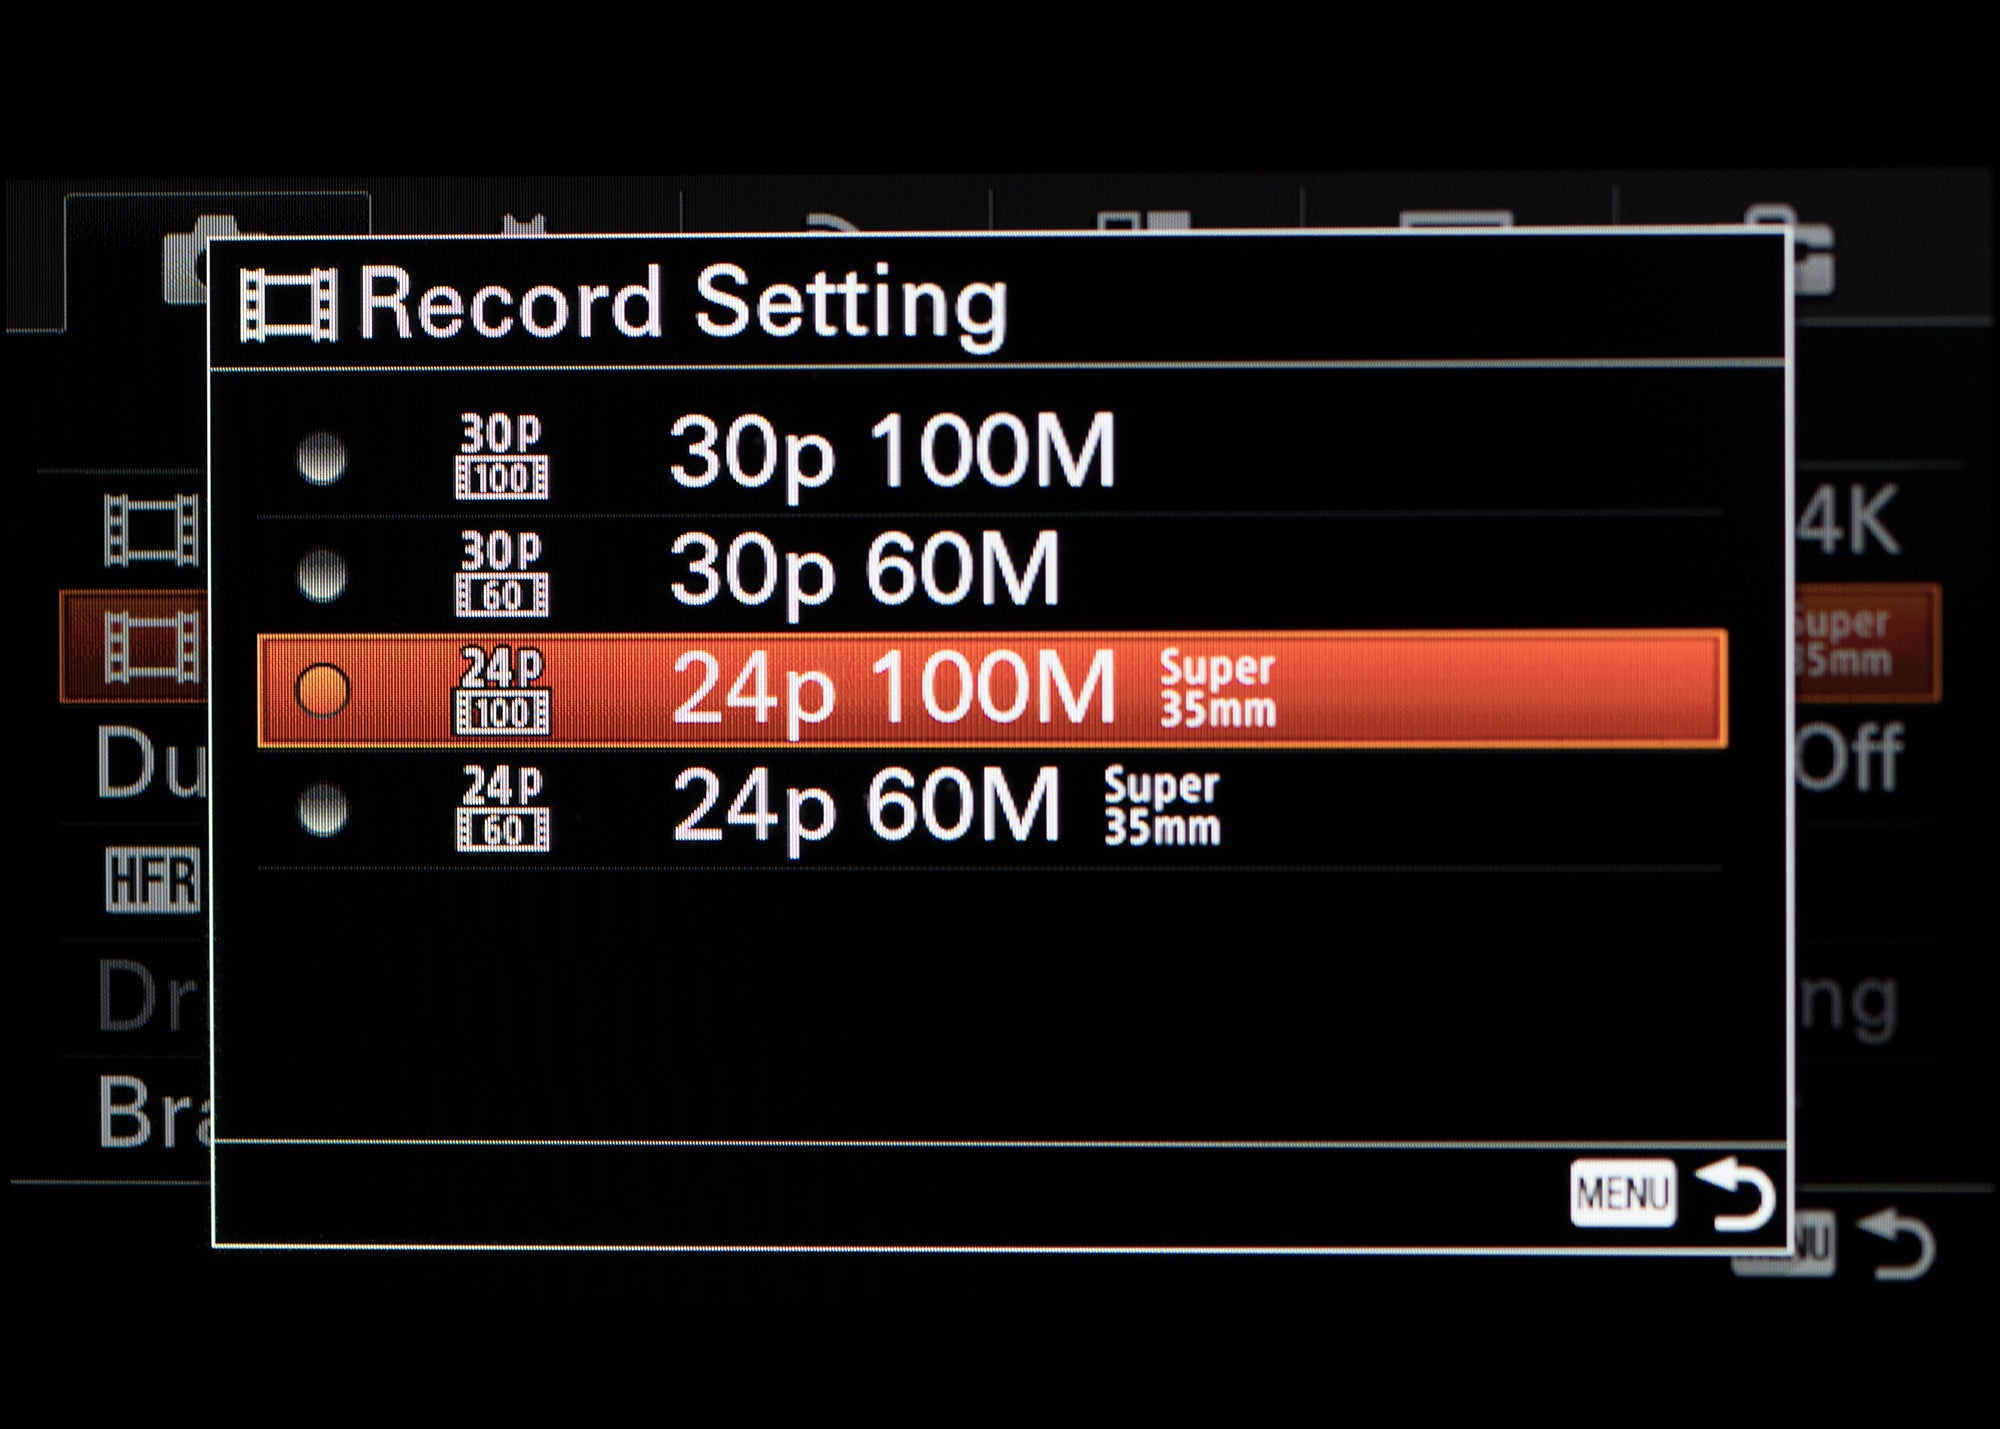
The first number that ends in a P is the frames per second. The second number is the compression rate. Higher numbers mean better quality with less compression. Sony α6300 Super35 is optimal for 4K capture. It has a crop factor of 1.5x compared to full frame sensor. I shoot in crop sensor Super 35 mode even when using a full frame α7R II.
Still cameras that shoot video are often limited to an 8 bit compressed file . This is why you want to get as close as possible to a final look in-camera. To take it to the next level you can use an external recorder like the Atoms Ninja Flame which captures uncompressed 4K video using one of the high dynamic range S-log gamma presets.
When shooting video, I use the Sony RM-VPR1 wired remote to minimize camera movement when triggering the recording button.
There’s no need to manually pull focus in most of the video clips I shoot. The autofocus is so good on Sony cameras that I use it for stills as well as video.
Cinemagraphs can be more complicated than a still but less complex than a narrative video, so plan your motion for better results. You don’t have to have a storyboard, just a solid idea of what you want to do and how to execute it. You only need 4-5 seconds of video to creating a looping video for online viewing. Direct the scene with some kind of action or looping in mind and tell your subject to move slowly and hold poses for a few beats. One big difference between shooting stills and video is that there’s no shutter click, which can be unnerving for the person posing.
Once I get started, I often fire off a JPEG and look at the histogram. If the JPEG looks good and nothing is blown out, then you are in the ballpark exposure-wise. As you get more advanced, you might want to use the Zebra stripes menu option to make sure there are no hot spots on important areas of your video. Since, video doesn’t save EXIF data, an additional benefit of capturing a JPEG is that it preserves camera data from the scene.
Once you shoot your video, it’s time to edit. I use Adobe Premiere, Photoshop, After Effects and the desktop version of Cinemagraph Pro from Flixel. For simpler cinemagraphs, it’s possible to use Adobe Photoshop CC for the entire process. Here’s how: (Note, in this article, we're going through all of the steps for creating a cinemagraph in Photoshop. Here's a video tutorial on the process followed by the steps written out below:
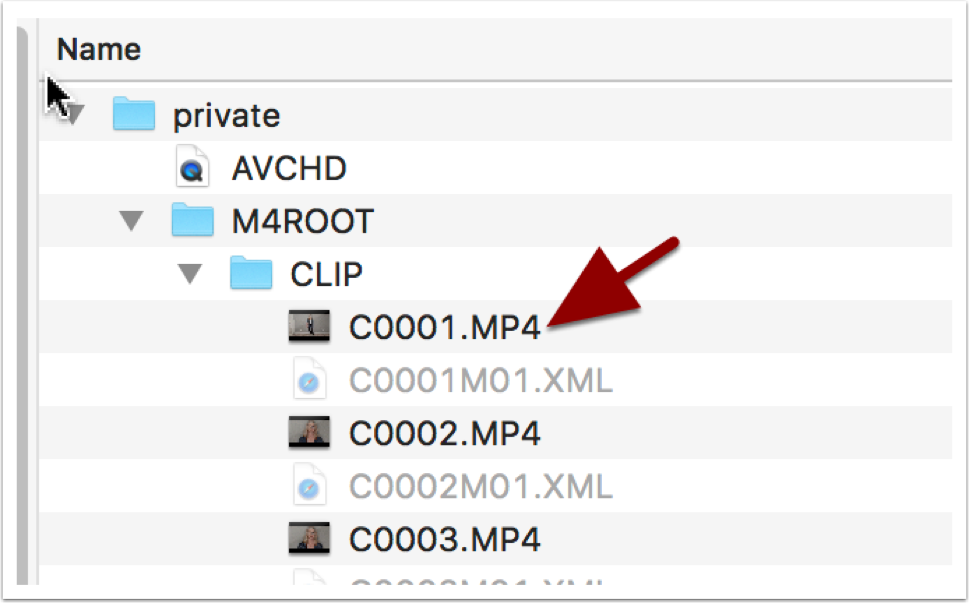
Getting Started: Copy MP4 Movie Files From SD Card to Computer
Once you have the footage and you’re ready to begin, the first step is to get your video files off of your card media. Finding the 4K movie files can be a little confusing until you understand the folder structure on the card media CARD/private/M4ROOT/CLIP
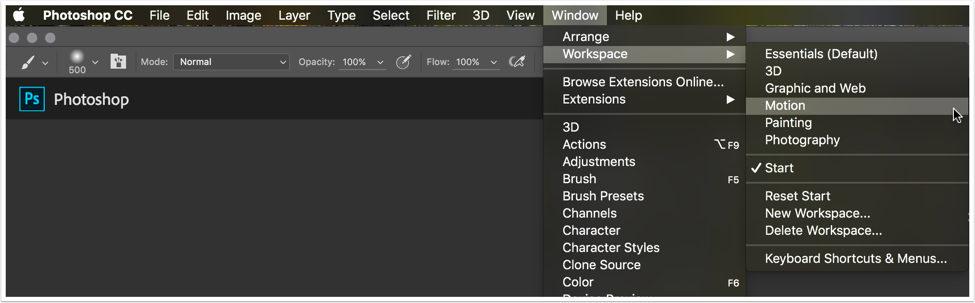
Launch Photoshop
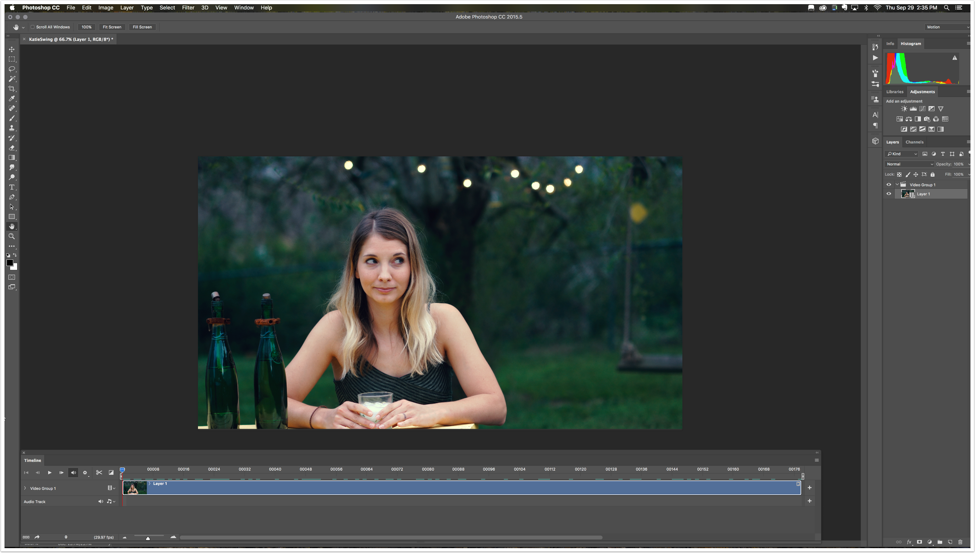
Launch Photoshop and go to the top menu and select Window/Workspace/Motion.
Open Video
Add your video clip to the timeline via File/Open or by dragging your clip onto the Photoshop Icon.
Resize Video Preview
If you can't see all of the 4K video clip use Command/- to resize the on-screen preview just like you would for a still image
Optimize Playback Settings
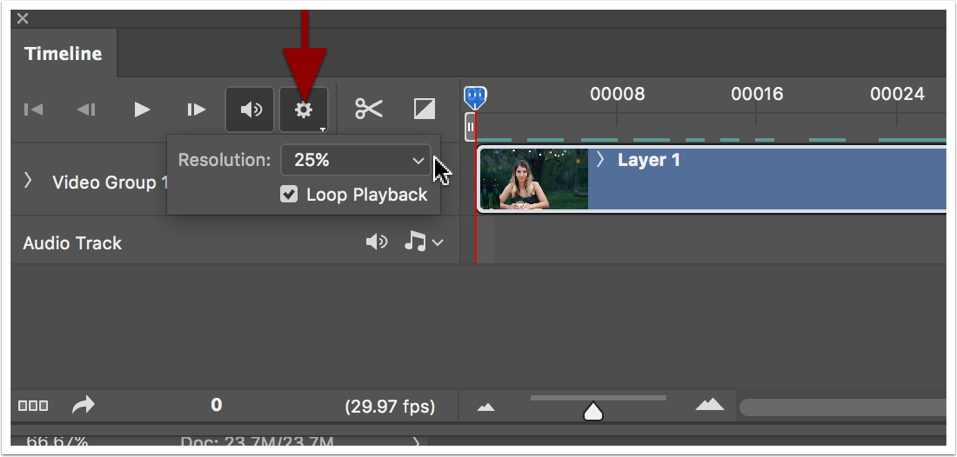
Turn looping on and then lower playback resolution using the gear icon. I work on the latest iMac set up for video editing but Photoshop still struggles to play back video in full resolution. Lowering the setting to 25% will allow smother playback in the preview window. This frees up processing power during playback but when stopped, the frozen video frame will display at full 4K resolution. It only lowers the quality of video while it's playing in the preview window and will not affect the exported video quality.
Play Your Video Clip In The Preview Window
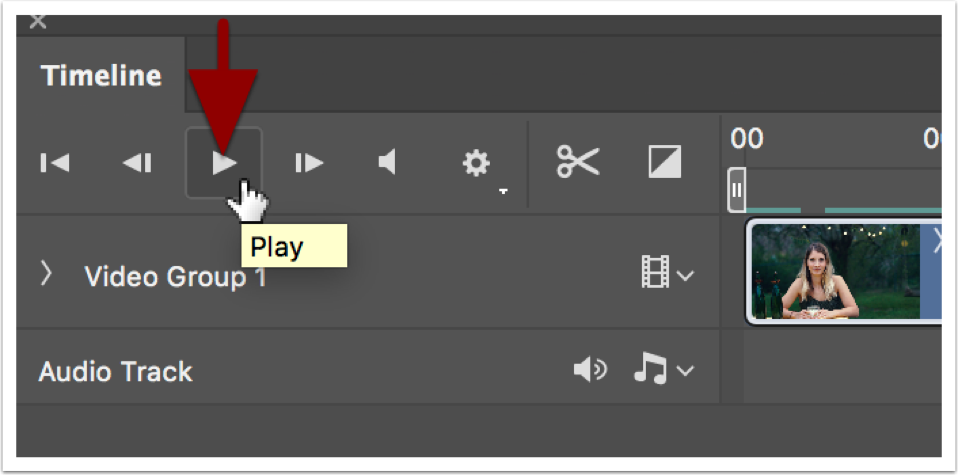
Hit the Play button in the Timeline panel to preview your video for editing.
Trim Your Video For Looping
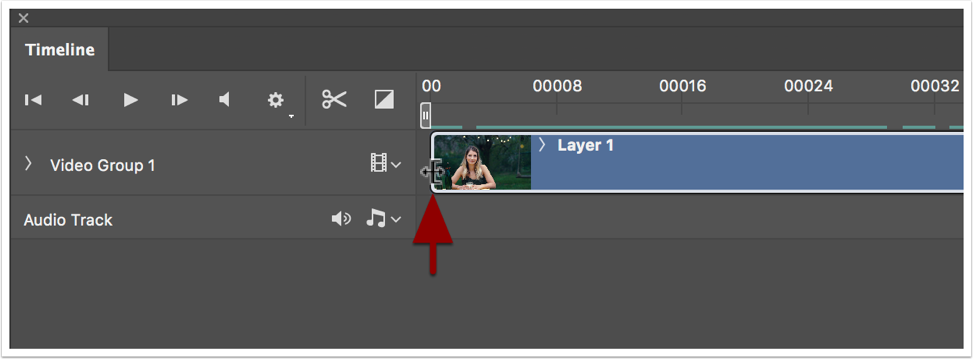
Trim your video by placing the cursor at either end of the video clip in the timeline where you will see the cursor change to the trim tool. Slide the trim tool to the frame you wish the video to start and release. The clip will be shortened and the new start frame will snap to the beginning of the timeline. This is a non-destructive edit. You aren’t actually cutting anything away by doing this, just hiding the footage from the timeline view. Repeat the trim on the tail of the video until you achieve a nice repeatable action for 4-5 seconds.
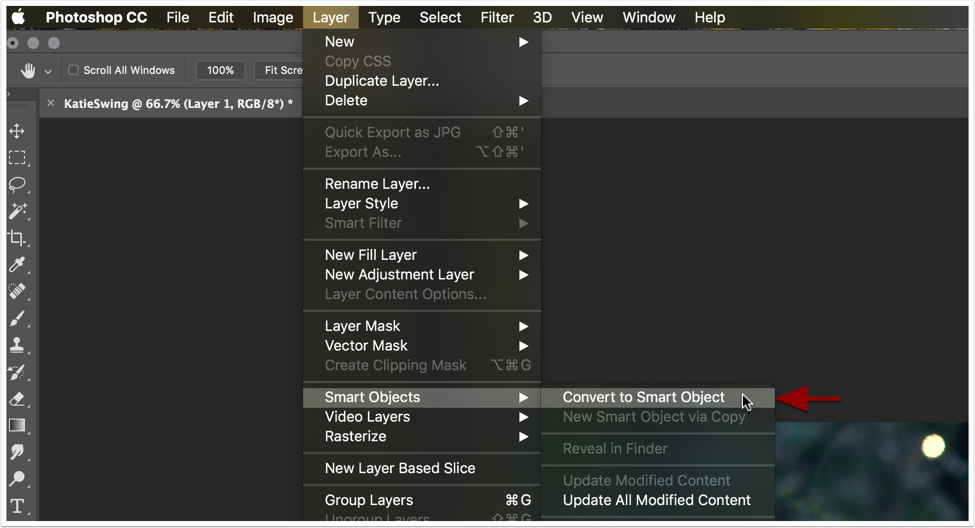
Convert To Smart Object
Convert the video into a smart object so that filters and other PS tools can be applied to the video footage Layer/Smart Objects/Convert To Smart Object.
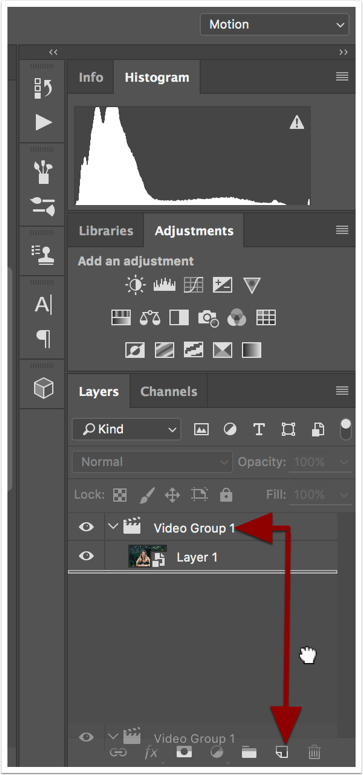
Duplicate Video Layer
Drag the “Video Group” Layer onto the “New Layer” icon in the Layers palette window. This copies the video layer and automatically puts it above the existing video with the same length/number of frames.
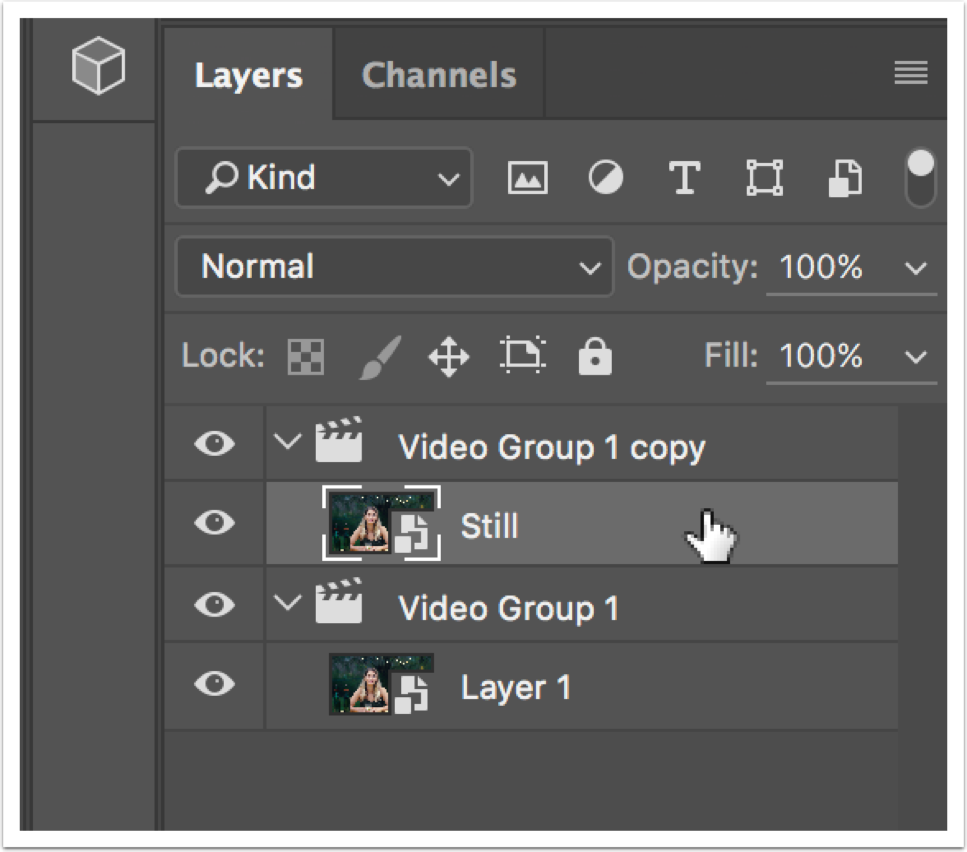
Check Video Timeline
The video timeline should now have two video layers stacked on top of each other. Tip: If your clip is longer than the timeline panel, adjust the magnification slider until you can see the front and tail of both clips.

Rename Duplicate Layer
Rename the duplicate video layer to “Still” so you can keep the layers organized.
Find Your Still Frame
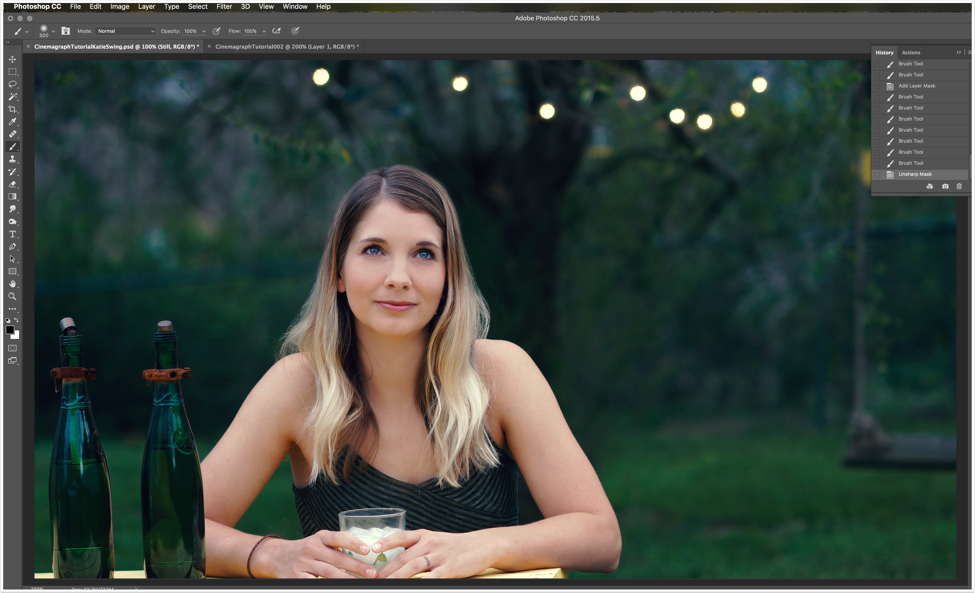
Use the playhead to scrub through your video to find the best still frame. In this example, I chose the frame where she looked up and her eyes caught some nice highlights from the twilight sky.

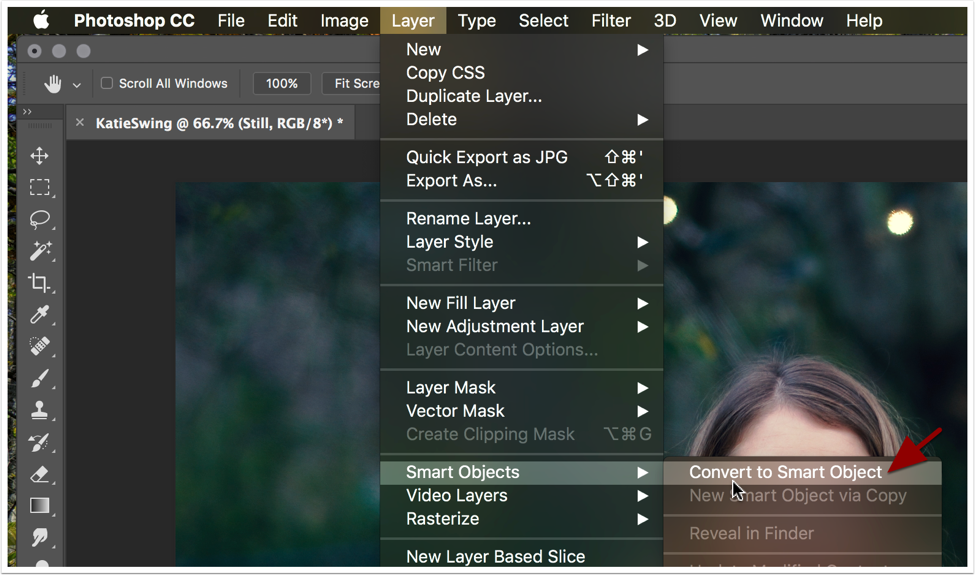
Rasterize Still Layer
Once you’ve found your still frame, rasterize the layer which is now a smart object - Layer/Rasterize/Smart Object.
Notice that when you hit play that nothing moves. This is because you have created a still frame by rasterizing the video. The still covers the video and blocks any motion from coming through.
Retouch Still Layer
One of the big advantages of cinemagraphs over straight video is the ability to cleanup and retouch the still layer just like you would a portrait or fashion image. For this image I cleaned up stray hairs and did a little skin cleanup on her face. I also ran a subtle Unsharp Mask over the retouched image to sharpen it up a bit.
Create a Layer Mask
With the Still layer selected, hit the “Add Vector Mask” tool in the layers window to create a mask on the Still layer.

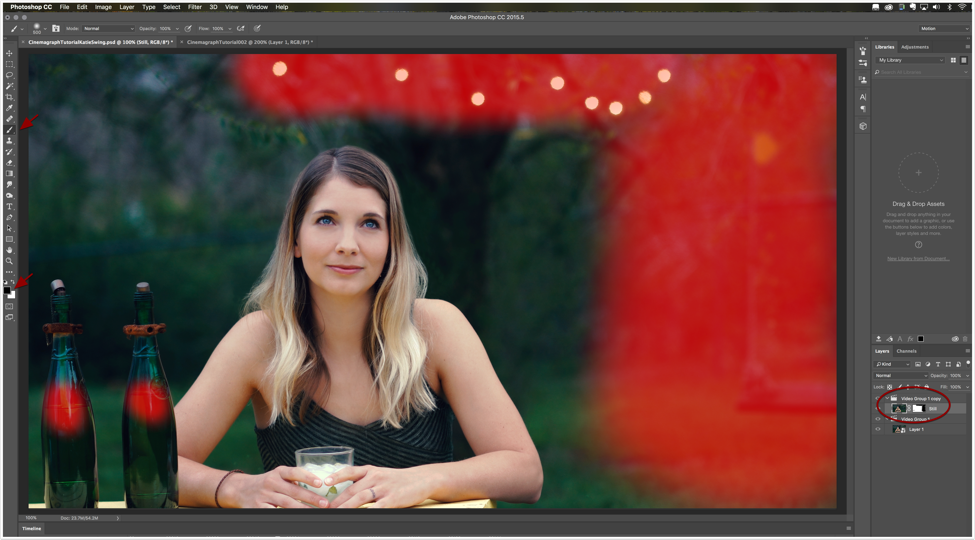
Mask Out Motion
With the mask selected, use the Brush Tool with Black as the foreground color. Paint the areas that you want motion to show through from the video layer below. Hit the \ key to see the mask overlay. I painted over the swing action, the liquid in the bottles and the hanging lights. Masked areas are shown in red, the default color setting for the mask overlay.
When you are finished creating the still layer mask, hit play to check your video for any stray artifacts or unnatural behavior. A clean moving object in the background or gently blowing hair can be a very simple masking job. For more difficult cinemagraphs, you can finesse the mask by varying the opacity to help smooth out motion transitions.
Render The Cinemagraph
Now we’re going to export the final 4K cinemagraph. To do that we go to File/Export/Render Video. Set the format for H.264. This is the best format for video clips on the web. All of the major websites support H.264. Set the quality to High Quality under the preset and go ahead and click Render.You’ll now have a high-quality video file all set for playback.
Wrap Up
What I’ve shown here is the basic setup for shooting a Cinemagraph and editing it in Photoshop. As I said earlier, there are other tools available and each has varying degrees of learning curve. I often do my first edits in Premiere, then take the clip into Photoshop. If you want, you can skip Photoshop altogether and use Flixel’s Cinemagraph Pro. It’s intuitive software designed exclusively for creating Cinemagraphs. I often use Cinemagraph Pro as a kind of “finishing” software because it has more 4K export options than Photoshop. Also, the monthly fee includes cloud hosting with easy embed tools for Wordpress and HTML web pages.
For details about creating a Flixel embed, go to Flixel.com to learn more.

