


As summer has turned to fall, we can see this change visually represented in the changing of the leaves. The cooler days are contrasted with the bright yellows, reds, and oranges, creating scenes that are intrinsically autumnal. Every year, photographers head out in flocks to capture the vibrant colors. Though capturing fall colors is no easy feat, from finding locations to creating unique and compelling compositions to editing for vibrancy, there are many factors that go into capturing this time of year. We sat down with Cate Schweitzer and Jesse Roos, two renowned photographers to get the lowdown on how to find, capture and share the magic of the fall season through your photography.
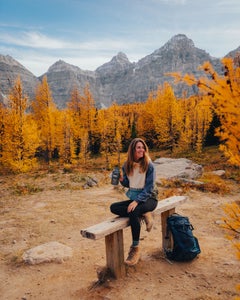
Cate Schweitzer, more commonly known as @CatesCompass, is a photographer, blogger and all around outdoor adventurist based in the southeast United States. Through her Instagram and blog Cate shares her “granola girl” knowledge – everything you need to know about hiking and camping.

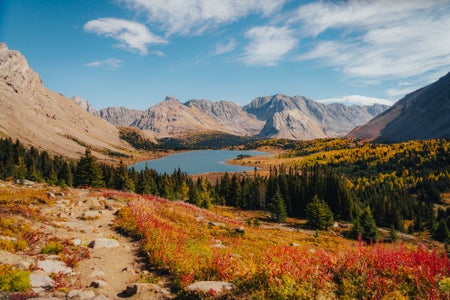
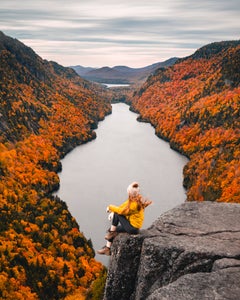
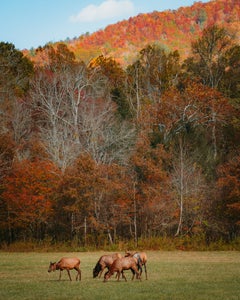
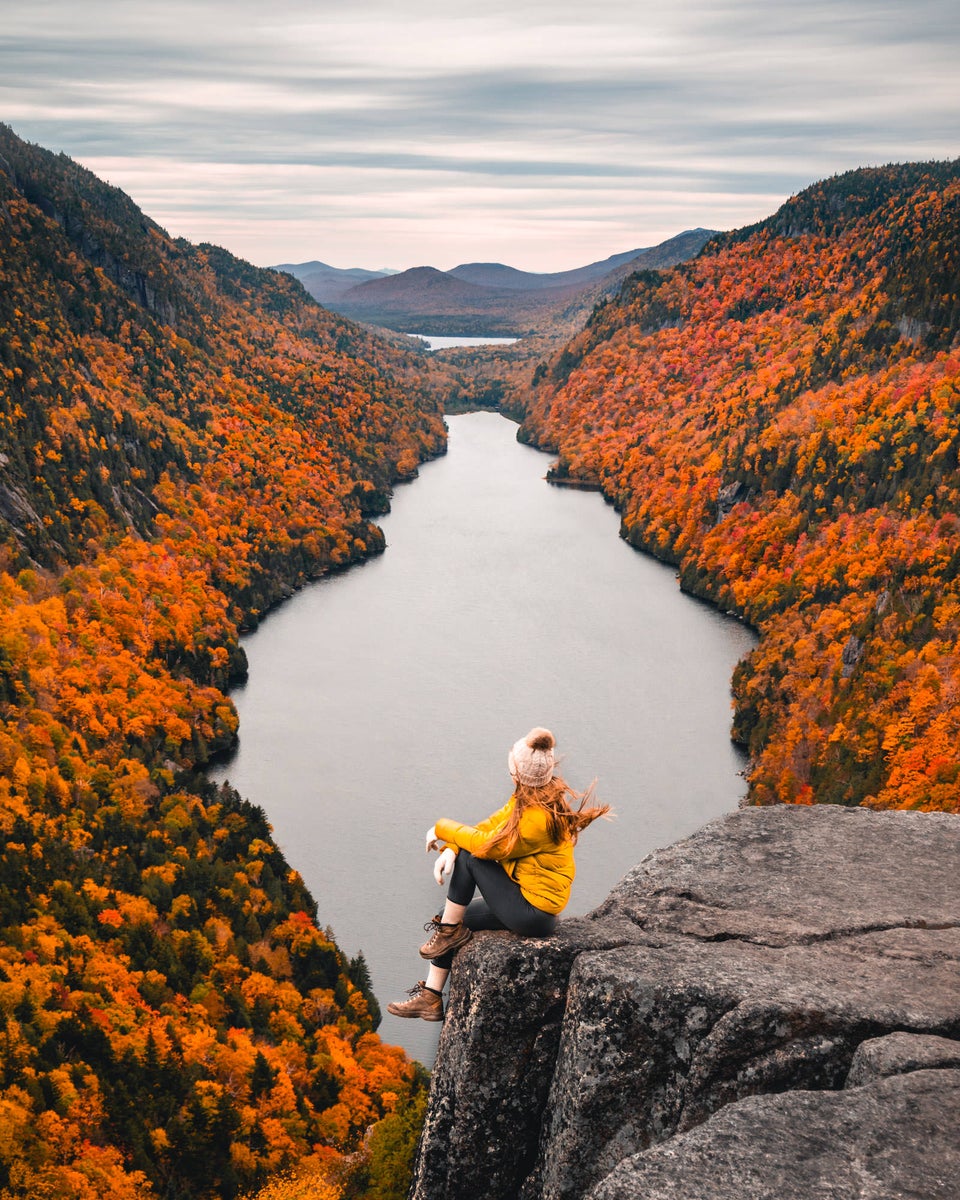
Photo by Cate Schweitzer. Sony Alpha 7 III. Sony 24-240mm f/3.5-6.3. 1/500-sec., f/4, ISO 50
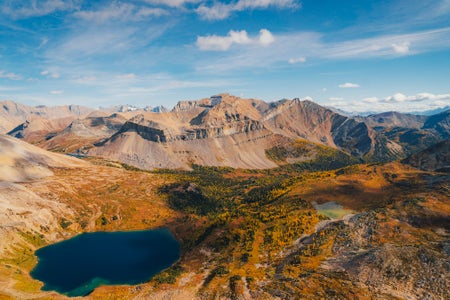
Jesse Roos (@Jesseroos) is a commercial photographer and content creator based in Portland, Oregon. He specializes in outdoor sports, lifestyle, landscape, conservation, travel imagery and adventure storytelling. Jesse works with leading travel and outdoor brands to capture authentic moments of adventure and the wild. He has traveled extensively, always bringing a camera along with him.

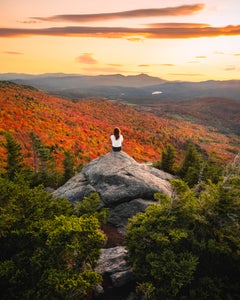
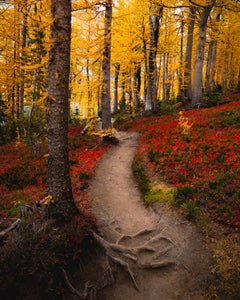
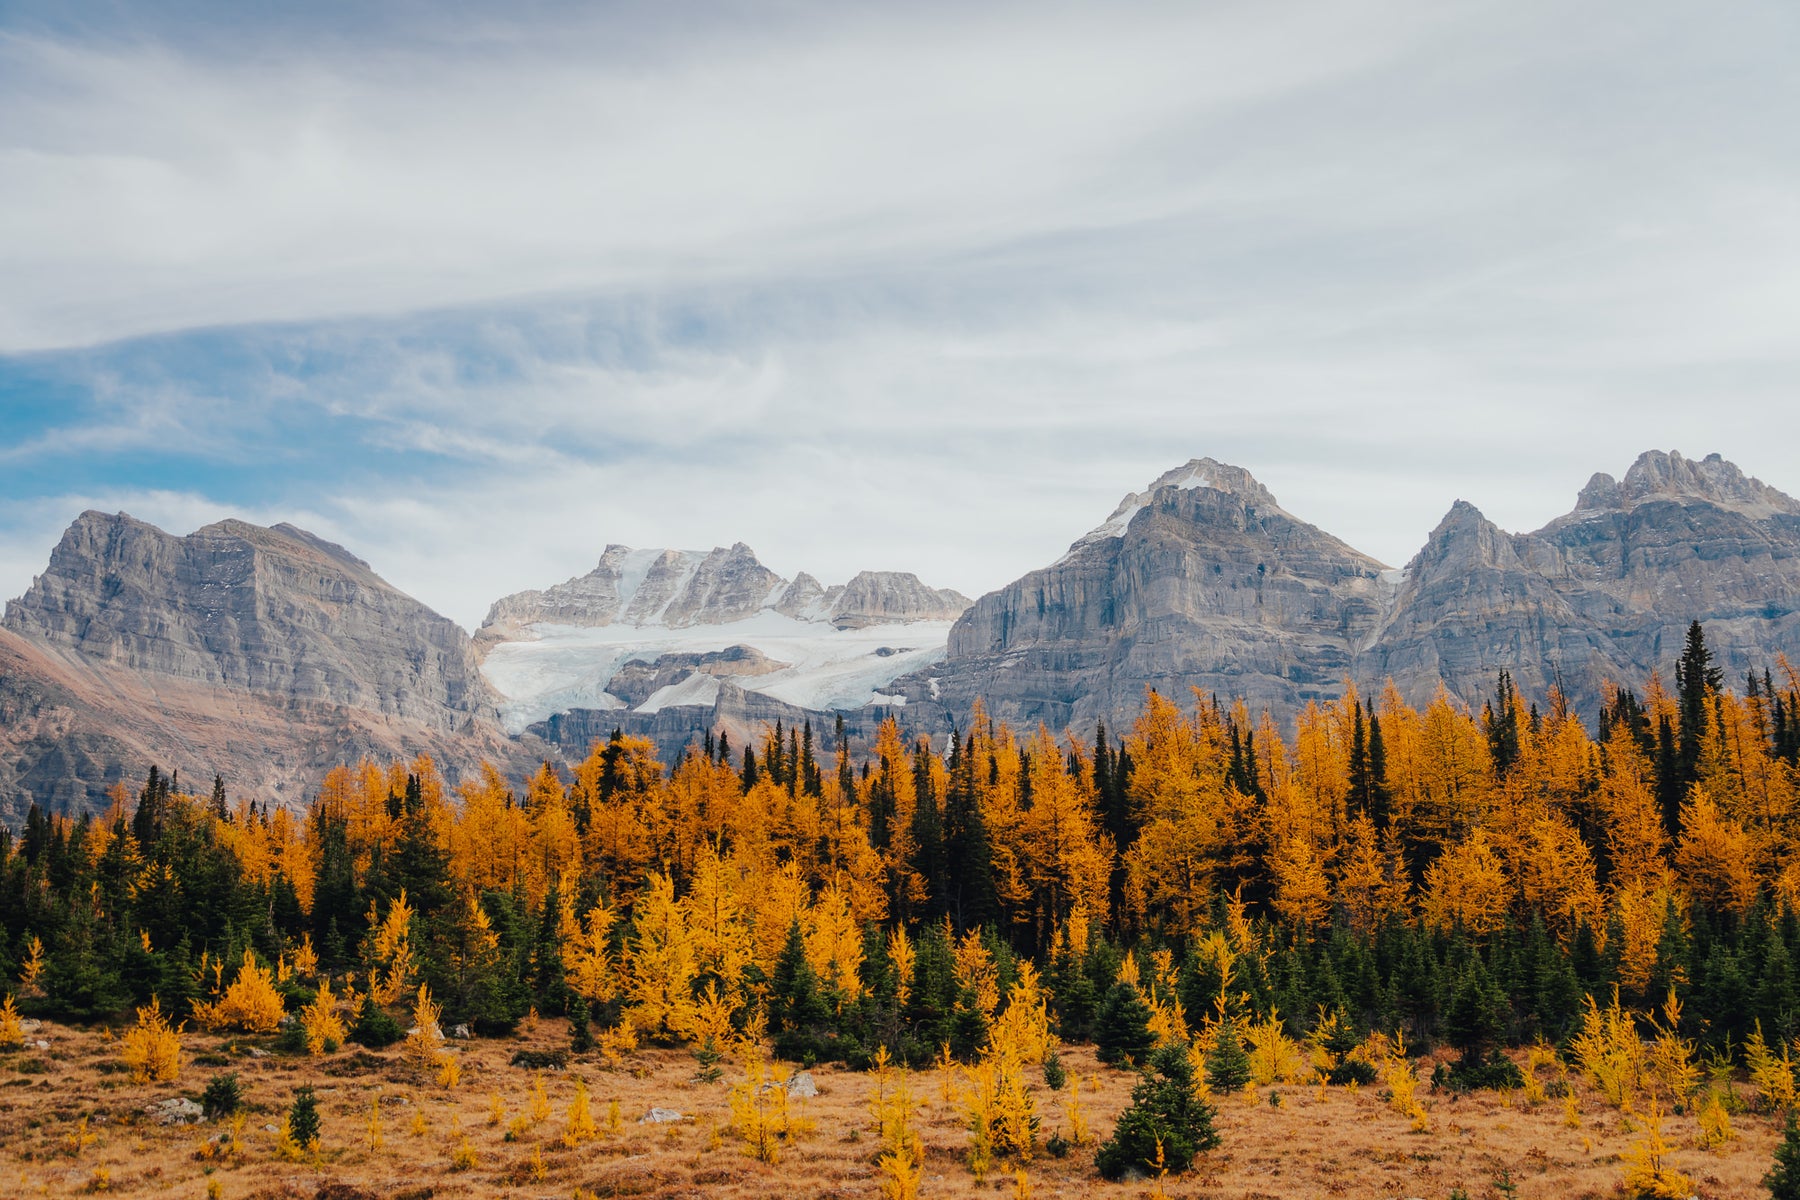
Photo by Jesse Roos. Sony Alpha 7R II. Sony 16-35mm f/4. 1/100-sec., f/10, ISO 500
Location Inspiration For Fall Color Photography
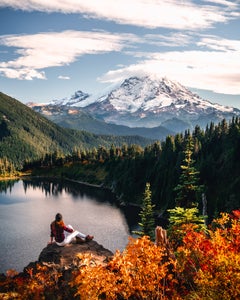
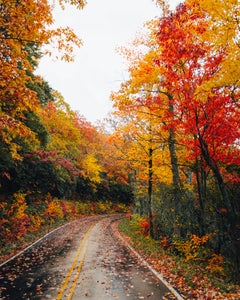
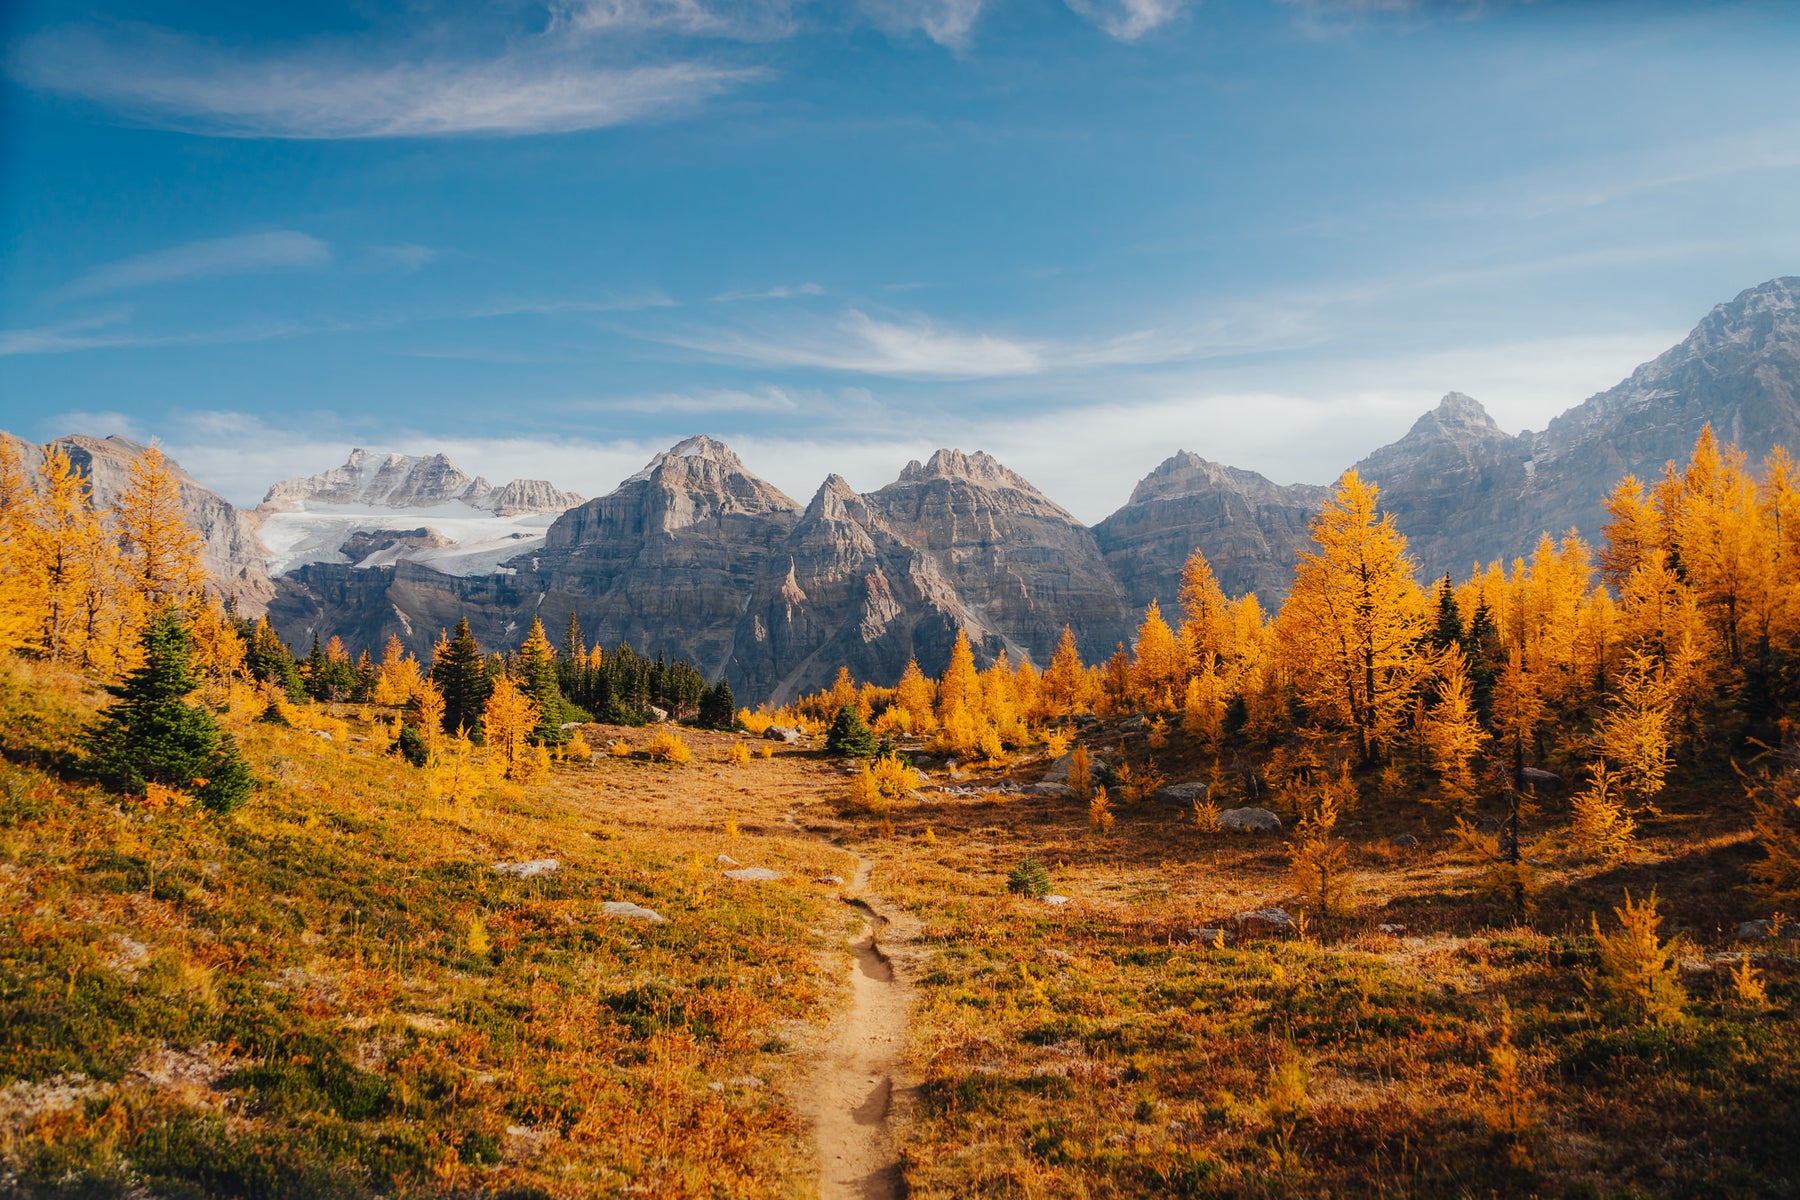
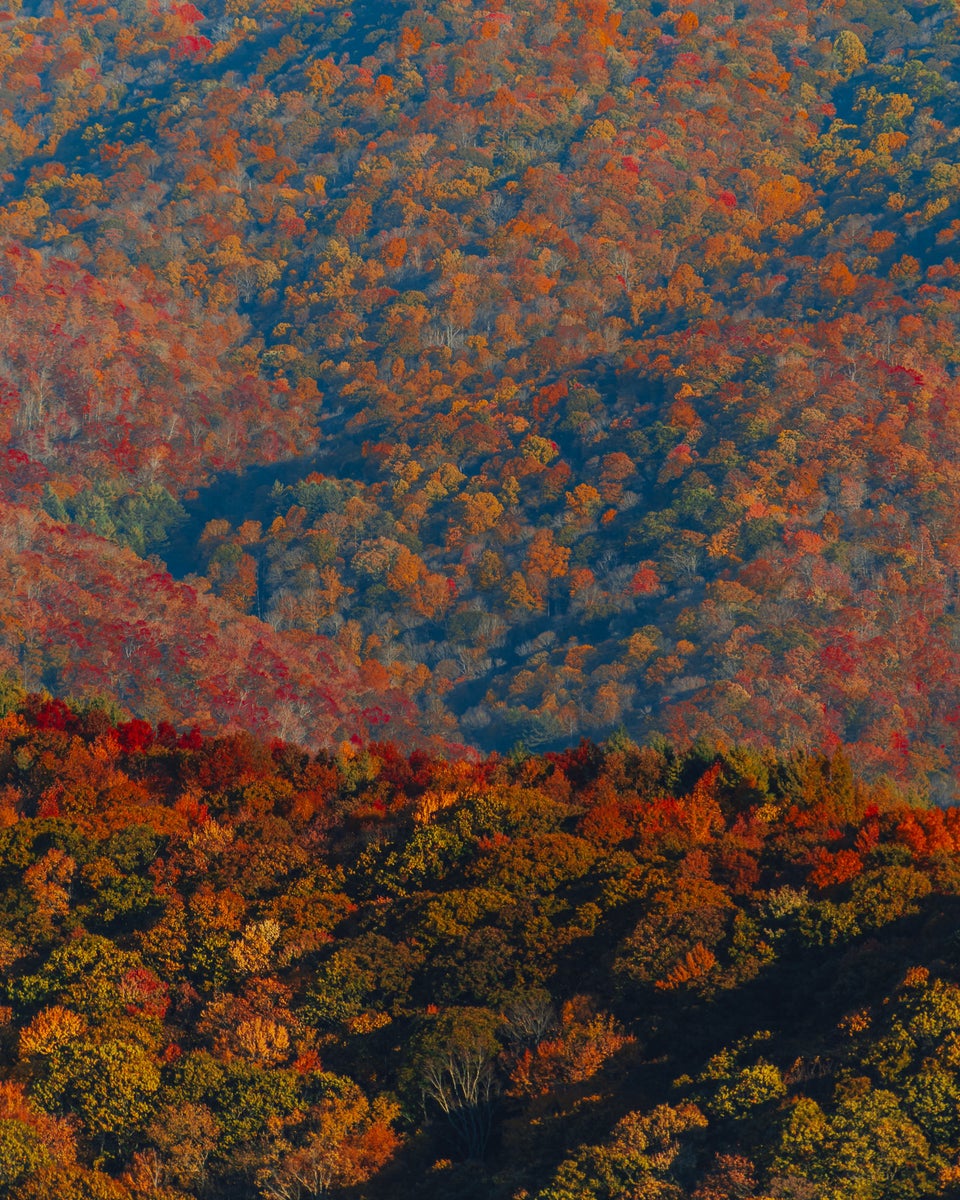
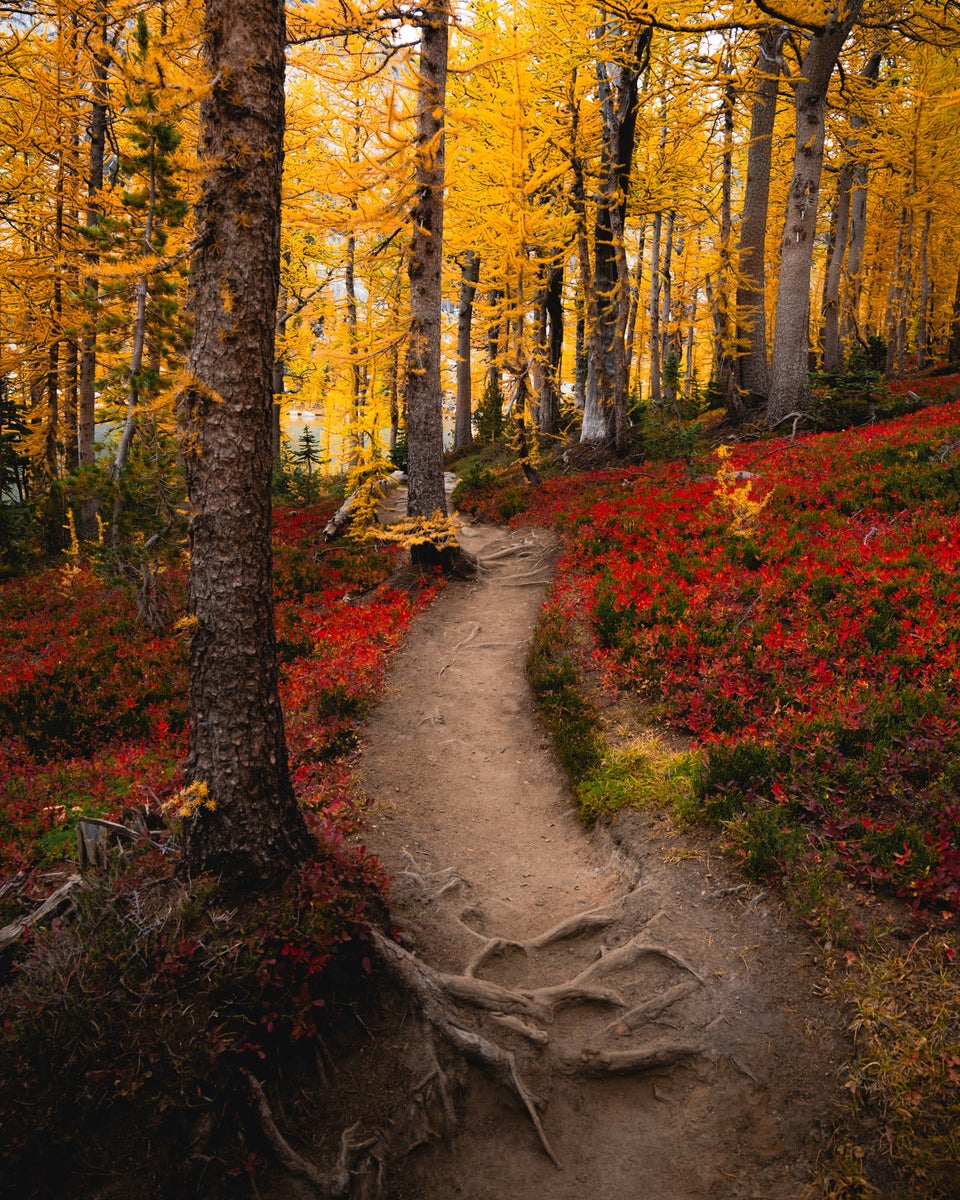
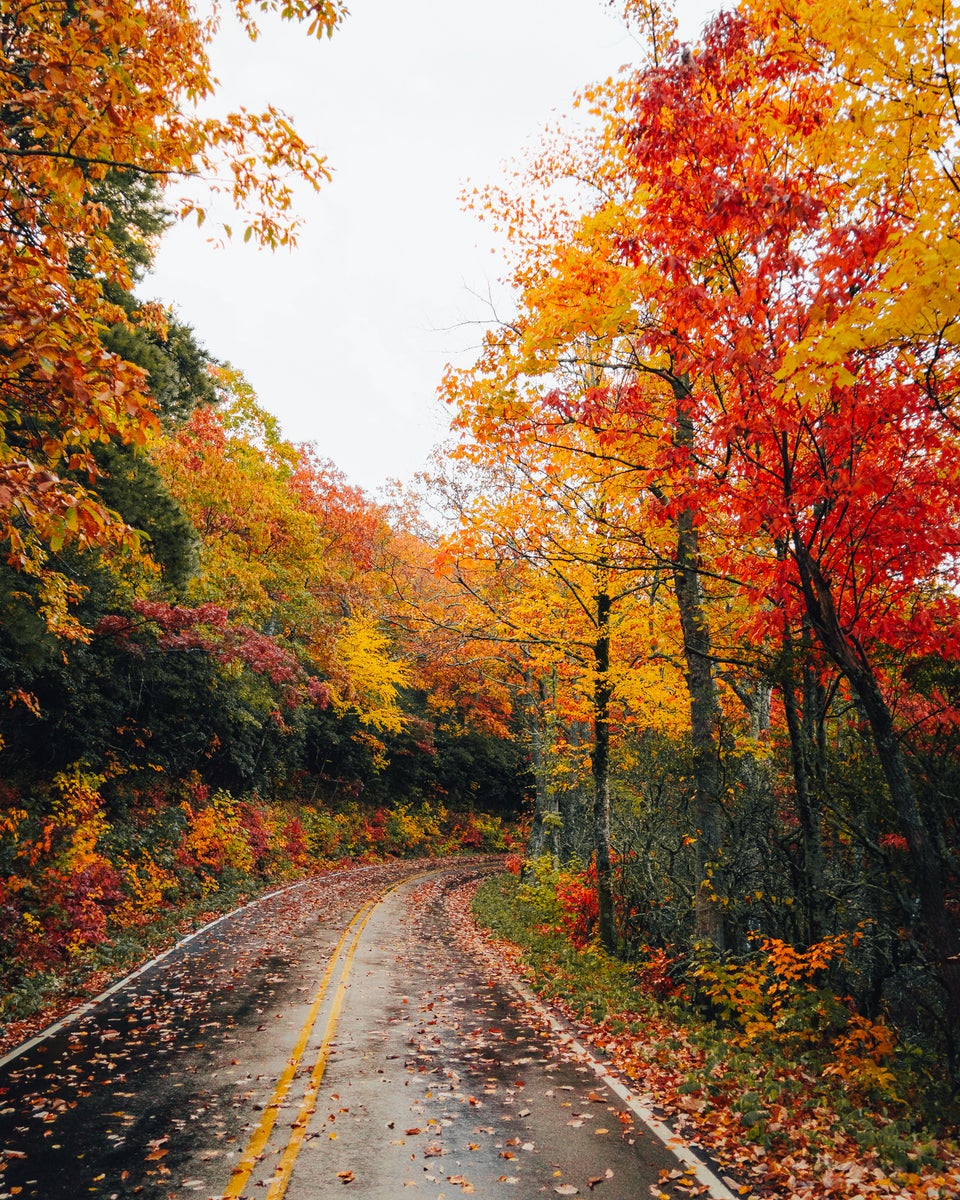
First, we asked these creators about locations they suggest. Since they are based on opposite sides of the country, they had a wide range of locations. They also discussed different types of colors you might see. For example, on the East Coast, you will find the classic deciduous trees, which change color and fall off annually. Jesse explains, “These types of trees offer a lot of variety in terms of color. It’s not just yellow, there are those stunning oranges and reds as well.” On the other hand, in the North West, you’re more likely to find larches, which are known for their bright golden yellow color in the fall. Understanding which trees exist in which areas can help you select locations for the type of image you’re visualizing.

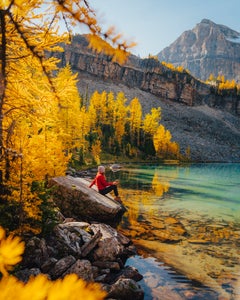
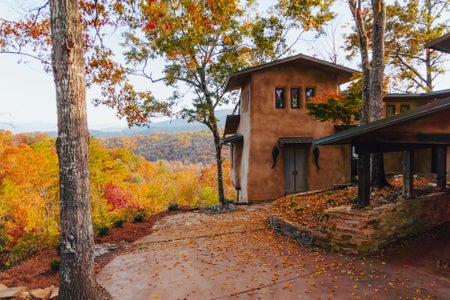
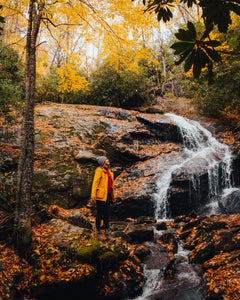
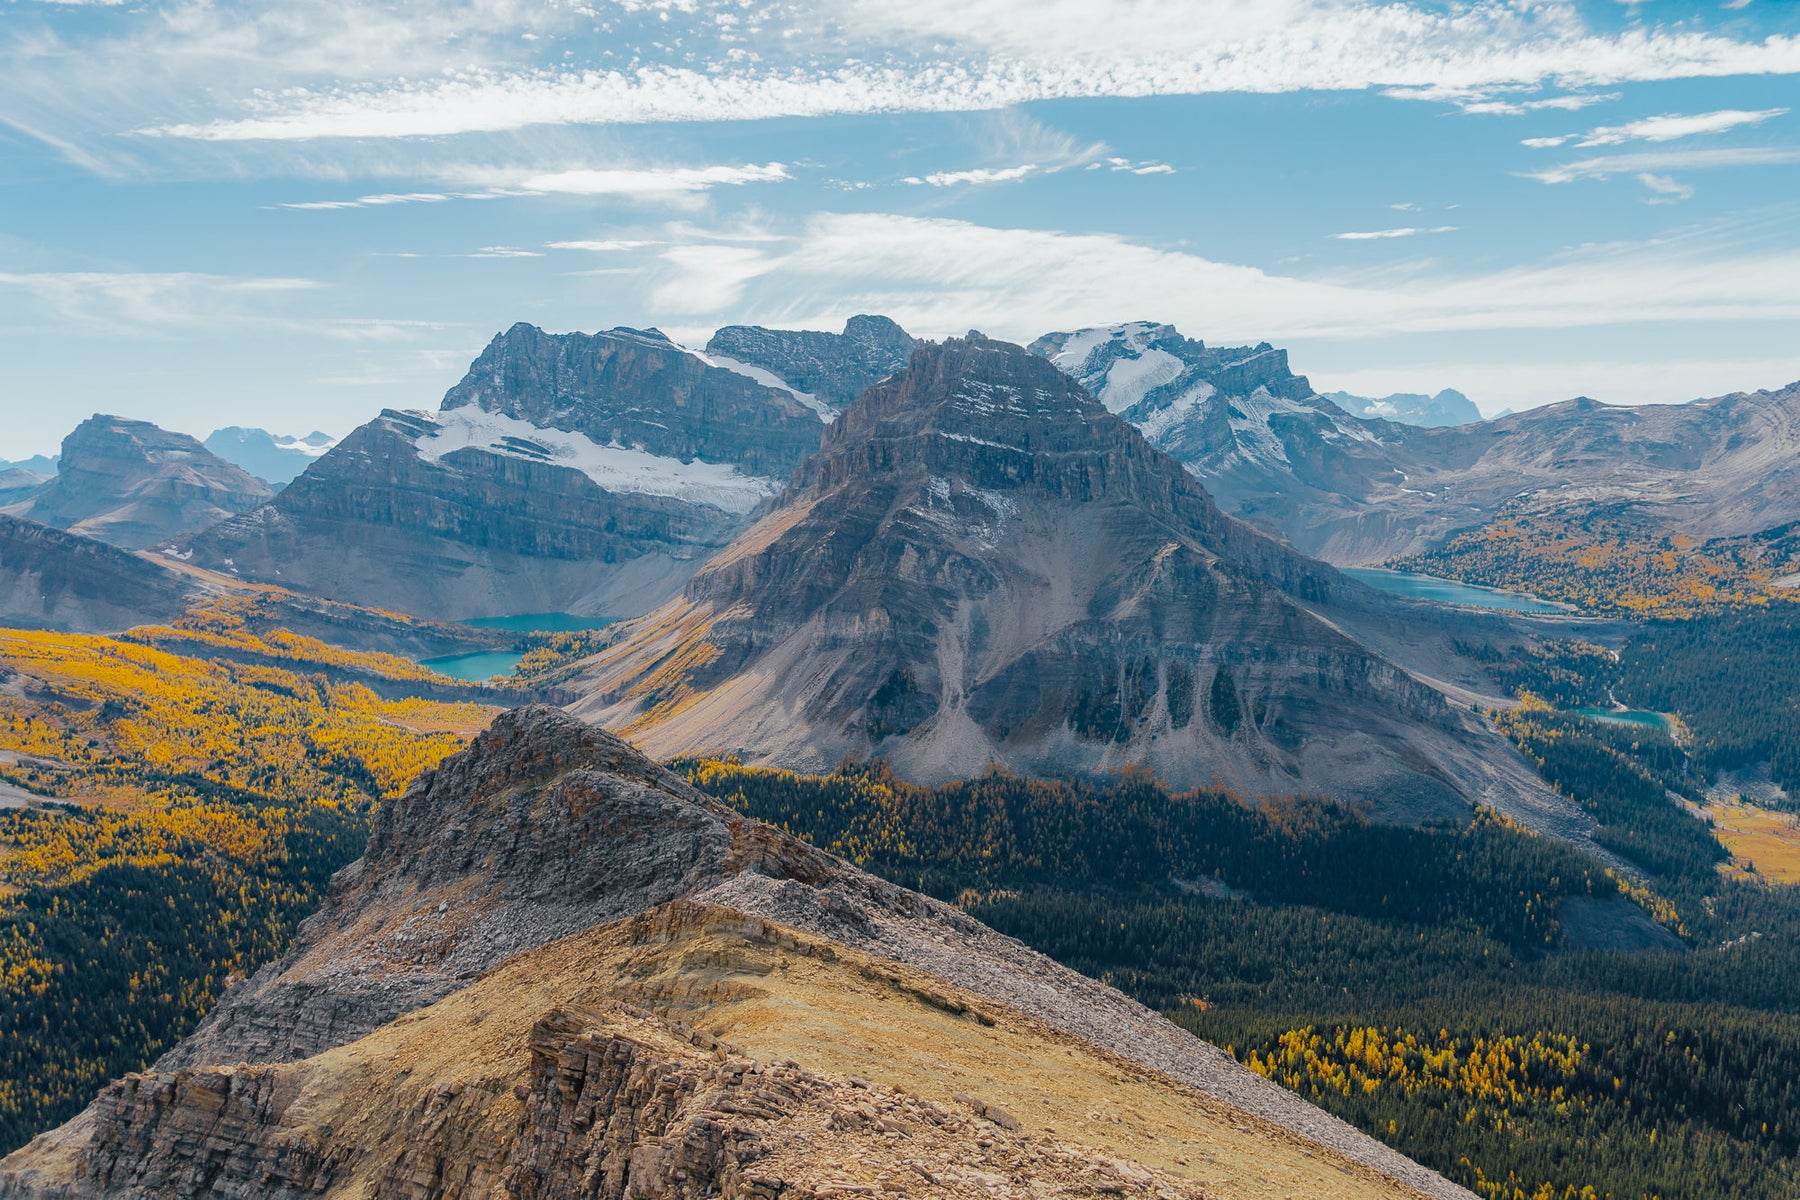
Photo by Cate Schweitzer. Sony Alpha 7 III. Sony 24-240mm f/3.5-6.3. 1/500-sec., f/6.3, ISO 125
The South East: North Carolina & Beyond
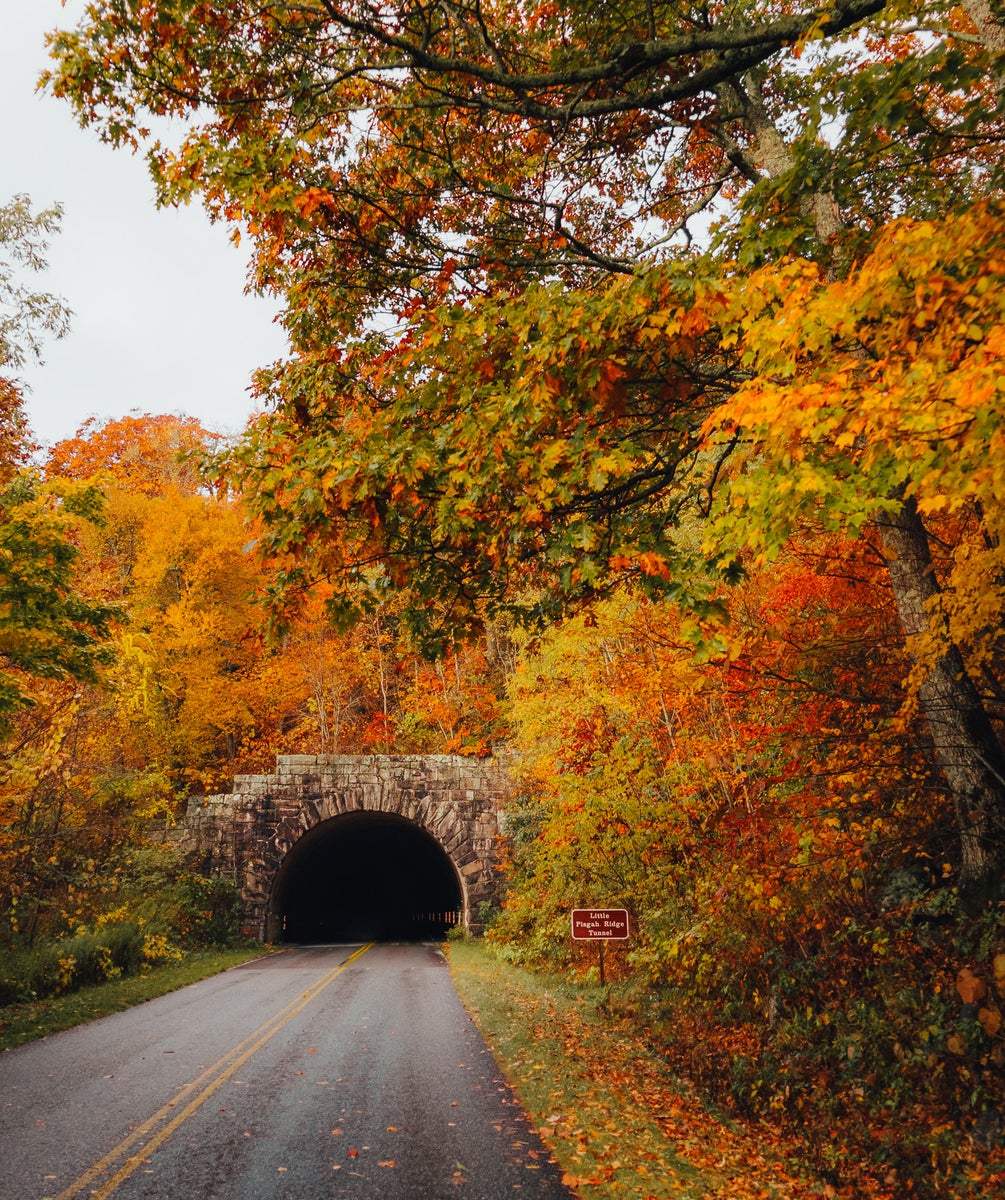
Though Cate lives in South Carolina, she spends a great deal of time in North Carolina because she loves the landscape and the outdoor recreation opportunities. Because of that, she’s found some great fall color location gems. She highly suggests the Blue Ridge parkway, but she does note that some of these places are extremely touristy and crowded. If that isn’t what you’re looking for, she recommends the Linville Gorge Wilderness. “Particularly if you can drive, if you have a car that has clearance, you can typically drive the roads around Linville Gorge,” Cate explains. “They're great to drive and then there are a lot of awesome hikes and viewpoints there. Linville Falls gets pretty busy, but it is a beautiful hike. That's a really good family fall hike.”
She continues, “I’ve done fall color hunting and found that the city of Brevard and the surrounding area is beautiful. It's lower elevation so, typically it changes the following week or is peak the following week than your typical peak prediction times. That's why North Carolina is so great for fall colors because at the top elevations they're going to change the first or second week of October and then it goes down from there. So you’re able to find fall colors for quite a while.”

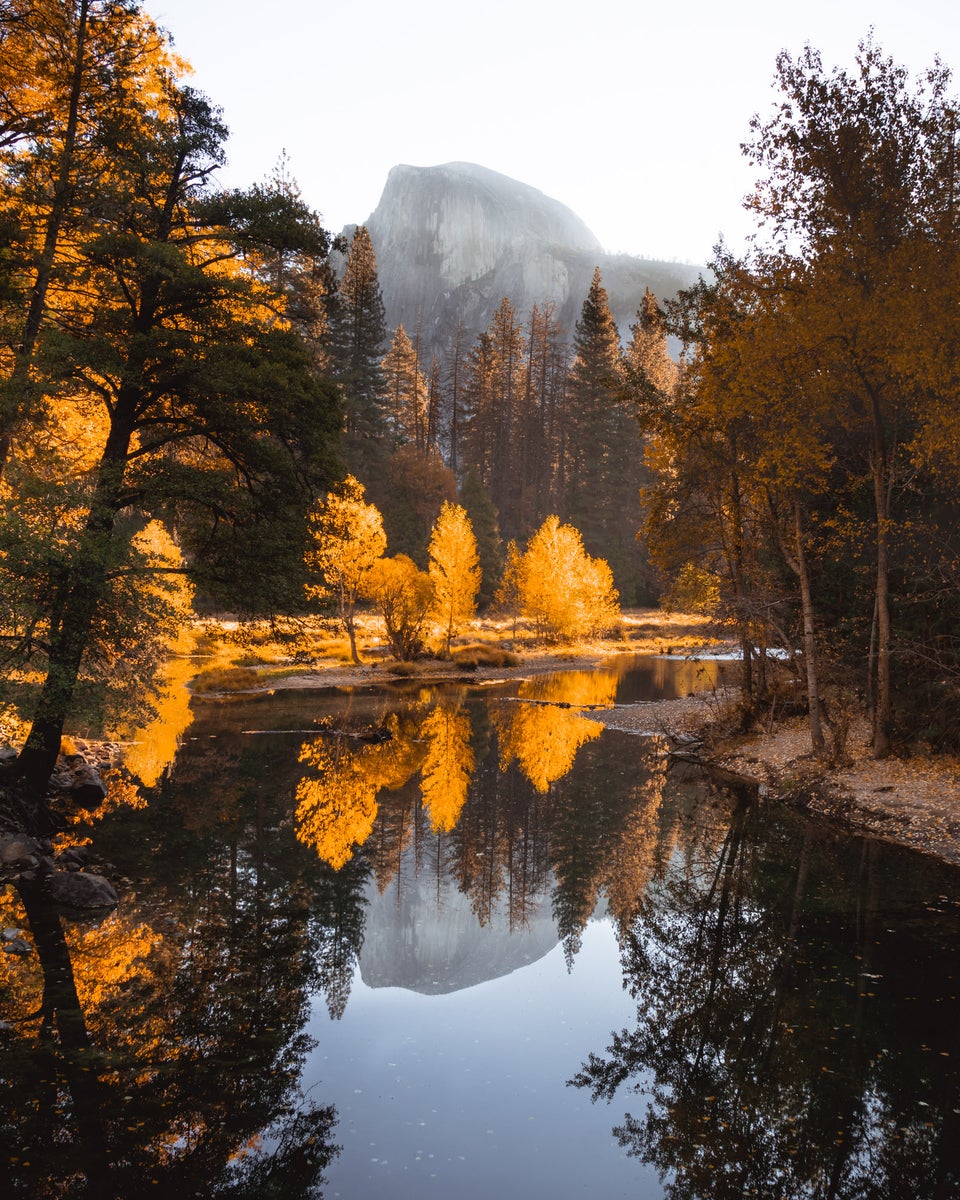
Photo by Cate Schweitzer. Sony Alpha 7 III. Sony 24-240mm f/3.5-6.3. 1/320-sec., f/3.5, ISO 100
She also recommends the Highlands-Cashiers area. “It is great for fall colors with waterfalls because you have Whitewater Falls, which is one of the tallest waterfalls East of the Mississippi, and then you have Dry Falls which is a very iconic waterfall that you can walk behind and is really pretty in the fall.”
Finally, Cate says that the Great Smoky Mountains are also a fantastic place to check out, though she mentions that it can get quite crowded as well. If you want to be close to the mountains but in a less populated area, Cate says you could camp in or around Robbinsville, North Carolina. “There are a lot of camping options and you’re pretty close to the Smokies.”
The North East: Vermont, Maine, New Hampshire & More
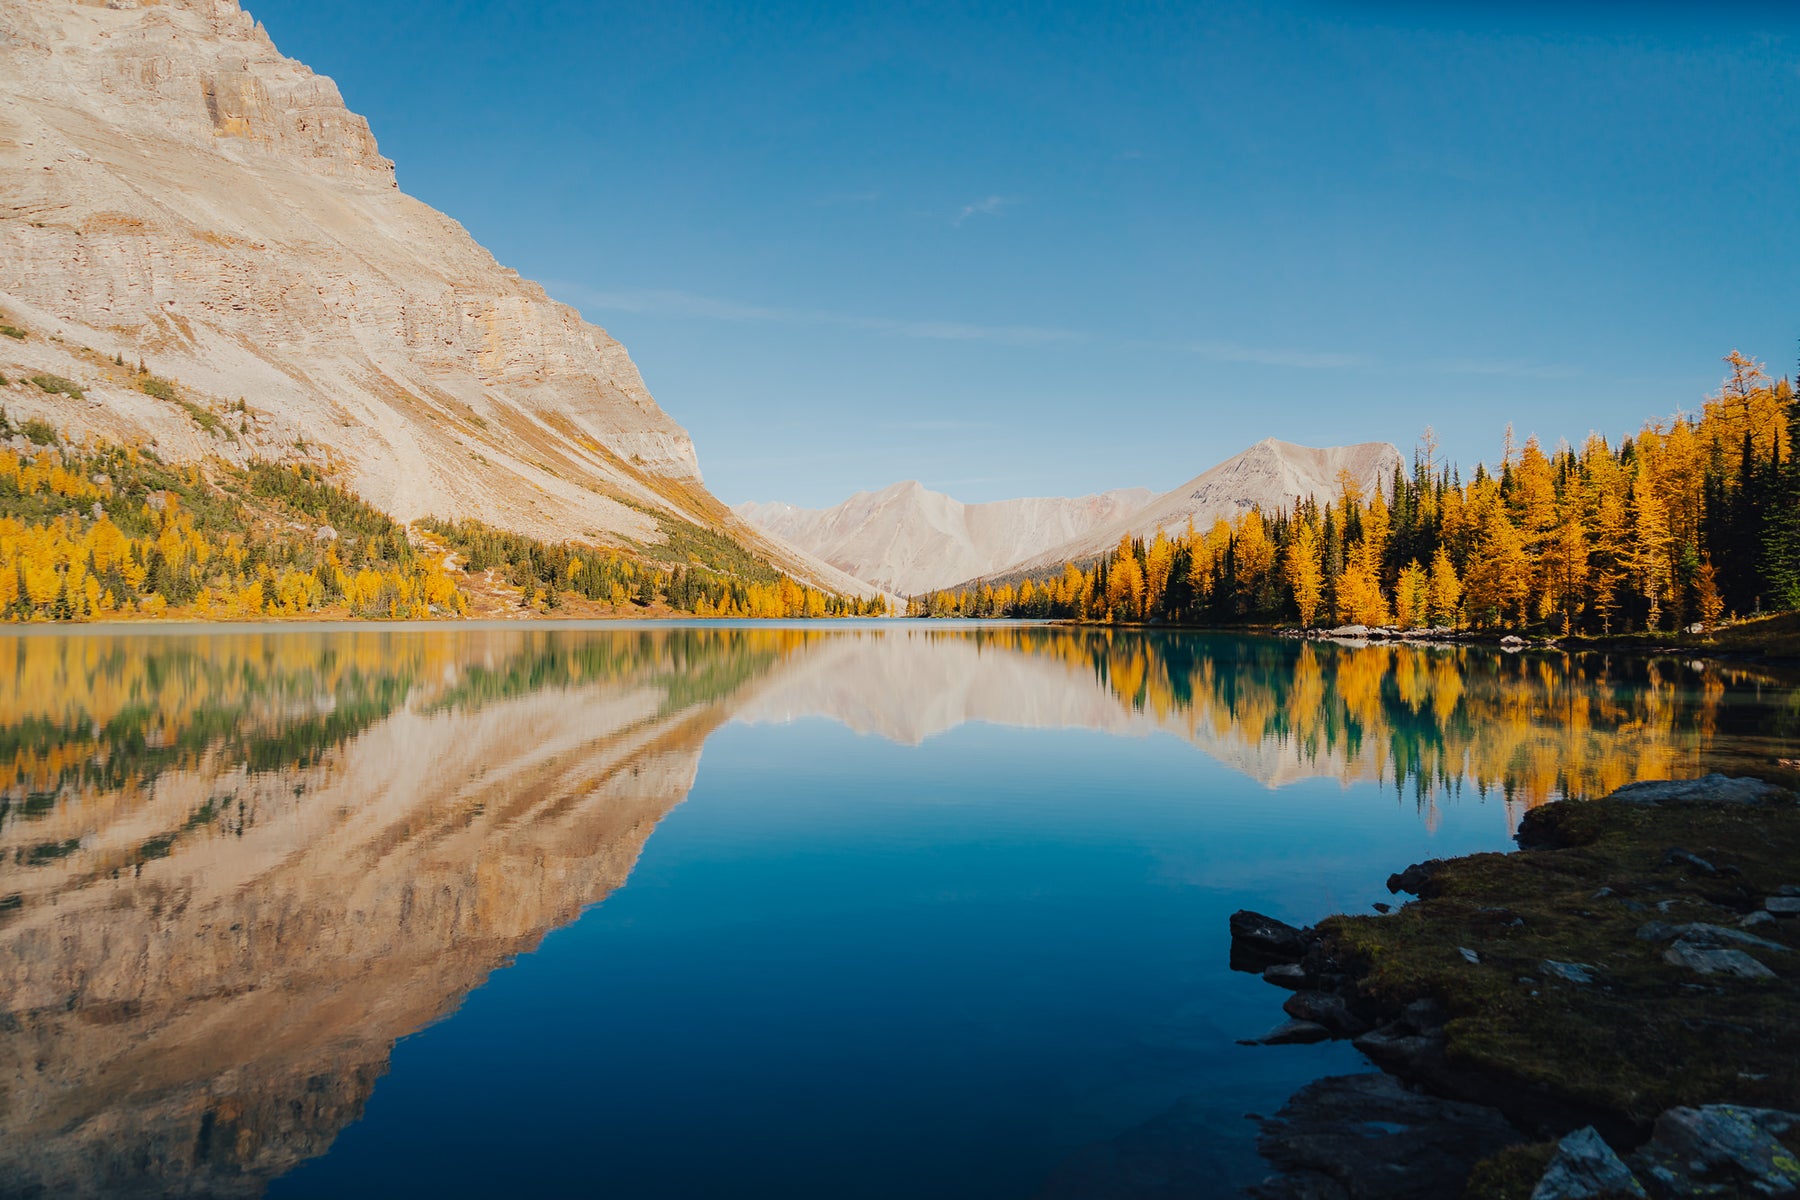
Jesse has spent a bit of time chasing the colors in New England. He’s found success in creating vibrant images in Vermont, New Hampshire, New York and Maine. In Vermont, Jesse recommends checking out Stowe Pinnacle, an out and back hike with a great view. In New Hampshire he suggests you check out Gile Pond, which has great fall colors and incredible opportunities for reflections in images.
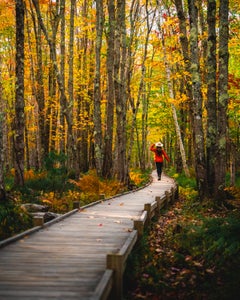
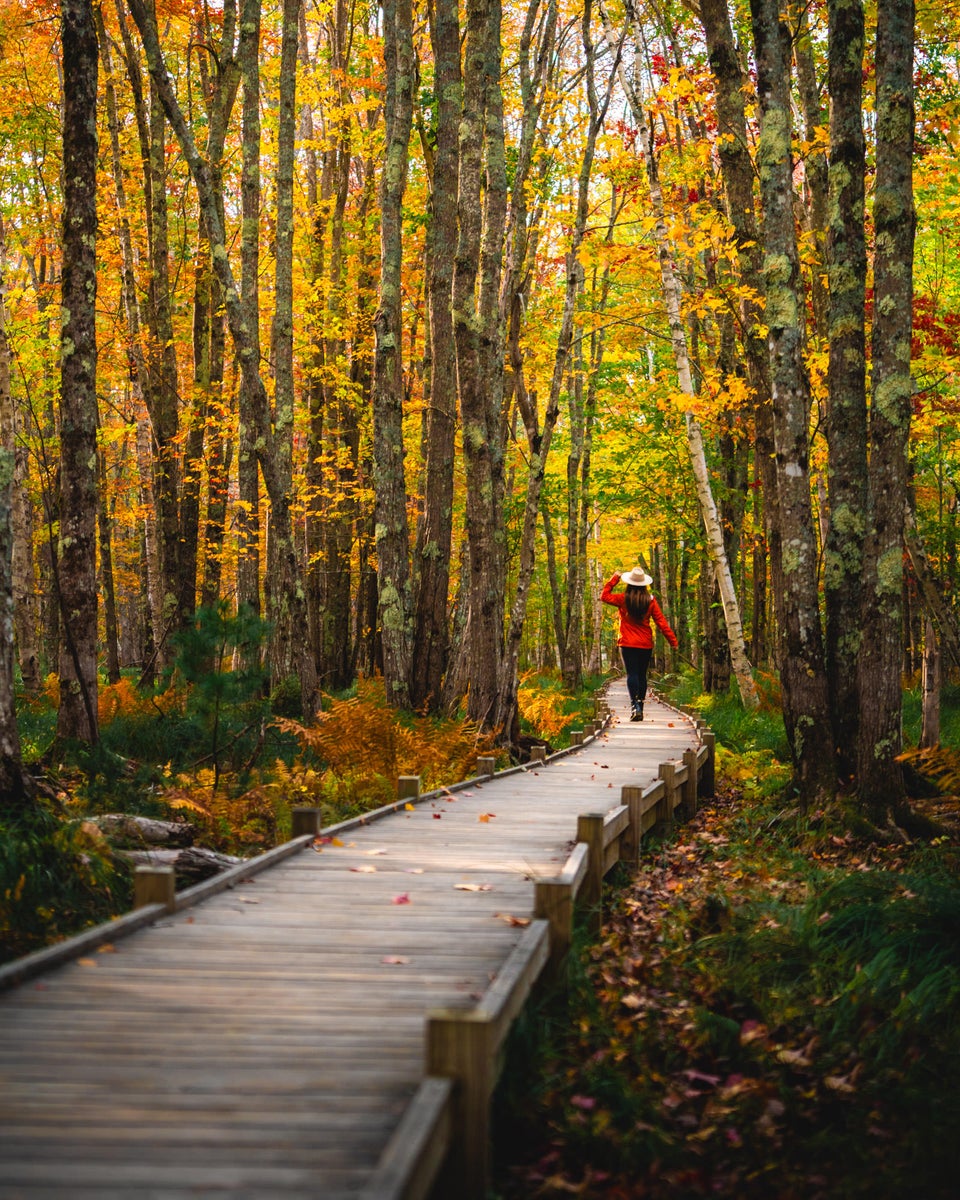
Then for New York, one of Jesse’s favorite hikes is Indian Head Mountain, which offers sweeping views, interesting rocks and a remote vibe. Finally, for Maine, he loves Jesup Path, which is a fairly easy hike with a boardwalk through a marshy forest area.

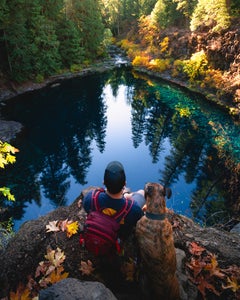
Photo by Jesse Roos. Sony Alpha 7R II. Sony 70-200mm f/4 G. 1/800-sec., f/4, ISO 500
The Midwest: Minnesota
Cate grew up in Minnesota, so she also has some great ideas for finding fall colors there as well. Although, she does mention that the challenge for finding fall colors in that region is that the window of time before the leaves fall off is very small.

Photo by Cate Schweitzer. Sony Alpha 7 III. Sony 24-240mm f/3.5-6.3. 1/1000-sec., f/3.5, ISO 100
“The North Shore is hands down the best place to visit in Minnesota for fall colors, but if you’re closer to Minneapolis, I would suggest checking out Interstate State Park in Taylors Falls. That whole area is beautiful and there are a few state parks that you can stay in plus they have great camping options. I also love Superior National Forest, it’s easy to find very chill hikes, wooded hikes that are just blazing with color.”
The North West: Oregon, Washington & Banff
Since Jesse lives in the Pacific Northwest, he had many suggestions for that region. His first recommendation is Lower Multnomah Falls. “It’s got a great waterfall and it’s easy to access.” He says the bridge, which you can see in his image below, offers great opportunities for creative imagery. Another fun hike in Oregon is Tamolitch Blue Pool.

Photo by Jesse Roos. Sony Alpha 7R II. Sony 16-35mm f/4. 3/5-sec., f/11, ISO 160
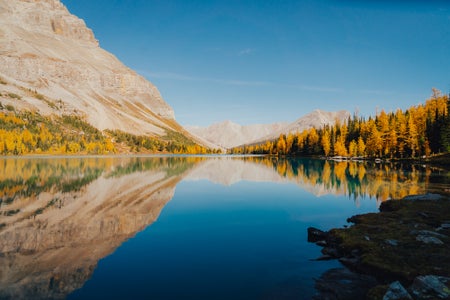
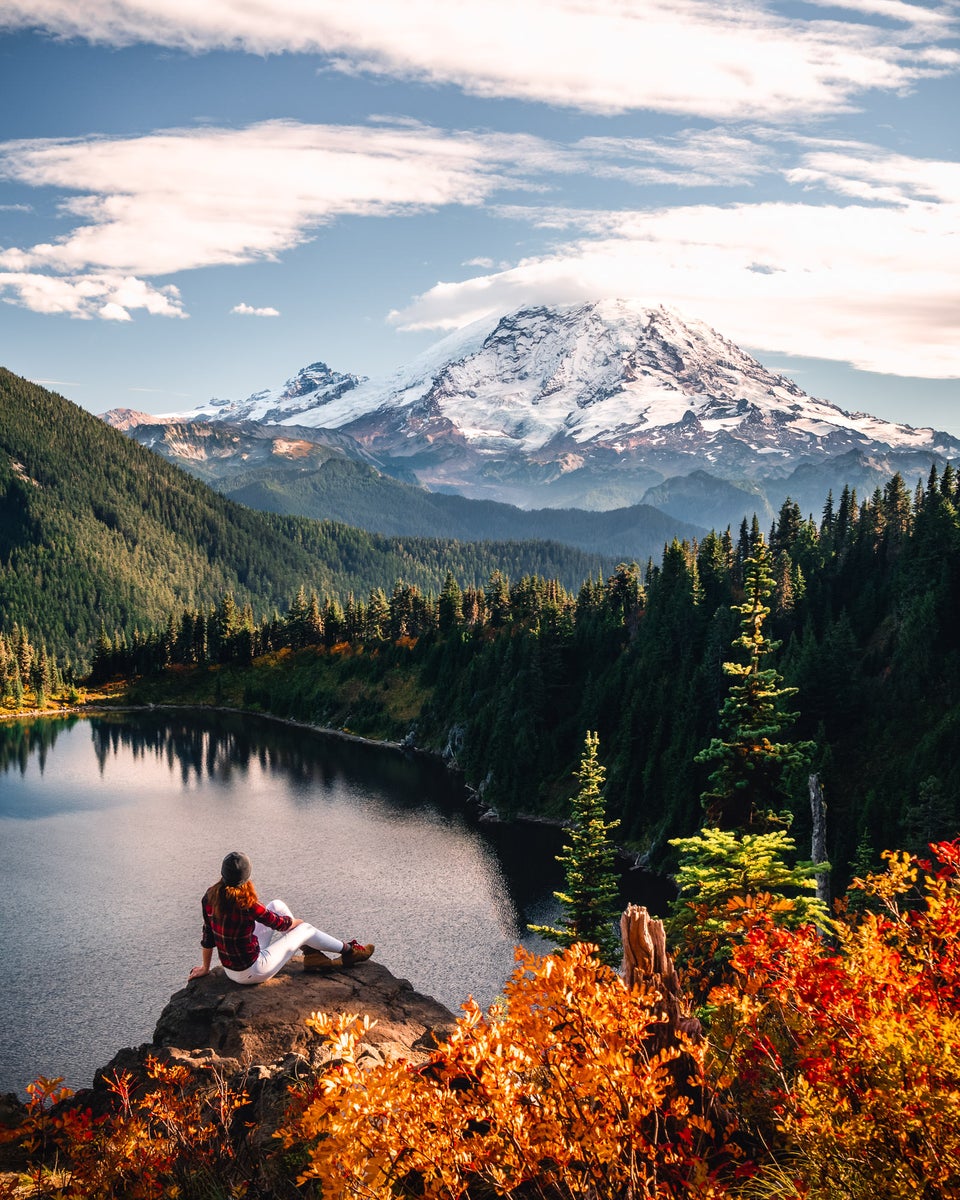
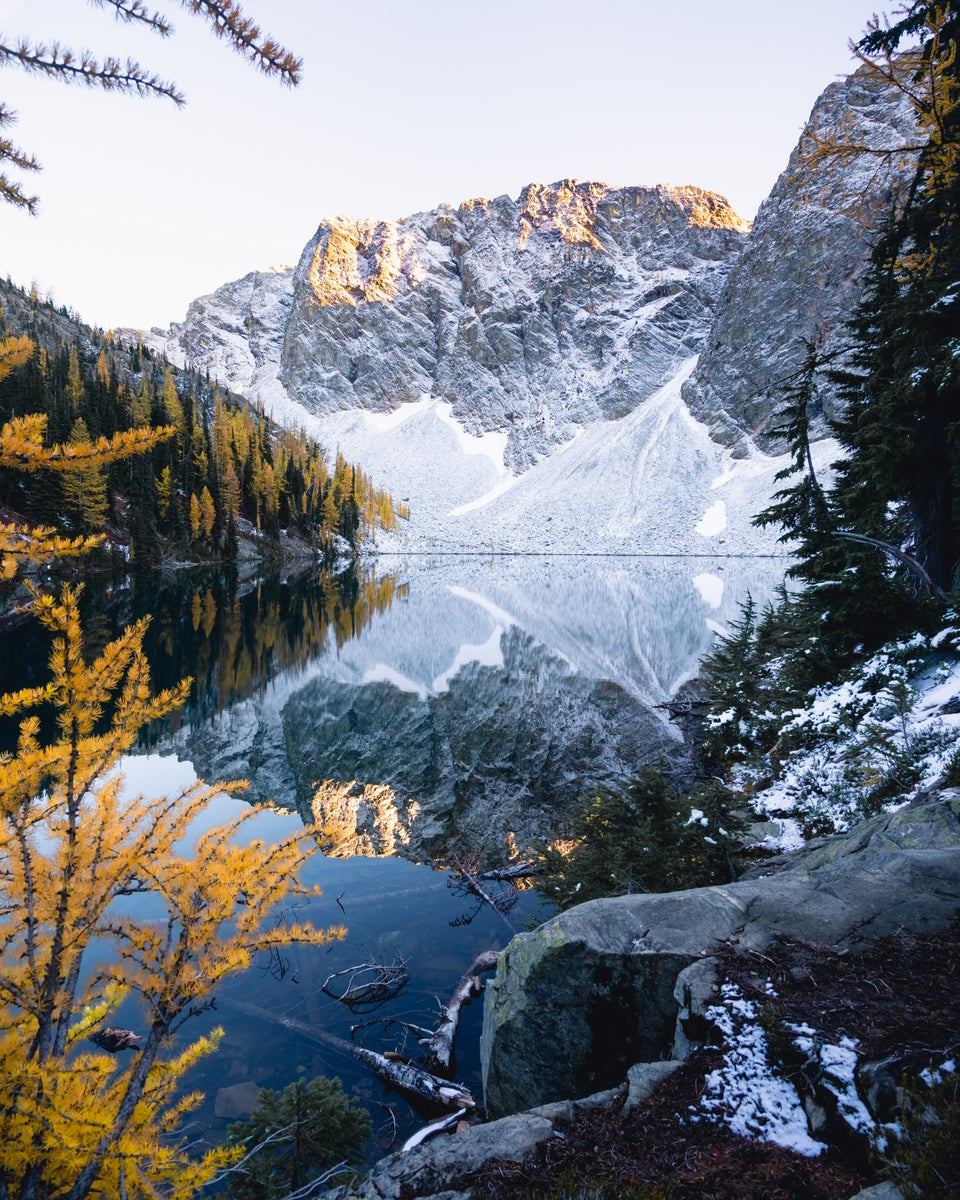
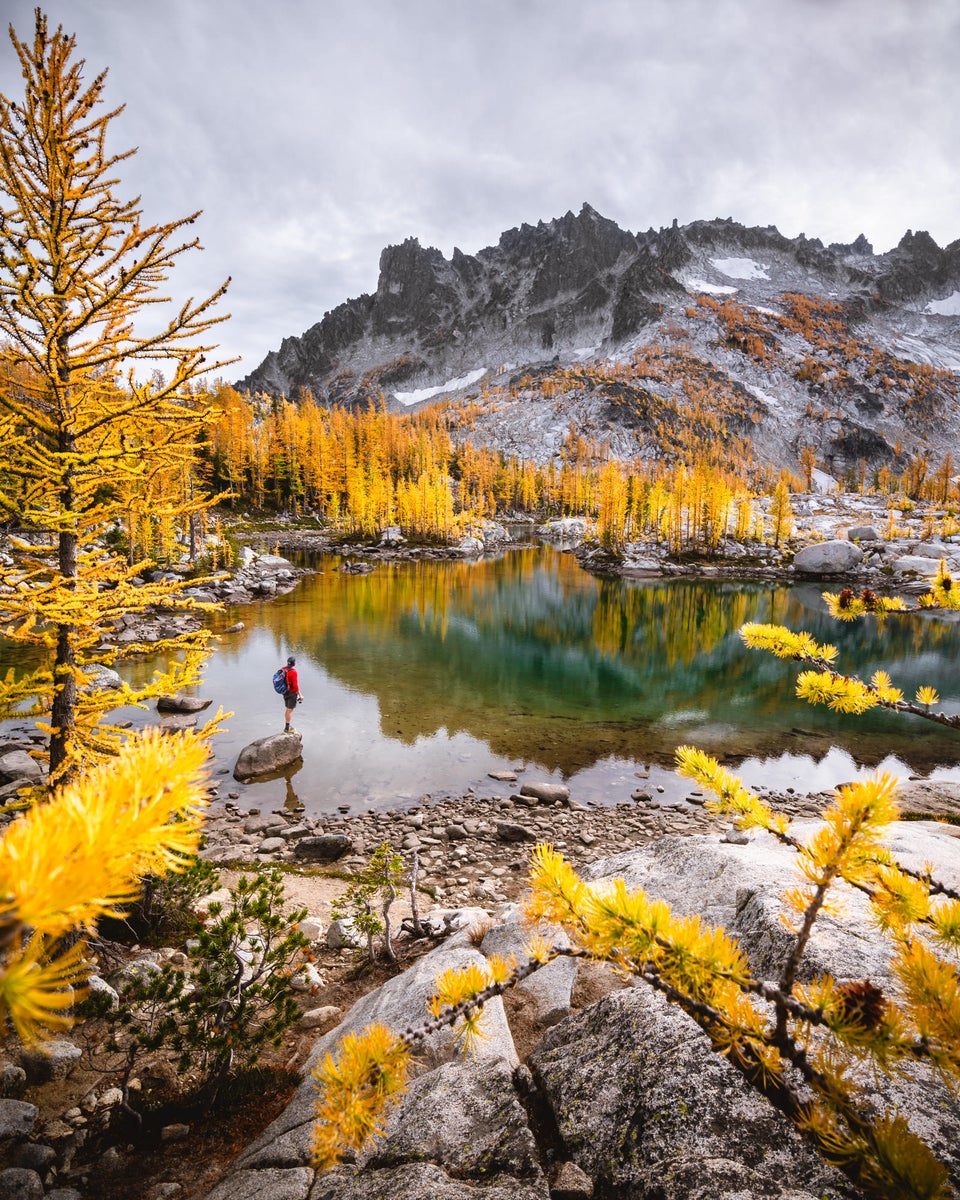
Jesse says that his favorite spot by far is the Alpine Lakes Wilderness in Washington. “That was one of the coolest places I've ever been. It literally felt like a fairy tale because when you look at it, it doesn't even look real.” His top hikes in that area are The Enchantments, Summit Lake and Blue Lake.

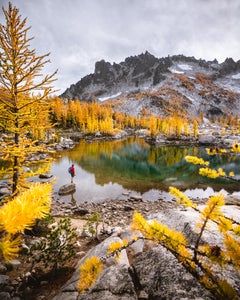
Photo by Jesse Roos. Sony Alpha 7R II. Sony 16-35mm f/4. 1/200-sec., f/6.3, ISO 500
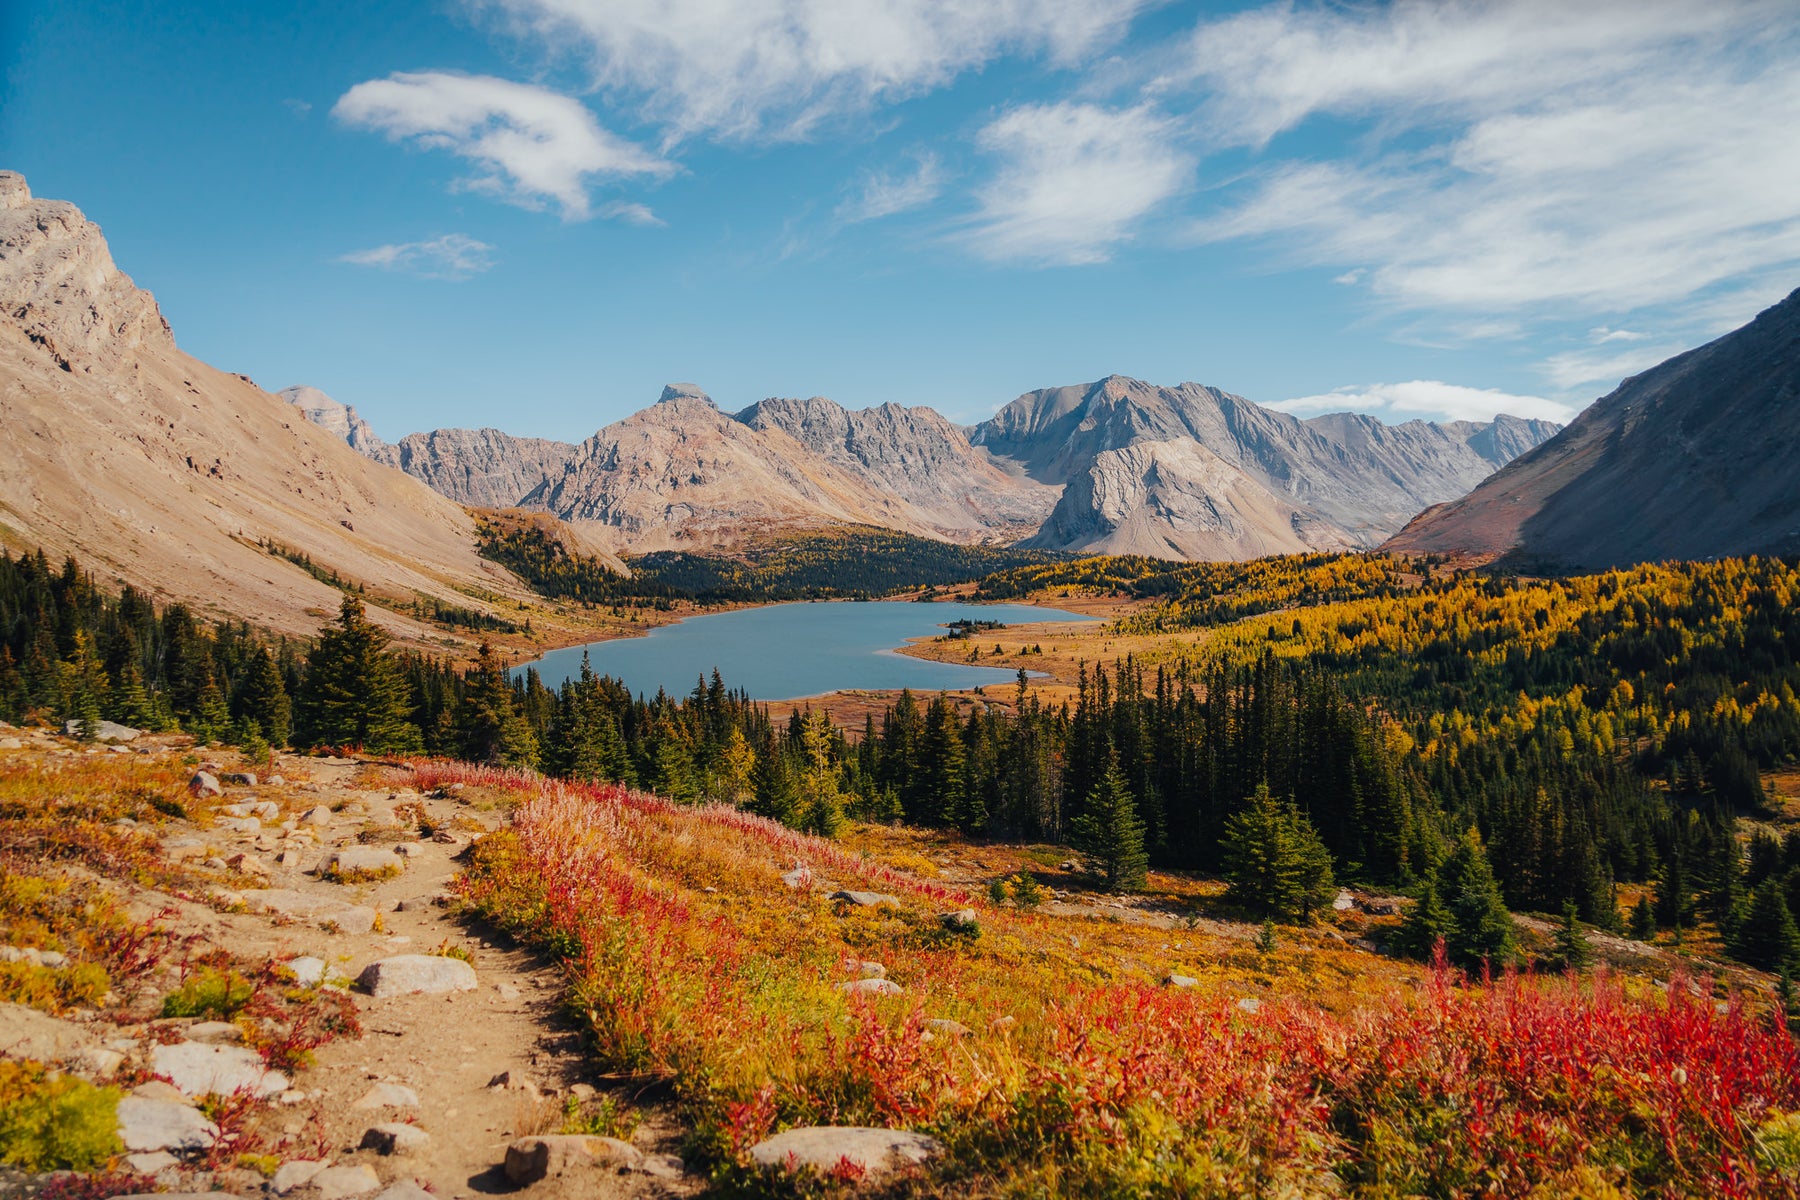
Cate has also visited this area, but her time was spent time in and around Banff National Park. “One area that if often overshadowed is the Kananaskis region,” she says. “It is stunning. We loved it and you see way more locals there. Peter Lougheed and Spray Valley Provincial Parks have some incredible hikes. We were there slightly before all the colors turned, but I could imagine how incredible it would be at peak season.”
Location Peeping For Fall Color Peaking
We asked Jesse and Cate how they went about finding photogenic locations. Both said that they check out state or regional park websites. They also both look at Google maps and Google reviews to see what it looks like and what people have said recently. For images of what it looks like currently, they will take a look at recently posted and tagged images on Instagram.

Photo by Jesse Roos. Sony Alpha 7R II. Sony 70-200mm f/4 G. 1/1000-sec., f/7.1, ISO 320
Jesse also uses an app called Explorist, that has guides and tags from other photographers. He said that it’s great for finding new shooting locations.
Cate emphasized looking for a fall color map that will give information on when they predict peak colors will be. “I also always recommend people be flexible, you can have ideal locations in mind but nature is unpredictable and it might not work out like you expected. If you’re in an area with different elevations, that will maximize your chance for finding good color. So just have a variety of locations to check out and be flexible with the plan.” Smoky Mountains offers an interactive map that predicts the foliage conditions across the contiguous US. This is a useful resource for planning trips. Other local areas, like New Hampshire, New England, Washington and Minnesota have similar guides.

Photo by Cate Schweitzer. Sony Alpha 7 III. Sony 24-240mm f/3.5-6.3. 1/500-sec., f/4.5, ISO 100
Photographing Fall Colors
Once you’ve found an ideal spot, it’s time to actually make the photos. Cate and Jesse both rely on Sony Alpha cameras and lenses. Cate uses the Sony Alpha 7 III. “That camera has withstood so much throughout my travels,” she says. “Then I always prefer my Sony 16-35mm f/2.8 G Master for landscape photography. I just love the look of a small person and a big landscape. And you can even use that lens for close ups and details.” She also shoots with the Sony 24-240mm f/3.5-6.3, she says that’s a perfect all-around lens because it covers so much focal distance.
Jesse currently shoots with the Sony Alpha 7R IV and the G Master “holy trinity” of lenses – the Sony 16-35mm f/2.8 G Master, Sony 24-70mm f/2.8 G Master and Sony 70-200mm f/2.8 G Master. When he first arrives at a scene, Jesse tends to start with the Sony 70-200mm f/2.8 G Master due to its versatility. He also loves being able to use the APS-C mode to punch in a bit, and with the R sensor, he doesn’t have to worry about losing resolution. In the past he's used the Sony Alpha 7R II and a variety of Sony f/4 lenses.
Cate says that she prioritizes hiking at golden hour, so she can have the best light for making images. She explains that golden hour is of course beautiful light, but that it is particularly important for fall colors. She says it’s important to photograph with diffused light, meaning golden hour, cloudy conditions, or in an area where there isn’t a lot of direct light, otherwise those vibrant colors you’re trying to showcase are going to look washed out.

Photo by Cate Schweitzer. Sony Alpha 7 III. Sony 24-240mm f/3.5-6.3. 1/640-sec., f/4, ISO 50
Jesse mentions that he has had success using a polarizing filter or an ND filter. Both of them use auto white balance, but pay close attention to the white balance when editing. Jesse goes on to explain that if you’re going to have a human subject in the shot, you should be thoughtful about their clothing. “It could be interesting to have them in a contrasting color to really pop. Or maybe you want to go the other way and have them blend in a bit. Either can be cool, just think it through ahead of time.” He also recommends using compression to your advantage when composing an image.
Both photographers talked about the importance of composition. “You could position leaves at the bottom of your frame to add some visual interest,” Cate says.
Jesse likes to use that technique as well. He also talked about trying to create a fresh shot. He states that with the rise of Instagram, certain images of locations have become overdone and everyone is just making the same shot. “I usually get the classic shot too, but once I get that out of the way, I honestly feel better because then I can be creative and get something unique, which is what makes me really happy.”

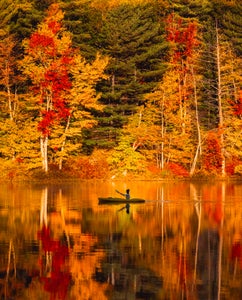
Photo by Jesse Roos. Sony Alpha 7R II. Sony 24-70mm f/4. 1/125-sec., f/8, ISO 200
Editing Your Fall Imagery Authentically
After you’ve found awesome locations and made epic images, the next step is editing the shots. This can be particularly tricky with fall colors, because you can easily move from a beautifully vibrant image to one that looks fake and oversaturated. Cate and Jesse both stated that they prefer to edit images to look as true to life as possible. Both of their goals are to authentically represent the beauty they saw in nature.
Cate’s editing process always starts with a preset, but then she does quite a bit of fine tuning and individualized editing from there. First, she tries to get an accurate white balance. Then she bumps the saturation for red, yellow and orange as high as she can, without them looking fake. Next, she drops the luminance for all three colors. She has found that this step makes the colors look richer, especially in cloudy shots. She then uses the brush tool or the color mask tool in Lightroom to hone in on specific parts of the image. She also stresses the importance of taking time away from your computer, she says she likes to do an initial edit, then give her eyes a break and come back the next day to make sure the colors and everything still look authentic.

Photo by Cate Schweitzer. Sony Alpha 7 III. Sony 24-240mm f/3.5-6.3. 1/640-sec., f/3.5, ISO 1250
For luminance, Cate explains that you need to be careful if you have a person in your frame. Cate often includes herself in the shot, and with a lighter skin tone there tends to be some orange in it. Sometimes, she is just careful with the orange luminance slider. Other times, she selects the person in the shot and edits them separate from the scene. Either way, she says it’s something important to keep an eye on in your photographs.
Jesse’s editing process is a little different. He adjusts the tone curve to an S curve. He lifts the blacks a tiny bit, adjusts the highlights, and raises the shadows. He also adds some vibrance, depending on the image. “I try to just tow that line where it doesn’t look dull but it still looks real. I do add saturation, sometimes and desaturate sometimes, just depending on the scene for different colors. Overall, I like it to have a little bit of extra special sauce. but mostly be an accurate portrayal. I don’t adjust the hues too much, Mother Nature already did an amazing job and I don't really want it to reflect me, I want it to reflect nature.”
Photo by Jesse Roos. Sony Alpha 7R II. Sony 70-200mm f/4 G. 1/800-sec., f/4, ISO 500
Sharing Images & Protecting Natural Spaces
While we love promoting exploration and sharing images through social media, it is important to protect these natural spaces for years to come. Over the past few years, certain locations have become extremely popular on Instagram and then become overrun with people. To mitigate this, some photographers are more vague about the location in their posts. This has been a large debate for a number of years and while there is no definitive solution, it is certainly an issue to be aware of and something to try to avoid.
The best way to ensure your behavior doesn’t leave a negative impact is by following Leave No Trace principles. Leave No Trace has a set of guidelines to ensure a sustainable future for the outdoors and the planet. The seven main principles are:
- Plan ahead and prepare
- Travel and camp on durable surfaces
- Dispose of waste properly
- Leave what you find
- Minimize campfire impacts
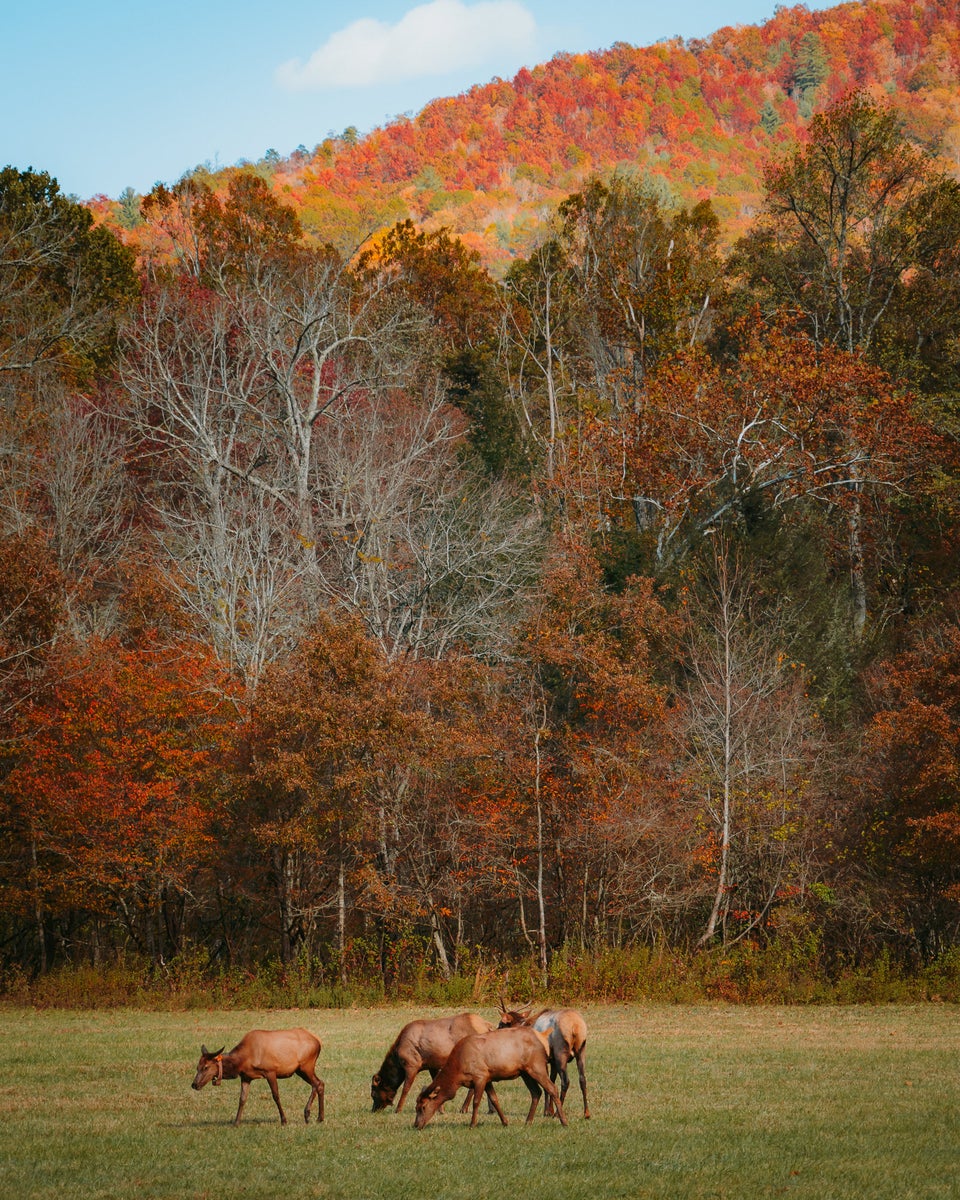
- Respect wildlife
- Be considerate of others

Photo by Jesse Roos. Sony Alpha 7R II. Sony 16-35mm f/4. 1/125-sec., f/4, ISO 500
“I actually prefer the phrase, ‘Leave it Better,’” Jesse adds. “We really need to listen to the experts and heed their advice so that posterity has the same privilege of visiting and enjoying the places on Earth that we do.” Ultimately, we are in a community of photographers and nature enthusiasts, so following the Leave No Trace principles allows us to serve as strong community members.
For more inspiration and ideas for photographing fall colors, be sure to follow Cate and Jesse on Instagram. You can also check out Cate's blog, which lists even more hikes. And join the community of photographers and filmmakers on the Sony Alpha Community Forums to connect with more creators.

