Travel, landscape and wildlife photographer Colby Brown is an expert at shooting all kinds of wildlife including birds, reptiles, and of course – megafauna. He has found that his techniques for each kind of animal varies. From his essential go-to gear for photographing big animals and walking through his in-the-field camera setup, the Sony Artisan of Imagery shares his tips for getting your camera ready for anything so you won't miss the shot.
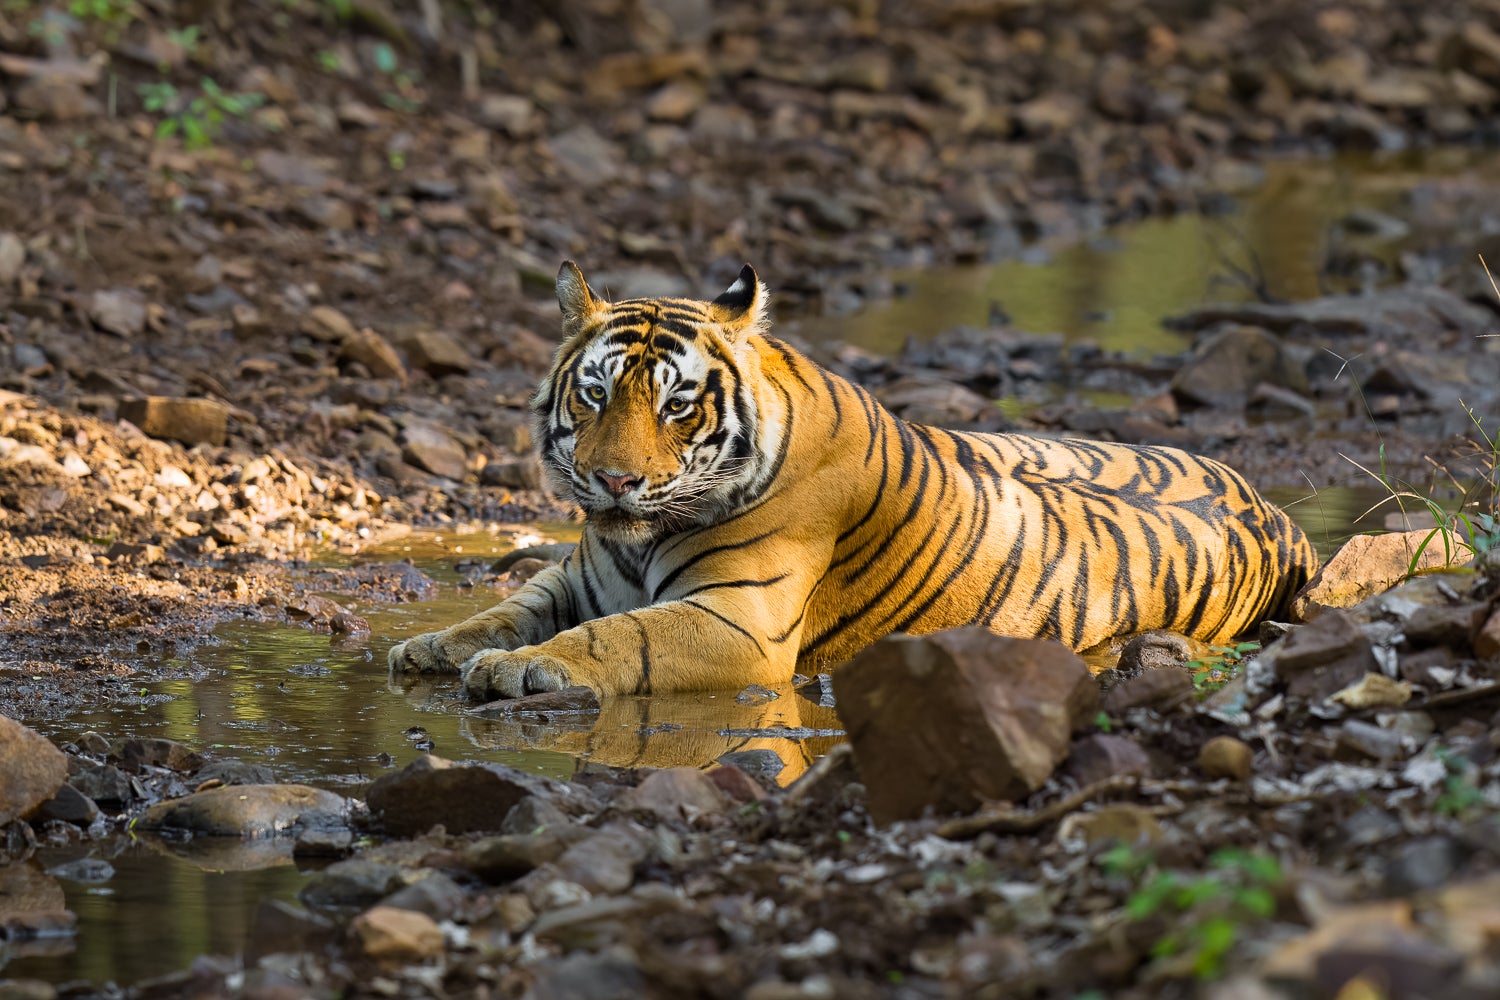
Photo by Colby Brown. Sony Alpha 1. Sony 400mm f/2.8 G Master. 1/250-sec., f/4, ISO 1000
Sony Artisan Colby Brown shares his tips for how to set up your camera for maximum content when take photos and videos of very large mammals.
Go-To Gear
Brown’s go-to camera when he treks out to photograph megafauna is the Sony Alpha 1. When packing his camera bag, he has a few considerations for selecting which lenses to bring. “I usually go with the Sony 400mm f/2.8 G Master, if I am not worried about portability and packability. And then that will usually be paired with the new Sony 70-200 f/2.8 G Master II and typically the Sony 200-600mm f/5.6-6.3 G. So I’ve got one lens for when I have enough light and want that extra reach, the extra 200mm beyond the 400. And then when I'm shooting in low light situations, the 400mm f/2.8 GM is my go-to, my bread and butter. The new 70-200mm is so light and so packable – it's really great to have in those situations where the animals get closer than you're expecting.”
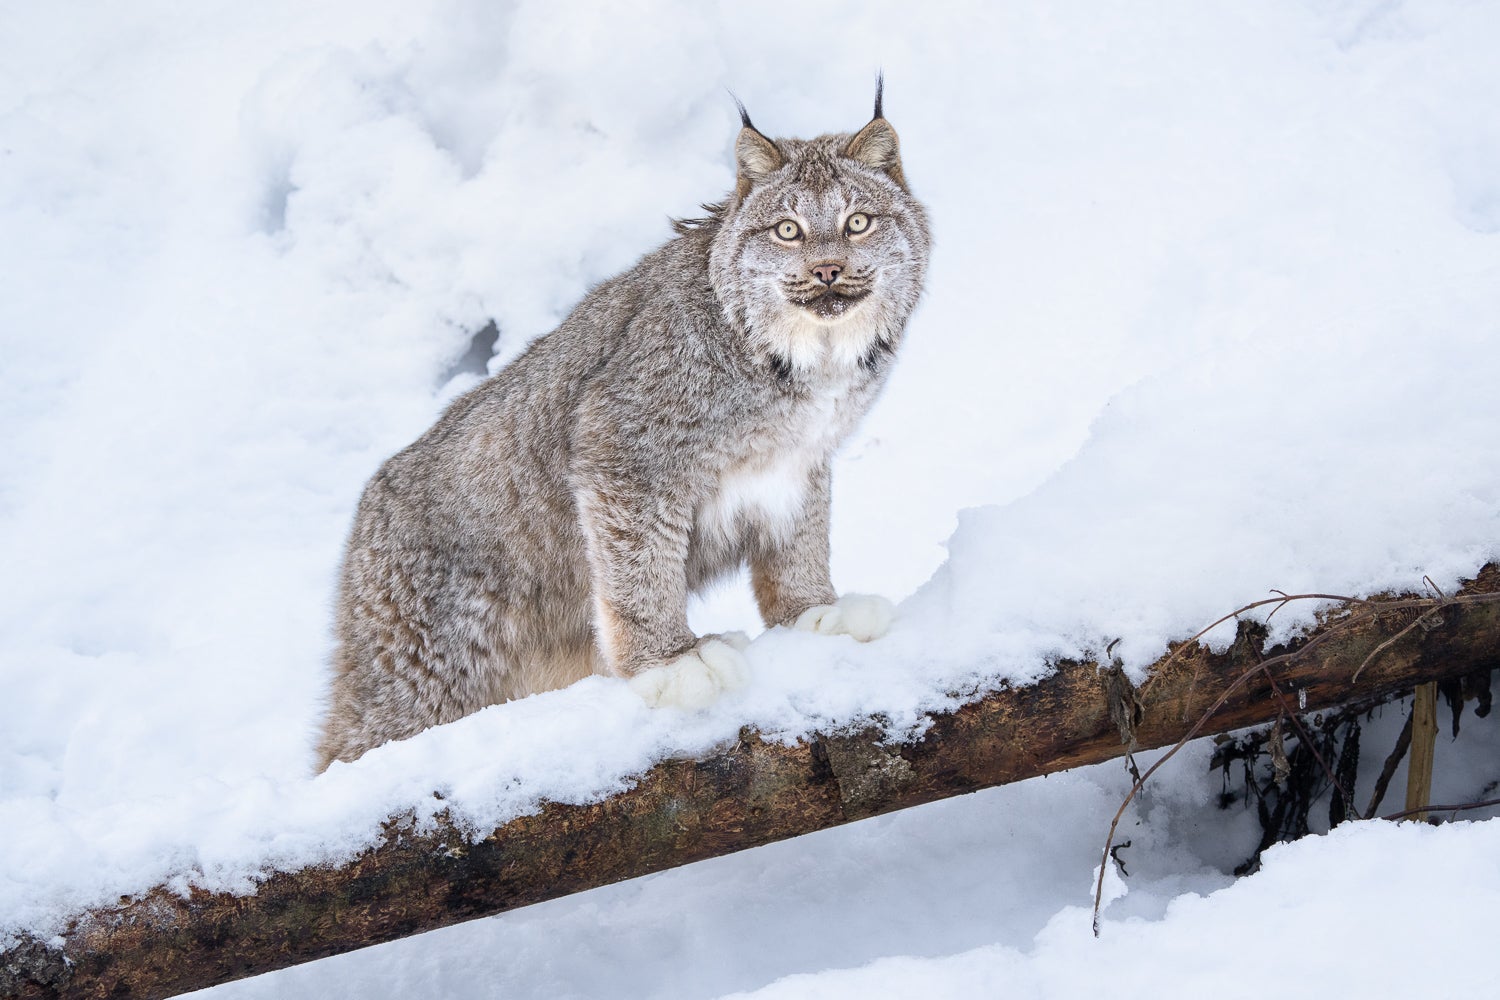
Photo by Colby Brown. Sony Alpha 1. Sony 200-600mm f/2.8 G Master. 1/800-sec., f/5.6, ISO 1250
Customize Buttons For Easy Access
Brown customizes the buttons on his Sony Alpha 1 to ensure that he’s maximizing his time with the megafauna species. “I'm always trying to make sure that I have certain elements, the things that I need the most quick access to, within one button click away.”
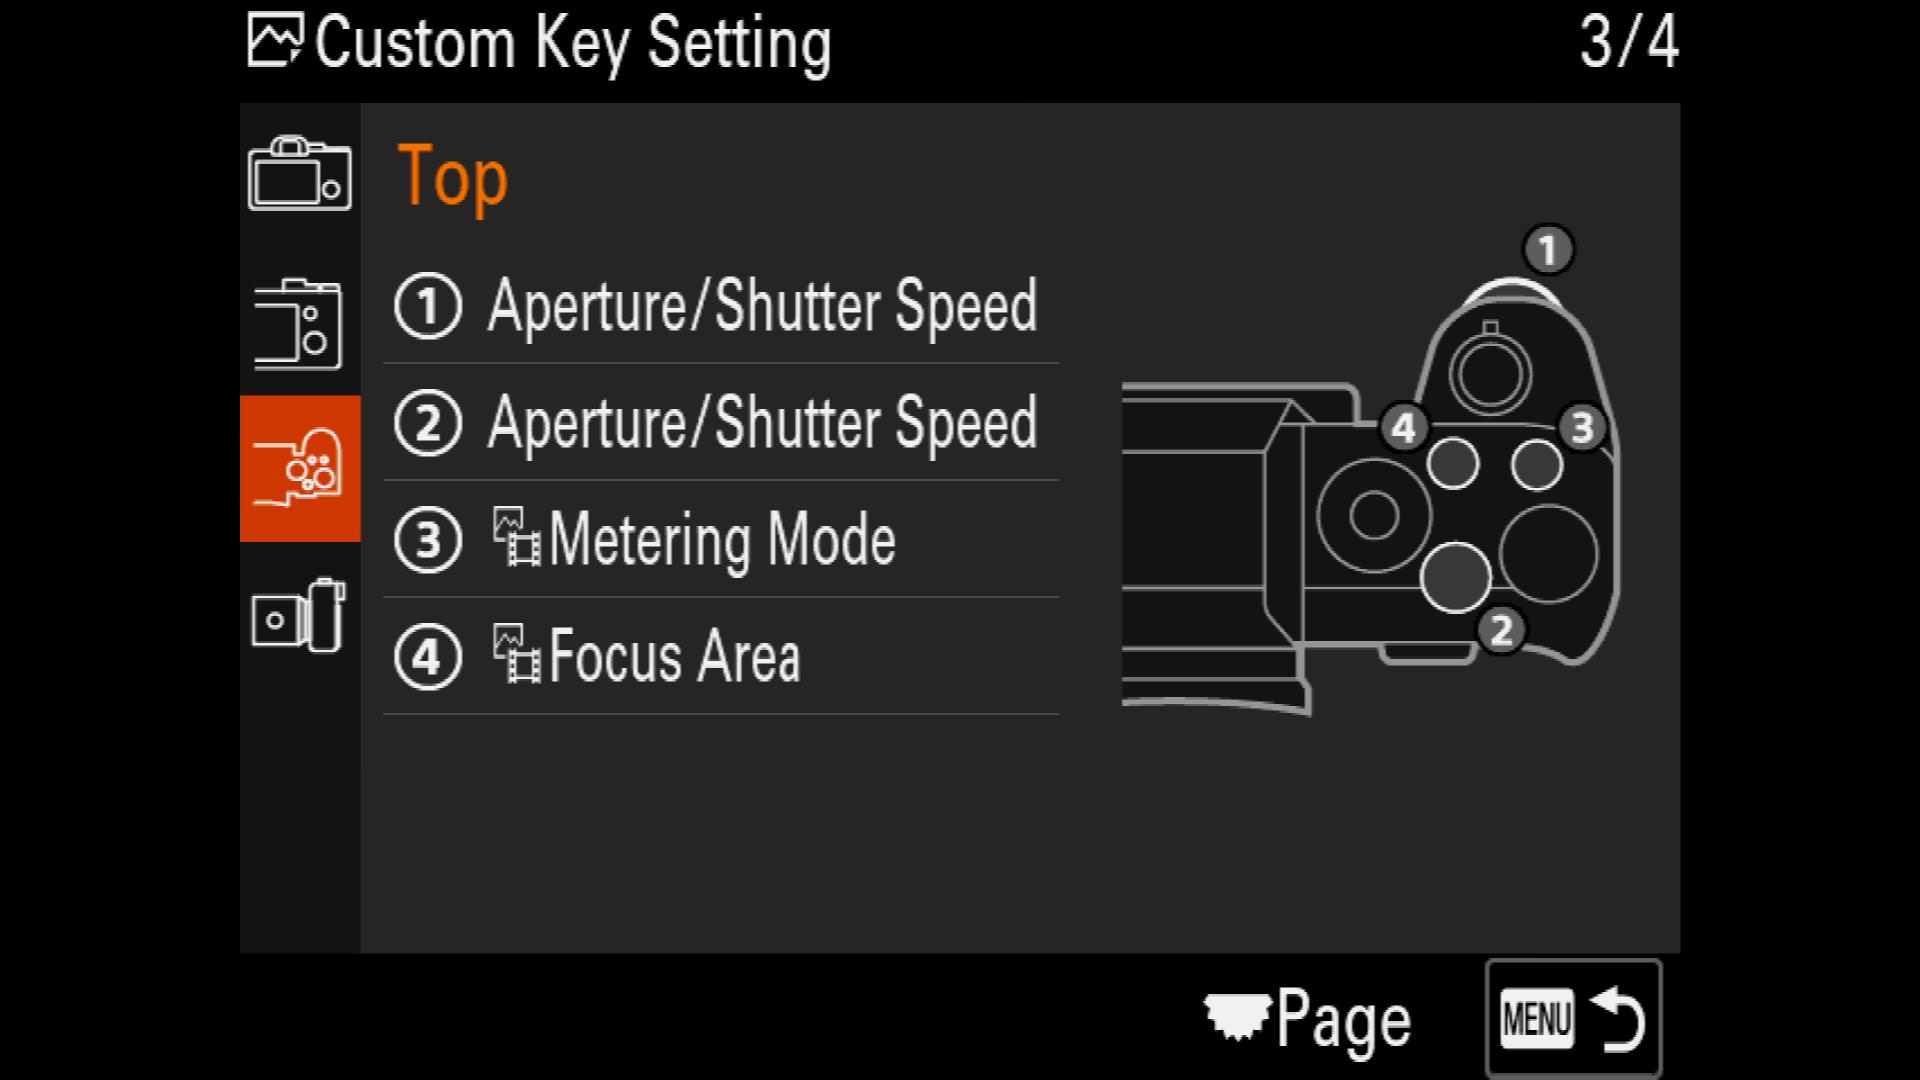
He customizes buttons on the top and back of the camera. He has found he needs quick access to the autofocus area and customizes button 4 on the top of the camera to focus area. “While the ‘AF Mode’ on the Alpha 1 has a dedicated top dial, I still want quick access to change the Focus Area from wide to zone to everything in between.”
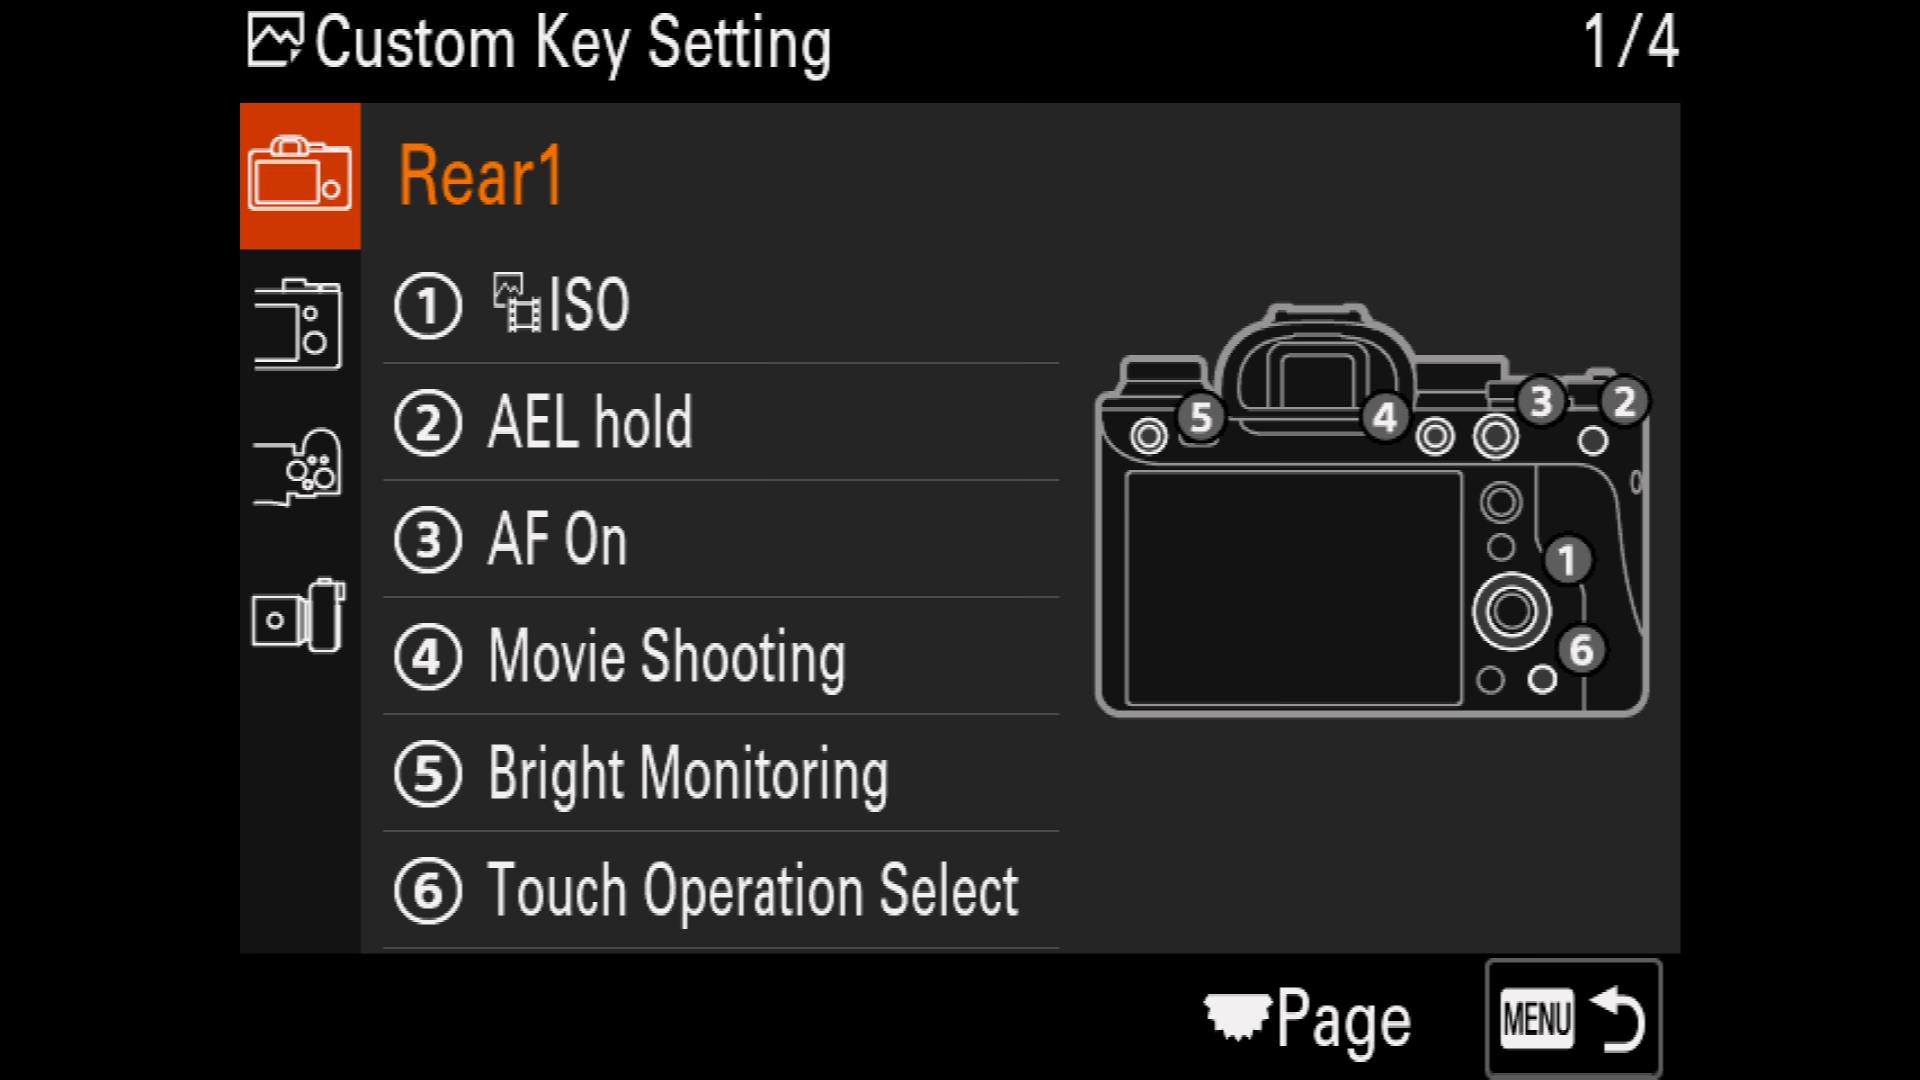
But Don’t Customize Everything
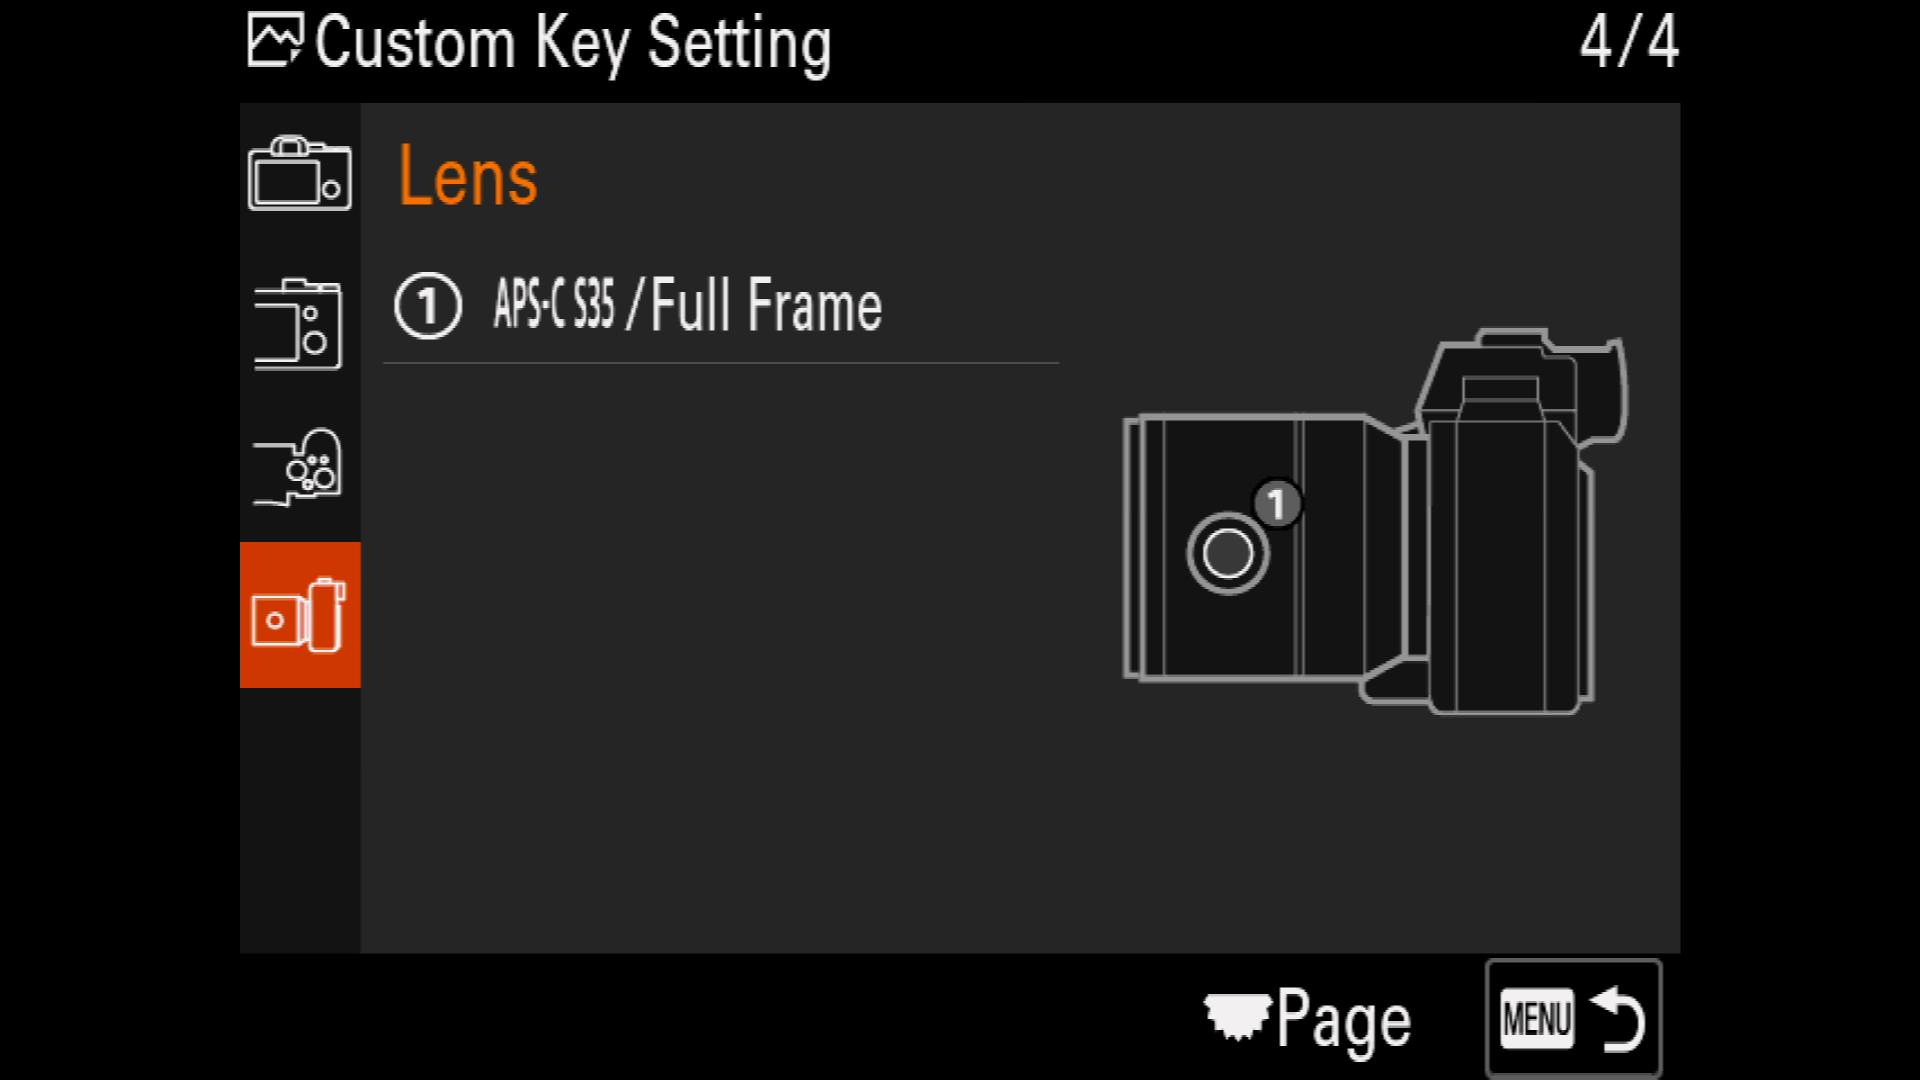
Brown also gave us a tip on a custom setup he used to have, but found didn’t work as well as he thought it would. “I used to custom set the lens button on the telephoto lenses to jump me into APS-C mode so that I could get that extra perceived reach. I stopped doing that because there were too many times I accidentally hit that button. There is an indicator on the screen when you have that mode on, but when you're in the moment, you aren’t necessarily looking at those things. So just be aware, I don't recommend putting the easy access on the lens. Instead customize it to either your FN menu or one of your other buttons on the back of the camera. So you have to cognitively think more actively about using it so that you don't find yourself shooting with an APS-C mode when you didn't intend to do so.”
Don’t Be Afraid To Use Clear Image Zoom
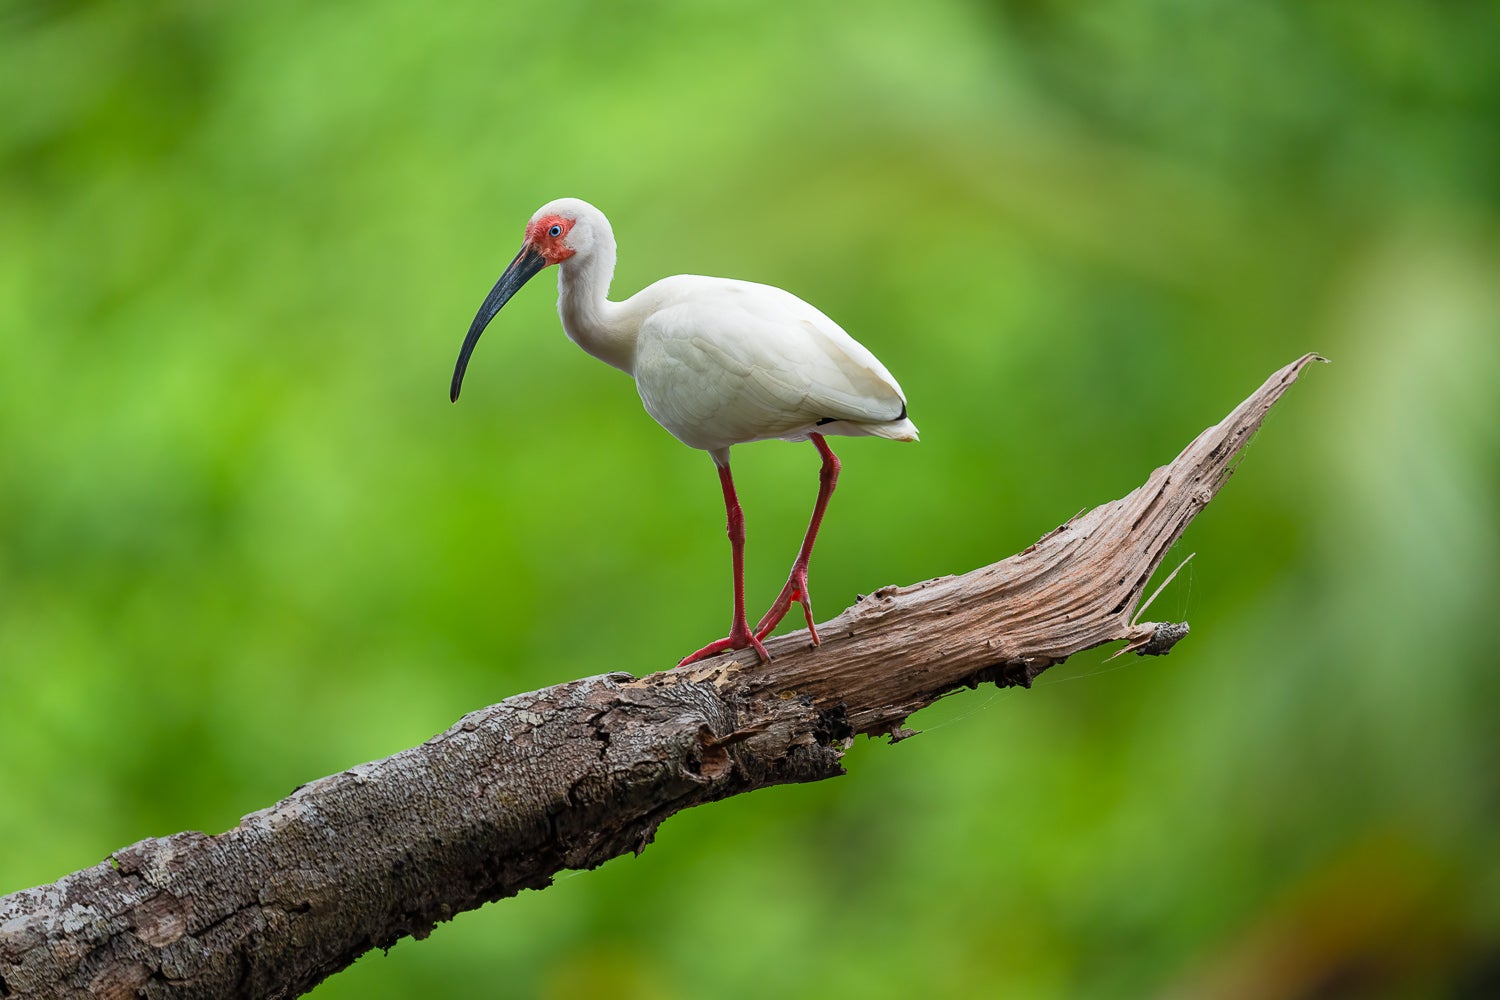
Photo by Colby Brown using Clear Image Zoom. Sony Alpha 1. Sony 600mm f/4 G Master. 1/2500-sec., f/4, ISO 640
Brown has found that with fast moving wildlife, being able to access Clear Image Zoom immediately is critical. He makes button C3 on the top right hand corner of the camera trigger this setting. “Clear Image Zoom is a really great option for those that want to zoom in for that extra reach,” he says. “You're limited because you have to change into JPEG mode, but in a lot of situations you have very minimal image quality loss, if any at all, to be able to double your zoom. There have been times where I’ve been in a situation where I’m shooting with my 600mm and I end up using Clear Image Zoom without a teleconverter so I don't lose my aperture stops. Then I can zoom in to 1200mm and come away with a really beautiful image, assuming there's enough light to be able to handle the details and things like that.”
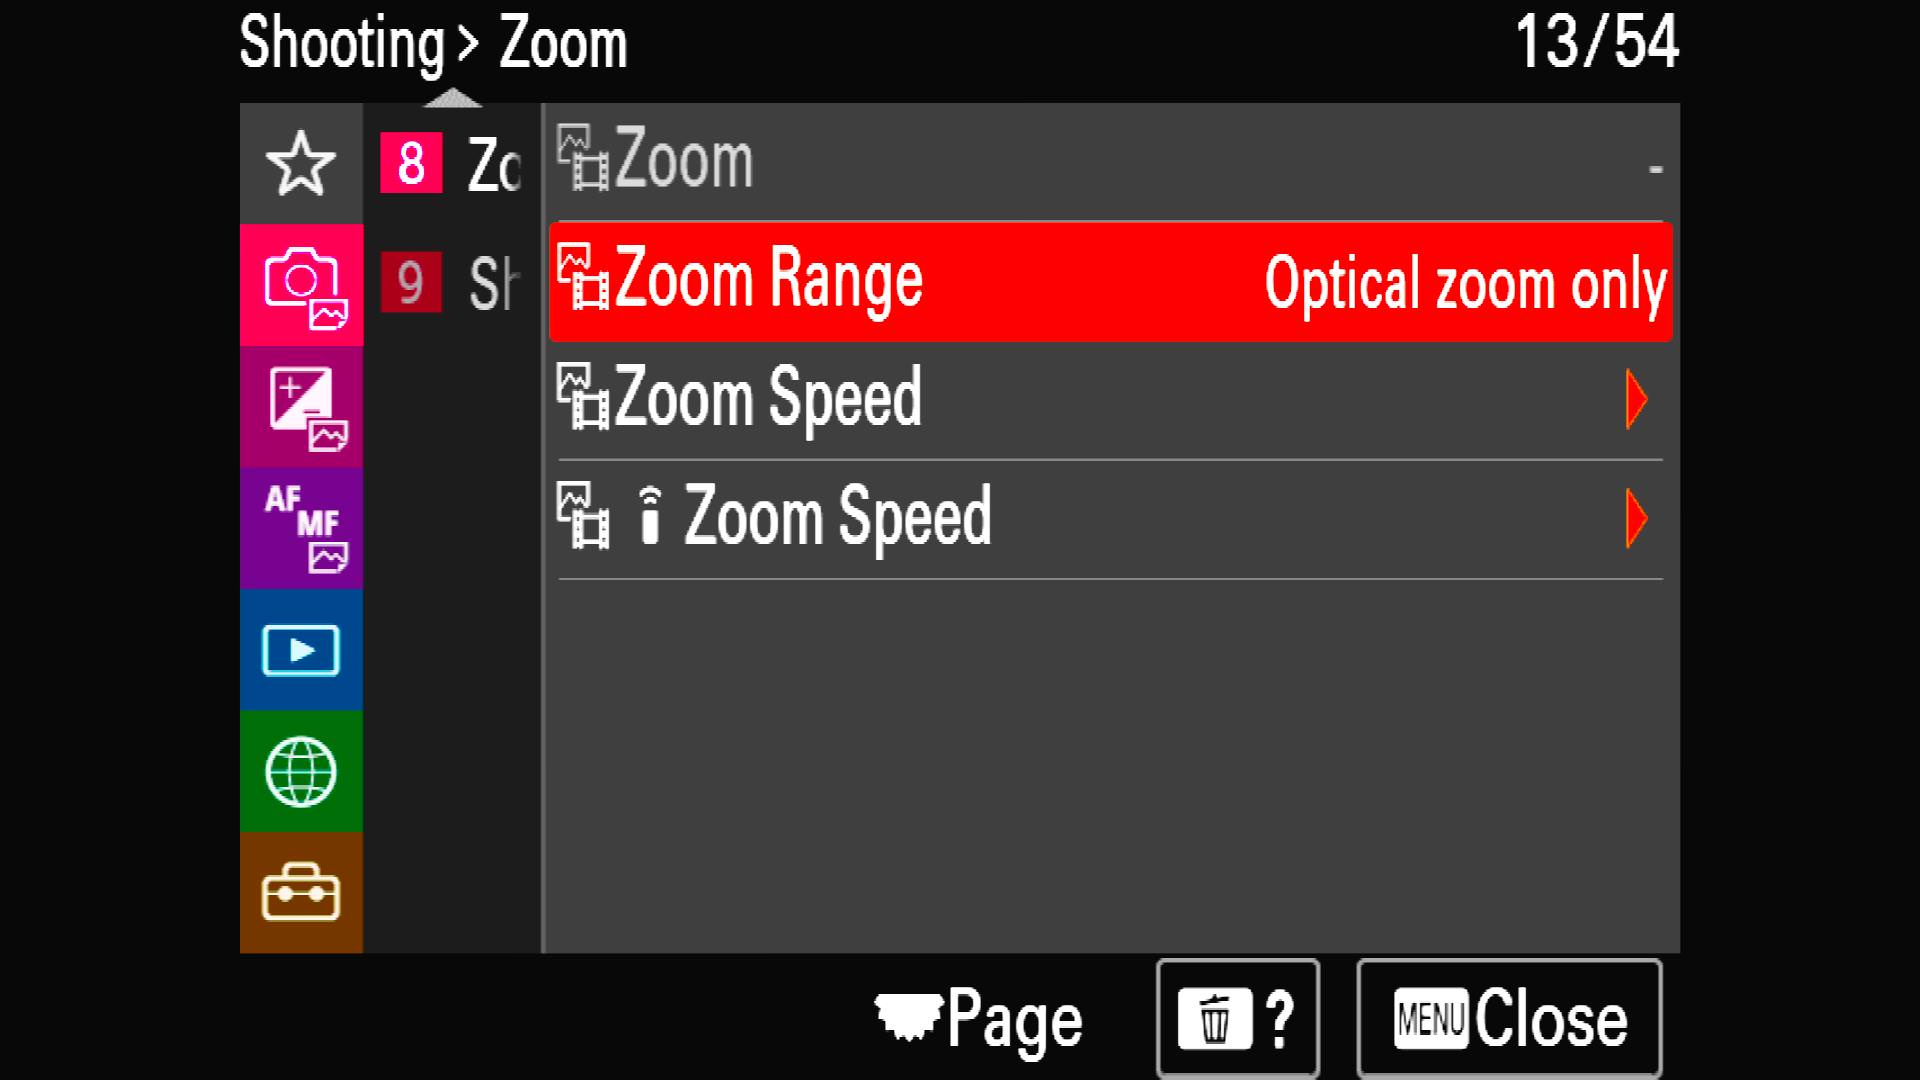
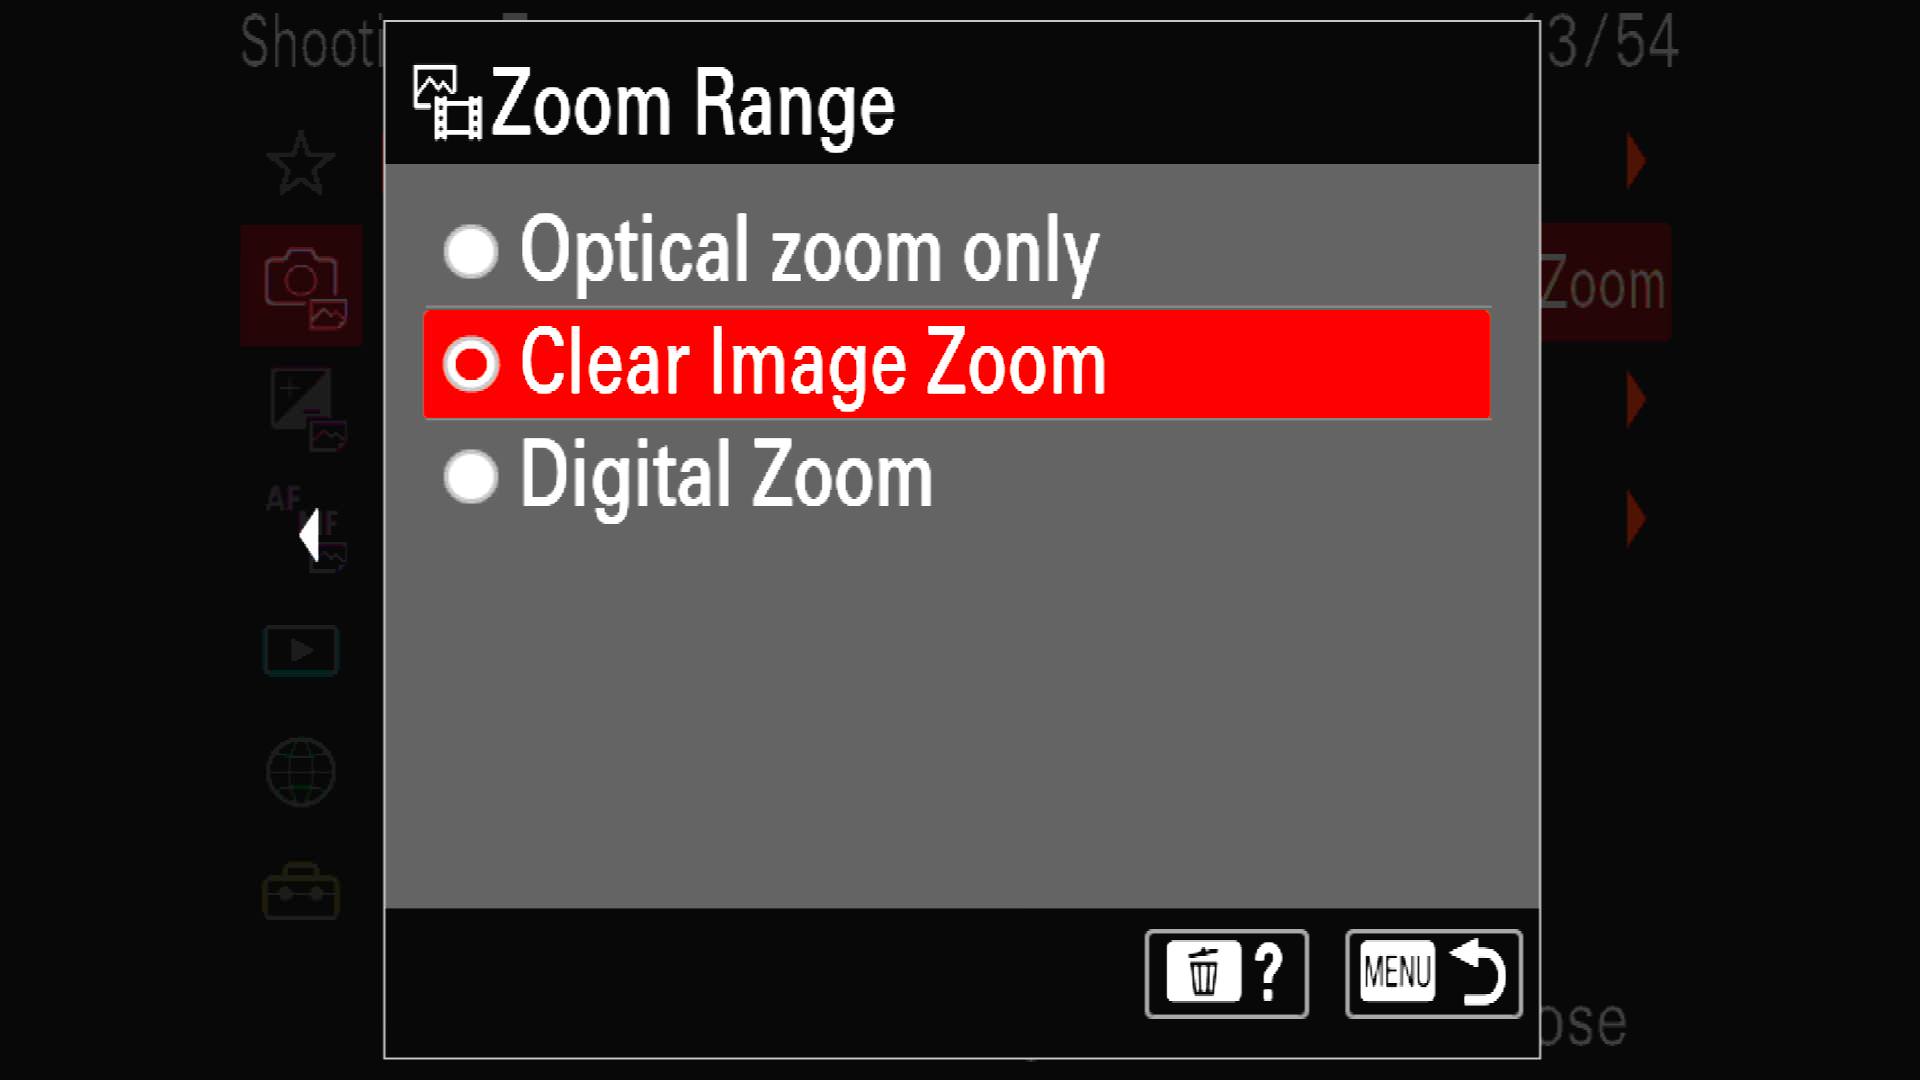
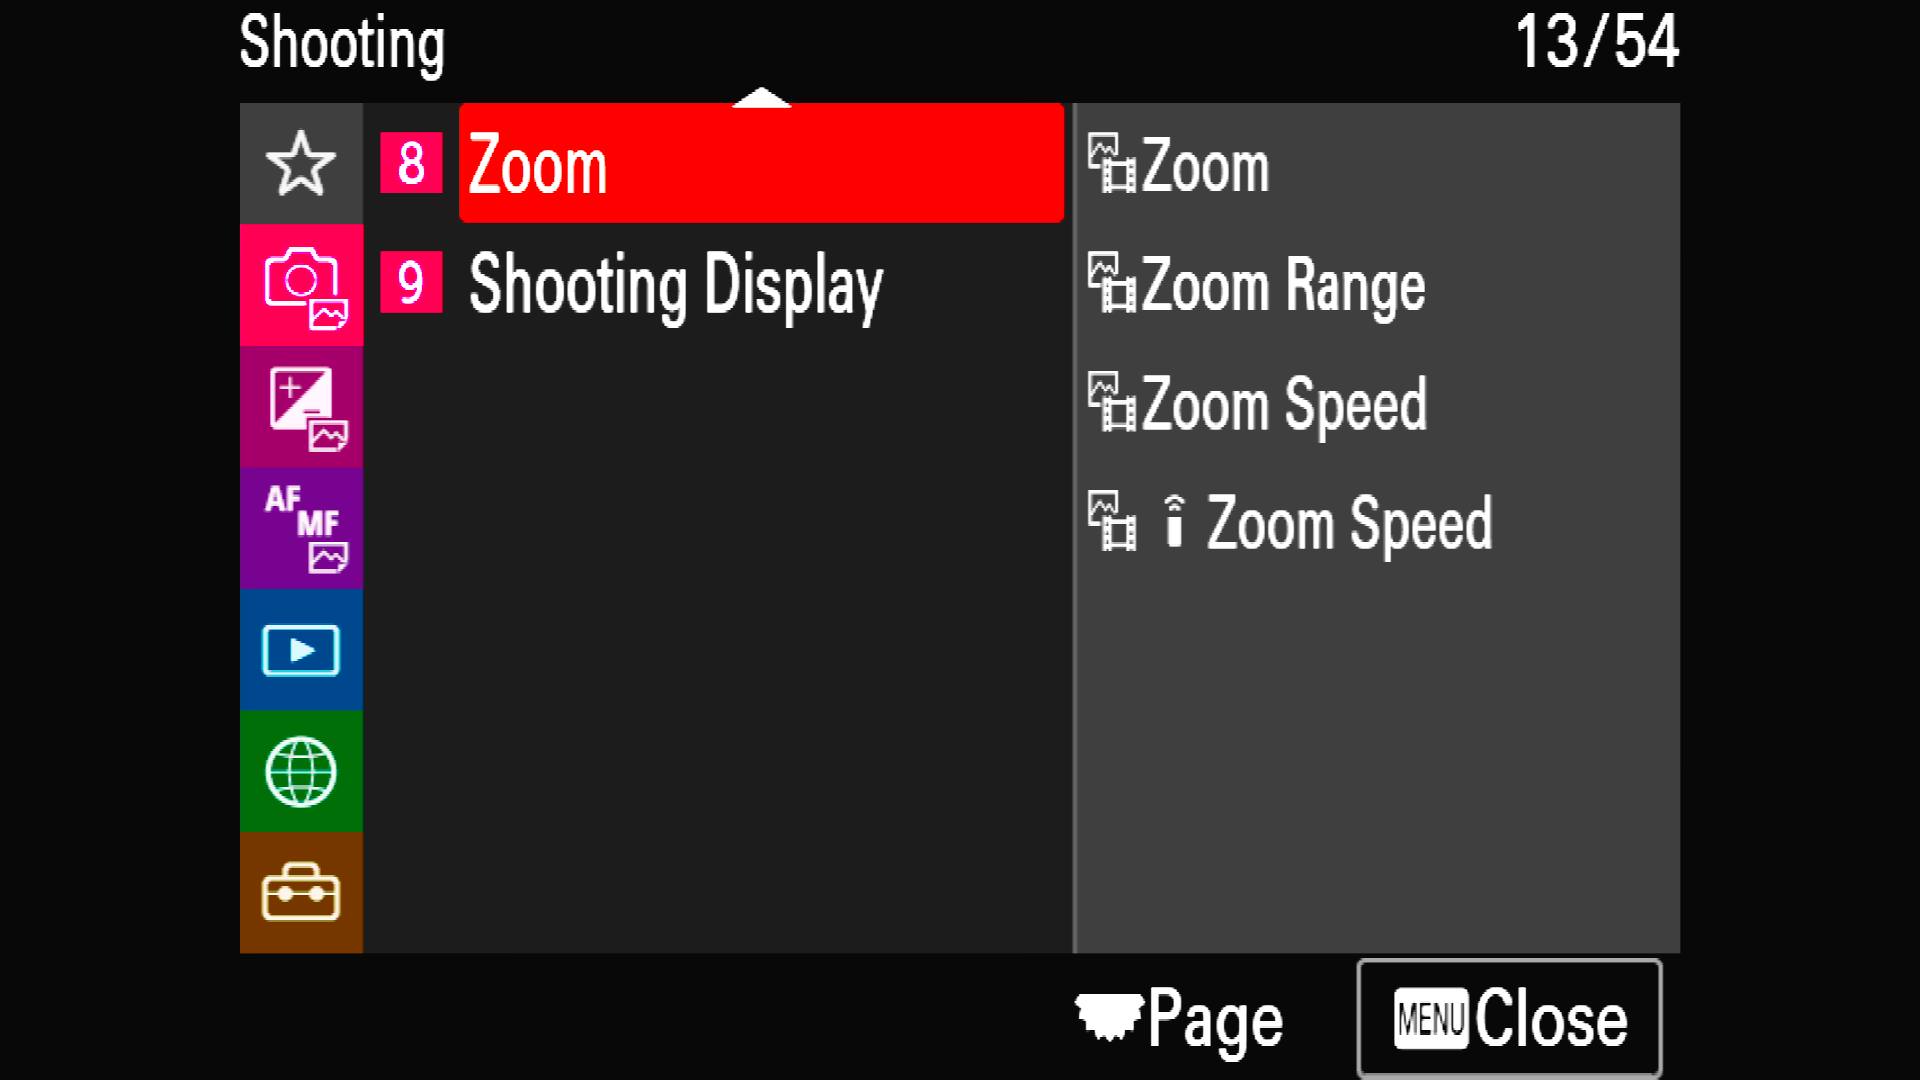
Take Advantage Of The Save Custom Mode Option
“On the cameras, you have three physical options on the camera mode dial,” explains Brown. “What I'll typically do when I get to a scene is I will dial in that mode for stills for whatever it is that I'm photographing. So a lion or a gorilla, whatever it is, and then I'll dial in and that's number one. Next I'll dial in number two for the exact same scene, but I'll do it for 8K video – that way I can quickly move back and forth between the two. I can make sure I have the right settings and everything because they're going to be different for the two different variations. Then I’m able to quickly go back and forth as things are happening or as the subject is doing different things, and I can maximize my efficiency output of what I'm creating out of a given scene.”
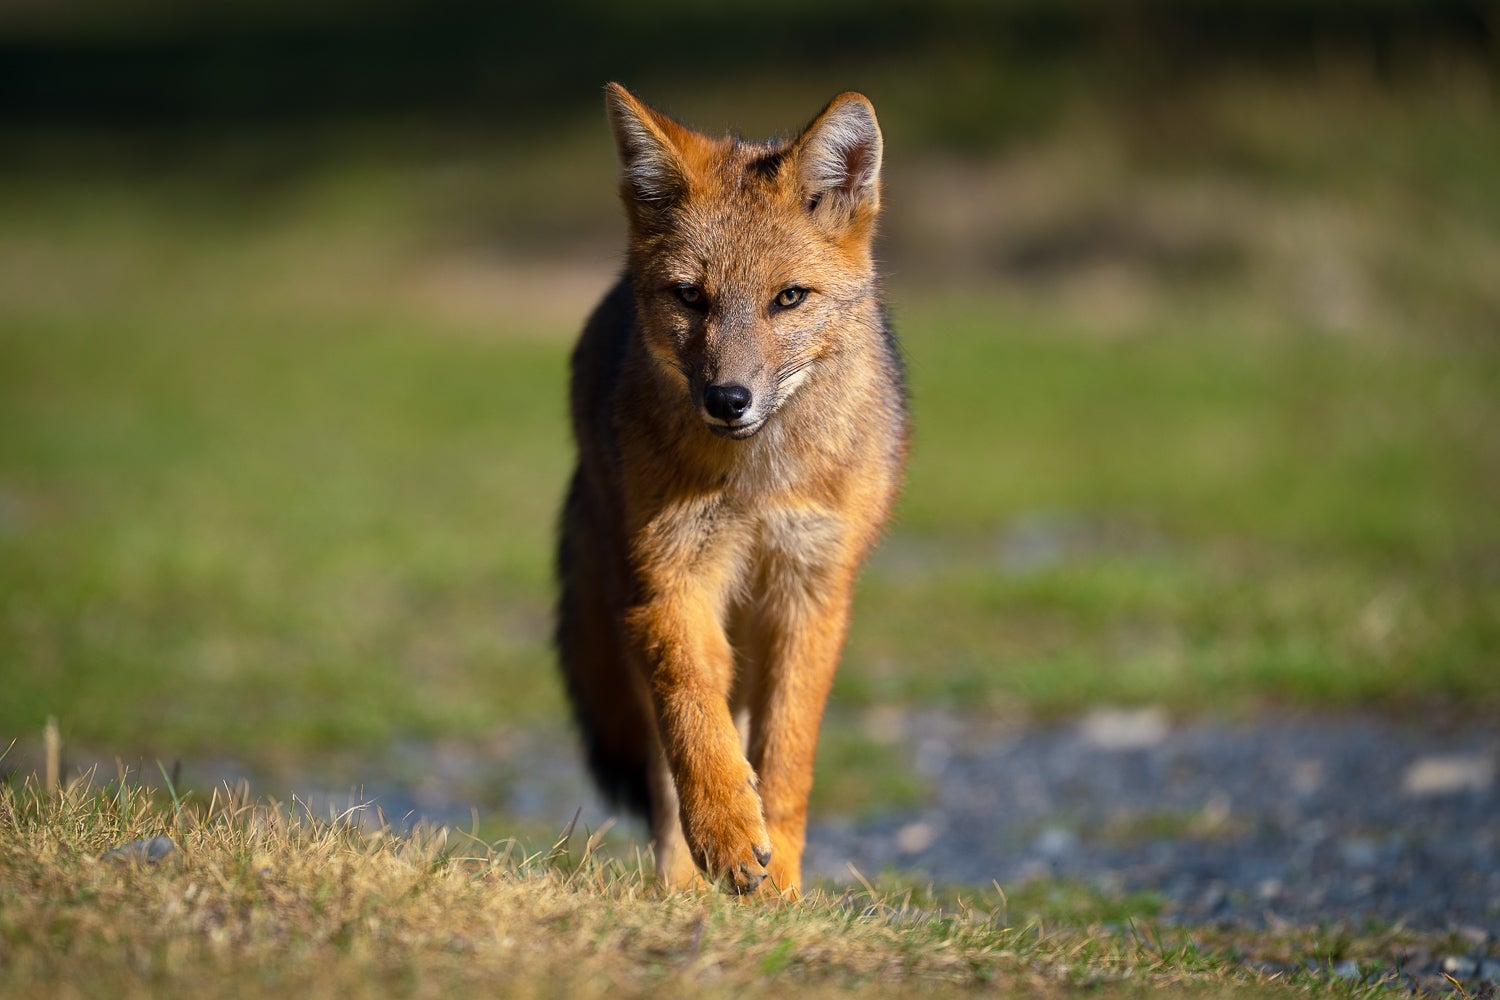
Photo by Colby Brown. Sony Alpha 1. Sony 600mm f/4 G Master. 1/1250-sec., f/4, ISO 100
Use Buttons To Change Eye-Autofocus
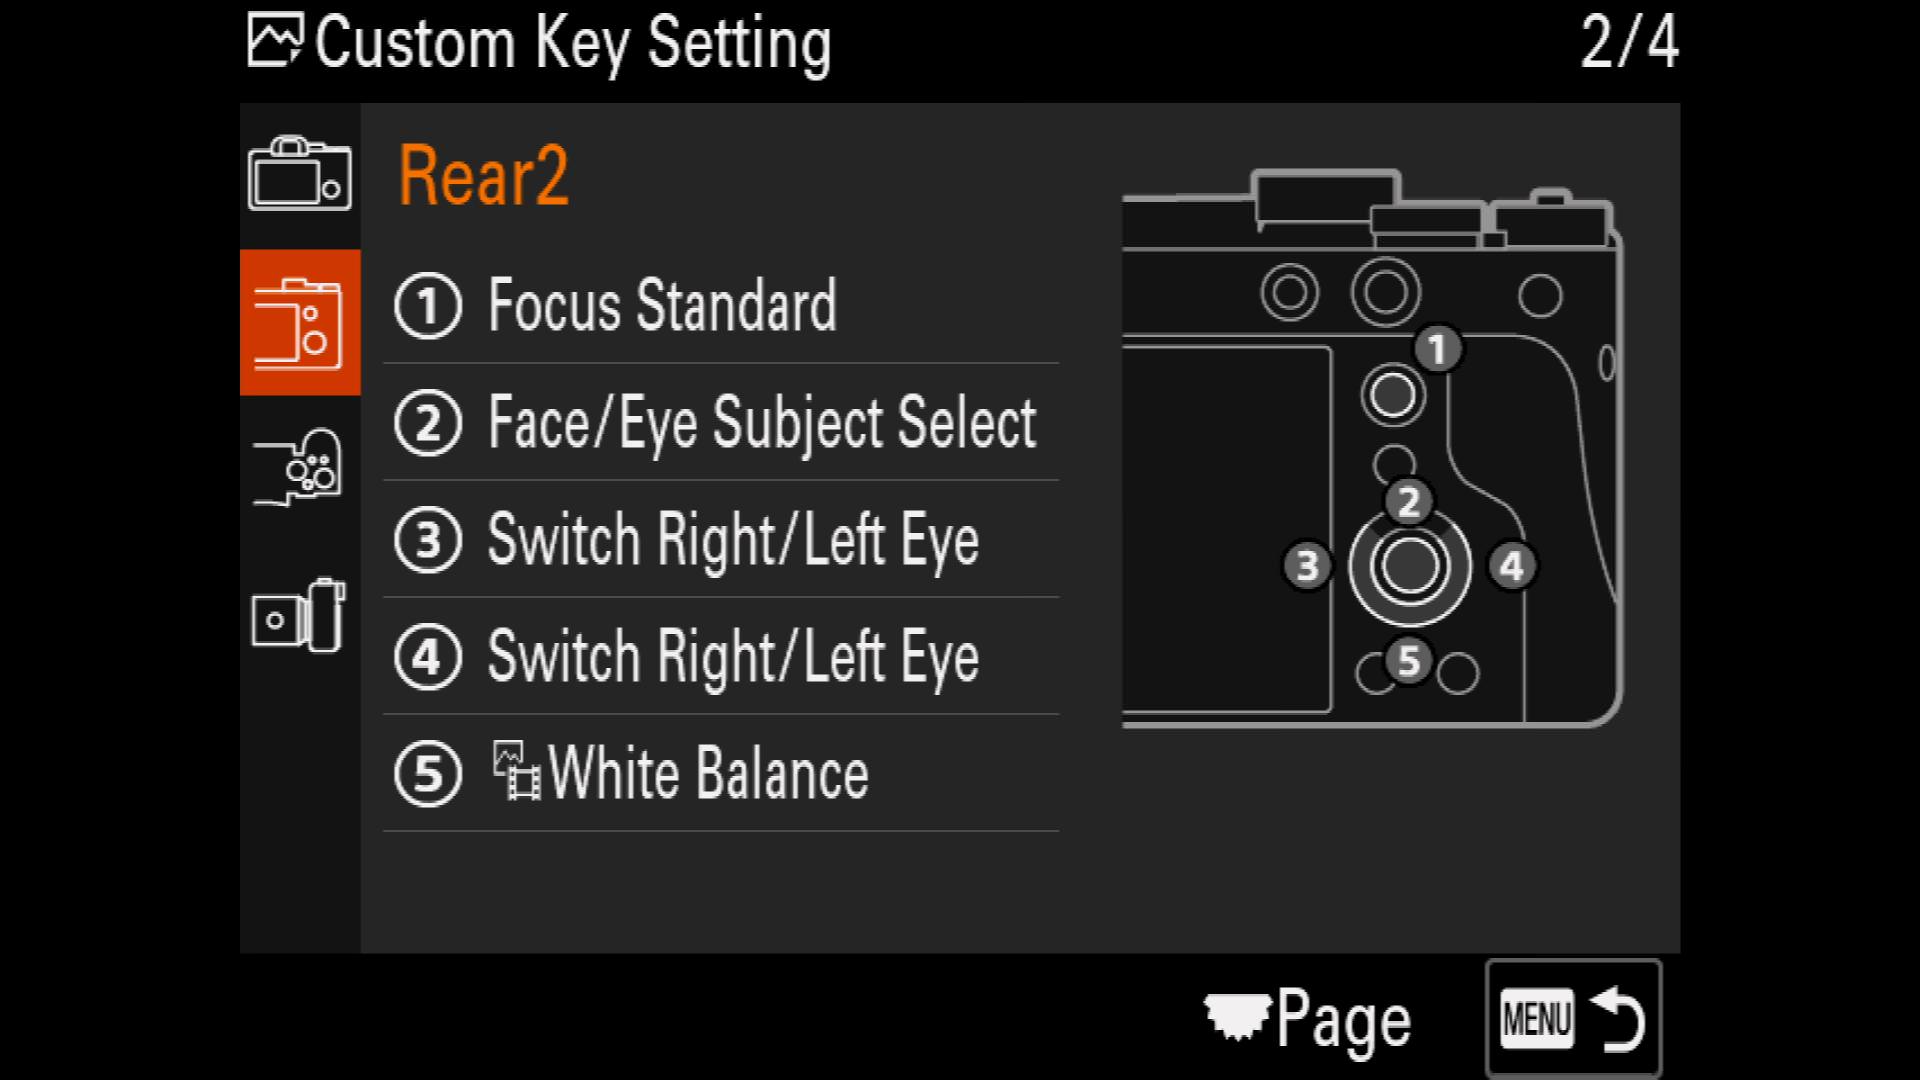
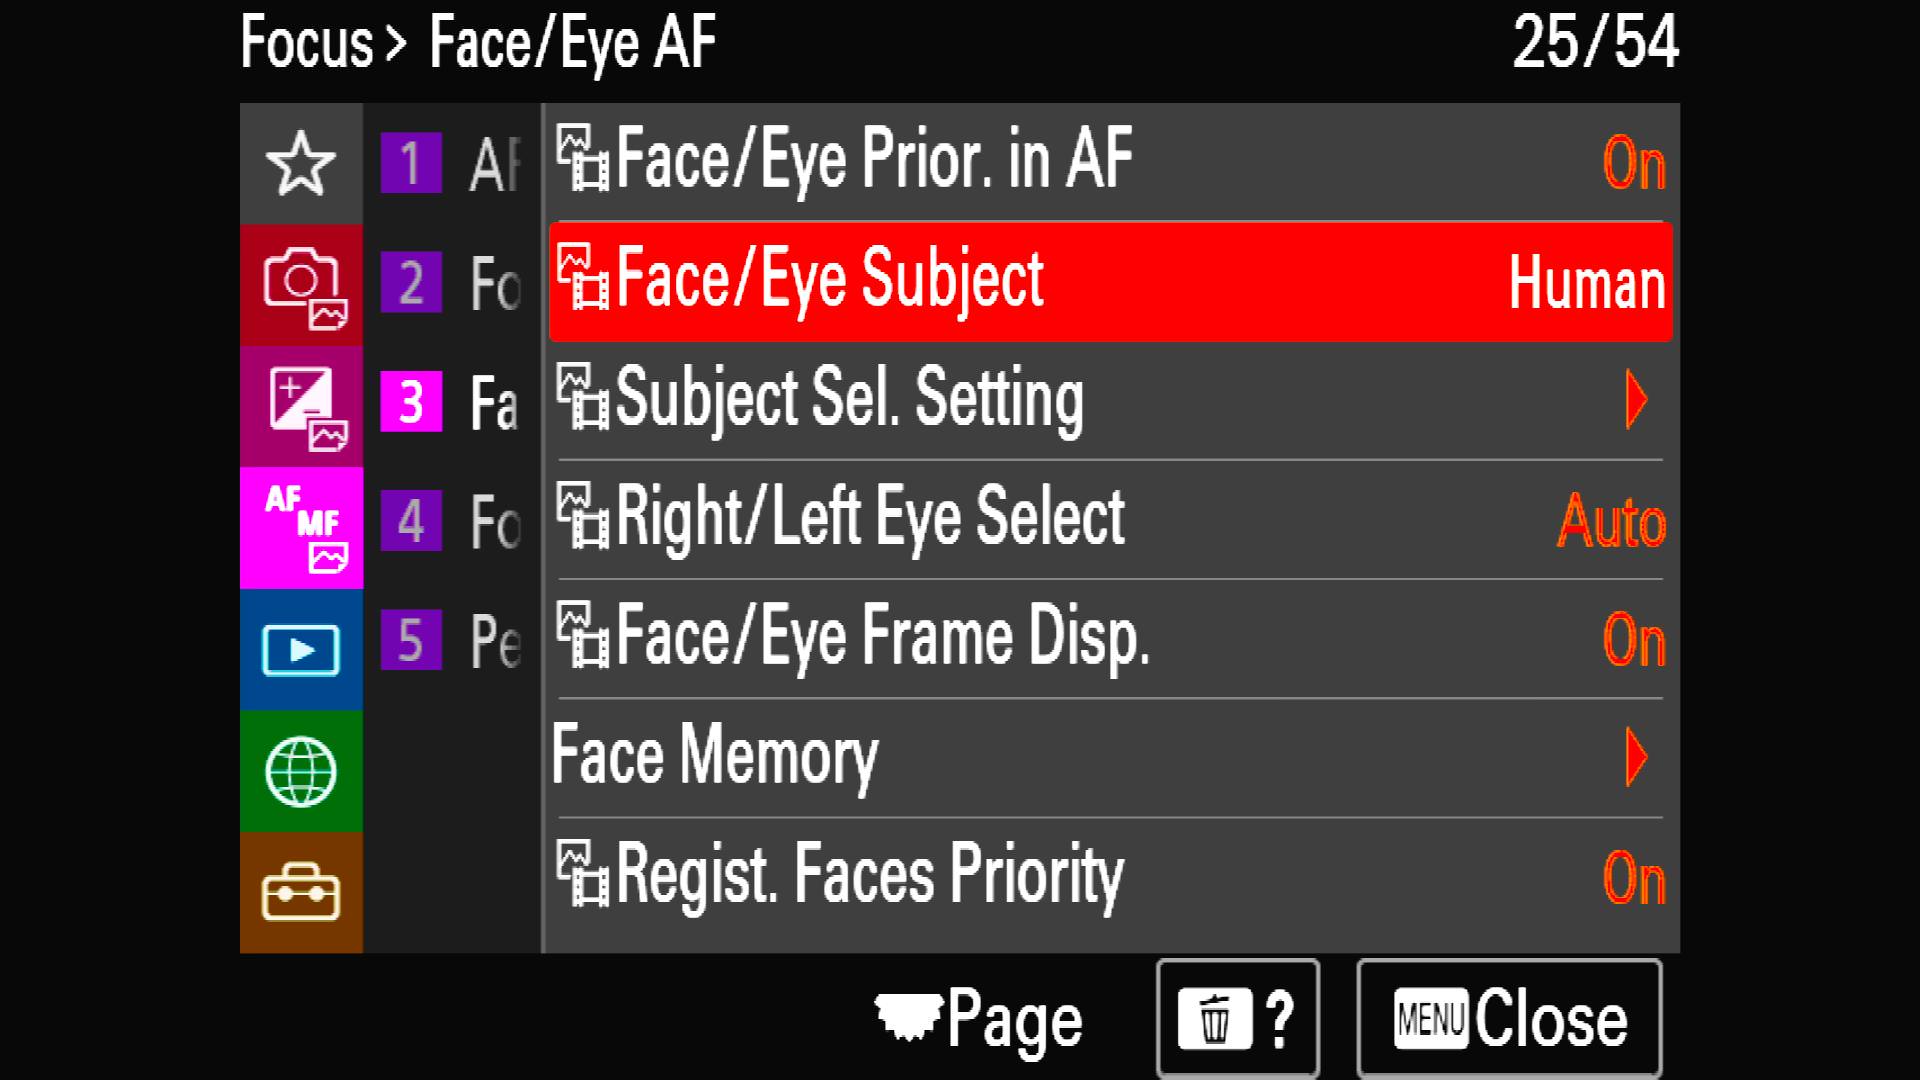
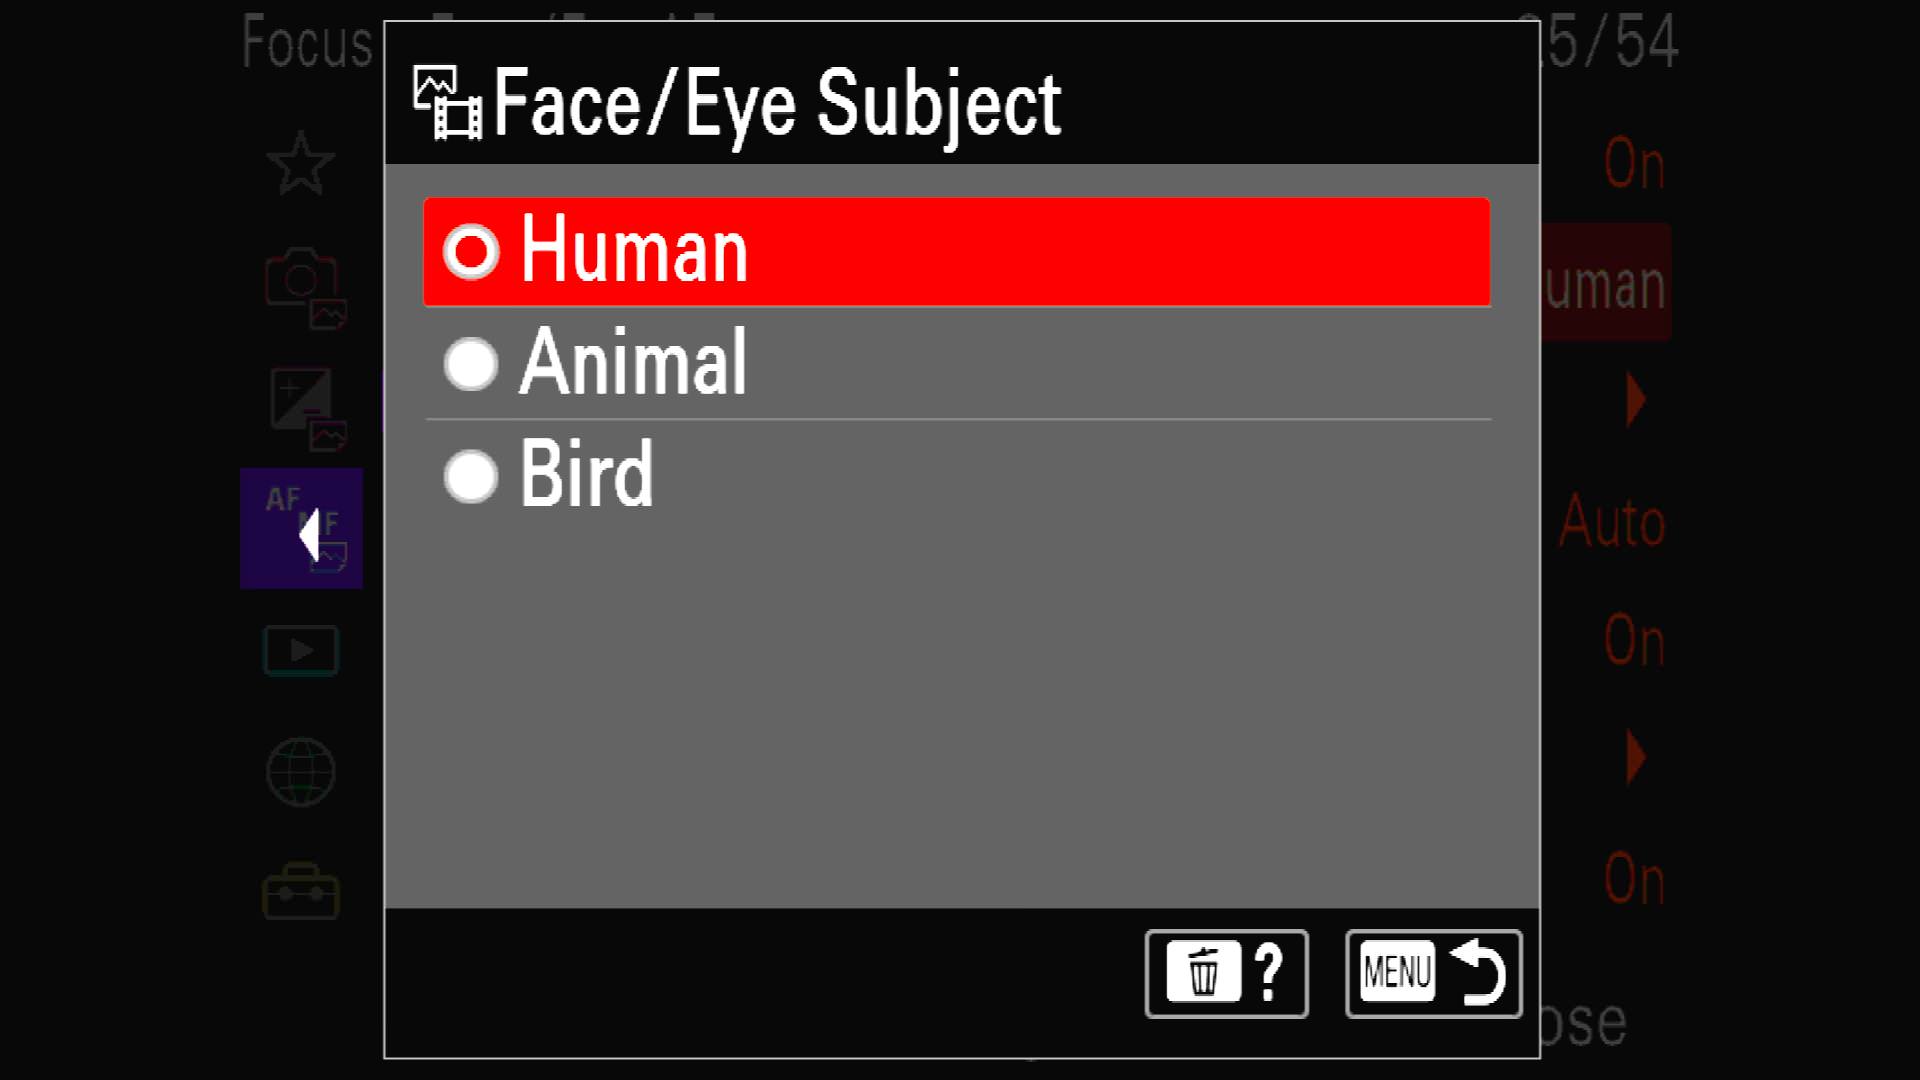
Brown advises using the rear wheel on the back of the camera to maximize your use of the Eye Autofocus system. First, he recommends using the center button on the wheel to switch between Animal and Bird Eye AF, if you're in the field. This way you can quickly switch back and forth, saving yourself an extra few clicks and an extra few seconds.
He also recommends using the right and left wheel buttons to switch between eyes. “Each of the buttons will go to the different eyes depending on if both of them are visible or not,” he explains. “So then just looking through the camera, you don't have to make any changes. You can adjust that really quickly just with your thumb.”
By customizing these buttons, you can lock on to the focus you want without lowering your camera or losing the subject. Along with that, occasionally the Eye Autofocus system will latch onto a part of the animal that’s not the eye, for example a tuft of hair on a bear's shoulder, and these buttons will help refocus without lowering your camera.
This setting can be found in the “Focus” menu tab under “3: Face/Eye AF” in the “Face/Eye Subject” setting.
Make Your Focus Peaking Red
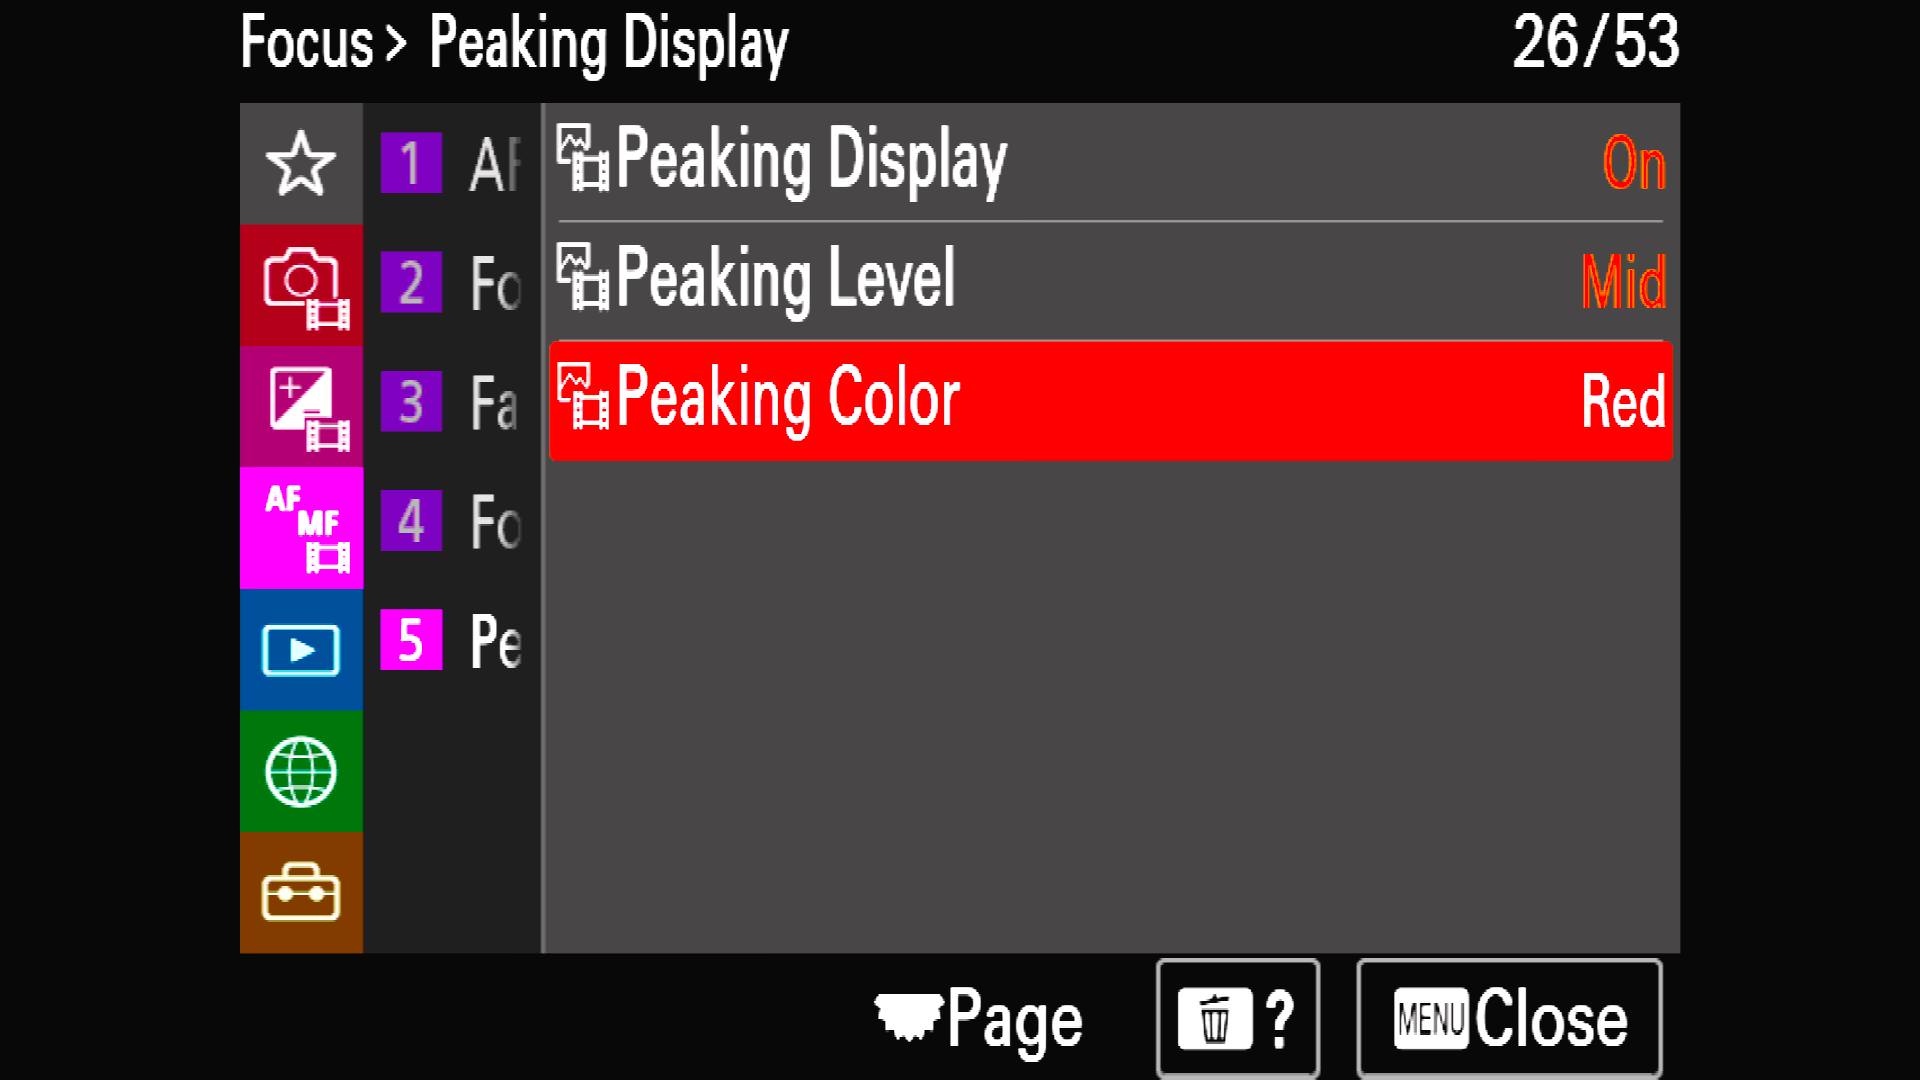
Brown recommends taking advantage of focus peaking. He prefers to set mid-level. He also explains that the default color for focus peaking is white, which he has found to be problematic in many wildlife settings. For example, if the bright sky is white, it’s too challenging to check focus peaking. Brown’s go-to color is red, he has found this to stand out clearly in nearly every situation when photographing megafauna.
For the Alpha 1, you can change this in the “Focus” menu under the “5: Peaking Display” section you will find the Peaking Display, Peaking Level and Peaking Color menu options.

Shoot In Continuous Mode & Silent Shooting
“Silent Shooting is a huge deal that people don't realize just how quiet it is,” says Brown as he explains its particular importance in wildlife photography. “When you get tuned to that silence, and then all of a sudden when you hear a shutter, it's just so loud and jarring. You can see the animals sometimes flinch and it gives them a reaction.”
Along with that, Brown says his “happy zone” for shooting in Continuous Mode is Medium – that allows him to get the perfect shot even if the animal blinks or slightly moves. If the animal is in high motion, for example a cheetah, he will pop up to the full 30 frames per second to ensure he gets the shot.
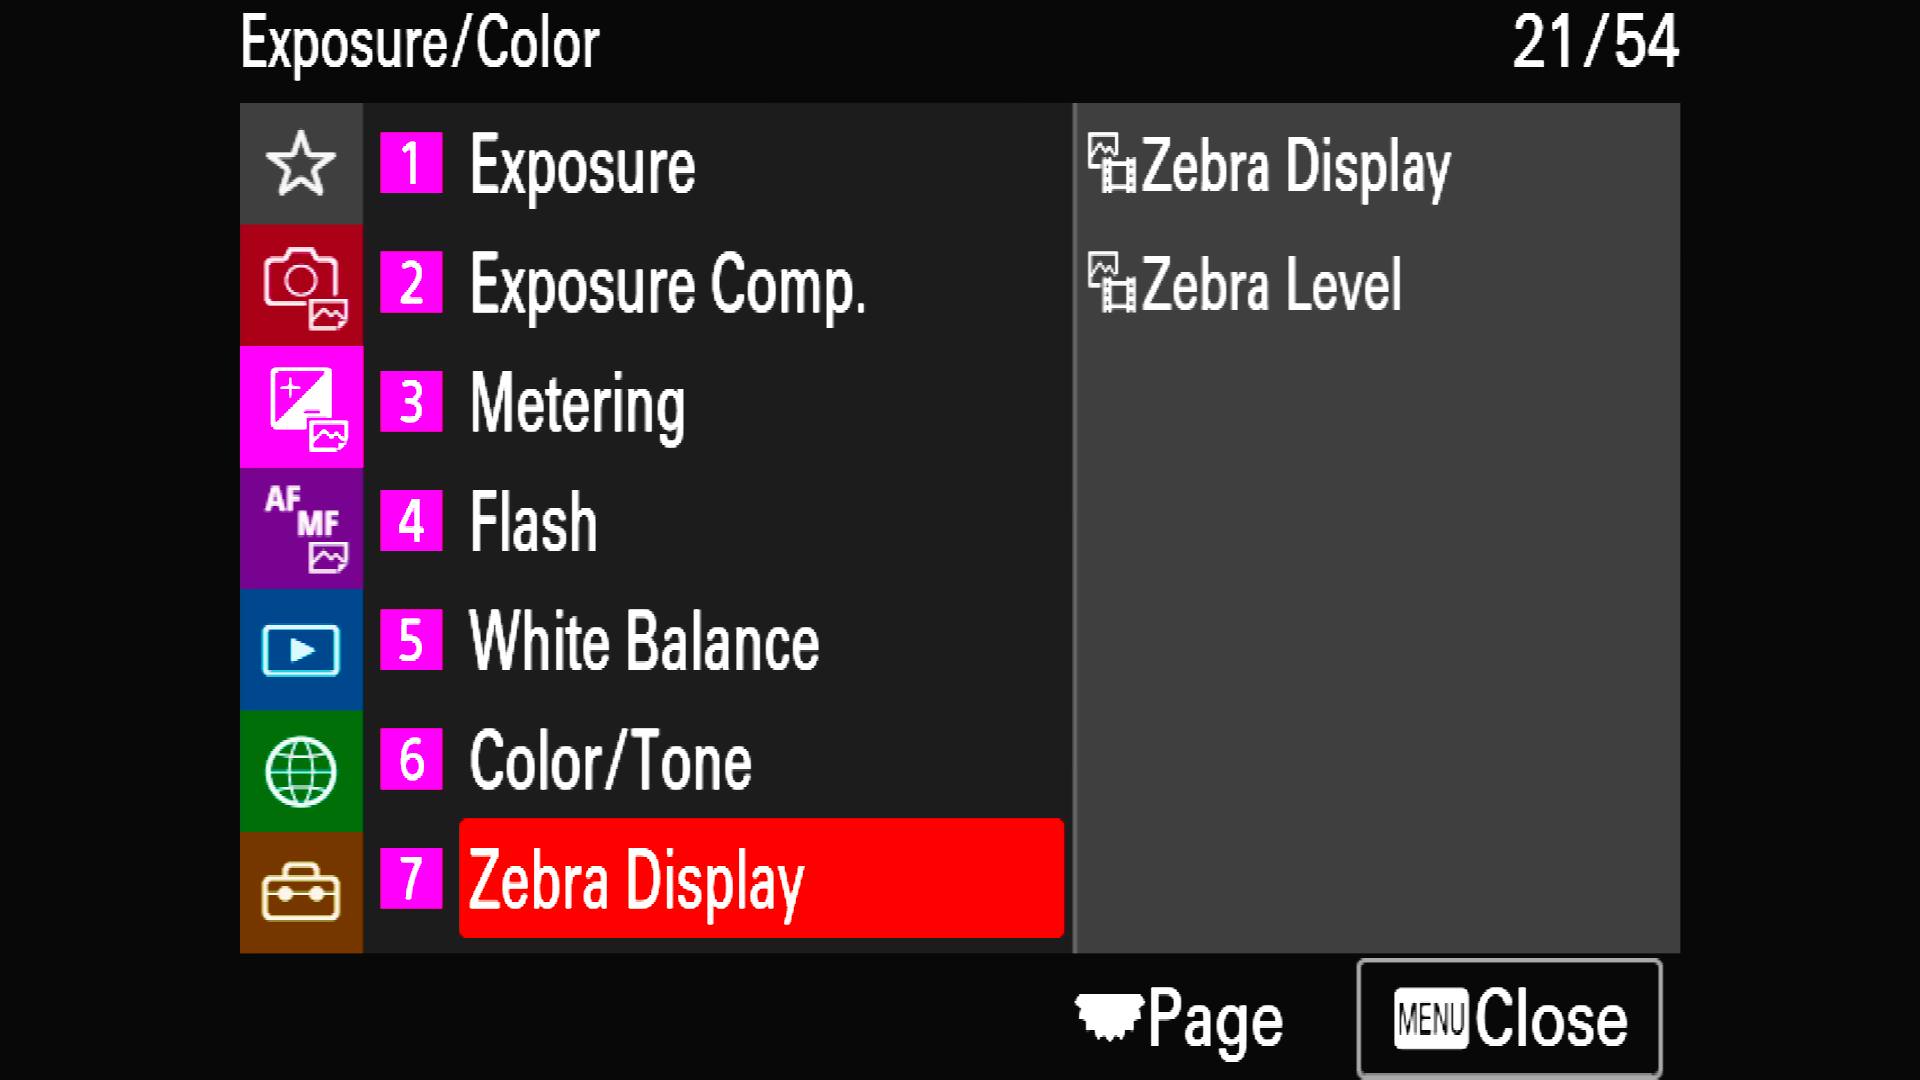
Trade In Your Histogram For Zebra Setting
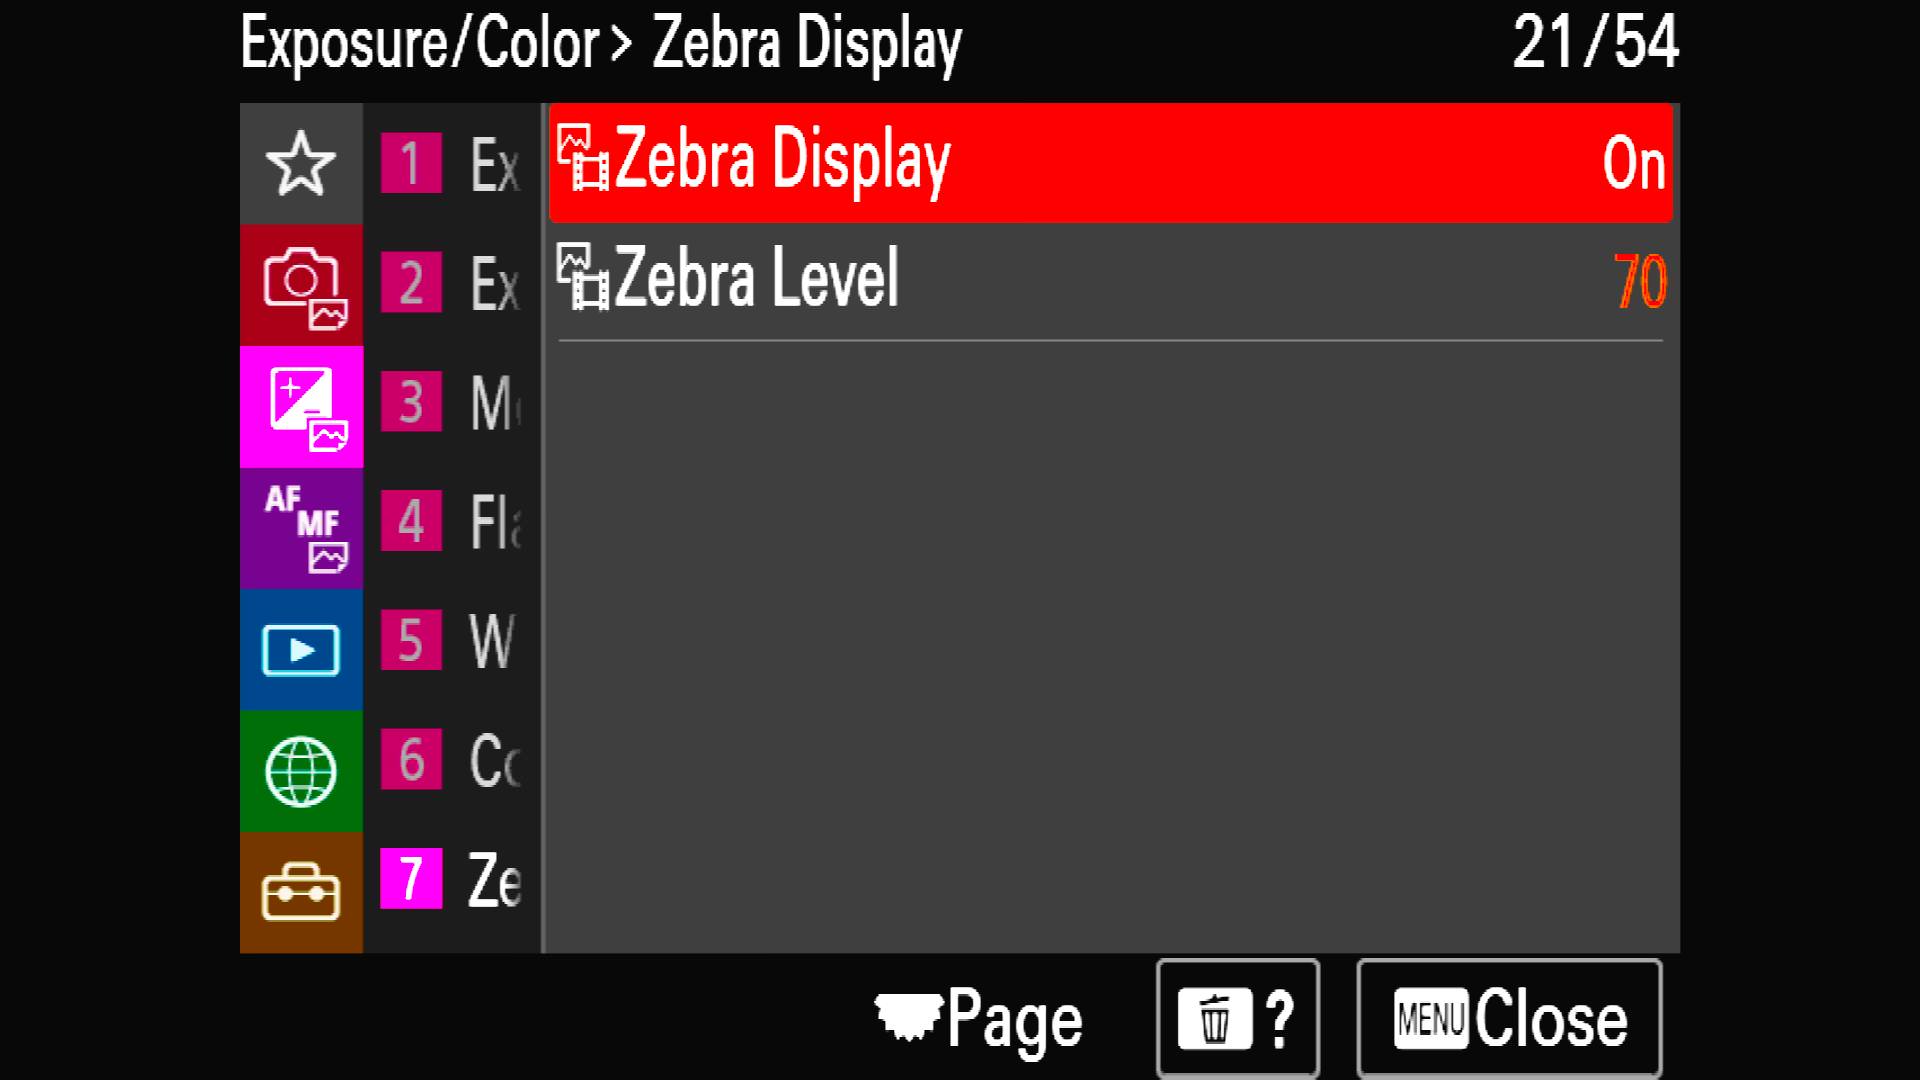
“Counter to historical teachings, I find the histogram to be extremely distracting in the field. On the Alpha 1, I prefer to use the zebra setting. I set the lower limit to 107+ and what this does specifically with the Alpha 1 is that it tells me exactly where I'm going to start clipping the highlights based on the dynamic range of the sensor.”
Brown knows with this camera he has enough dynamic range to recover the shadows, so the zebra setting keeps him from clipping the highlights without the destruction of a histogram.
Both the “Zebra Display” and “Zebra Level” settings can be found in the “Exposure/Color” menu tab under “6: Zebra Display.”
Check out more of Brown's work at colbybrownphotography.com and on Instagram (@colbybrownphotography). If you’re interested in learning more from Brown, check out his upcoming workshops photographing Gorillas, Chimpanzees, Rhinos, Elephants, Tree-climbing Lions & More In Uganda and Jaguars, Caiman, Capybara, Tapir, & A Wide Variety Of Bird Species In Brazil!

