There are some scenes that just don’t properly fit into a single frame. Dramatic cityscapes with towering skyscrapers and vast mountainous landscapes studded with endless peaks: cropping tight doesn’t do the scene justice, and ultra-wide lenses allow us to fit everything in, but at the expense of significant distortion. Enter: the panorama. Multiple shots eliminate distortion and produce an ultra-high-resolution image suitable for printing as large as you could possibly want. At first, stitching multiple exposures into a panorama can seem like a daunting task, and many photographers steer clear. But with quality optics and a very simple trick in Adobe Lightroom, it’s easy to capture stunning landscapes in the ultimate wide-angle format.
Rather than trying to jam everything into a single photo and making compromises on my composition, I spent an extra three minutes in the field and three more minutes at home in Lightroom to create a photo I’m truly happy with.
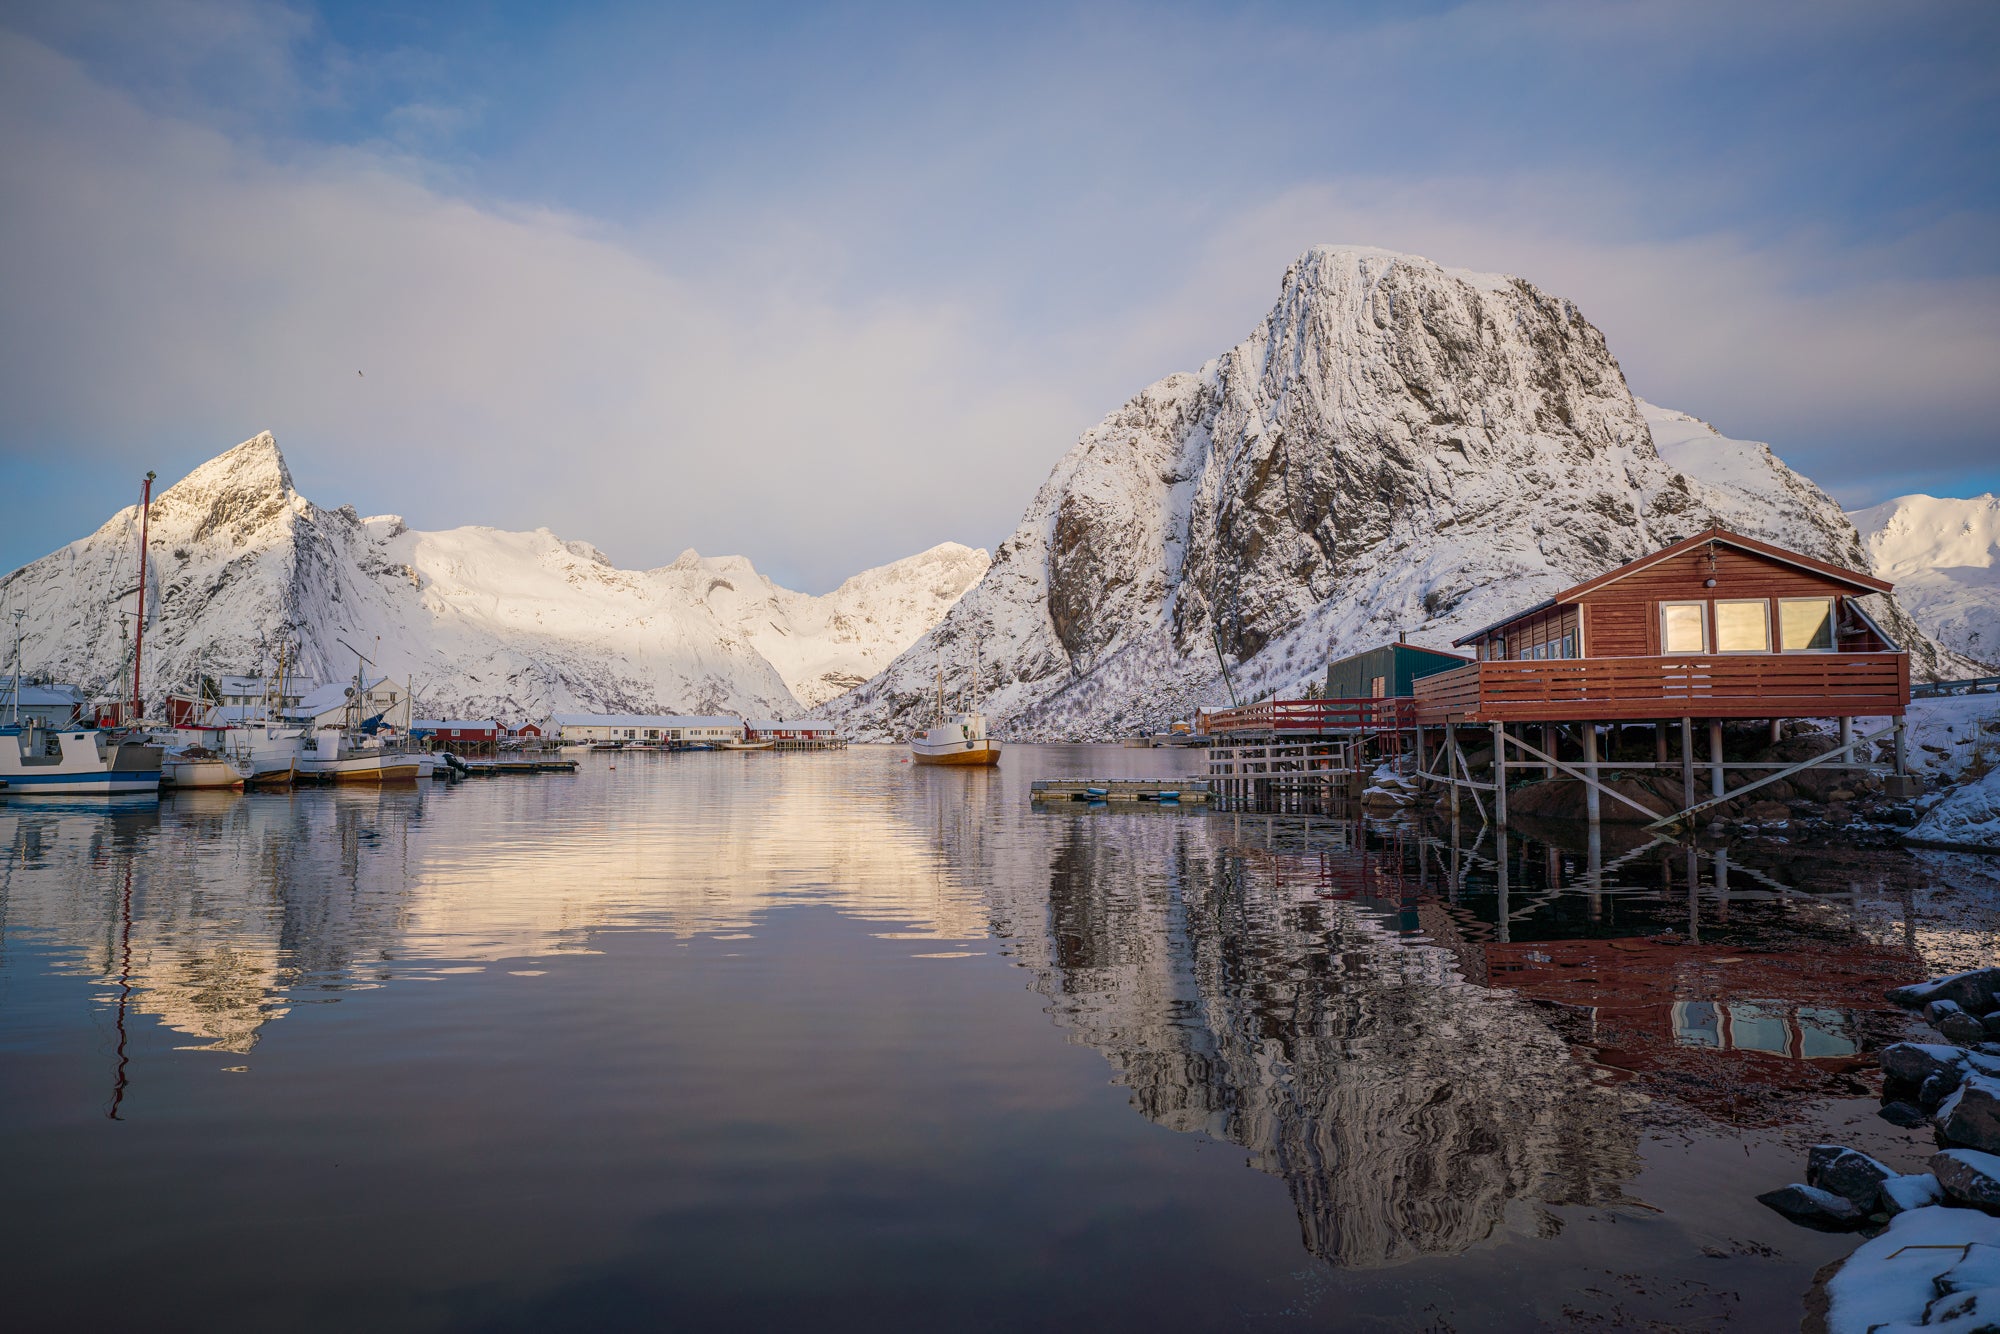
If the full scene doesn’t fit comfortably in the frame, it’s the perfect opportunity for a panorama! Sony α7R III, Sony 20mm f/1.8 G lens.
Step 1: In The Field (Lens Selection, Camera Setup and Shooting Technique)
Some people heavily rely on post-processing to create their photographic masterpieces, while others prefer to “get it right in-camera” to prove their photography prowess. More than any other subset, panoramas walk a perfect middle ground between the two camps, with your in-field execution equally important as your post-processing workflow. With this in mind, let’s begin the discussion from the very top: how to shoot a series of photos in the field that can be effectively compiled into a panorama.
Lens Selection
To make a panorama, it's important to be shooting with the right lens. For this example I used the new Sony FE 20mm f/1.8 G lens. With the exceptional corner-to-corner sharpness, plus the lack of distortion from the rectilinear image projection, this lens is perfect for panoramas. (Note: You can see my review of the new Sony 20mm f/1.8 G here and the video I made about it below.) Using this kind of wide, low-distortion lens is important to prevent weird curvatures when you're stitching the frames together. I'm shooting with a Sony camera and Sony lens, so I can further eliminate any distortion and vignetting with the in-camera Distortion Correction (under Lens Comp in the menu).
Framing & Shooting Technique
First off, I prefer to shoot my panoramas with my camera in portrait orientation. While this does mean a bit more work up front, it results in a higher resolution final product and more cropping options later on. Each individual shot will feel “tight” but we will be creating a very wide image by the end.
The goal here is to “shoot outside the frame.” Or, put another way, we want to shoot more of the landscape than we’ll end up with for the final panorama. Due to lens distortion and the limits of projection-stitching we’re going to lose about 20% of the photo from the edges of the composition, so shooting 30% extra landscape means that we won’t lose any important details during the final cropping step. Compare my uncropped panorama with the final, cropped and edited photo:
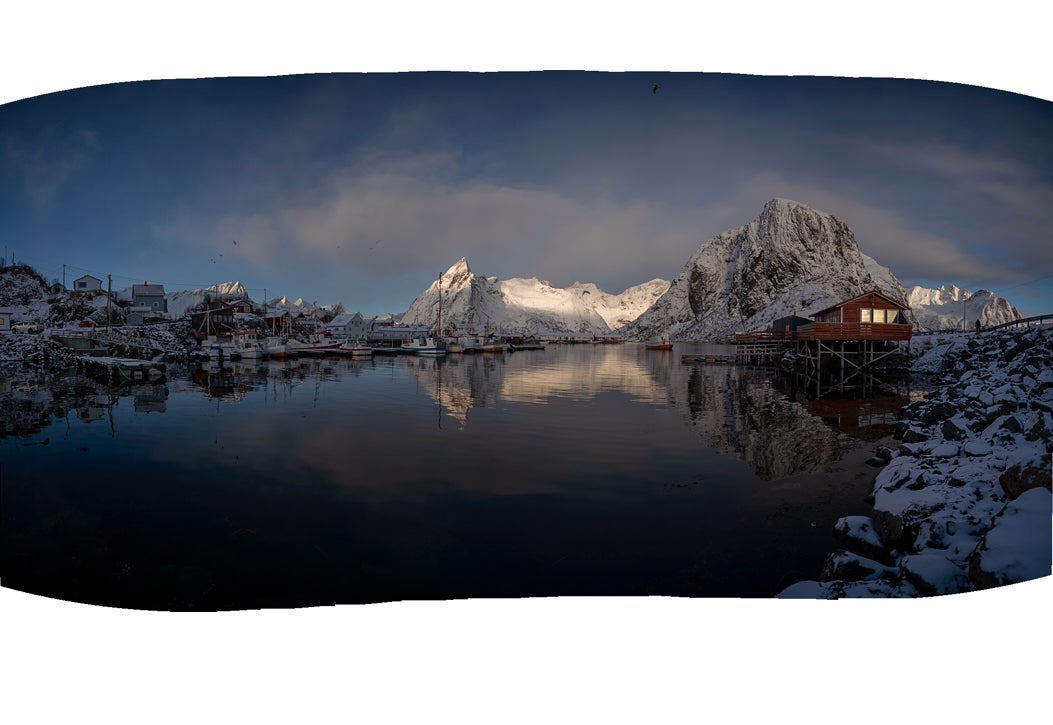
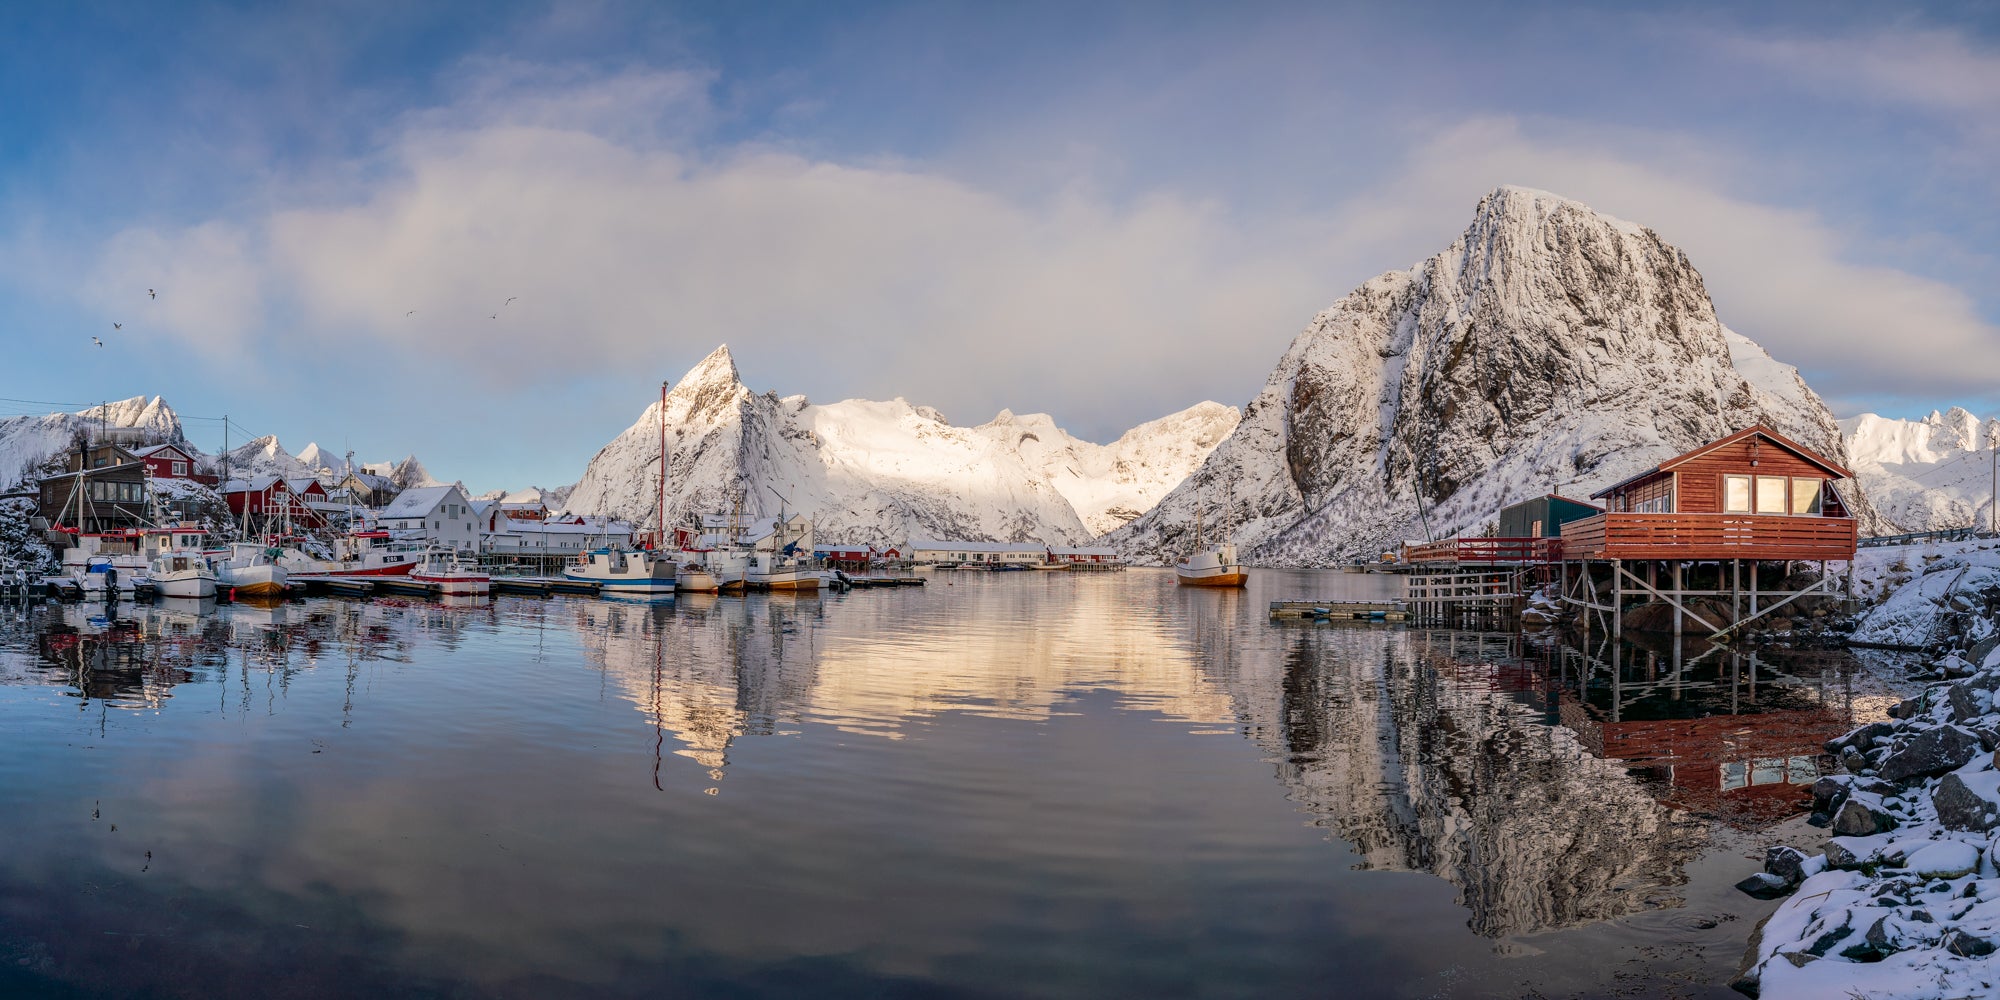
As you can see, the process of stitching multiple images into a single flat projection causes the edges of the photo to appear rounded. This is a result of smushing a wide landscape into a single, flat image. This is unavoidable, but not a major issue to worry about. Simply shoot more of the scene than you’ll end up using, and the cropping process won’t feel like you’re sacrificing important subject matter.
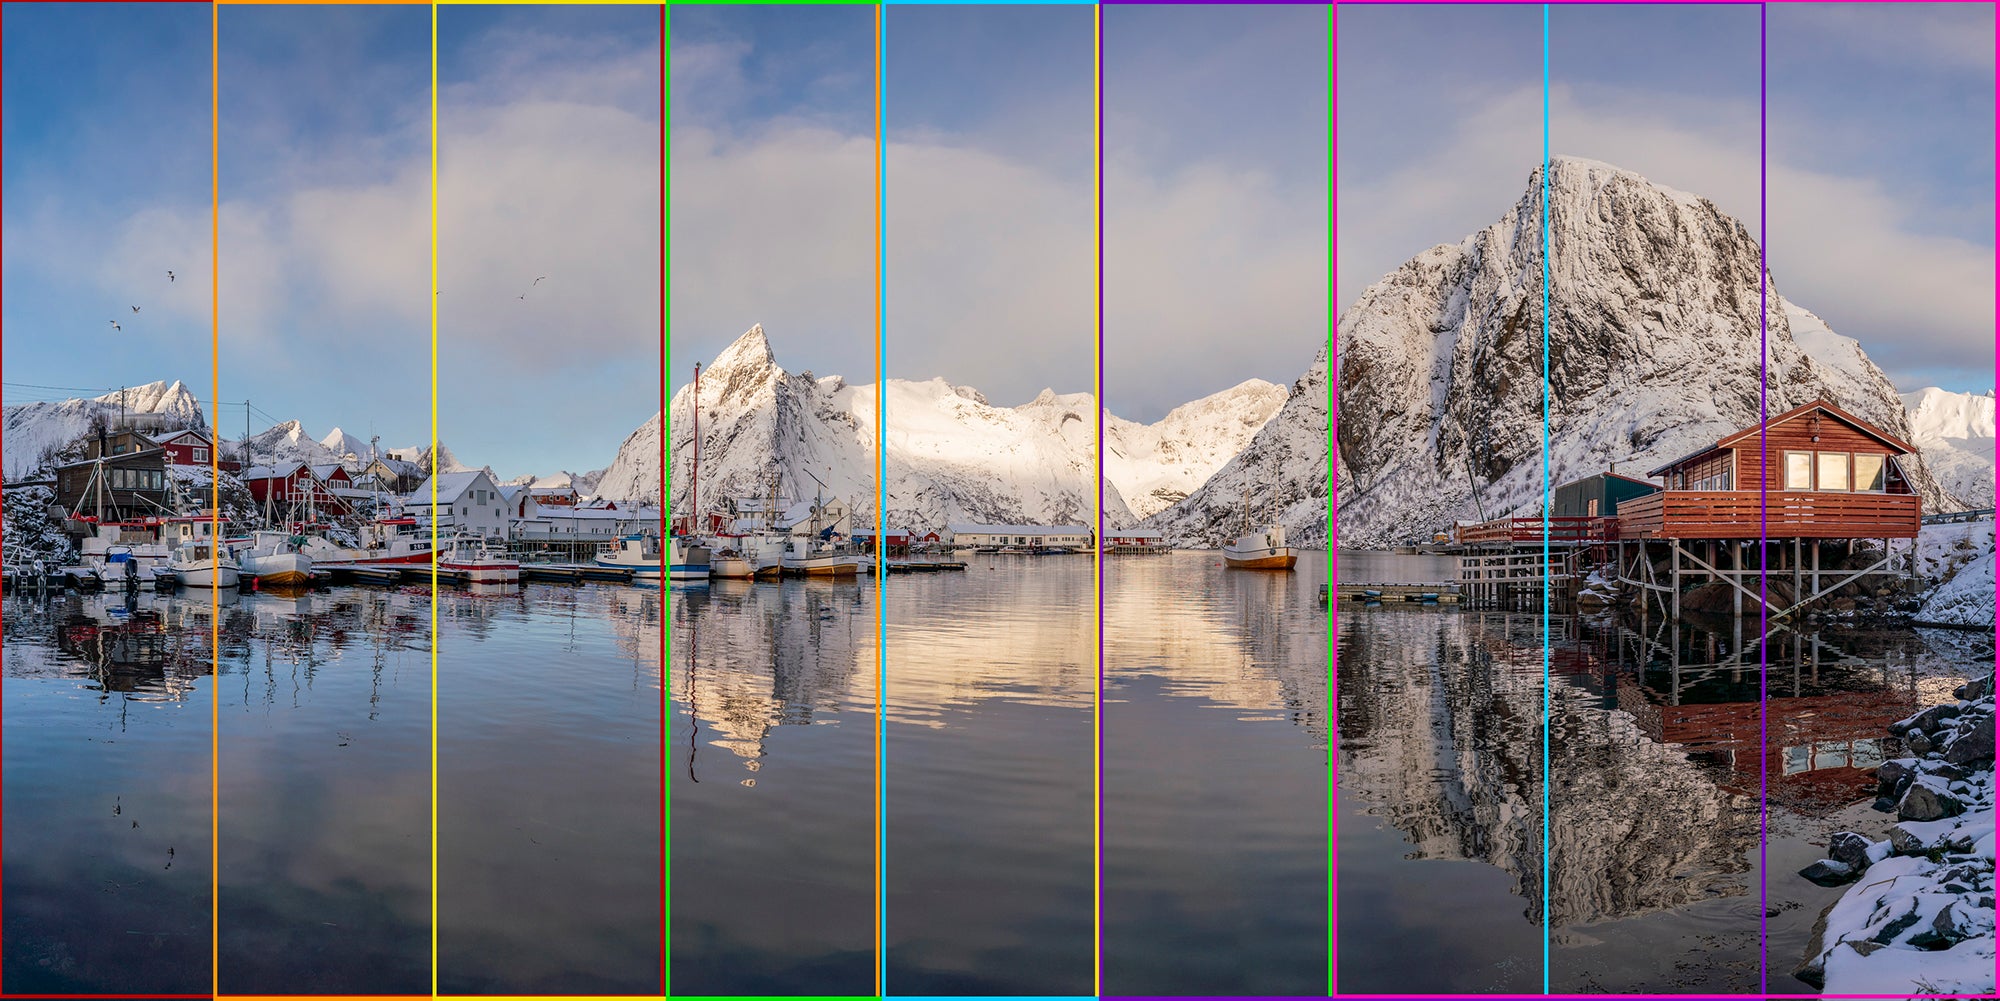
It’s also important to shoot with a significant amount of overlap between frames. This gives Lightroom additional information to use when assembling the panorama, and various lens effects like vignette and focusing variation will be compensated for accordingly. Take a look at the 16 images I used, below:

You’ll notice that each frame overlaps with the photo before it by about 40%, and the photo after it by about 40% as well, meaning that only a very small portion of each frame is “unique” imagery. I overlayed each individual frame onto the final panorama to help give a better feel for what I’m talking about:
Camera Setup
So all of this is very technical, but how do we actually implement this in a real-life scenario? Surprisingly, this part is actually very easy. First, expose the scene properly. I generally shoot with a fairly wide aperture, but stopped down enough to give me some flexibility with my depth-of-field, and with a shutter speed fast enough to compensate for accidental camera motions. A single frame with unintentional motion-blur will ruin the entire panorama, so this is a setting I’m always aware of. For this scene, my settings were as follows:
- 20mm
- ISO 100
- f/3.2
- 1/1600-sec.
Next, I set my focus to AF-C, and zone focus so the camera can help me track my focus as I move left-to-right across the scene. Don’t worry if it jumps around a bit between subjects in the middle ground – part of the panorama stitching algorithm automatically selects for in-focus areas of the frame, so Lightroom will be focus stacking the image in addition to stitching the different photos. We truly live in a world of digital-wizardry.
Now, paying close attention to keeping your camera level, begin taking photos of your scene, moving from left to right. Remember, start farther left than you want, finish farther right than you want, and be sure to overlap each photo with the one before it to ensure you fully capture the entire scene.
You might have seen some photographers talk about rotating the lens around the nodal point to create a panorama and there are special panorama tripod heads that are specificially built for this. It's true that rotating around the nodal point can give you an excellent result, but for a lot of panorama photography, it's not really necessary. The bottom line is go out and shoot with the gear you have.
Step 2: Assembling and Editing
Once you’ve taken your photos, it’s time to turn all those individual frames into a single panorama. Thanks to the powerful panorama tool in Adobe Lightroom, this step is an absolute breeze.
Start by selecting all of the images that you want to assemble into a finished panorama. Next, right click, and navigate down the menu to ‘Photo Merge’.
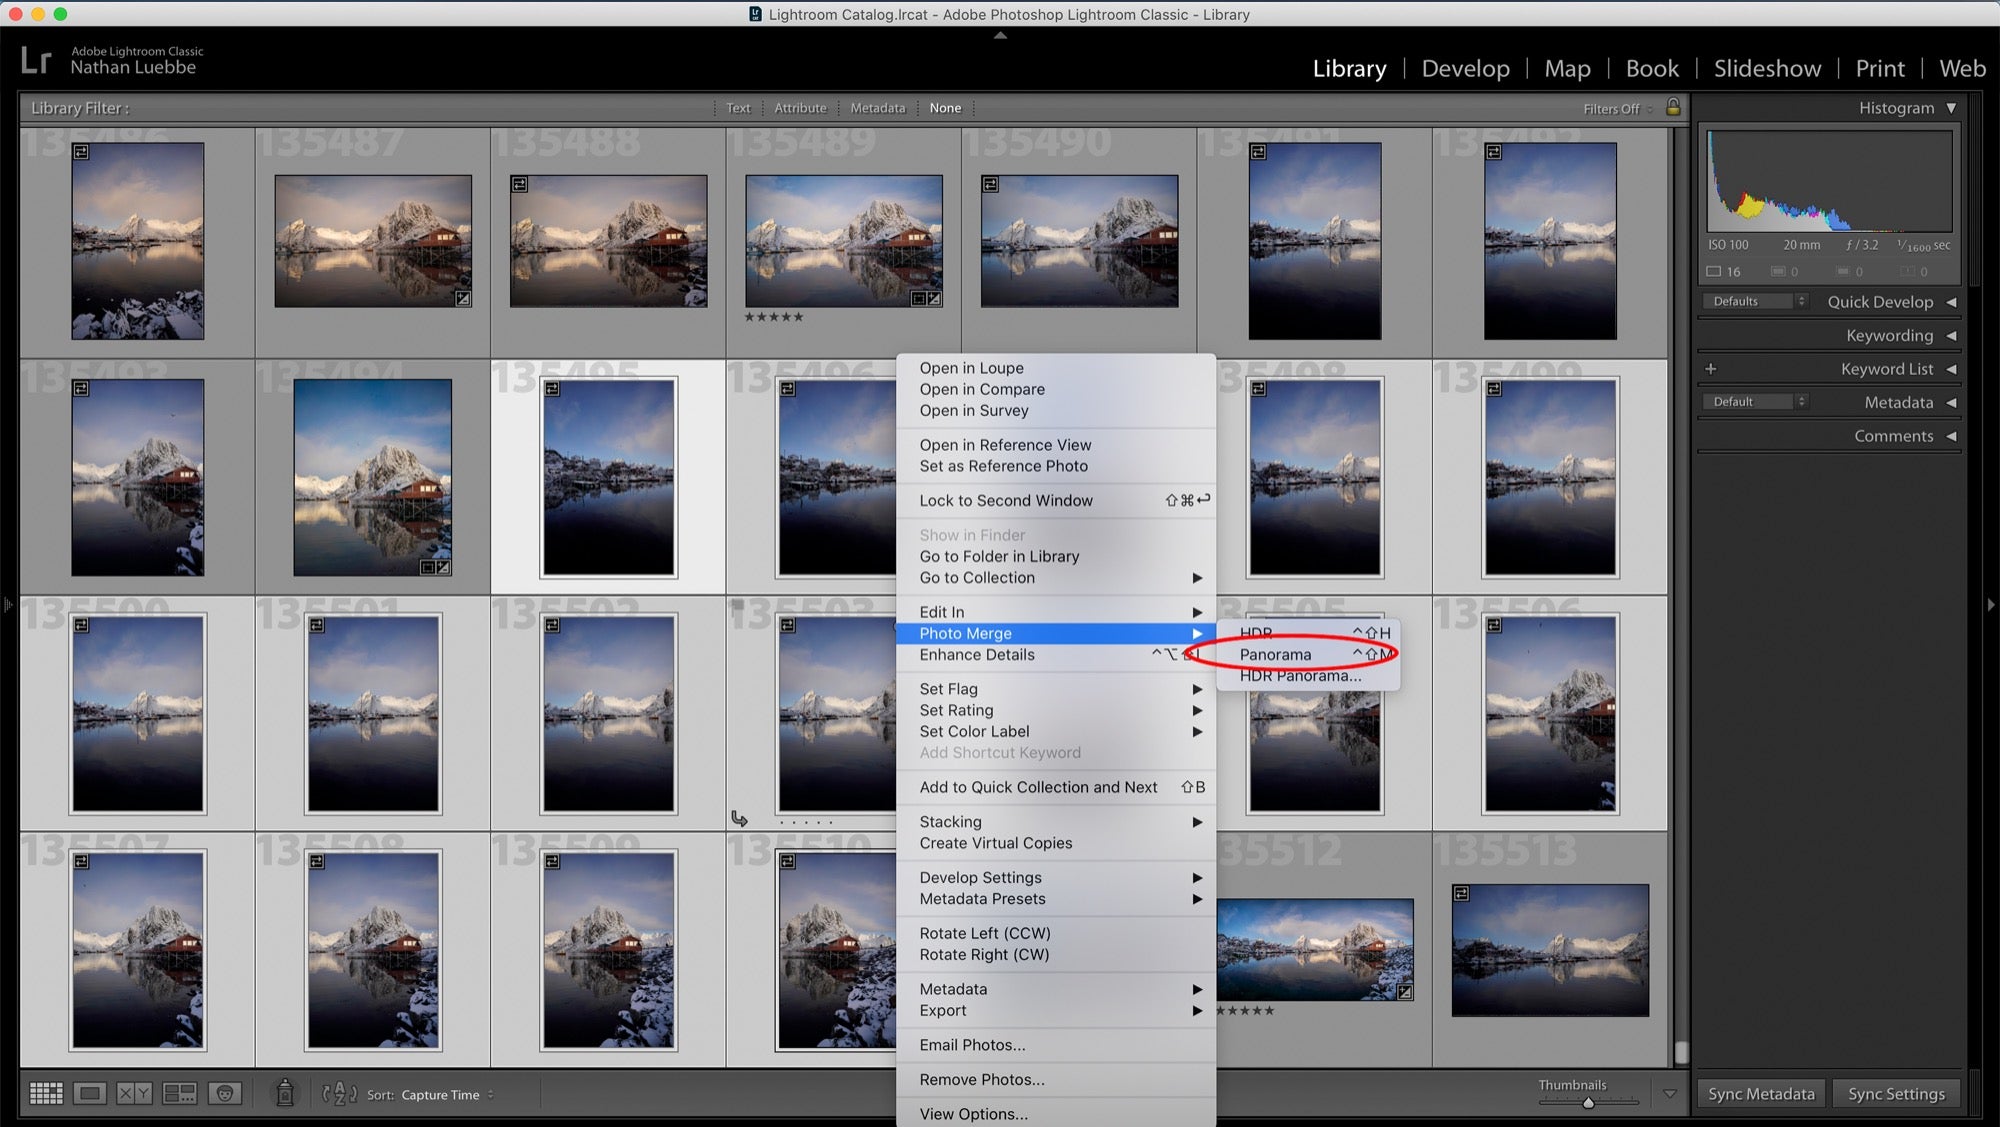
There will be a few second delay as Lightroom generates a rough preview. Once a preview renders, you’ll need to choose a projection method. While this seems daunting at first, the differences are fairly minor, and both spherical and cylindrical projections will make a great panorama in the vast majority of cases.
Spherical Projection
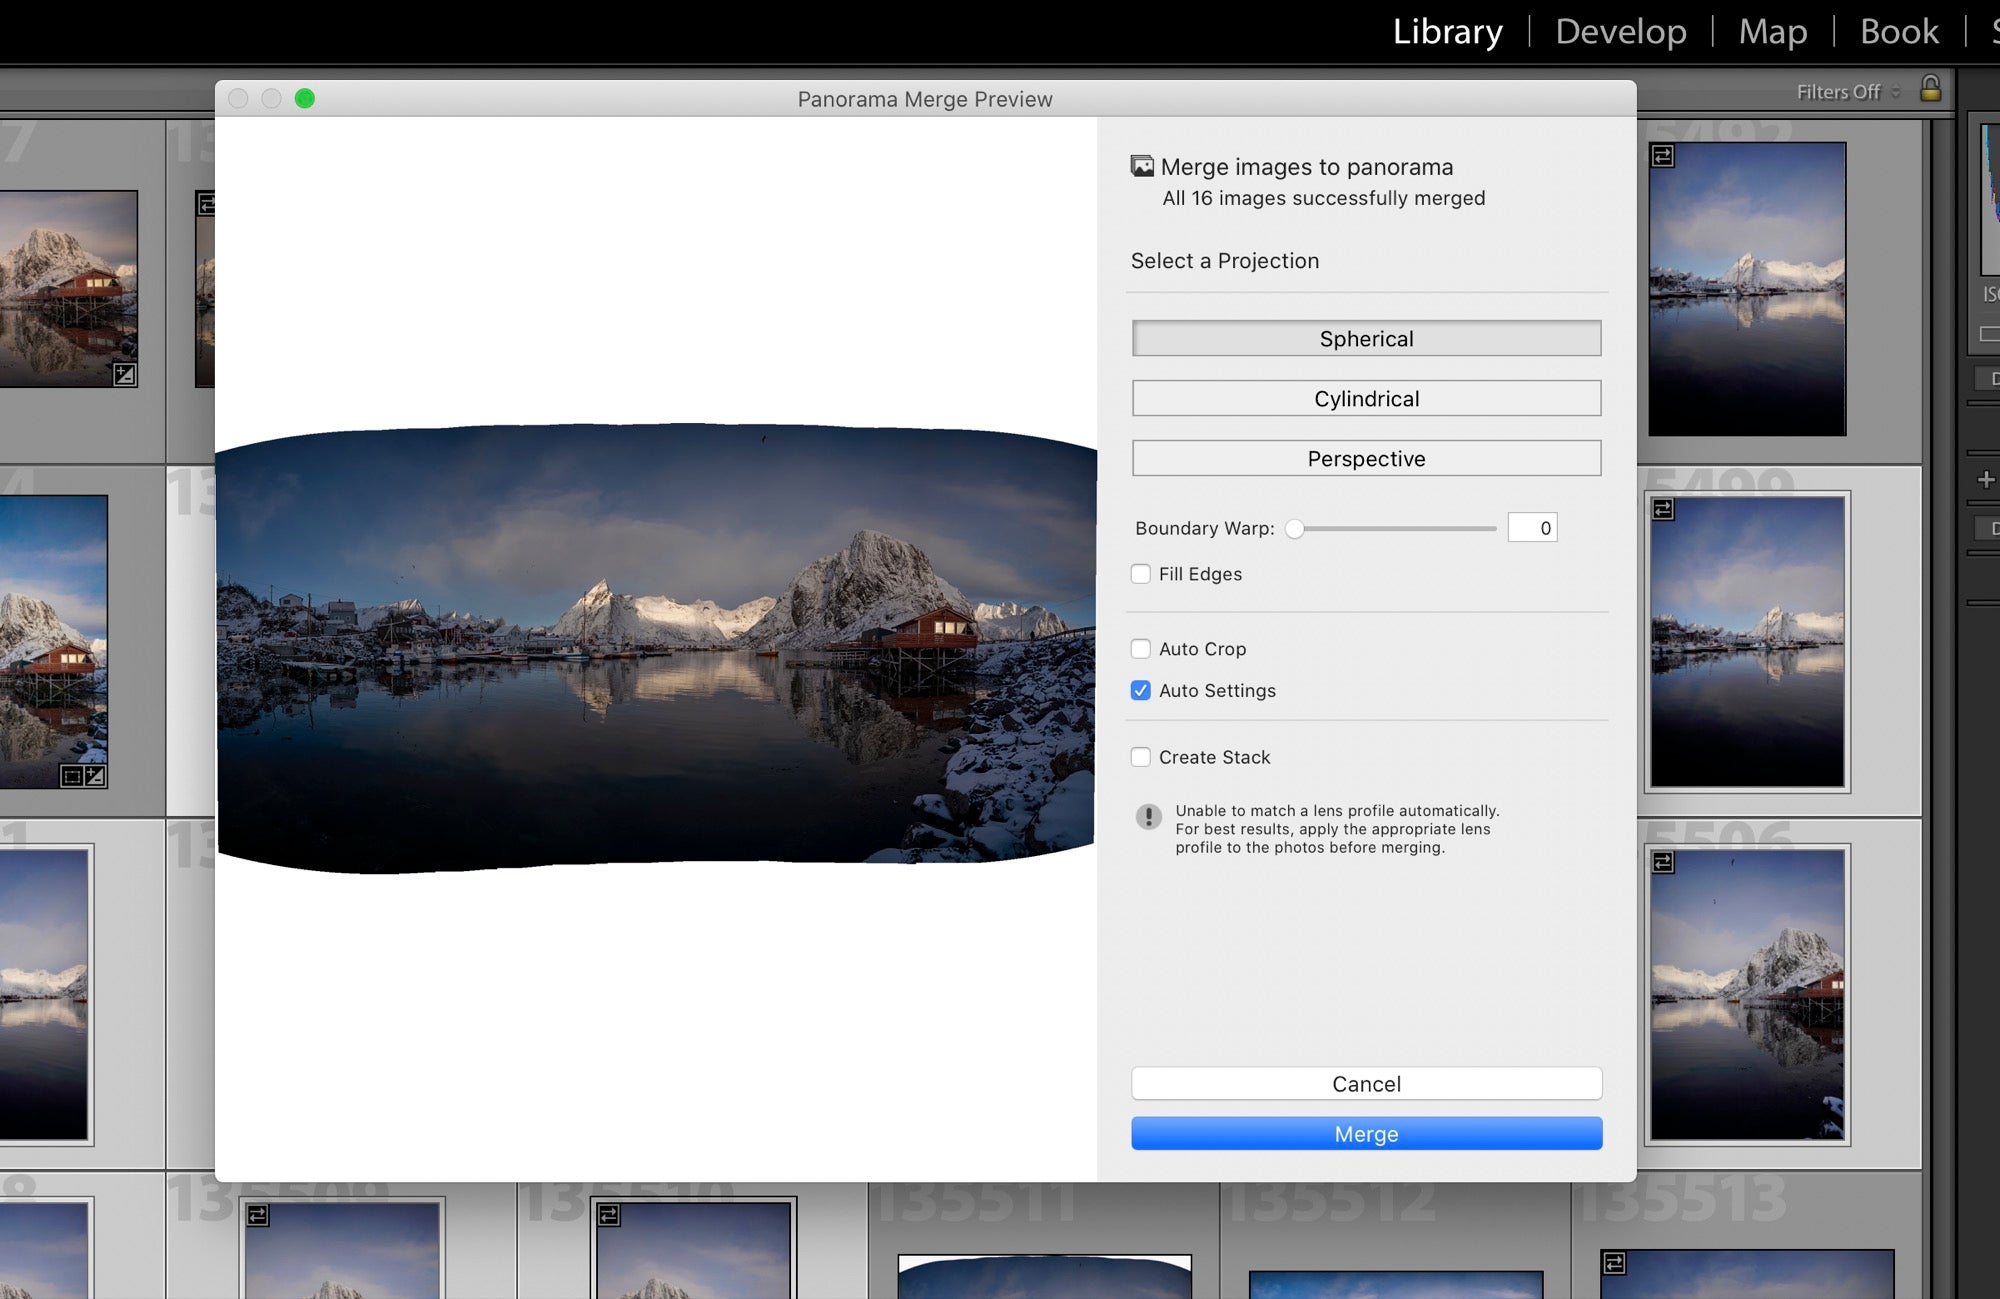
As the name implies, the spherical projection arranges your images as though they were mapped on the inside of a sphere. This works best for multi-row panoramas, but I’ve had great success using this for single layer panoramas (like we’re doing here) as it results in very low distortion assembly.
Cylindrical Projection
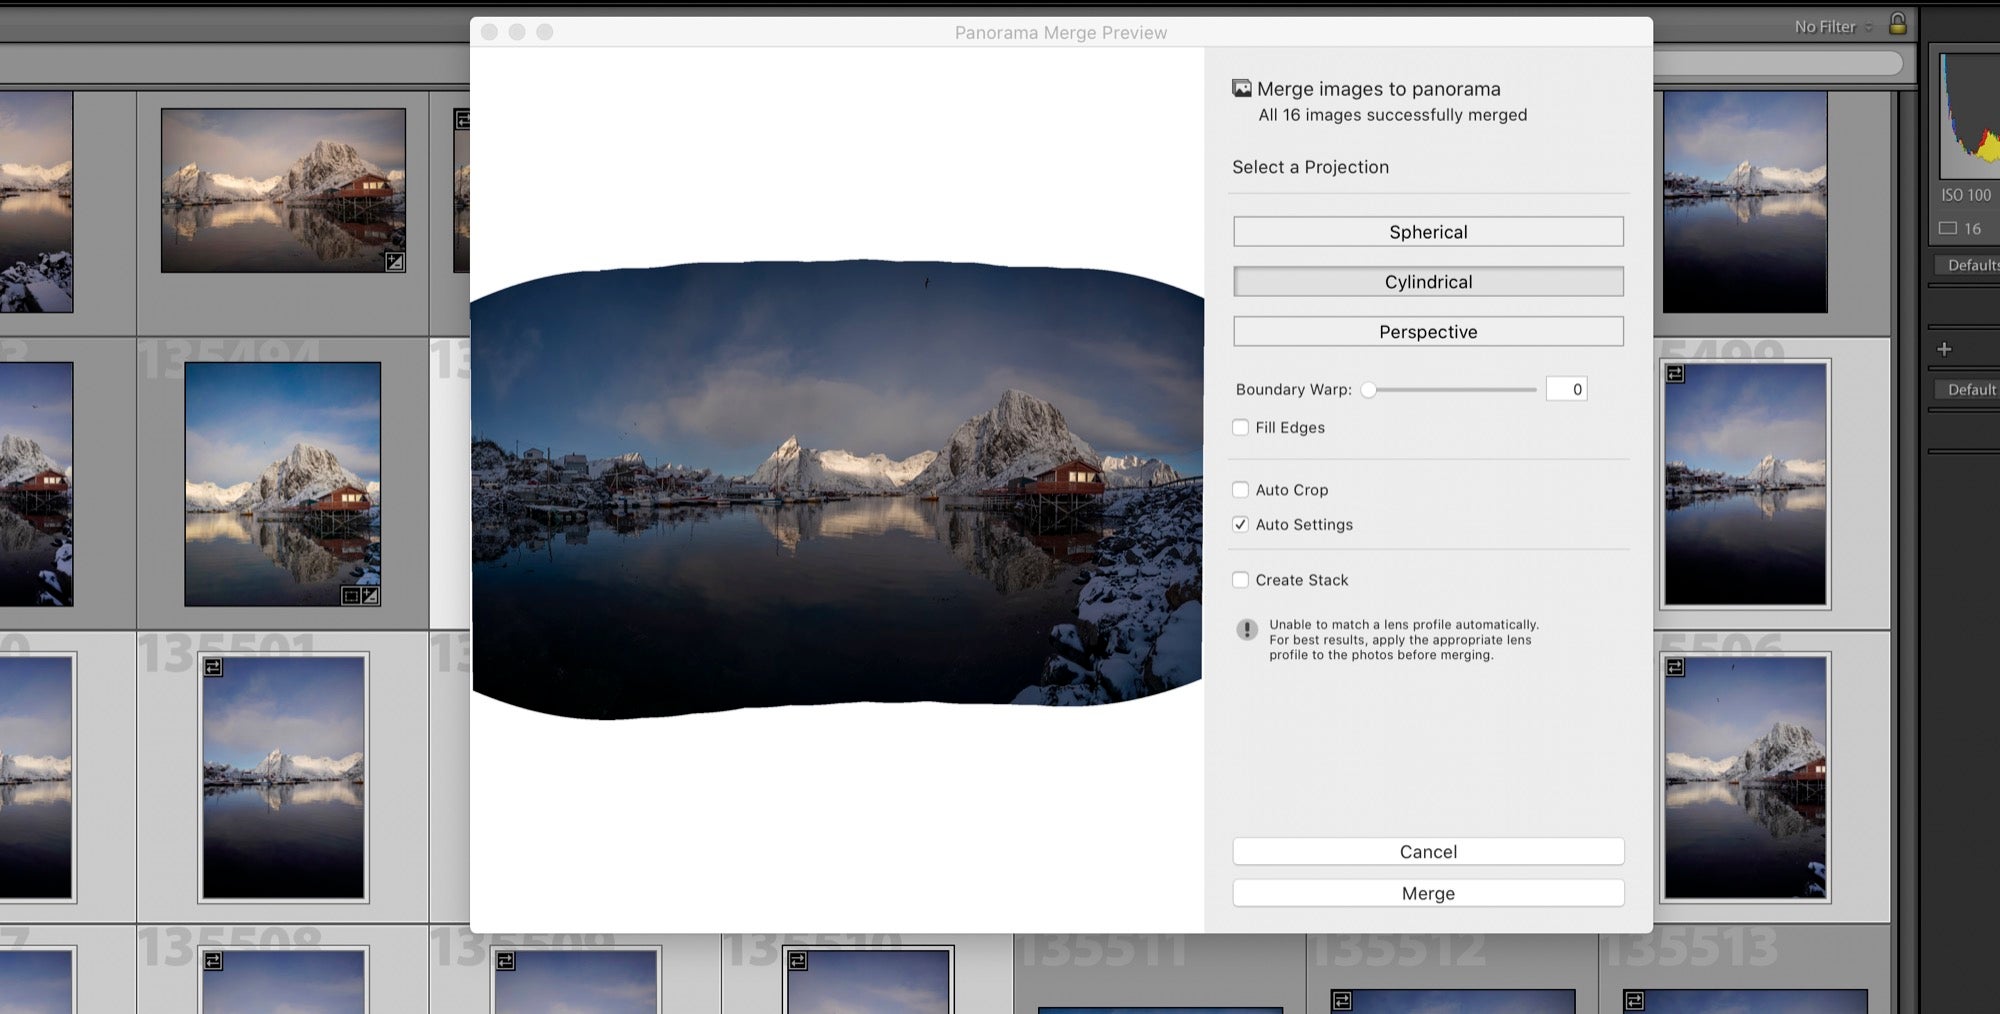
Again, as the name implies, cylindrical projection maps the images out as though they’re arranged inside a cylinder. This tends to stretch the top and bottom edges of the photos a bit more, but still creates a realistic panorama. I’ve found myself preferring this for certain landscape scenes, as the vertical stretching component helps make mountains look taller and more impressive. Your mileage may vary.
Perspective Projection
This is best for vertical panoramas. For horizontal panoramas it will dramatically stretch the edges of the frame and distort the center. For this particular example, the scene was so wide that this projection option wasn’t even possible, and Lightroom gave me an error when I tried to capture an example to show here.
Boundary Warp and Autocrop
Boundary warp is as it sounds; stretching the ‘rounded’ edges of each frame out a bit to fit the final image into a nicer, rectangular package. I’m not going to pass judgment here and say that this is either good or bad, as I’ve found that it’s fairly subjective and dependent on context. Play around with it and decide for yourself – this is where the photography gets to truly become art. If you think it looks good and you’re happy, then it IS good, because it’s YOUR art.
Once you’ve made your projection selections, simply click ‘merge.’ Lightroom will then stitch the photos into a seamless panorama, which you can then edit as you normally would. The best part, is that once the stitching is complete, the output photo is still a raw file, providing you with the same amount of editing latitude as you would have with any other raw file from your camera.
So now that everything is stitched together and edited, I have a finished photo that’s nearly 110MP in resolution (13198 x 8301). Rather than trying to jam everything into a single photo and making compromises on my composition, I spent an extra three minutes in the field and three more minutes at home in Lightroom to create a photo I’m truly happy with. As a bonus, it has enough resolution to surprise your friends with a 40-foot wide print for their birthday.
Happy shooting.
To see more of Nate Luebbe's work and to see his online journal, go to his website. You can follow Nate on Instagram @nateinthewild.
