I can be a control freak. There. I said it. In photography, that tendency caused me to resist letting the camera make a lot of decisions for me. Starting with my first high-end film SLR, I tended to bypass technology and instead I kept it pretty much set to manual exposure and that approach served me well for a long time. Switching to Sony mirrorless cameras, however, led to a new way for me to make perfect exposures with every frame. As a landscape photographer, that's a big deal. I'm often shooting at the edges of the day when the light is changing fast and even with the power of post-processing software, getting the exposure right in camera matters.
To explain how I work with my Sony cameras, and how they've changed my process in the field, I'll start by going back to that first serious film SLR. As I mentioned, I'm a bit of a control freak and that camera launched me into the manual exposure paradigm that would serve me for most of my photography life:
- Always on a tripod
- Start with the best f-stop for the scene
- Spot meter a known tone
- Dial the shutter speed until the meter matched the tone
- For extreme scenes, bracket exposures by a stop on either side of the chosen exposure
- Hold my breath until the transparencies returned from the lab
That approach changed very slightly when I purchased my first digital SLR, about 15 years ago. With selectable ISO, I made 100 ISO my default, but remained steadfast with the belief that the composition determines the f-stop, and the light determines the shutter speed. Since I always use a tripod, the only time I compromise my ISO and f-stop is to deal with motion in the scene.
No need to chimp. Switching to Sony mirrorless cameras led to a new way to make perfect exposures with every frame.
The huge advantage digital capture gave me for determining exposure came in the ability to check each image’s exposure via a simple graph of the image’s tones: the histogram. Instead of bracketing and hoping as I did in my film days, the histogram provided instant, post-capture feedback on each image’s exposure. Life was good, and I couldn’t imagine exposure being any easier.
Then I switched to Sony mirrorless….
The Live-View Histogram
One of the great advances mirrorless technology brings is the ability to see the histogram before you actually shoot the photo—and not just on the camera’s LCD monitor, but also in the viewfinder (my preferred way to view a scene). To take advantage of the pre-capture histogram for exposure decisions, you need to set-up a couple of things in your camera.
First, you need to display the histogram. Sony mirrorless cameras provide many live-view screens, with lots of useful information, but only one of these screens displays the histogram and the scene you’re photographing. To cycle through the various Sony screens, press the DISP button at the top of the Control Wheel until the histogram appears.
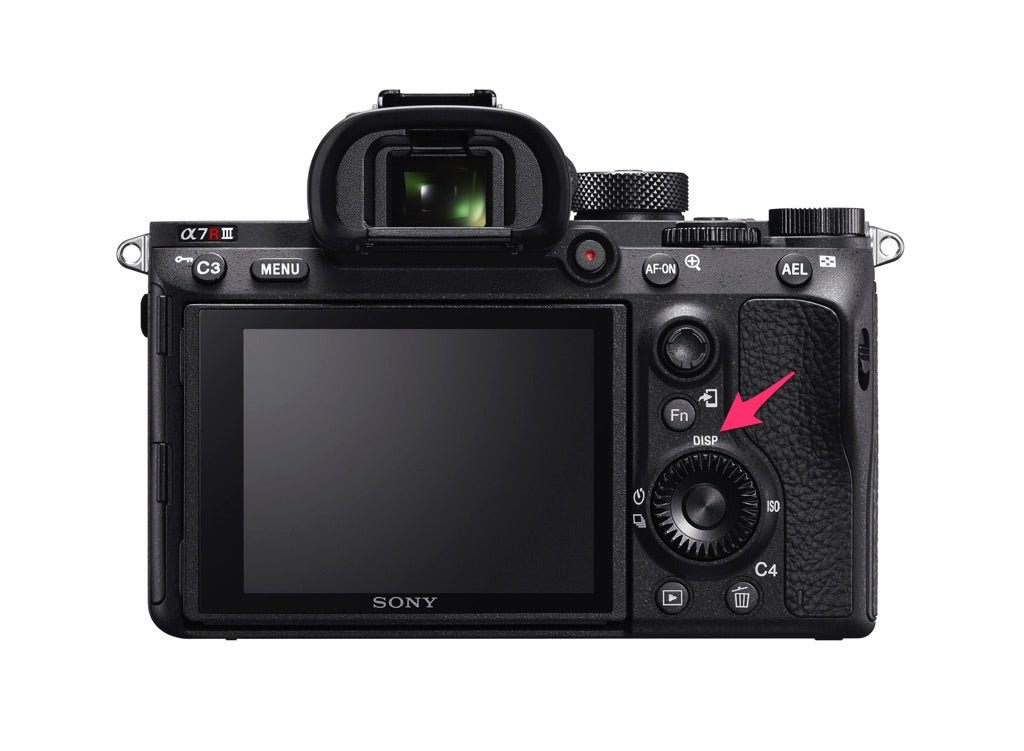
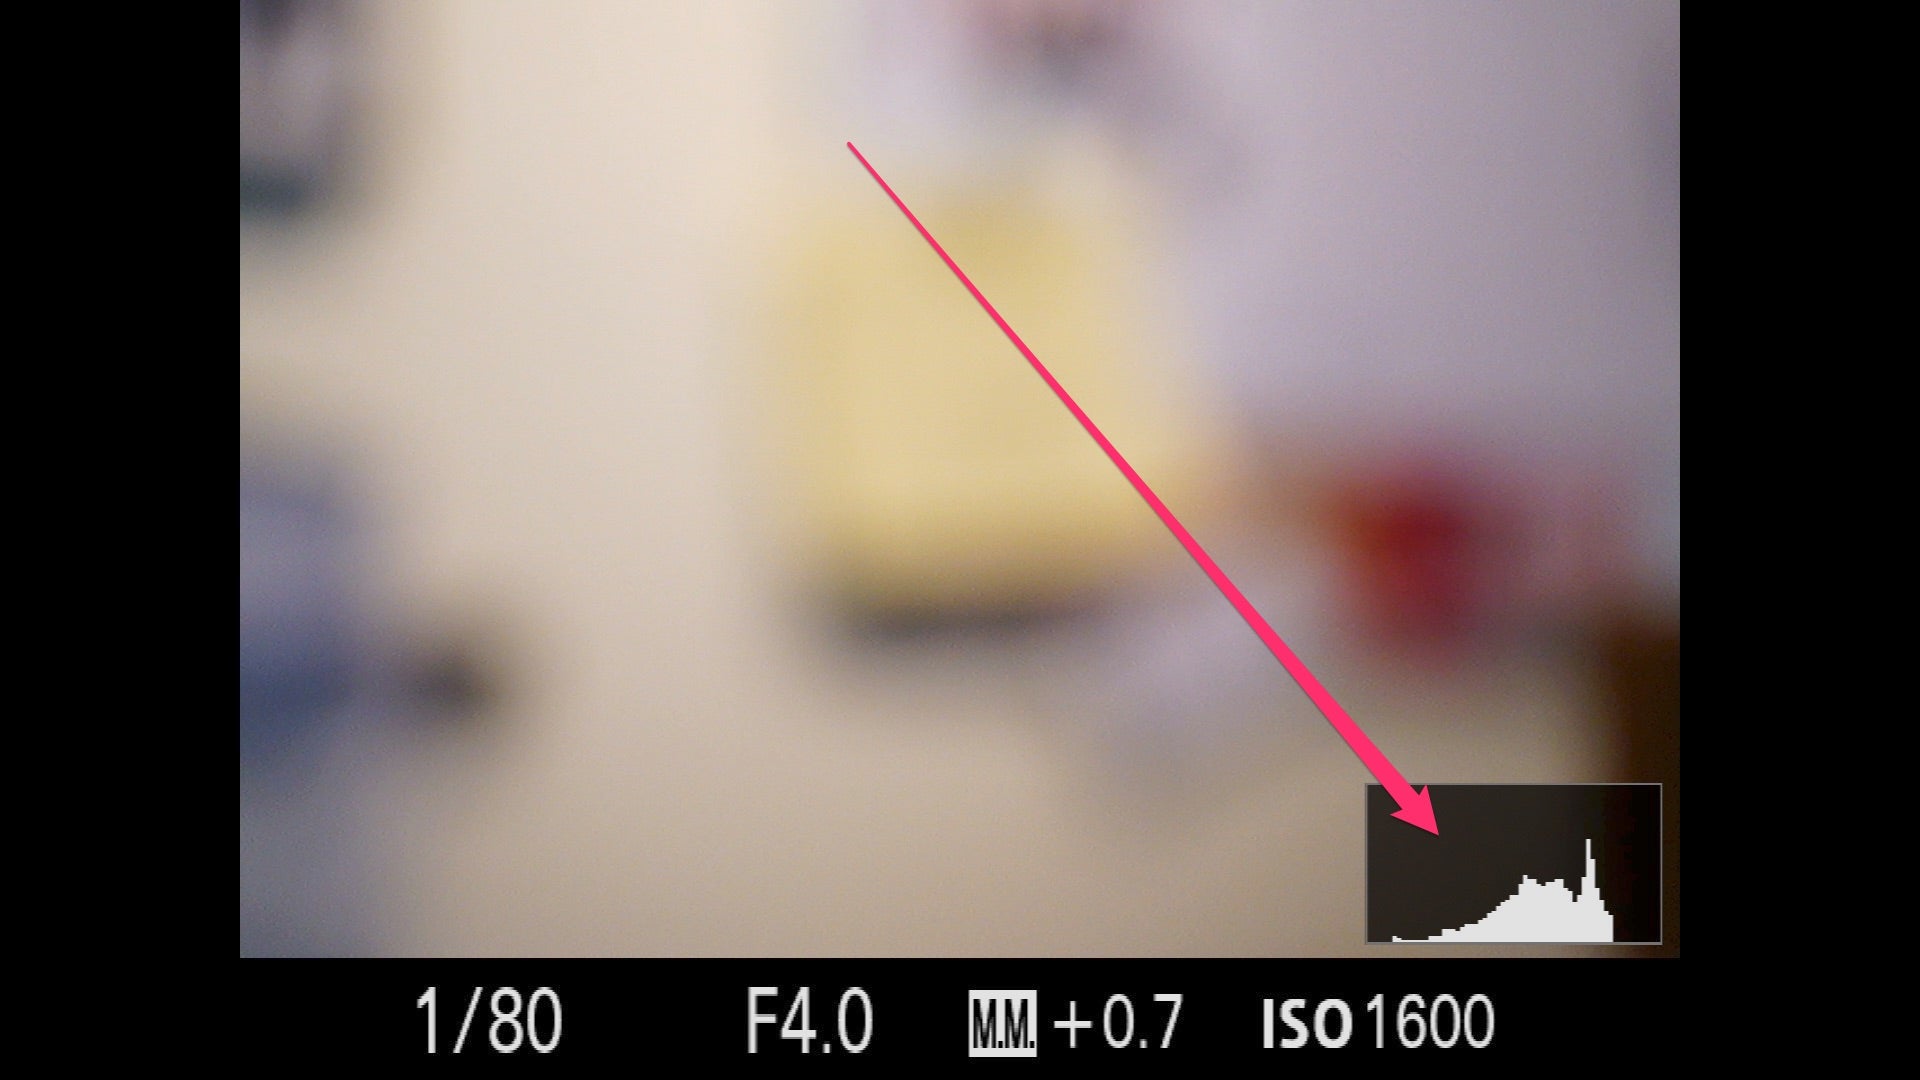
If the histogram screen doesn’t appear, or if you want to add or remove screens, page through your camera’s menu system to the DISP Button option. Here you can select either Monitor (LCD) or Finder (viewfinder): to customize, check/uncheck the various screen options. To keep things as simple as possible, I turn off every screen except: No Disp. Info, Histogram, and Level.
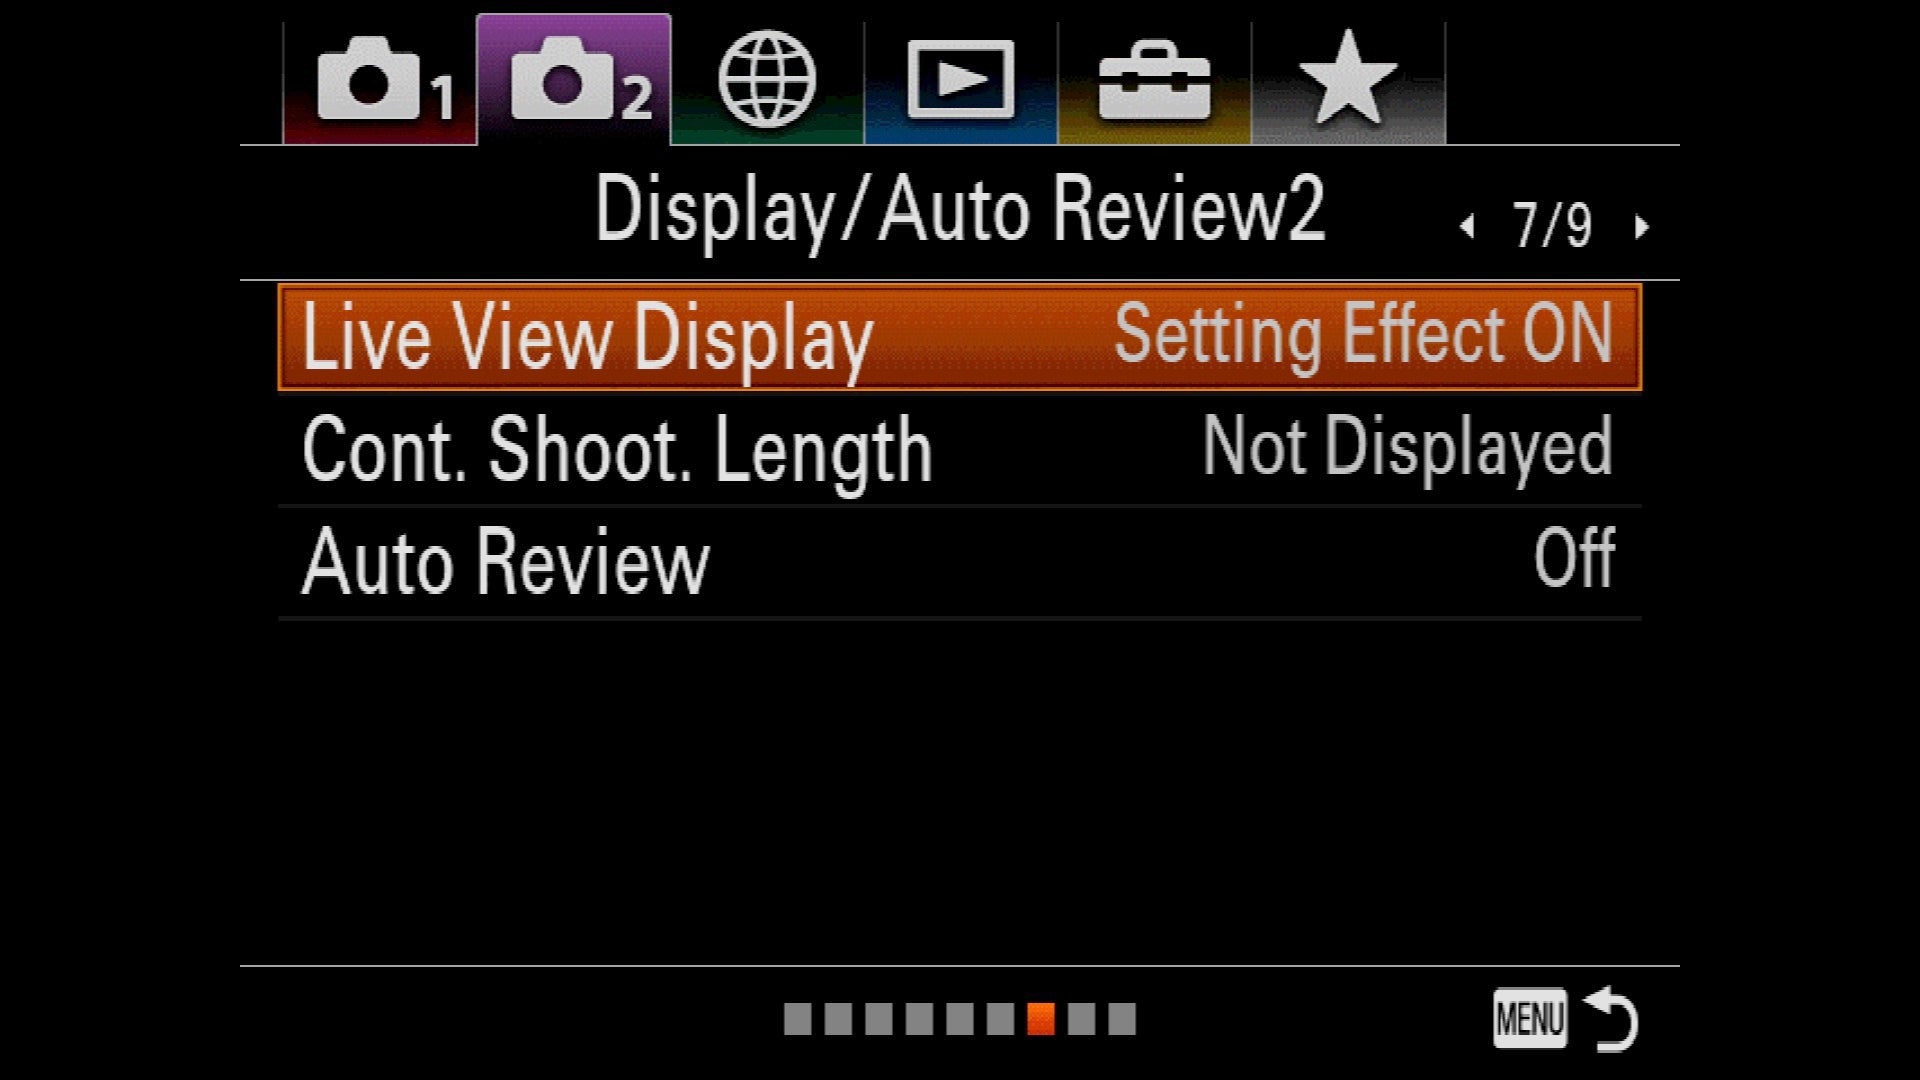
Sony’s live-view histogram is based on the jpeg image displayed on the monitor/viewfinder screen (even if you shoot only raw, your camera’s preview image is a jpeg), but that isn’t necessarily a reflection of the exposure you’ll capture. To ensure that your screen (and its histogram) match your exposure settings, set Live View Display Setting Effect On in your camera’s menu.
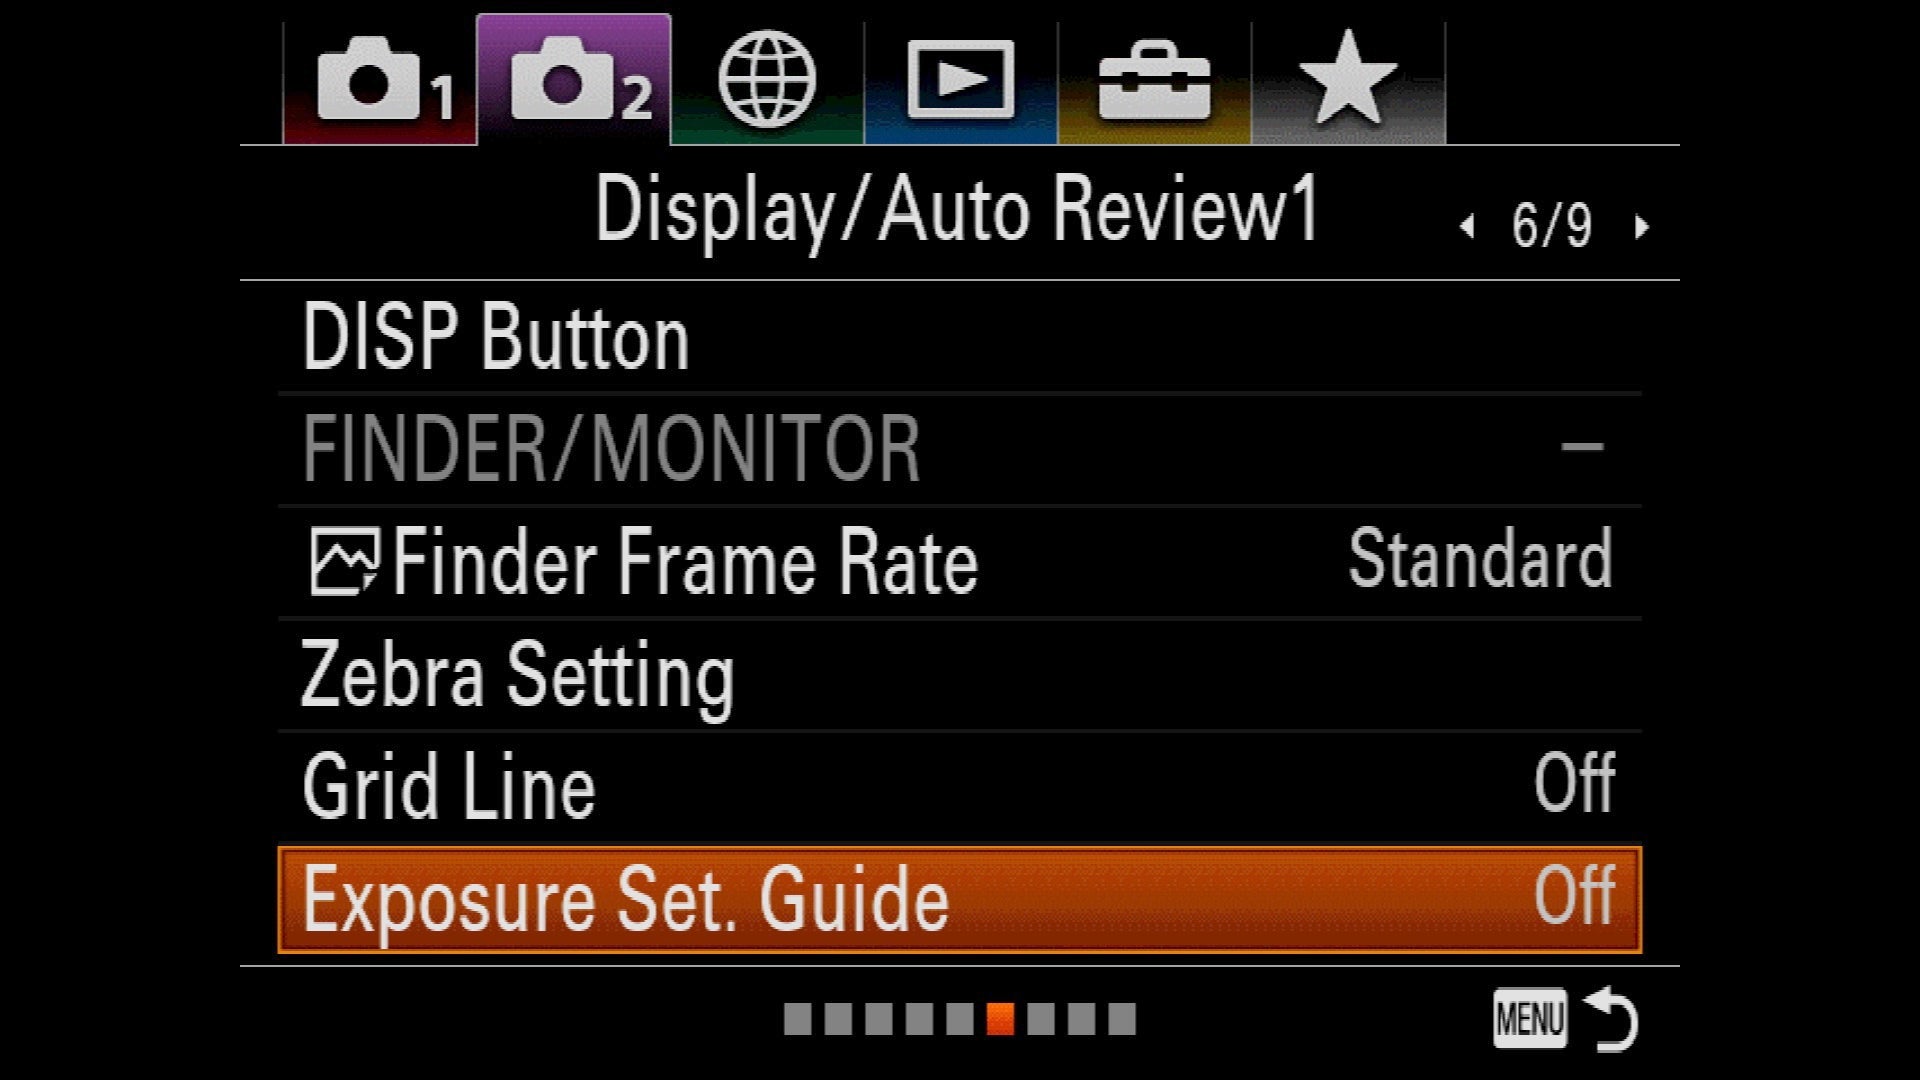
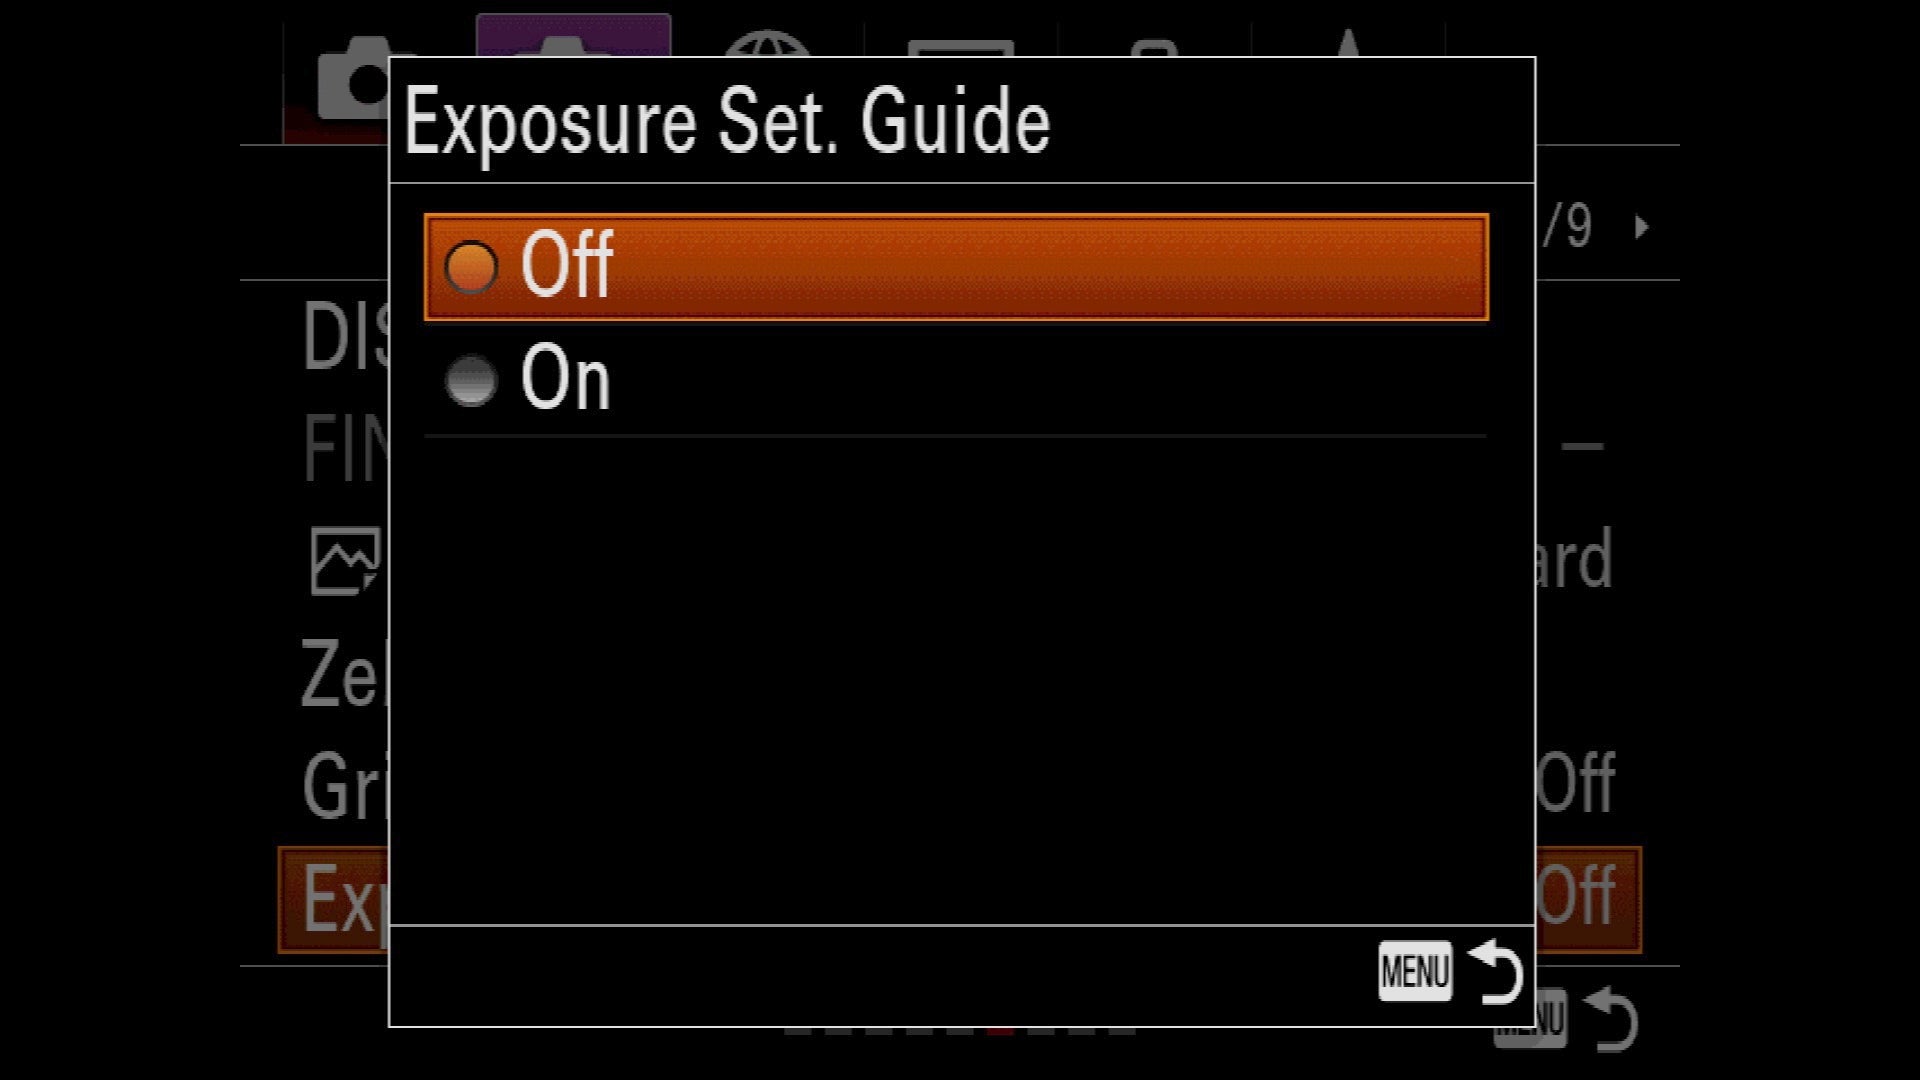
The final piece to this puzzle is keeping the histogram on the screen when you make exposure adjustments. If your histogram is replaced with exposure values across the bottom of the screen whenever you adjust an exposure setting, turn off Exposure Set. Guide in the camera’s menu.
Zebras
The Sony mirrorless bodies display “zebra” highlight alerts when the highlights clip. Though some photographers find the zebras distracting, and they aren’t nearly as reliable as the histogram, I use their appearance as a signal that it’s time to check my histogram.
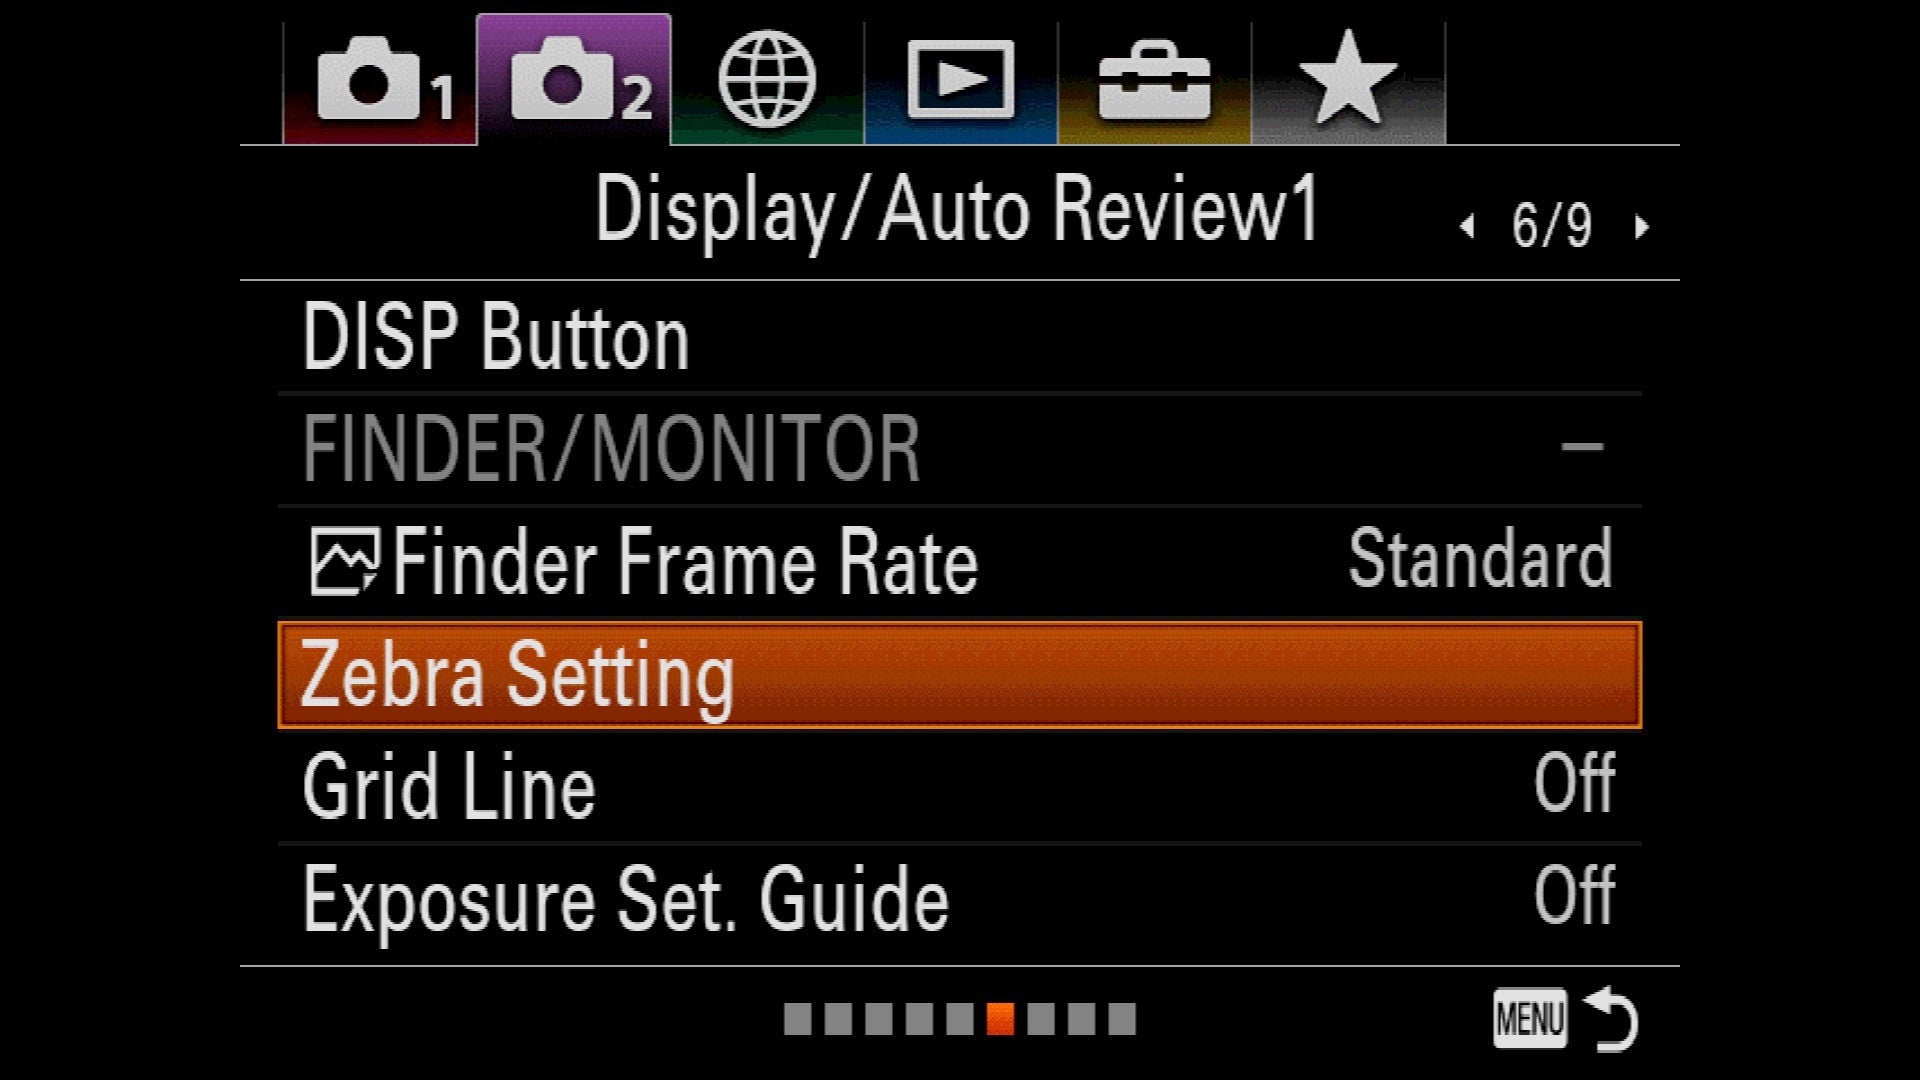
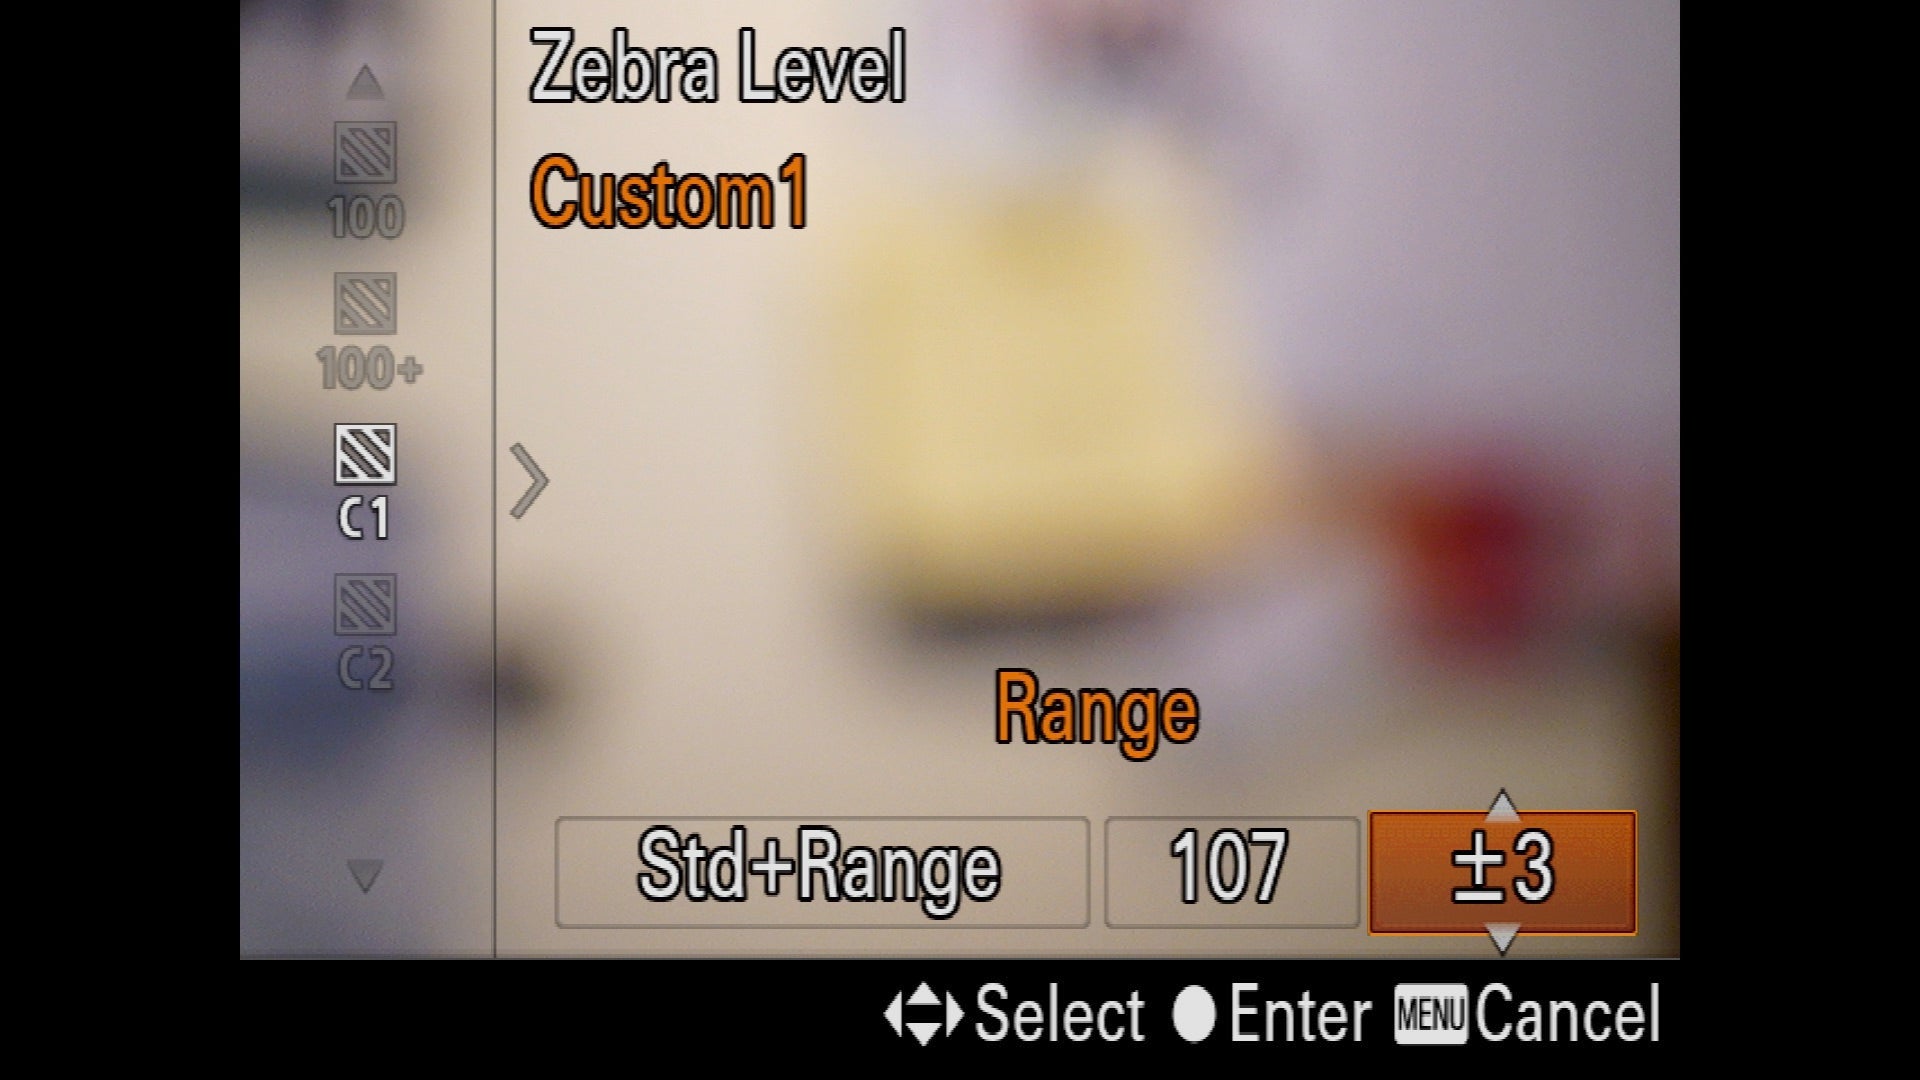
From the factory, I find the Sony mirrorless bodies’ Zebras appear much too early (when there’s lots more room to add exposure). Fortunately, you can dial down their sensitivity in the Zebra Level selection of Zebra Setting menu option: the higher the number, the lower the sensitivity (the later the Zebras appear).
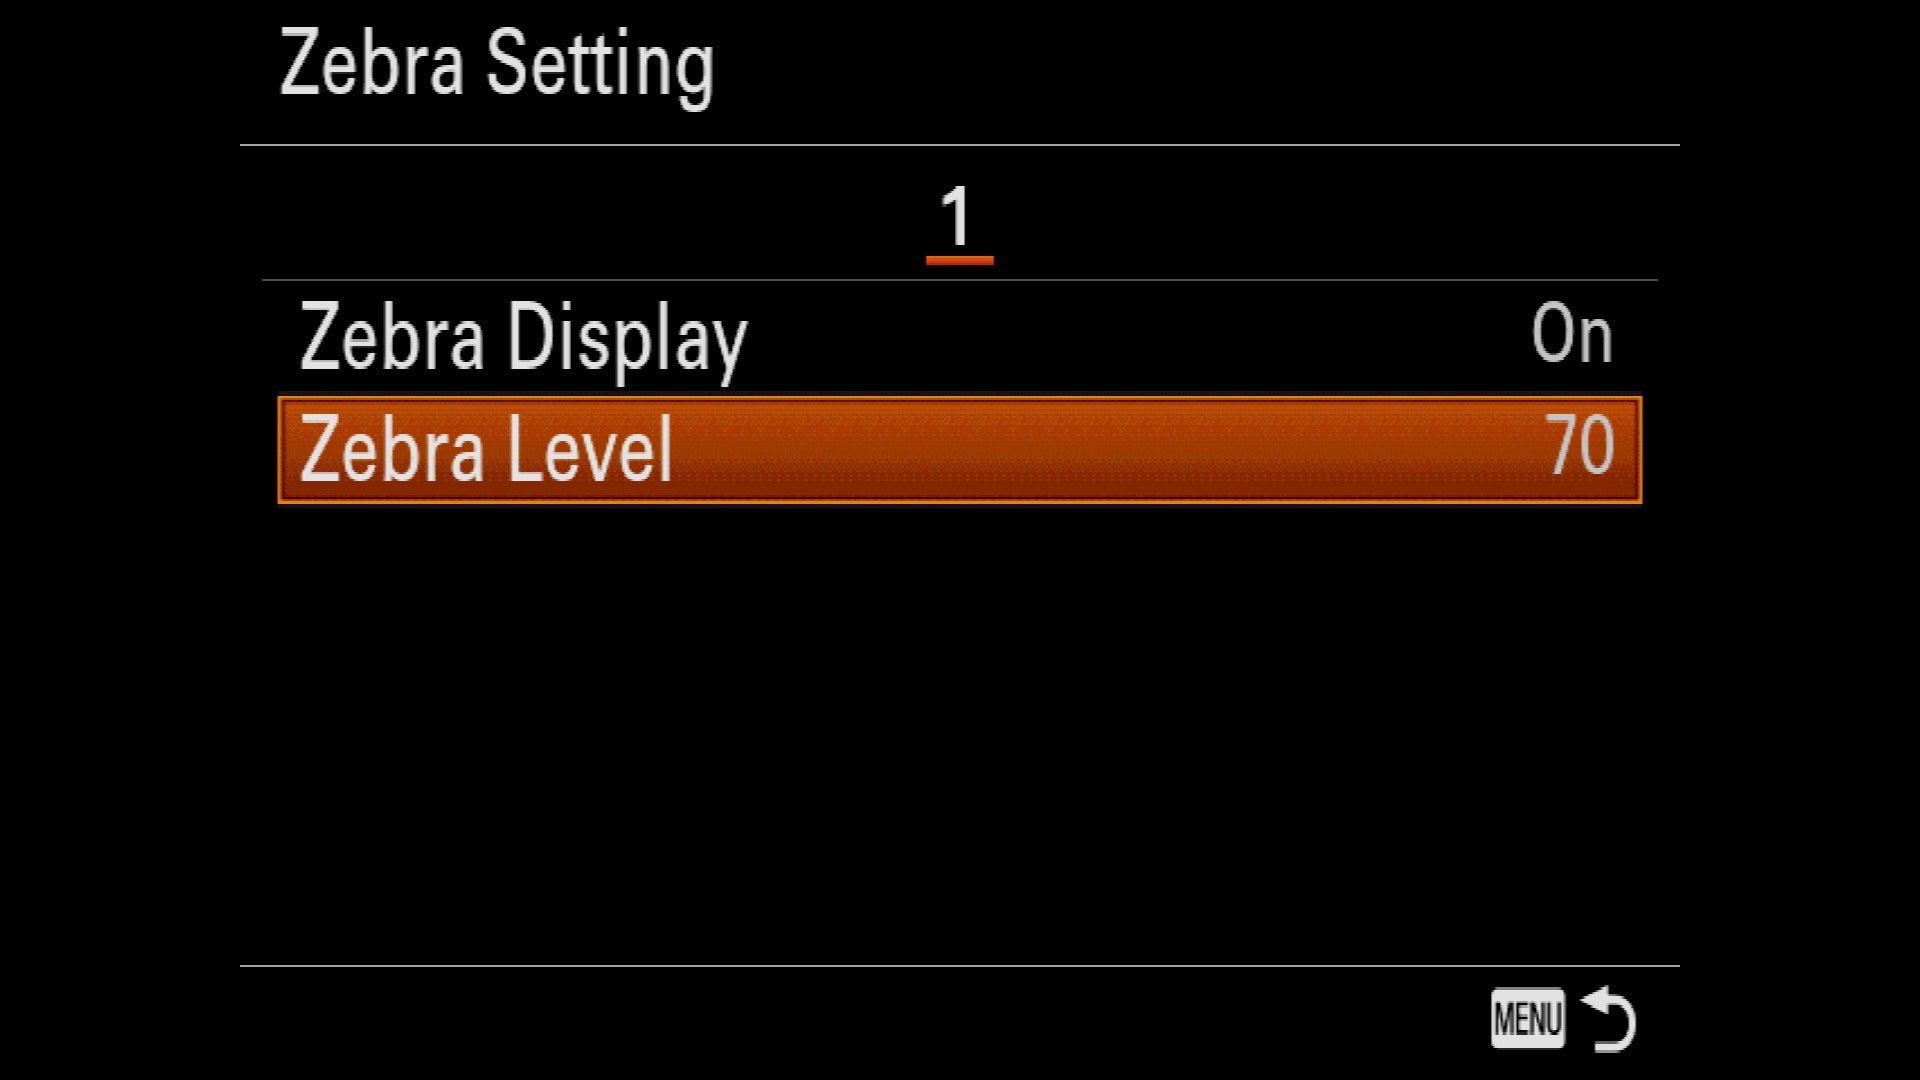
At first glance it appears that the highest possible zebra threshold is 100+, but if you go into the Custom options (C1 and C2), you’ll see that you can set the Lower Limit (the exposure at which zebras appear) all the way up to 109+. A raw file has more margin for error than a jpeg, so I have my zebra level set to 107+. If you shoot jpeg, your blown-highlight threshold comes sooner and you should experiment to find the zebra level that works best for you.
How It Works In The Field
With the pre-capture histogram displayed, I start my metering process as I always have: In manual exposure mode, I dial in ISO 100 and the best f-stop for my composition. I’m always on a tripod, so unless there’s motion in the scene (such as wind-blown leaves or star movement), I don’t compromise my ISO and/or f-stop. With ISO and f-stop set, I adjust my shutter speed with my eye on the histogram in my viewfinder (or monitor). Non-Manual shooters can achieve the same results with the Exposure Compensation dial in Aperture or Shutter Priority modes.
Before I meter a scene, my camera is at whatever exposure settings I used for the prior scene I shot, so they can be far from the exposure the current scene requires. When a new scene needs a large exposure adjustment, I push my shutter speed fast until the zebras appear (if my prior exposure was too dark) or disappear (if my prior exposure was too bright), then refine the exposure more carefully while watching the histogram.
In a low or moderate contrast scene, I’ll have room on both sides of the histogram—a pretty easy scene to expose. But in a high dynamic range scene, the difference between the darkest shadows and brightest highlights might stretch the histogram beyond its boundaries. When a high dynamic range scene forces me to choose between saving the highlights or the shadows, I almost always bias my exposure choice toward sparing the highlights, carefully dialing the exposure until the histogram bumps against the right side. As long as I haven’t clipped my histogram, I know the detail can be easily recovered in post-processing.
As handy as it is, I’ve found that the pre-capture histogram isn’t as reliable as the capture histogram; in a high dynamic range scene with little margin for error, I always verify my exposure by checking the capture histogram. Here’s where the RGB (red, green, blue) histogram becomes important. While the luminosity (white) histogram shows the detail captured, it doesn’t tell me if I captured all the color. Lost color is always possible when you push the luminosity histogram all the way to the right, so it’s best to check the RGB histogram to ensure that no color channel is clipped.
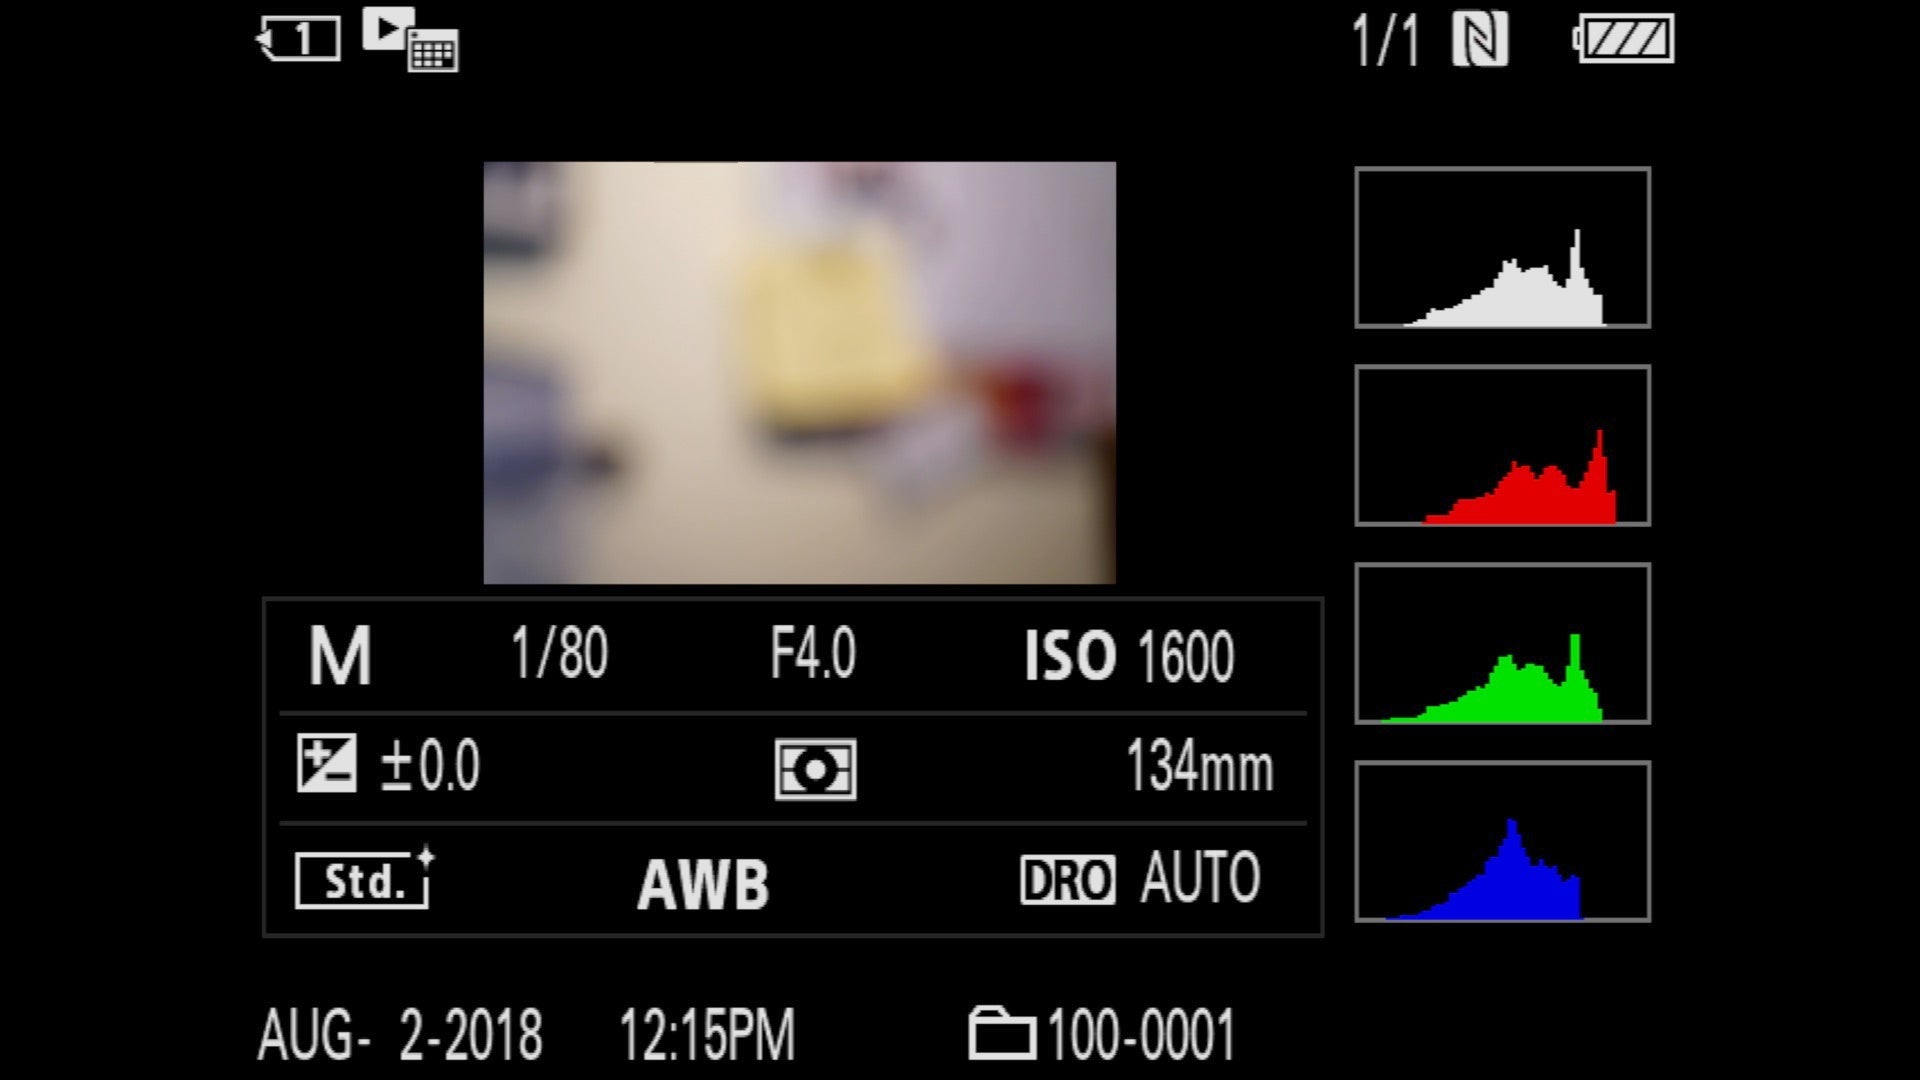
An often overlooked aspect of mastering histogram metering is simply learning how your camera reports exposure. Most cameras capture a little more information than their histograms report, but since every camera builds its jpeg preview uniquely (depending on proprietary processing algorithms and your own customization), you need to know how much exposure data outside the histogram’s boundaries is in your image file. And of course raw files always contain more exposure information than jpeg files.
With my Sony α7R bodies, I’ve found that I’m safe pushing my histogram’s exposure about a stop beyond the histogram’s left or right boundary (sometimes farther). Understanding my cameras’ histograms, and basic Lightroom/Photoshop skills, I’m able to extract every available photon from a scene.
Putting It All Together
While accuracy is usually paramount where exposure is concerned, sometimes speed is just as important. For example, chasing lightning at the Grand Canyon, I got a bonus when a full rainbow arced above the canyon. But by the time I could drive to a vantage point with an open view of the canyon, only a fraction of the rainbow remained, and it was shrinking fast. Knowing that time was of the essence, I quickly vaulted from the car, set up my tripod, and framed a composition.
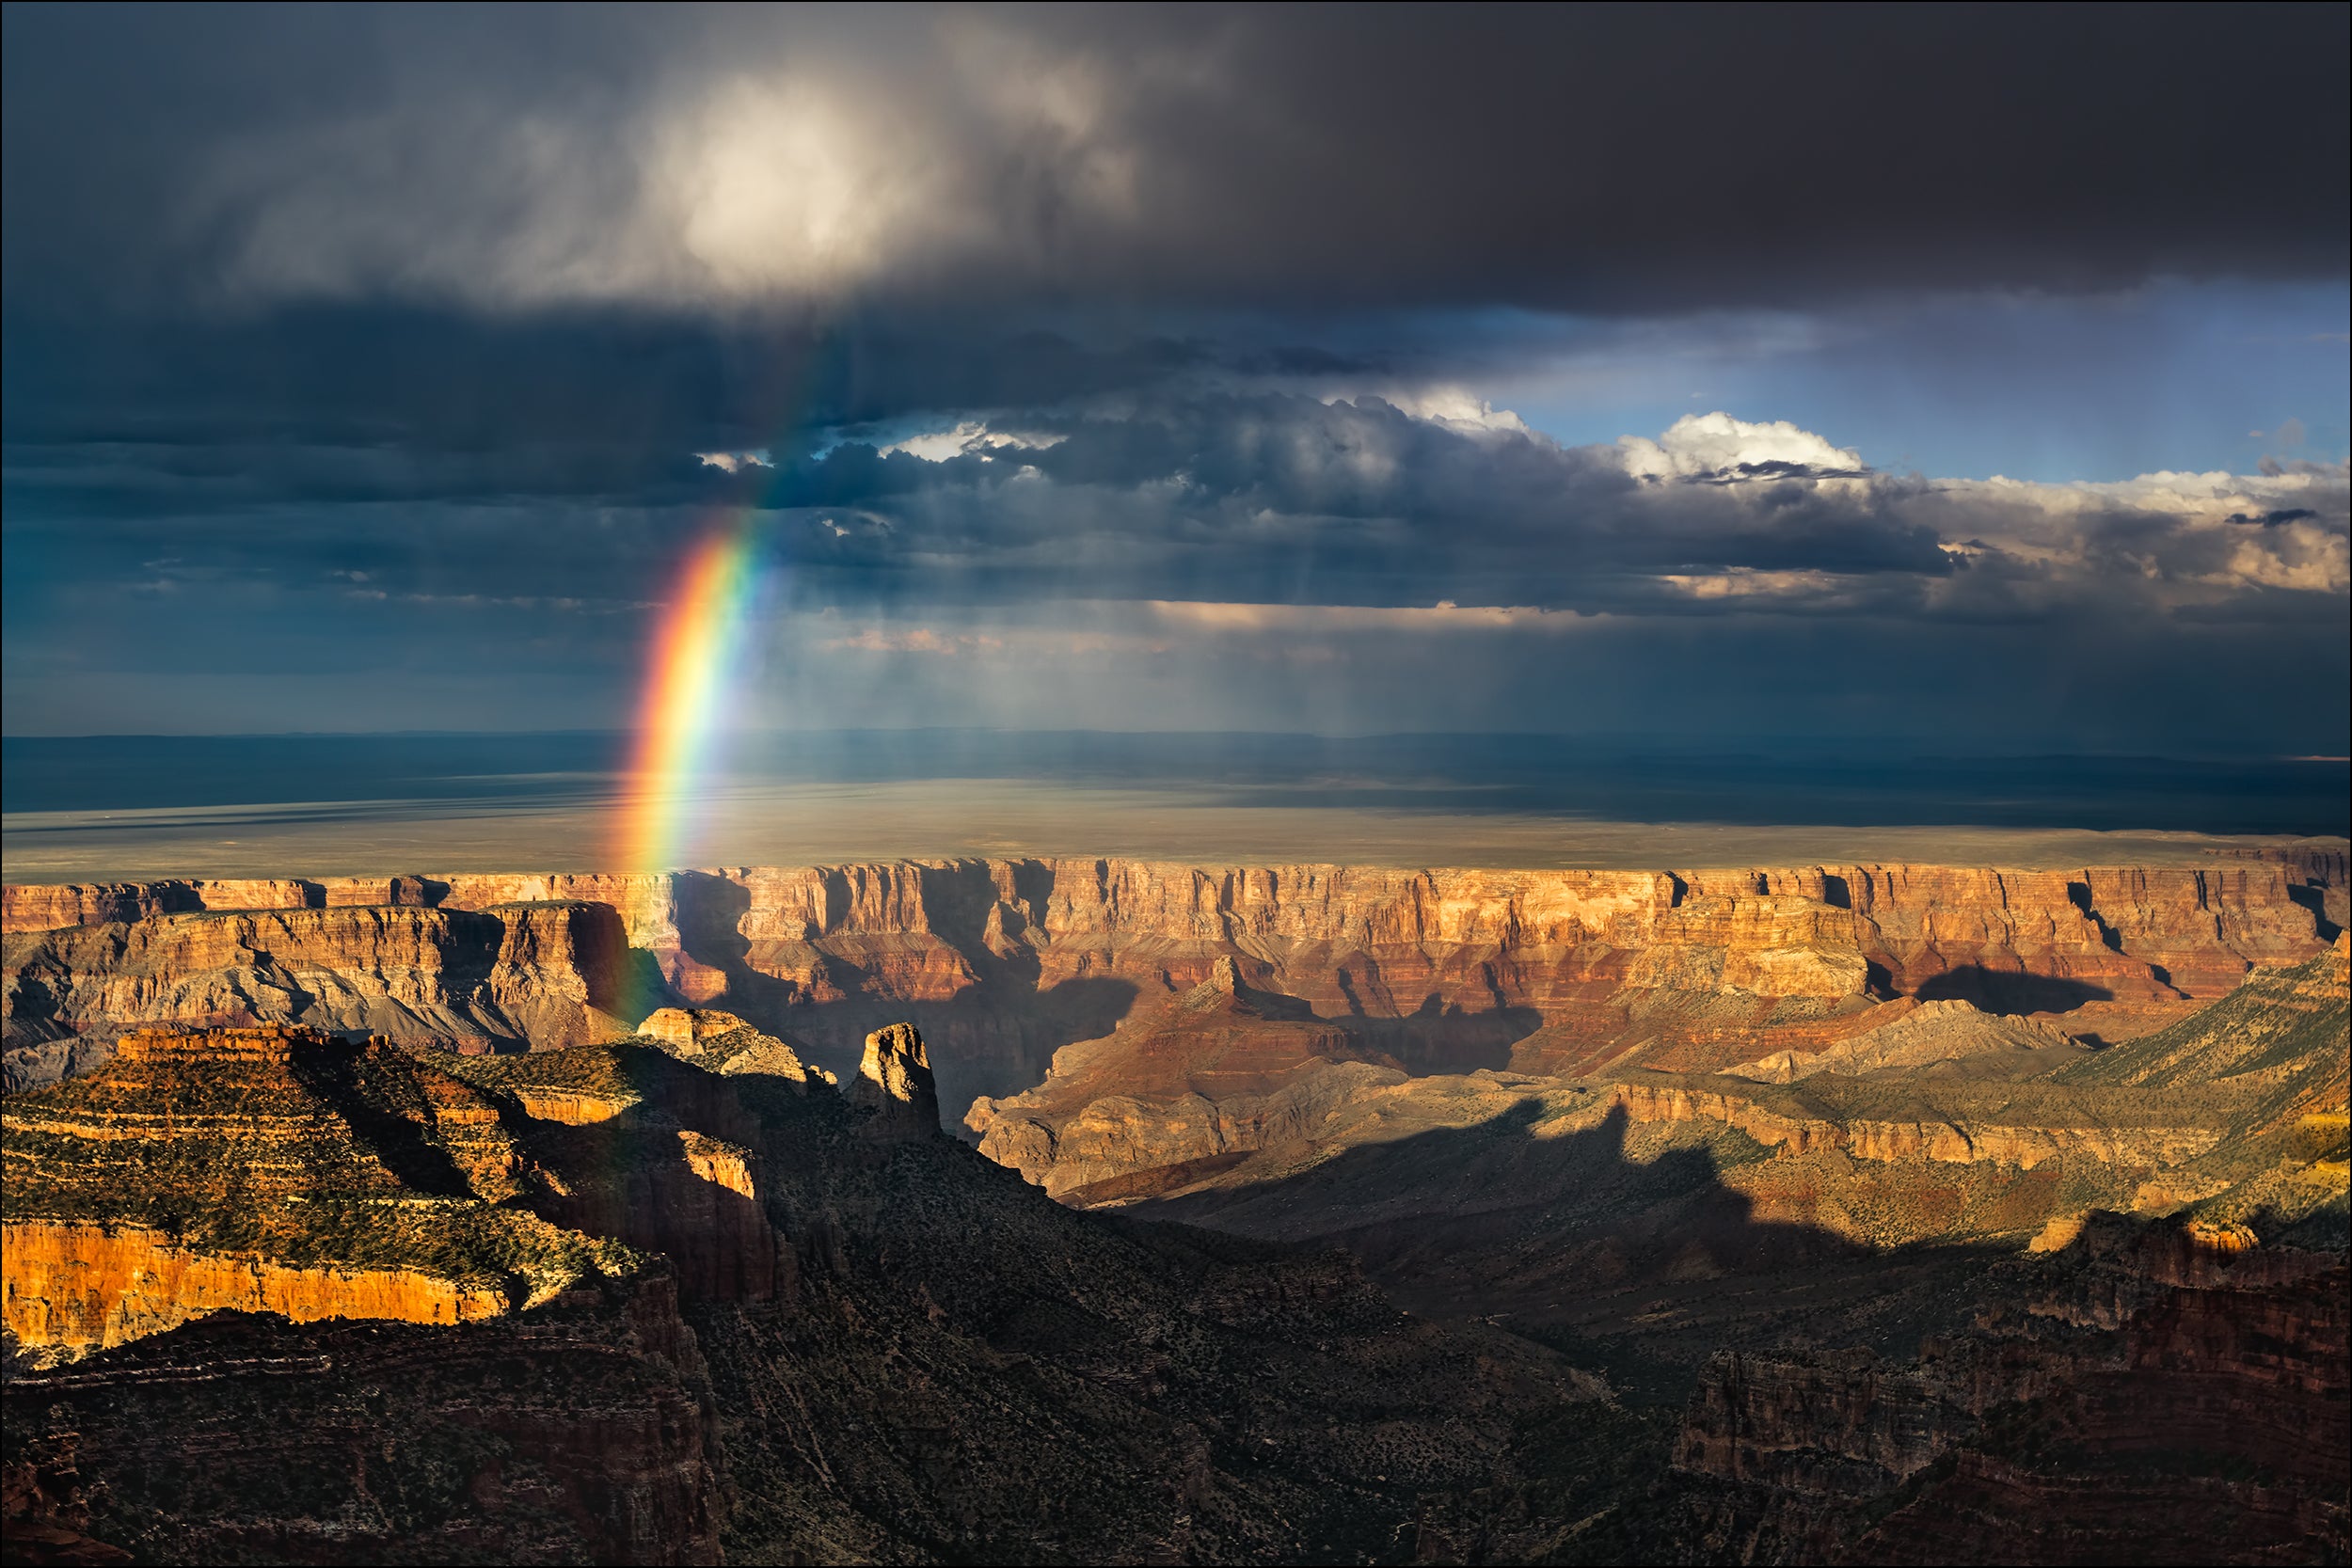
Photo by Gary Hart. Grand Canyon and Rainbow. Sony a7R II, Sony Vario-Tessar T* FE 16-35mm F4 ZA OSS lens. 1/60-sec., f/11, ISO 100.
The dynamic range between the canyon shadows and sunlit clouds was well within the range of my Sony α7R II, but extreme enough that I needed to be careful with my exposure. My camera was already set at ISO 100 and f/11 from the previous stop, but the pre-capture histogram showed that the current shutter speed was much too fast to capture clean shadow detail.
With my eye on the bright clouds, I rapidly dialed in more light with my shutter wheel. As soon as the zebras appeared, I turned my attention to the histogram, refining it with a few deliberate shutter adjustments. When the histogram just barely nudged its right boundary, I clicked this frame.
A quick glance at the capture histogram confirmed that I’d nailed the exposure with my first click. Good thing, because within seconds the rainbow faded. This turned out to be my only frame with the rainbow at its most vivid—with my old metering approach, the exposure would have been perfect too, but I probably would have missed the rainbow.

